How to install Ozeki SMS Gateway on Windows
This guide gives you the installation steps of Ozeki SMS Gateway. This information is useful if you wish to install the software into an environment where you don't have Internet access, or your corporate firewall policy prevents software to communicate with the Internet. This installation procedure has to be used on Windows 11 as well. The offline installation is quite simple: you need to download the installation package and follow the instructions on the screen. It is similar to a classic Next...Next...Next... Windows installation procedure.
Windows 11 support
If you are running a Windows 11 computer, you can also follow this guide, as the steps are the same and there shouldn't be any change in the process. Ozeki SMS gateway supports to create windows sms service.
How to install Ozeki SMS Gateway (Quick steps)
To install Ozeki SMS Gateway:
- Download the Ozeki SMS Gateway .zip file
- Choose Extract All from context menu
- Run the .exe file from the created folder
- Click Next to complete the installation
- Open the SMS Gateway App
- Add new SMPP connection
- Enter the SMPP server details
- Send test SMS message from the Test tab
- Check the logs of the connection
Download Ozeki SMS Gateway (Video tutorial)
In this video, you will discover the process of downloading and installing Ozeki SMS Gateway software. You will be guided to the SMS software download page on the https://ozeki-sms-gateway.com site and learn how to extract the SMS software zip file. Subsequently, you will unzip the SMS gateway, preparing it for the installation process. Upon completion of the installation, you will launch Ozeki SMS Gateway and gain access to the user-friendly Dashboard. Now you are, ready to start your SMS management journey.
Step 1 - Download Ozeki SMS Gateway
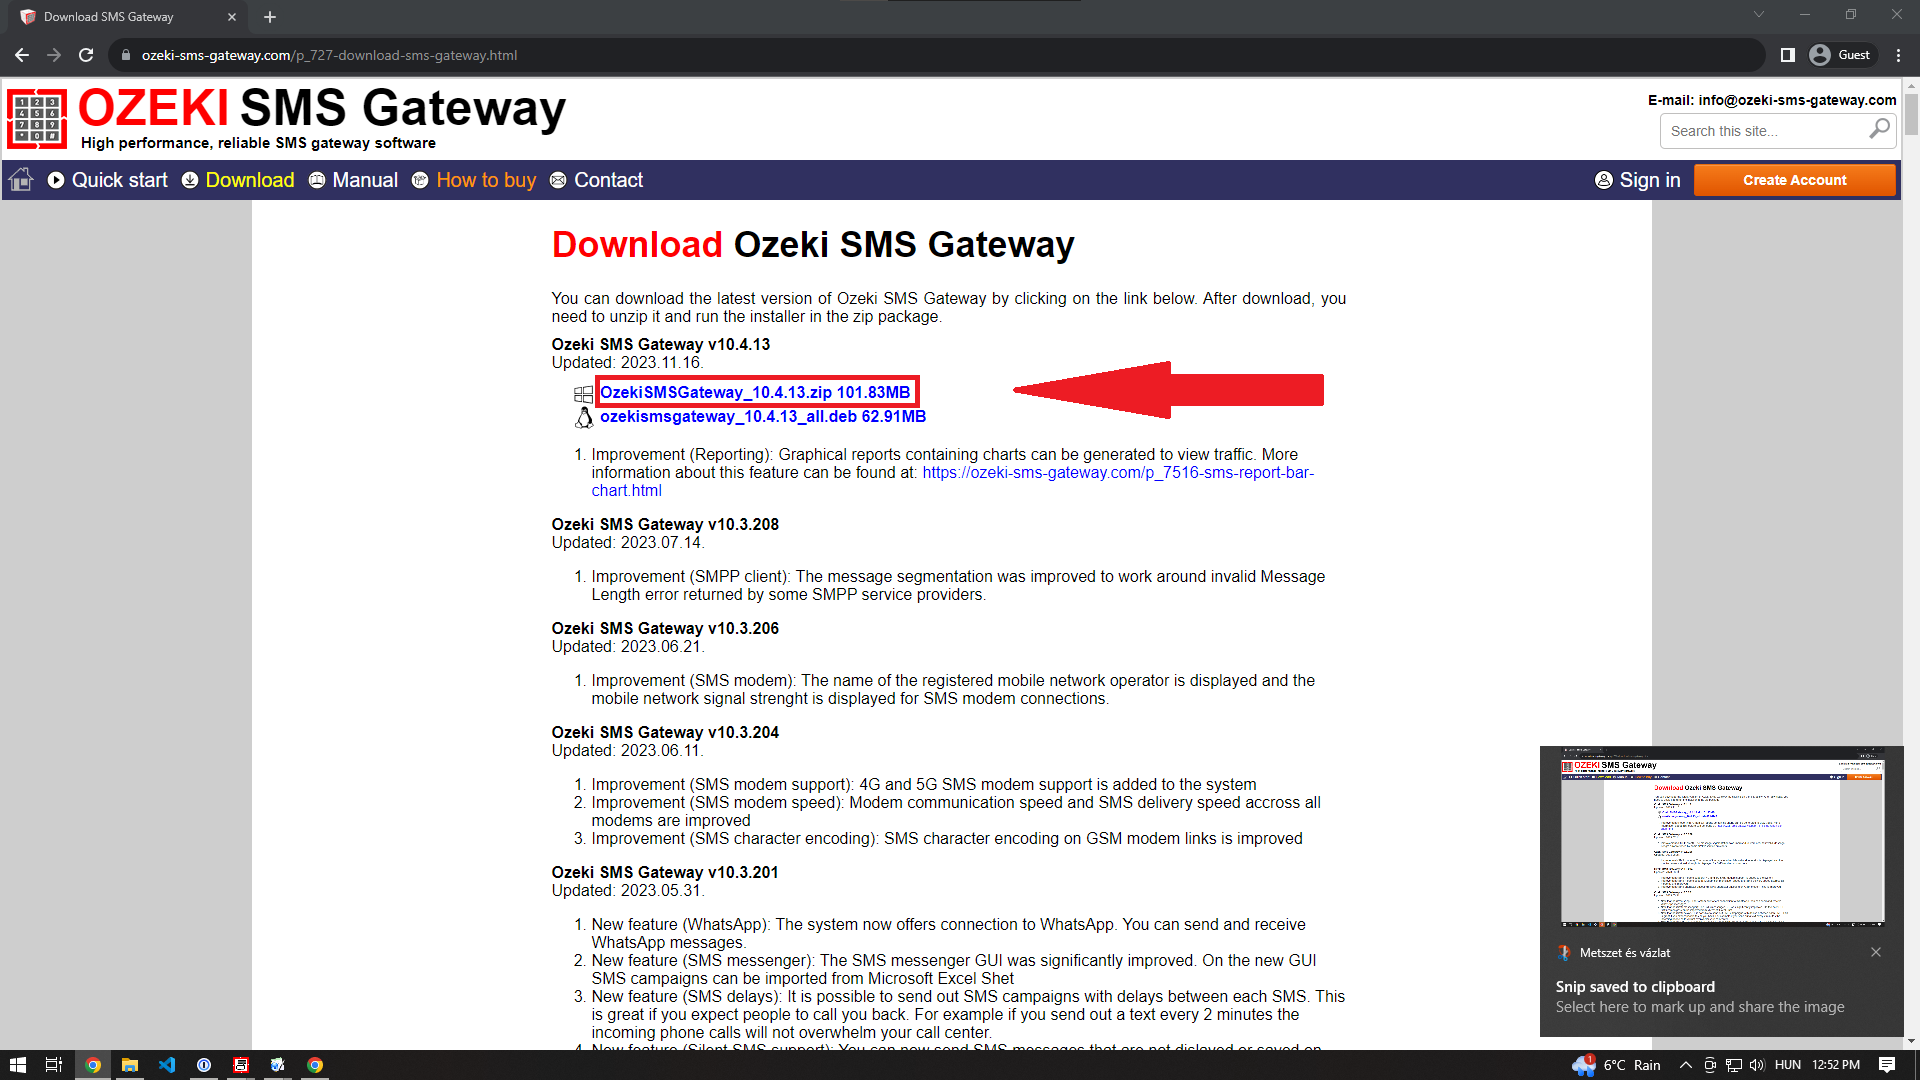
The latest release of Ozeki SMS Gateway can be downloaded from the Ozeki SMS Gateway download page. To download the installer in compressed format, you need to click on the first OzekiSMSGateway_x.x.xx.zip link as Figure 1 shows below. We recommend you to always download the latest version. This version always contains all the currently available features and improvements.
Step 2 - Extract the downloaded file
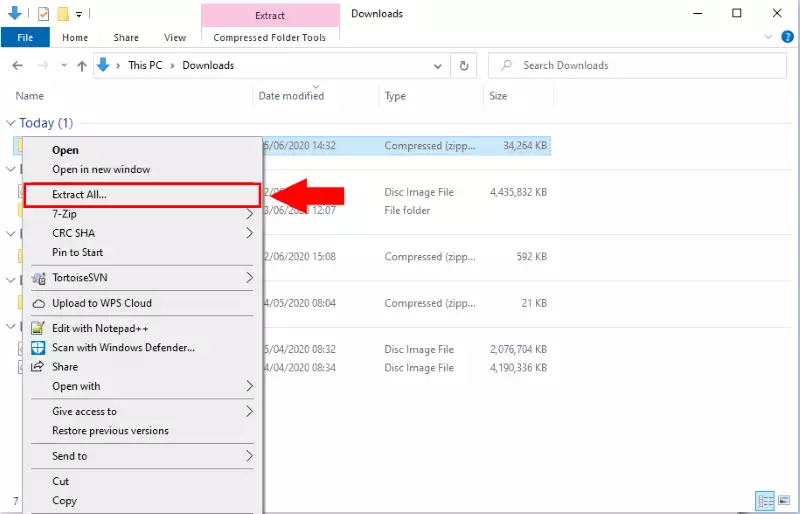
When the download finished, you have to extract the compressed file to be able to run the installer of the software. For that, please open the Downloads folder on your computer. Then, as you can see it on Figure 2, right click on the file and select Extract All.... By doing this, you will get the executable installer of Ozeki Installer.
Step 3 - Run the installer
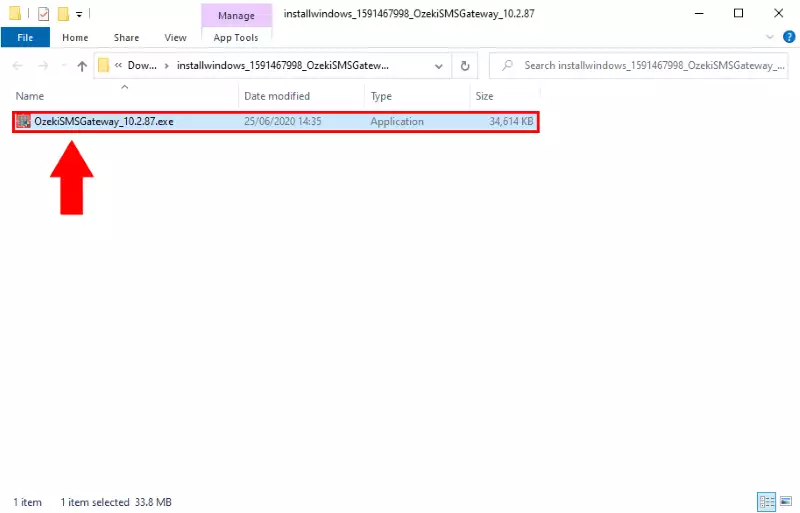
After you extracted the .zip file, please open the newly created folder, and just like in Figure 3, just click on the executable file to start the installation process.
Step 4 - Install Ozeki SMS Gateway
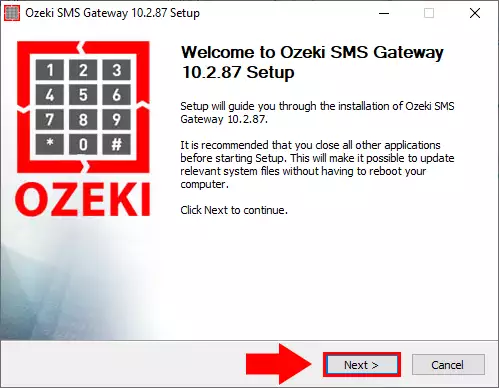
As soon as you clicked on the .exe file, the installer starts with a welcome screen (Figure 4). All you have to do here is to click Next to continue the installation.
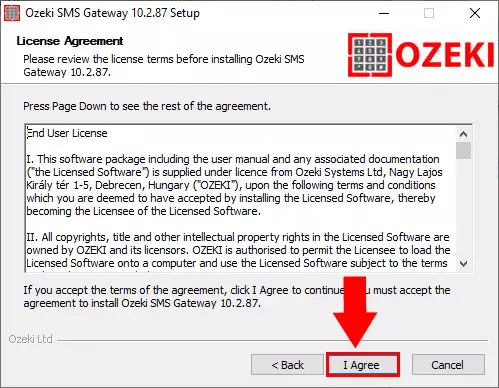
To install Ozeki SMS Gateway on your computer, you must accept the terms of the License Agreement. Please review them then as Figure 5 demonstrates, click 'I Agree' button to continue.
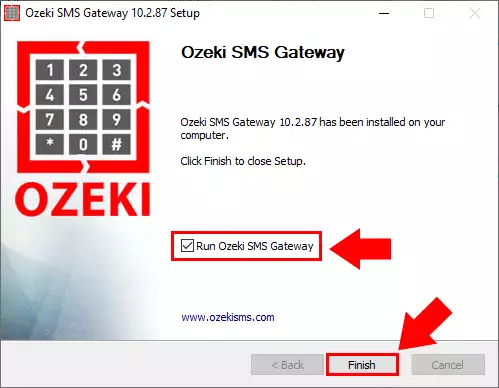
After the installation process is finished the Ozeki SMS Gateway service will start automatically in the background. To run Ozeki SMS Gateway on your web browser, just check Run Ozeki SMS Gateway as you can see it on Figure 6 and click Finish.
Step 5 - Ozeki SMS Gateway desktop
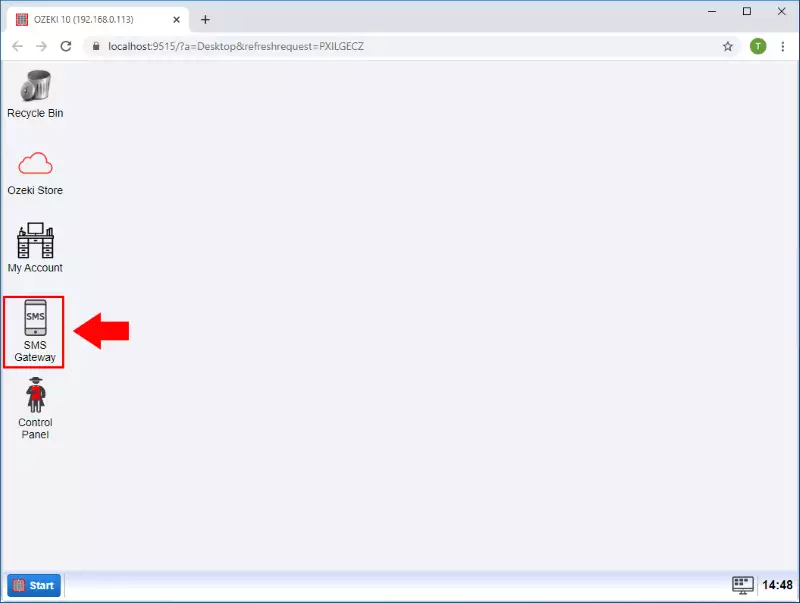
The home page of Ozeki SMS Gateway is a desktop, where you can find the SMS Gateway application's icon as Figure 7 shows it. Click on the Icon to open the application.
Step 6 - Connect to the mobile network
SMS messages are sent through the mobile network, so the next step in the procedure, is to select a method to connect your computer to the mobile network. There are various options to setup this connection. You can connect using a GSM modem, for higher capacity you can connect an SMS modem pool. You can also connect through an Androi mobile phone. If you operate an Internet SMS service, you want to connect directly to the Short Message Service Center (SMSC) of a mobile network operator over the Internet. In this case you would setup an SMPP connection, an UCP connection a CIMD2 connection or an HTTP SMS connection. The most popular choice is to setup an SMPP connection over the Internet.
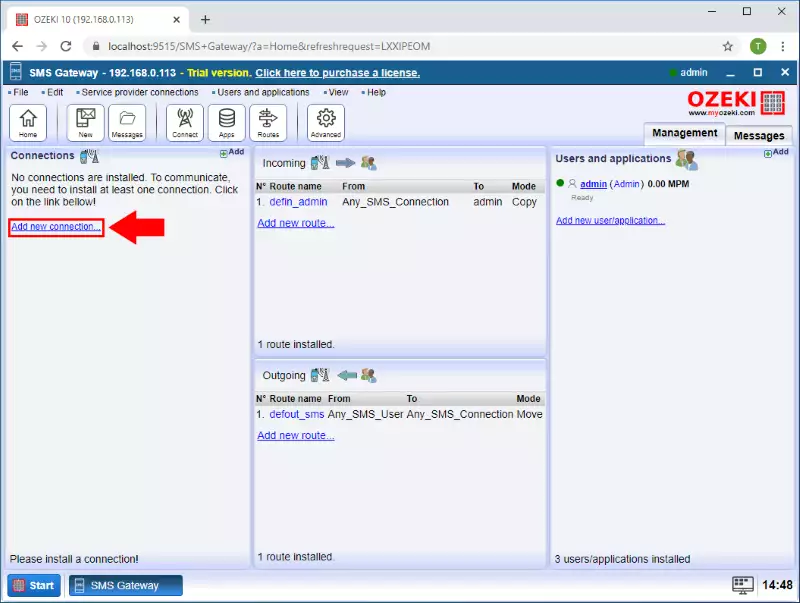
To install and configure an SMPP connection, please click on the Add new connection in the SMS Gateway's Home page (Figure 8).
Step 7 - Install SMPP Client
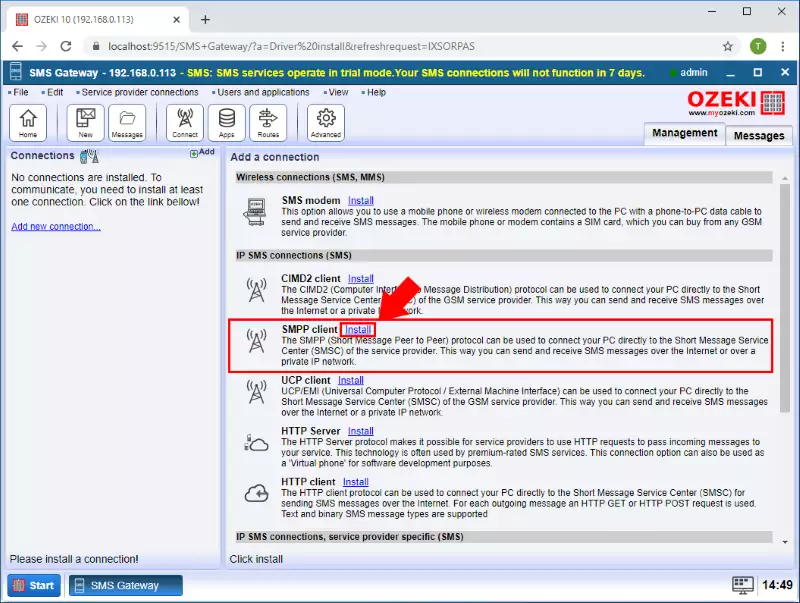
Then click the Install button next to the SMPP client in the list. (Figure 9).
Step 8 - Provide SMPP client informations
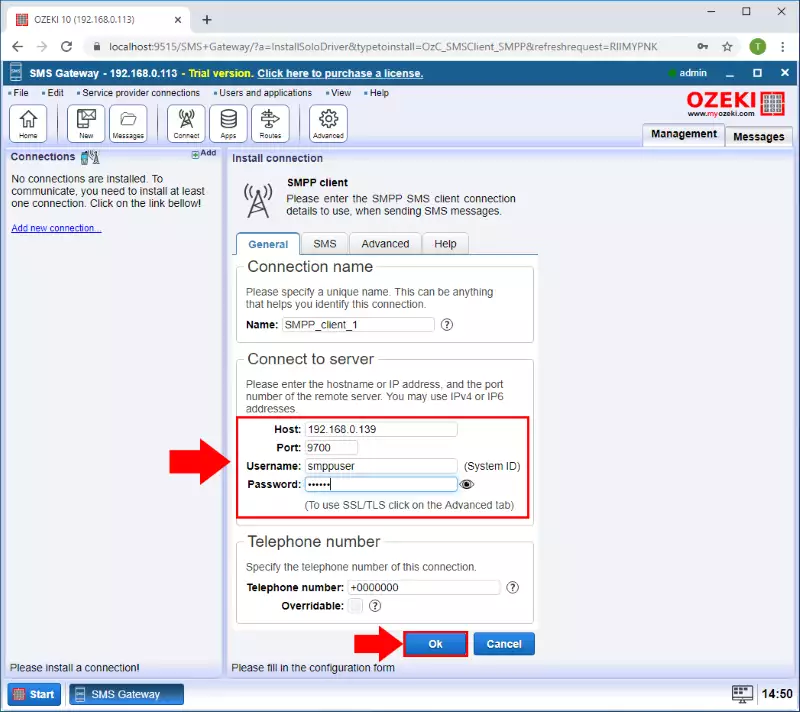
After it please enter the host name, the port number, a username and a password. This information is provided by the service provider whose service you have subscribed to (Figure 10).
Step 9 - Send test message
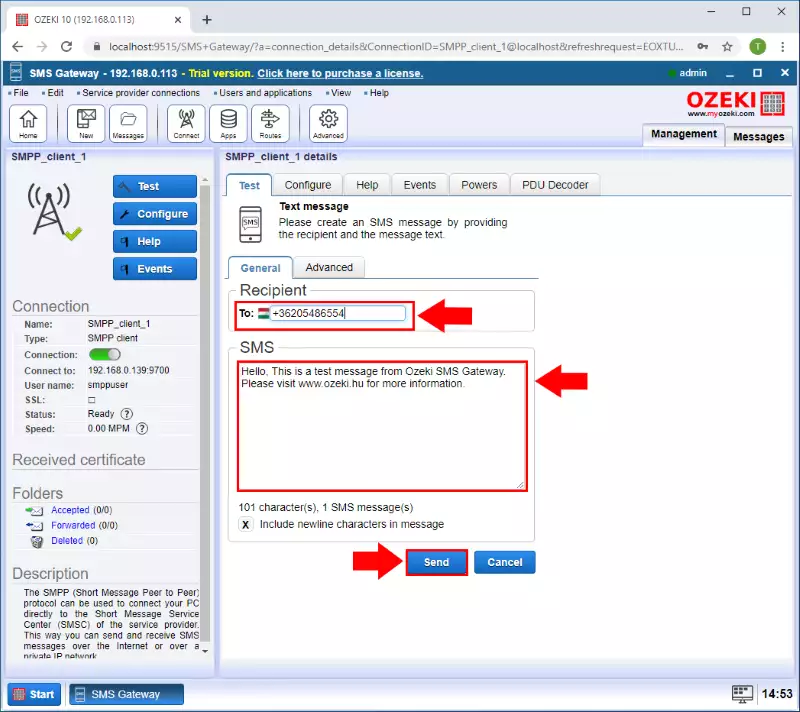
In the Test tab you can send a test SMS message. Please provide the phone number and the message text, then click on the Send button (Figure 11).
Step 10 - SMS sent successfully
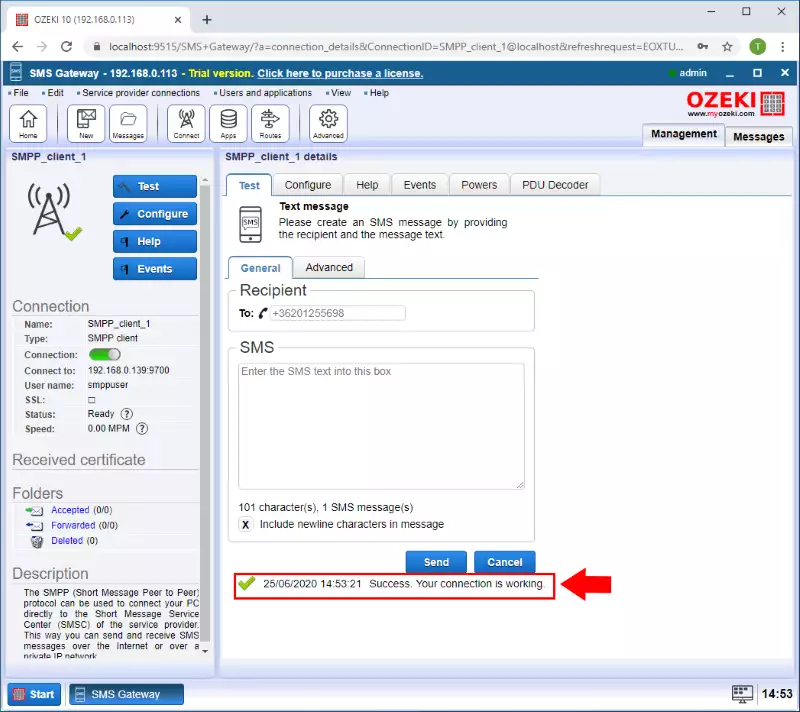
You can see that the SMS was sent successfully (Figure 12).

 Sign in