How to track SMPP delivery reports
This guide explains how to track SMPP delivery reports in Ozeki SMS Gateway. It shows how to enable delivery-report matching, configure an SMPP client connection, request delivery reports, send a test SMS, and verify the resulting status in the submit-reference log and message history.
Enable delivery report logging
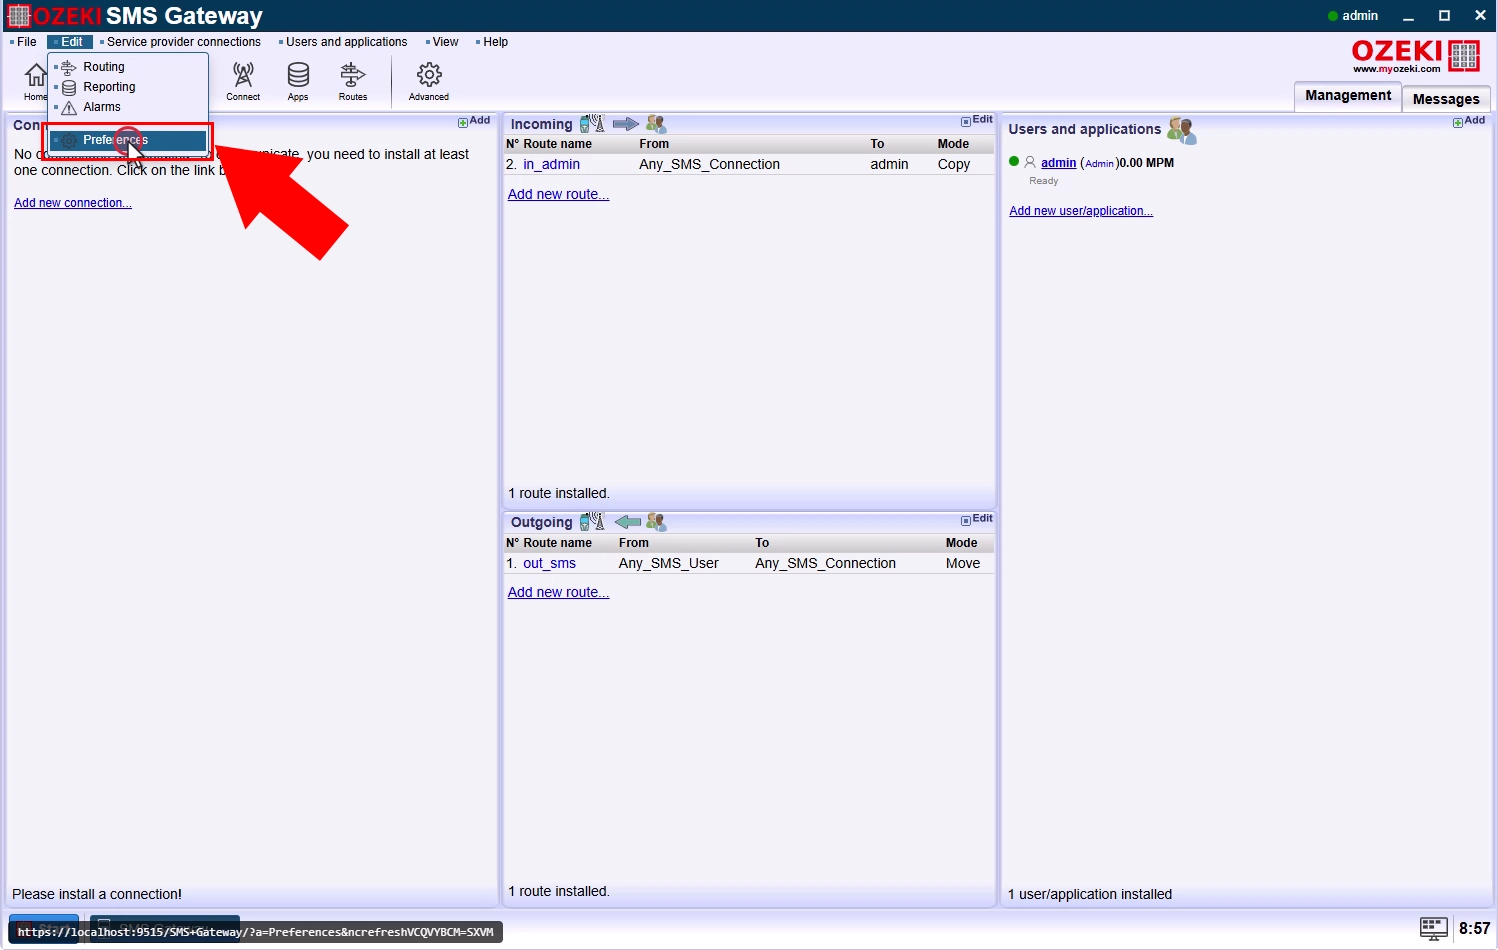
Open the Ozeki SMS Gateway Preferences menu to access the system-wide logging settings. This is the first step because delivery-report matching events must be enabled before the gateway can record and display SMPP delivery reports. From the main interface, locate and select Preferences to continue.
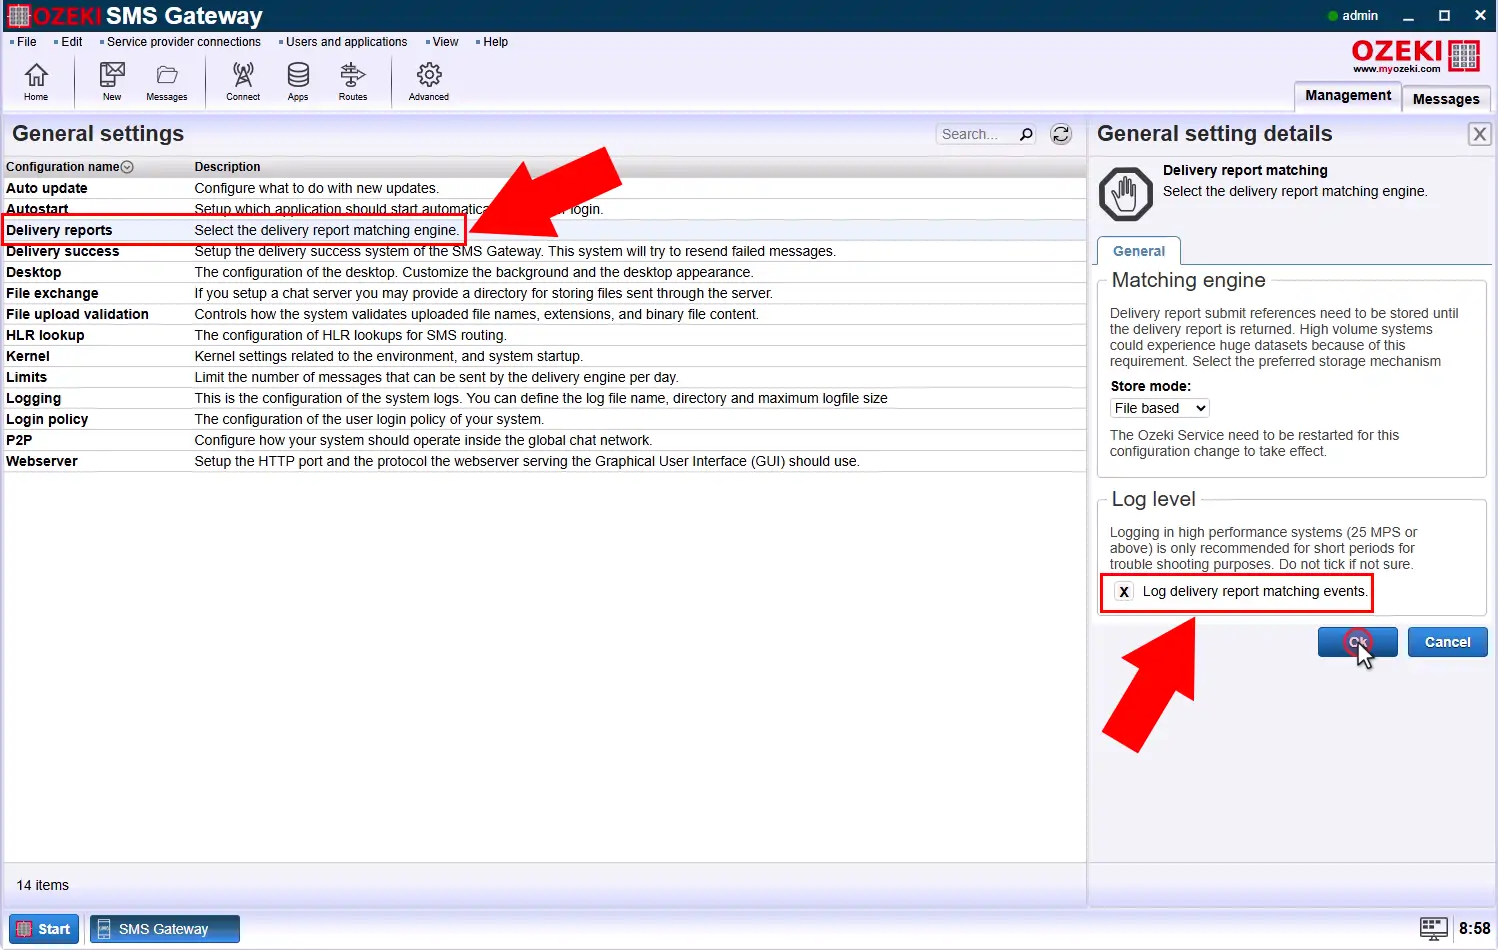
In the Preferences menu, enable Log delivery report matching events. This setting tells Ozeki to record when an incoming SMPP delivery report is matched to the original submitted message, making later troubleshooting and report verification possible. Save the setting before proceeding to configure the SMPP client connection.
Receive delivery report
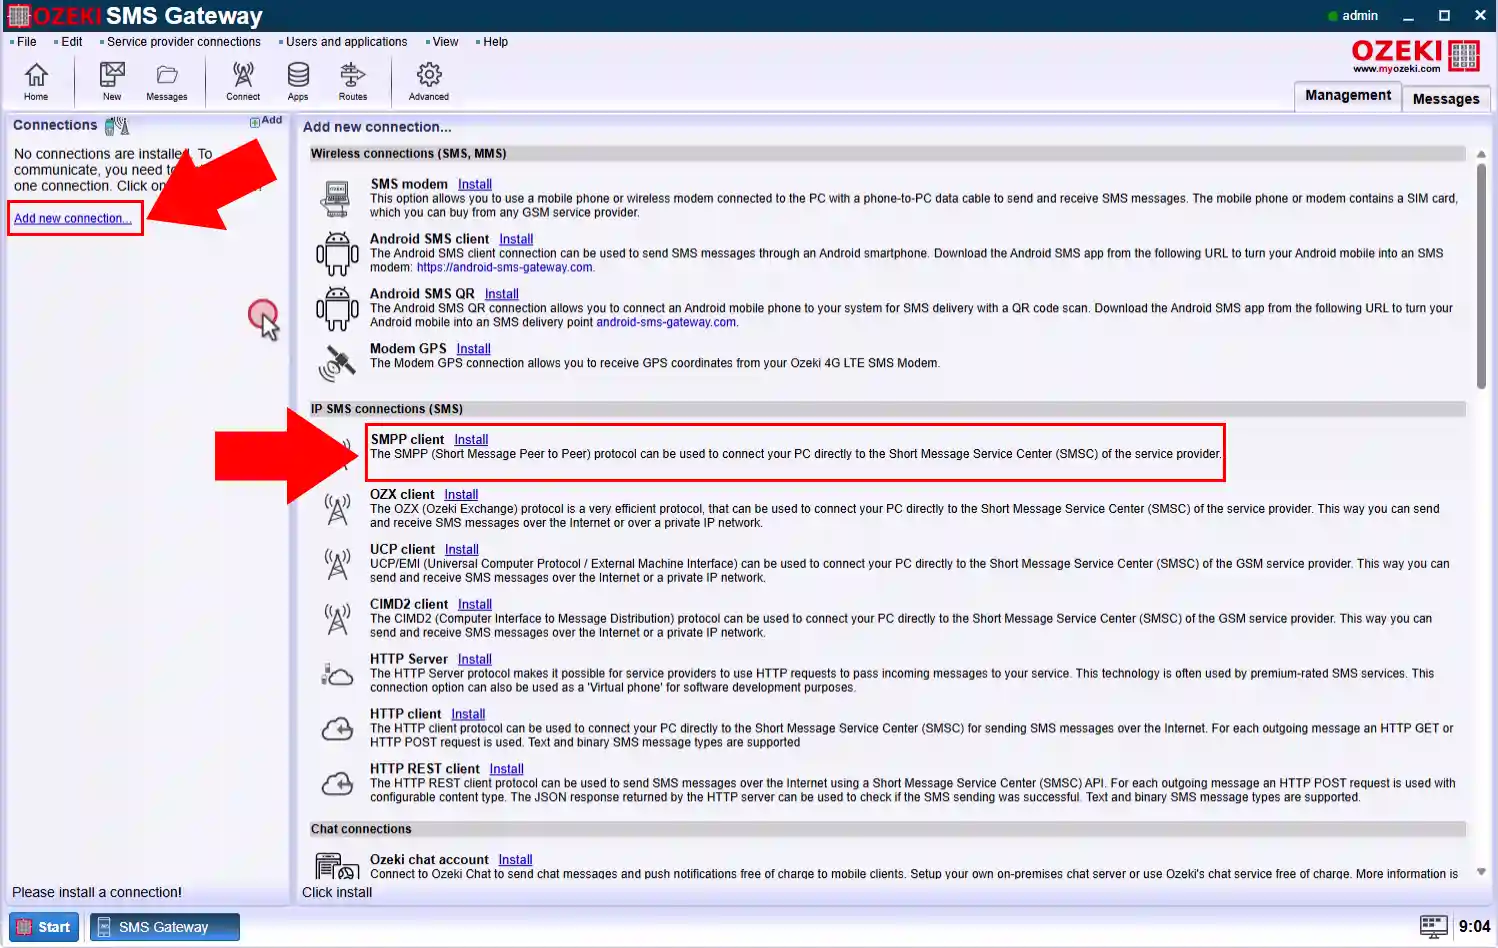
Install the SMPP client connection in Ozeki SMS Gateway. The client acts as the SMPP connection through which test messages are submitted and delivery reports are received. Open the connection list or installation area, choose the SMPP client option, and complete the installation wizard to create the connection.
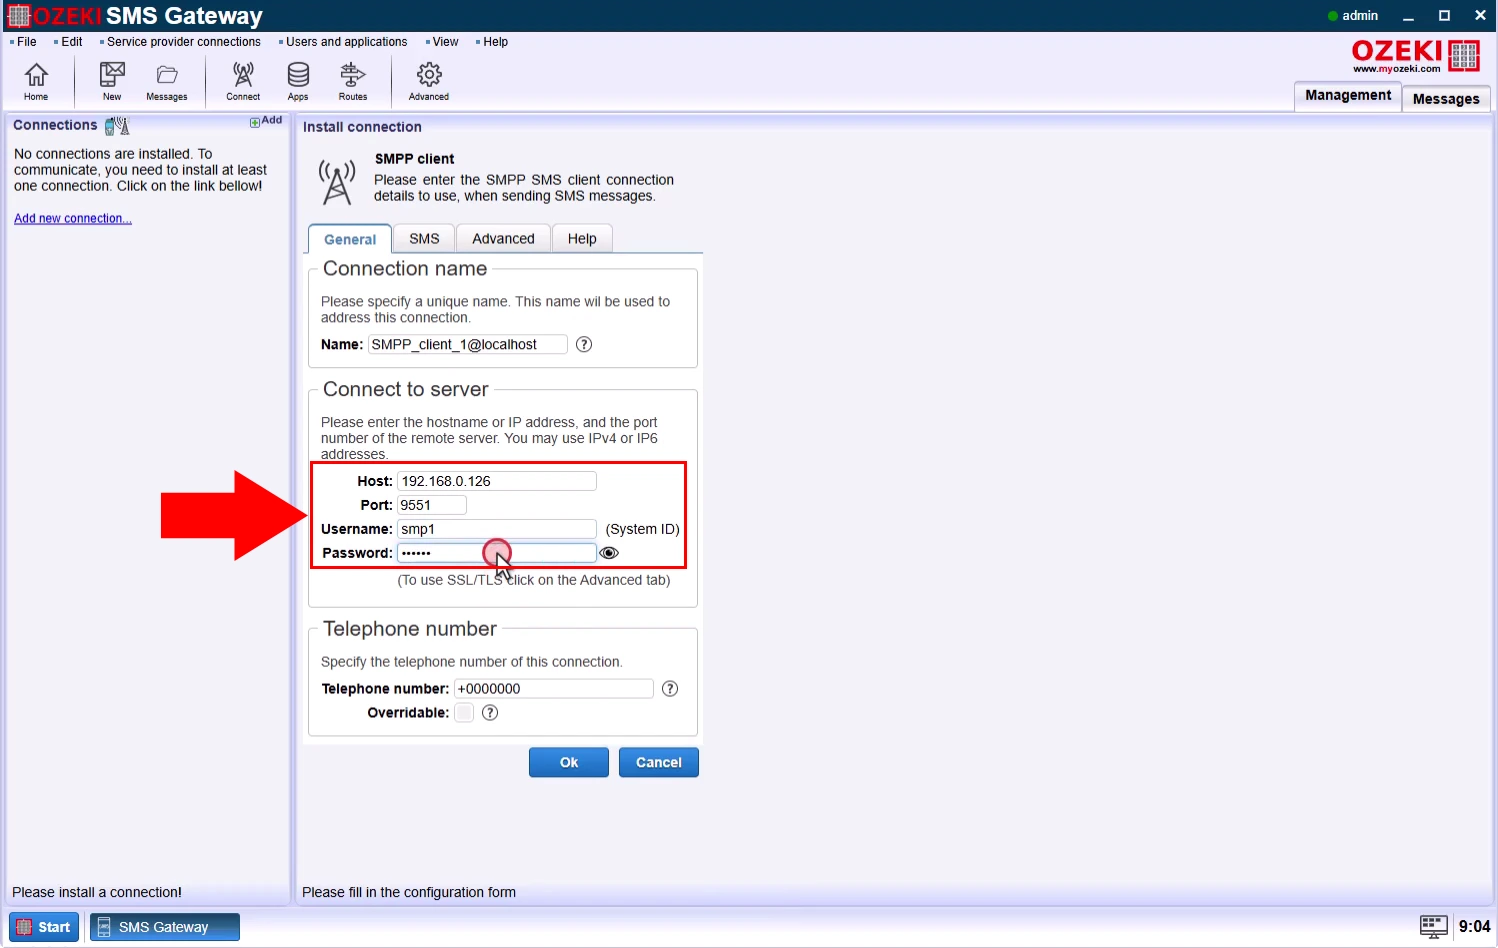
Configure the SMPP client connection with the service provider’s host address, port, system ID, password, system type, and required SMPP version. These settings establish the connection to the SMSC. Verify the details carefully, because an incorrect host, port, or credential will prevent the gateway from submitting messages or receiving delivery reports.
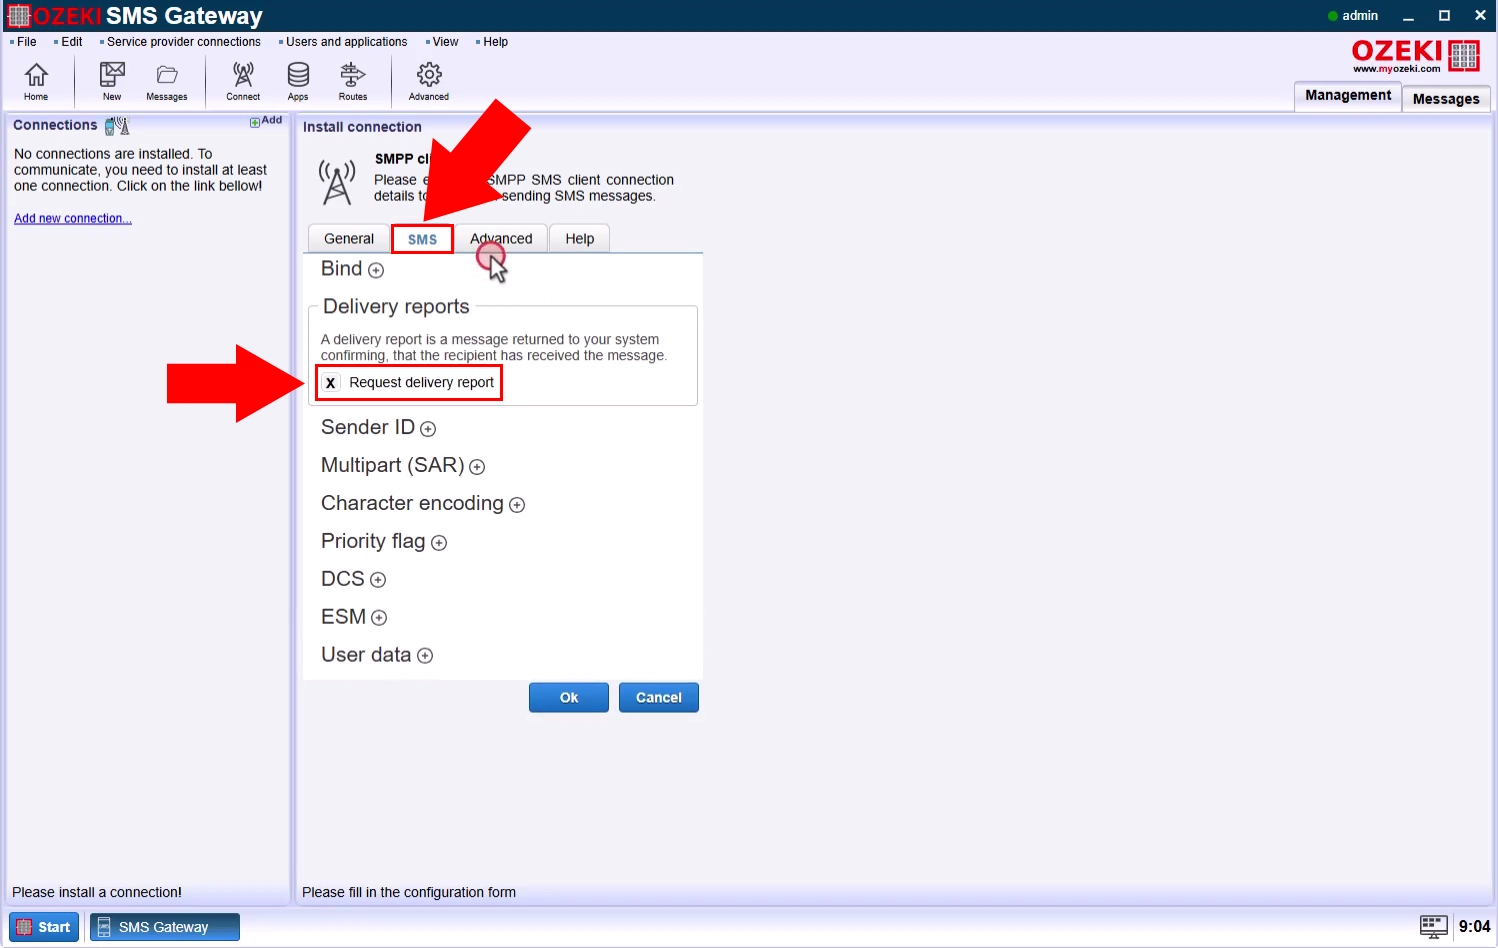
Enable the Request delivery report option in the SMPP client configuration. This instructs the gateway to ask the SMSC for a delivery receipt when a message is submitted. Without this option enabled, the mobile network may not return the status updates needed to track whether the SMS was delivered successfully.
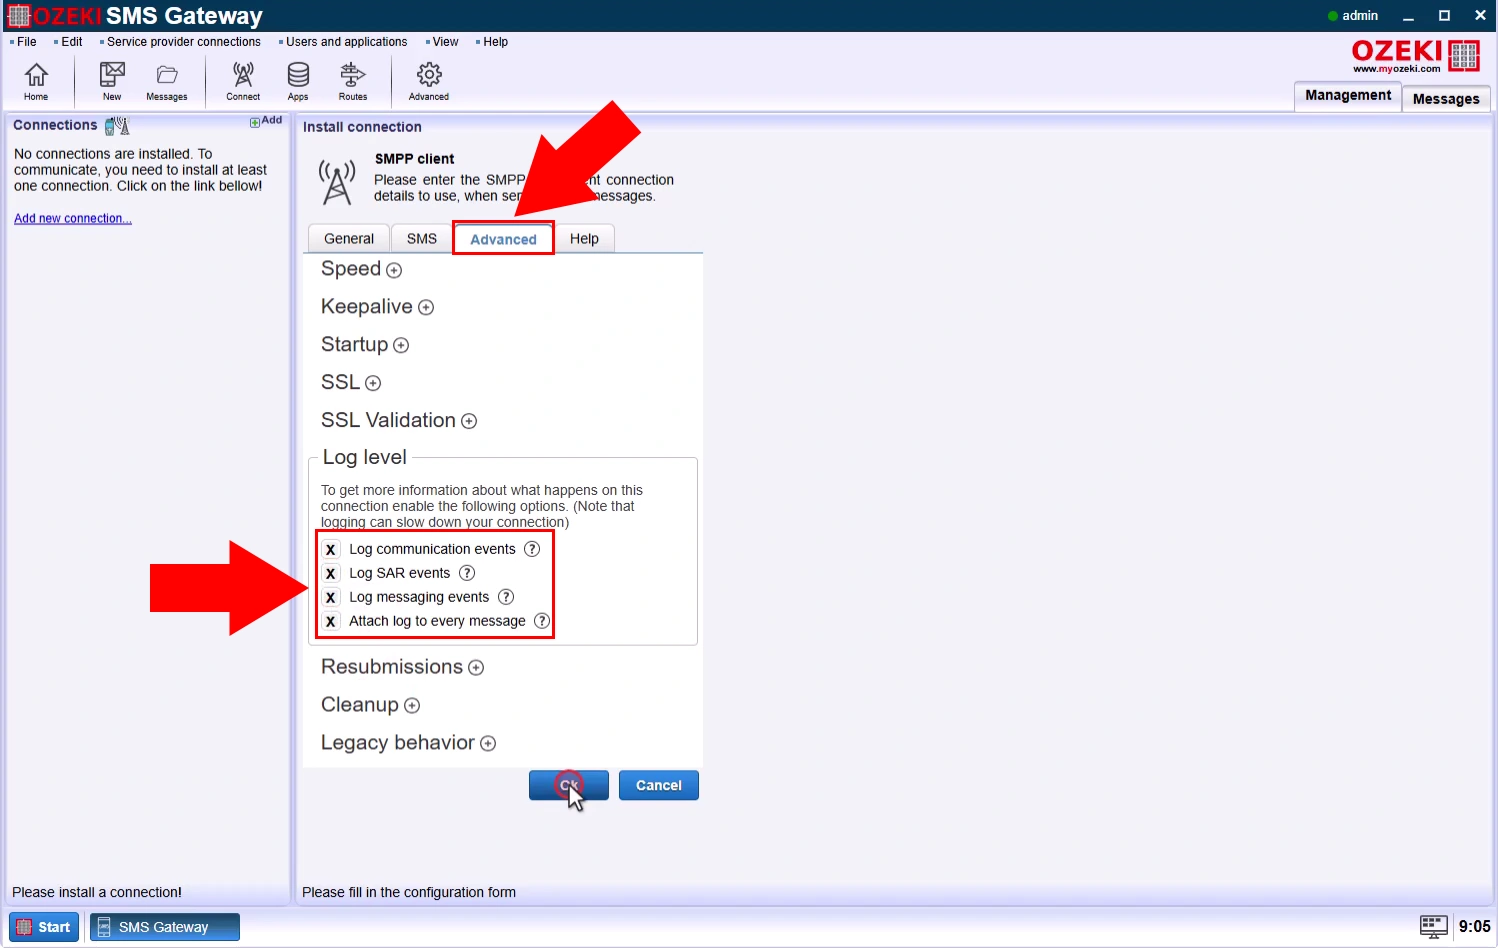
Enable logging for the SMPP client connection. Logging captures connection activity, submitted messages, and incoming delivery-report events, which helps you verify that reports arrive and are matched correctly. Turn on the appropriate event or communication logging options, then save the configuration before activating the connection.
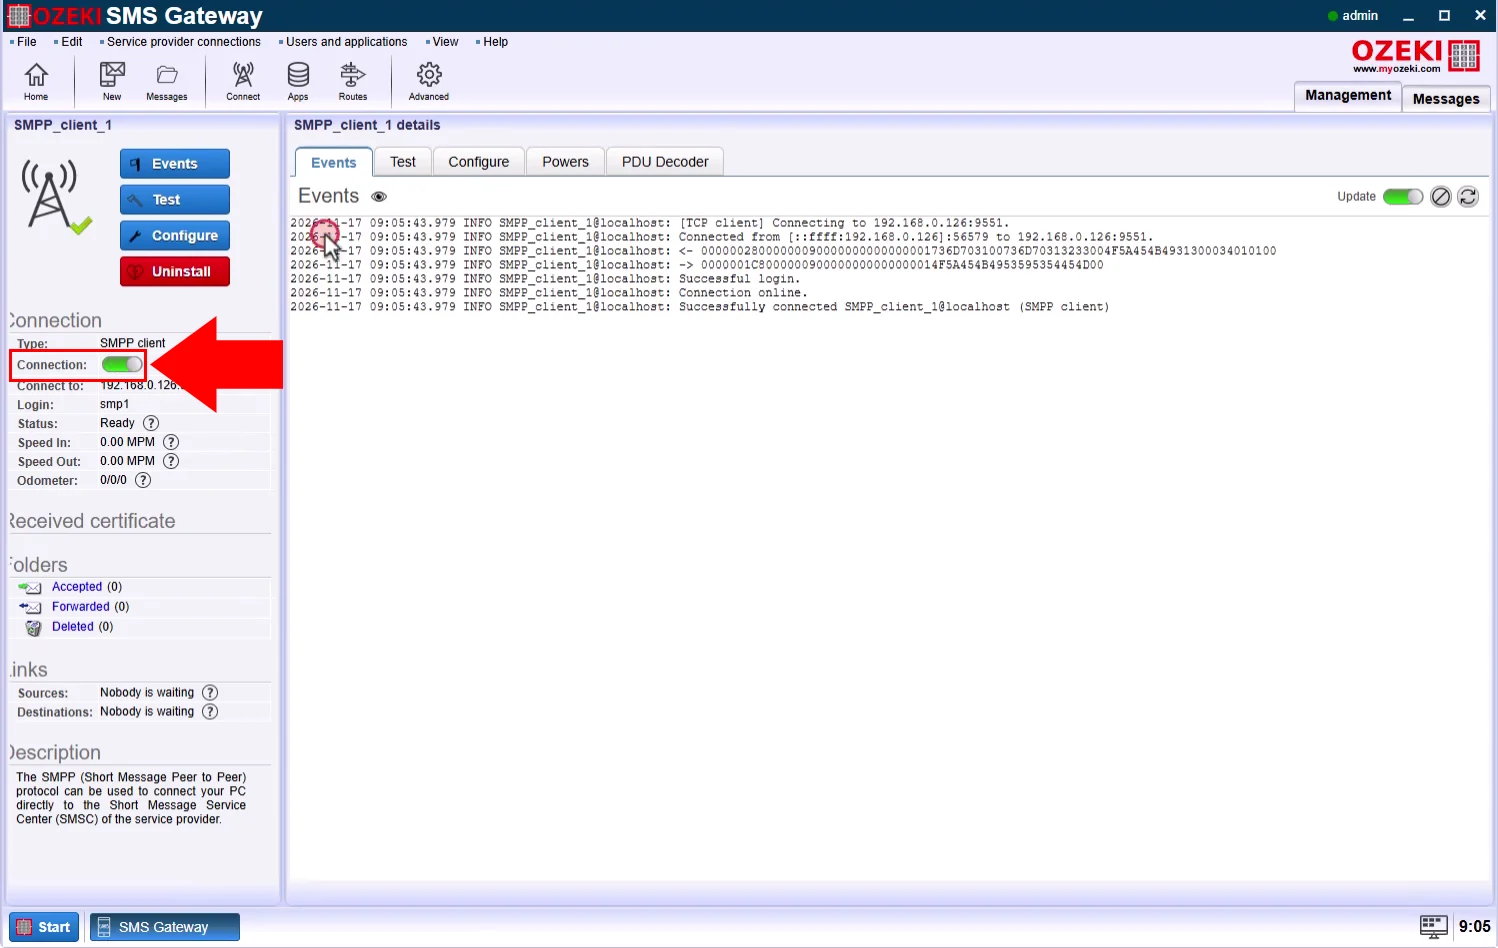
Enable the SMPP client connection so Ozeki can connect to the SMSC and begin exchanging SMPP messages. Check that the connection status becomes connected and that no configuration or authentication errors appear. A stable connection is required before you can send the test message and observe its delivery report.
Send a test message through the configured SMPP client connection. Enter a valid recipient phone number and a short test text, then submit the message. This creates a real message submission whose status can be followed in the gateway, allowing you to confirm that delivery reporting works end to end.
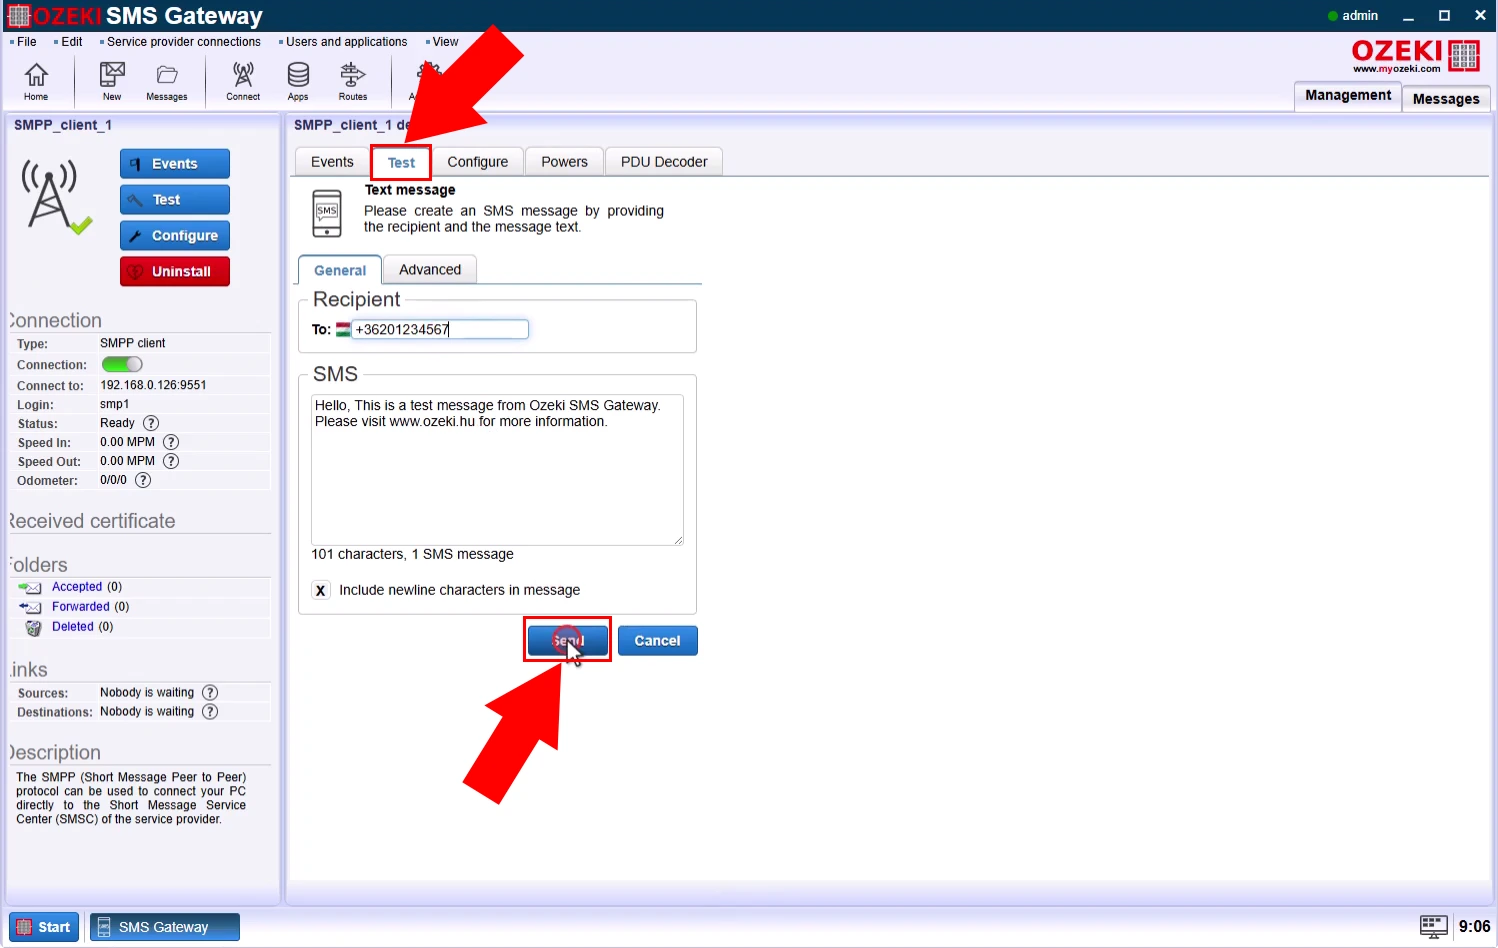
Wait for the delivery report to arrive from the mobile network. Ozeki should display the report status, such as delivered, failed, or pending, and associate it with the original test message. If the report does not appear, recheck that report requests and delivery-report matching-event logging are enabled.
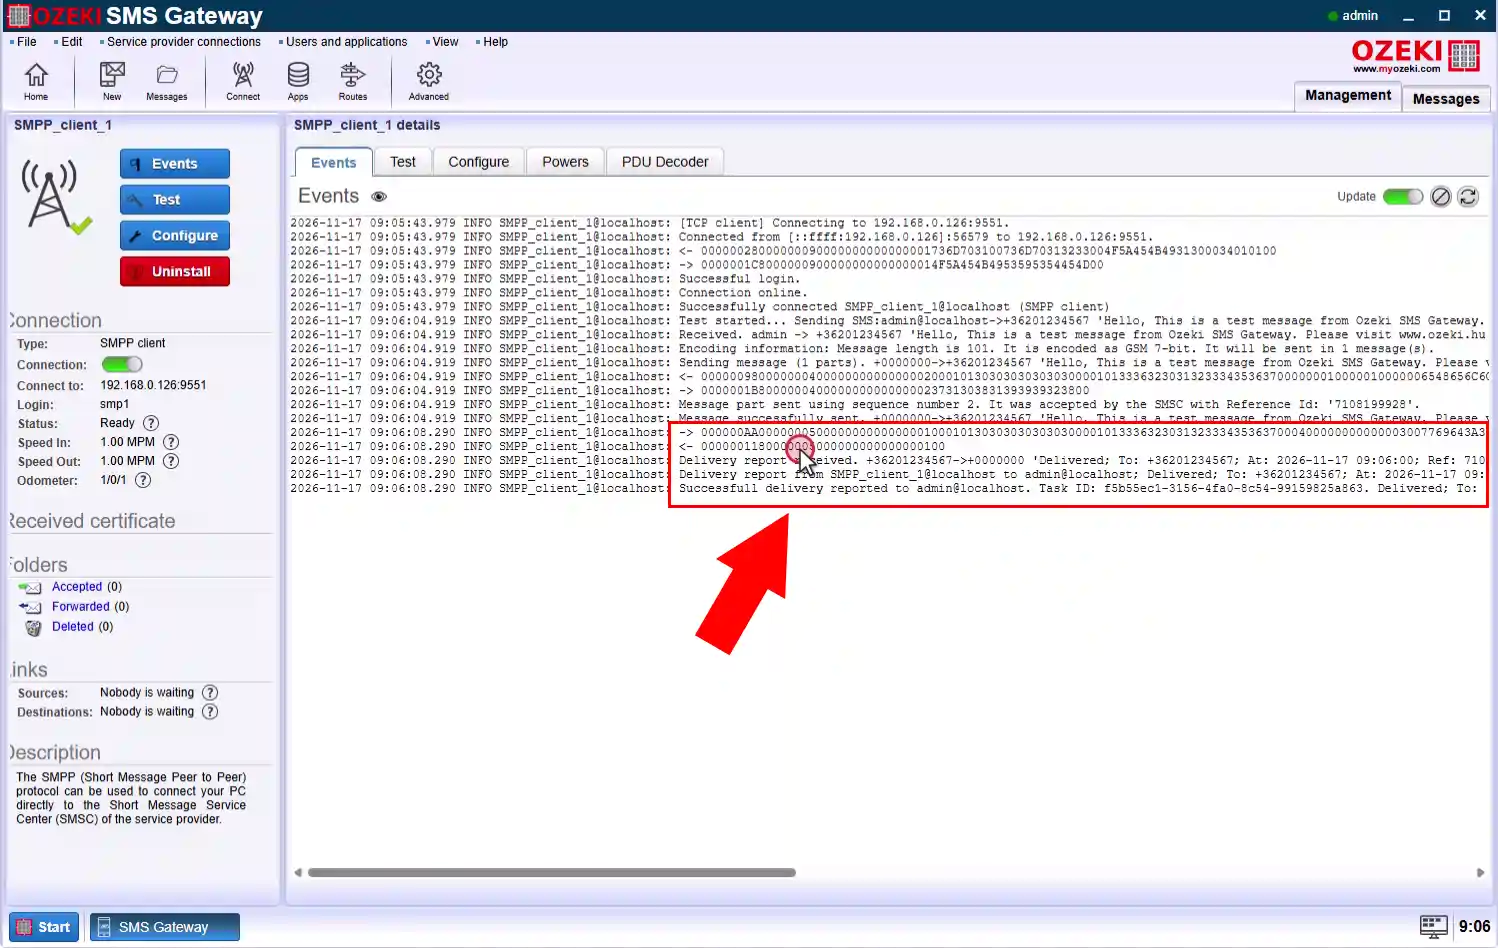
Check submit references log
Open the SMPP client interface again after sending the test message. This area provides access to the connection’s logs and message-related information. You will use it to inspect the submit references recorded during message submission, which are essential for matching an incoming delivery report to the correct outbound SMS.
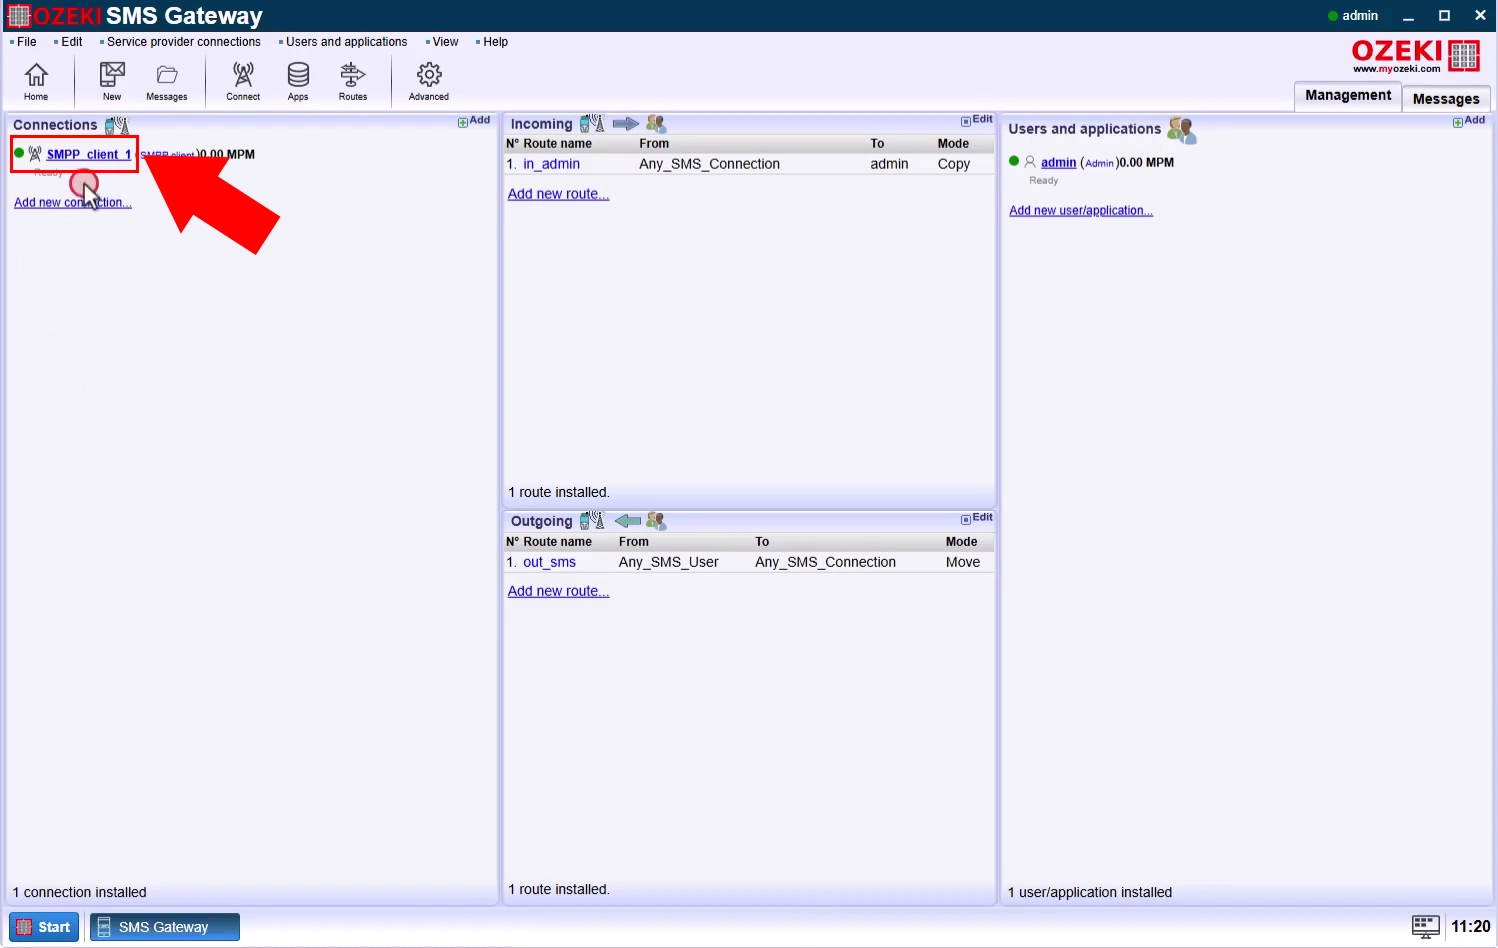
Send another test message if needed, using the same SMPP client connection. This ensures that a fresh submission reference is created and logged. Keep the recipient number and message details available, because you will compare them with the submit-reference log and the delivery history in the following steps.
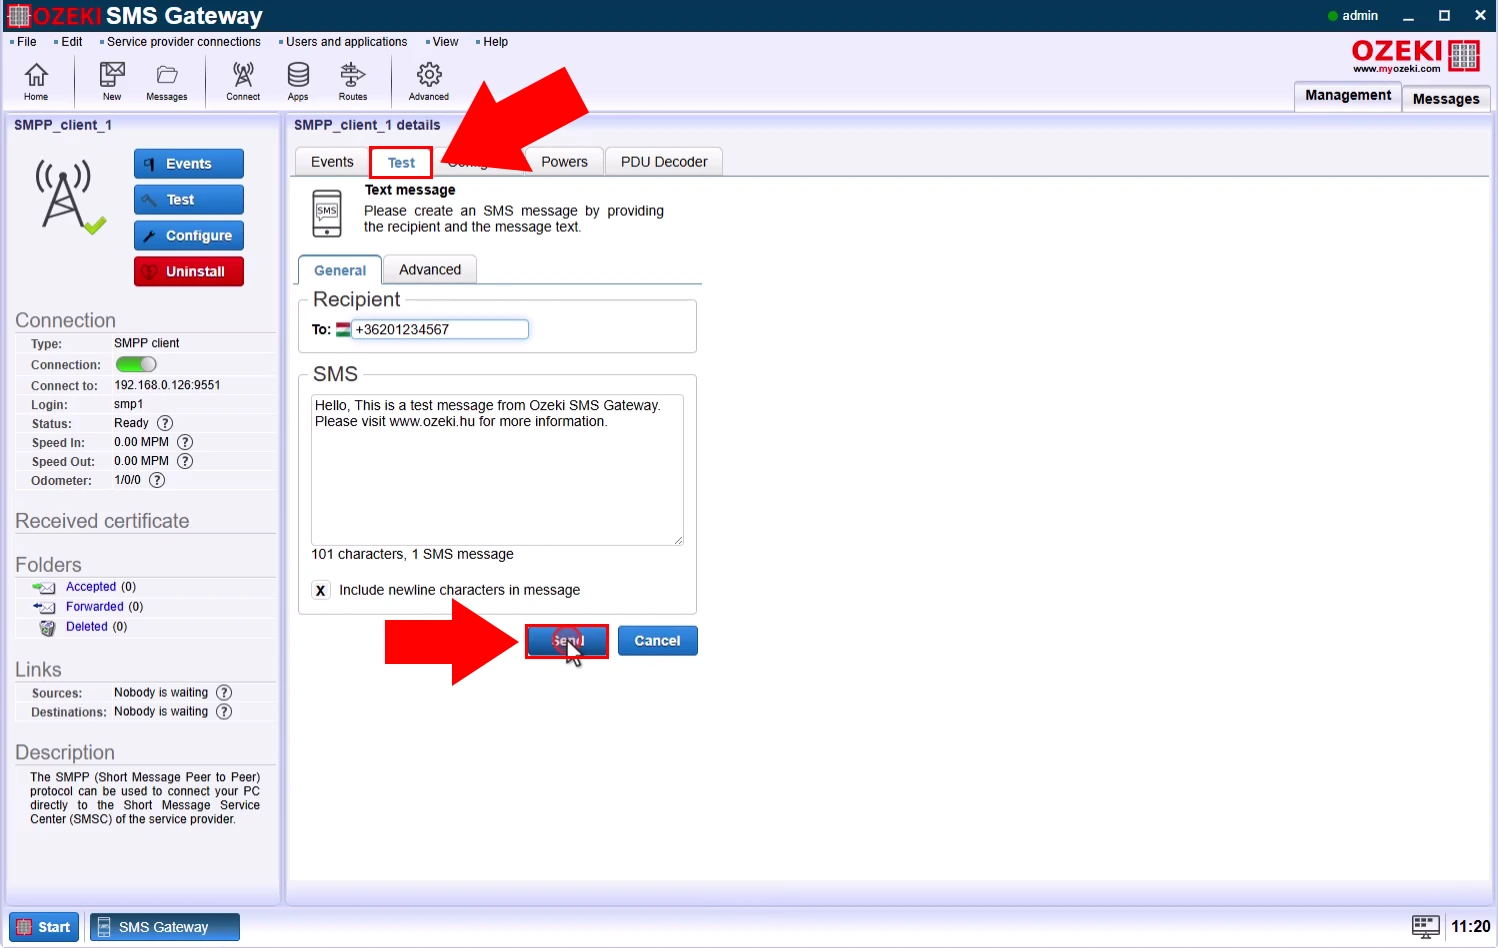
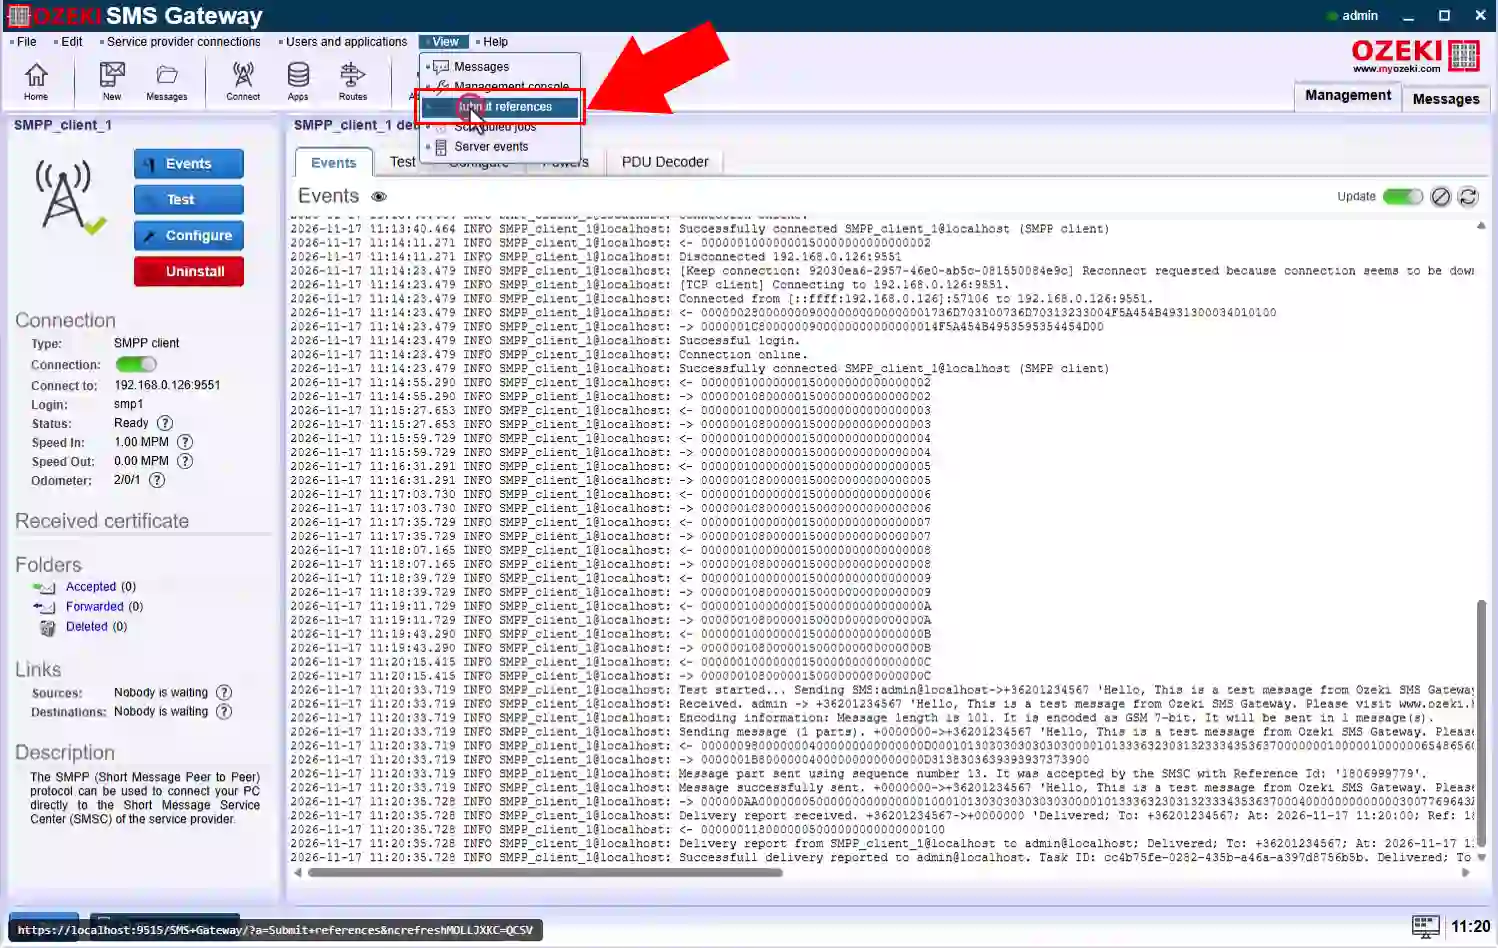
Open the submit references log from the SMPP client interface. This log records the references assigned when messages are submitted to the SMSC. Opening it lets you verify that Ozeki stored the correct reference for your test message, which is the key identifier used to correlate the later delivery report.
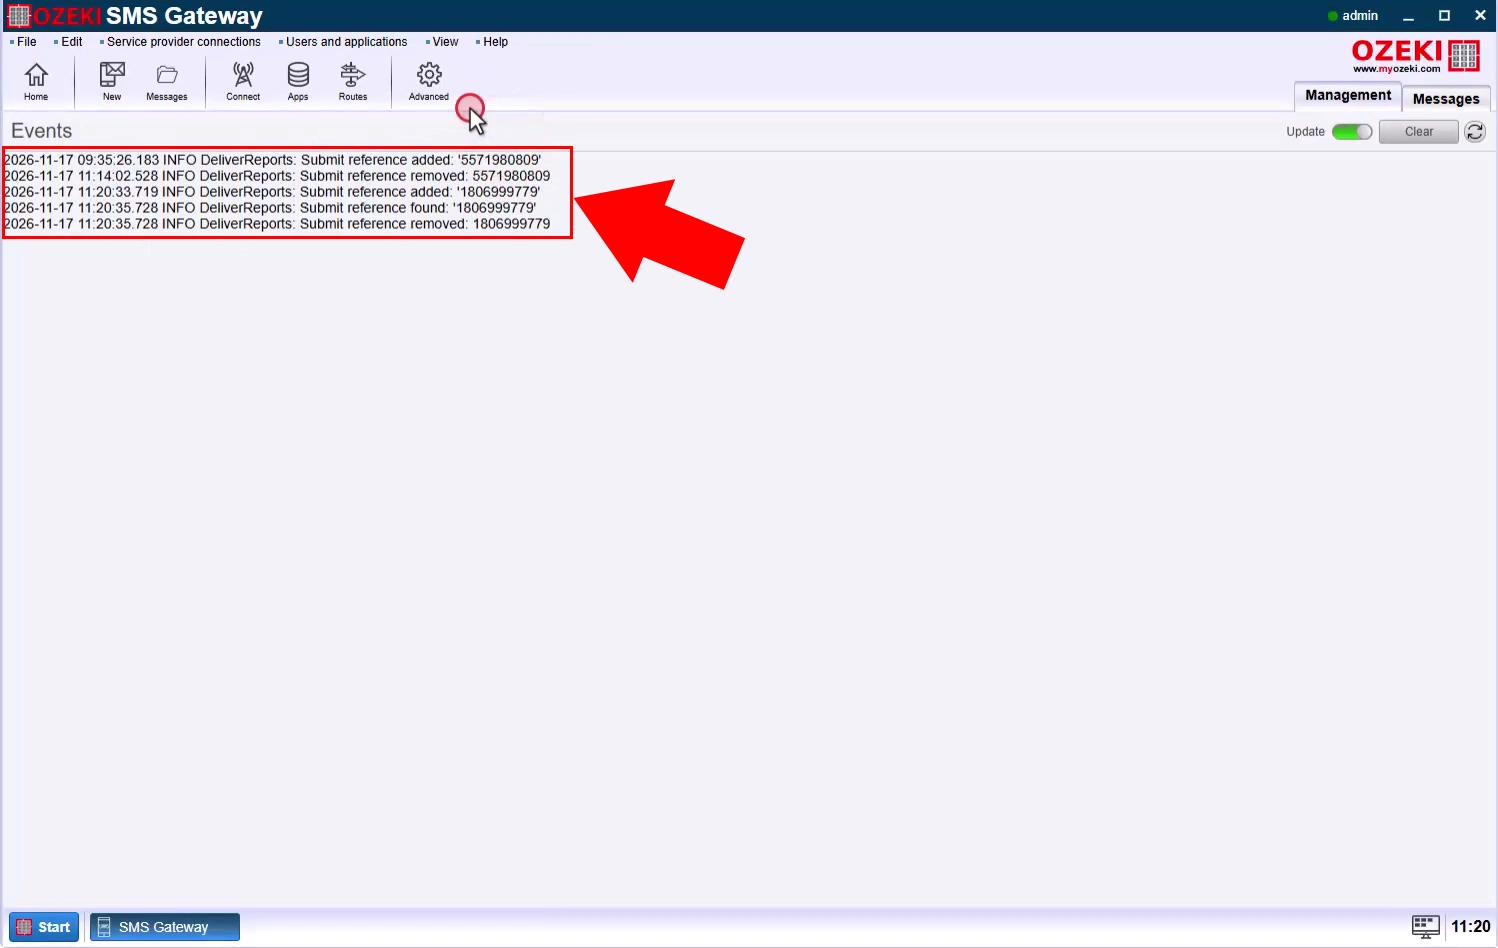
Review the submit references log entries. Confirm that your test message appears with its submit reference, destination number, timestamp, and submission status. If the reference is missing or incorrect, the gateway may not be able to match the incoming SMPP delivery report to the original message, preventing accurate delivery tracking.
Check message history
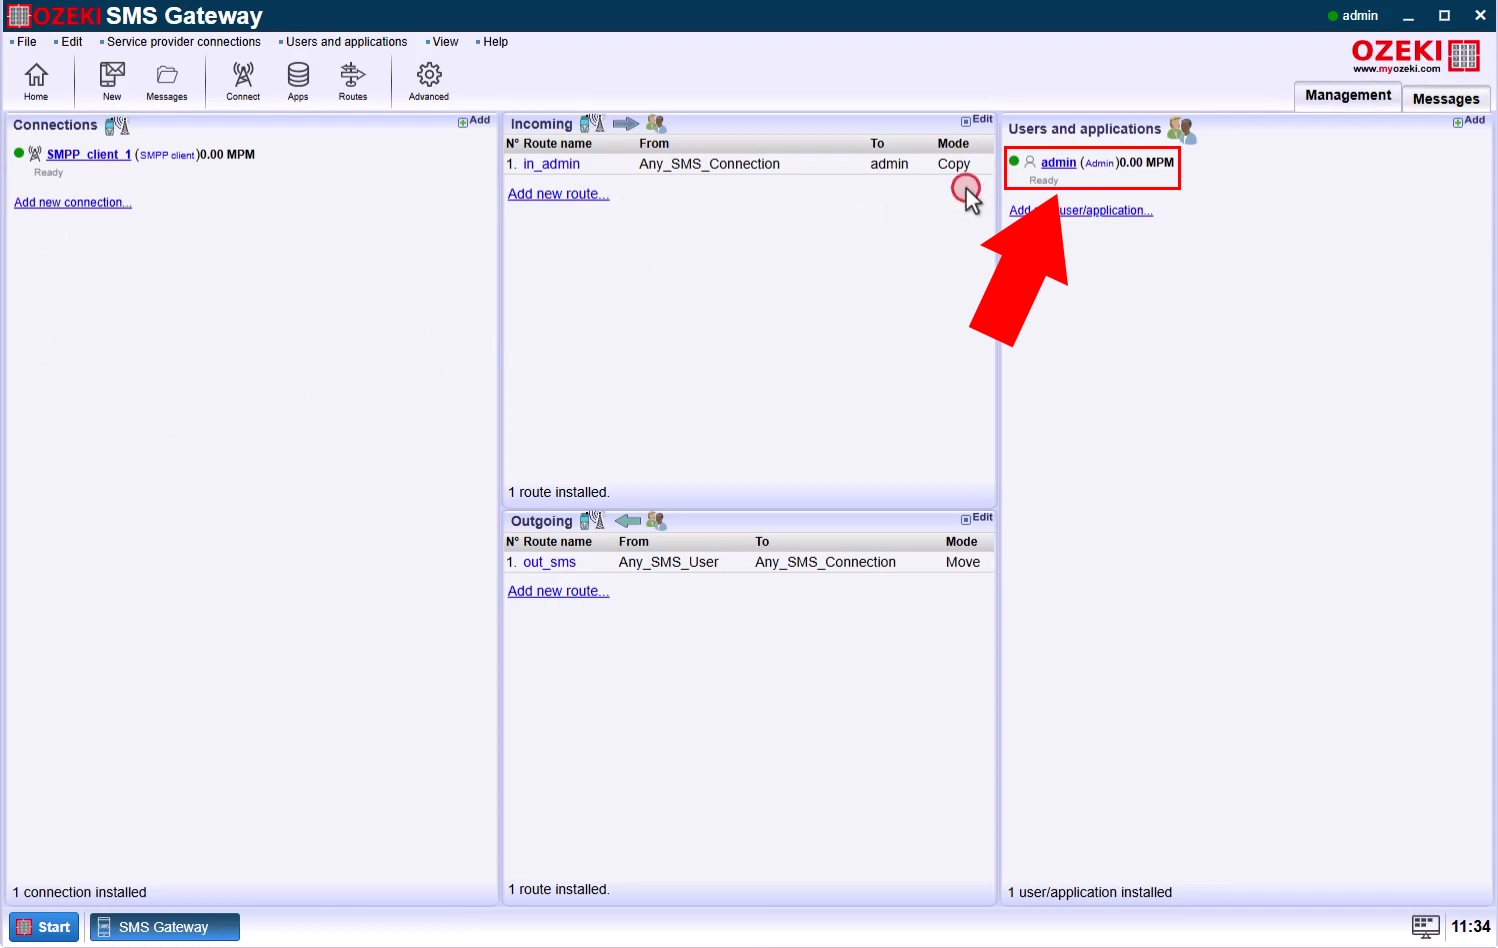
Open the Admin user account in Ozeki SMS Gateway. The Admin user’s message folders contain the messages submitted through the gateway, including the test SMS. Selecting this user is necessary to access the Sent folder, where you can inspect the individual message and review its complete delivery history.
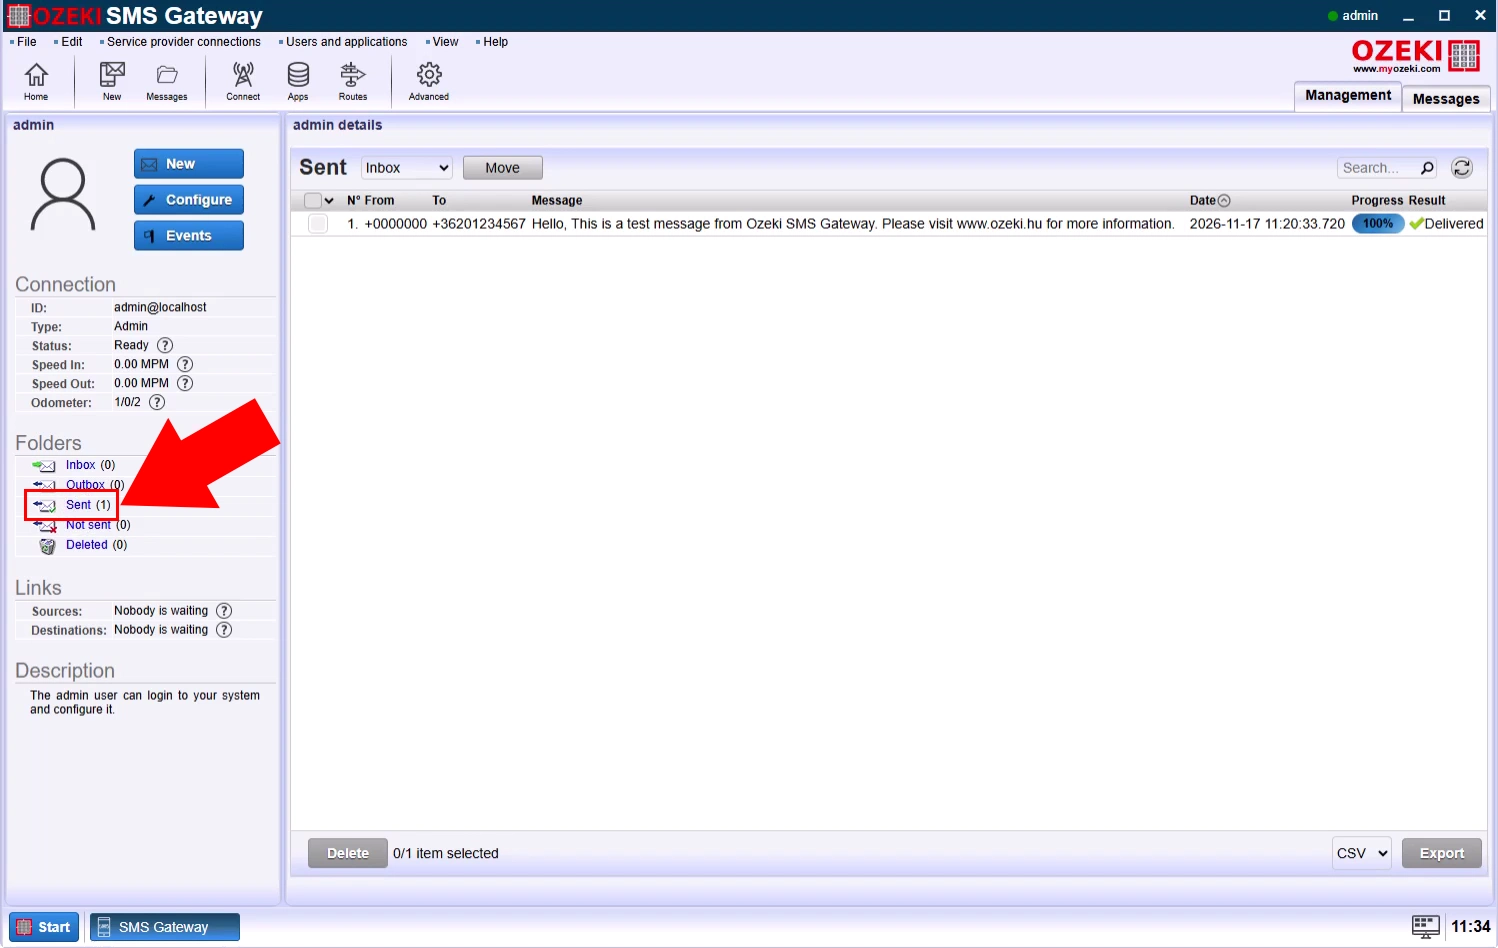
Select the Sent folder for the Admin user. This folder lists messages that have been submitted through Ozeki, including your SMPP test message. Locate the test message by recipient number, sending time, or message text, then open it to view its detailed status and delivery-report information.
Open the message details page for the selected test message. Here you can inspect the message content, recipient, submission time, connection used, and current status. This view confirms that Ozeki recorded the outbound message correctly and provides the starting point for checking its delivery-report history.
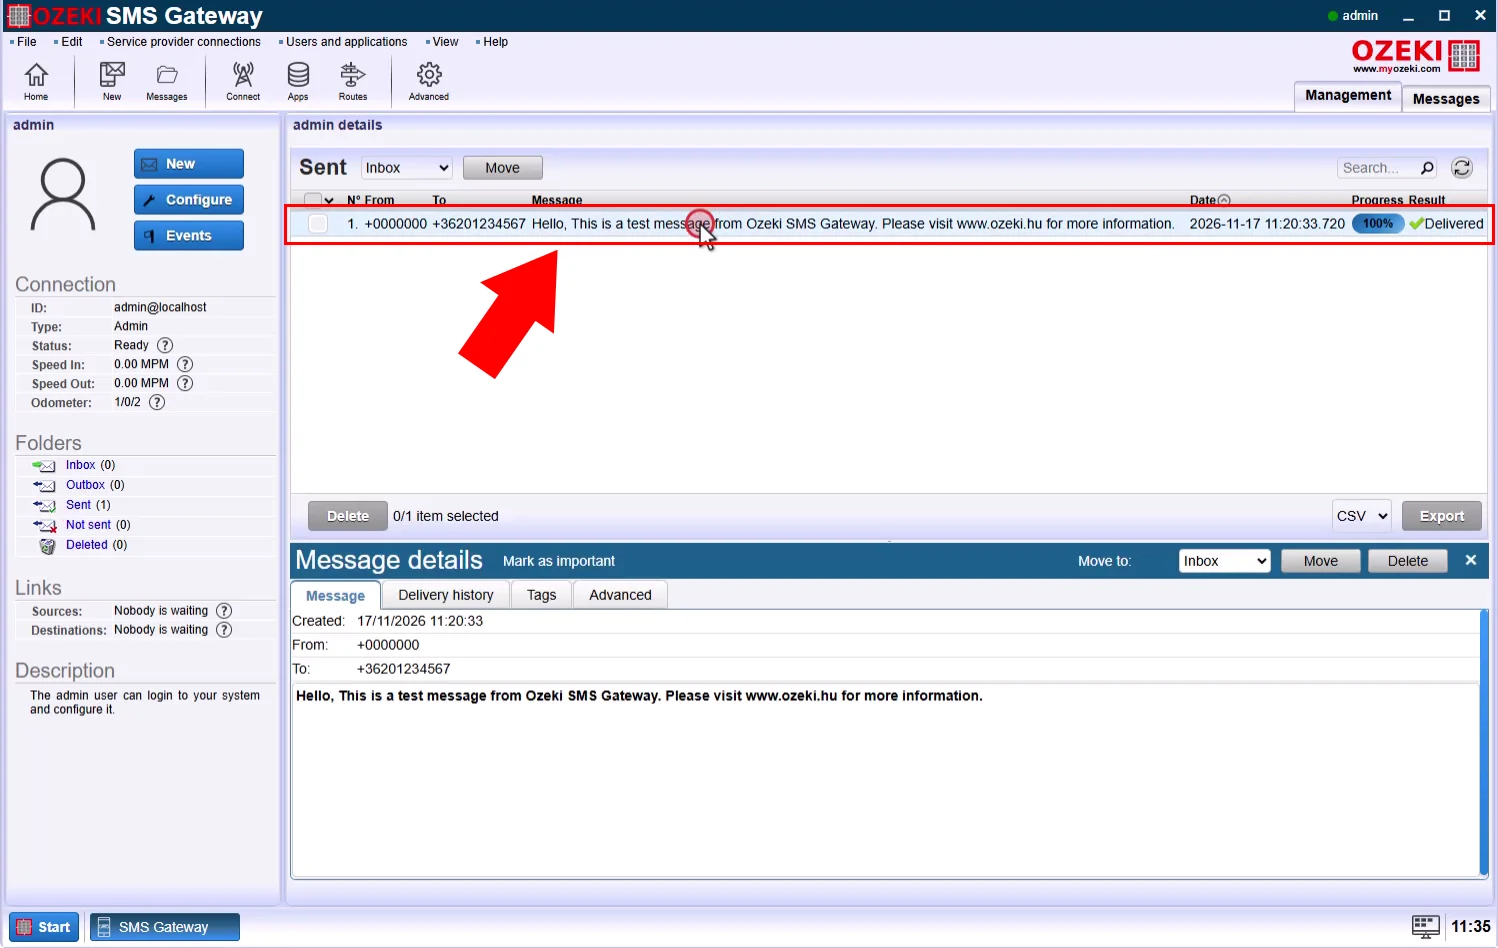
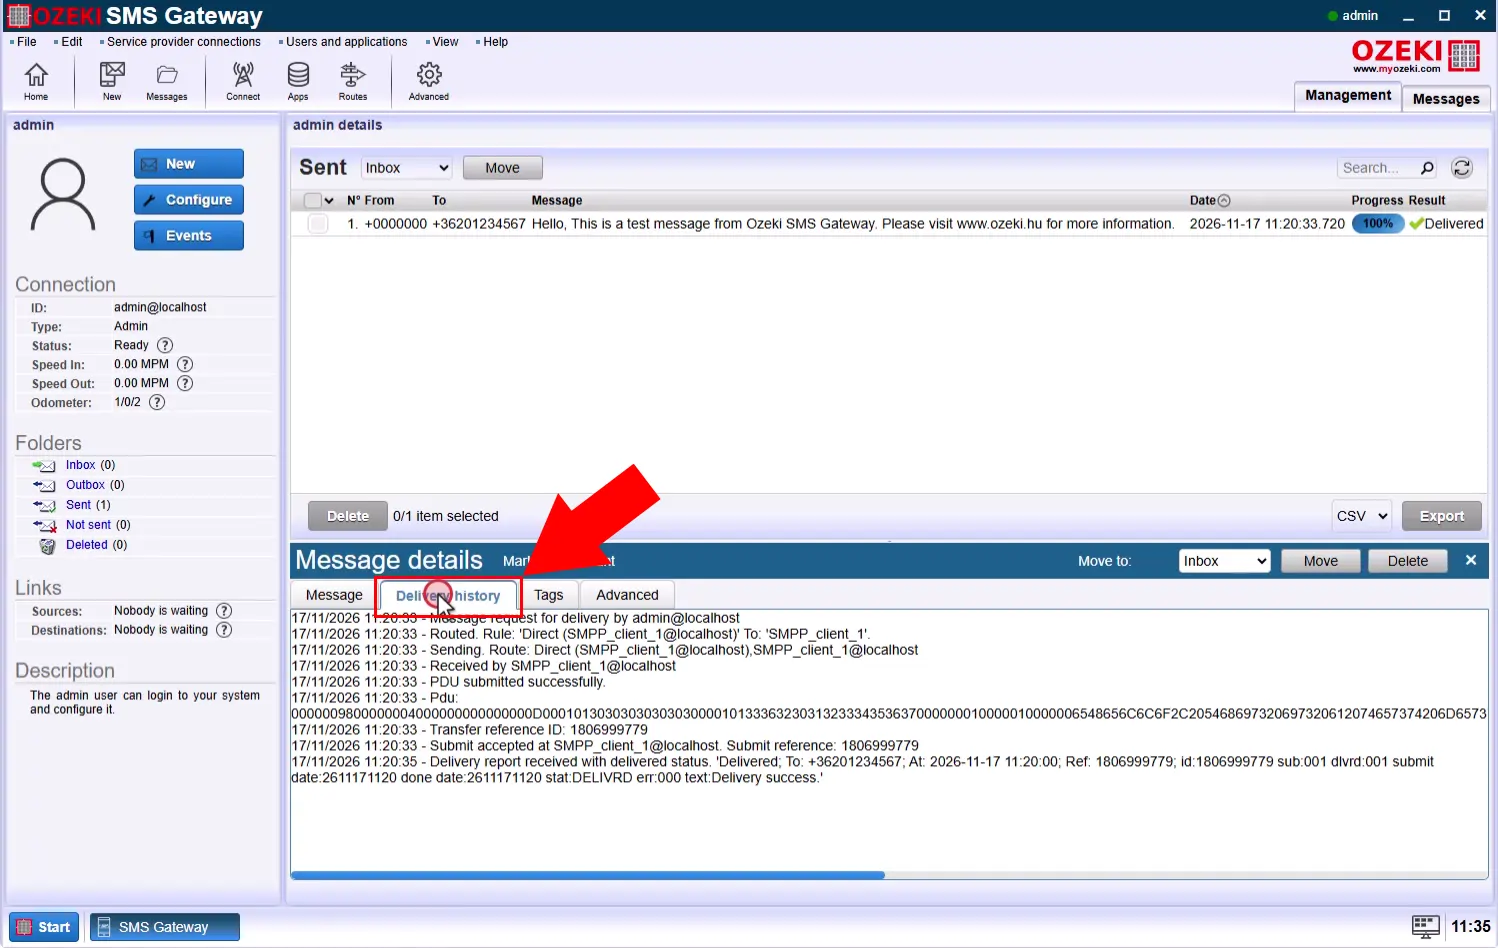
Check the delivery history for the test message. This section shows every status update received from the SMSC, including the final delivery result and timestamps. If the delivery report was matched successfully, the history should display the expected status; otherwise, revisit the report-request and logging settings.