Kako instalirati Autoreply Database korisnika
Autoreply Database korisnici su idealno rješenje za generiranje bilo koje poruke ovisno o dolaznoj poruci. Ove poruke se generiraju iz baze podataka. Ovdje ćete vidjeti kako instalirati i konfigurirati Autoreply Database korisnika u Ozeki SMS Gatewayu.
Što je Ozeki SMS Gateway?
Ozeki SMS Gateway je softverska platforma visokih performansi koja vam omogućuje slanje i primanje SMS poruka koristeći različite komunikacijske protokole kao što su SMPP, HTTP, UCP, CIMD i više. Djeluje kao most između vaših aplikacija (poput CRM sustava, web stranica ili baza podataka) i mobilnih mreža, omogućavajući automatizirano i pouzdano SMS slanje poruka.
Kako instalirati Autoreply Database korisnika (Brzi koraci)
- Otvorite Control Panel
- Kreirajte novu vezu s bazom podataka
- Odaberite vrstu baze podataka
- Konfigurirajte i omogućite vezu s bazom podataka
- Idite na SMS Gateway nadzornu ploču
- Instalirajte Autoreply Database korisnika
- Povežite se s vezom baze podataka
- Uredite i omogućite autoreply skriptu
Kako instalirati Autoreply Database korisnika (Video tutorial)
U ovom videu naučit ćete kako instalirati i konfigurirati Autoreply Database korisnika u Ozeki SMS Gatewayu. Ovaj korisnik automatski odgovara na dolazne SMS poruke na temelju podataka dohvaćenih iz povezane SQL baze podataka. Tutorial vam pokazuje kako postaviti vezu s bazom podataka, instalirati Autoreply Database korisnika i napisati SQL upit koji generira odgovore. Na kraju videa moći ćete kreirati pametan sustav za automatsko odgovaranje koji dinamički odgovara na poruke koristeći sadržaj vaše baze podataka - idealno za podršku botova, informacijske usluge ili automatizirane odgovore.
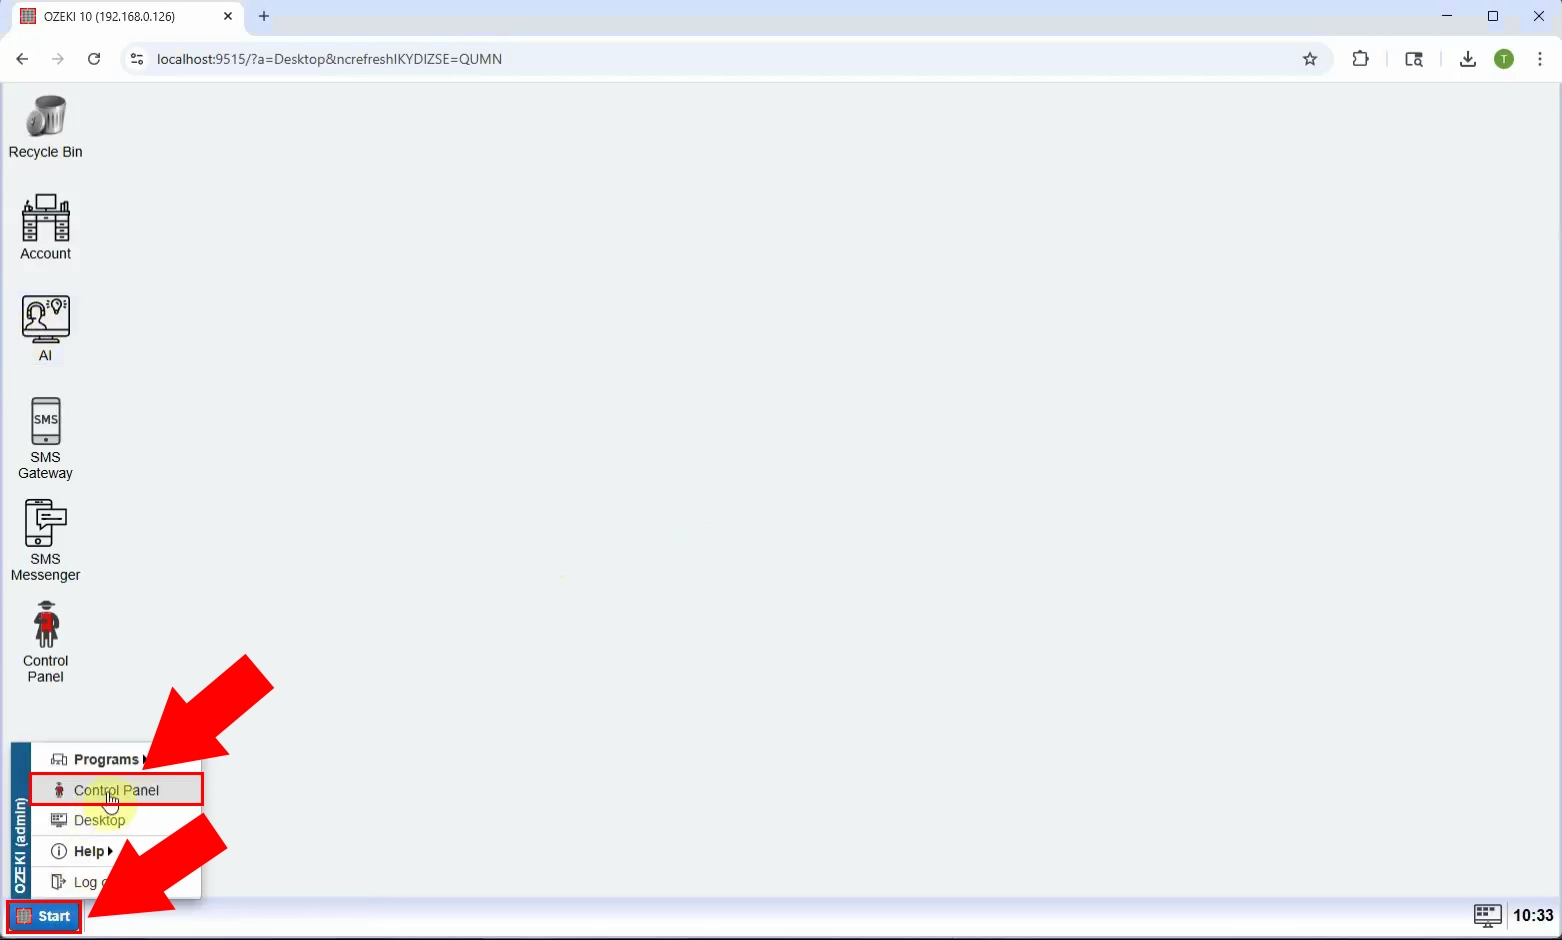
Korak 1 - Otvorite Control Panel
Pokrenite Ozeki SMS Gateway i pritisnite Start izbornik u donjem lijevom kutu, zatim idite na Control Panel gdje možete upravljati vezama i postavkama sustava (Slika 1).
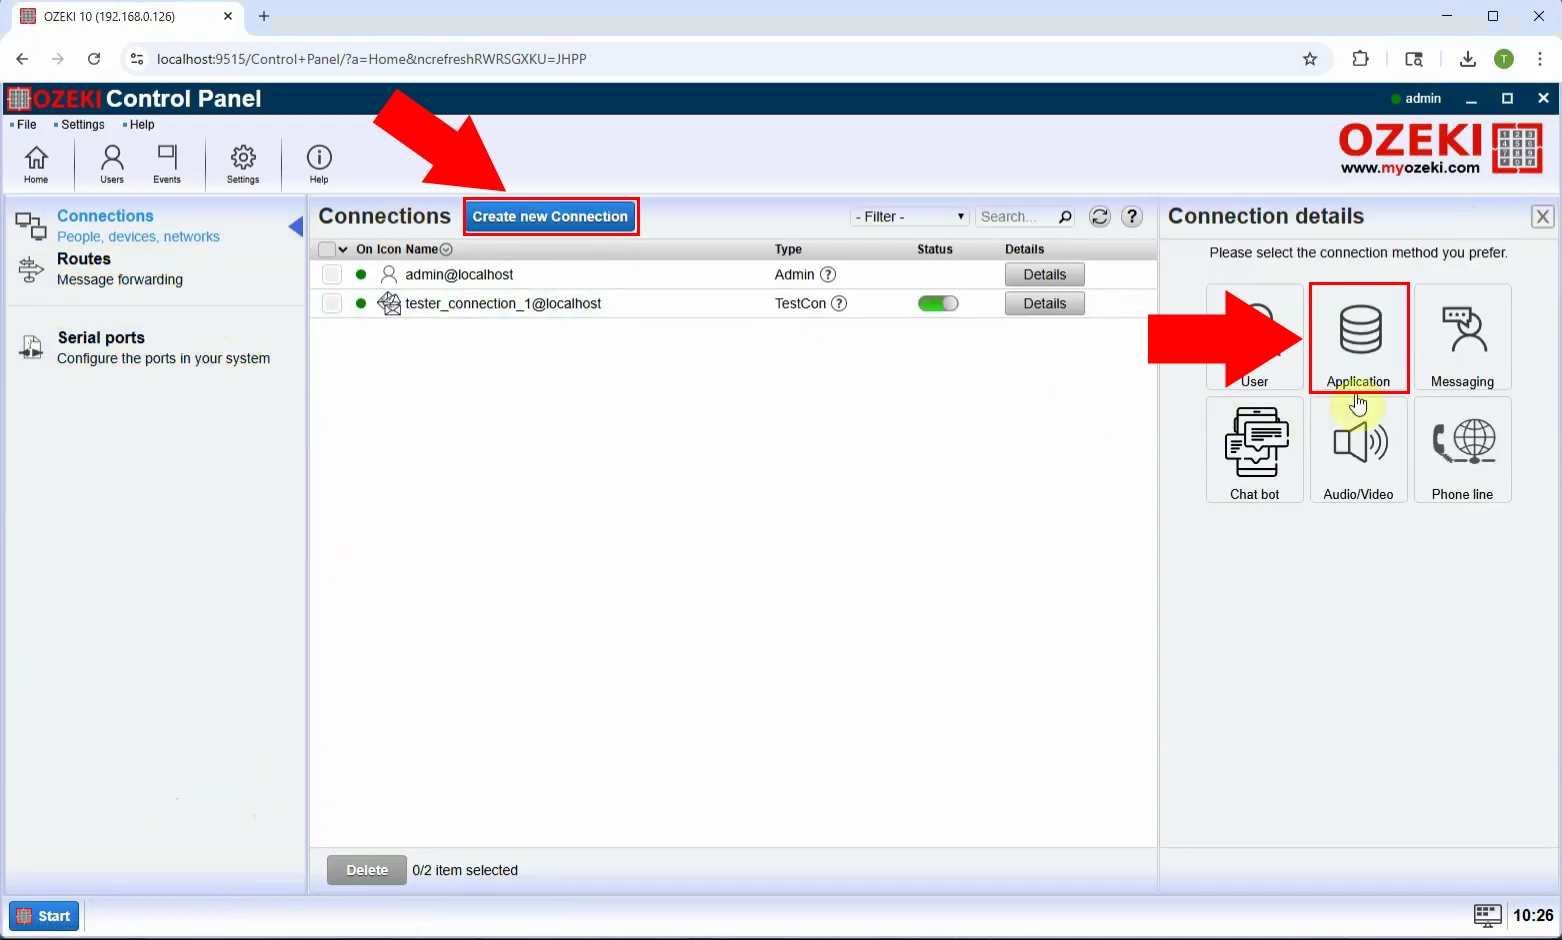
Korak 2 - Kreirajte novu aplikacijsku vezu
Kliknite na Create new connection, zatim kliknite na Application s desne strane kako biste započeli postavljanje nove veze s bazom podataka (Slika 2).
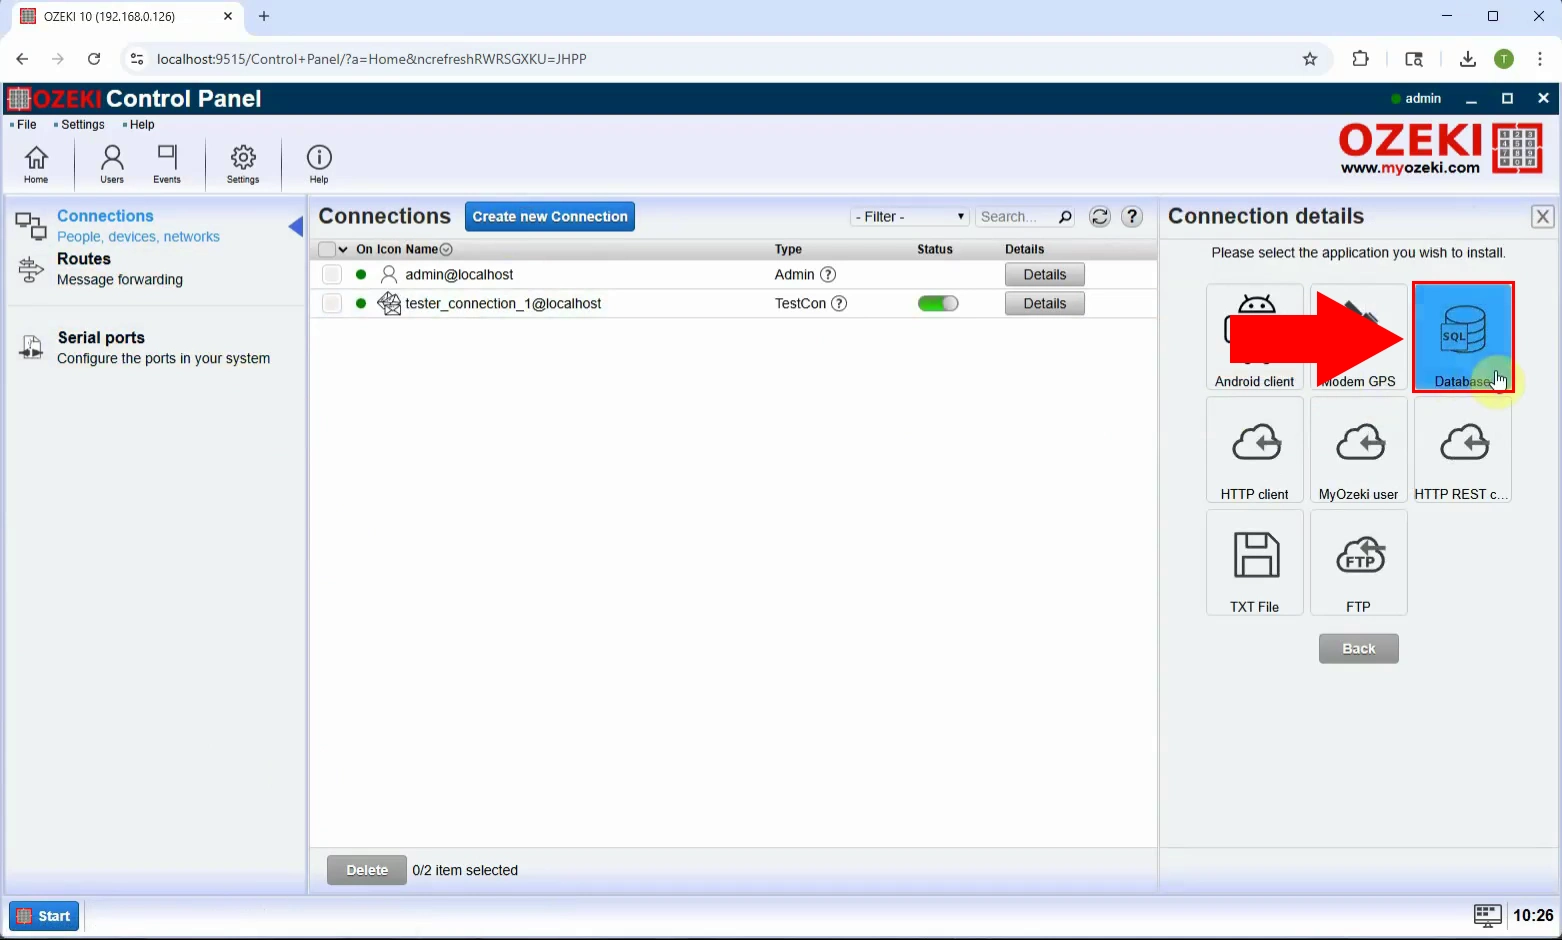
Korak 3 - Odaberite bazu podataka
Od dostupnih opcija odaberite Database kao vrstu aplikacijske veze (Slika 3).
Korak 4 - Odaberite SQL queries vezu s bazom podataka
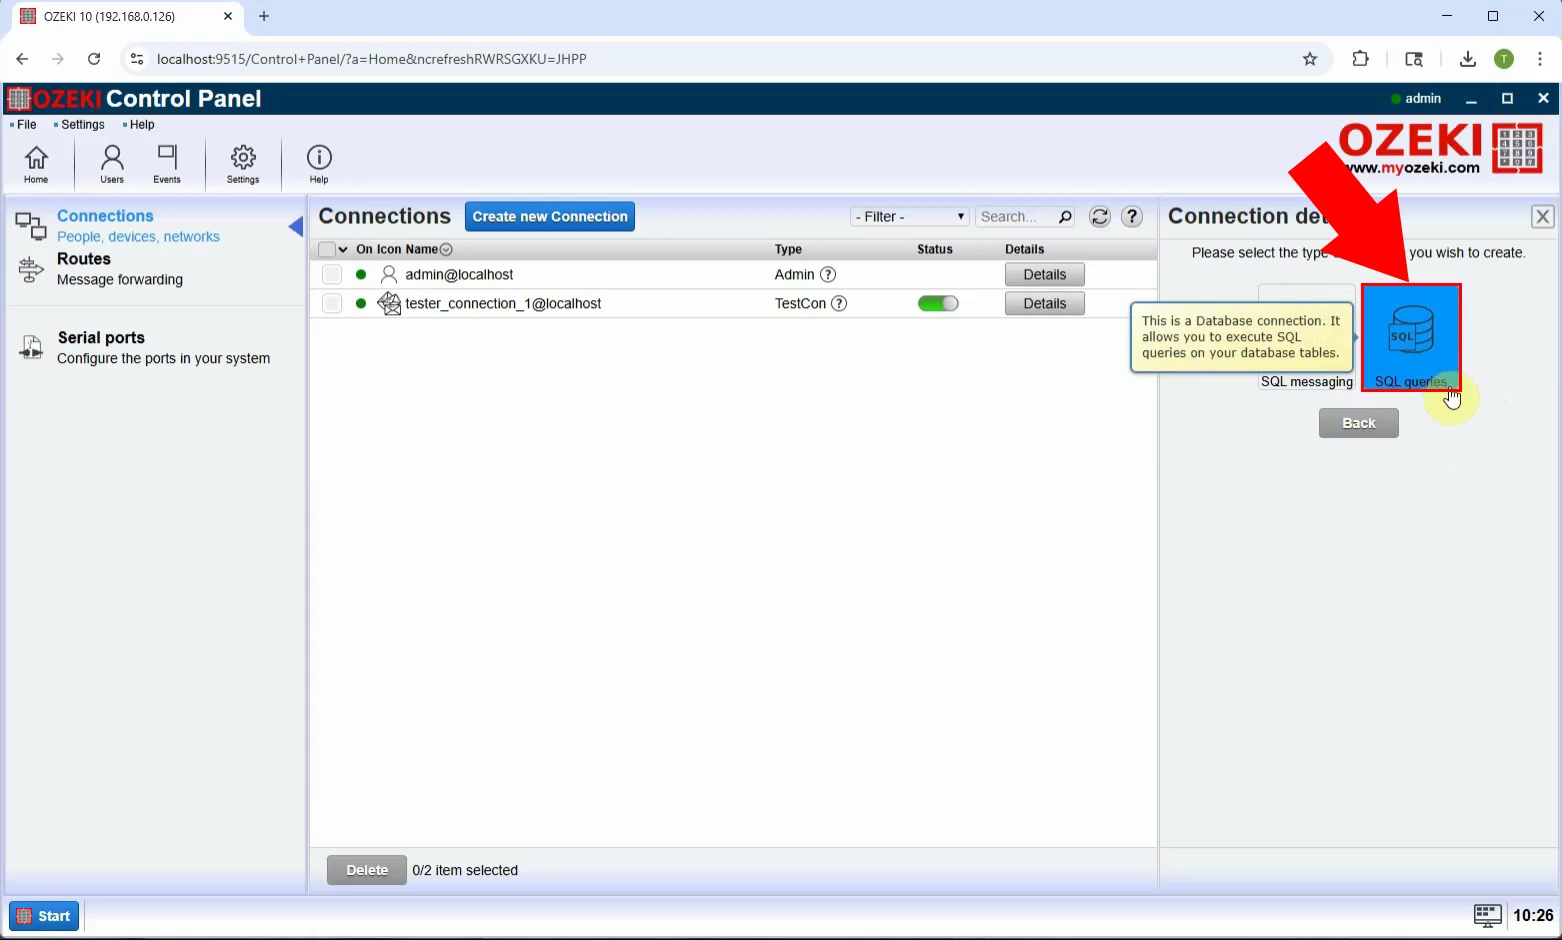
Odaberite SQL queries kako biste konfigurirali vezu koja koristi SQL upite za dohvaćanje podataka iz vaše baze podataka (Slika 4).
Korak 5 - Odaberite vrstu baze podataka
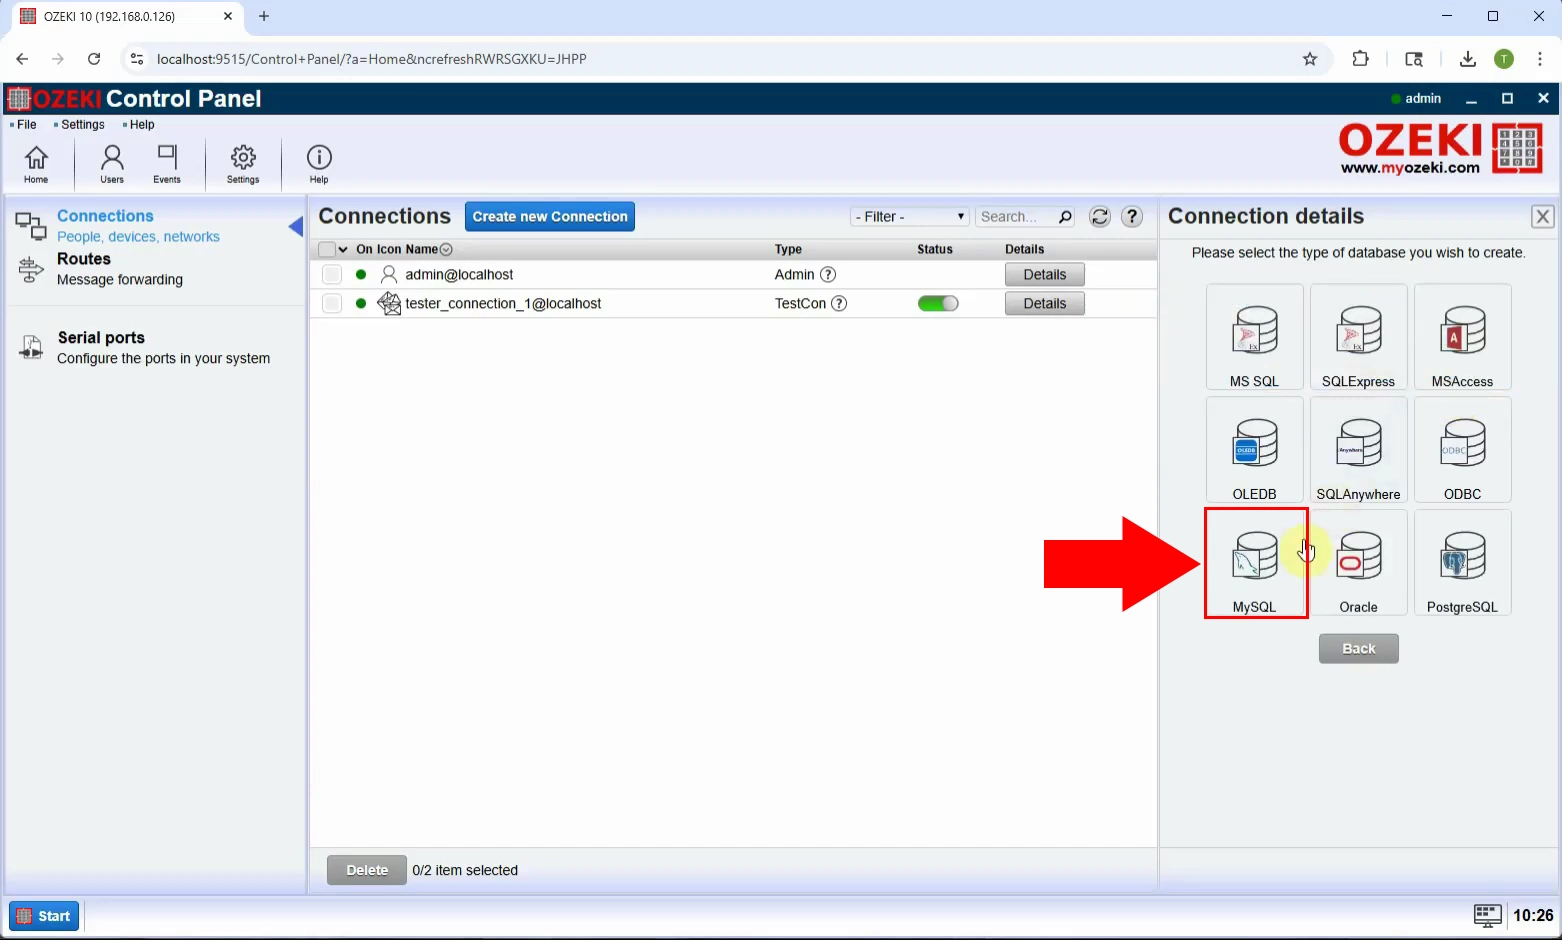
Odaberite vrstu baze podataka MySQL (Slika 5).
Korak 6 - Konfigurirajte vezu s bazom podataka
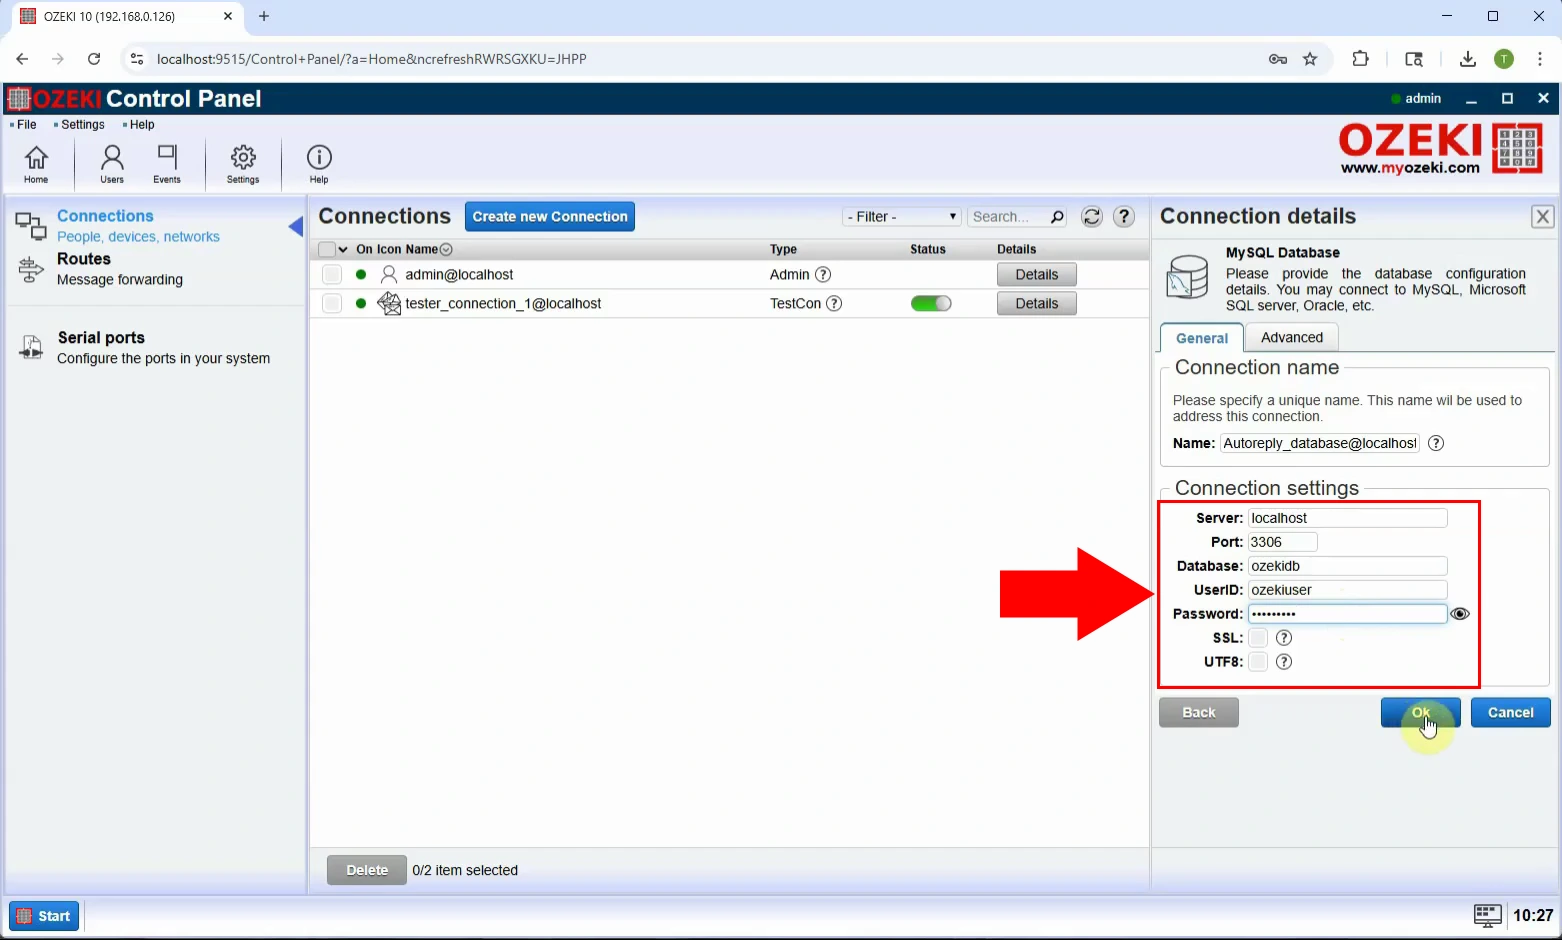
Unesite potrebne detalje: Server, Port, Database, UserID, Password. Spremite konfiguraciju (Slika 6).
Korak 7 - Omogućite vezu s bazom podataka
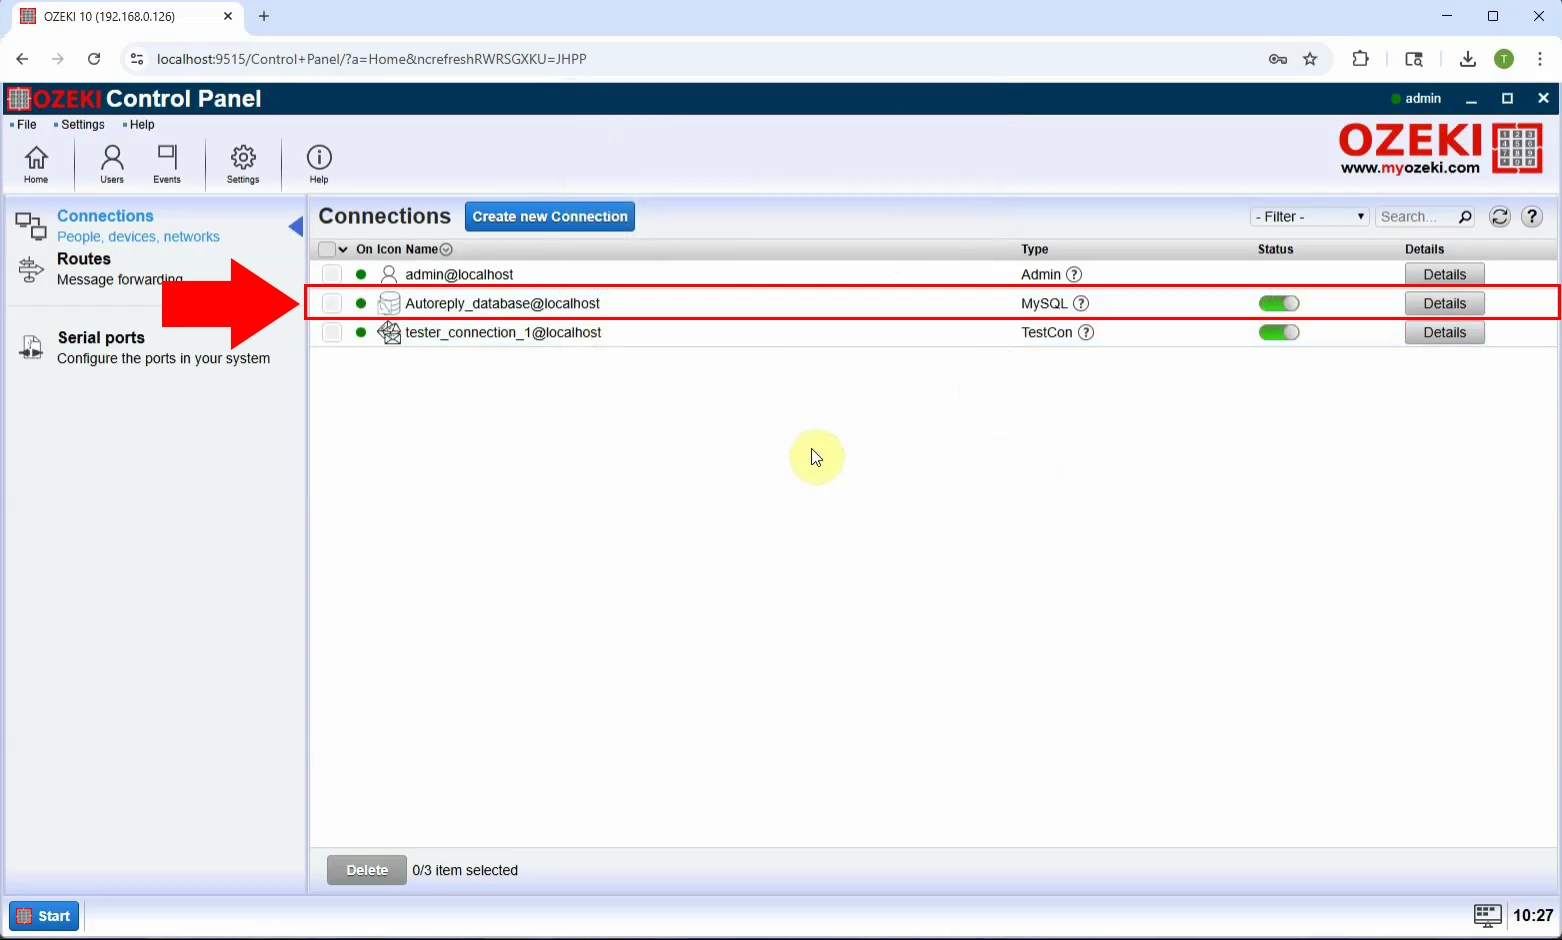
Aktivirajte vezu tako što ćete je omogućiti. Time baza podataka postaje spremna za korištenje u funkcijama automatskog odgovaranja (Slika 7).
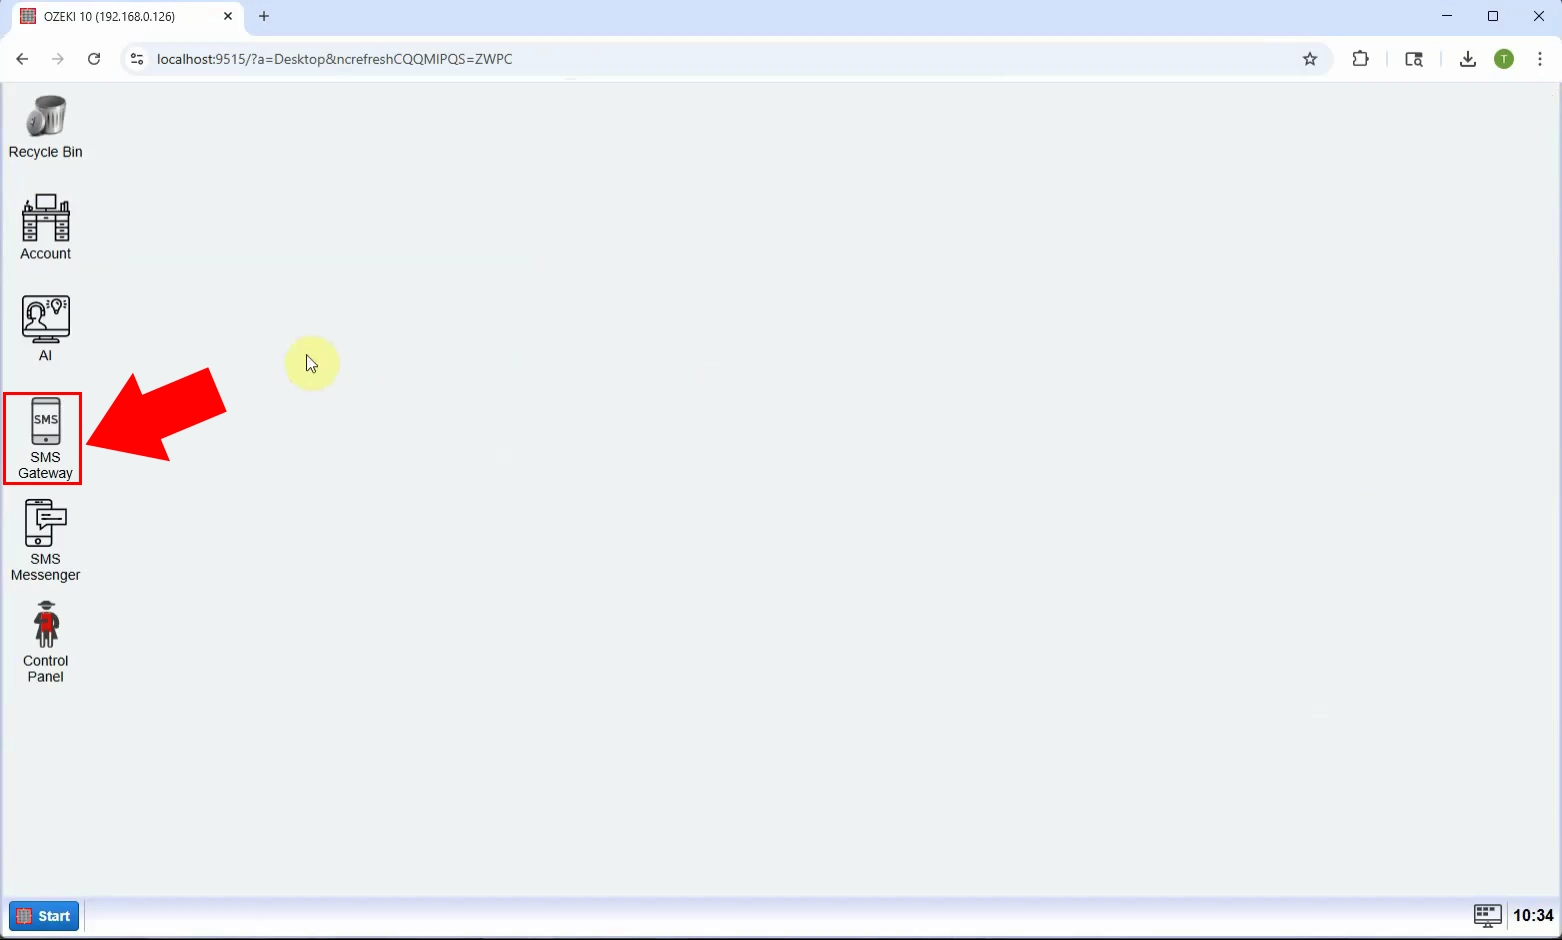
Korak 8 - Otvorite SMS Gateway
Vratite se na SMS Gateway nadzornu ploču kako biste konfigurirali korisnike i značajke slanja poruka (Slika 8).
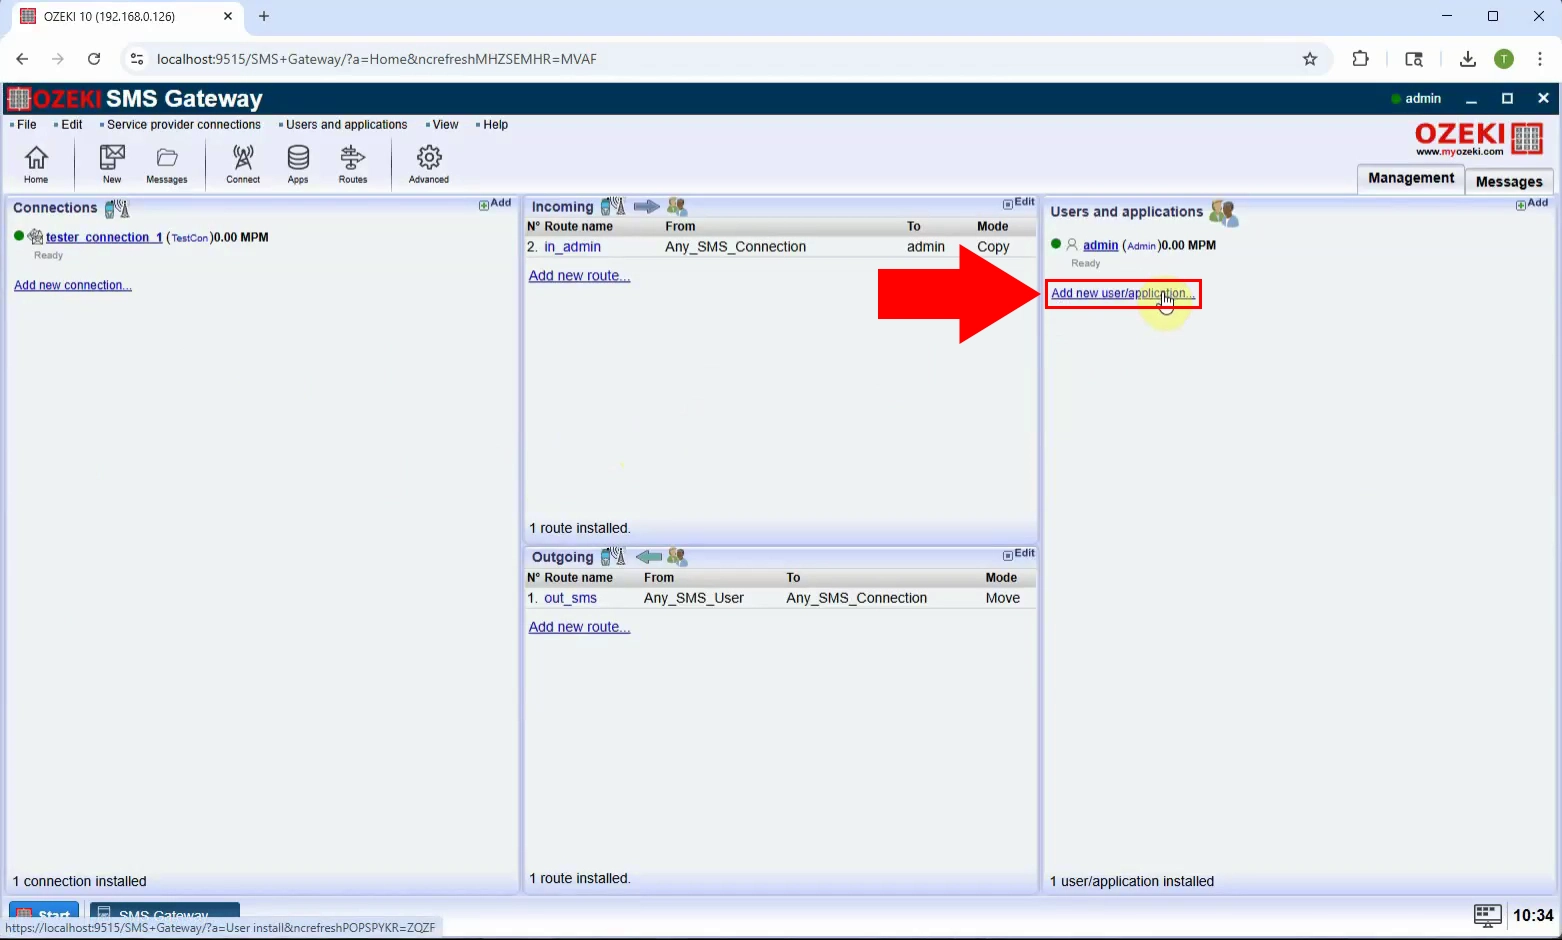
Korak 9 - Dodajte novog korisnika/aplikaciju
Kliknite na Add new user/application kako biste kreirali novog korisnika koji će upravljati funkcijom automatskog odgovaranja (Slika 9).
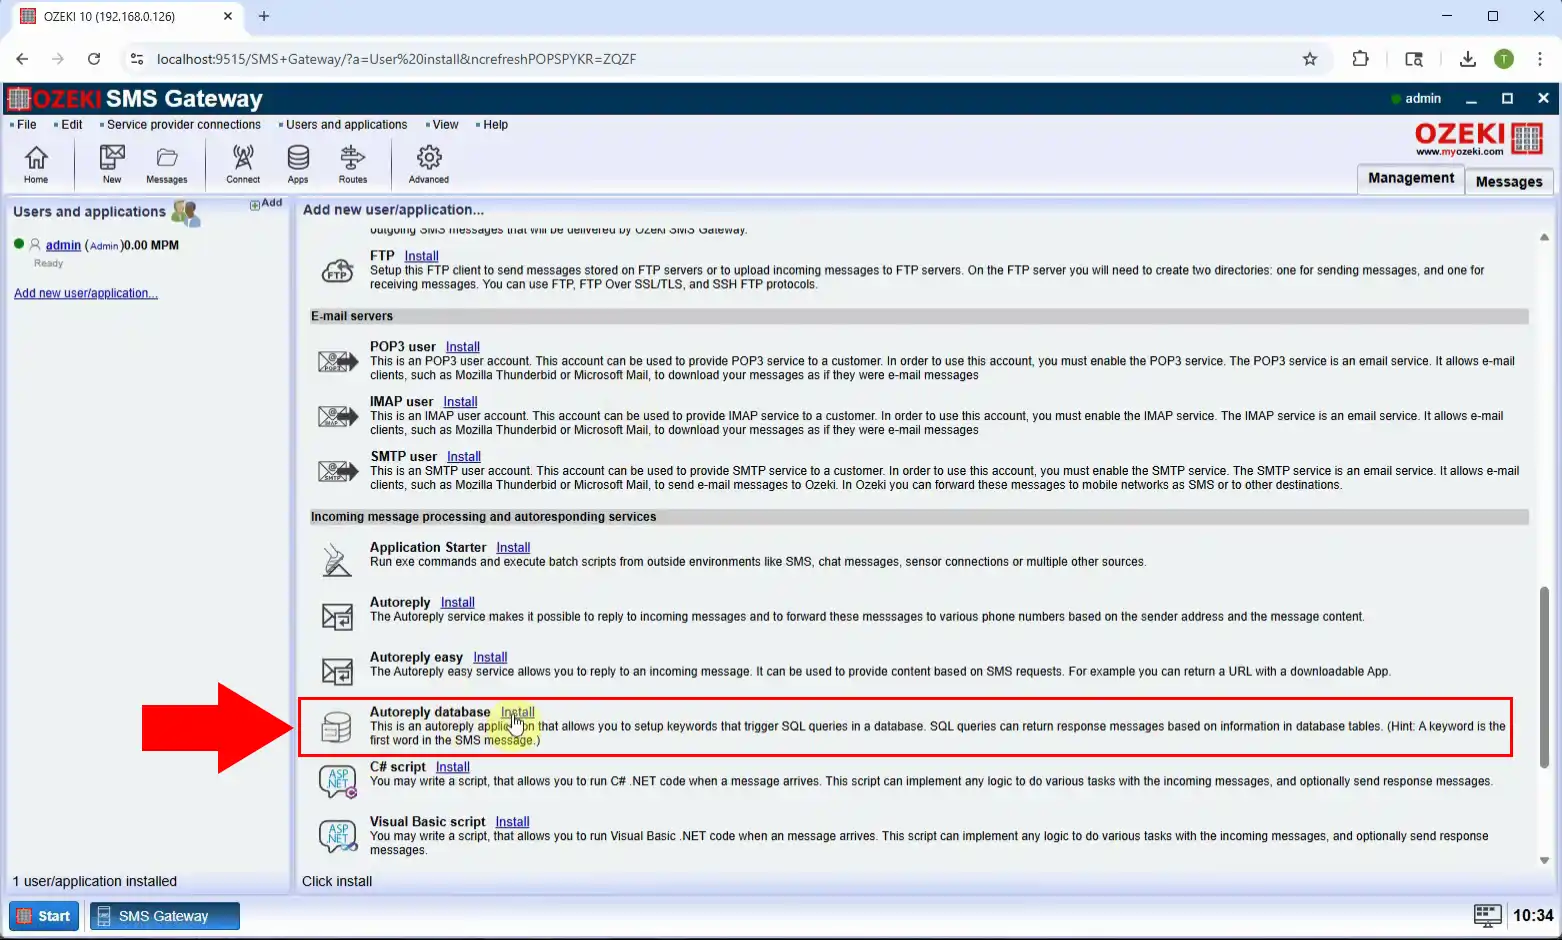
Korak 10 - Instalirajte Autoreply bazu podataka
S popisa vrsta korisnika odaberite Autoreply database i kliknite Install kako biste nastavili (Slika 10).
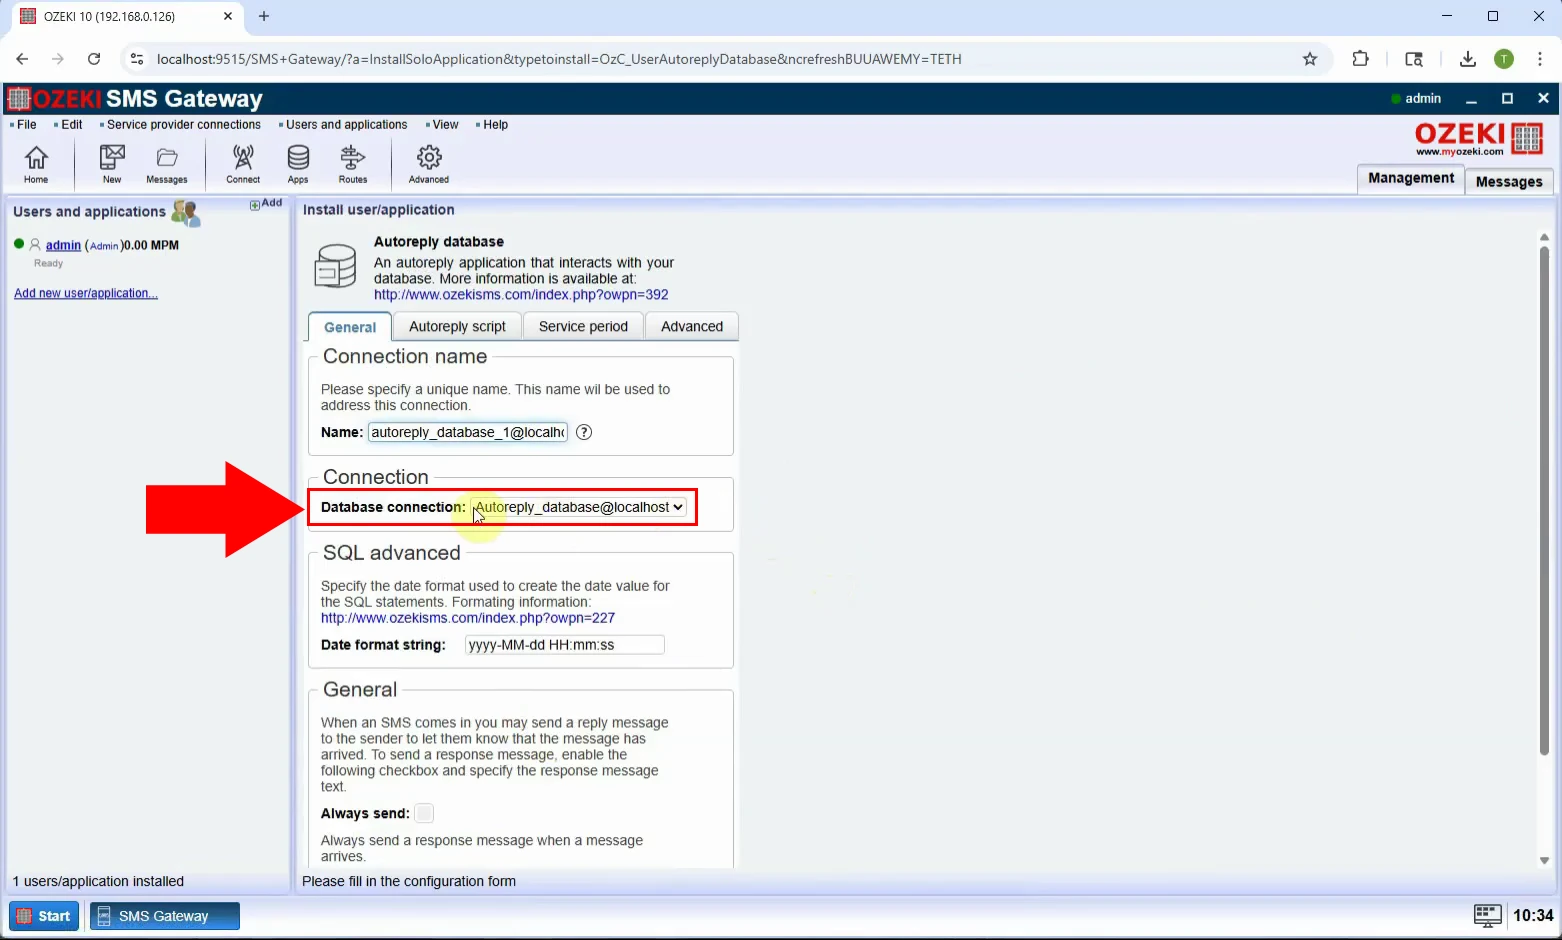
Odaberite vezu s bazom podataka koju ste prethodno kreirali za korištenje s ovim korisnikom automatskog odgovora (Slika 11).
Korak 12 - Konfigurirajte skriptu automatskog odgovora
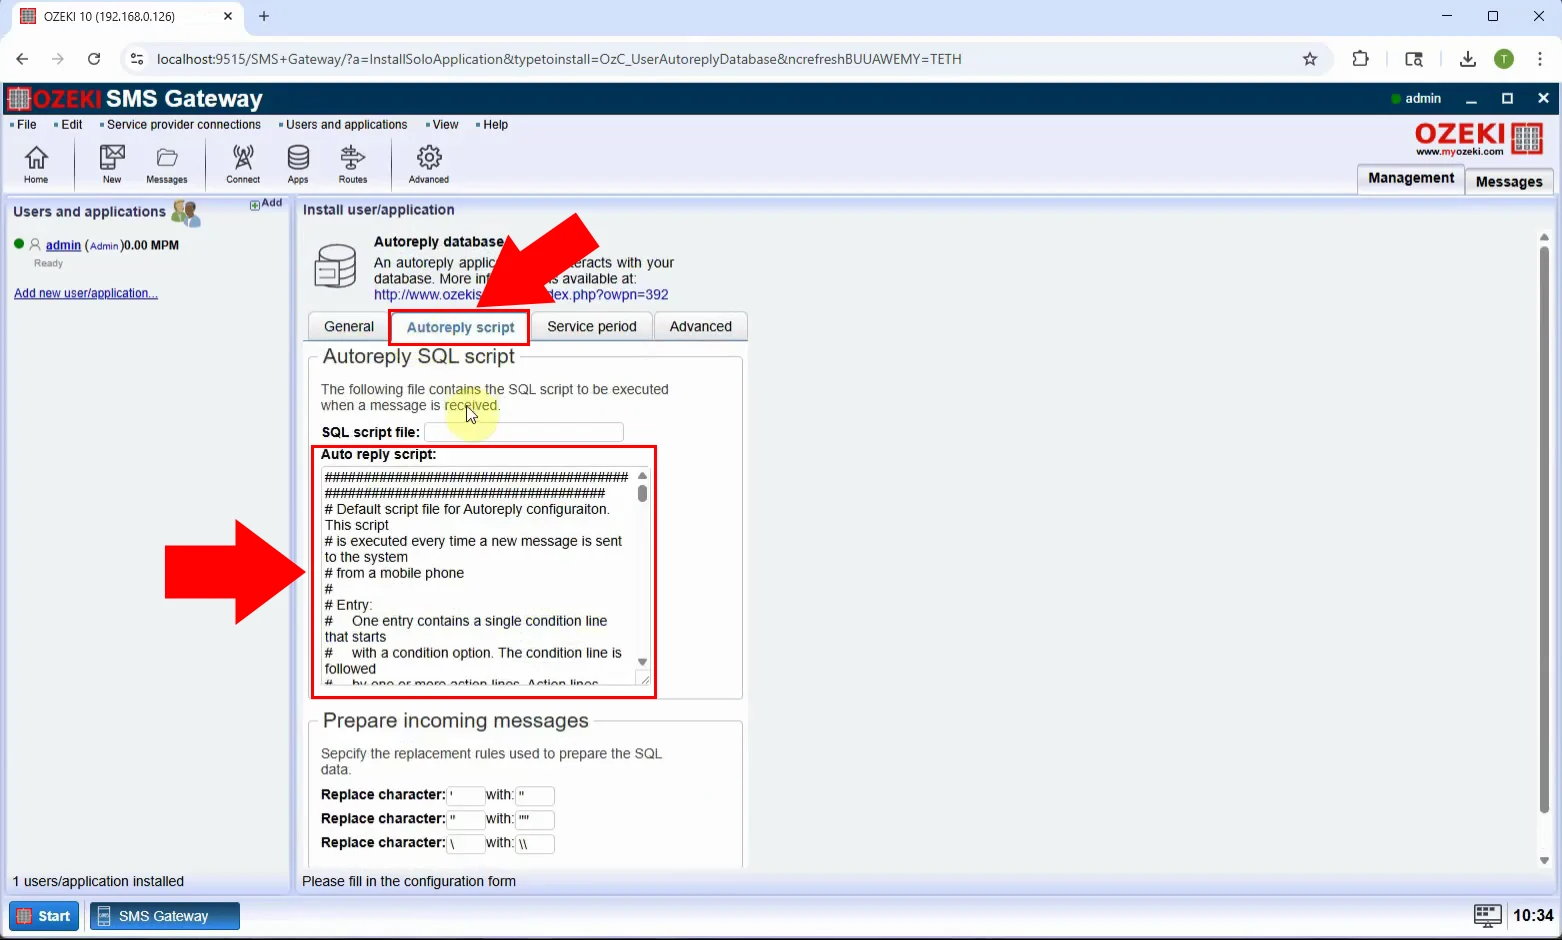
U kartici Skripta automatskog odgovora, vidjet ćete unaprijed napisanu skriptu za automatski odgovor (Slika 12).
Korak 13 - Kreirajte vezu s bazom podataka za automatski odgovor
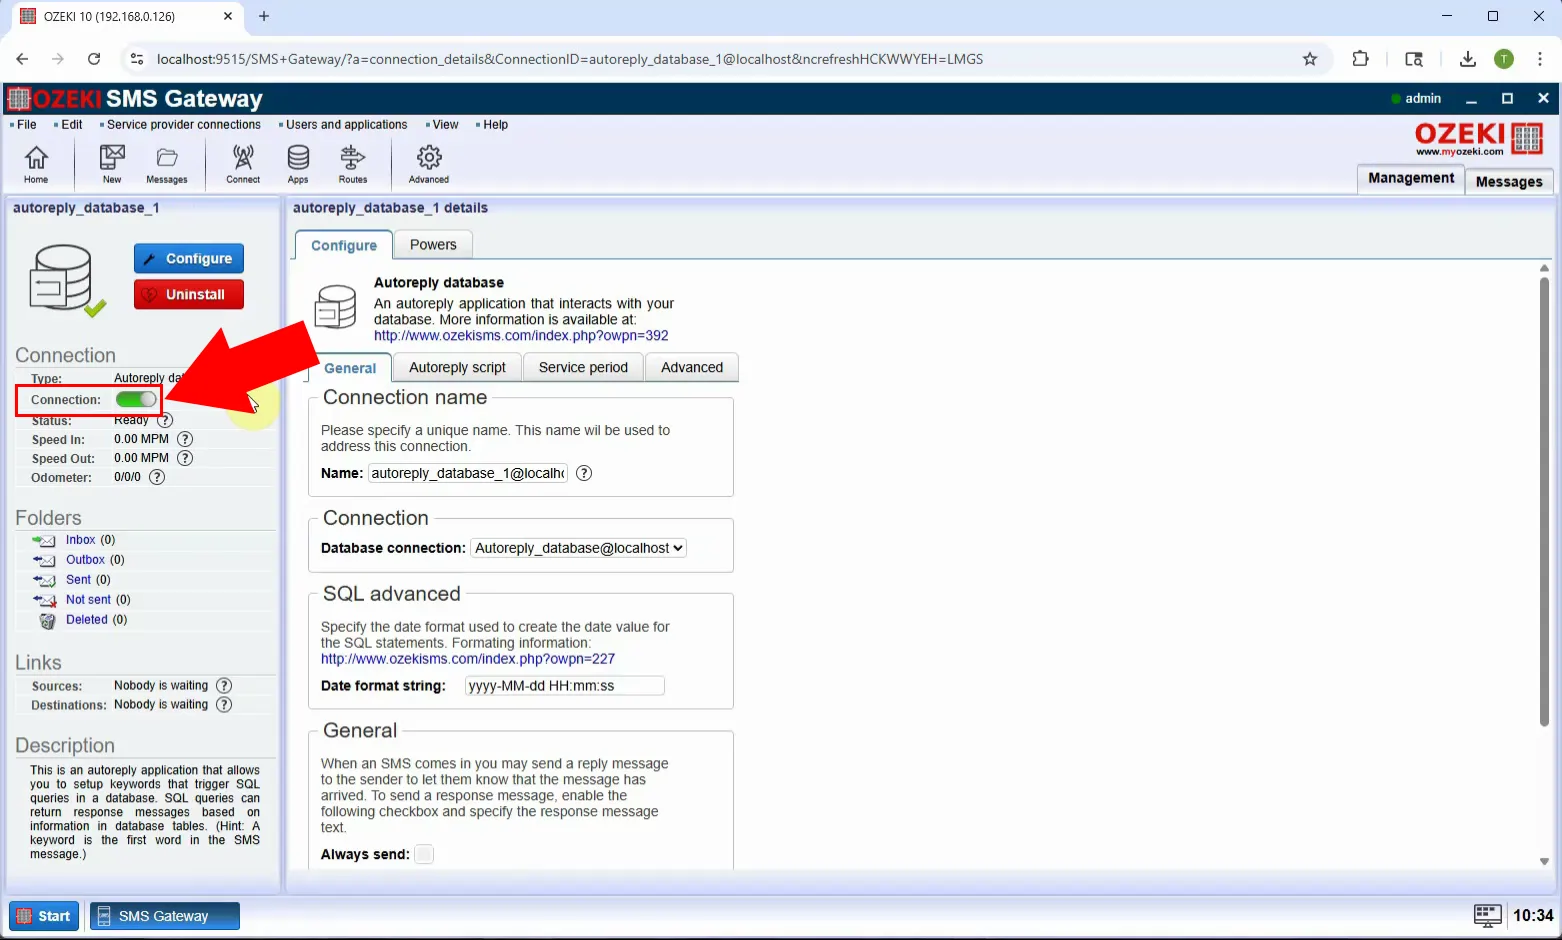
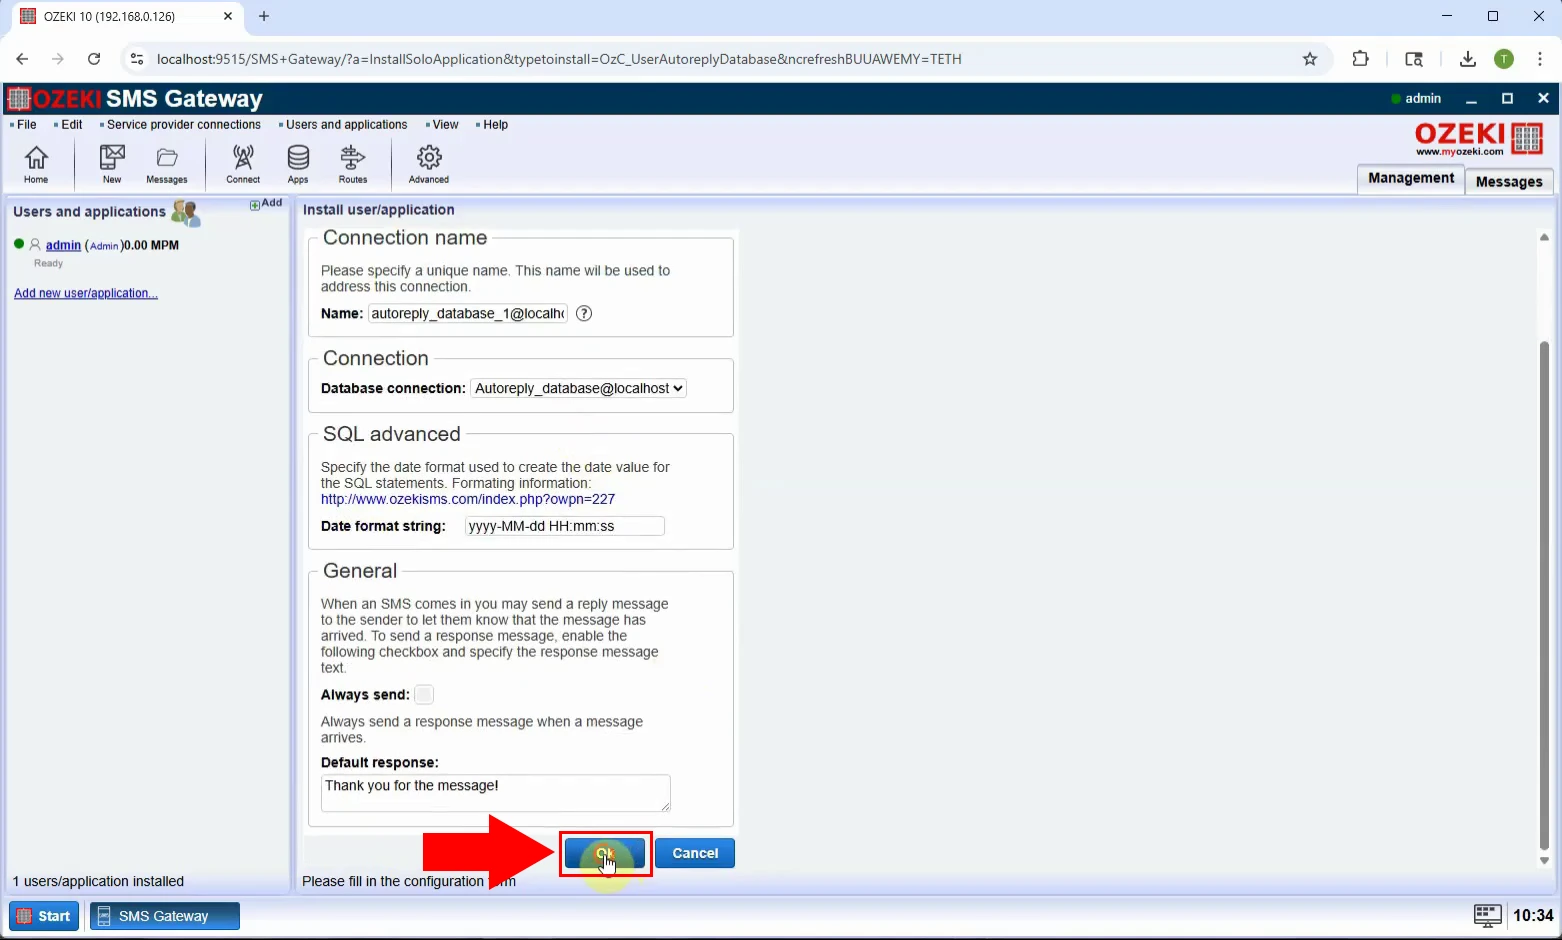
Završite postavljanje pohranom konfiguracije. Korisnik automatskog odgovora sada je povezan s vašom bazom podataka (Slika 13).
Korak 14 - Omogućite vezu s bazom podataka za automatski odgovor
Omogućite korisnika kako bi mogao početi primati i automatski odgovarati na poruke temeljene na SQL upitu (Slika 14).
