Send SMS from HTTP API with PHP
You will see how a random person can use their internet browser to send SMS. The trick is that this PHP script can make 'sendmessage' HTTP requests to Ozeki SMS Gateway's HTTP API. The 'sendmessage' request can send any SMS from SMS Gateway.
Video content1. Download PHP File
2. Copy PHP File to webserver
3. Create HTTP Server user
4. Modify PHP File
5. Open webpage
6. Send test message
sendsms.zip
If you scroll down, you can find screenshots that describe how to implement the HTTP API + PHP solution.
Step 1 - Setting up a webserver
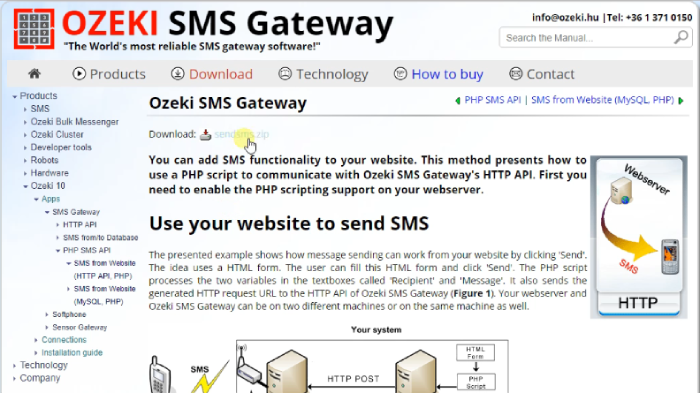
The first step to set up a system what you can be used to send messages from a website, is to download the files we provide to you. You can click the download link on the top of this website as you can see on Figure 1. After you clicked the download link, you must wait until your browser downloads your files.
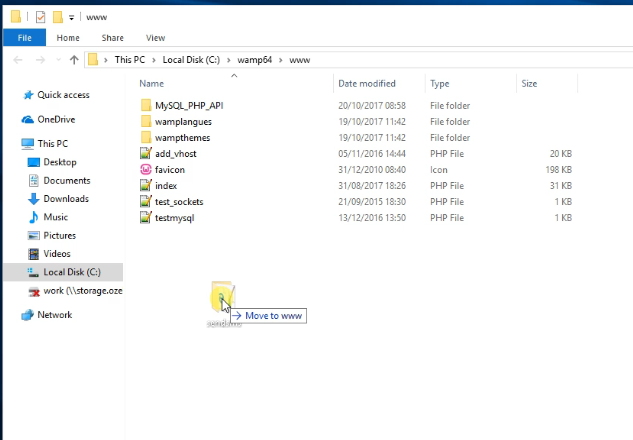
After you have the files, you need to move them to the “www” folder of the webserver. On Figure 2, you can see the access path of the folder which you need to move the files in.
Step 2 - Set up a new user
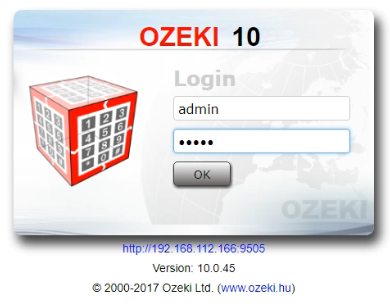
If you have all the files in all the right place, you could now login to Ozeki 10. On Figure 3, we use an example user's account. You can log in by typing in your username and password and hit the “OK” button.
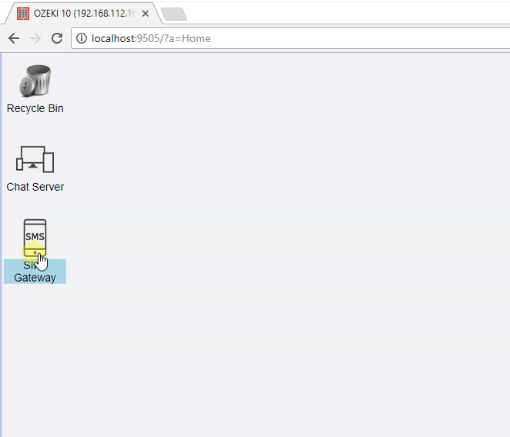
To establish connection between an HTTP server and the Ozeki 10, you need to launch the SMS Gateway. You can do this by searching for an “SMS Gateway” icon on the desktop of Ozeki 10 and clicking it. You can see what to search for on Figure 4
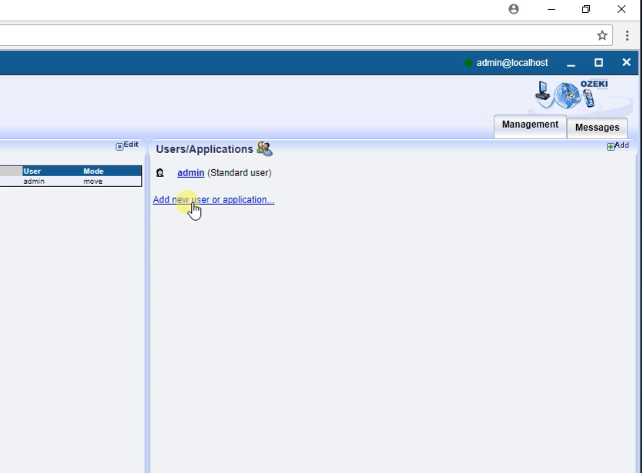
To communicate with an HTTP server, the Gateway needs a new user. You can add one with the “Add new user or application” button on the main page of the SMS Gateway, as you can see on Figure 5.
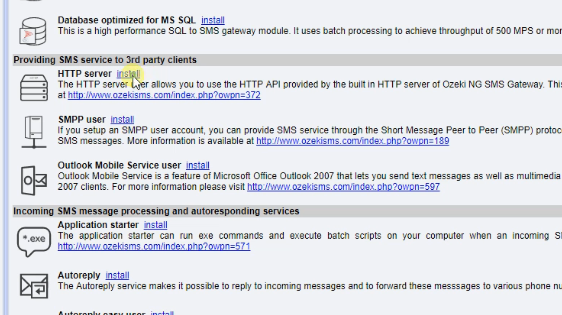
Now you can install the HTTP server which you will use to send messages from. Click the “Install” button next to the “HTTP server” title to start configuring your webserver. You can find it on Figure 6.
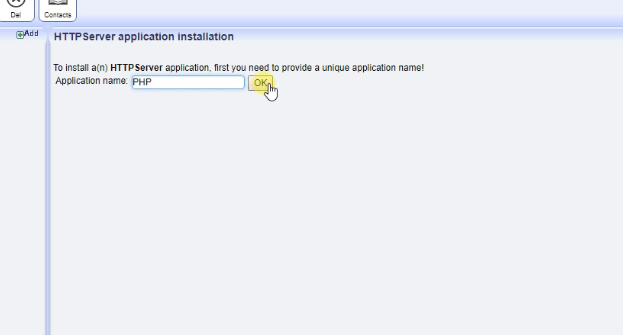
Here you can create the name of the new user which will be used to communicate with the server. As you can see on Figure 7, we gave the user the name “HTTP”.
Step 3 - Modify the sendsms.php file
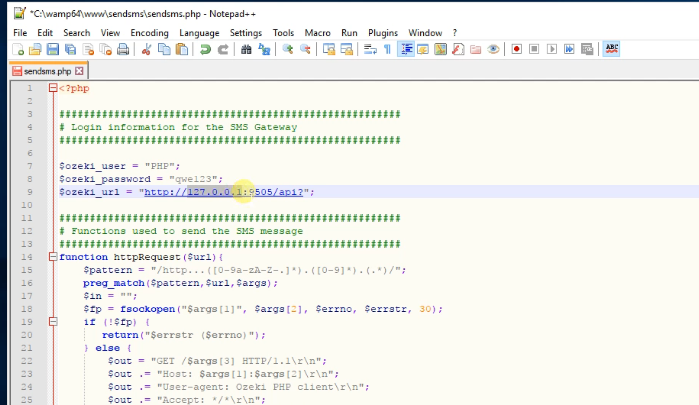
Now you must modify the sendsms.php file, the one you downloaded and move to the www folder. On Figure 8, you can see how the php file should look like after you done the modifications to it.
Step 4 - Test your webpage
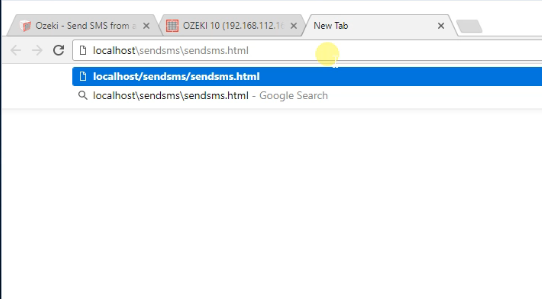
You are finished, you can now open the page you just created and start typing your first message. Go to your browser and type in “localhost\sensms\sendsms.html”. Press enter and the webpage will load in. On Figure 9, you can see what to type.
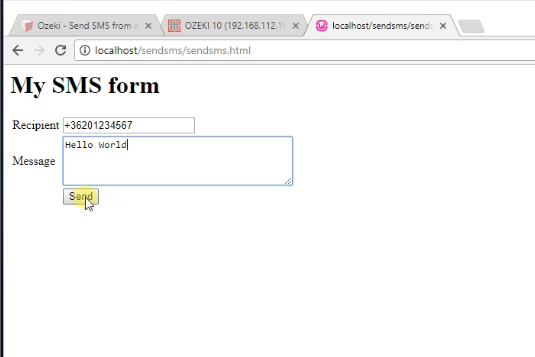
Now you can send a test message to the Ozeki 10 SMS Gateway. The “Recipient” will be the number you send your message from, and the “Message” will be the text of the message. We used an example number on Figure 10.
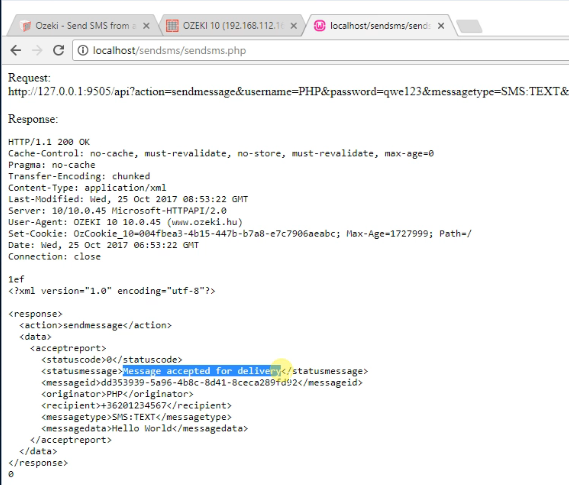
If you managed to follow the tutorial carefully, you now have a working system. As you can see on Figure 11, your message is processed and sent to the recipient.
We hope that this guide was helpful. If you have any problem with any of the steps, feel free to contact us at info @ ozeki.hu
Conclusion
In this guide, we presented the information about how to use our HTTP API with PHP. With this solution, you can use your internet browser to send SMS messages. It sends a ‘sendmessage’ HTTP request to the Ozeki SMS Gateway, which can send up to 1000 SMS per second. This service can be put into use and can make your organization more efficient because it allows you to deliver key information, using only a web browser.
Find out more information about this technology and Ozeki SMS Gateway, so make sure that you don't finish your work here. To know more about the system, visit the page where we use MySQL, or Python to send SMS messages.
Now your next thing to do is to download Ozeki SMS Gateway and configure this solution immediately! Everything is there to get it up and running in less than 10 minutes.
