How to restore Ozeki SMS Gateway
This guide explains how you can restore your data and your configuration files. The guide requires you to have a backup file called Data.zip. It was saved when you have created a backup of Ozeki SMS Gateway. This procedure can be used if you move Ozeki 10 from one computer to another or you when you reinstall Windows and you need to install Ozeki again.
How to restore the Ozeki configuration (quick steps)
To restore the Ozeki configuration:
- Open Windows Services
- Select Ozeki service from the Services list
- Click Stop the service on the left
- Delete the Ozeki Data folder from Program Files
- Extract Data.zip file by select Extract all from context menu
- Move the extracted Data folder to the Ozeki folder
- Start the Ozeki service in Windows Services
- Check the restored configuration in Ozeki SMS Gateway
Video tutorial: Restore Ozeki 10 from backup
Step 1 - Install Ozeki 10
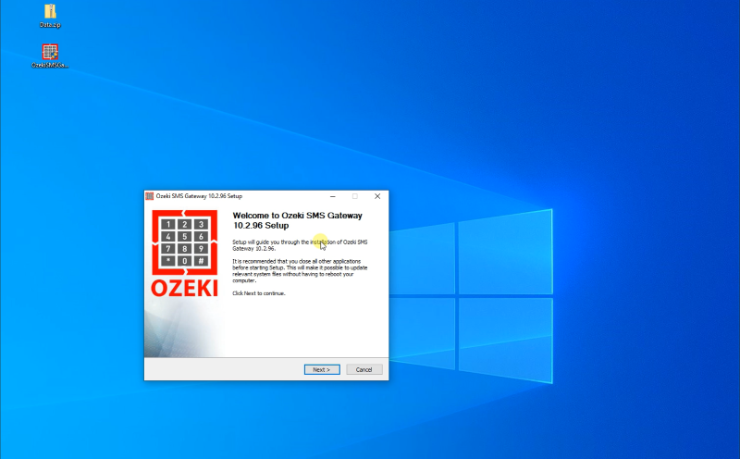
The first step is to install the Ozeki software on your PC. You can find a detailed installation guide in the Ozeki SMS Gateway Offline Installation page.
Step 2 - Stop the Ozeki service
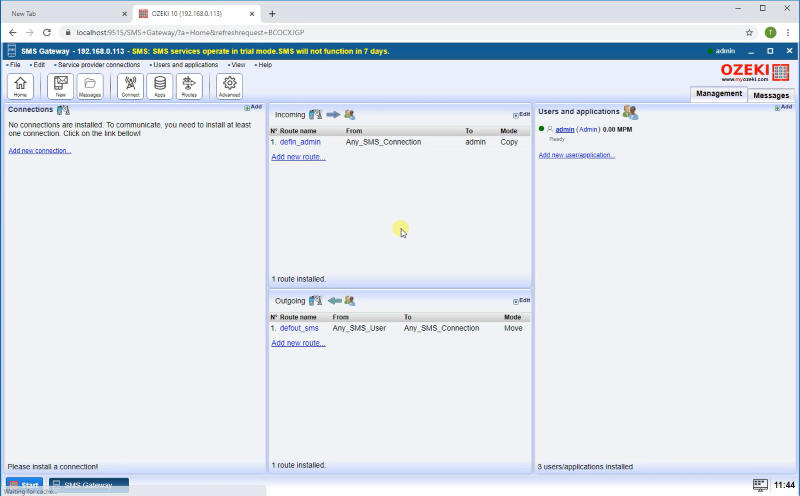
After the installation you can see that the Ozeki SMS Gateway has no configuration yet.
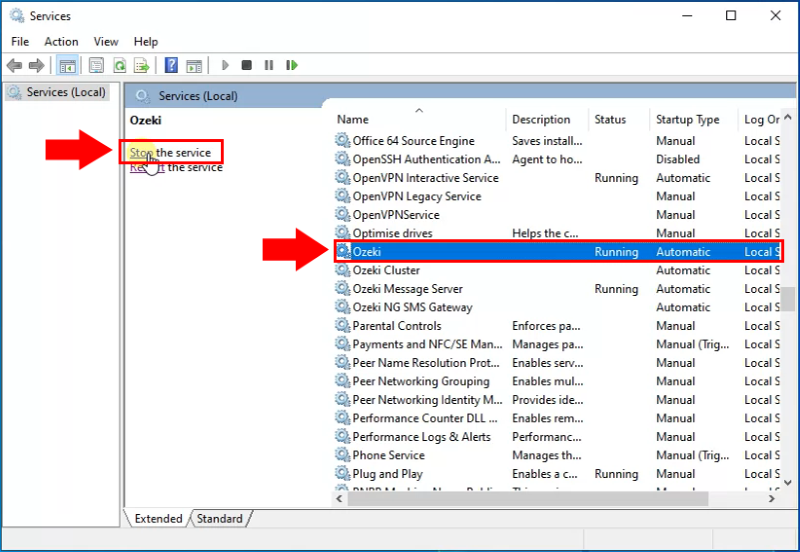
To restore the configuration, you need to stop the Ozeki service under the services.msc. Select the Ozeki service from the list and click Stop on the left side.
Step 3 - Delete the default data folder
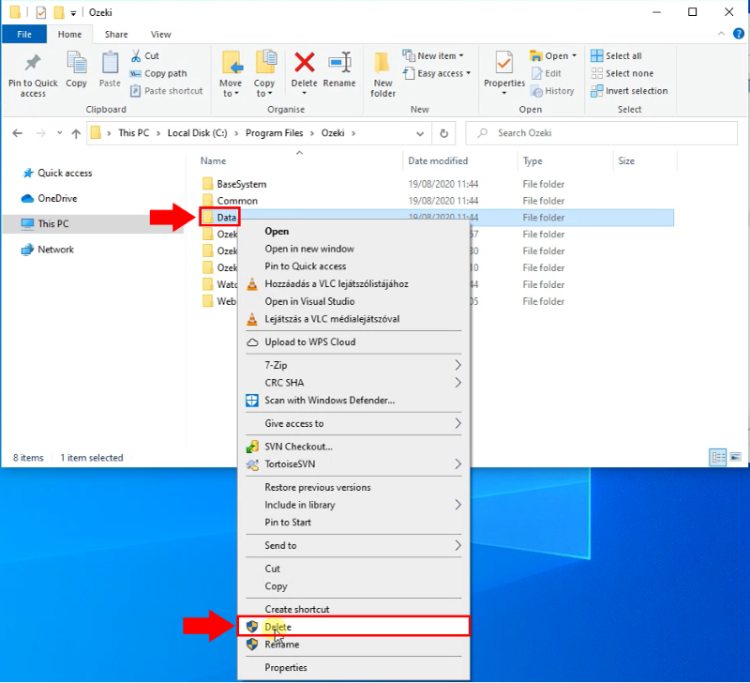
Now delete the existing data folder. This folder can be found at C:\Program Files\Ozeki\Data. This is the default config that came with the Ozeki installation package.
Step 4 - Extract the backup config
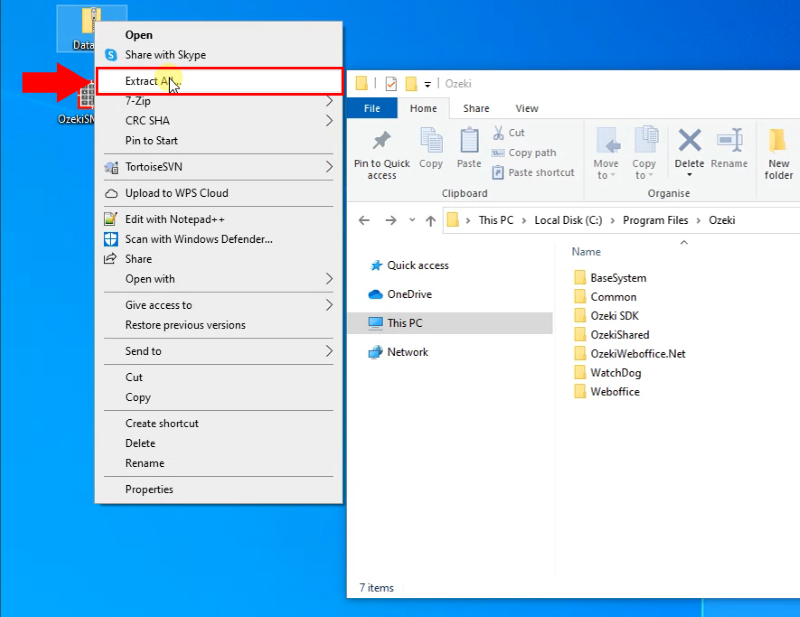
Next extract the backup data zip by right clicking on the Data.zip and by selecting "Extract All...".
Step 5 - Copy the data folder to the appropriate location
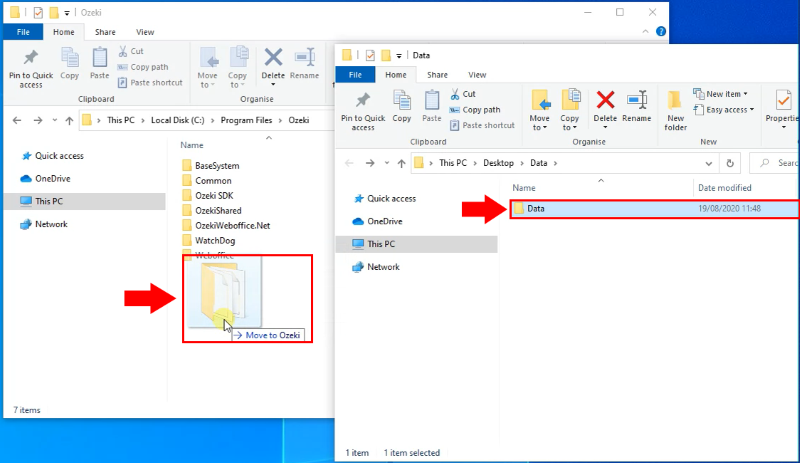
After the zip file was successfully extracted, move the extracted Data folder to the C:\Program Files\Ozeki folder.
Step 5 - Start the Ozeki service
Finally, you need to start the Ozeki service again under the services.msc. Select the Ozeki service from the list and click Start on the left side.
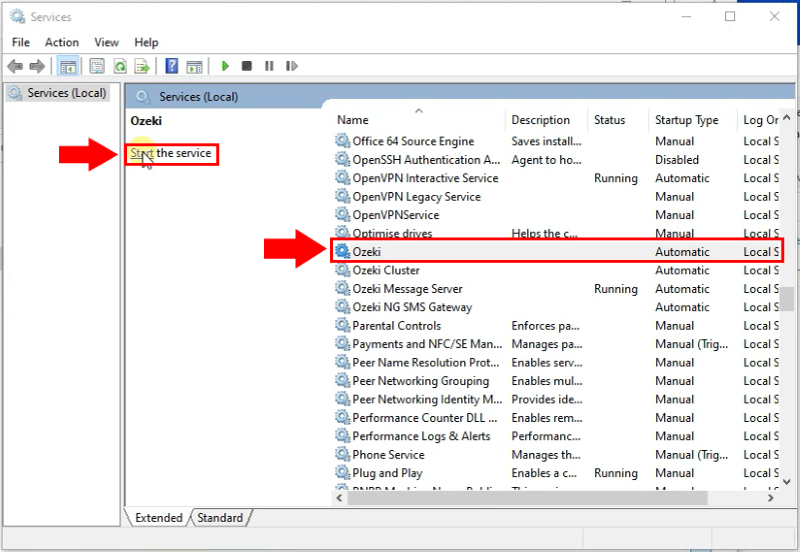
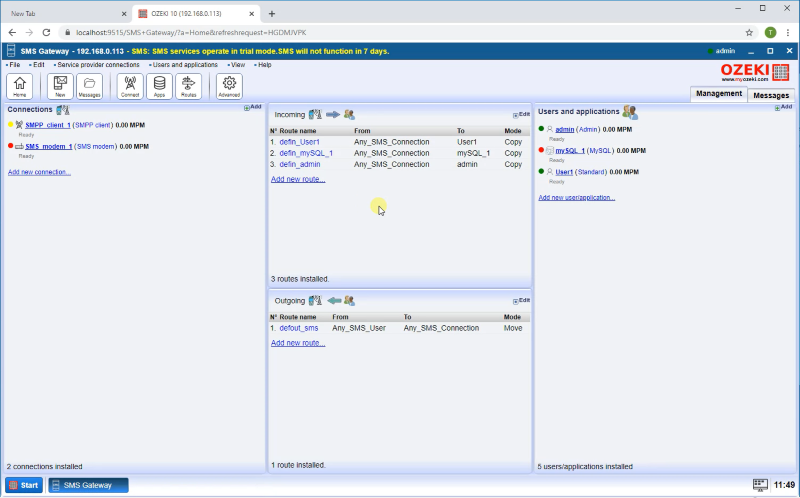
If the service is started, you can see that the configuration is restored successfully.
