How to send a scheduled SMS message using the HTTP API
This guide helps you to understand how you can send scheduled SMS messages using HTTP API. With this solution, you can set the exact date when you would like to send the message. The document contains a video tutorial and a step-by-step guide where each step consists of a short description of the current step and a screenshot to demonstrate what you need to do. To complete this guide, you don't need to have any specific knowledge and it does not need more than ten minutes to complete. So, let's start right now!
Video tutorial
Step 1 - Create HTTP user
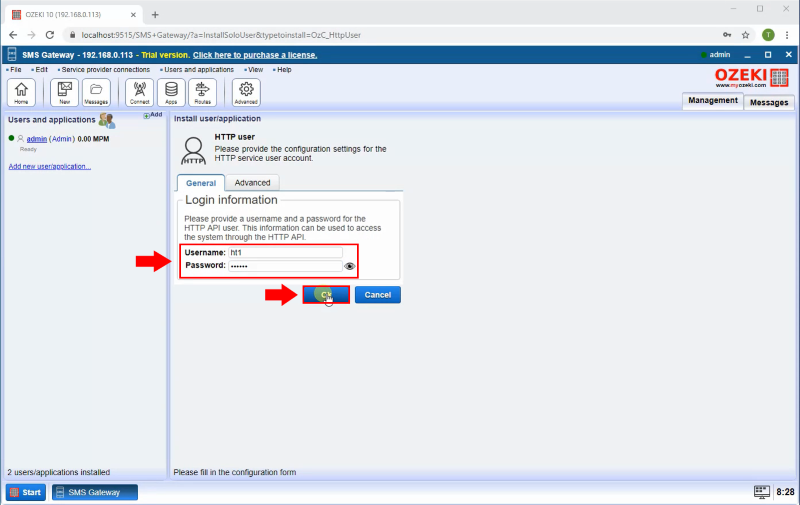
In the first step, you need to create the HTTP user connection. For that, open the Apps menu from the toolbar, and here, in the Network users' section, click on the Install button of the HTTP user. To start configuring a HTTP user please provide a username and a password for the HTTP API user as you can see in the Figure 1. This information can be used to access the system through the HTTP API.
Step 2 - HTTP request for send message
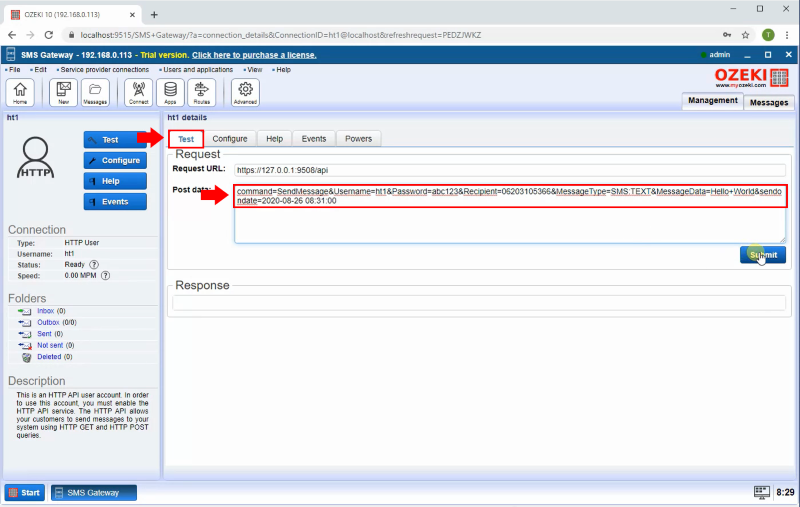
After you created the HTTP user connection, just open the connection to see the Details page of the connection. Here, you need to navigate to the Test tab, where you can send HTTP request to send a SMS message across the Ozeki SMS Gateway. To the request, add the sendondate parameter where you can define that when will be the message sent by the Ozeki SMS Gateway as Figure 2 demonstrates it. To initiate the HTTP request, just click on the Submit button. You can find this command here:
command=SendMessage&Username=HTTP_User_1&Password=qwe123&Recipient=06203105366&
MessageType=SMS:TEXT&MessageData=Hello+World&sendondate=2020-08-26 08:31:00
Step 3 - Message accepted by Ozeki SMS Gateway
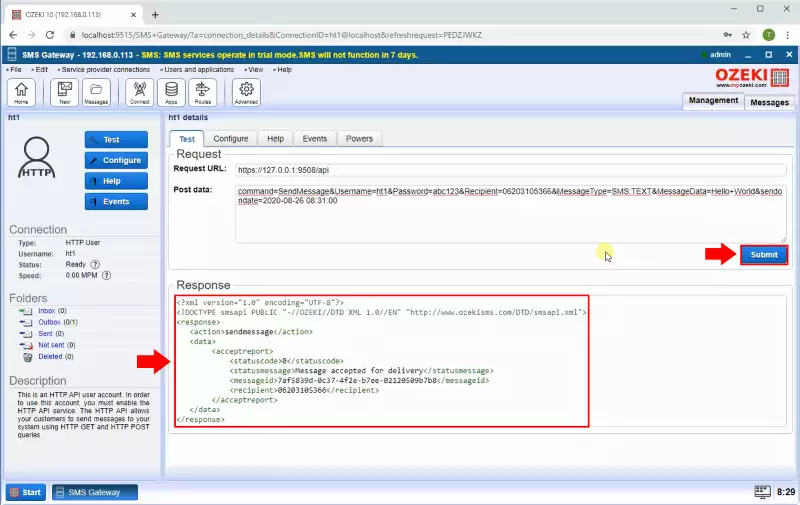
After you clicked on the Submit button and you initiated the HTTP request, you will be able to see the response message from the Ozeki SMS Gateway as the Figure 3 shows below. This response message contains the status code and the status message as well. This message should tell that the message was accepted for delivery. If the message is accepted it will be placed in the outbox folder.
Step 4 - Message in the outbox folder
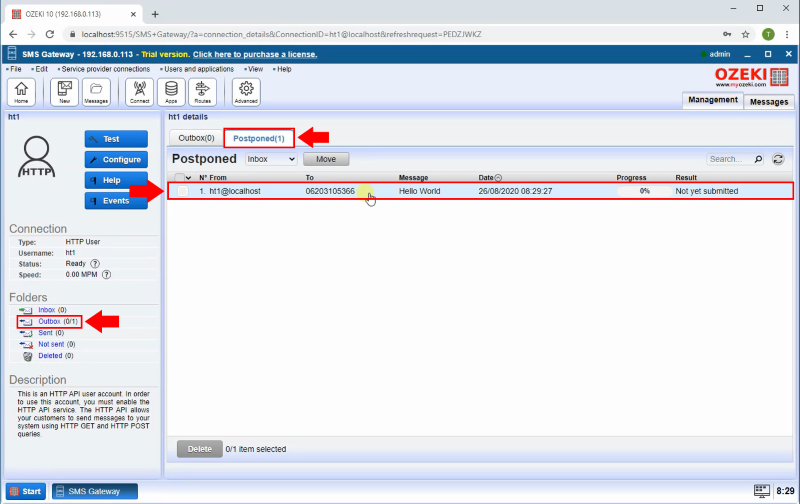
The accepted message stored in the Outbox folder of the HTTP user connection. Before the date of the sending, it can be found in the list of the Postponed tab as you can see it in Figure 4. At this point, it waits to reach the sending date and be delivered.
Step 5 - Message tags
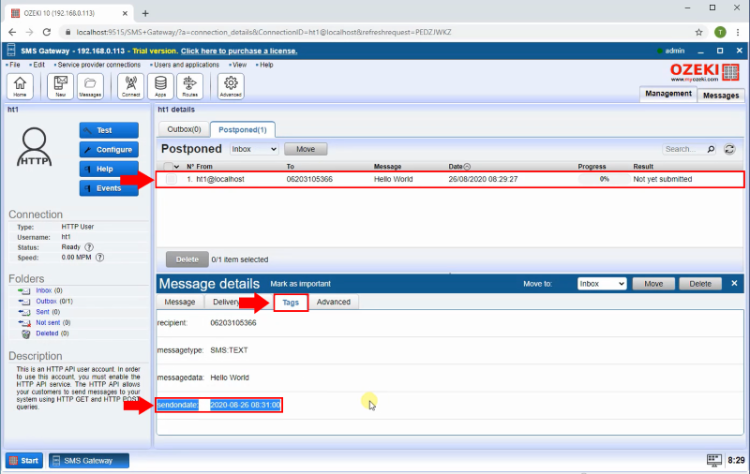
In that list of postponed messages, you can click on the selected message to see the details of it. Here, you can select the Tags tab as Figure 5 shows that. This tab provides you the main tags that describes the details of the message. Here, you can see the sendondate tag, that shows the date when the message is about to be sent by the SMS Gateway.
Step 6 - Message sent on the selected date
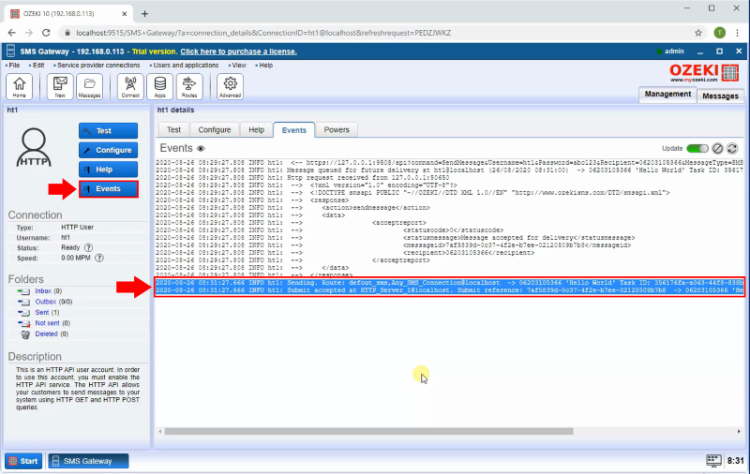
As soon as the sending date arrives, the HTTP user connection sends the message to the specified recipient. If you would like to see if the delivery was successful, you can check the Events menu of the HTTP user connection. For that, select the Events menu like in Figure 6, and here, you will be able to see the events of the message. Every event contains a timestamp and a simple description about the event itself.
