How to send SMS from Perl
The example code below is about to demonstrate how you can use HTTP requests to send SMS messages from Perl via SMS Gateway. The Perl program first sets up all the important variables that will be used for sending the message. Then it creates the string for sending the message and lastly, it initiates the HTTP request. The response message will be also printed by the program.
What is a Perl SMS API?
The Perl SMS API ensures the ability to send SMS messages from a program written in Perl. It uses HTTP requests and SSL encrypted communication to forward the SMS sending request to the SMS Gateway.
Prerequisites
Send SMS from Perl
- Open Notepad
- Create a new file
- Copy-Paste the example code from this page
- Save the file as HttpApiTester.pl
- Open Command Prompt
- Navigate to the folder where you saved the Perl file
- Type 'perl HttpApitester.pl' in the Command Prompt
- Press Enter to run the Perl file
Perl SMS source code example
This example Perl source code below is free to use, you can simply implement it into your project, or you can modify the source code to use it for other projects or applications. If you want to just run and test this example, all you have to do is to follow the instructions above or watch the tutorial video which demonstrates the way to create a Perl file for the source code and run it from the Command Prompt.
#!/usr/bin/perl
use strict;
use warnings;
use Encode;
require HTTP::Request;
require LWP::UserAgent;

sub main
{
    my $username = "john";
	my $password = "Xc3ffs";
	my $messagetype = "SMS:TEXT";
	my $httpUrl = "https://127.0.0.1:9508/";
	my $recipient = Encode::encode("utf8", "+36201324567");
	my $messagedata = Encode::encode("utf8", "TestMessage");

	my $sendString = $httpUrl."api?action=sendmessage"."&username="
					.$username."&password="
					.$password."&recipient=".$recipient."&messagetype="
					.$messagetype."&messagedata=".$messagedata;

    print "Sending html request: ".$sendString."\n\n";

	my $request = HTTP::Request->new(GET => $sendString);
	my $ua = LWP::UserAgent->new (
   			ssl_opts => { verify_hostname => 0 },
			);
	my $response = $ua->request($request);

	print "Http response received :\n";
	print $response->content;

}

# Call main.
main();
Step 1 - Open a text editor application
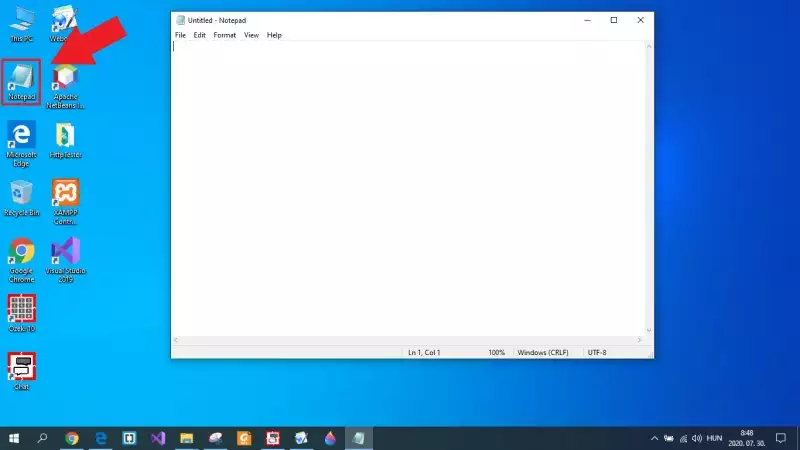
To be able to run the example code above, first, you need to create a Perl file for that. To perform this operation, you only need to have a text editor. You can download a custom text editor, but the default Notepad application installed on Windows can do the job as well. So, as Figure 1 shows that, just open the Notepad application from your desktop.
Step 2 - Copy the source code
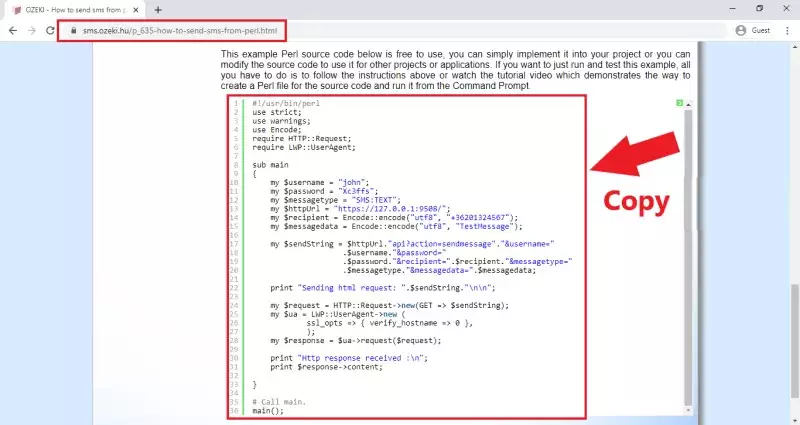
The next step is to get the source code. This is an easy task, since the code can be found on this page, so you just need to copy that. So, as you can see it in Figure 2, just go to the example code section on this page, mark out the whole source code and press Ctrl+C on your keyboard to copy the source code to the clipboard.
Step 3 - Paste the code into your text file
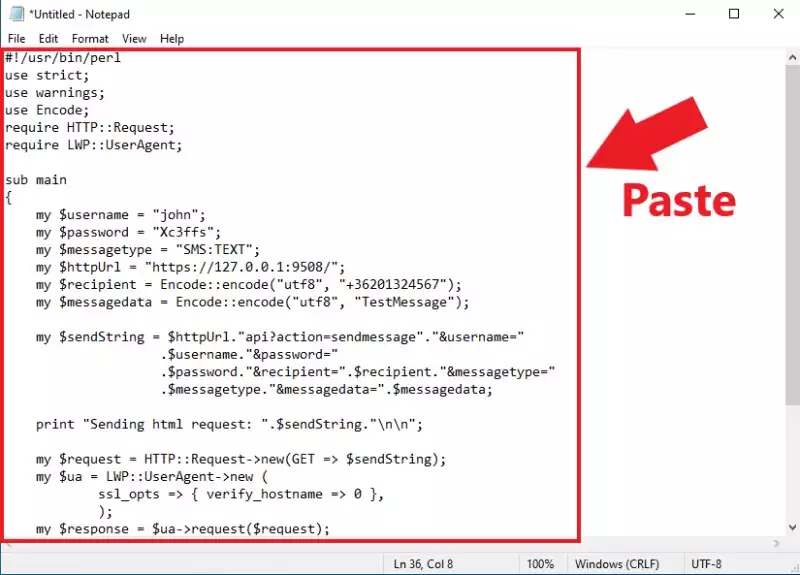
Next, you need to place the copied source code into your empty text file. To do that, you just need to navigate to the text file and press Ctrl+V on your keyboard. By performing this action, the source code will be placed into your text file as Figure 3 demonstrates it.
Step 4 - Save the text as a Perl file
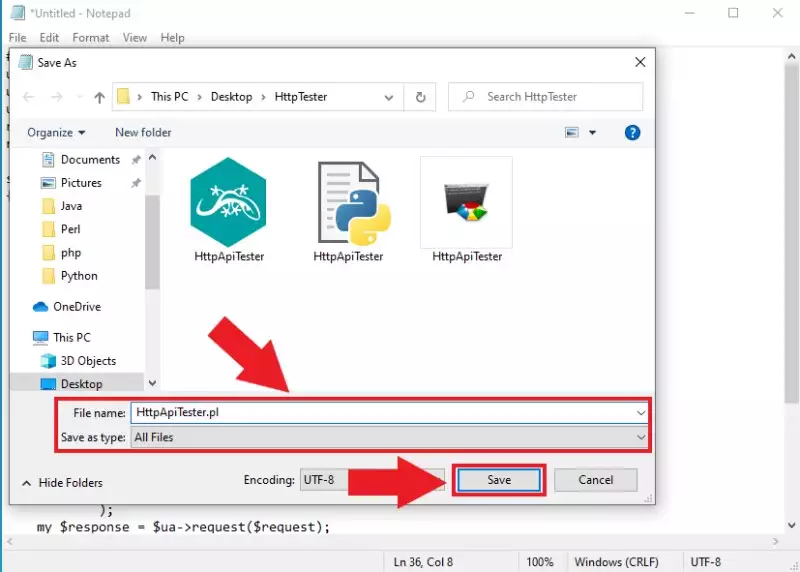
To create the Perl file, you just need to save the text file with the file extension of the Perl files. This extension is .pl. So, select the 'Save as' option in Notepad, and as you can see it in Figure 4, and after you gave a name for the file, append it with the '.pl' file extension and click on 'Save'. The operation just created the Perl file that you need to run the Perl SMS example.
Step 5 - Open Command Prompt
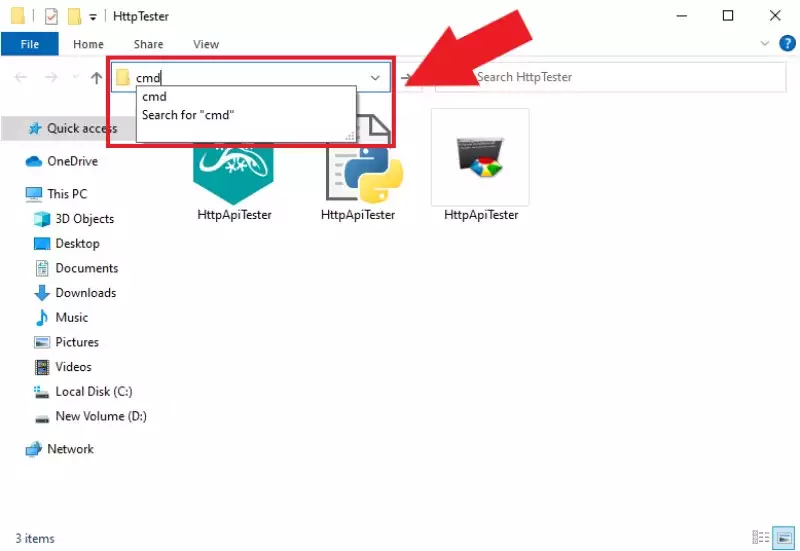
The last main step the guide is to run the Perl file you created before. In this case, you are going to run the example using the Command Prompt. You can easily open the Command Prompt by opening the File Explorer, and like in Figure 5, just type 'cmd' in the address bar and lastly, just hit Enter. If you navigate into the folder where you saved the Perl file in the File Explorer, the Command Prompt will use this location as default, so you can run the Perl file straightaway.
Step 6 - Run the Perl file
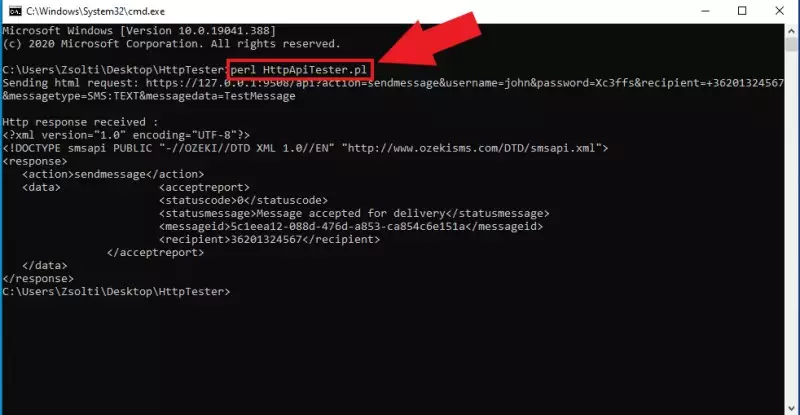
The last thing that you need to perform, is to initiate the command, that runs the Perl file. This is a simple command; you just need to write 'perl *file name*.pl' in the Command Prompt as Figure 6 shows that. After you pressed Enter, the Perl file executes the commands within and sends the test message. The HTTP request and response from the SMS Gateway will be printed in the Command Prompt.
Step 7 - Check the send result in the Ozeki log
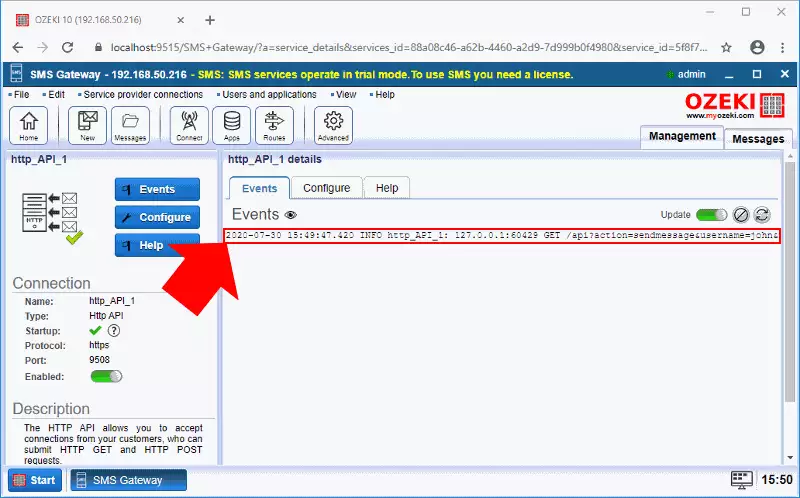
Ozeki 10 SMS Gateway ensures that to check what messages sent by your application, since the HTTP API service logs every event that occurred during the time it is enabled. So, if you open the SMS Gateway, and select details of the HTTP API service, you will be able to see the events. As you can see it in Figure 7, the service logged an event, when the Perl program sent the HTTP request to the service.
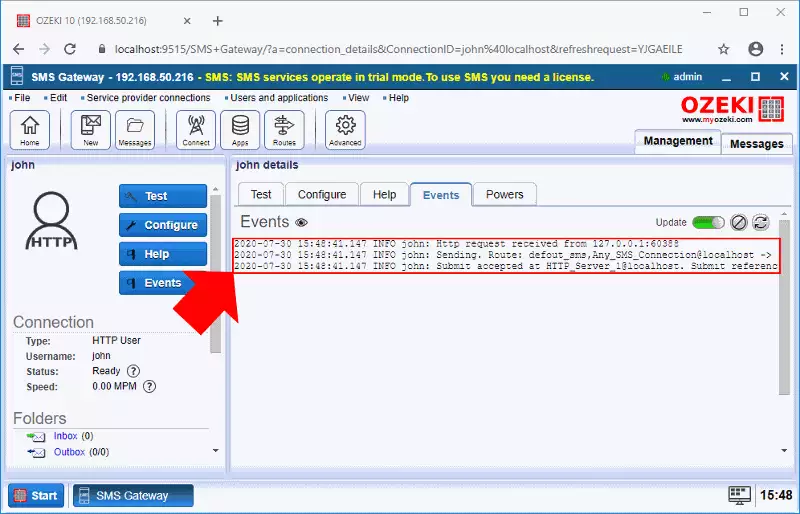
The events that occurred during the sending of the message back be checked by the events as well. For that, open the HTTP API User connection, that you had to configure before. Figure 8 demonstrates that how the connection handles the HTTP request and send the message to the recipient that you specified in your Perl SMS example program.
Summary
In this article, we provide you information about how to send SMS messages using Perl. We also included an example code which you can use to start the implementation process. Setting up a solution that can use the Perl language to send SMS will make it easier to implement the SMS sending solution to your communication system.
If you would like to implement more programming language to your communication system, feel free to visit the articles about other programming languages compatible with the Ozeki SMS Gateway, like: PHP and Java.
Now your next thing to do is to download Ozeki SMS Gateway and configure this solution immediately! Everything is there to get it up and running in less than 10 minutes.
