Simulate incoming messages
If you want to test some elements of your communication system, sometimes you will need to simulate incoming messages, to see if your system works correctly. We are providing you a step-by-step tutorial to set up a web page which you can send messages to the Ozeki SMS Gateway. This is a simple process, you don’t need any developer knowledge to follow the guide.
Step 1 - Setting up an HTTP server
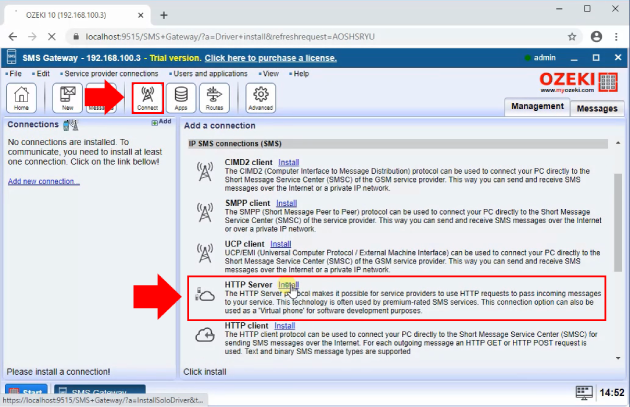
To be able to send messages to your own system, you will need to have a working HTTP server. To do that, click the connect button on the main page of the Ozeki SMS Gateway. Here you will be presented with some options of connections. Now you need to click the “HTTP Server” as you can see in Figure 1.
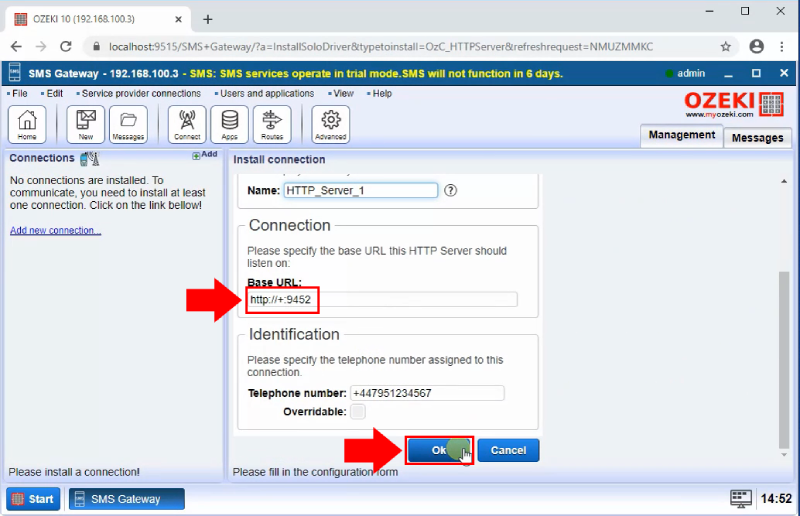
At Figure 2, you will see how the HTTP server should be configured. The “Base URL” specifies the URL which the HTTP Server should listen on. The “Telephone number” assigns the number you provide to the connection. When you typed in the correct information, please click the “OK” button to proceed.
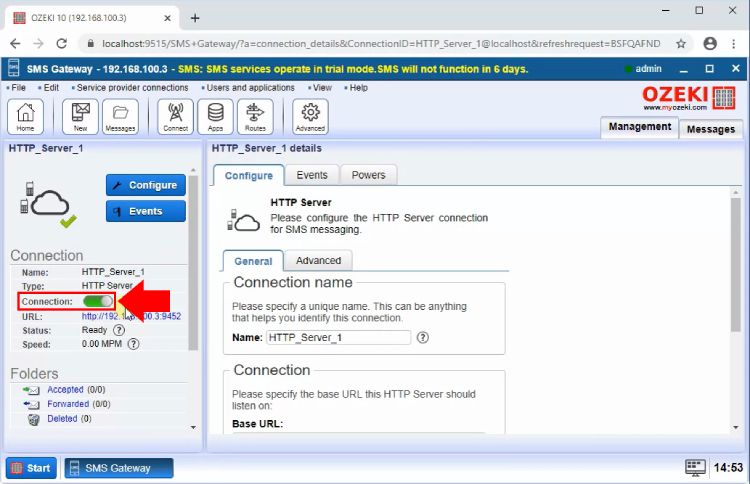
If you managed to set up your HTTP Server, you need to allow the connection. You can do this by switching the “Connection” switch, on the left side of the screen. As it is presented on Figure 3.
Step 2 - Adding a new route
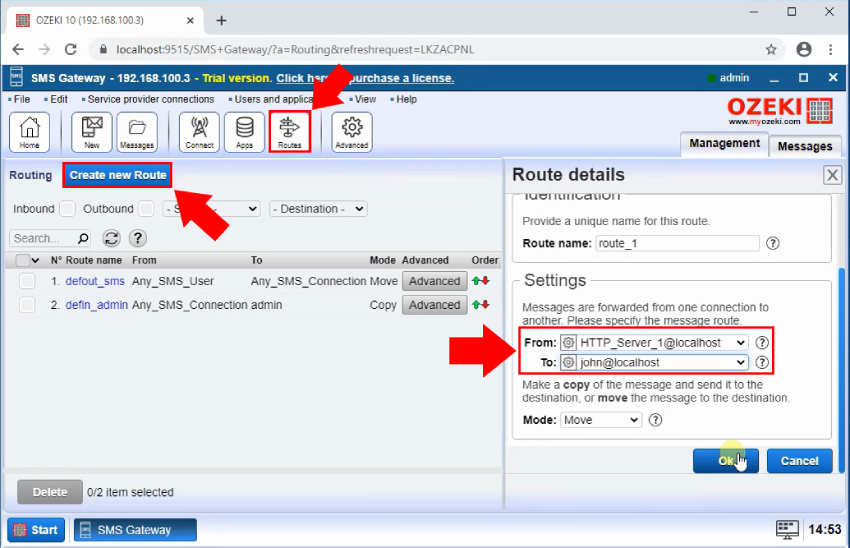
Now, you want the SMS Gateway to communicate with your HTTP server. You need a new route for it. You can set up a new route on the “Routes” panel, by clicking “Create new Route”. A “Route details” tab will pop-up. Here you can specify the route of the message as it can be seen on Figure 4.
Step 3 - Test your HTTP Server
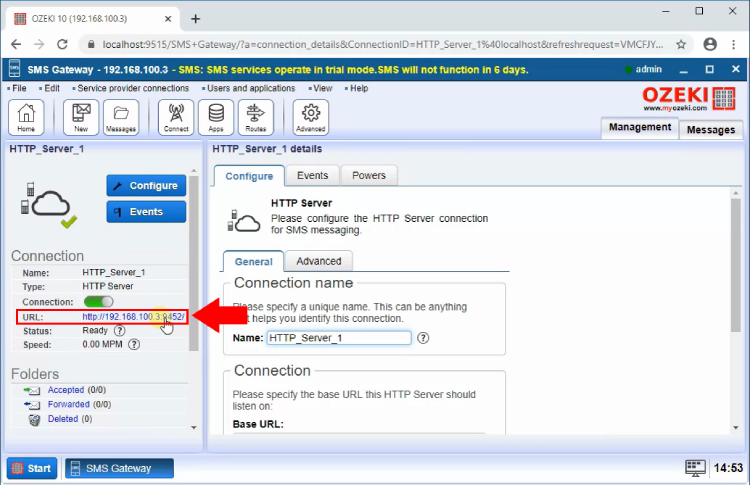
Now you have your HTTP Server, and you can communicate with it. To start sending test messages, open the HTTP server page by clicking on the provided URL on the left side panel as you can see on Figure 5.
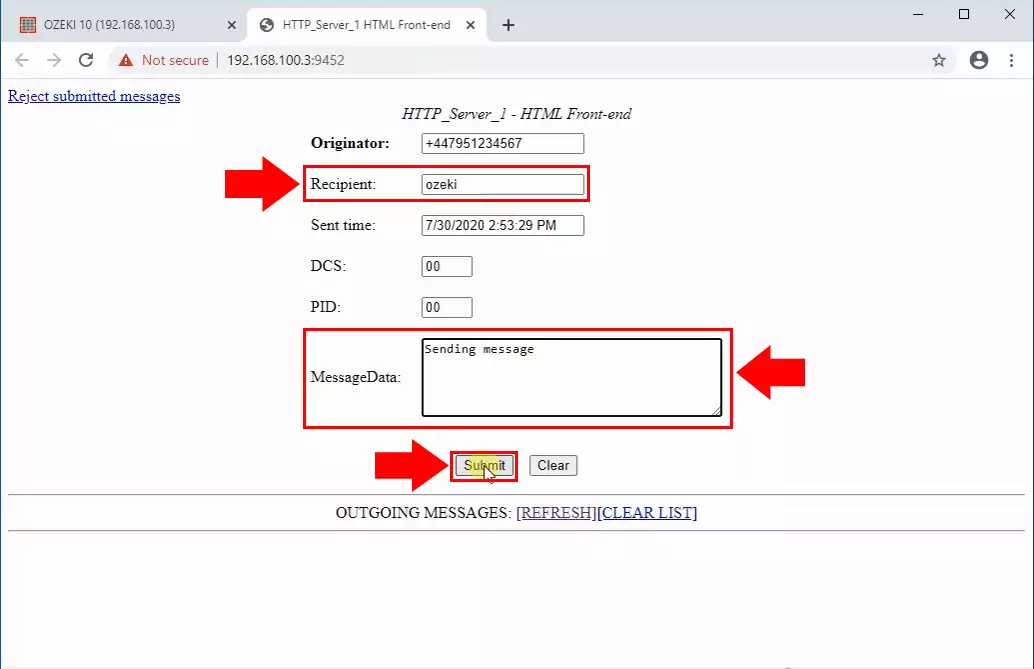
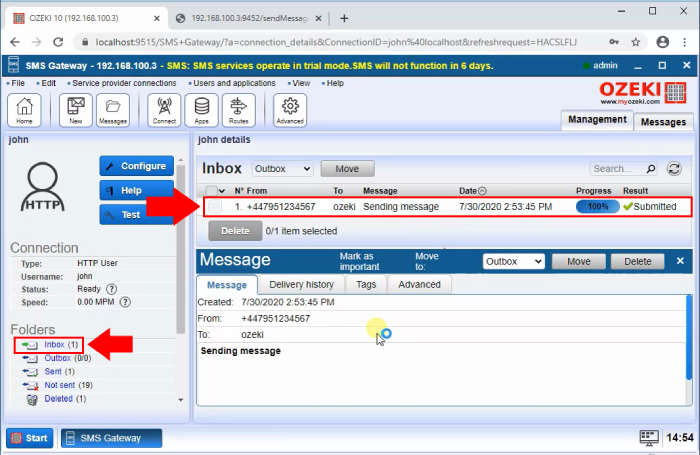
If you clicked on the URL link, a webpage will be presented to you. You can use it to send messages to your own system. The “Recipient” field will be the name of the sender, the “MessageData” will be the message itself. To send the text, just simply click the “Submit” button. You can find it with the help of Figure 6.
Summary
This article showed you how to set up a simulated incoming message for testing purposes. This will make troubleshooting and error handling much easier. If you want more insight into your system, use the Ozeki SMS Gateway. It offers excellent logging capabilities, which means you can track down errors quickly.
It is a good idea to check out the articles on the Ozeki website, so you can know more about the communication system that Ozeki offers. To learn more about how you can utilize the Ozeki SMS Gateway, feel free to explore the articles on the website such as: “How to receive SMS messages with C#” and “How to send SMS messages with C#”.
To create your first high performance SMS gateway system, now is the best time to download Ozeki SMS Gateway!
