Receive SMS in C#
The following guide is going to demonstrate how you can get the messages received by your SMS Gateway with a C# application. This C# example uses HTTP requests to ask for the messages from your inbox folder in SMS Gateway. The SMS Gateway collects all these received messages and sends them to the C# application as a response to the HTTP request. The guide also shows, how you can use the HTTP server connection to simulate incoming messages. It does take not more than five minutes to complete this guide, so let's start right now.
What is a C# SMS API?
The C# SMS API is a great tool to be able to send SMS message from any kind of C# based project or application by initiating HTTP requests and forwarding them to the SMS Gateway.
Prerequisites
- Installed Visual Studio 2019 Community Edition
- Installed Ozeki 10 SMS Gateway
- A configured HTTP Server connection
Receive SMS in C#
- Open Visual Studio
- Create a new Console App project
- Copy the C# example code from this page
- Paste the code into your C# application
- Open Ozeki 10 SMS Gateway
- Select the HTTP Server connection
- Send test messages using the HTTP Server connection
- Run your C# application to get all incoming messages
The example C# code below is capable of collecting all incoming messages using HTTP requests. This example code is free to use, you can modify and implement it into your own project application. If you wish to just test the solution, you need to follow the step-by-step instructions below or watch the video above which demonstrates how you can use this example C# code.
using System;
using System.Net.Http;
using System.Xml;
using System.Threading.Tasks;

namespace ReceiveSMS
{
    class Program
    {
        static async Task Main(string[] args)
        {
            var username = "john";
            var password = "Xc3ffs";
            var httpUrl = "https://127.0.0.1:9508/";
            var folder = "inbox";
            var limit = "3";

            var sendString = $"{httpUrl}api?action=receivemessage&username=" +
                 $"{username}&password={password}&folder={folder}&limit=" +
                 $"{limit}&afterdownload=delete";

            Console.WriteLine("Sending request: " + sendString + "\n");

            var handler = new HttpClientHandler();
            handler.ServerCertificateCustomValidationCallback =
                (sender, cert, chain, sslPolicyErrors) => { return true; };

            using var client = new HttpClient(handler);

            try
            {
                var response = await client.GetStringAsync(sendString);
                Console.WriteLine("Http response received: ");
                DisplayMessages(response);
            }
            catch (Exception e)
            {
                Console.WriteLine(e.Message);
            }
        }
        static void DisplayMessages(string response)
        {
            var xmlDoc = new XmlDocument();
            xmlDoc.LoadXml(response);
            var nodes = xmlDoc.SelectNodes("response/data/message");

            foreach (XmlNode node in nodes)
            {
                try
                {
                    var sender = node.SelectSingleNode("originator").InnerText;
                    var text = node.SelectSingleNode("messagedata").InnerText;
                    DisplayMessage(sender, text);
                }
                catch (System.NullReferenceException e)
                {
                    Console.WriteLine("The inbox is empty!");
                }
            }
        }
        static void DisplayMessage(string sender, string text)
        {
            Console.WriteLine($"{sender}: {text}");
        }

    }
}
Step 1 - Open Visual Studio
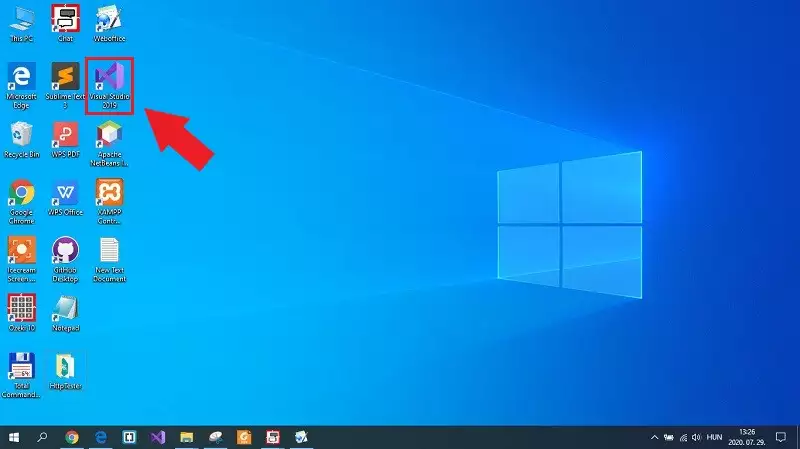
The first step of the guide, to create a C# application where you can place the example code from this page. The best tool to create a C# application is the Visual Studio. You can download it from the Prerequisites section if you haven't got it yet. If Visual Studio is already installed on your computer, you just need to open it from your desktop as you can see it in Figure 1.
Step 2 - Create a new project
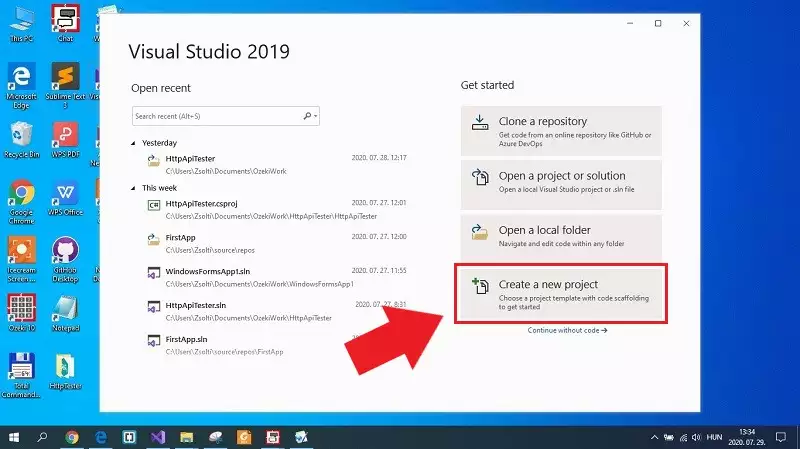
After you opened the Visual Studio, the welcome window is going to show up. You can open a recent project or create a completely new one from this window. As Figure 2 demonstrates, now you need to create a new project, so you just need to select this option from that window.
Step 3 - Select Console App
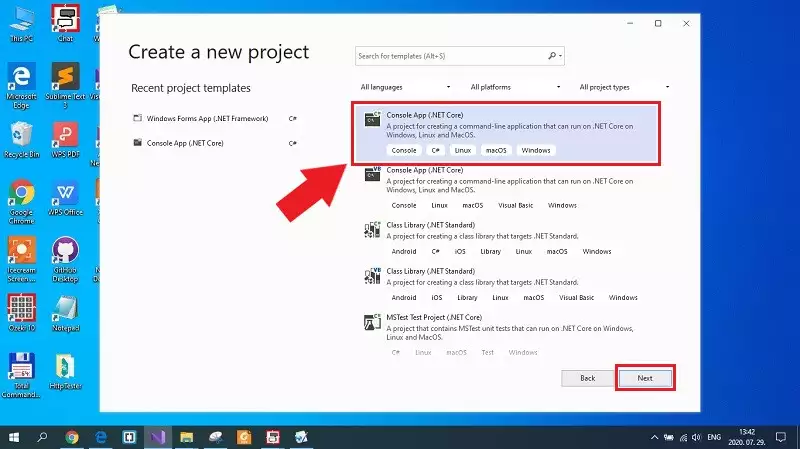
After you decided to create a new project, the next window lists all the available options that you can select from if you wish to create a new C# application. To follow this guide, you just need to create a simple Console App, so as Figure 3 shows that, just select that option and click on 'Next'.
Step 4 - Configure your project
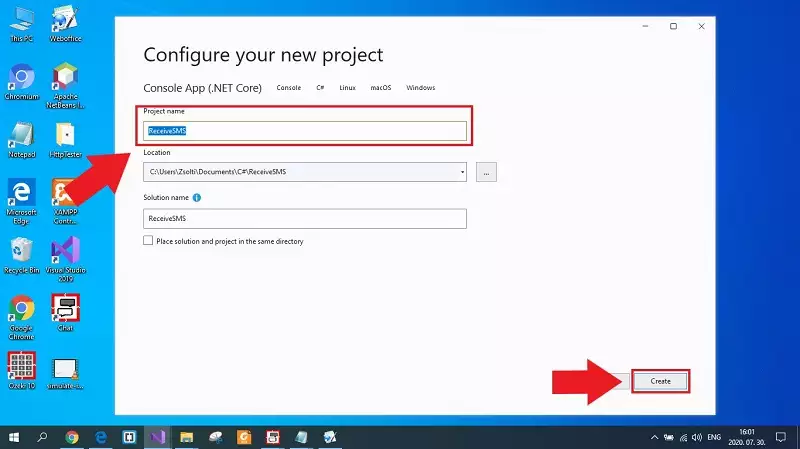
Before finally creating the Console App project, you need to do some configurations on the project. These are very simple configurations; you just need to give a name to your project as you can see it in Figure 4. At this window, you can also specify the location of the project files. If you finished with all the configurations, just click on 'Create' to create the Console App project.
Step 5 - Place the example code into the project
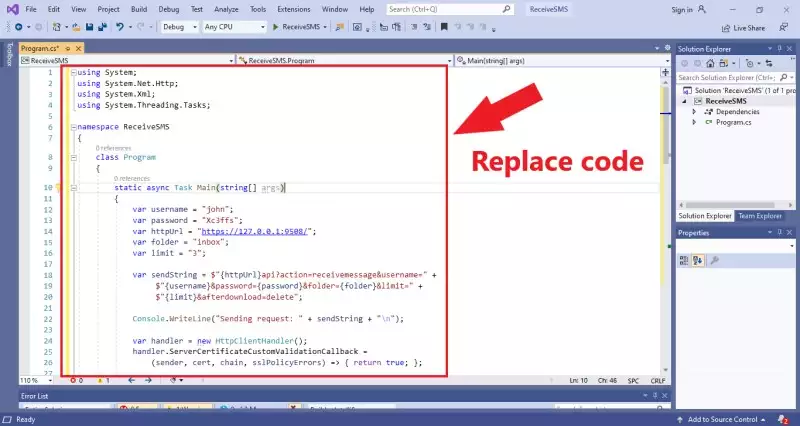
The created project contains one C# file, which is Program.cs. This is the file, where you need to place the example code. For that, just scroll up to the example code, mark out the whole code, and press Ctrl+C on your keyboard. This operation just copied the code to your clipboard. After that, go to the Program.cs file, delete the code that you can find here, and like in Figure 5, press Ctrl+V to paste the code into that file.
Step 6 - Simulate some incoming messages
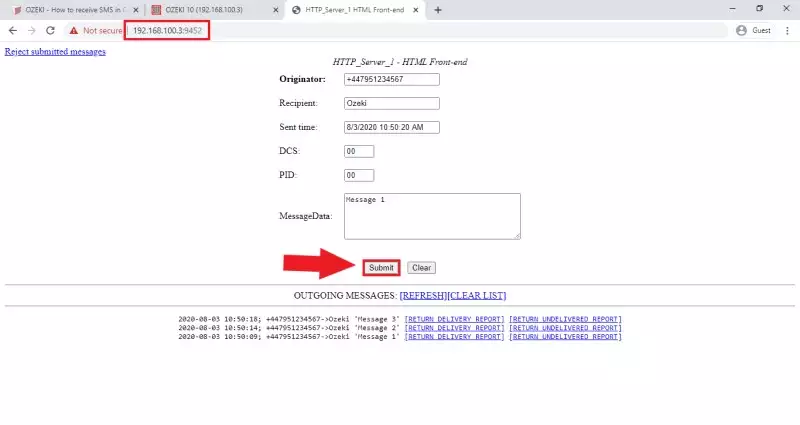
The next thing that you need to do, is to wait for some incoming messages in your SMS Gateway. This can take some time, so you can choose the option to simulate some messages using the HTTP Server connection. So, as Figure 6 demonstrates that, just open the HTML form of the HTTP Server connection. This form provides the opportunity to create some messages. You just need to type 'Ozeki' as a recipient and write some text into the 'MessageData' field. To send the test message, just click on 'Submit'.
Step 7 - Run the example C# code
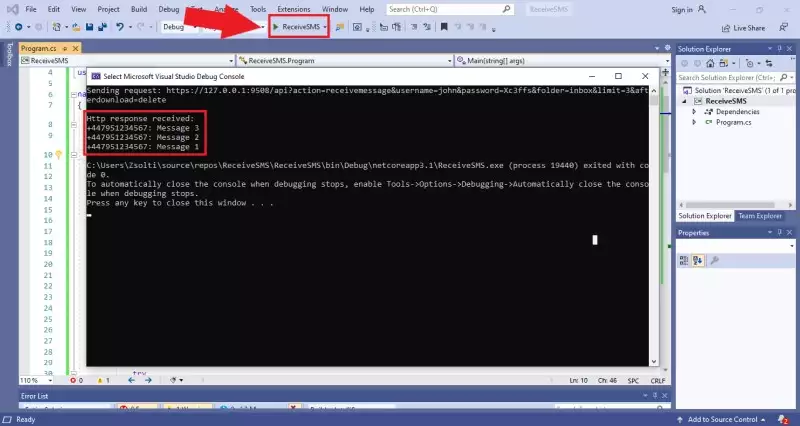
The last step that you need to perform is to run the C# code and get the received messages. to do that, just click on the 'Run' button in the Visual Studio as you can see it in Figure 7. By doing this, a console window shows up which prints the HTTP request that your application sent. It also prints the response message from SMS Gateway, which is a list of all messages that can be found in your inbox folder.
Conclusion
This tutorial gave you all the necessary information about how you can receive SMS messages in C#. Receiving messages in C# means that you can implement a message receiving functionality in any of your C# project. This will result in a versatile and widely used project. This solution revolves around the Ozeki SMS Gateway, meaning that you can track messages when going through the system and can detect errors easily thanks to the low-level logging capability of the Ozeki SMS Gateway.
Make sure to not stop here in the learning process. Feel free to check out other articles on the Ozeki website. For example start with sending SMS messages using C#. Another good article to learn is how to simulate incoming messages for test purposes.
The next thing to do is to download the Ozeki SMS Gateway and start developing now!
