How to authenticate SMPP server users with a database
When you operate your own SMS service, you might want to store user information in your database server. This user information can be used to authenticate users who are trying to access your server through various channels. For example, you may authenticate SMPP client connections, HTTP API connections, UCP or CIMD2 SMS clients with the same user database. This guide gives you step by step instructions on how setup database user authentication for an SMPP server configuration. The steps are similar for other service channels you may setup. You can use Microsoft SQL Server, MySQL, Oracle, or any other database server.
Overview
If you store your SMPP SMS Server user information in a database table, you need to follow these steps in order to configure Ozeki 10 SMS gateway to query your database when an SMPP client tries to connect to decide whether he is authorized to use your service
- Open the control panel
- Create a database connection
- Choose SQL queries
- Select the database type
- Enter the database login details
- Create a new authentication provider
- Write the SQL SELECT query to verify the user
- Open the SMS Gateway app
- Click Advanced on the toolbar
- Select the SMPP server configuration
- Open the advanced tab
- Select the database authentication provider
Step 1 - Create Database Connection in Ozeki SMS Gateway
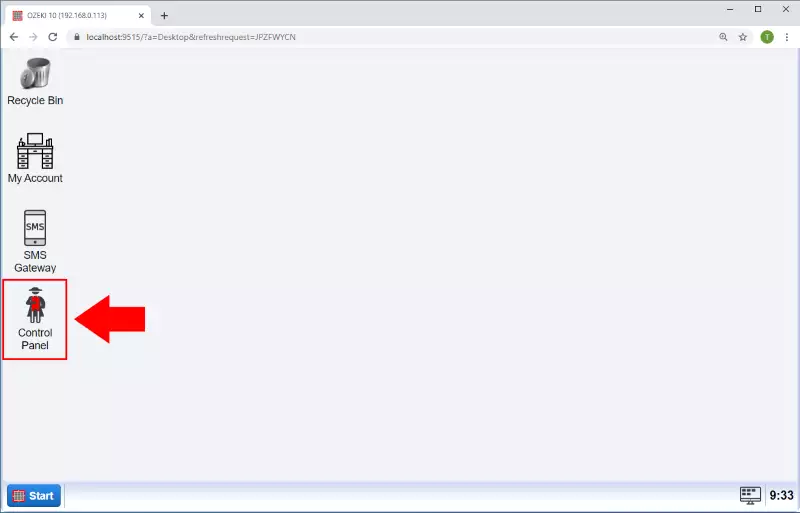
The first step is to open the Control Panel application in Ozeki SMS Gateway. So, just navigate to the desktop of Ozeki SMS Gateway, and here, as you can see it in Figure 1, just open Control Panel by clicking on its icon.
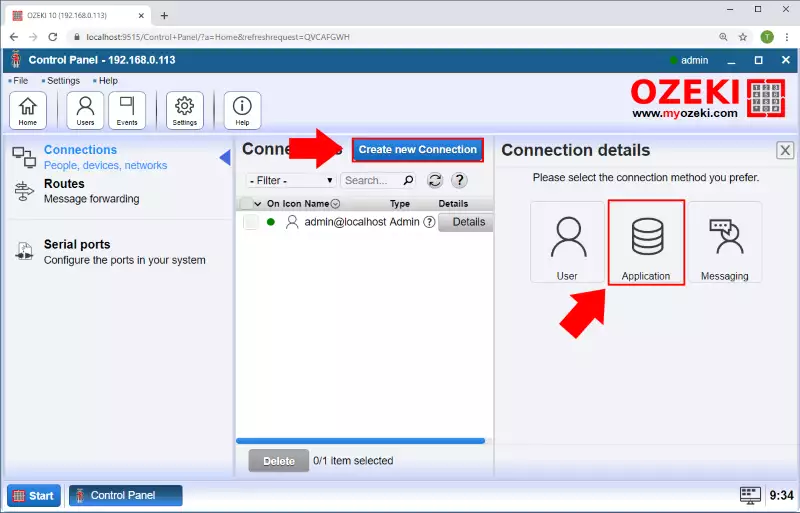
Now you should be on the Control Panel main page where you can create, modify or delete connections. Click on the blue Create new connection button and select Application from the box appearing on the right side of the screen (Figure 2).
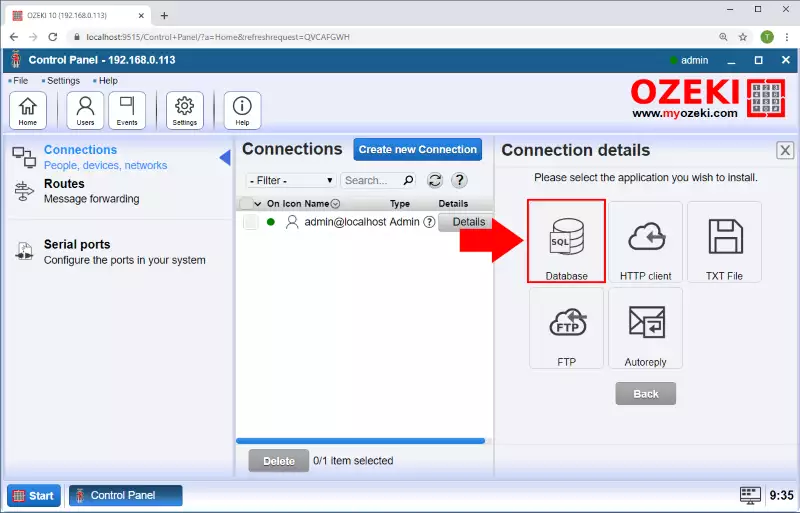
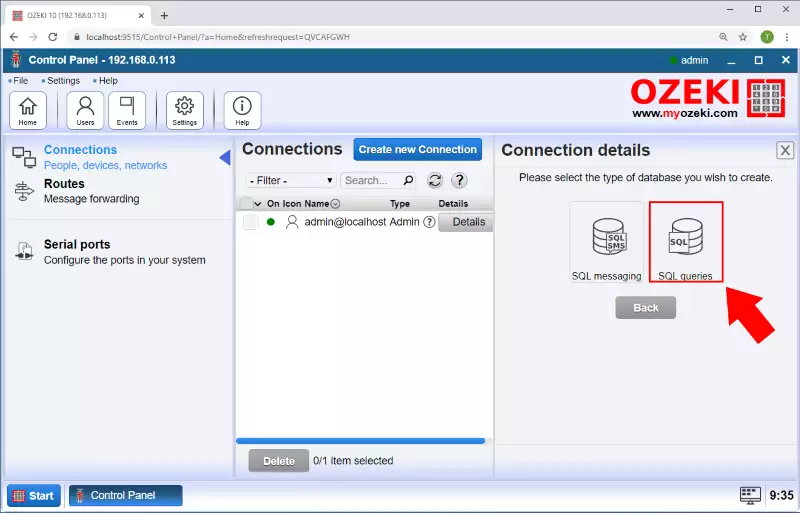
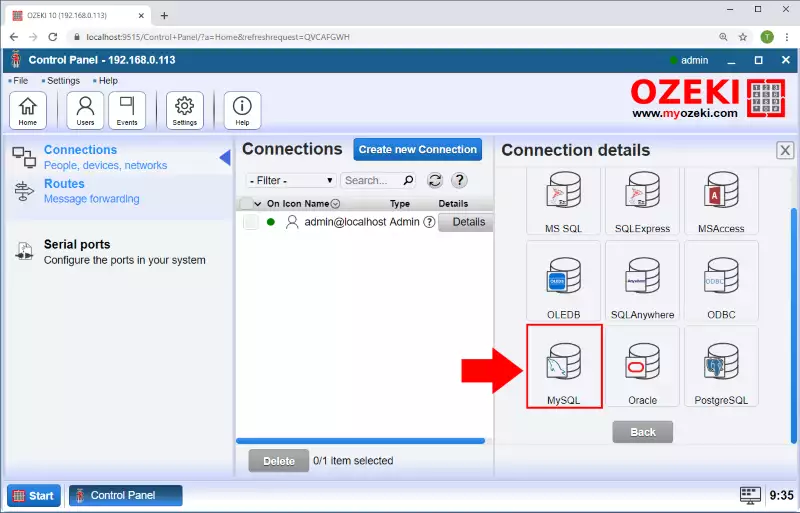
In this example we will use MySQL Database to store the user details for the Authentication Provider. So, select the MySQL connection type as the Figure 3-5 shows.
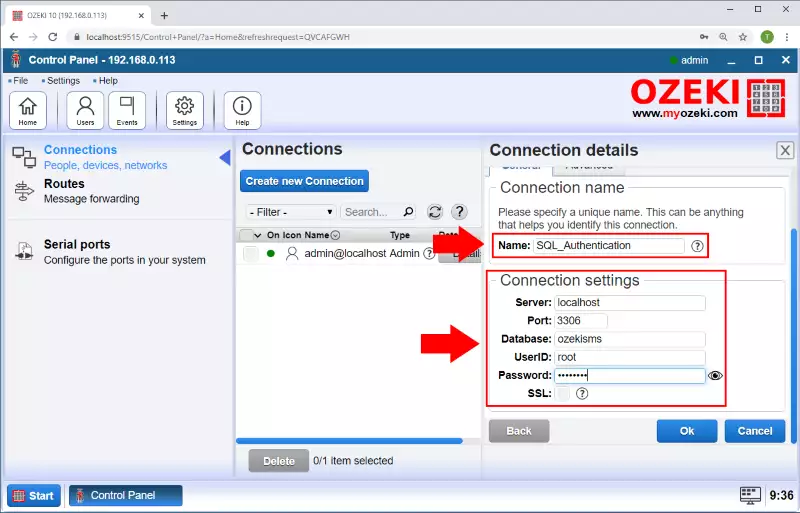
Then please fill out the following form with connection details. Make sure to provide the SQL server IP and port number. The default SQL port number is usually 3306. You also need to provide the name of the database where your users are. Finally provide the SQL username and password and click 'OK' (Figure 6).
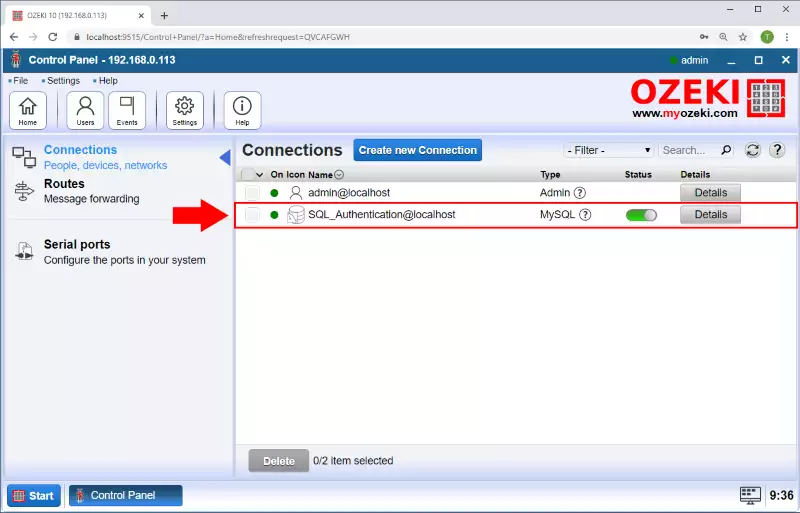
Finally, the connection was successful as you can see it on Figure 7.
Step 2 - Connect Database Authentication Provider to the SQL database
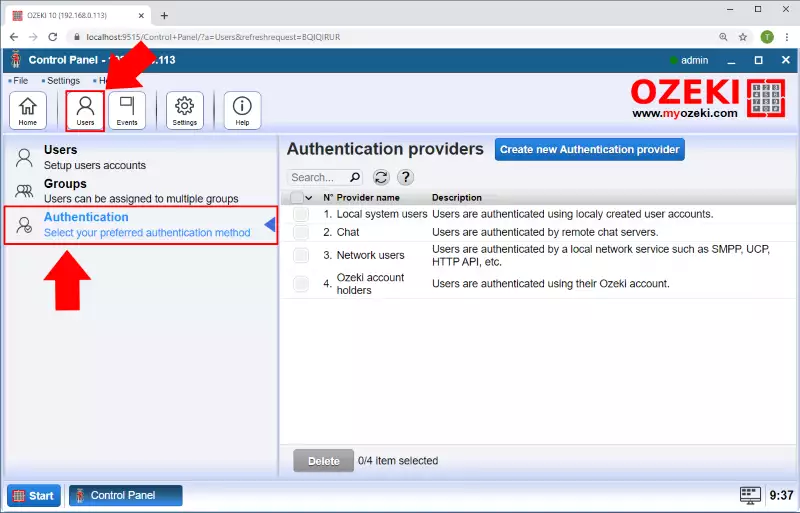
In this step we will set a SELECT query on the SQL table. This SELECT query will be called when a login attempt occurs. It checks the user table for users. Jump to the authentication provider page by clicking Authentication providers in the Users menu (Figure 8).
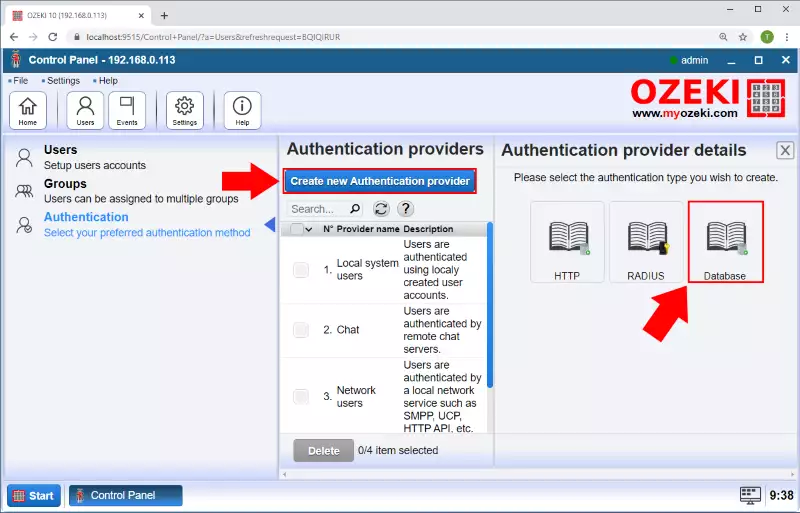
On the Authentication provider page you can create, modify or delete authentication providers. Create a new authentication provider by clicking the blue Create new authentication provider button. A new box will open on the right side of the page. In this box you can select between authentication providers. Please choose Database authentication provider (Figure 9).
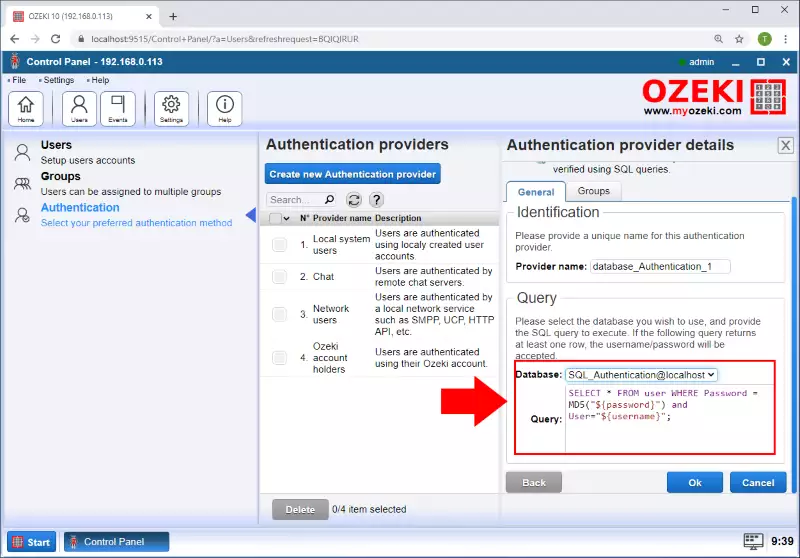
A form will be available in the box. You should fill out the form to configure the database authentication provider. In the most important field, you need to write the SQL query as you can see it in Figure 10. In STEP 4 we will set up an SQL database that is compatible with this SQL query.
SELECT * FROM user WHERE
Password = MD5("${password}") /* Hashes password and compares the hash. */
and User="${username}";
Step 3 - Create SMPP Service with SQL Authentication
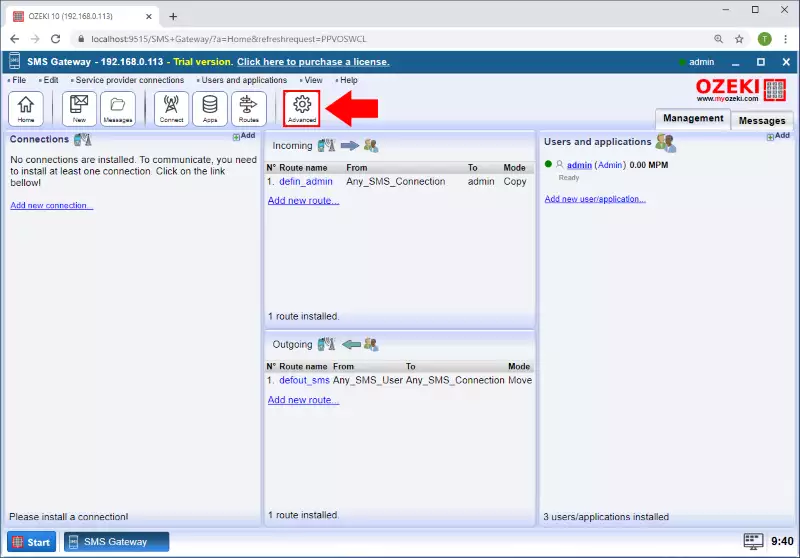
The next step is to open the SMS Gateway application. So, just navigate to the desktop of, and here just open SMS Gateway by clicking on its icon. Here you can find the Advanced menu of the SMS Gateway. To open it please click the "Advanced" button on the main page. (Figure 11)
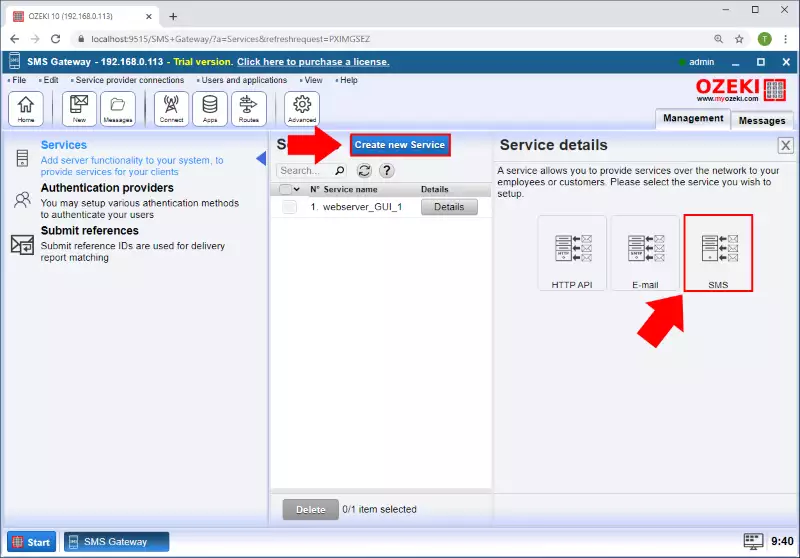
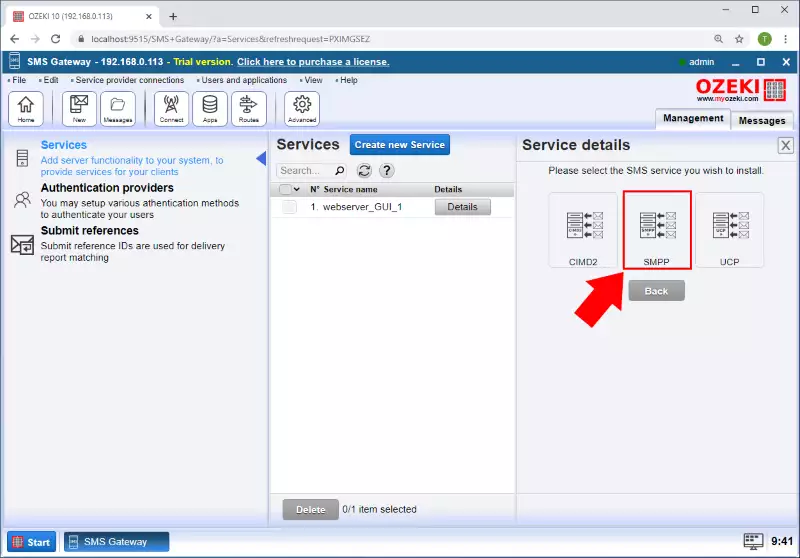
On the Advanced page you can create, modify or delete SMS Services. Create a new SMS Services by clicking the blue Create new Service button. A new box will open on the right side of the page. In this box you can select between SMS Services as you can see in the Figure 12. And then please choose SMPP Service (Figure 13).
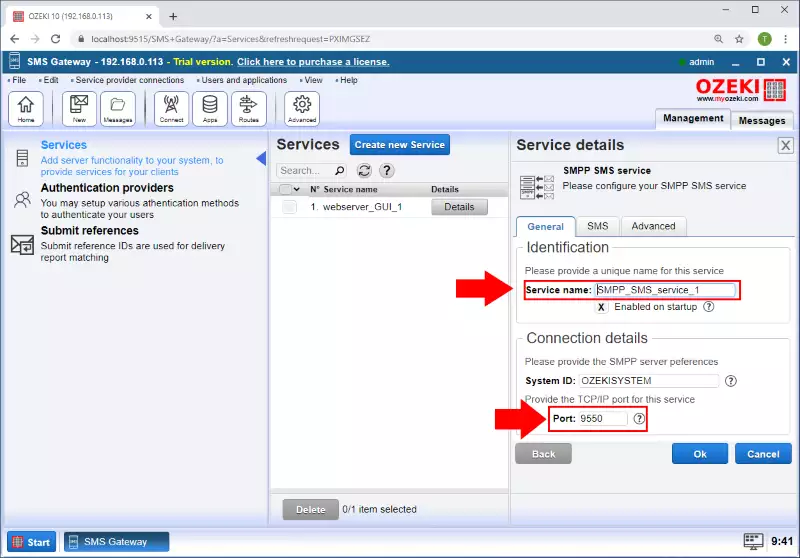
A form will be available in the box. You should fill out the form to configure the SMPP Service. Please provide a unique name and a port for this service as you can see it in Figure 14.
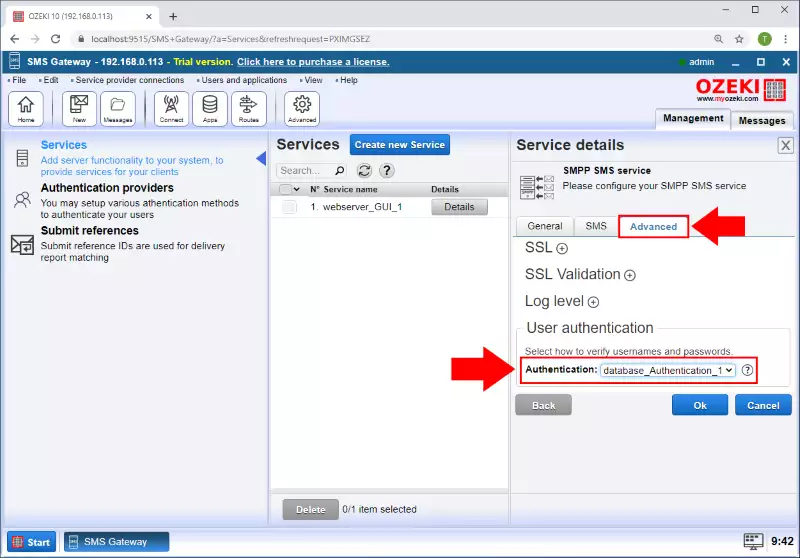
Then on the Advanced tab of the SMPP Service set the Database authentication provider in the User Authentication section as the Figure 15 shows.
Step 4 - Create SQL database table for users
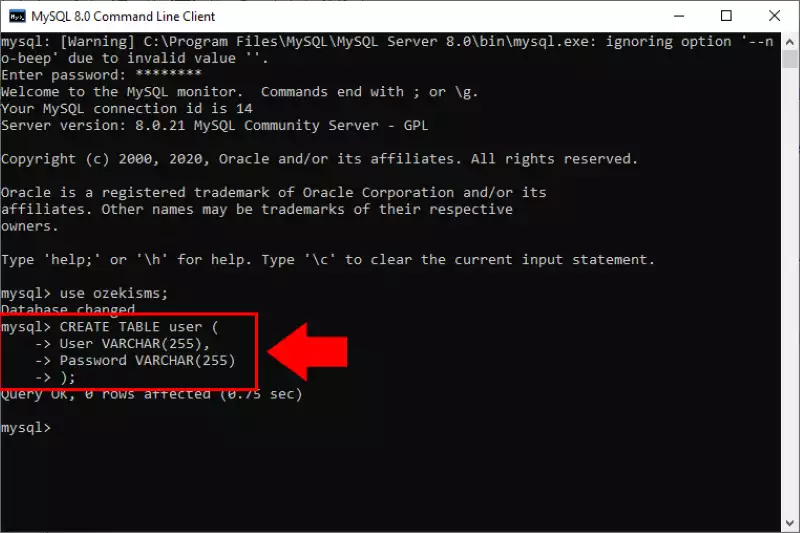
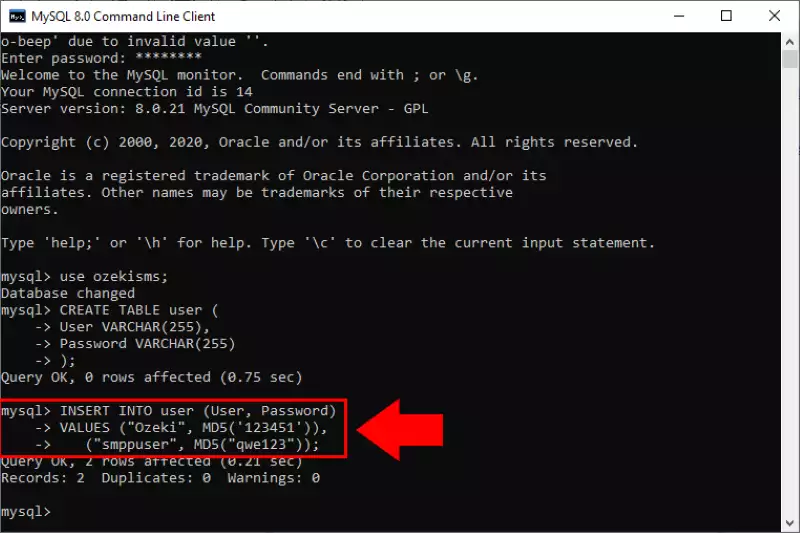
To use the Database Authentication Provider, you will need to have at least one SQL table that contains login information of the users. The table must have at least 2 columns. 1 column is for the username and the other one is for the password hash of the user's password. (Figure 16) Now you will need to create a table in the database:
CREATE TABLE user (
    User VARCHAR(255),
    Password VARCHAR(255)
    );
INSERT INTO user (User, Password)
VALUES ("Ozeki", MD5('123451')),
	   ("smppuser", MD5("qwe123"));
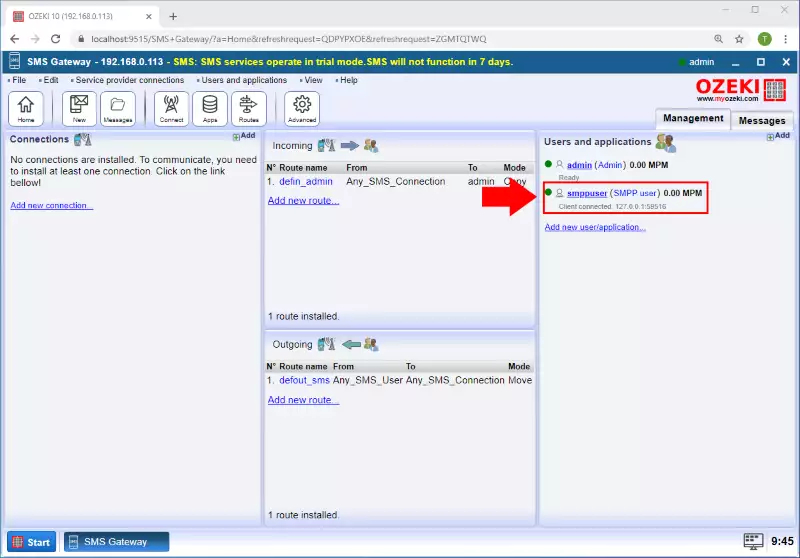
Finally, if an SMPP Client is connecting with the username and password you created in the database, you will see that the User is appear in the SMS Gateway Users and applications section (Figure 18).
FAQs
Does your gateway support clustering over multiple servers and how does it occur?
For scenarios involving a high volume of user connections, Ozeki SMS Gateway
offers a clustering solution to enhance service scalability. A cluster comprises
a group of independent computers, each equipped with Ozeki software. Each
instance of Ozeki independently connects to its designated SMS service providers
and serves users autonomously, without relying on other cluster members.
Load Balancing Strategies:
Ozeki SMS Gateway clustering employs two primary methods to distribute client
connections among cluster members:
- DNS-based Server Selection: This approach utilizes the round-robin algorithm within the DNS server. When a client queries for the service, the DNS server returns IP addresses from a pool assigned to the cluster, effectively distributing connections across available servers.
- Preselecting Router with Network Address Translation (NAT): In this method, a pre-configured router leverages NAT to distribute incoming traffic among the cluster servers. This approach offers greater control over load balancing compared to the DNS-based method.
- Enhanced Scalability: Clustering enables horizontal scaling, allowing you to add more servers to the cluster for increased capacity to handle a growing user base.
- Increased Availability: If a single server encounters issues, remaining cluster members continue operations, ensuring service continuity.
- Improved Performance: Distributing the load across multiple servers reduces the burden on individual machines, leading to improved overall performance and faster response times for users.
I cannot send more then 6 messages per second, although I have a 10 MPS license. What can be the problem? What is the scalability schema of the software?
Experiencing slow message delivery rates in Ozeki SMS Gateway? Here are several
potential bottlenecks to investigate:
Message Queue Management:
- Outbox Size: Monitor your outbox queue size. Ideally, it should range between 100 and 2,000 messages. A consistently low queue (0-100) suggests insufficient messages for transmission. Conversely, a very large queue (over 100,000) indicates the message source is overloading the system.
- Automatic Message Deletion: Consider enabling automatic deletion of old messages in the "Edit/Server Preferences" form. This prevents excessive queue buildup and performance degradation.
- Hardware Performance: Utilize the Windows Task Manager to identify any processes consuming excessive CPU resources. Disk defragmentation, screen savers, antivirus software, or automatic updates can temporarily affect performance.
- Network Bandwidth: Verify adequate upload bandwidth (ideally exceeding 256 Kbps). Minimize network congestion by closing bandwidth-intensive applications like video streaming or file sharing software.
- SMS Provider Limitations: In some cases, the SMS service provider's system might be slower than yours. Consult them regarding optimal window size settings within the "SMPP service provider configuration form." A smaller window size can restrict sending speed by waiting for confirmation responses before transmitting additional messages.
- Maintain Optimal Outbox Queue Size: Aim for a steady flow of messages by keeping the outbox queue within the recommended range (100-2,000 messages).
- Implement Automatic Message Deletion: Configure the software to automatically remove old messages using the "Edit/Server Preferences" form.
- Minimize Incoming Traffic: If feasible, reduce the volume of incoming messages, such as delivery reports, to streamline the sending process.
- Optimize Hardware Performance: Identify and close resource-intensive applications through the Windows Task Manager.
- Upgrade Network Bandwidth (if necessary): Consider upgrading your internet plan to ensure sufficient upload capacity.
- Consult SMS Provider: Discuss optimal window size settings with your SMS service provider to enhance sending performance.
