How to use the SMS nuget library in Visual Basic (VB)
Nuget is the package manager of the .NET framework. You can use a Nuget package in any .NET based application. If you are using Visual Studio 2019 you are able to install a Nuget package with a few clicks. In the following videos I'll show you how to create a Visual Basic console application, and how to use the Ozeki.Libs.Rest nuget package in that console application written in Visual Basic.
- Create a new Visual Basic console application in Visual Studio
- Install the Ozeki.Libs.Rest NuGet package
- Import the previously installed NuGet package with Imports Ozeki.Libs.Rest;
- Create a new Configuration, Message and a MessageApi object using the Ozeki.Libs.Rest pakcage
- Using the MessageApi object send the previously created message
Step 1 - How to create a new Visual Basic console application
Step 2 - How to install the Ozeki.Libs.Rest NuGet package
To install a NuGet package in Visual Studio you need to right click onto the icon of the project, then select the Manage NuGet Packages from the dropdown menu. After that you have to search for the package you want to install, in this case it is the Ozeki.Libs.Rest package. When you have found the Ozeki.Libs.Rest package you have to install it by clicking on the Install button. When it is installed, you are able to import and use the package in your project.
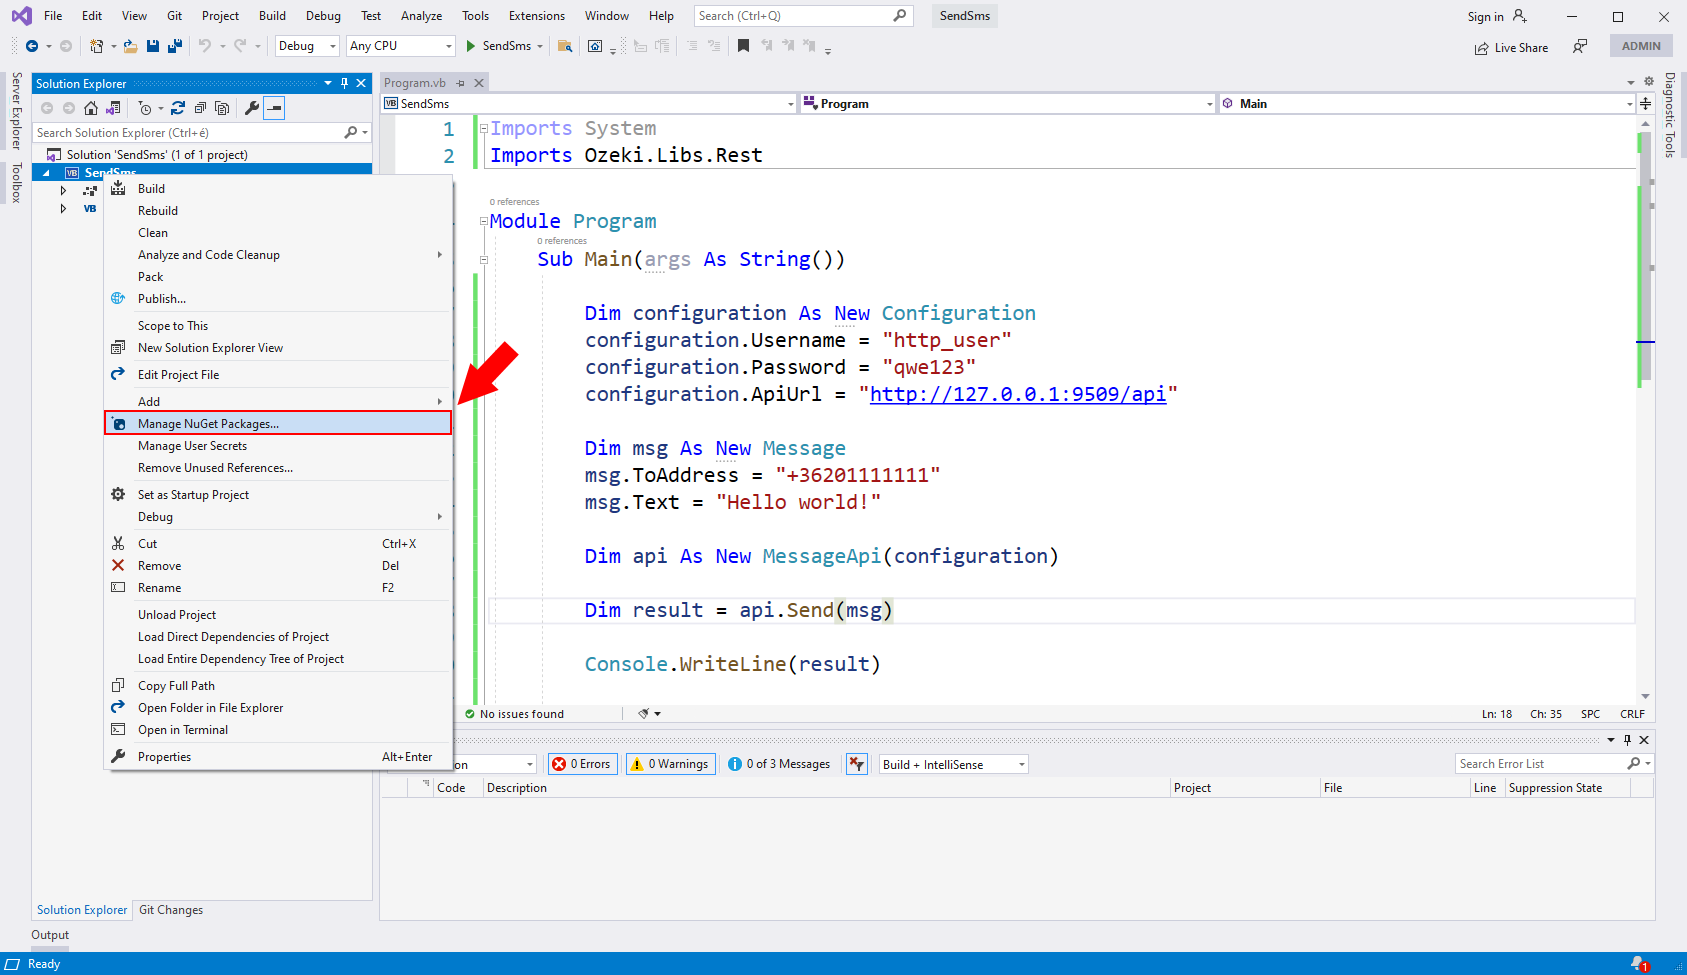
Open the NuGet Manager
If you would like to install a new NuGet package, you need to open the NuGet manager. You can do this by right-clicking the project you are working with in the Solution Explorer. Now you will see a sub-menu opening (Figure 1). There, you will be able to find the Manage 'NuGet Packages...' button, which will open the NuGet manager.
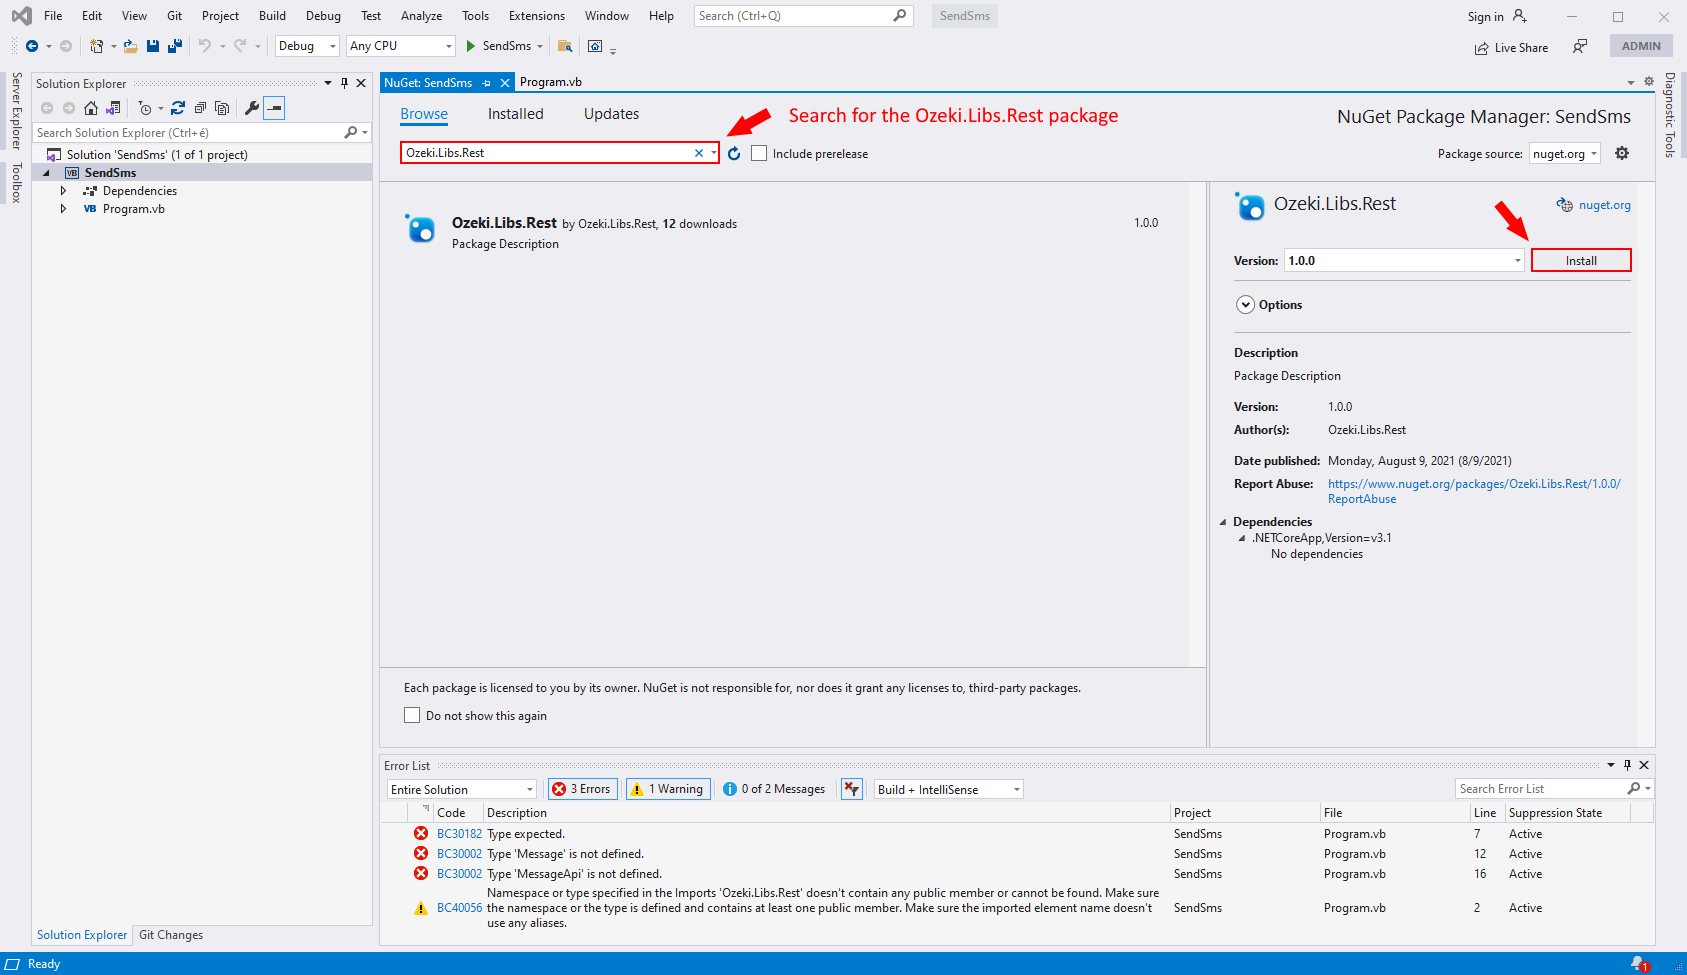
Find the Ozeki.Libs.Rest package
In the search bar of the NuGet manager, type in the 'Ozeki.Libs.Rest' text (Figure 2). You can find the search bar under the tab selector of the NuGet manager. If the search engine has found the package, click the Install button located in the right-side panel. It will start the installation procedure. You can get more information about the package under the Install button, in the options section.
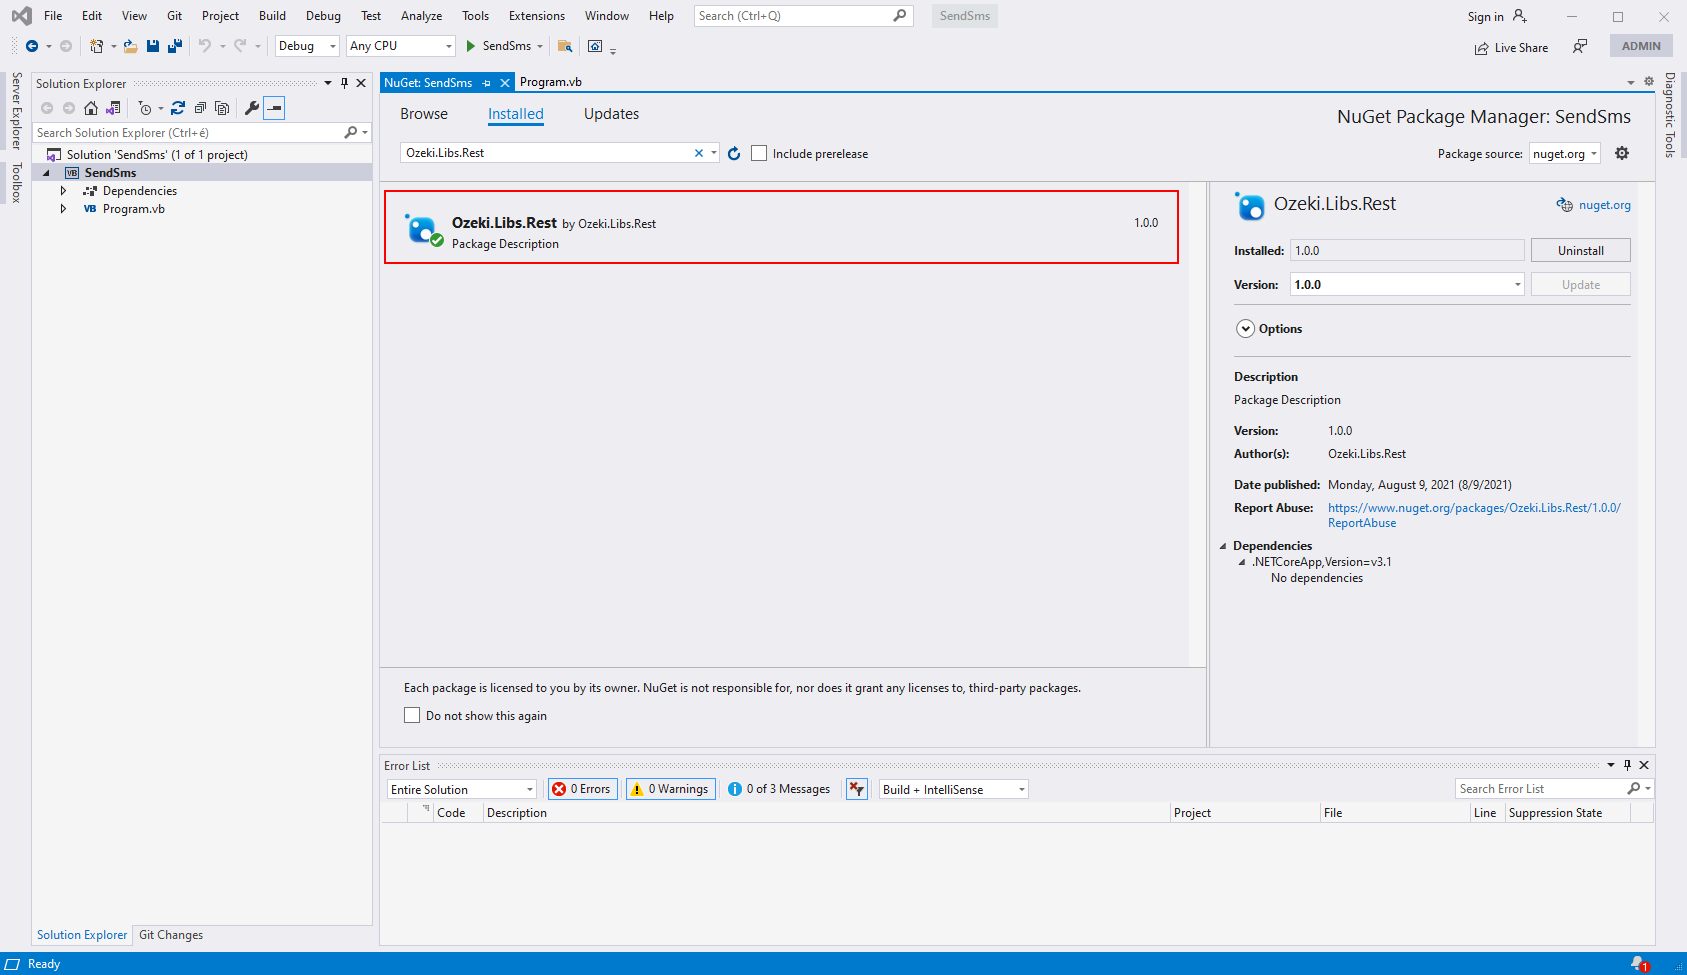
The installed package
As you can see on Figure 3, the Ozeki.Libs.Rest package is installed in your project. Switch to the Installed tab page and you will see the list of all the packages that you can currently use. In the right-side panel, you will see more information about the package. Also, if you do not want to use a package anymore, here you can find the uninstall button, that removes it from your project.
Step 3 - How to use the Ozeki.Libs.Rest package in your C# application
In order to use the contents of the Ozeki.Libs.Rest package, you need to import it by using the following line of code:
Imports Ozeki.Libs.Rest
How to use the Ozeki.Libs.Rest package
In this video, you are going to see how to write a code that is working with the Ozeki.Libs.Rest package. This solution will send an SMS to a provided address with the provided text. If you are familiar with the VB programming language, feel free to modify it to fit your preferences. The video will start with an empty coding area and will take you until you have the final product ready to launch. This 2:27 long video is easy to understand but it features all the information you need to create your own project.
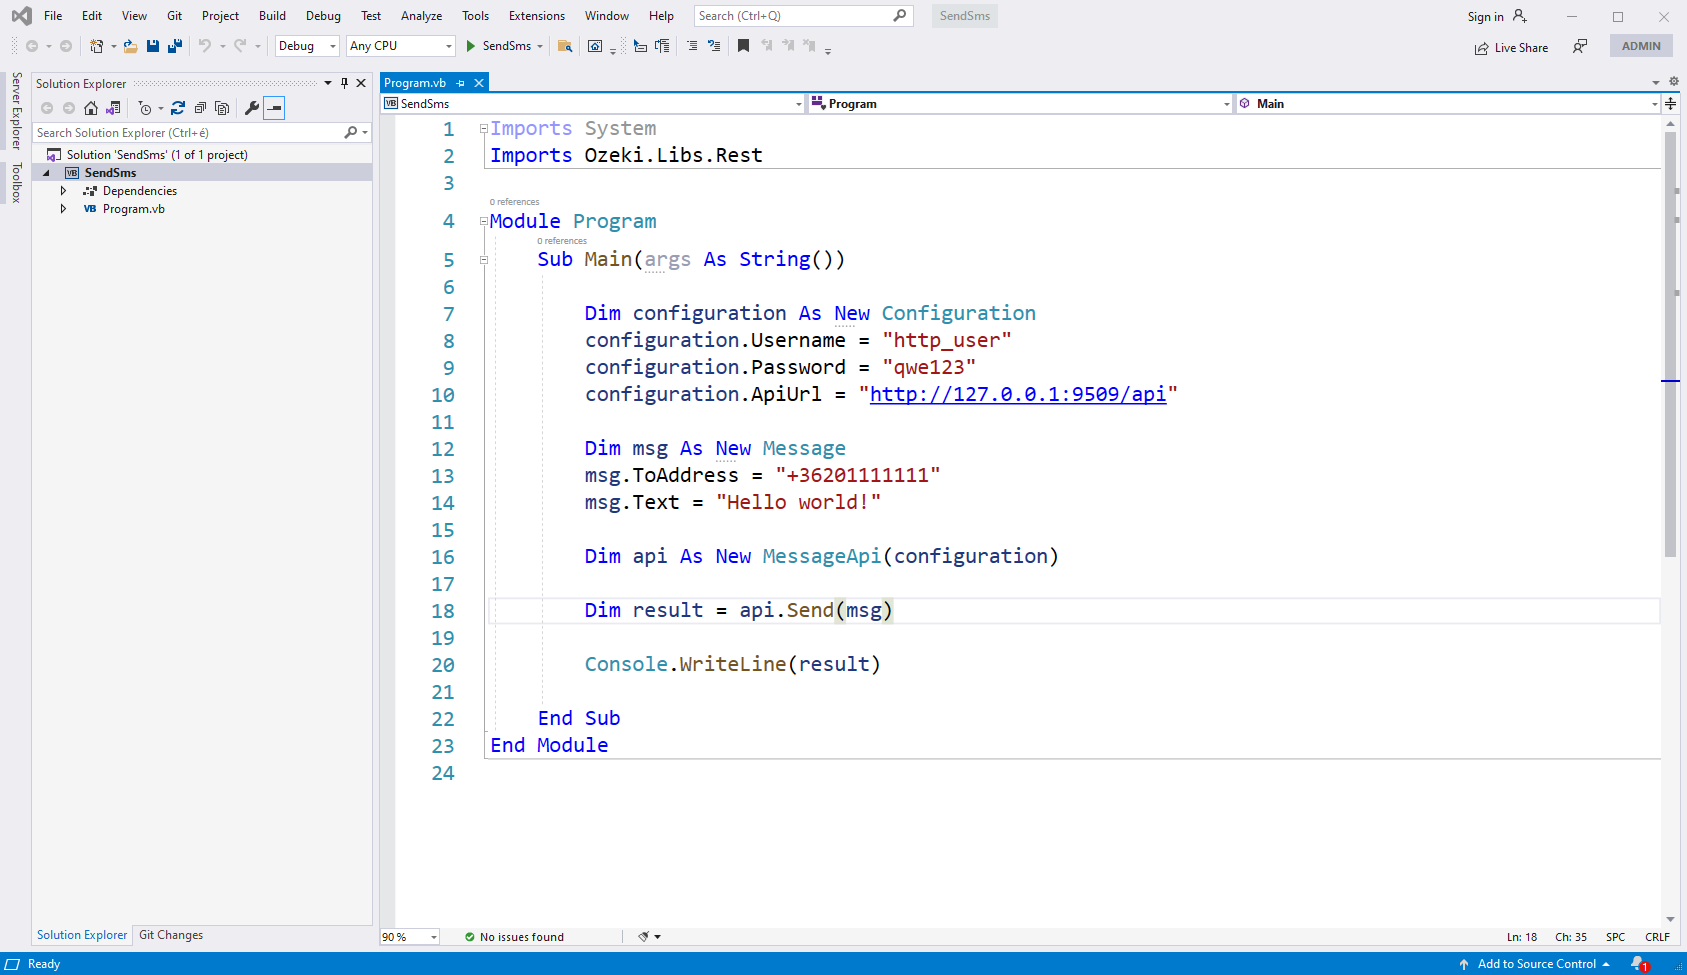
The source code
On Figure 4, you can see the source code of the project. As you can see the code is now done and it can send an SMS to the provided address, with the provided text. If you know your way around the VB language, feel free to customize the text of the message or the address to fit your needs. Make sure that the rest of the code stays the same as on Figure 4. You can run your code using the 'Run' button located on the lower menu bar of Visual Studio Code, next to the CPU selector.
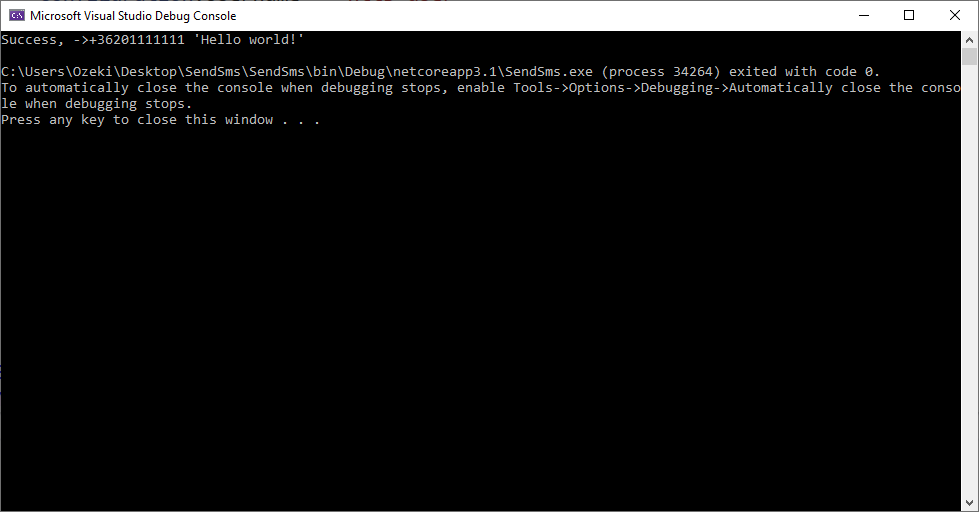
The output of the code
If you run the code, the result will be visible in a debug console. You will see the success text if the message sending procedure was successful (Figure 5). You can get more information about the sent message after the result indication text. You can see the phone number and the text of the message.
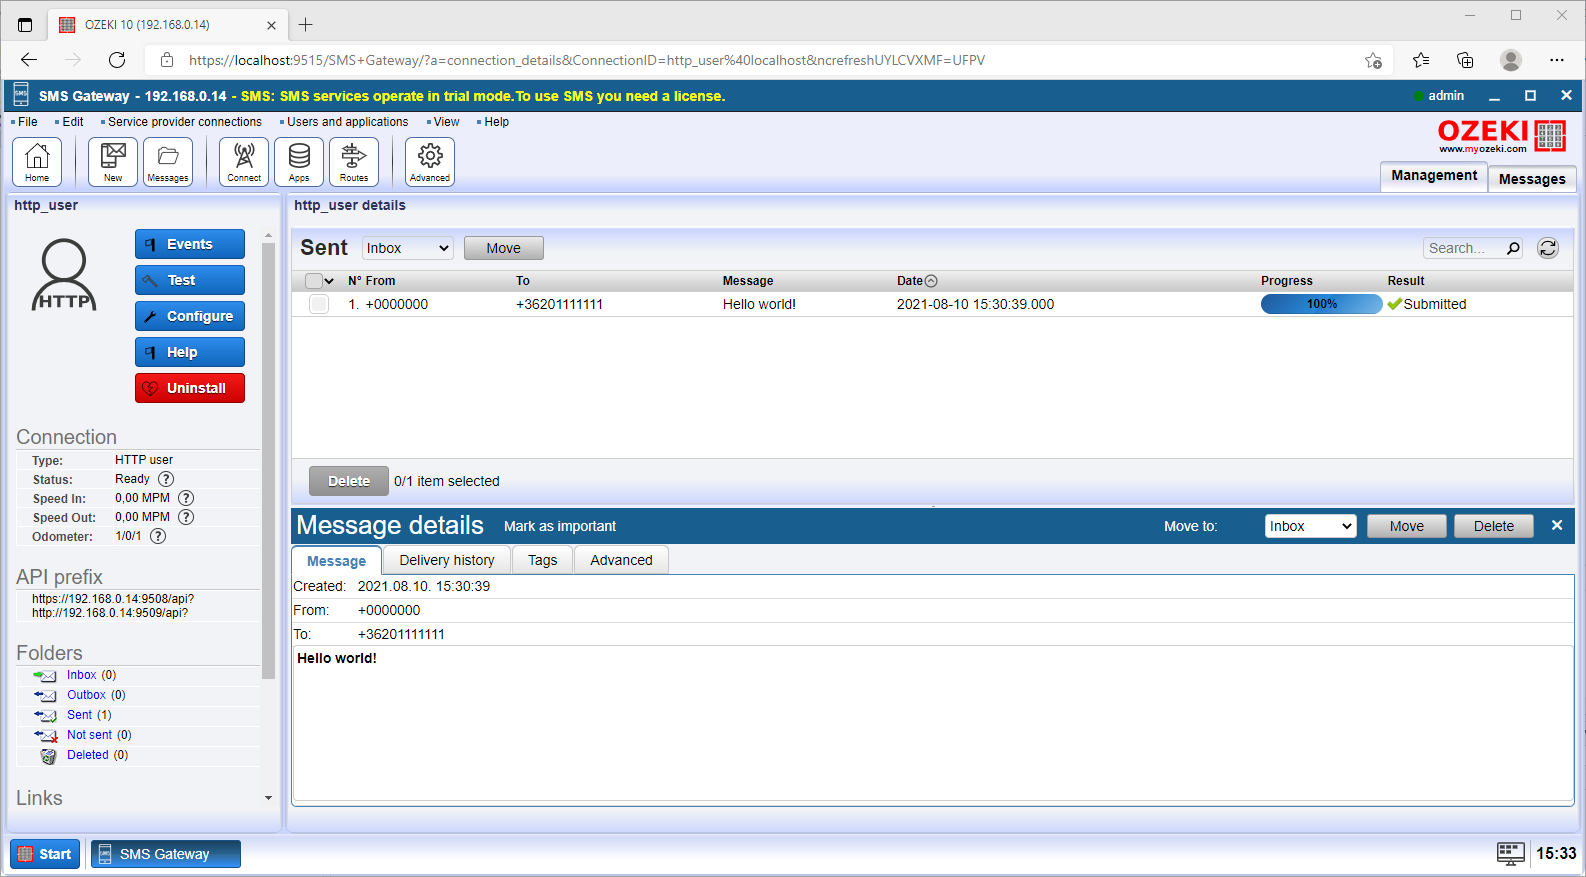
Check the sent folder
You can check the result of the SMS sending procedure after the code ran. Open the Ozeki SMS Gateway and navigate to the Sent folder. There you will be able to see all the messages you sent with the code. You can all the information about the message by clicking them and checking the message details panel. (Figure 6)
Conclusion
Now, you can pause and catch your breath. To review the above procedure we can conclude, that to use the the NuGet manager and sending an SMS with the help of VB is quite easy.
If you have already completed the steps, you can enjoy a well-deserved coffee or some other treat you have in mind. If you would like to get to know more interesting facts about the benefits of other similar solutions, please open ozeki-sms-gateway.com. I hope this page will be useful to all the readers and especially to beginners.