How to create a simple SMS route
This guide shows you the simplest SMS route, that routes SMS from one user to one mobile network connection. In the guide, you can see how you can create a new SMS route, how you can select the SMS source connection, and how you can select the SMS destination connection. You will also see that when an SMS comes from the source, you can see the routing decision in the source's logs.
What is SMS route?
It routes SMS from one user to one mobile network connection.
How to create a simple SMS route (Quick steps)
How to create a simple SMS route:
- Add new routing rule
- Configure routing rule
- New rule created
- Login as standard user
- Send SMS message
- Open user from Admin management console
- Open the sent message
- You can see the route decision in the delivery history
How to create a simple SMS route (Video tutorial)
In this short video lasting under 2 minutes, we provide a walkthrough of the process of creating an SMS route in the Ozeki SMS gateway. Our step-by-step guide covers everything from adding a new rule to configuring it, conducting a thorough test, and finally, viewing a detailed log. We understand the importance of an SMS routing system, and we've crafted this video to empower you with the knowledge and skills needed to set up and optimize your SMS routes effectively.
Step 1 - Add new routing rule
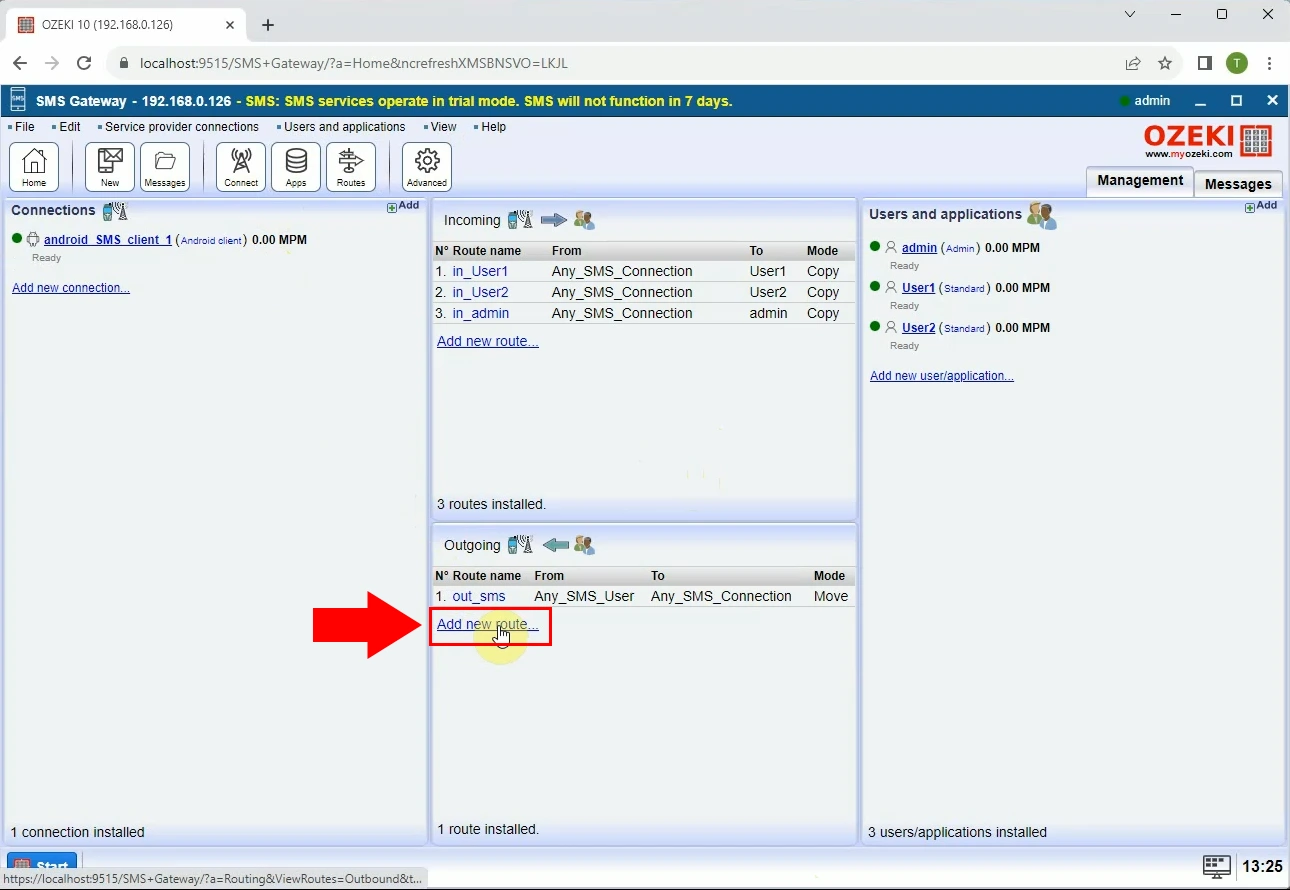
Navigate to the bottom, and you'll find the Routing Panel. Inside this panel, locate and click "Add new route..." to access the route creation panel (see Figure 1). This action will open the route creation panel, enabling you to create and configure the route rule.
Step 2 - Configure routing rule
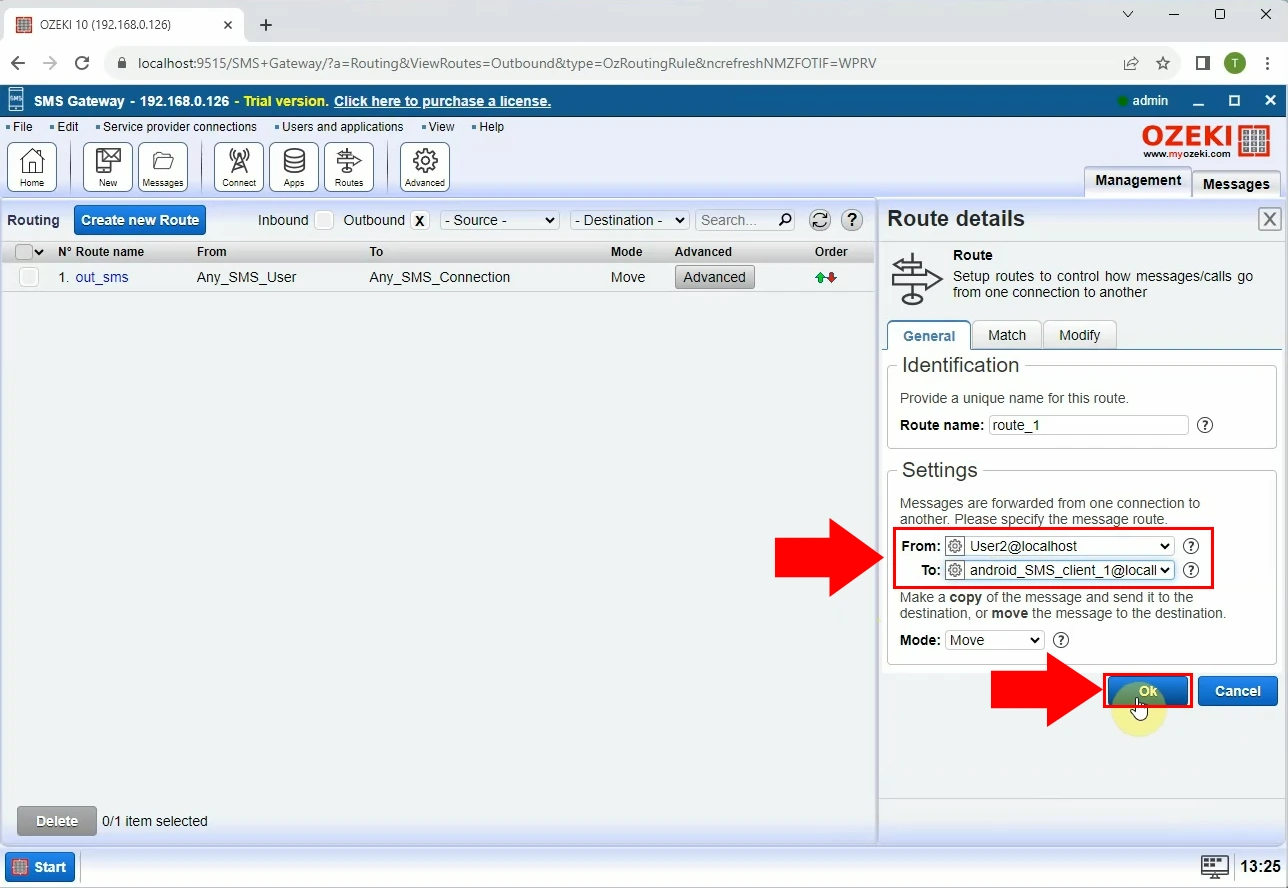
On the right side, find the "Settings" section. Here from dropdown menus, you can set the destination and the starting point.
After you select "From" and "To" simply click the blue "Ok" button under the form, to set the route (see Figure 2).
It will create a new routing rule.
From: User2@localhost
To: andoid_SMS_client_1@localhost
Step 3 - New rule created
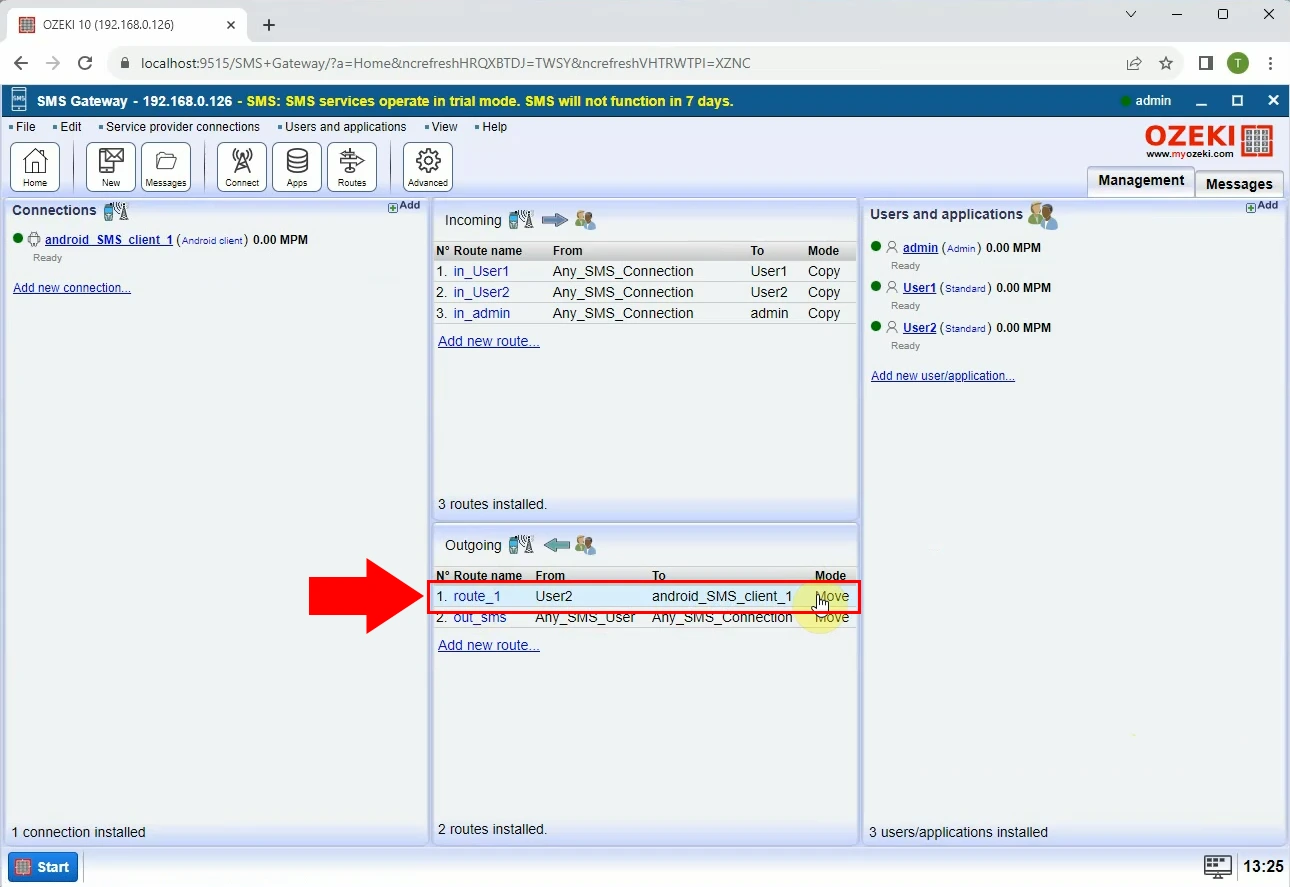
If you've followed the steps accurately, you should now see the rule you've just created within the Routing Panel (see Figure 3).
Step 4 - Login as standard user
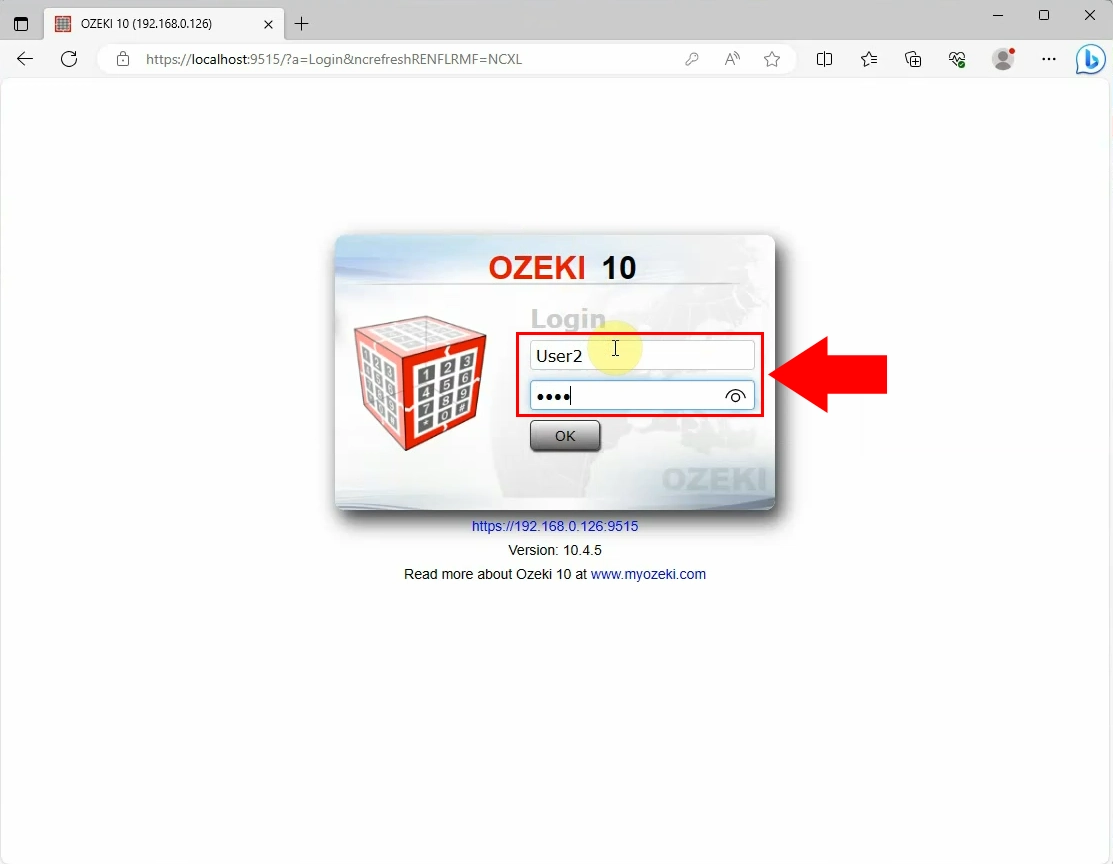
Now log into your Ozeki account as a standard user, by filling in the username and password field, after clicking "Ok" (see Figure 4). It will open your Ozeki Desktop, from where you can open SMS Messenger.
Step 5 - Send SMS message
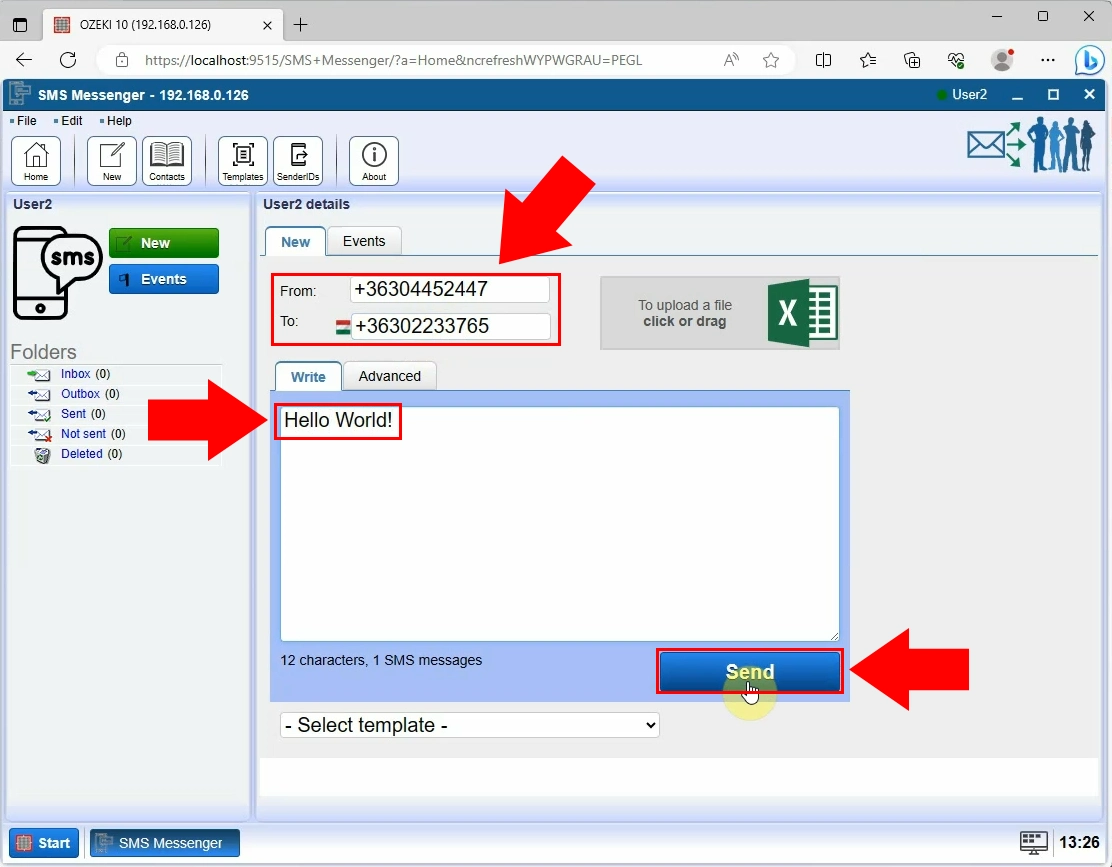
Upon logging into your Ozeki account, launch SMS Messenger from the Ozeki Desktop. Inside the "New" Tab page, fill the "From" field with the phone number from which you intend to send the SMS. Also, input the recipient's number into the "To" field, and in the "Write" section, insert the message. Once you have filled in these details, click the "Send" button located at the bottom (see Figure 5). If the form is filled correctly, it will send the SMS message.
Step 6 - Open user from Admin management console
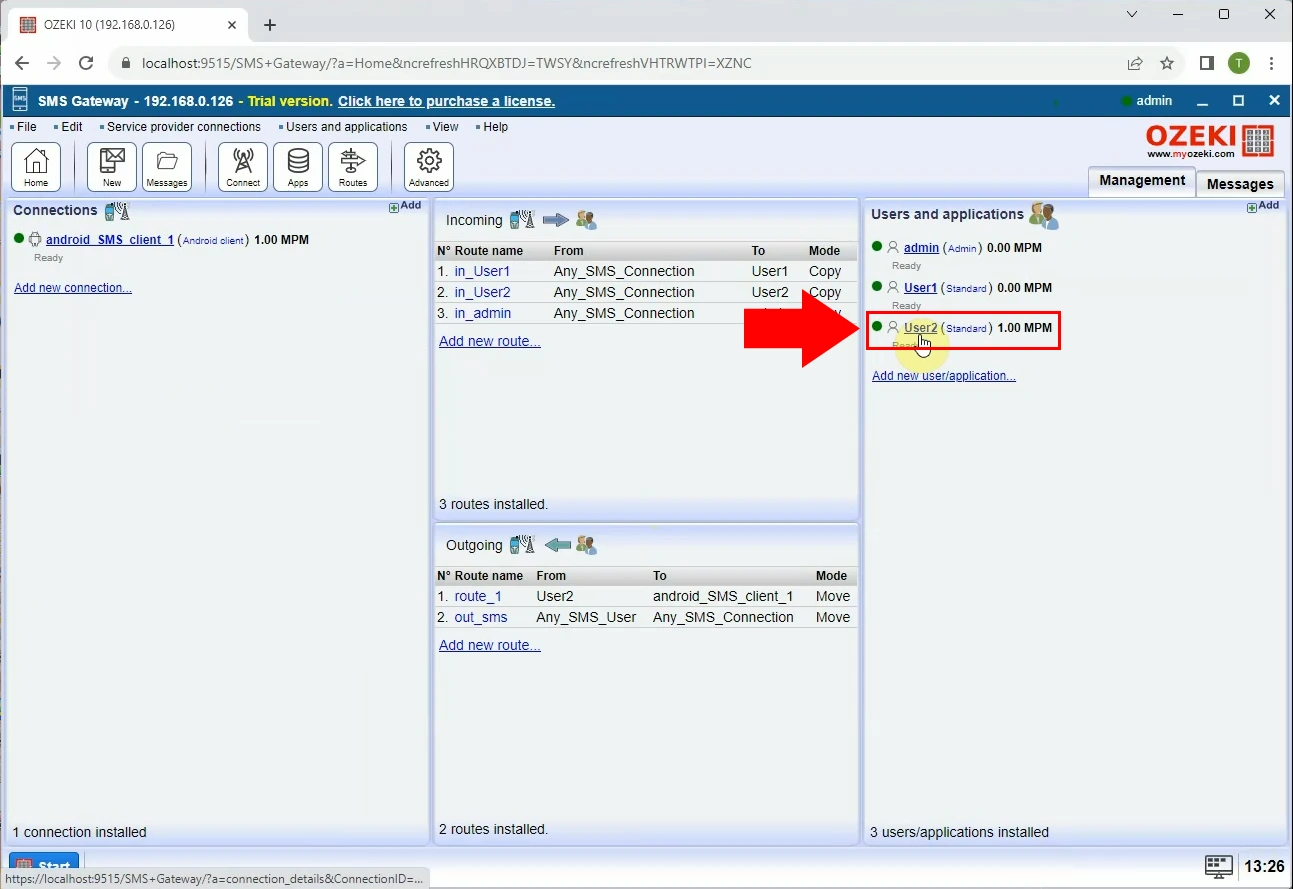
To see the route decision of the sent message, first, you have to open the user from the Admin management console. Locate the User and Applications Panel, then select and click the user where you sent the message (see Figure 6). It will open the Admin management console of the selected user.
Step 7 - Open the sent message
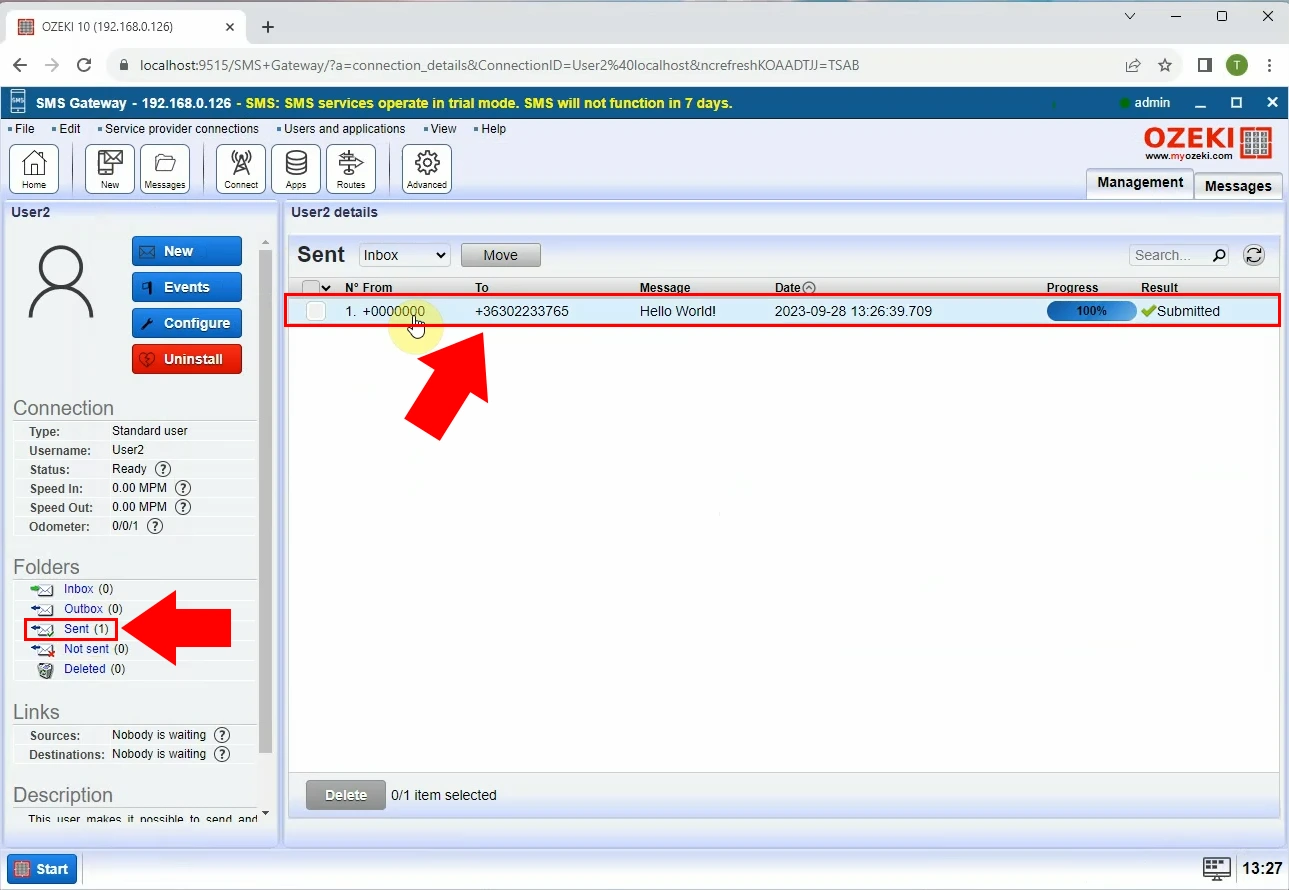
Inside the control table at the left, look for the "Sent" button. After you click it, it will open the sent messages Panel. Locate the message that you just sent and click on it to view details (see Figure 7).
Step 8 - Open delivery history
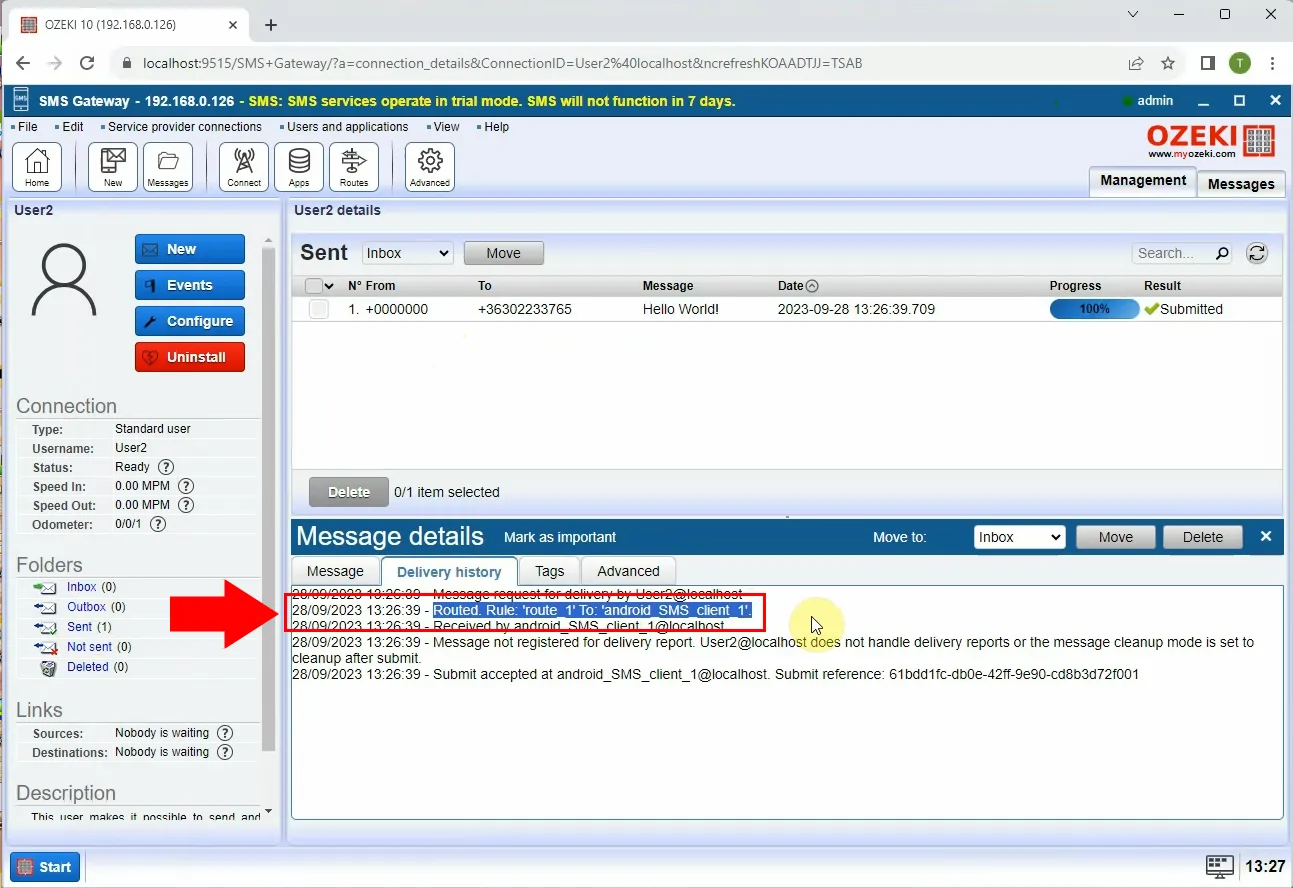
Here select the "Delivery history" tab, it will show the details about the message (see Figure 8). Locate the log that is about the routing. You can see which route rule has been used for the message.
Conclusion
Now, you can pause and catch your breath. By following the above directions, you can create the solution in a few minutes. Now you can use the SMS route to send sms. You have seen the benefits Ozeki SMS Gateway can bring. If you want to do well in the long run, focus on running your sms business. If you would like to get to know more useful insights about the advantages of other similar solutions, please open ozeki-sms-gateway.com. I hope this article will be helpful to all the readers and especially to beginners.
