How to setup sms load balancing
Setting up sms load balancing is not a hard task, but a helping hand is always useful. Load balancing prevents application downtime, increases performance and helps in detecting failures in the early stages. Our load balancer swiftly distributes traffic across different paths in order to reach perfect client experience. This guide is meant to be our way of helping while showing you Ozeki SMS Gateway. Reading this article is absolutely recommended if you are interested in this topic!
Listen to the podcast
What is SMS load balancing
Load balancing allows an increase in the throughput of SMS messages. You may need to make use of it if you wish to send out a large number of SMS messages with small capacity connections to GSM service providers. Load balancing means equally involving different connections in the job of sending out SMS messages.
What is Ozeki SMS Gateway
Ozeki SMS Gateway is a communication software that routes messages between real world entities. It allows you to build up simple communication between shared hardware and software resources of your system. It offers real time information and provides various configuration options to route messages.
How to setup SMS load balancing (Quick steps)
To setup sms load balancing:
- Launch Ozeki SMS Gateway
- Add new connection
- Install Connection Group
- Configure Members in General tab
- Specify the SMS message route
- Look at the SMPP user's Sent folder
- Check the first SMPP connection Events
- Inspect the second SMPP connection logs
- Realise the SMS load balancing
Bulk sms load balancing
Bulk sms load balancing is a traffic distributing process which helps the connection to remain fast flowing and easy-to-read. This solution uses several paths to distribute the messages in order to remain fast, scalable and secure. As you can see in Figure 1, this procedure consists of a computer (using the Ozeki SMS Gateway) and different SMS services. This is a highly reliable and fast solution.

How to setup sms load balancing
This video is a short and simple tutorial to Ozeki SMS Gateway's sms load balancing tool. Watching this can help you to understand the full procedure in no time! It starts with launching our program and by the end you will realise the benefits of SMS load balancing. While you are watching the video, you will see the steps of configuring the connection group, the route that you want to use and the final result of the load balancing.
Install new connection group
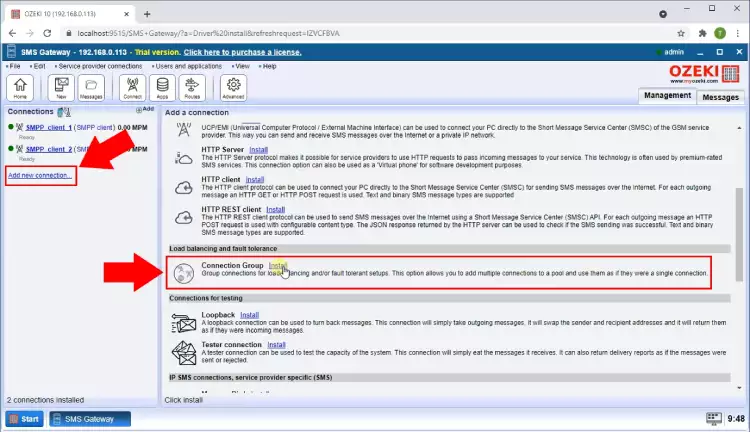
You can install new connection group by choosing the 'Add new connection...' link in the Connections panel. After that, in the Connection installation list you can find the 'Load balancing and fault tolerance install section' where you have to select the 'Connection Group' install item. By selecting that, you have the opportunity to install new connection group. This is the first step in setting up load balancing so pay attention to every detail if you don't want to face unpleasant moments. (Figure 2)
Add connections to the group
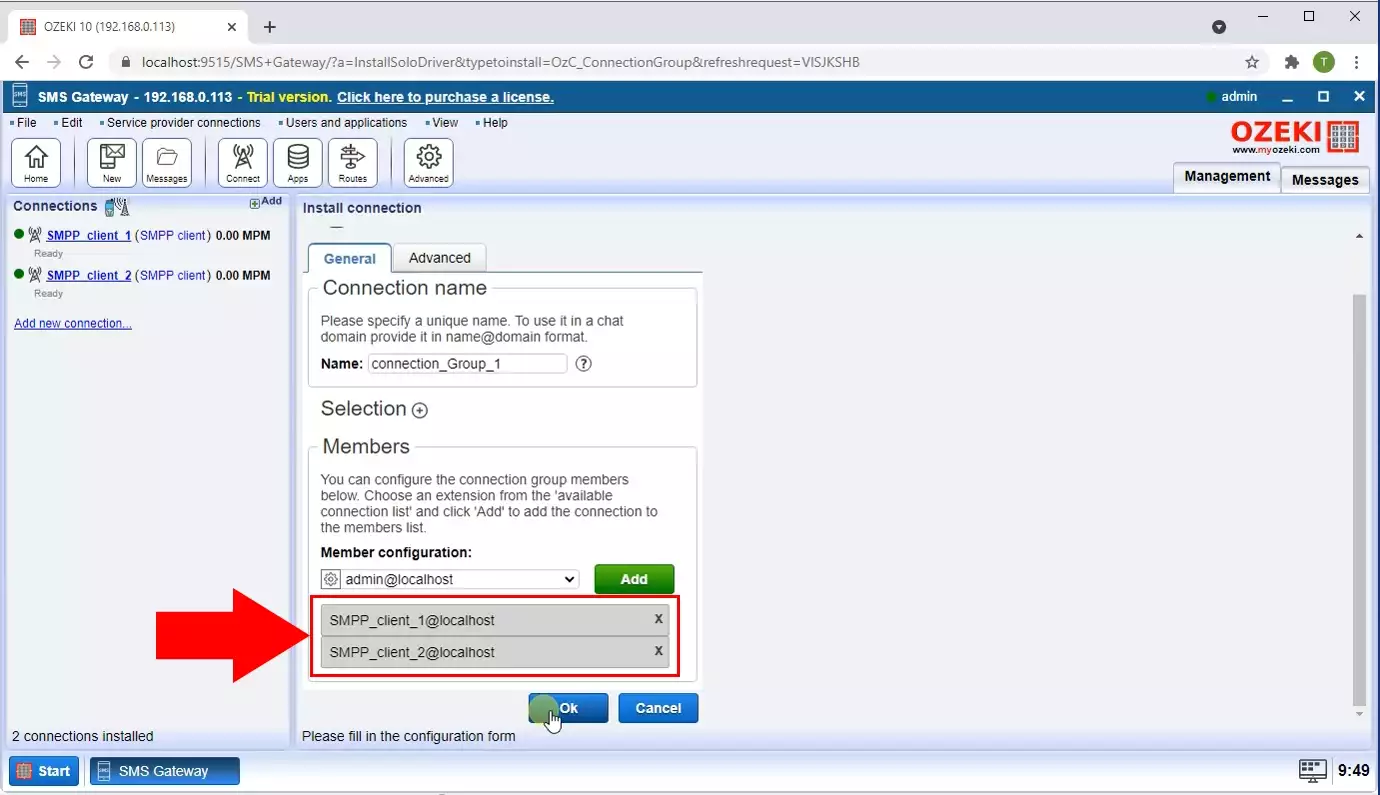
In order to add connections to the group, find the Install connection detail page where you have to go to the General tab's Members group box, which allows you to configure the connection group members with the 'Member configuration:' combo box. With the 'Add' button, you can extend the configuration list so you can have as much member as you wish to use in distribution. (Shown in Figure 3)
Set route to forward messages to the connection group
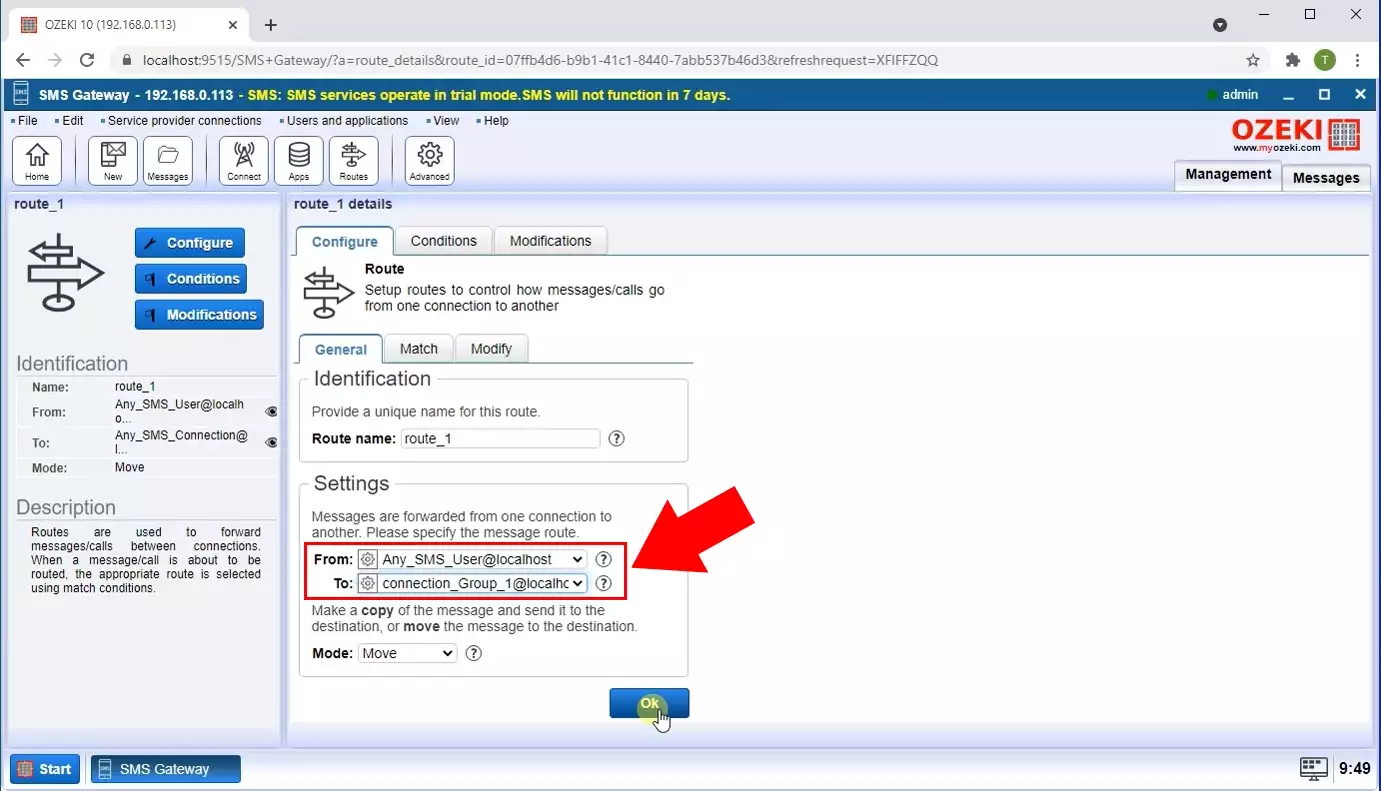
In the route_1 details page, under the Configure tab page, you can find the general tab. Clicking on that leads you to the Setting group box where you can specify the message route with the 'From:' and 'To:' combo boxes. (Figure 4) This is an important step because you have to specify the sender and receiver side in order to use the Ozeki SMS Gateway. This particular step is vital in the whole process so make sure that you set up a proper route.
Messages sent to the connection group
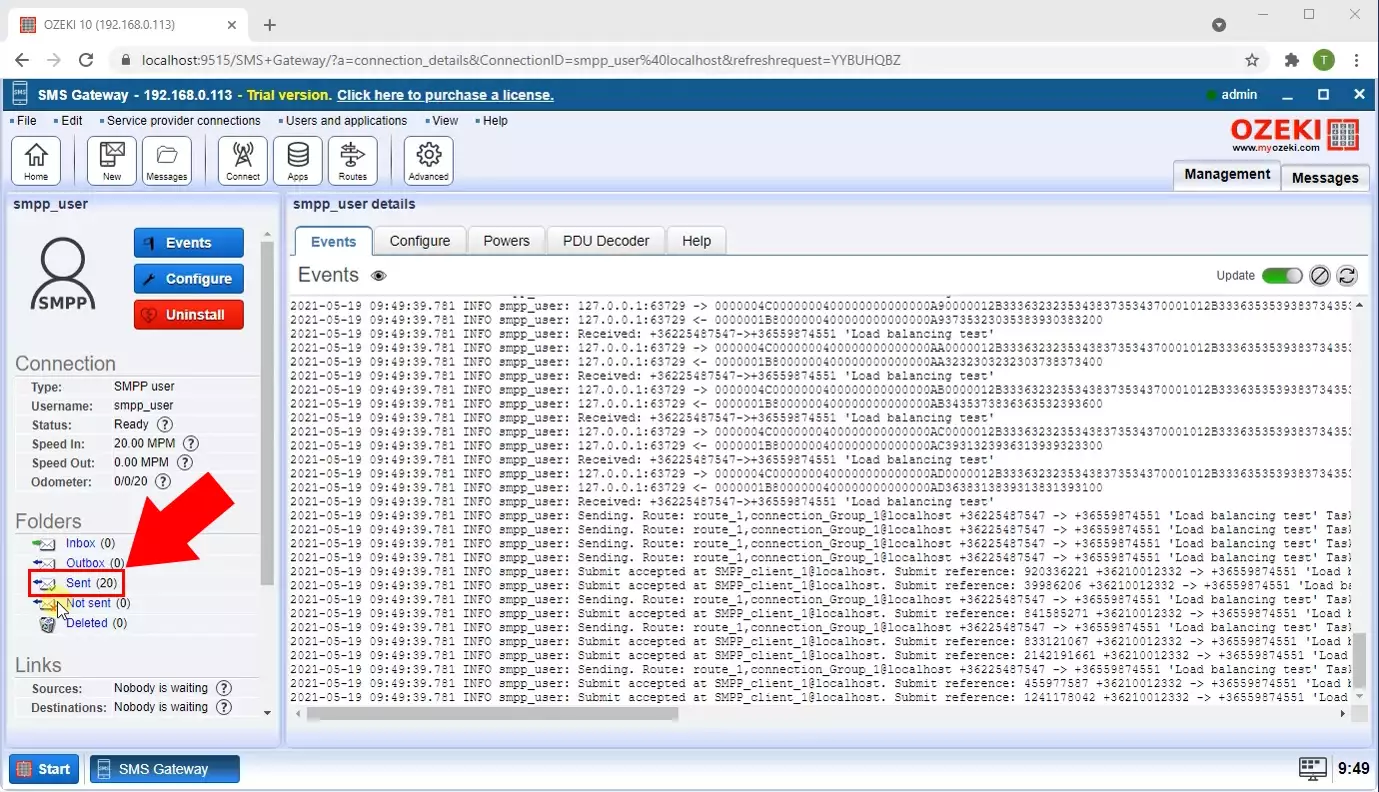
In the left panel of SMPP user detail page, on the Control table, you can find the 'Folders' section. This section has a 'Sent' folder where you can see the number of the messages. It's important to keep record about these details in order to make sure that you don't miss any message. These messages will be distributed by the load balancing solution. (Highlighted in Figure 5)
Messages sent out in the SMPP connection 1
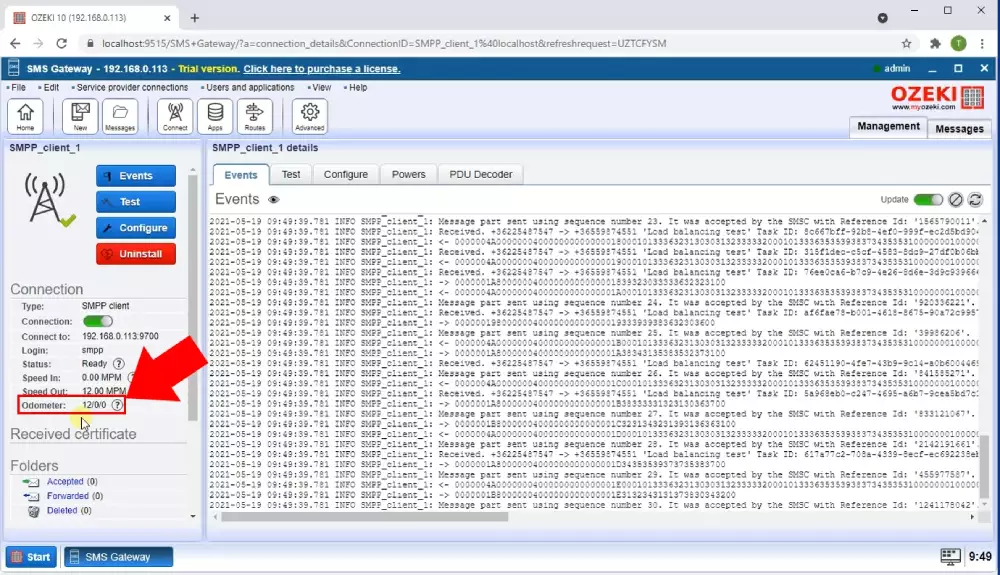
In the SMS Gateway Dashboard, you can observe several connections. To check the amount of sent messages in connection 1, the left panel has to show SMPP_client_1. In the Connection section, you can find the 'Odometer', which shows the number of messages sent out in the SMPP connection 1. This basically shows you the first half of the delivery process. You can use the hint icon if you want to know more about the Odometer. (Shown in Figure 6)
Messages sent out in the SMPP connection 2
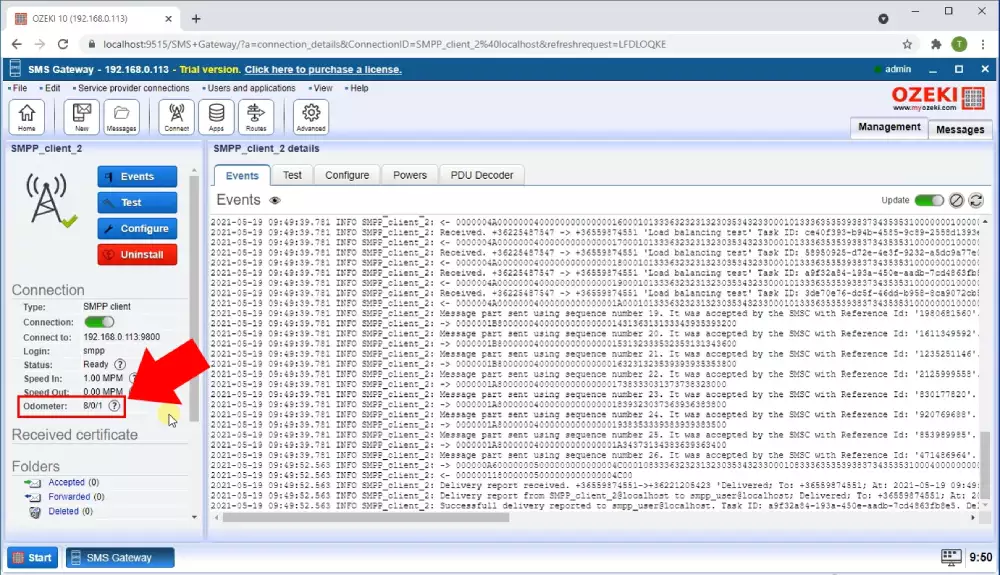
To see the number of sent messages in the second SMPP connection, the left panel has to show SMPP_client_2, you can switch to this in the SMS Gateway Dashboard, right under the SMPP_client_1. This panel also has the Connection section, where you can find the 'Odometer', which shows the number of messages sent out in the SMPP connection 2, so you can compare the two connection and check the method of distribution. (Figure 7)
Summary
As we promised you, this was not a hard procedure, and our explanation was very in-depth. This article highlighted the benefits of Ozeki SMS Gateway, if you want to use a compact and reliable software, you may already know that our solution is the best one for your needs.
SMS load balancing is a great innovation, increases flexibility and scalability, helps the server to organize the SMS sending and to optimize itself in order to keep up its response time. Make sure to collect more information about Ozeki SMS Gateway, we have guides about how to download and install Ozeki SMS Gateway using Ubuntu.
Do not waste any time, download Ozeki SMS Gateway now!
