How to measure the internal speed of your SMS Gateway
This guide will walk you through the process of measuring the internal message processing speed of your Ozeki SMS Gateway using built-in test tools. You’ll set up a simulated SMS environment by creating a tester connection and a tester user, connect them through a routing rule, and send SMS messages to monitor throughput and performance metrics. This is a useful method for stress testing, performance tuning, and benchmarking your system’s capabilities.
What is Ozeki SMS Gateway?
Ozeki SMS Gateway is a high-performance software system designed to enable automated SMS communication between computer applications and mobile networks. With Ozeki SMS Gateway, businesses can send and receive SMS messages reliably and at scale, whether for alerts, notifications, marketing, or customer service.
How to measure the SMS Gateway's internal speed (Quick Steps)
- Setup a tester connection + Enable logging
- Setup a tester user + Enable logging
- Create a route to forward sms from tester user to tester connection
- Send 10 SMS through the system and check the logs
- Send 1000 SMS to measure the performance
Setup a tester connection (Video tutorial)
This video will show you how to install and configure a tester connection, which will simulate message delivery without using a real mobile network.
Step 1 - Add new connection
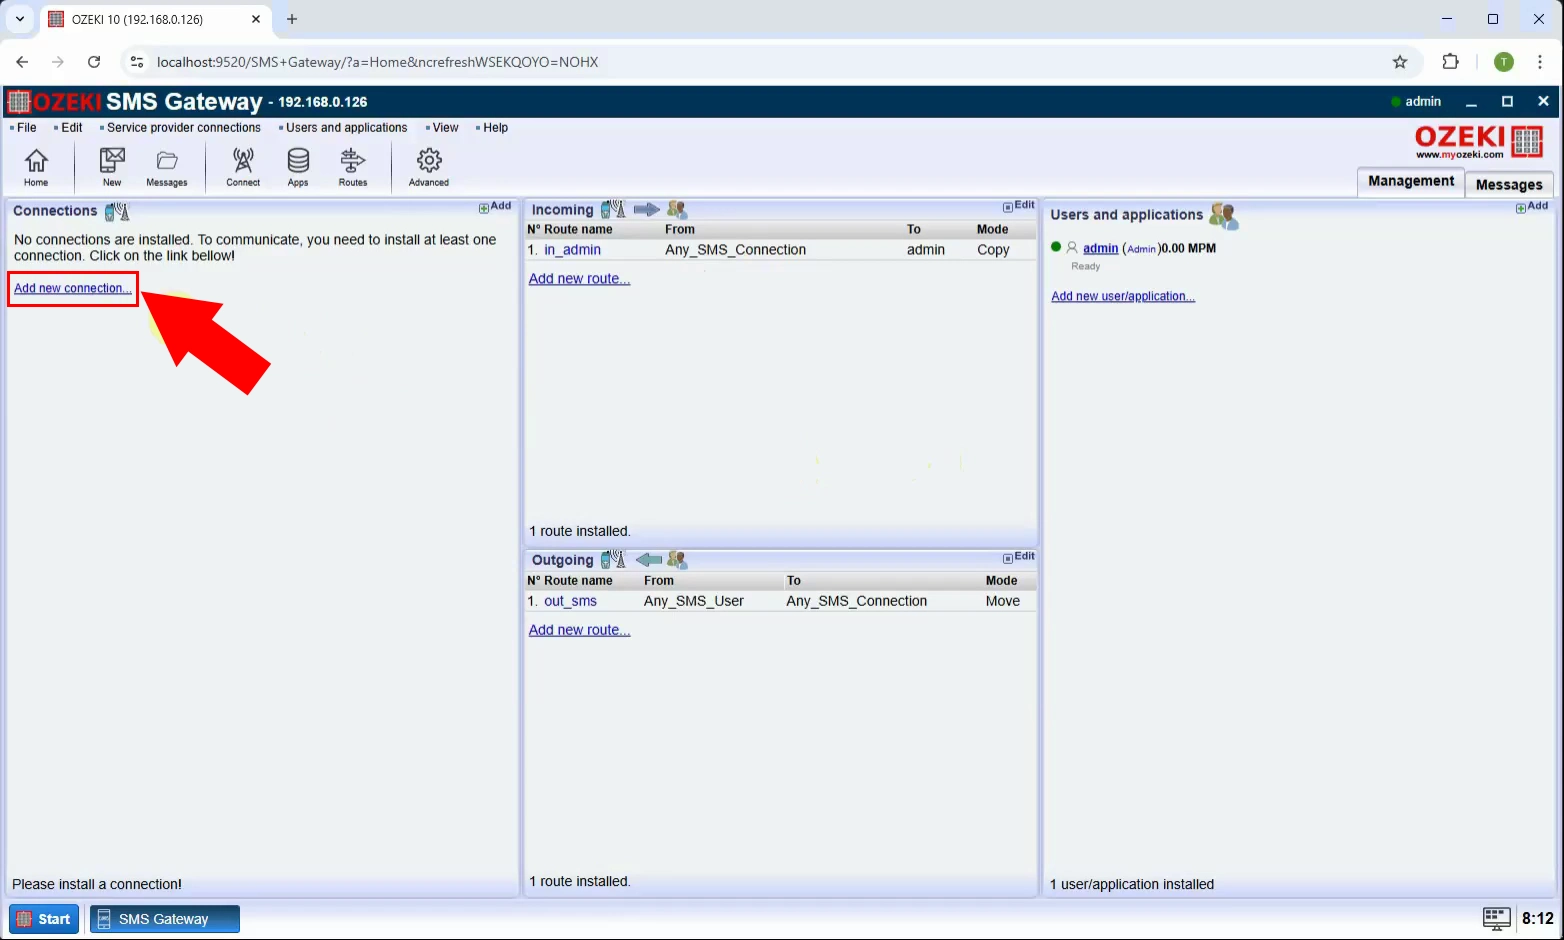
In the left-side menu, under the Connections section, click on Add new connection... to begin setting up a new SMS route (Figure 1).
Step 2 - Install tester connection
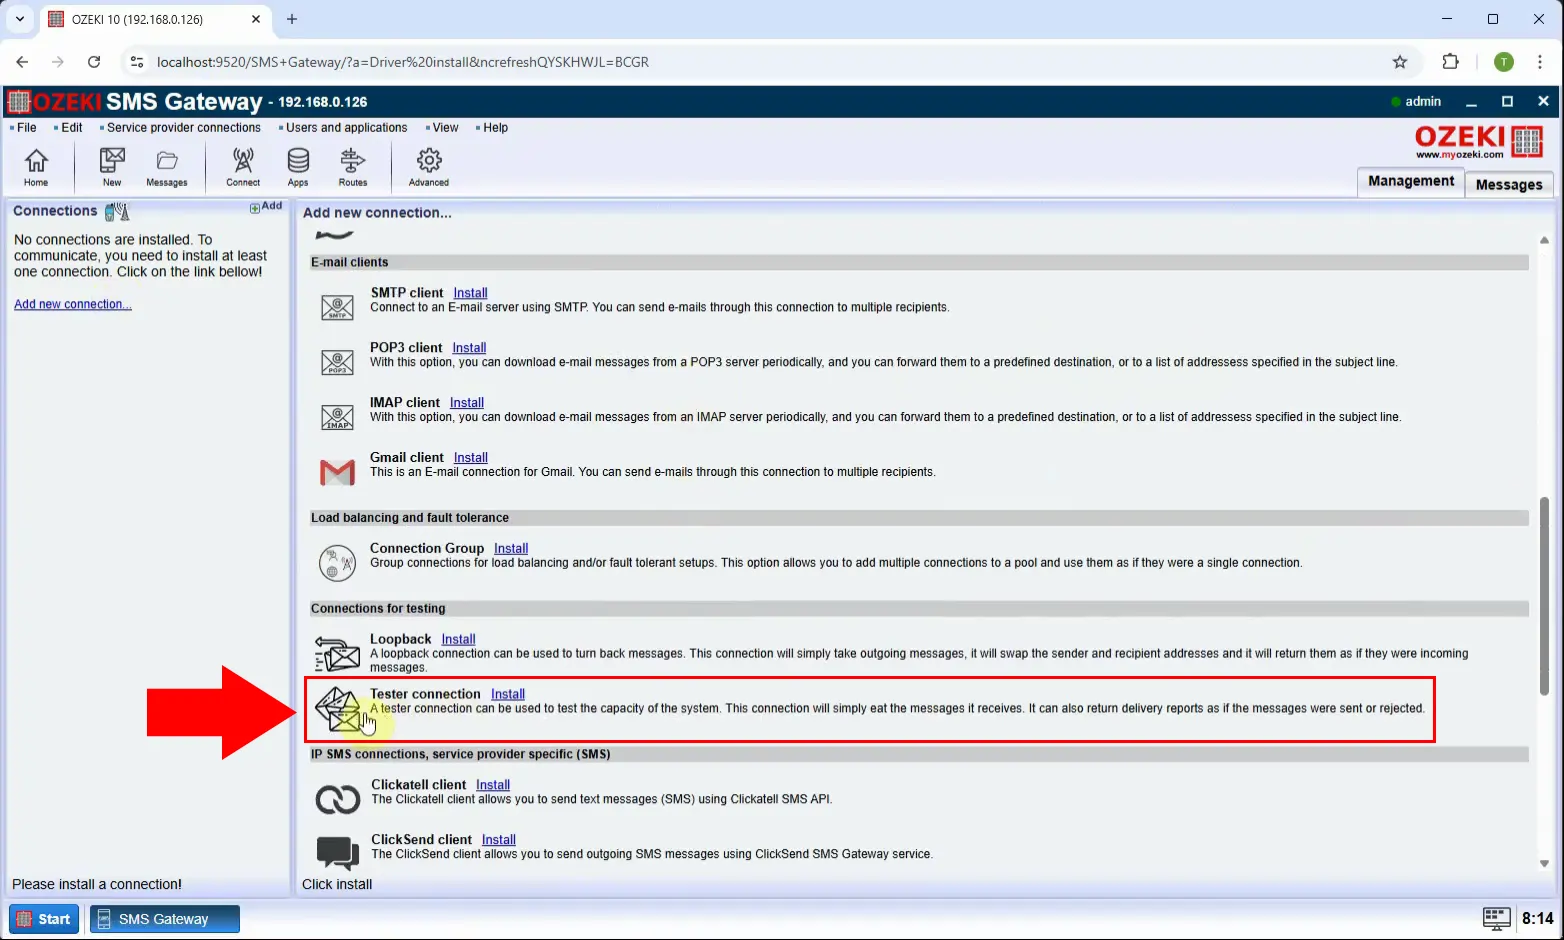
From the list, find "Tester connection", select it, and click Install (Figure 2).
Step 3 - Define connection name
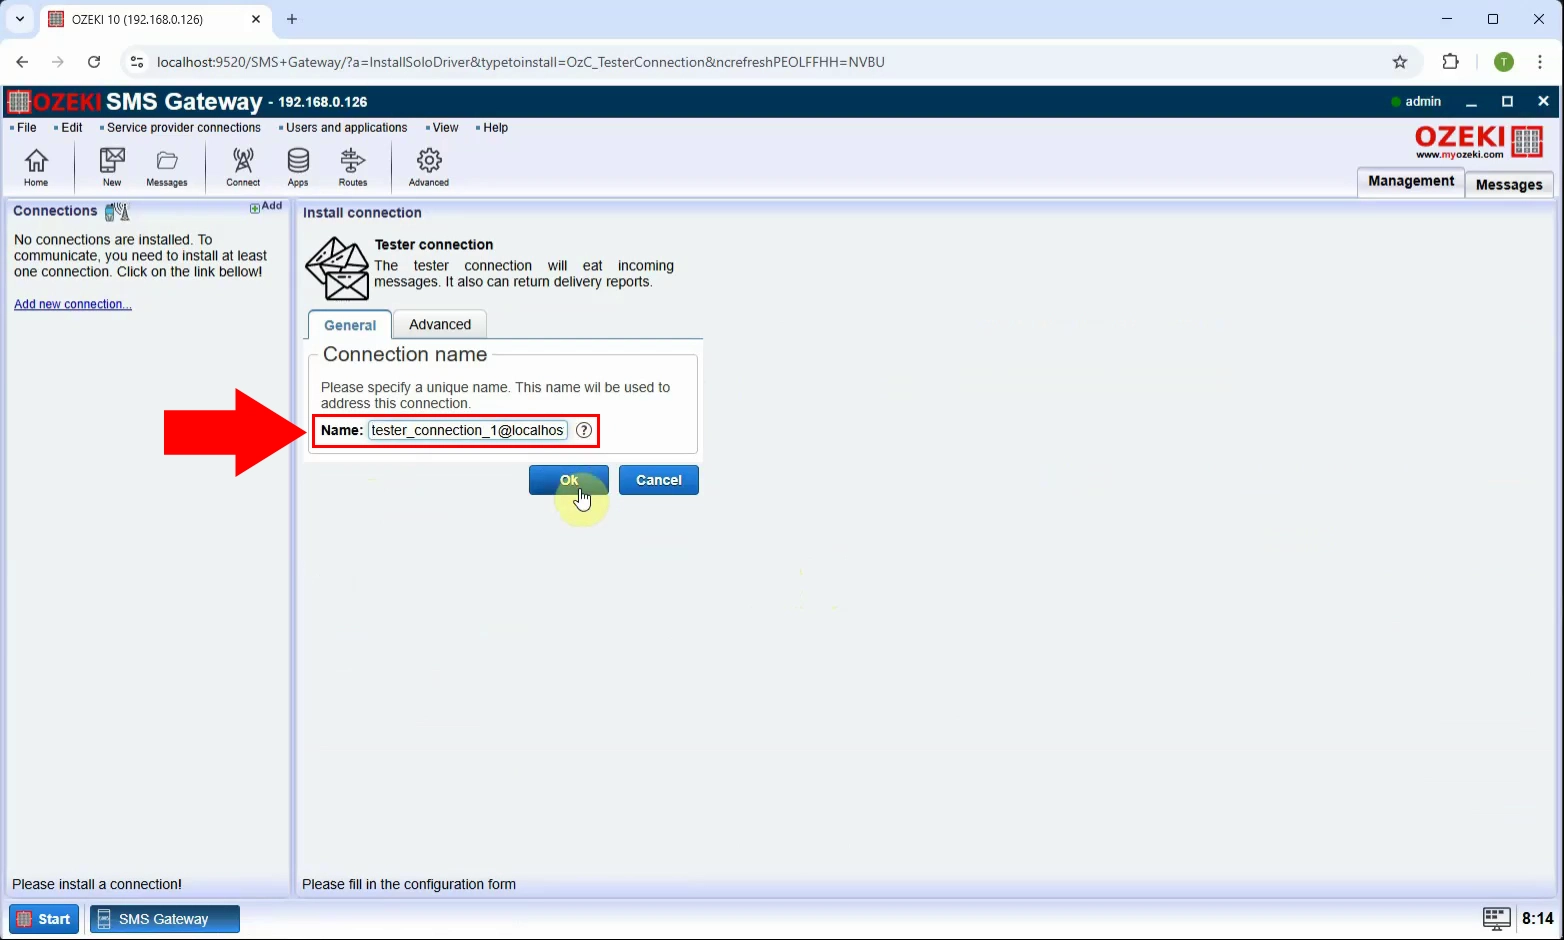
Give your tester connection a name (tester_connection_1) so it’s easy to identify later in logs and routing (Figure 3).
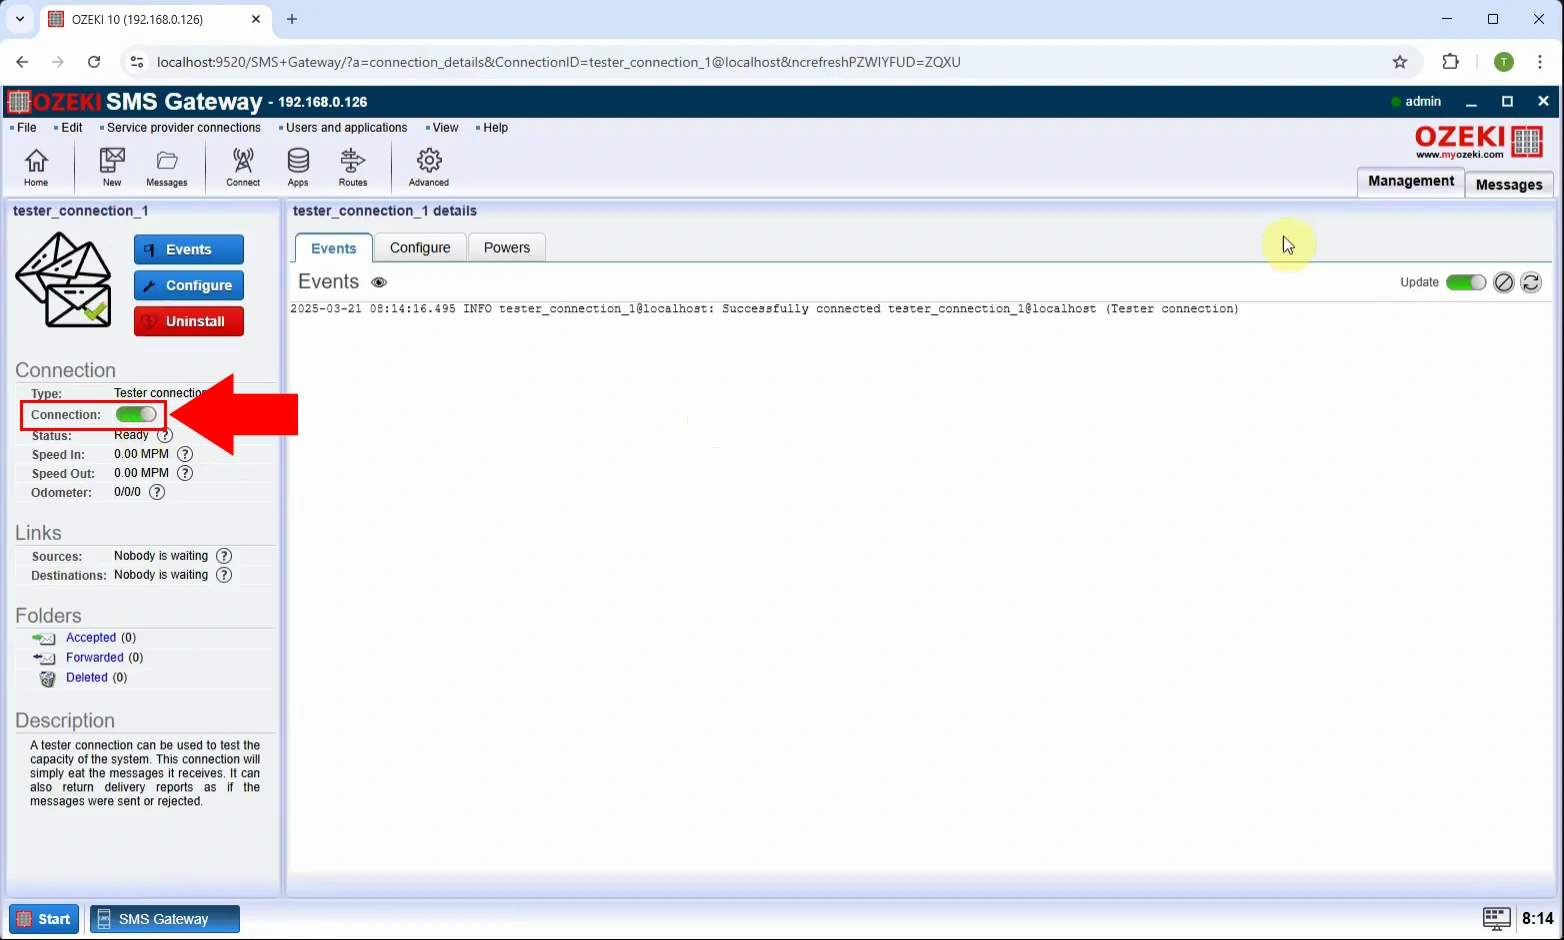
Step 4 - Enable connection
Activate the tester connection by toggling the switch to green. This prepares it to receive test messages (Figure 4).
Setup a tester user (Video tutorial)
This section walks you through creating a tester user, which will act as the source of your test SMS messages.
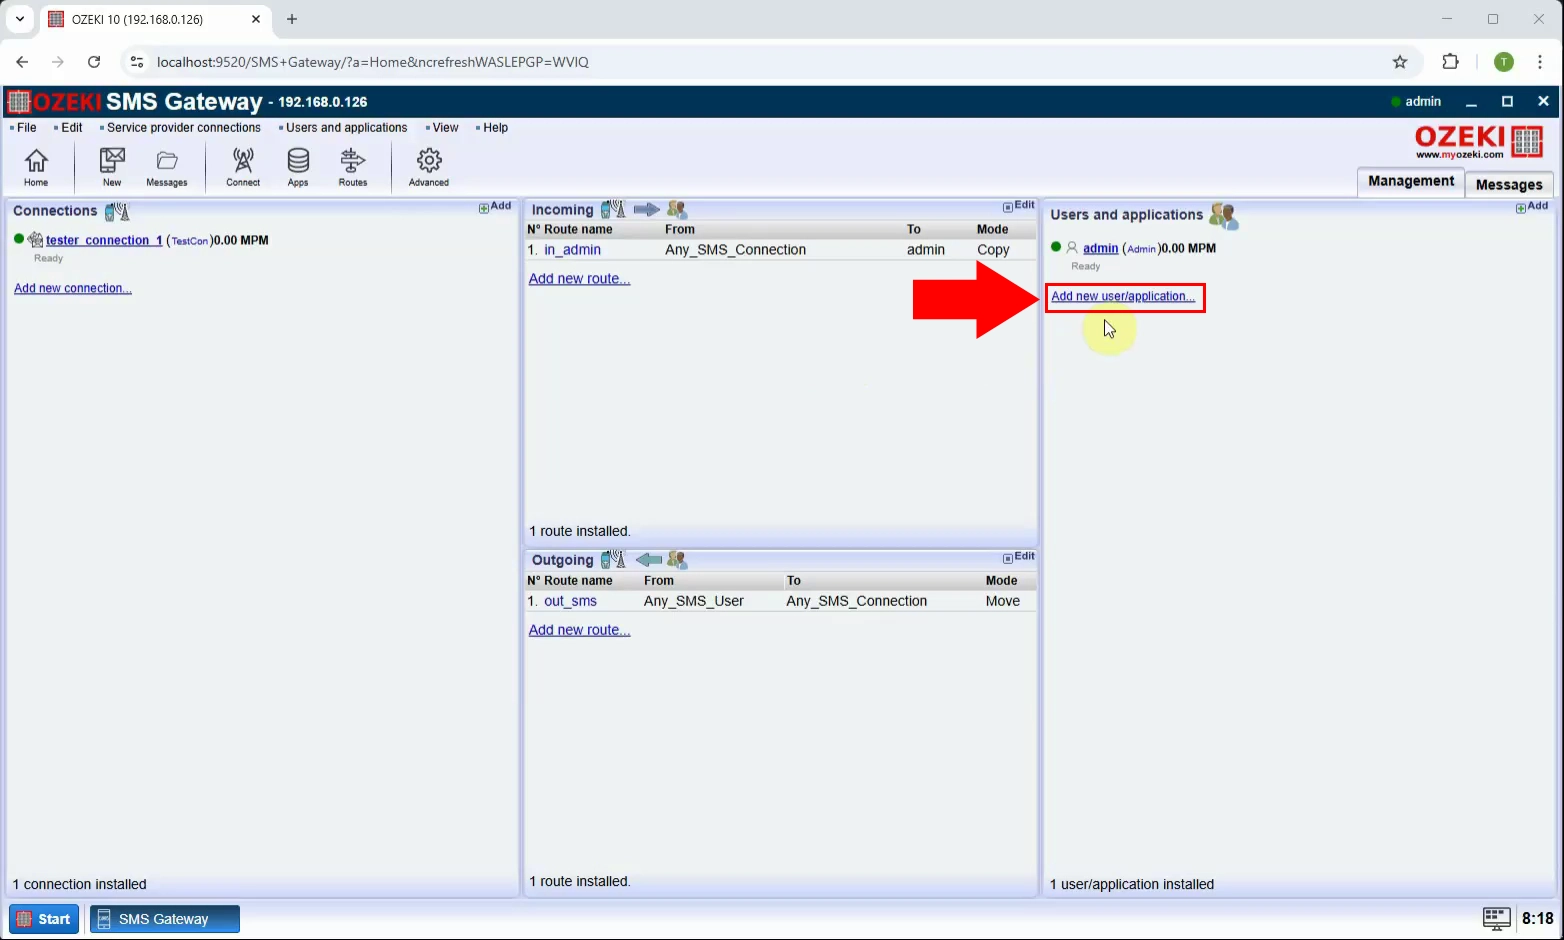
Step 5 - Add new user
In the Users and Applications panel, click "Add new user/application…" (Figure 5).
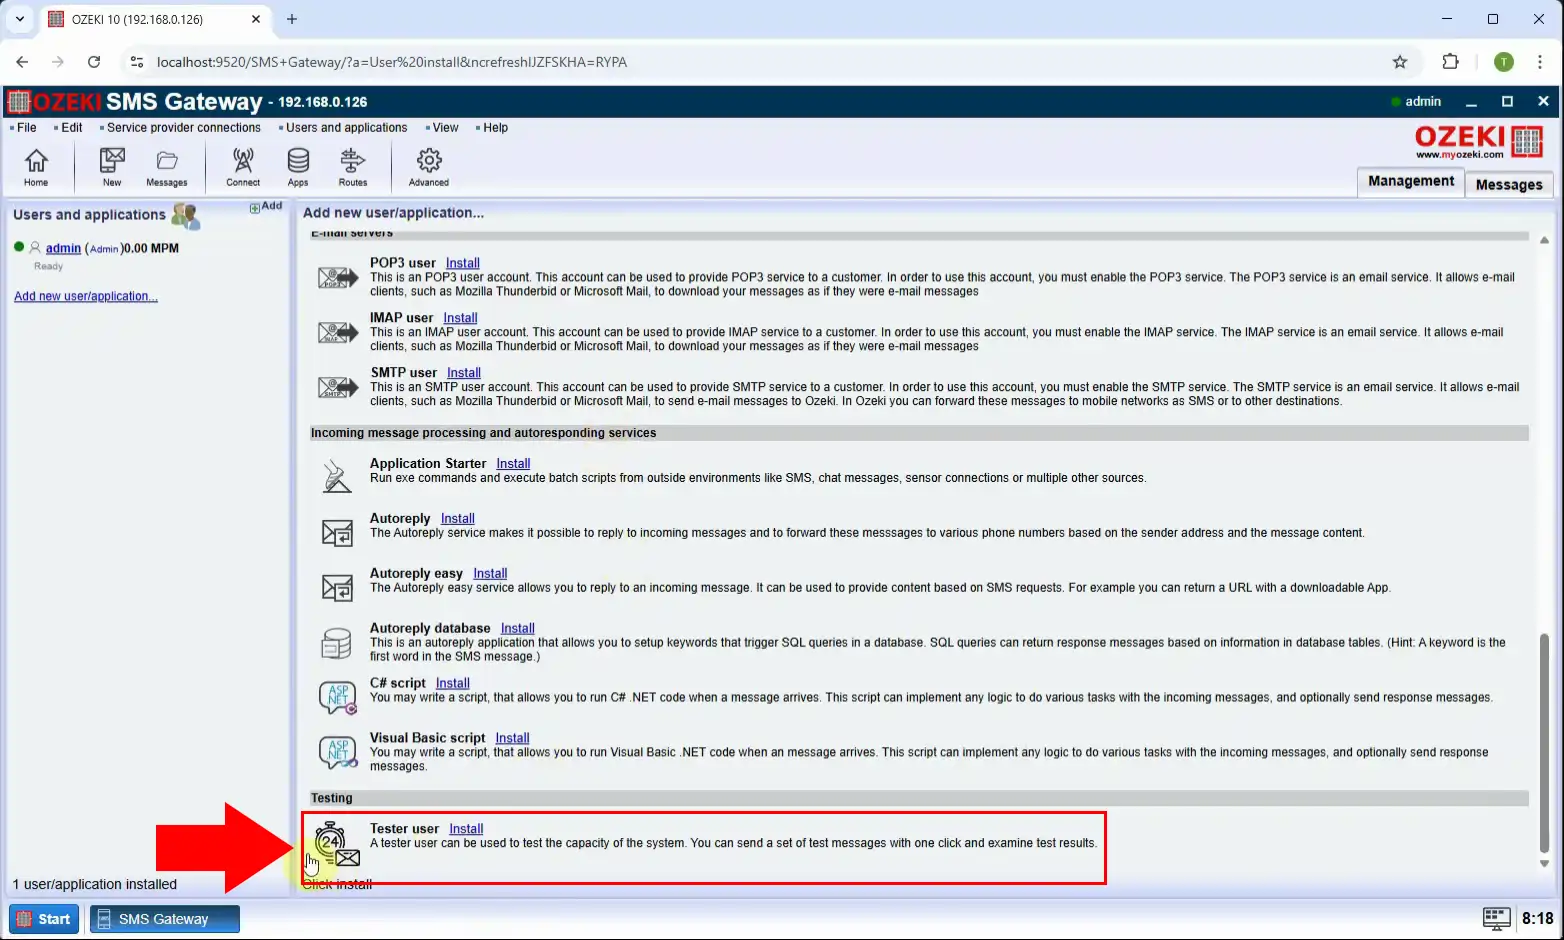
Step 6 - Install tester user
Choose the "Tester user" from the list of user types and click Install. This will simulate message input (Figure 6).
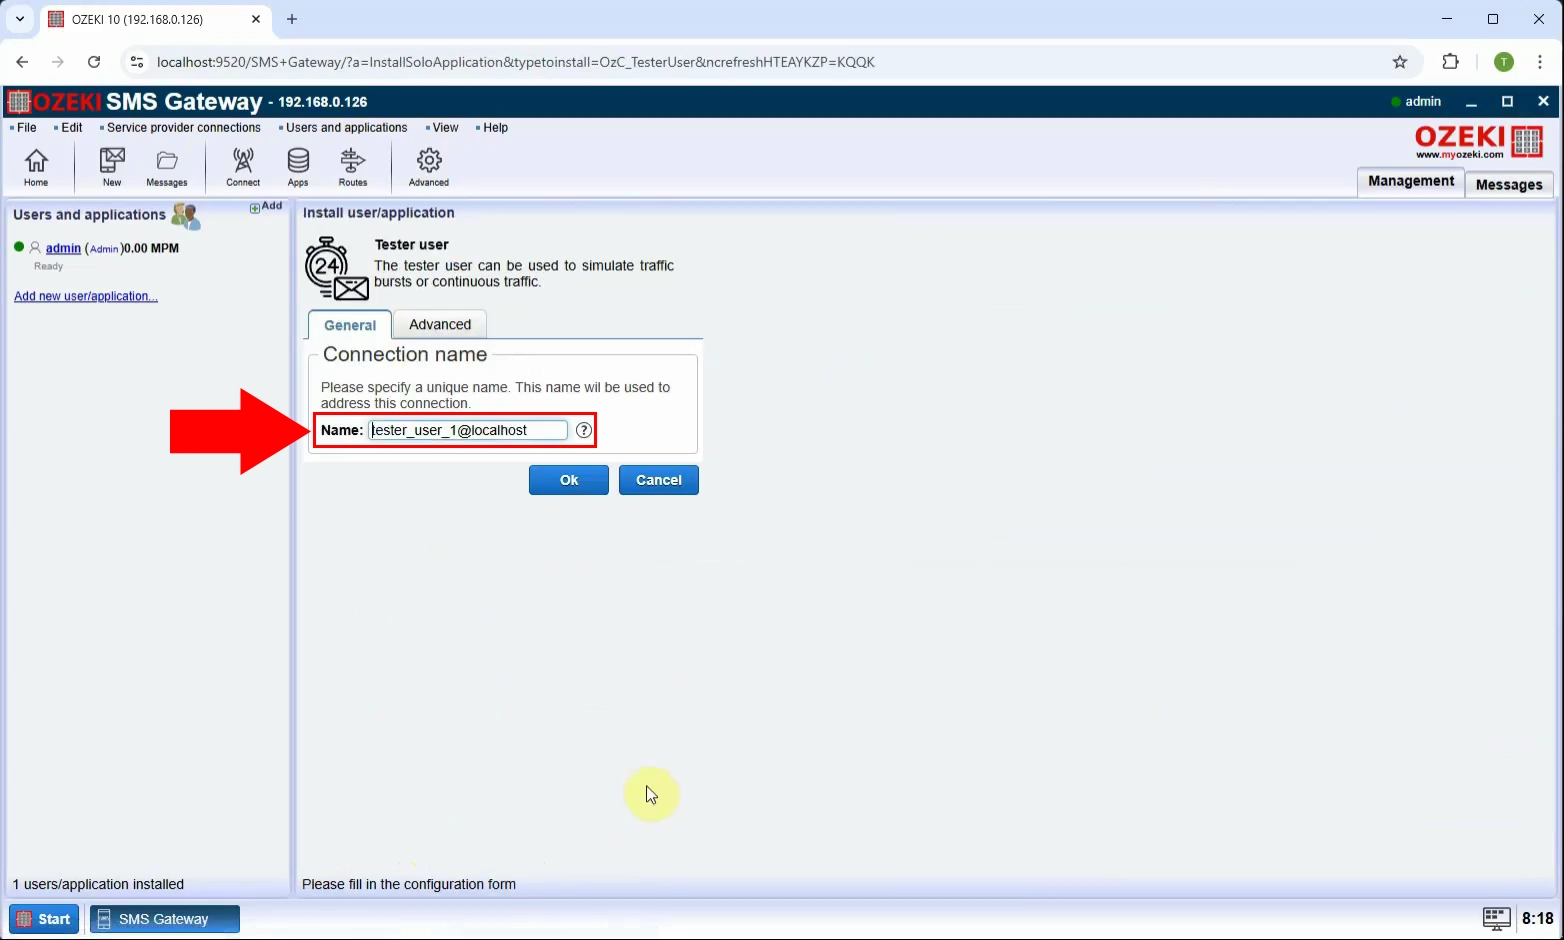
Step 7 - Define tester user name
Assign a clear and identifiable name to your tester user (tester_user_1) (Figure 7).
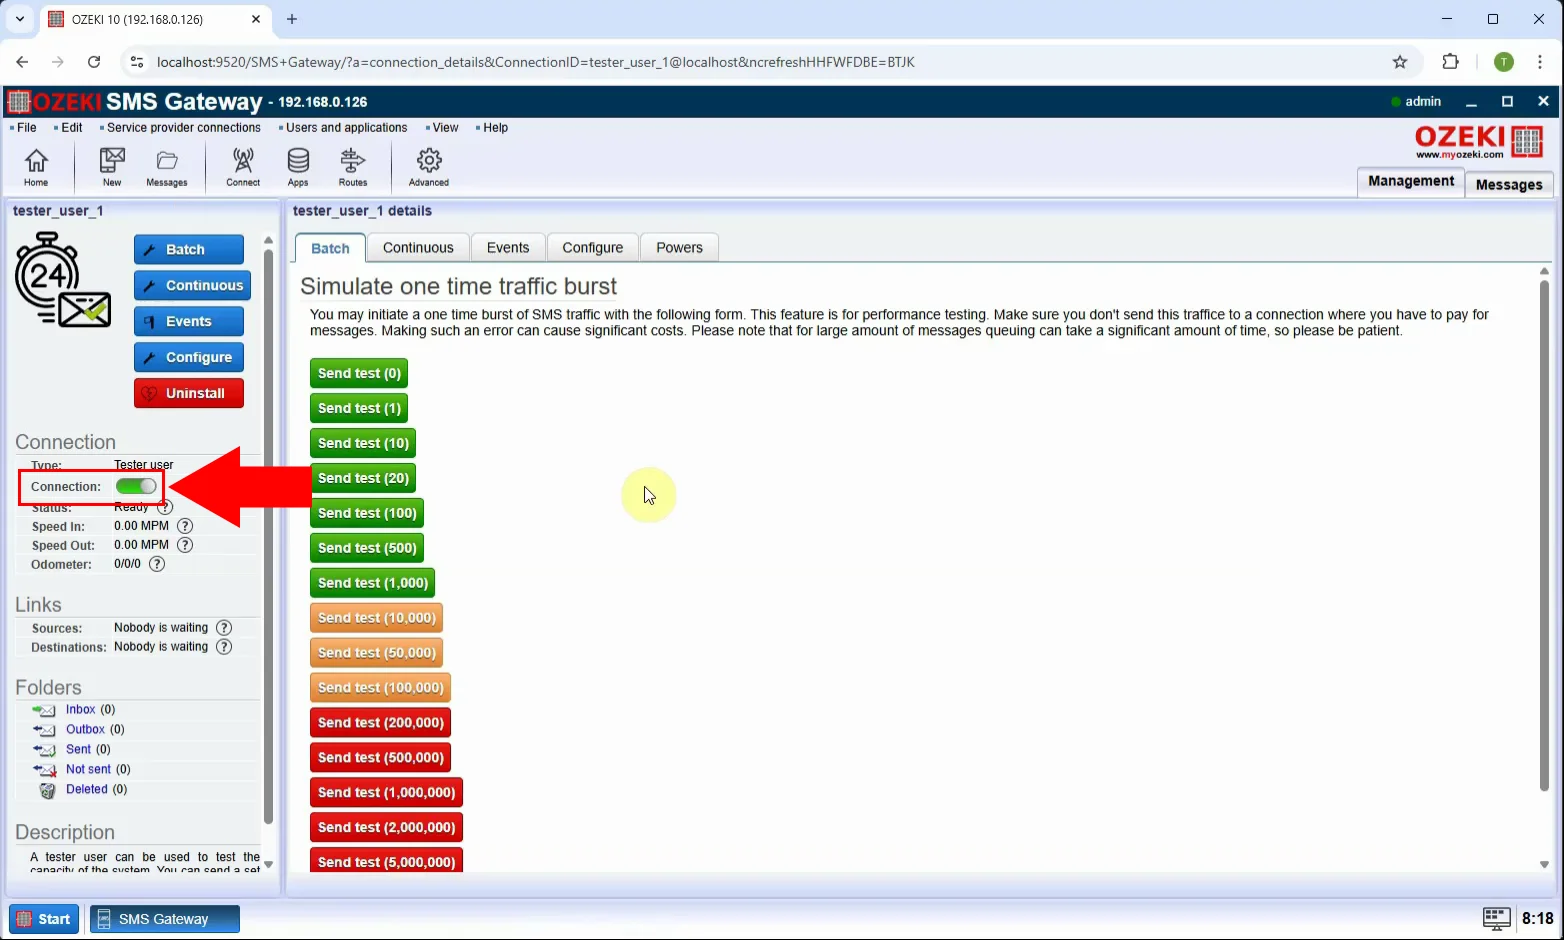
Step 8 - Enable tester user
Activate the tester user by switching it to the online state (Figure 8).
Create a route (Video tutorial)
Now, you’ll route messages from the tester user to the tester connection, enabling internal message flow.
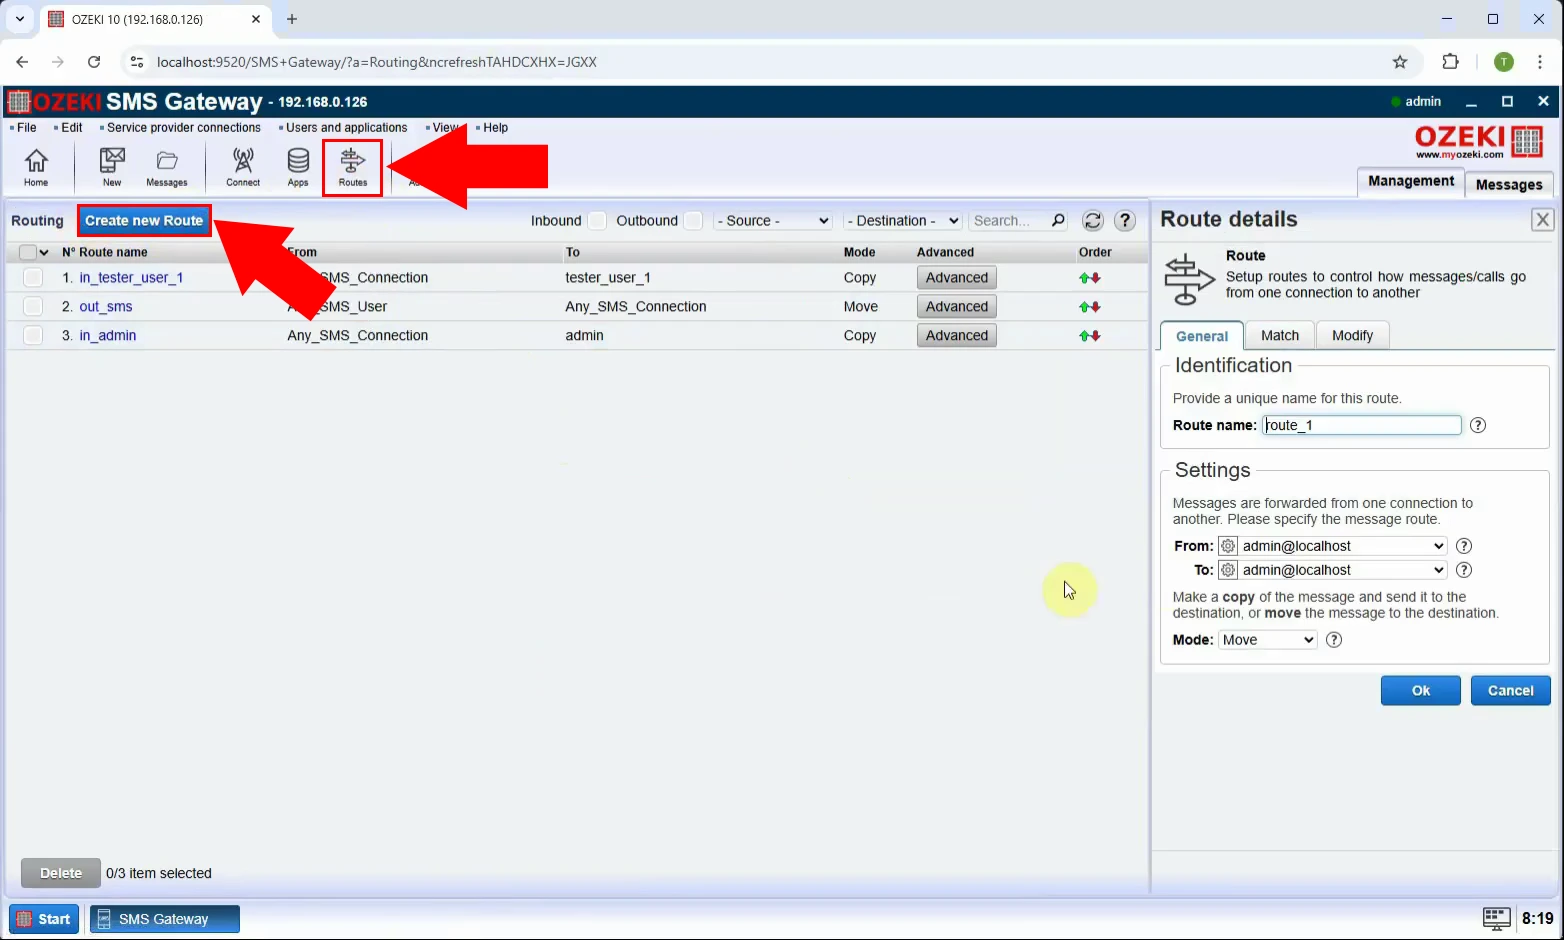
Step 9 - Create new route
Click on the "Routes" button at the top menu, then select "Create new Route" (Figure 9).
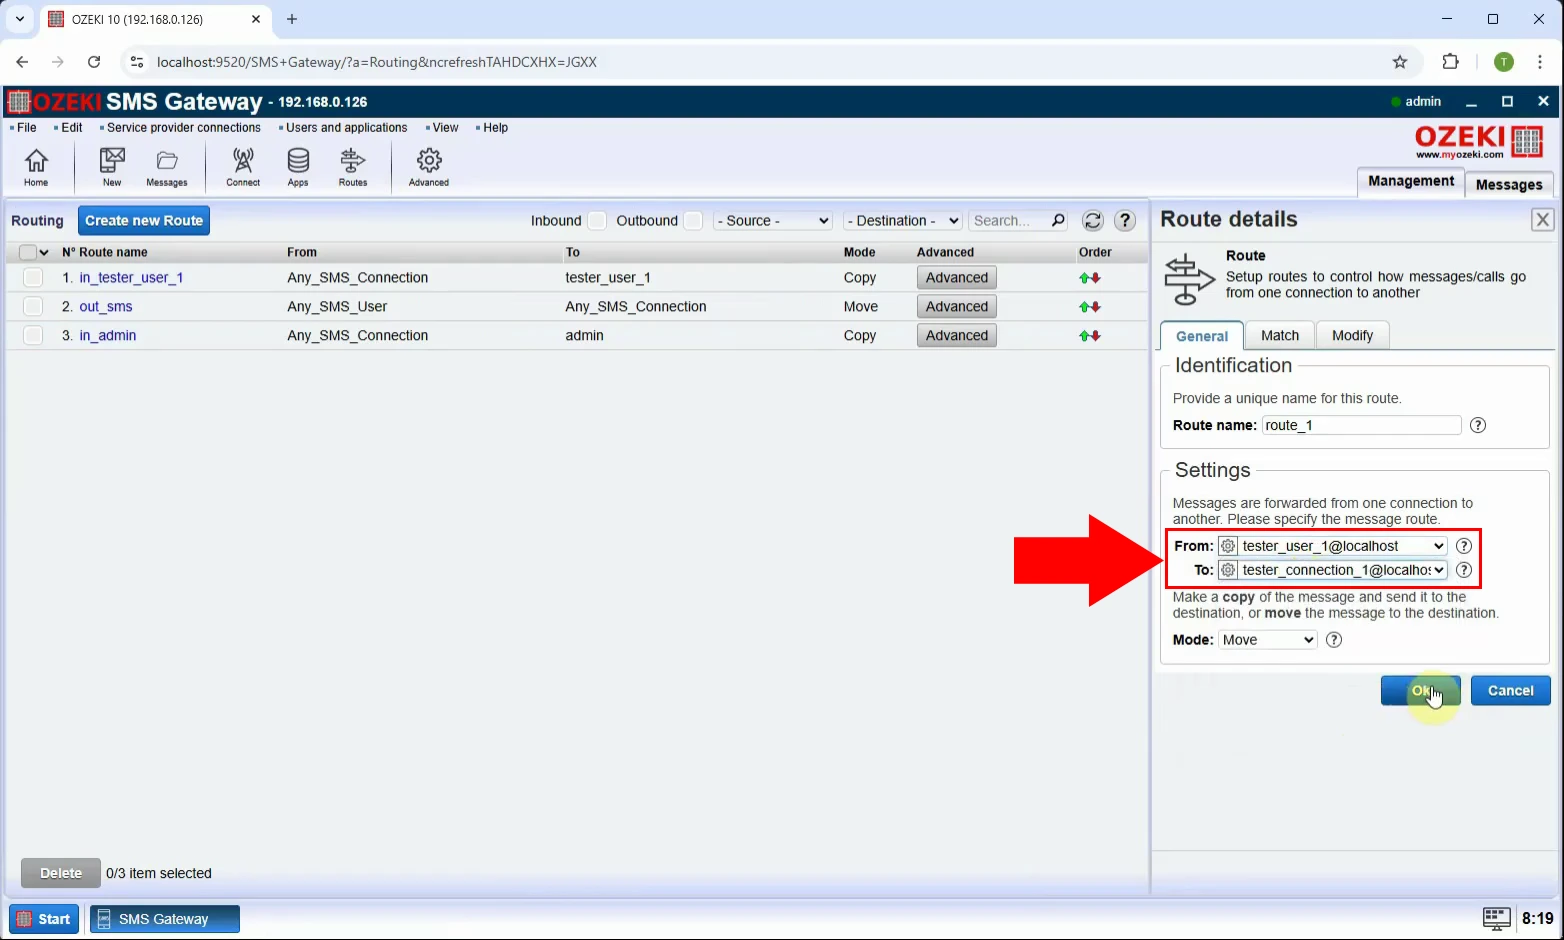
Step 10 - Configure from/to connection
In the routing setup panel, select your tester user as the sender and your tester connection as the receiver (Figure 10).
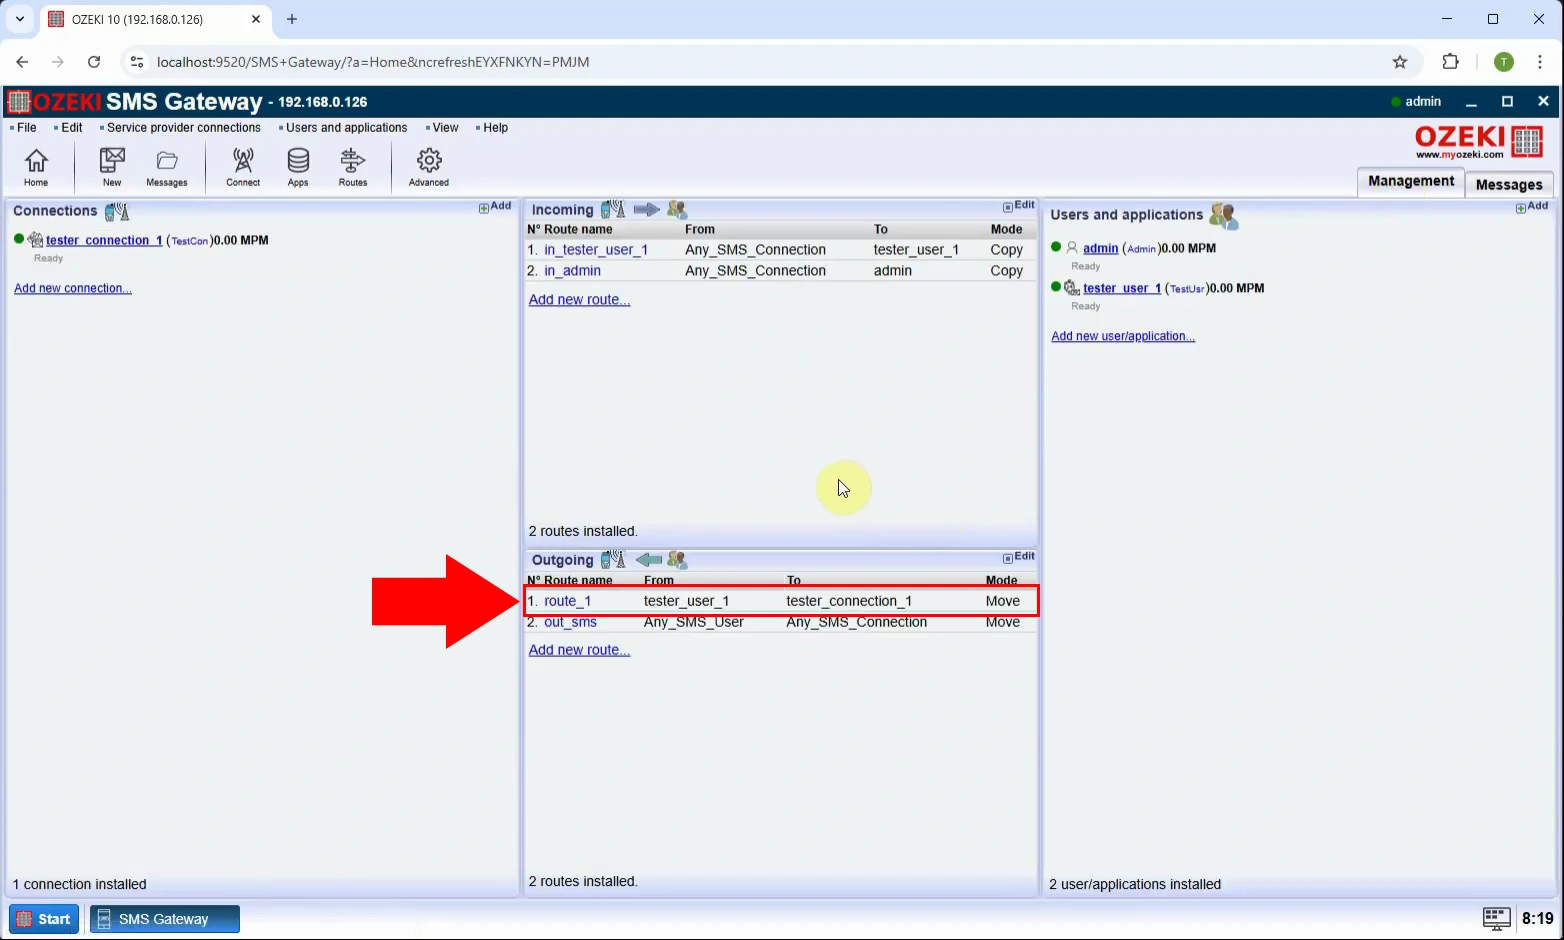
Step 11 - Outbound route created
Confirm the route has been created and listed. This ensures messages will be forwarded correctly (Figure 11).
Configuration test (Send 10 SMS) (Video tutorial)
Before proceeding to a full performance test, it's important to validate that your routing setup is working correctly. In this test, you’ll use the tester user interface to send 10 SMS messages through the configured route to ensure the messages are properly delivered by the system.
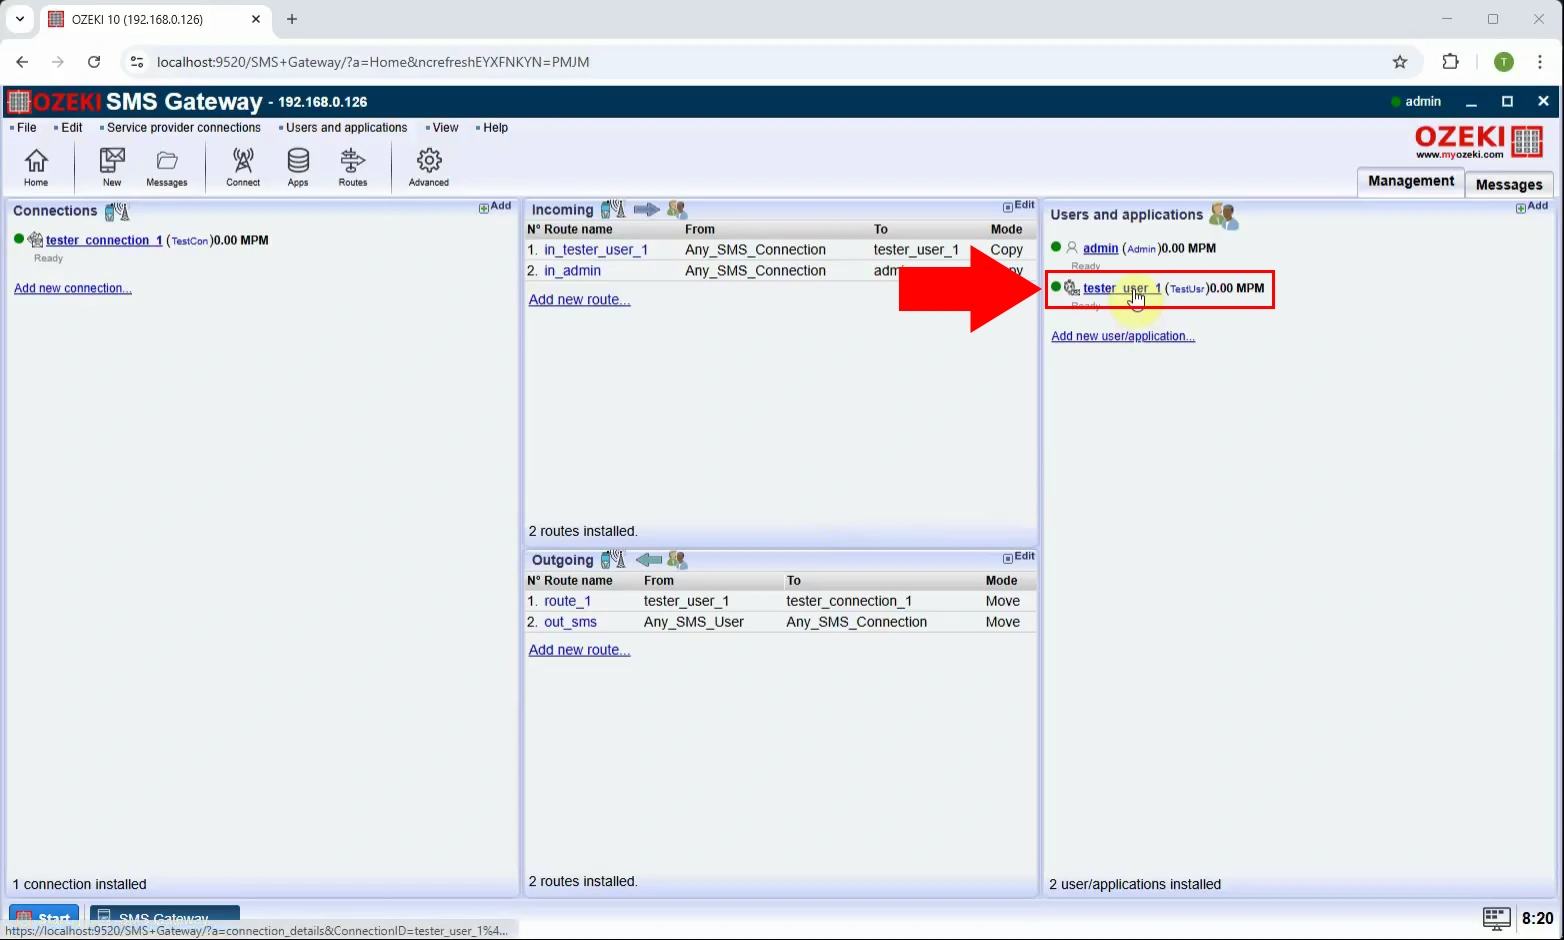
Step 12 - Open tester user
Navigate to the Users and Applications section and click on the tester user you previously created. This will open its control panel where you can manually send messages and monitor activity (Figure 12).
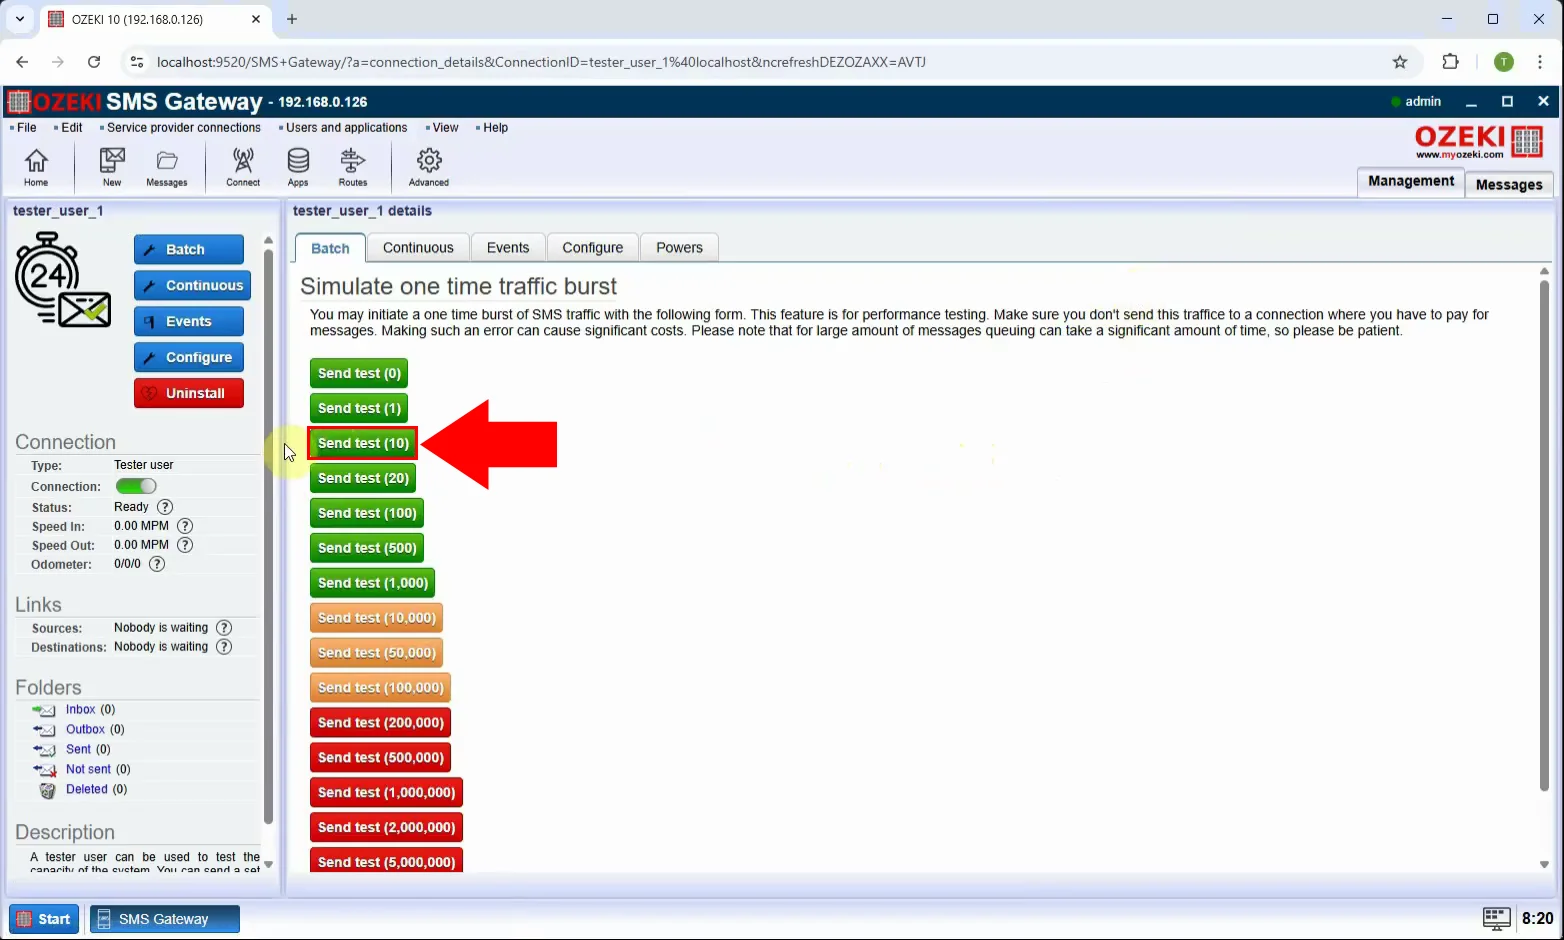
Step 13 - Send test messages
You can send a different number of messages on the page, for testing let's send 10 sms by pressing the green "Send test (10)" button (Figure 13).
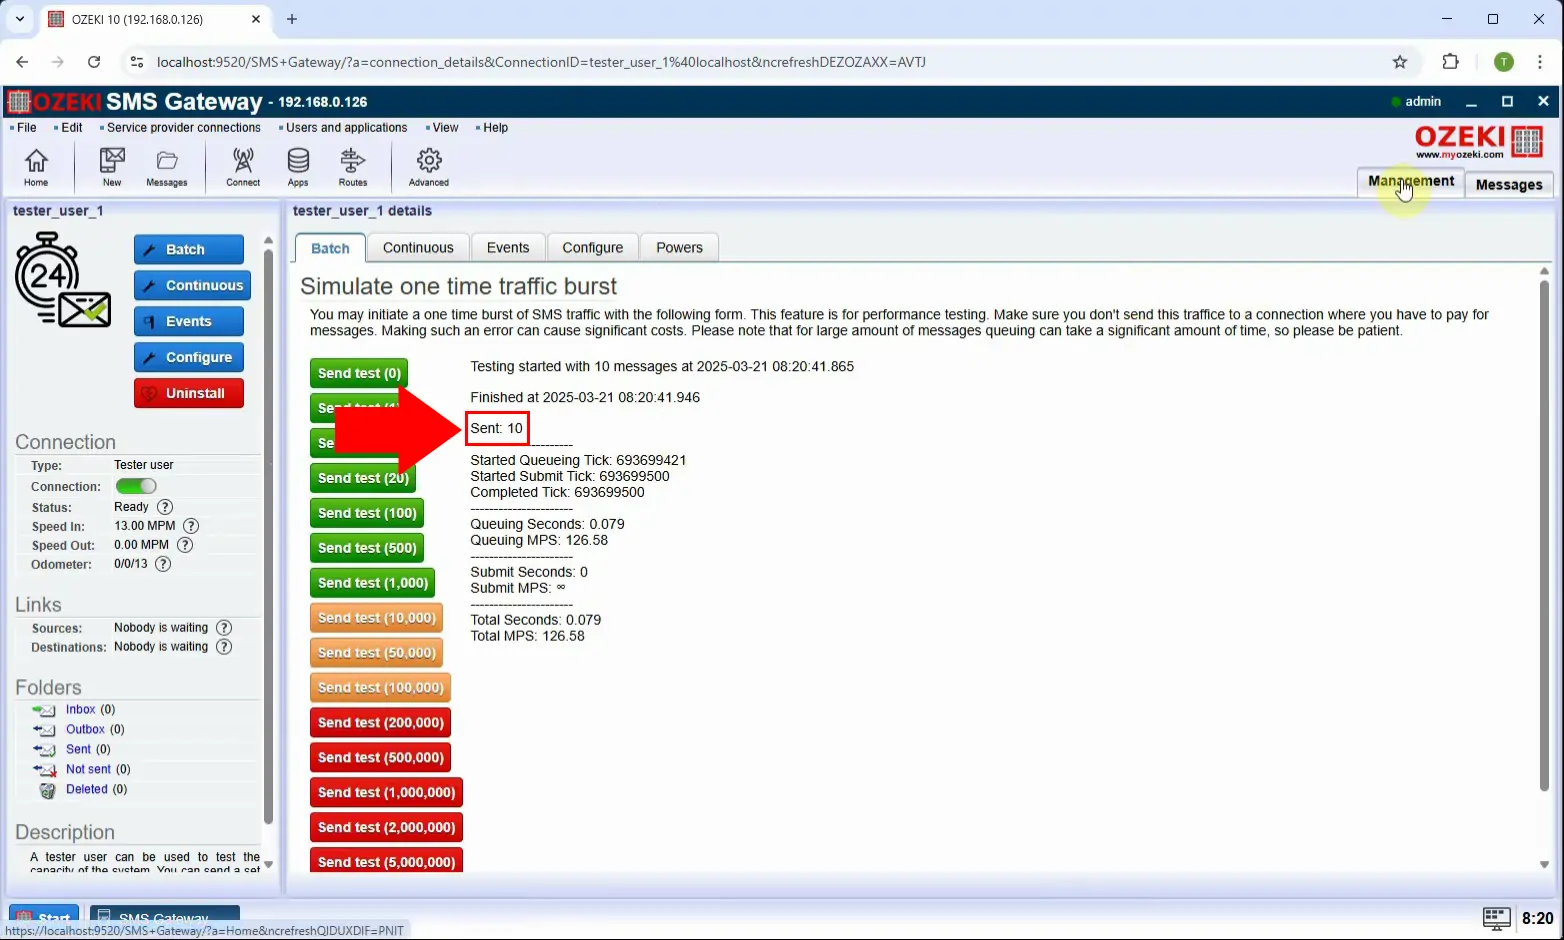
Step 14 - Send 10 test messages
Verify the message count and confirm all were sent from the user interface (Figure 14).
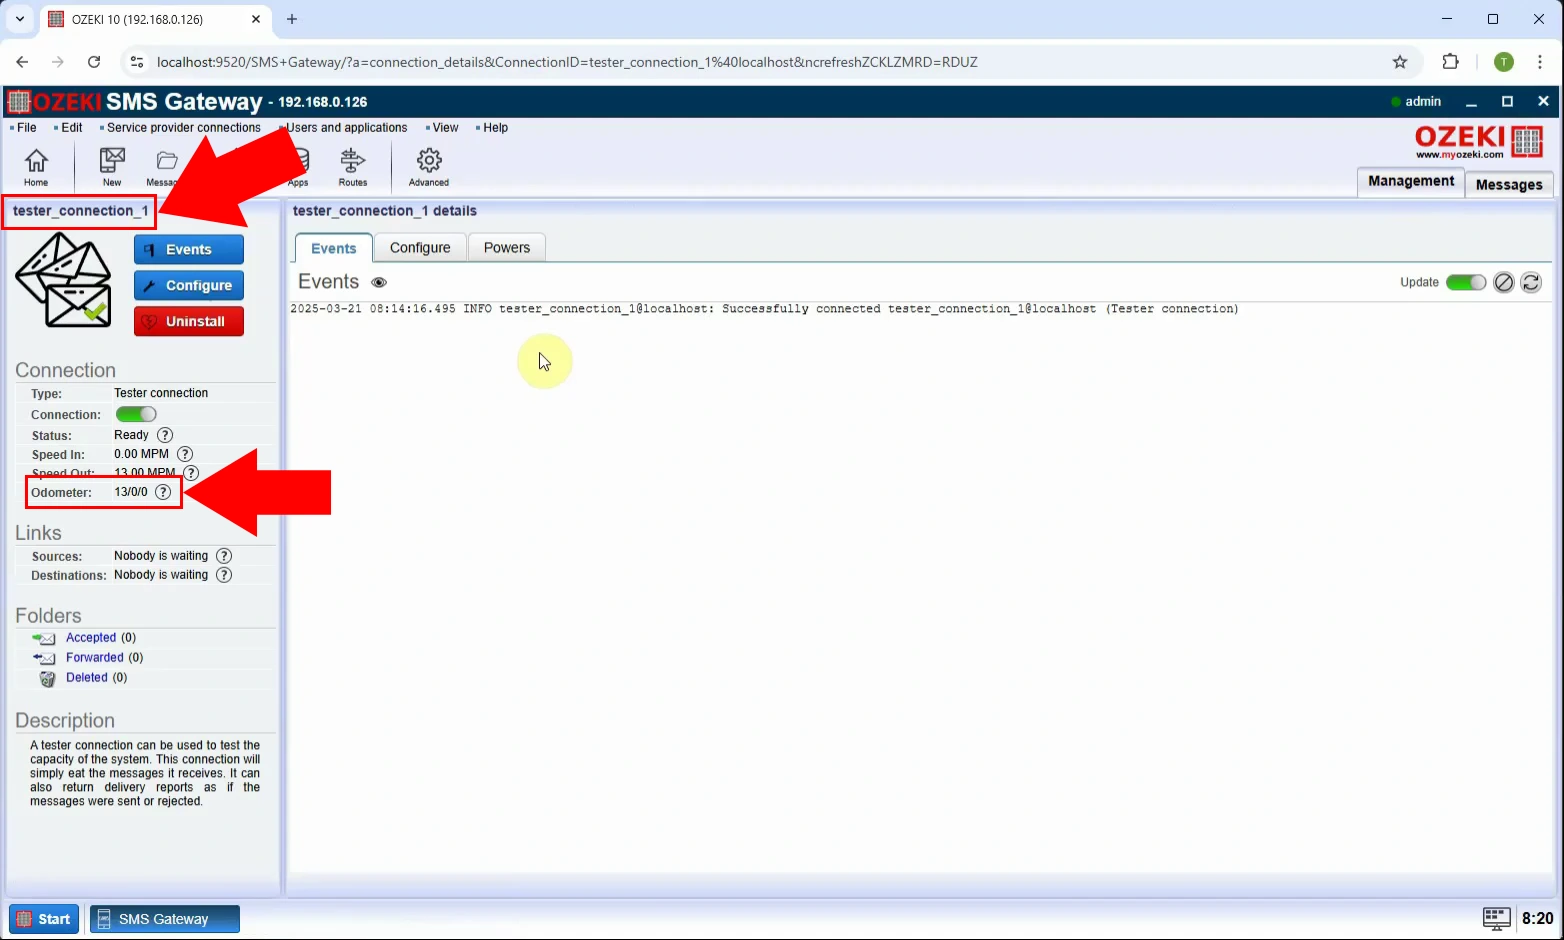
Step 15 - Tester connection received messages
In the Events tab you can see the log and the odometer, which is important for tracking the number of SMS sent/received/forwarded (Figure 15).
Performance test (Send 1000 SMS) (Video tutorial)
Now that the routing is verified, it’s time to measure the internal throughput of your SMS Gateway under a heavier load. Sending 1,000 messages allows you to test how efficiently the system processes and routes high-volume traffic, giving insight into system capacity and performance metrics.
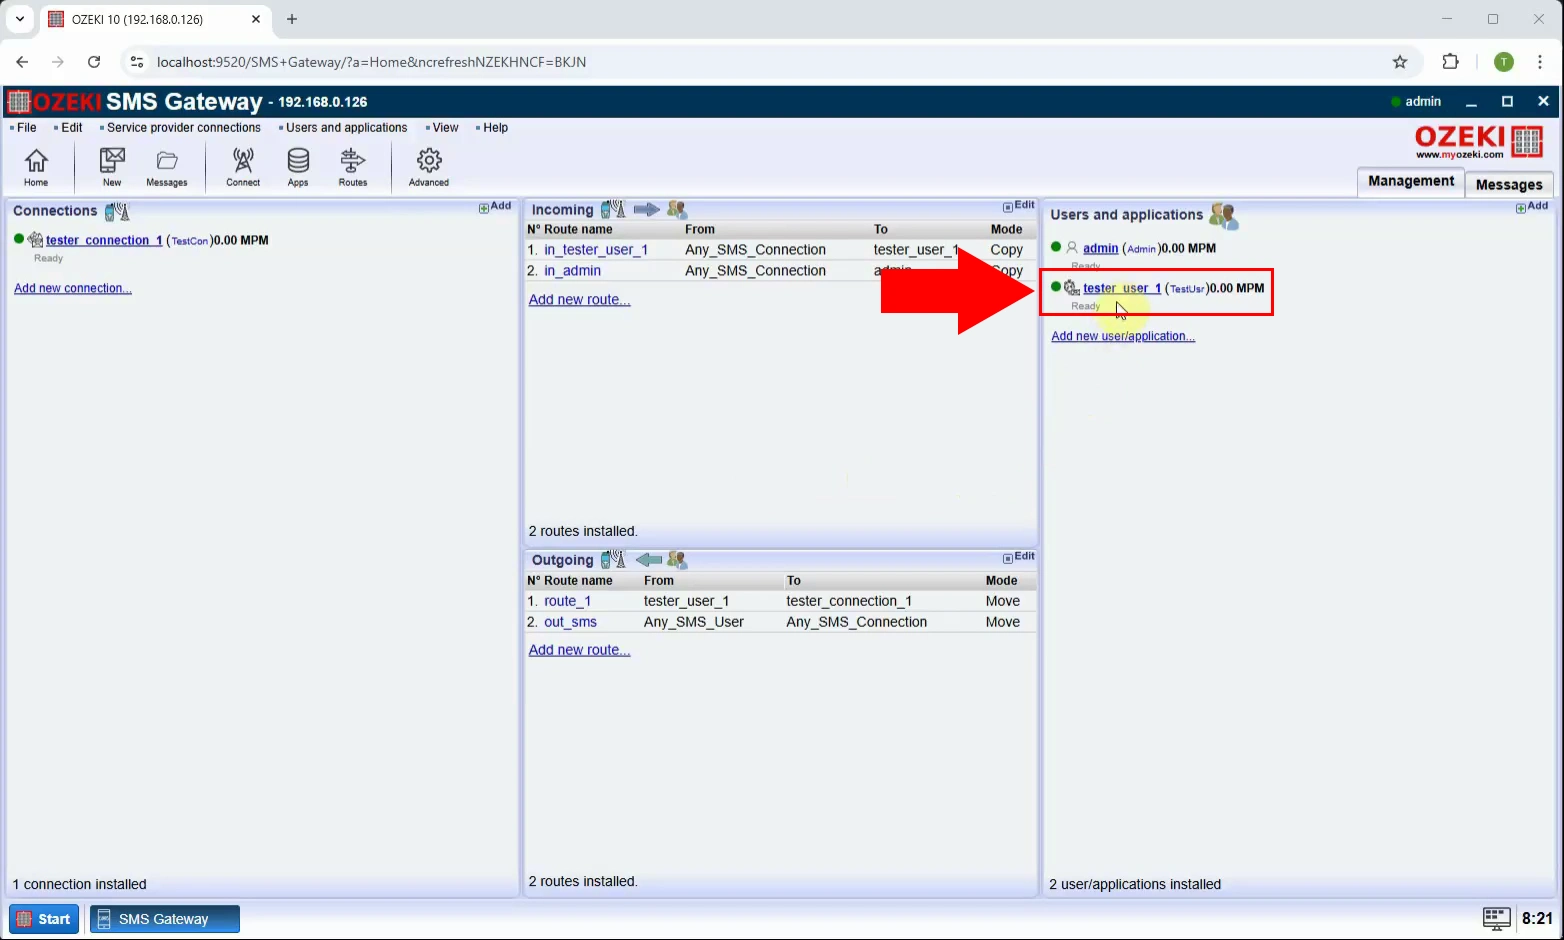
Step 16 - Open tester user
Navigate to the Users and Applications section and click on the tester user you previously created. This will open its control panel where you can manually send messages and monitor activity (Figure 16).
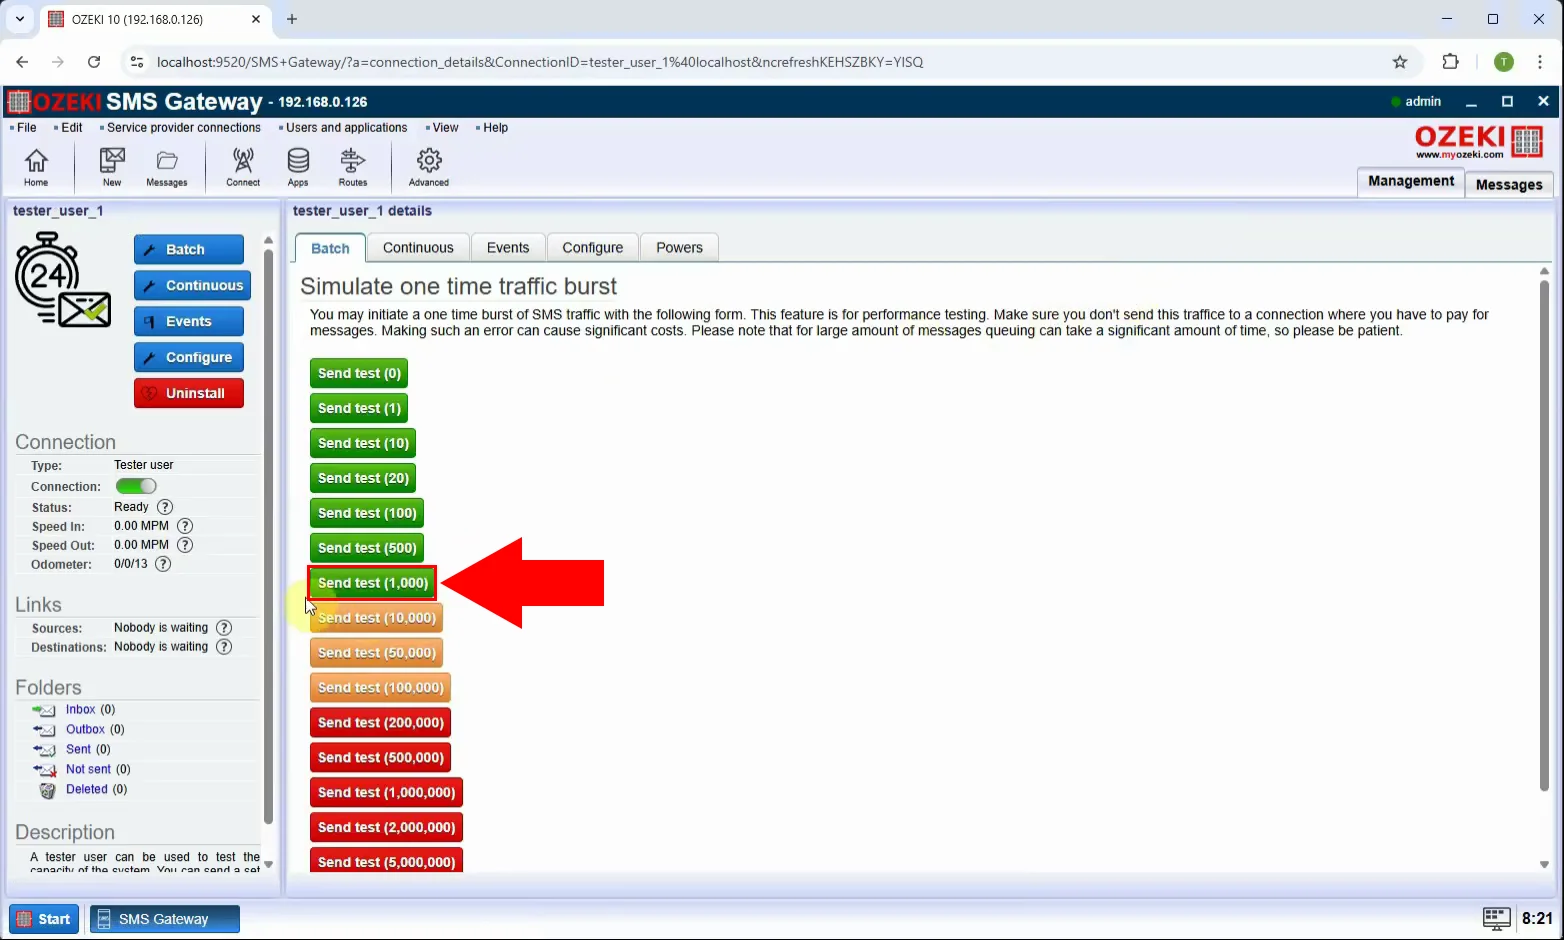
Step 17 - Send 1000 test messages
Now send a message with a larger number, send 1000 SMS by pressing the green "Send test (1000)" button (Figure 17).
Step 18 - Messages sent
Verify the message count and confirm all were sent from the user interface (Figure 18).
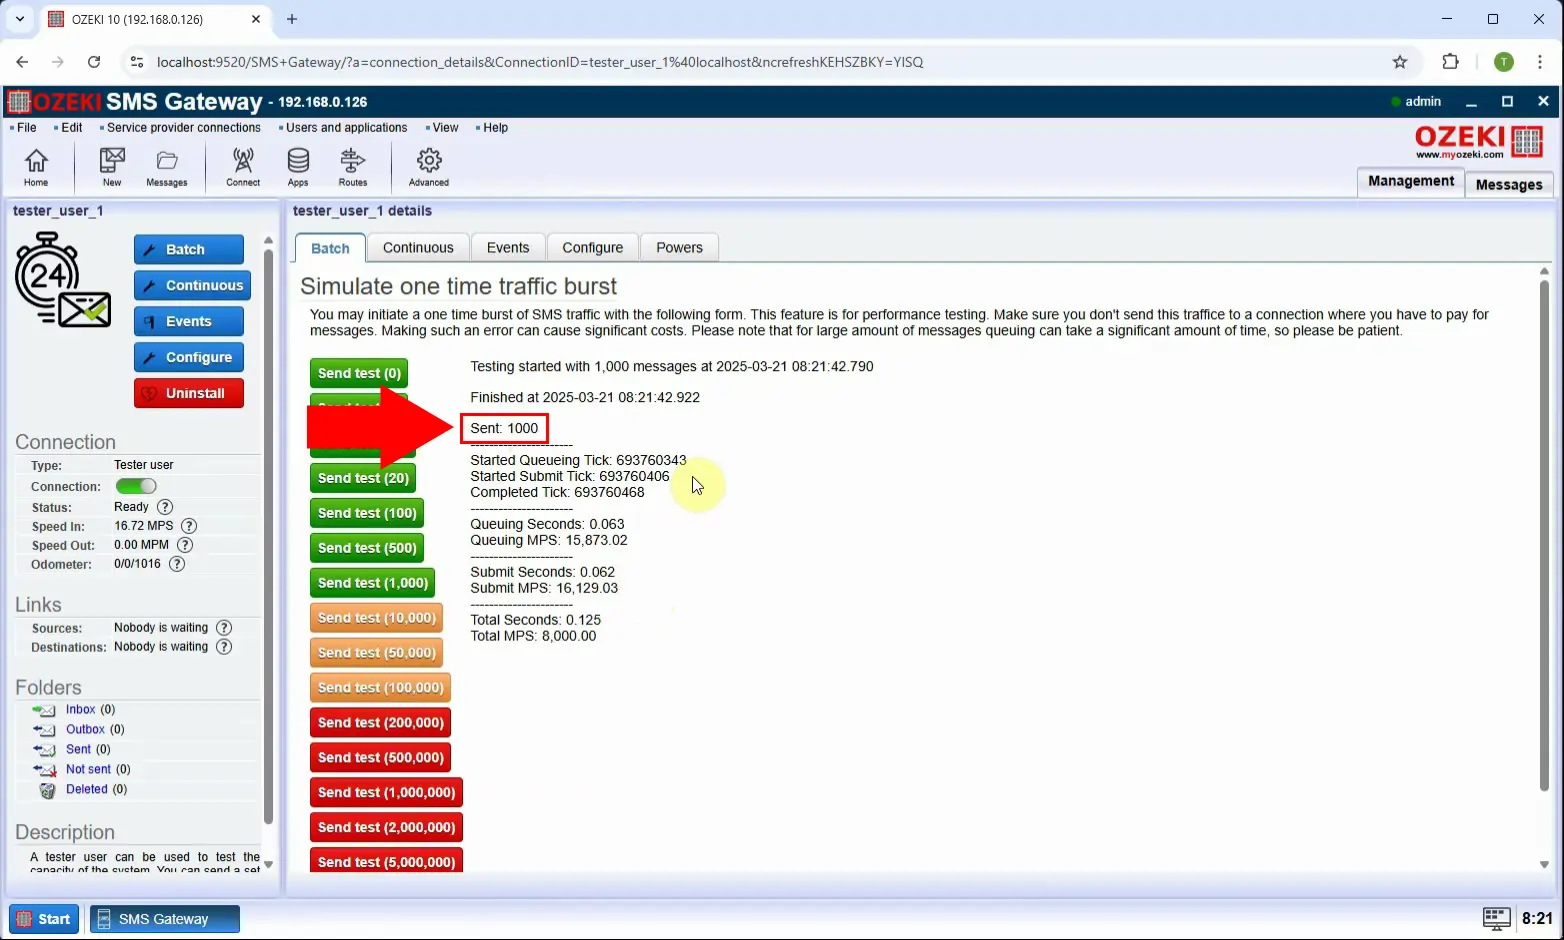
Step 19 - Sent speed reported
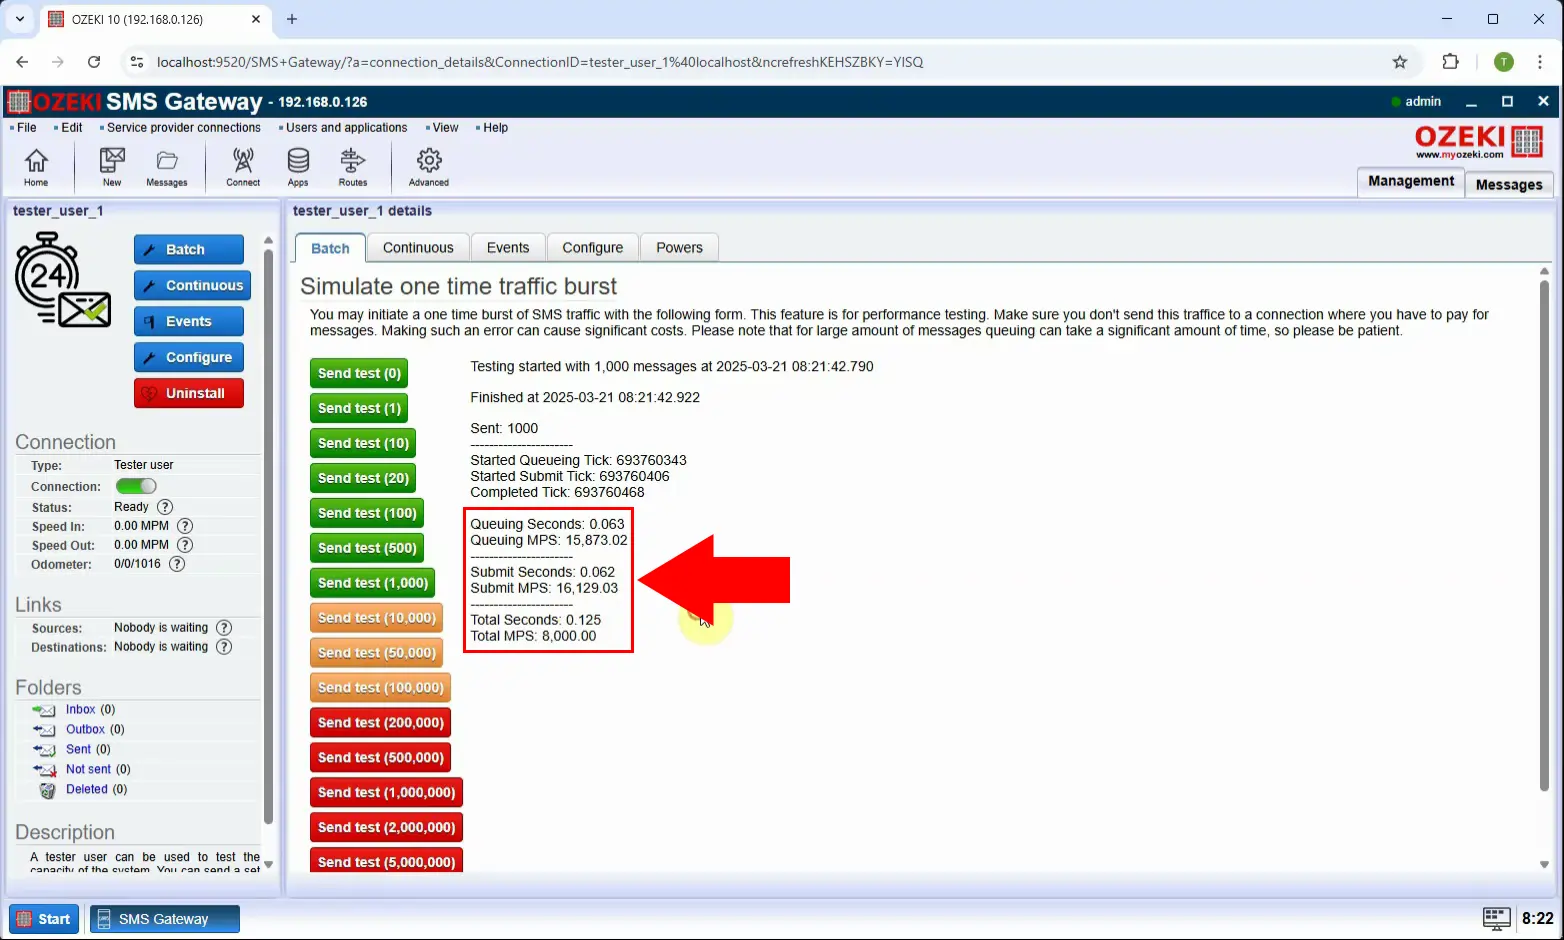
Review the final stats reported by the system - such as messages per second (MPS) - to measure the gateway’s speed and stability (Figure 19).
