Github: Node.js SMS API
This article demonstrates how you can download the latest Node.js SMS API from the GitHub using the GitHub desktop application. You will learn where to download and how to install the desktop application. It will show you how to clone a repository to edit it locally and how to start the Node.js API. This process will take about 5-10 minutes. We assume that you have already used GitHub and familiar with the Windows command line. The tutorial is detailed and the GUI of the Ozeki SMS Gateway is very intuitive. It will take no effort to follow the steps. Don’t waste any time. Start sending SMS messages now.
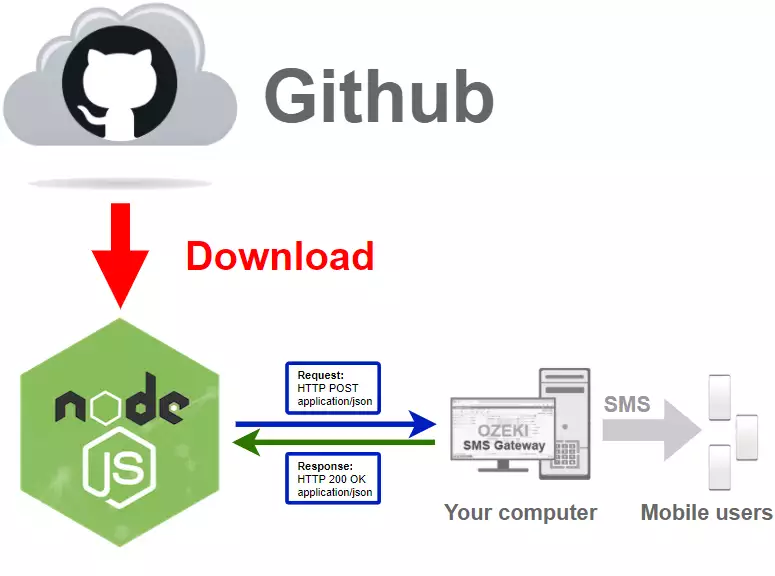
How to download the Node.js SMS API from GitHub (Quick steps)
To download the Node.js SMS API from GitHub:
- Create a GitHub account
- Setup GitHub Desktop
- Browse to github.com/ozekisms/nodejs-send-sms-http-rest-ozeki
- Clone the Node.js SMS repository in Github Desktop
- Open Rest API folder in cmd
- Send Node.js SMS API script
- Launch Ozeki SMS Gateway
- Check the SMS in Ozeki SMS Gateway
Download Github Desktop
The purpose of the next video is to show you how to download the GitHub Desktop installer. The video will start with visiting the download page and will end with the installer on your computer. The video is easy to understand and requires no knowledge of computer technology to follow. You will learn where to click to download the installer and where to find it after.
Download the GitHub Desktop installer
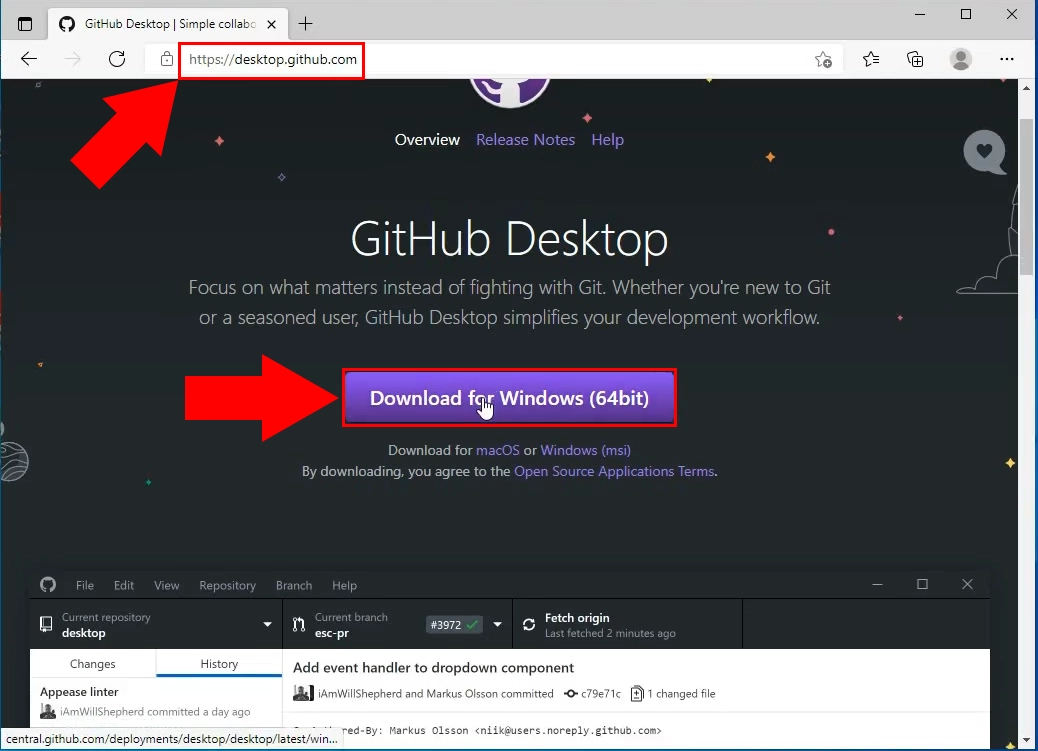
To install the GitHub desktop app, you need to download the installer from the GitHub webpage. Find the purple Download for Windows (64bit) button (Figure 2). Click it and it will start the download process. Wait for your browser to finish and you can start the installation procedure.
Install Github Desktop
In the following video, you are going to see how to install Github Desktop. The video will start with the installer on your computer and will show you how to get to the installed application. You will learn about all the steps of the installation. This video is great because it is only 59 seconds long, but it features all the information you need to complete the process.
Launch the installer
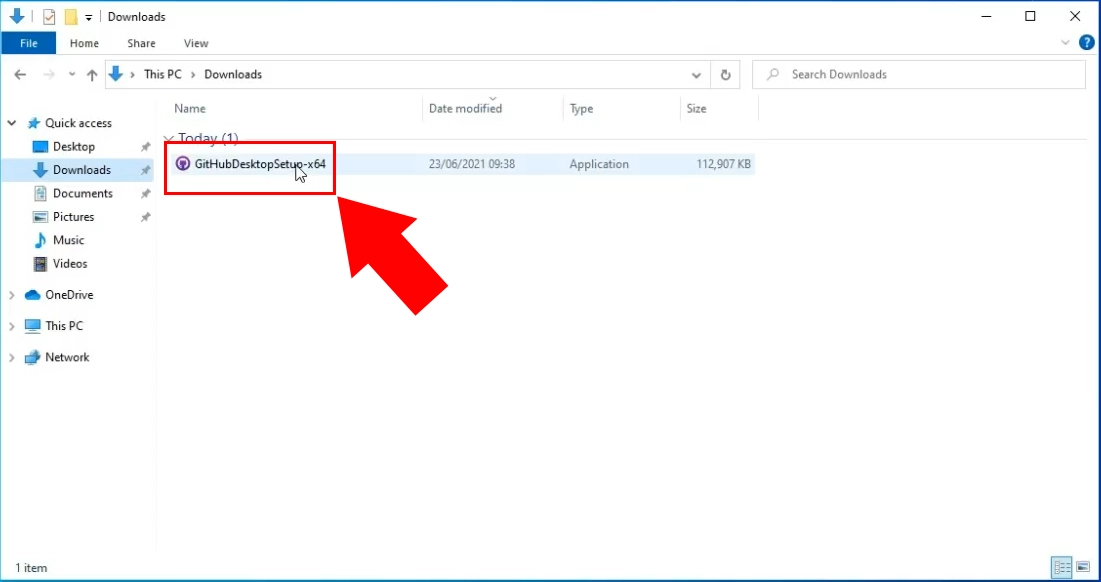
If your browser is finished with downloading the required file, search for the installer. At default settings, the installer will be in the downloads folder (Figure 3). Search for the GitHubDesktopSetup-x64 file and launch it. It will install the GitHub Desktop application on your computer automatically.
Wait for the installation procedure to finish
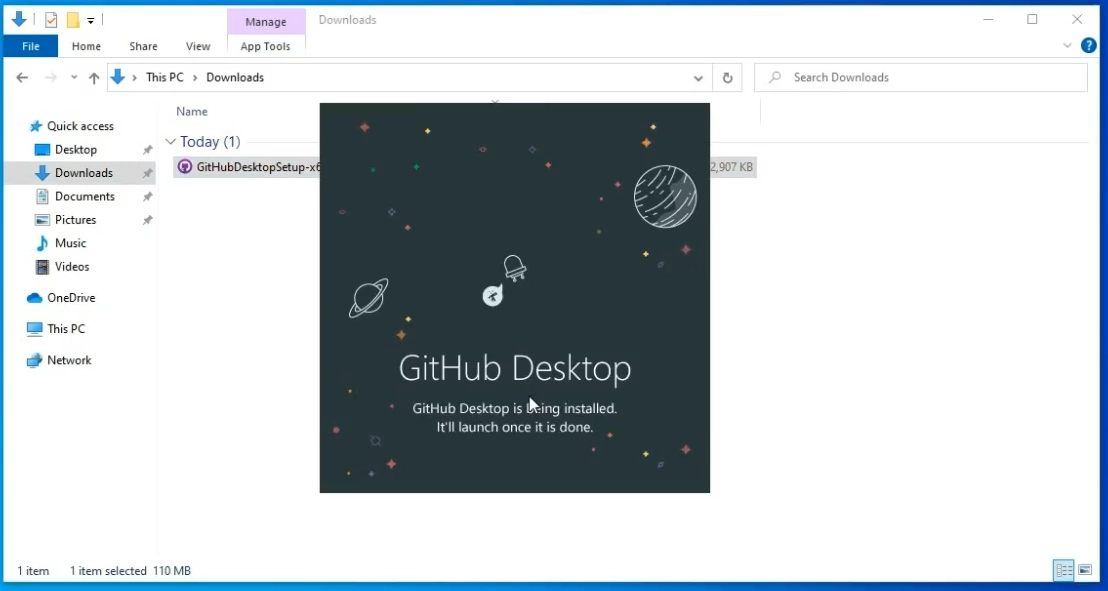
The GitHub Desktop installer will now install the software. On Figure 4, you can see the window that is visible during the installation. The software will be fully functional after this window disappears. You don’t have anything to do, just wait for the end of the process.
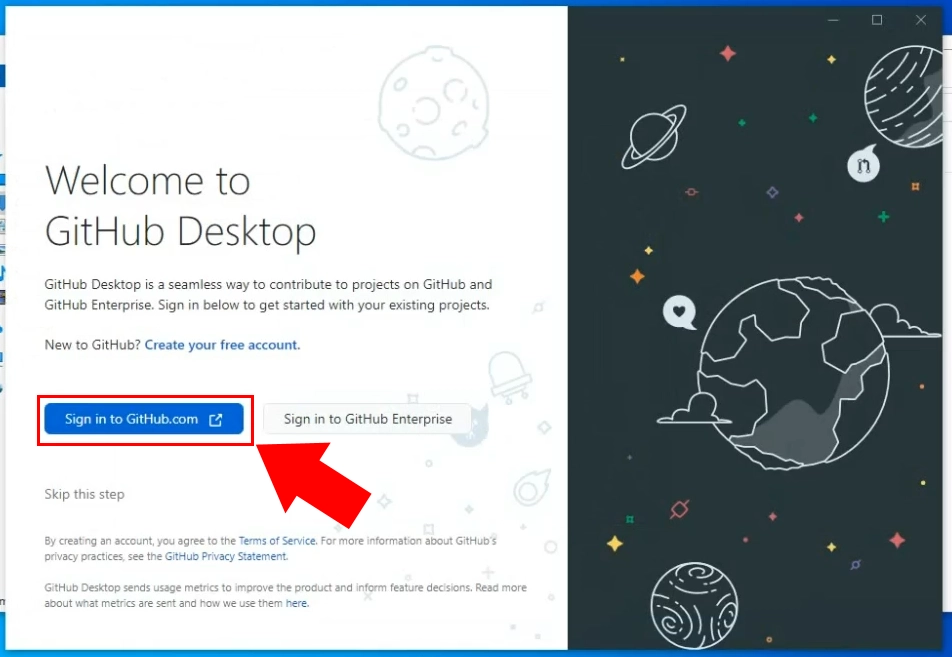
Choose the Sign in to GitHub.com
After the first launch, the application will ask you to sign in. You have two possible options. Sign in with your GitHub account or sign in with your GitHub enterprise account (Figure 5). Click the sign in to GitHub.com to access the login page. If you don’t have a GitHub user account yet, feel free to create one by clicking the Create your free account link above the sign in button.
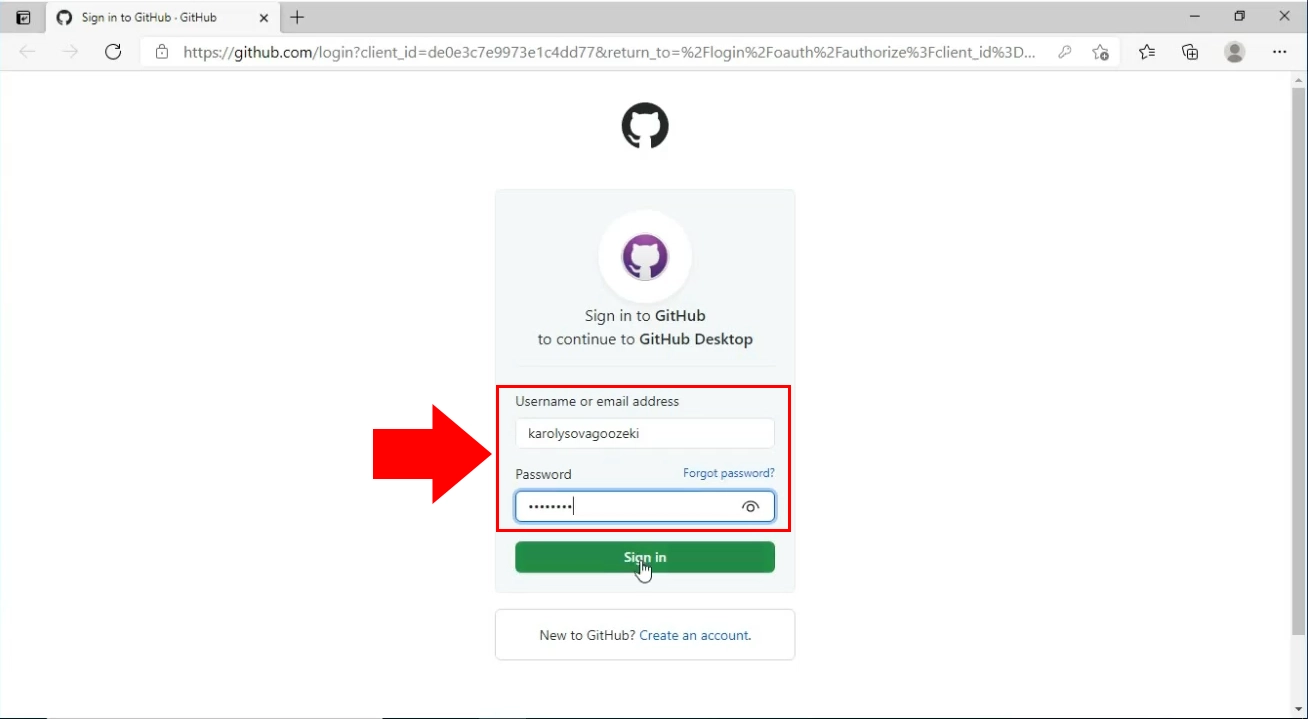
Sign in with your GitHub account
You will see a new browser page with a login form. Here, you need to login to your GitHub account. Provide the correct username and the password and click the green Sign in button to process to the next step (Figure 6). You also have an opportunity to start the new password application process if you forgot your password.
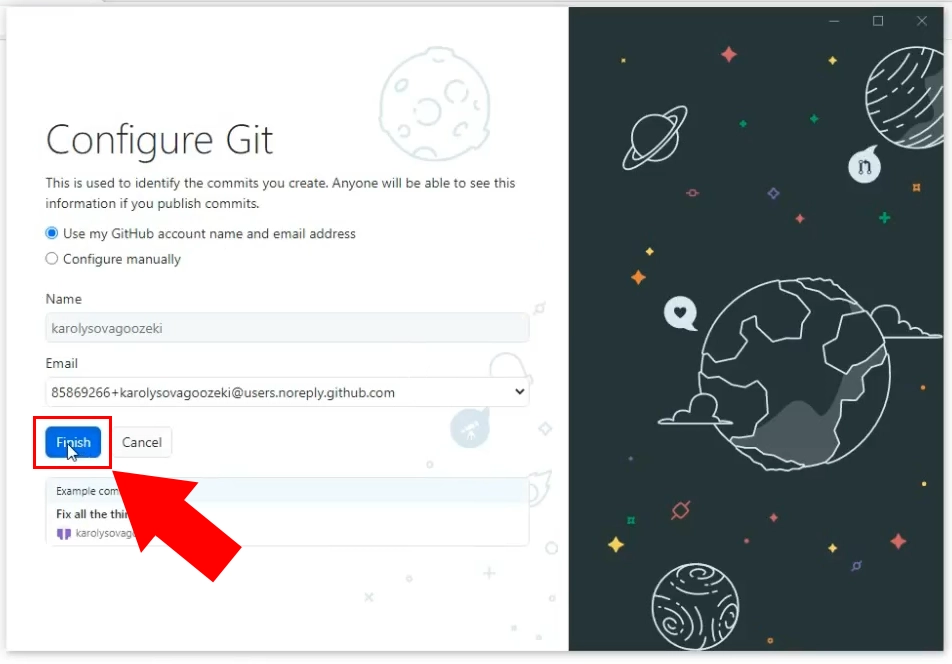
Configure the Git
If you modify anything in a repository, the other contributor will see some information about the changes. Like your name and an e-mail address. In this step, you get to decide if GitHub should use your GitHub account to display information from or it should display the custom info you provide here. Decide which option is suitable for your and click the blue Finish button under the Email textbox. (Figure 7)
Clone the Ozeki.Libs.Rest.VB repository
In this video, we are going to show you how to clone a repository from GitHub. The video will start with opening the browser page of the repository and will take you to the downloaded files. You will learn how to copy the URL of the repository and where to paste it. The video is only 37 seconds long, but it contains all the information you need to finish the cloning process.
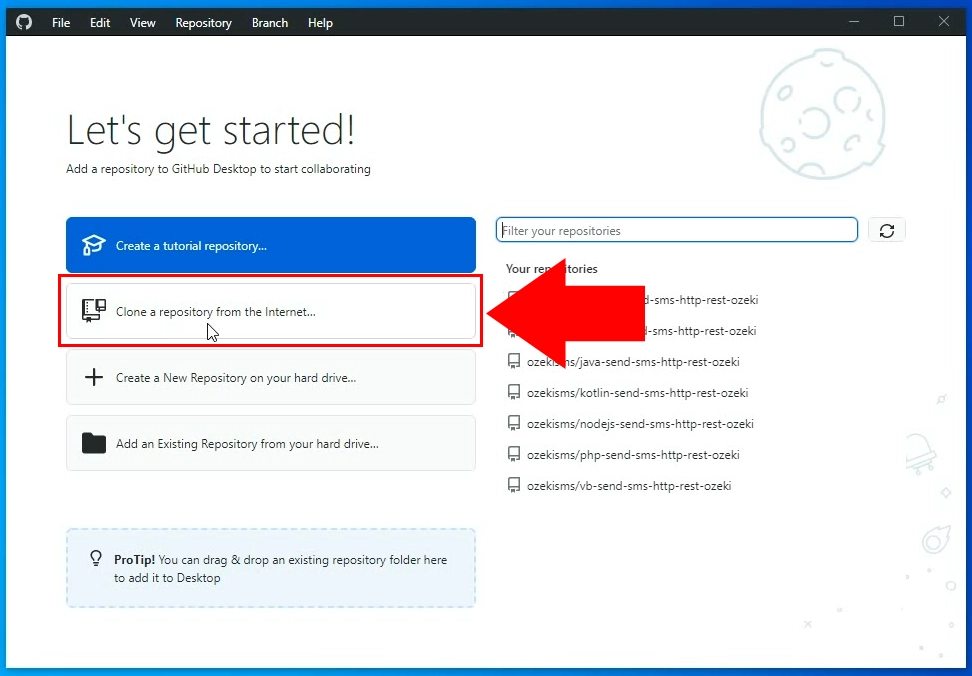
Choose to Clone a repository from the Internet
The GitHub Desktop application will let you create or collaborate with repositories. In this page, you can create a new tutorial repository where you can learn more about the system or clone a repository, so you can modify it without harming the original repository (Figure 8). Choose the Clone a repository from the Internet option to download an offline copy of the Ozeki Node.js SMS API files.
Copy the GitHub repository URL
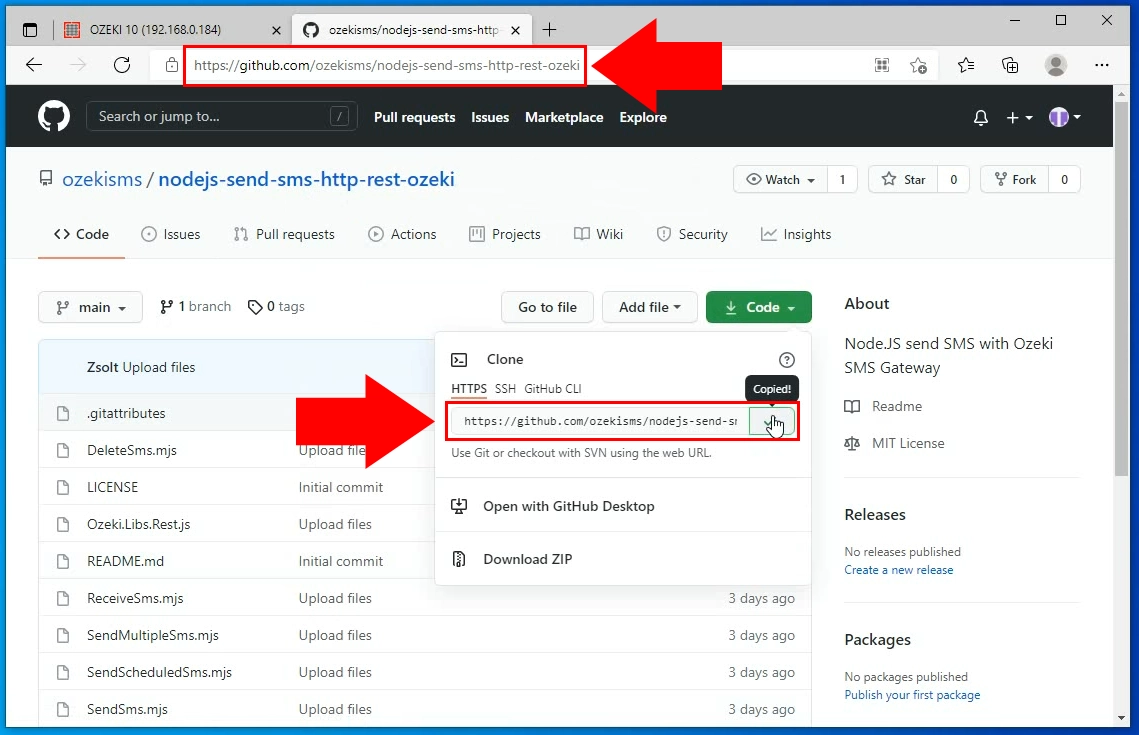
To download the correct repository, you need to provide the URL address of it to the GitHub Desktop. To do so, you need to copy it from the GitHub page of the repository. You have two options to do so. Visit the GitHub page of the repository and copy the link from the URL bar of your browser. The other method is to look for the green code button and click it. It will open the sub-menu, where you can choose to copy the link. Click the Copy button next to the URL line to do so (Figure 9).
Paste the GitHub repository URL
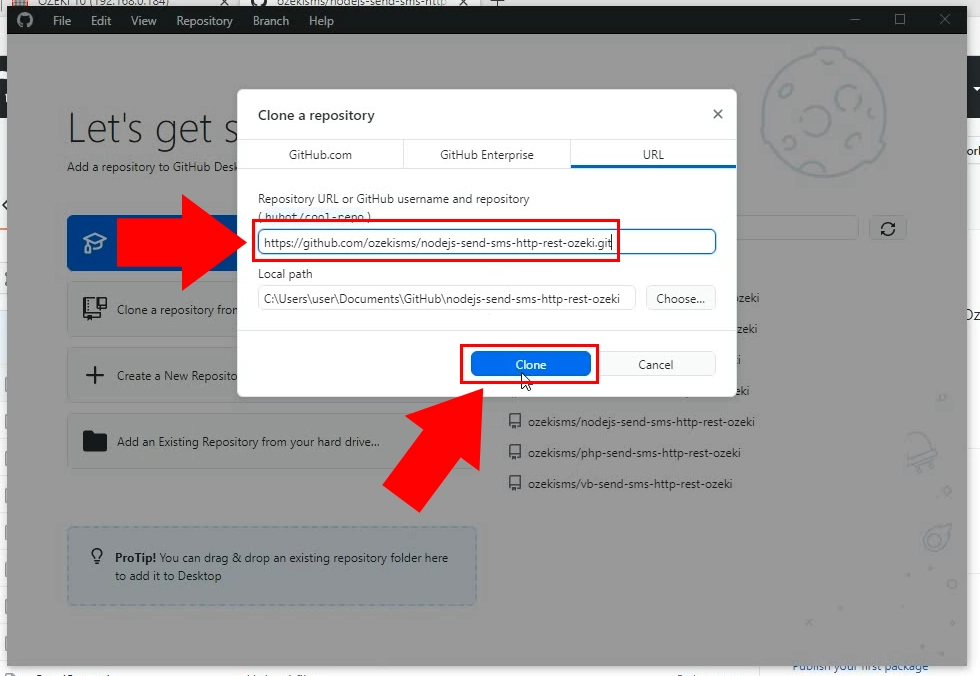
Paste the copied URL into the Clone a repository panel. You will find the Repository URL textbox where the link belongs. Below that, you can choose where to save the file. Give it an access path where there is enough space the store the files. Click the Clone button if you completed the form. (Figure 10)
Find the cloned repository
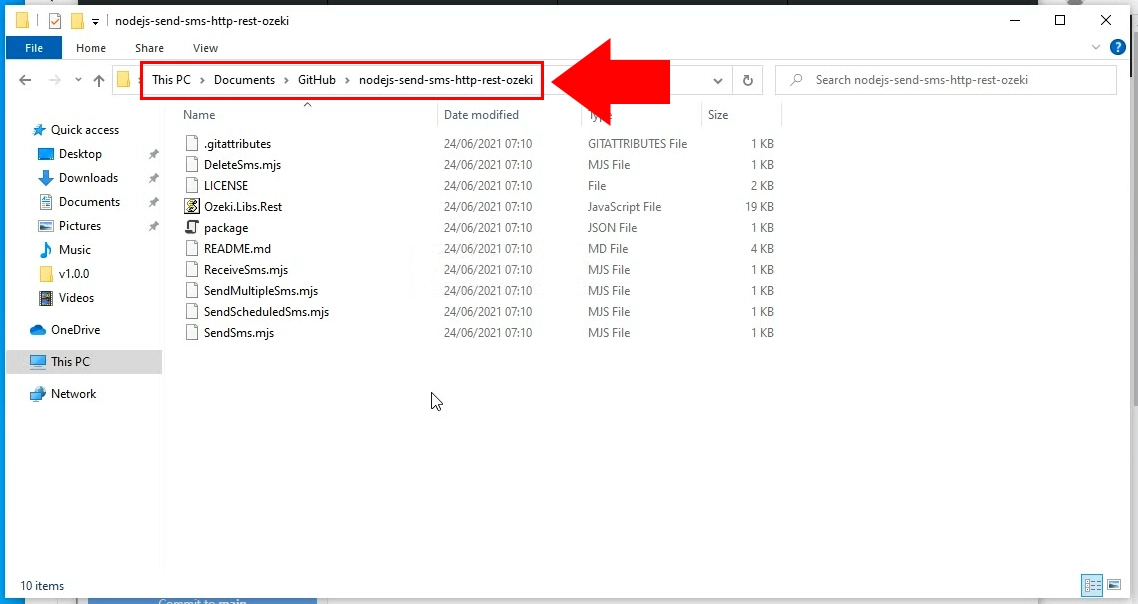
Now you have the cloned repository in the chosen destination. Open it to see all the downloaded files (Figure 11). It is important to copy the access path of the downloaded files folder because you will use it to launch the solution form a Command Prompt.
How to use the repository
In this video, we are going to show you how to use the cloned repository. The video starts with the folder of the downloaded files opened and will end with the sent folder filled with messages. In the video, you are going to learn how to launch the project in a command prompt and how to check the log for the process. This 1:35 long video is very accurate, and it includes all the actions you need. Watch it and start sending SMS!
Open the Rest API
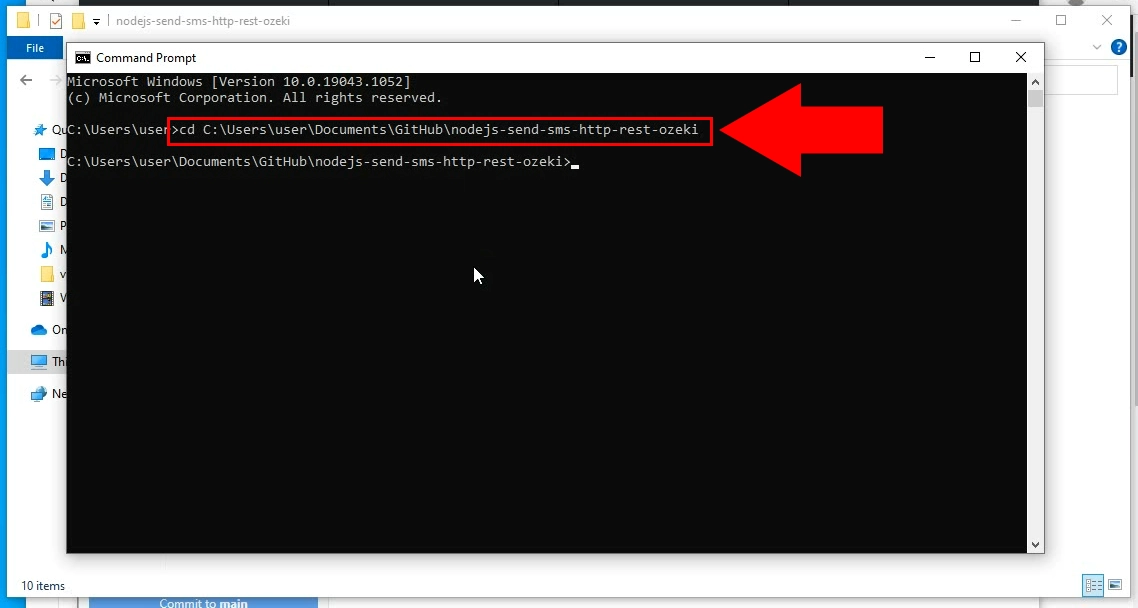
To start working with the repository, open a command prompt on your computer. You need to change the folder you are working with in the command prompt. To do so, type in the cd command and paste the access path of the repository folder into the command prompt. Hit the enter button to start working inside the folder (Figure 12).
Install the node fetch from the command line
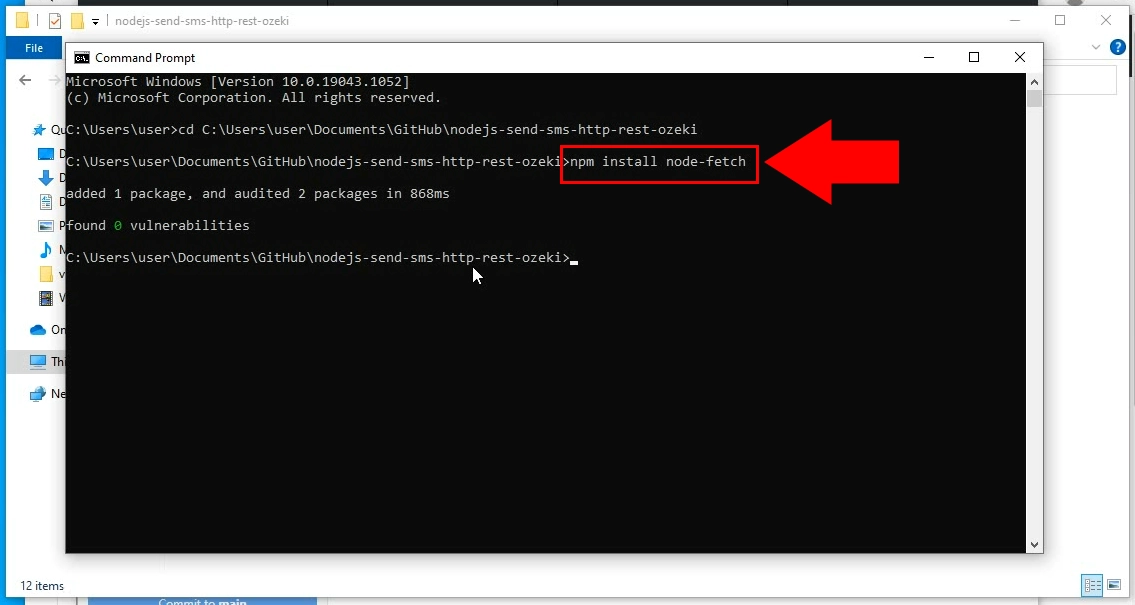
The node-fetch is a Node.js module that enables us to use the fetch() function in Node.js, with very similar functionality as window. To install it, you need to give the npm install node-fetch command to the command prompt. This will automatically install the node-fetch module and you will get feedback about the result of the installation (Figure 13).
Start the send SMS script
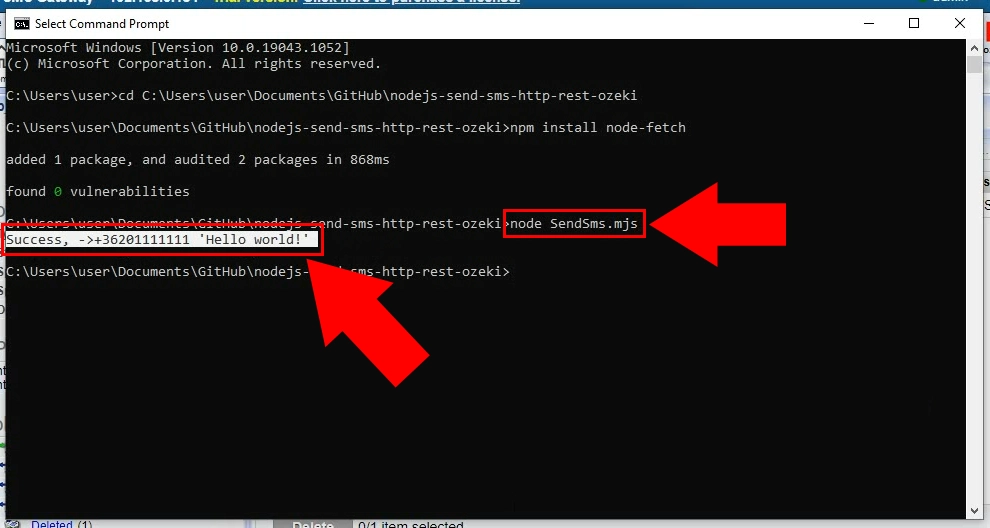
To send a test SMS, all you need to do is start the SendSms.mjs application. To do so, type in the following command. node SendSms.mjs. It will start the sms sending script. You will get feedback about the sending process in the command prompt. It will display the phone number, the body of the text and the result of the executed script. (Figure 14)
Check the sent folder
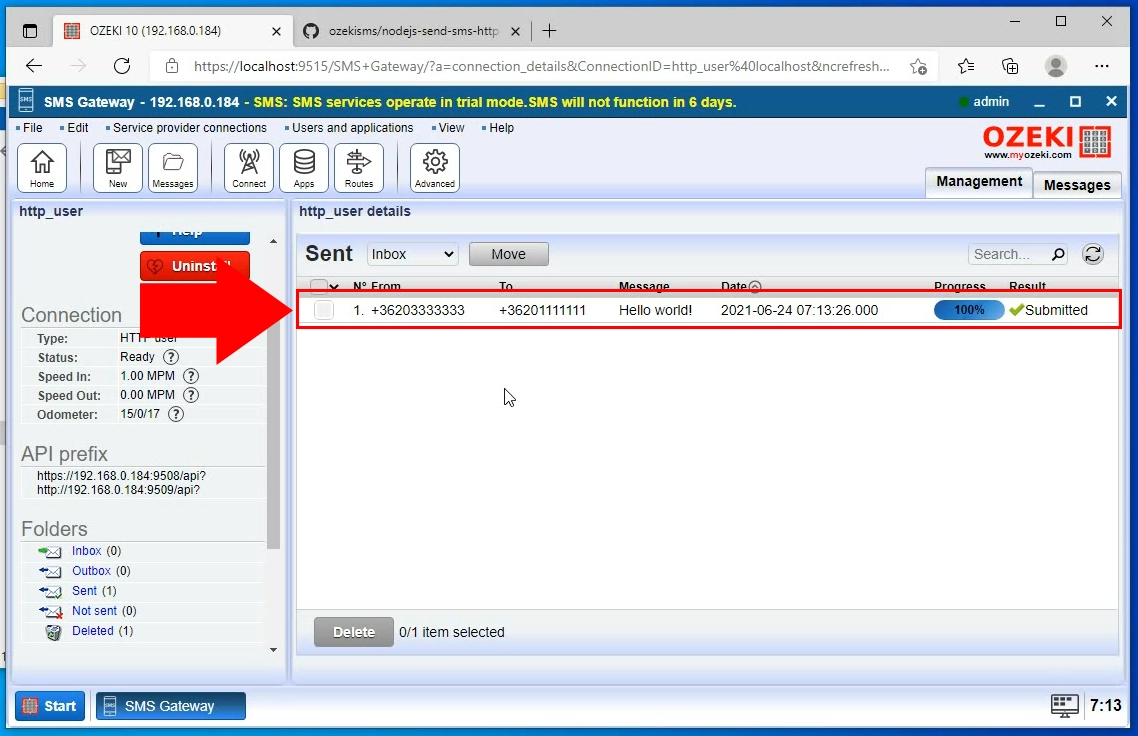
You can check the sent SMS in the Ozeki SMS Gateway as you can see on Figure 15. Here you can also check the log of the message, or you can track the current condition too.
Conclusion
We hope you didn’t get lost in the explanations. By following the above tutorial steps, you can create the solution in a short time. Now you can use the Node.js SMS API to send text messages. You have seen the advantages it can bring. If you have already completed the steps, I am sure, if you let your wife (or girlfriend) know, you will be rewarded. Let me mention that Ozeki SMS Gateway offers excellent logging capabilities, which means you can track down errors quickly. If you would like to pick up more about the advantages of other similar solutions, please open ozeki-sms-gateway.com.
