How to Receive an SMS in Node.js
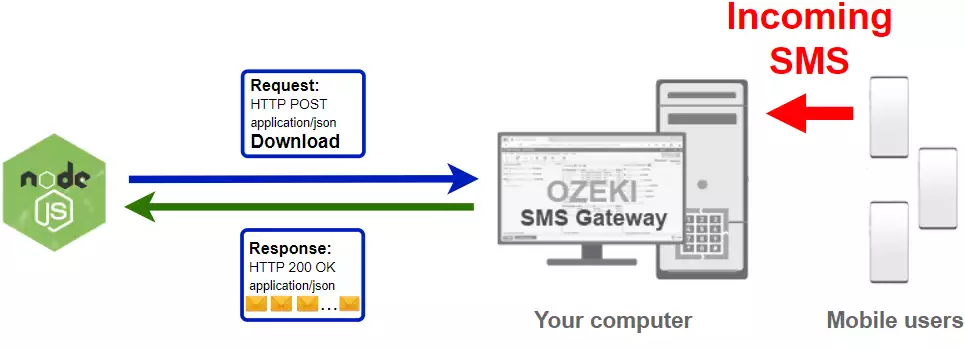
The simplest way to send SMS from Node.Js is to use the built in HTTP/Rest SMS api of Ozeki SMS Gateway. When you use this API, you will send SMS messages by issuing a HTTP Post request to the SMS gateway. The HTTP Post request will contain a message formatted in json format. The SMS gateway will send this SMS to the recipient phone, and it will return a HTTP 200 OK response to your request.

JavaScript code to receive SMS messages
The JavaScript sms code sample below demonstrates how you can receive SMS using the http rest sms api of Ozeki SMS Gateway using the JavaScript Ozeki.Libs.Rest library. This library is provided to you free of charge, and you may use it and modify it in any of your projects.
ReceiveSms.mjs
import { Configuration, MessageApi } from './Ozeki.Libs.Rest.js';


var configuration = new  Configuration();
configuration.Username = "http_user";
configuration.Password = "qwe123";
configuration.ApiUrl = "http://127.0.0.1:9509/api";

var api = new MessageApi(configuration);

const result = await api.DownloadIncoming();

console.log(result.toString());

for (let i = 0; i < result.MessageCount; i++) {
    console.log(result.Messages[i].toString());
}
How to use the JavaScript sms example:
You can use the Message class to create the SMS and you can use the MessageApi class to send the SMS to the SMS gateway. The SMS gateway will forward your message to the mobile network either through a wireless connection or through the Internet.
Download ReceiveSms.js
The source code explained in this article can be downloaded and used and modified free of charge.
Download: ReceiveSms.js.zip (4.38Kb)
What is in the ReceiveSms.js.zip file?
The ReceiveSms.js.zip file contains the Ozeki.Libs.Rest library, which gives you all the tools necessary to send, mark, delete and receive SMS messages. You will also find a ReceiveSms.mjs file in the project, which contains the example code to show you how to receive SMS messages. This example code is listed below.

This project has dependencies, so before you start you have to install the node-fetch package with the following command:
npm install node-fetch
How to Receive SMS messages from Node.Js (Quick steps)
To receive SMS messages from Node.Js:
- Install Ozeki SMS Gateway
- Connect Ozeki SMS Gateway to the mobile network
- Send a test sms from Ozeki GUI
- Create a HTTP sms api user
- Apache NetBeans
- Download the example project above
- Create the SMS by creating a new Message object
- Create an api to send your message
- Use the DownloadIncoming() method to receive your message(s)
- Read the response message on the console, and print the messages to the console
- Check the logs in the SMS gateway
Install Ozeki SMS Gateway and create an HTTP API user
To be able to send SMS from Node.Js, first you need to install Ozeki SMS Gateway. The SMS gateway can be installed on the same computer, where you develop your JavaScript code in Visual Studio Code or any other code editor. After installation, the next step is to connect Ozeki SMS Gateway to the mobile network. You can send a test sms from the Ozeki GUI to verify, that your mobile network connection works. The final step to prepare your environment is to create a HTTP sms api user. Create a user with a username of "http_user", and with a password of "qwe123" to make the example work without modification.
After the environment is setup, you can run your JavaScript code.
HTTP API url to use receive sms from Node.Js
To receive a SMS from Node.Js, your JavaScript will have to issue an HTTP request to the SMS gateway. The API url is shown below. Note that the IP address (127.0.0.1) should be replaced to the IP address of your SMS gateway. If Ozeki SMS Gateway is installed on the same computer where the JavaScript sms application is running, this can be 127.0.0.1. If it is installed on a different computer, it should be the IP address of that computer.
http://127.0.0.1:9509/api?action=rest
HTTP authentication to use send sms from JavaScript
To authenticate the Node.Js sms client, you need to send the username and password in a base64 encoded string to the server in a HTTP request. The format used is: base64(username+":"+password). In JavaScript you can use the following code to do this encoding:
var usernamePassword = username + ":" + password;
return `Basic ${Base64.encode(usernamePassword)}`;
For example if you encode the username 'http_user' and the password 'qwe123', you will get the following base64 encoded string: aHR0cF91c2VyOnF3ZTEyMw==. To send
HTTP request header to send SMS from JavaScript
To send the SMS messages, you need to include the following lines as headers in the HTTP request. Note that we include a content type and an Authorization header.
Content-Type: application/json
Authorization: Basic QWxhZGRpbjpvcGVuIHNlc2FtZQ==
HTTP request to send SMS from Node.Js
To submit the SMS, your Node.Js application will send an HTTP request similar to the one below. Note, that this request contains a HTTP header part and a http body part. The HTTP body is a JSON encoded data string. It contains the recipient's number and the message's text.
GET /api?action=receivemsg&folder=inbox HTTP/1.1
Connection: close
Accept: */*
Accept-Encoding: gzip,deflate
Authorization: Basic aHR0cF91c2VyOnF3ZTEyMw==
Host: 127.0.0.1:9509
User-Agent: node-fetch/1.0 (+https://github.com/bitinn/node-fetch)
HTTP response received by the JavaScript sms example
Once the SMS gateway receives this request, it will generate a HTTP response. The HTTP response will contain a status code, to indicate whether the SMS submit request was successful or not. It will also return a JSON encoded structure to provide you useful details about the message's submission.
HTTP/1.1 200 OK
User-Agent: OZEKI 10.3.120 (www.myozeki.com)
Content-Type: application/json; charset=utf8
Last-Modified: Mon, 14 Jun 2021 09:12:00 GMT
Server: 10/10.3.120
Transfer-Encoding: chunked

{
	"http_code": 200,
	"response_code": "SUCCESS",
	"response_msg": "",
	"data": {
	  "folder": "inbox",
	  "limit": "1000",
	  "data": [
	    {
	      "message_id": "02ccc4d5-4aeb-7f64-b980-9aa262ef86fb",
	      "from_connection": "http_user@localhost",
	      "from_address": "+36201111111",
	      "from_station": "%",
	      "to_connection": "http_user@localhost",
	      "to_address": "http_user",
	      "to_station": "%",
	      "text": "Hello world 1",
	      "create_date": "2021-06-14 12:00:14",
	      "valid_until": "2021-06-21 12:00:14",
	      "time_to_send": "2021-06-14 12:00:14",
	      "submit_report_requested": true,
	      "delivery_report_requested": true,
	      "view_report_requested": true,
	      "tags": [
	        {
	          "name": "Type",
	          "value": "SMS:TEXT"
	        }
	      ]
	    },
	    {
	      "message_id": "bb663f6c-fcf2-df32-bd33-1778e8578f23",
	      "from_connection": "http_user@localhost",
	      "from_address": "+36202222222",
	      "from_station": "%",
	      "to_connection": "http_user@localhost",
	      "to_address": "http_user",
	      "to_station": "%",
	      "text": "Hello world 2",
	      "create_date": "2021-06-14 12:00:14",
	      "valid_until": "2021-06-21 12:00:14",
	      "time_to_send": "2021-06-14 12:00:14",
	      "submit_report_requested": true,
	      "delivery_report_requested": true,
	      "view_report_requested": true,
	      "tags": [
	        {
	          "name": "Type",
	          "value": "SMS:TEXT"
	        }
	      ]
	    },
	    {
	      "message_id": "ca555a52-2f5a-285a-b6e2-6aa1fa3353f8",
	      "from_connection": "http_user@localhost",
	      "from_address": "+36203333333",
	      "from_station": "%",
	      "to_connection": "http_user@localhost",
	      "to_address": "http_user",
	      "to_station": "%",
	      "text": "Hello world 3",
	      "create_date": "2021-06-14 12:00:14",
	      "valid_until": "2021-06-21 12:00:14",
	      "time_to_send": "2021-06-14 12:00:14",
	      "submit_report_requested": true,
	      "delivery_report_requested": true,
	      "view_report_requested": true,
	      "tags": [
	        {
	          "name": "Type",
	          "value": "SMS:TEXT"
	        }
	      ]
	    }
	  ]
	}
}
How to receive SMS from Node.Js using the sms api (Video tutorial)
This video shows you how to download and use the ReceiveSms.js project. Once you added the needed files to your project, you might notice that a there is a file called Ozeki.Lbis.Rest.js. This is the file that contains the MessageApi and all the stuffs you need to send an SMS using JavaScript.
Node.Js sms example: ReceiveSms.mjs (in Notepad)
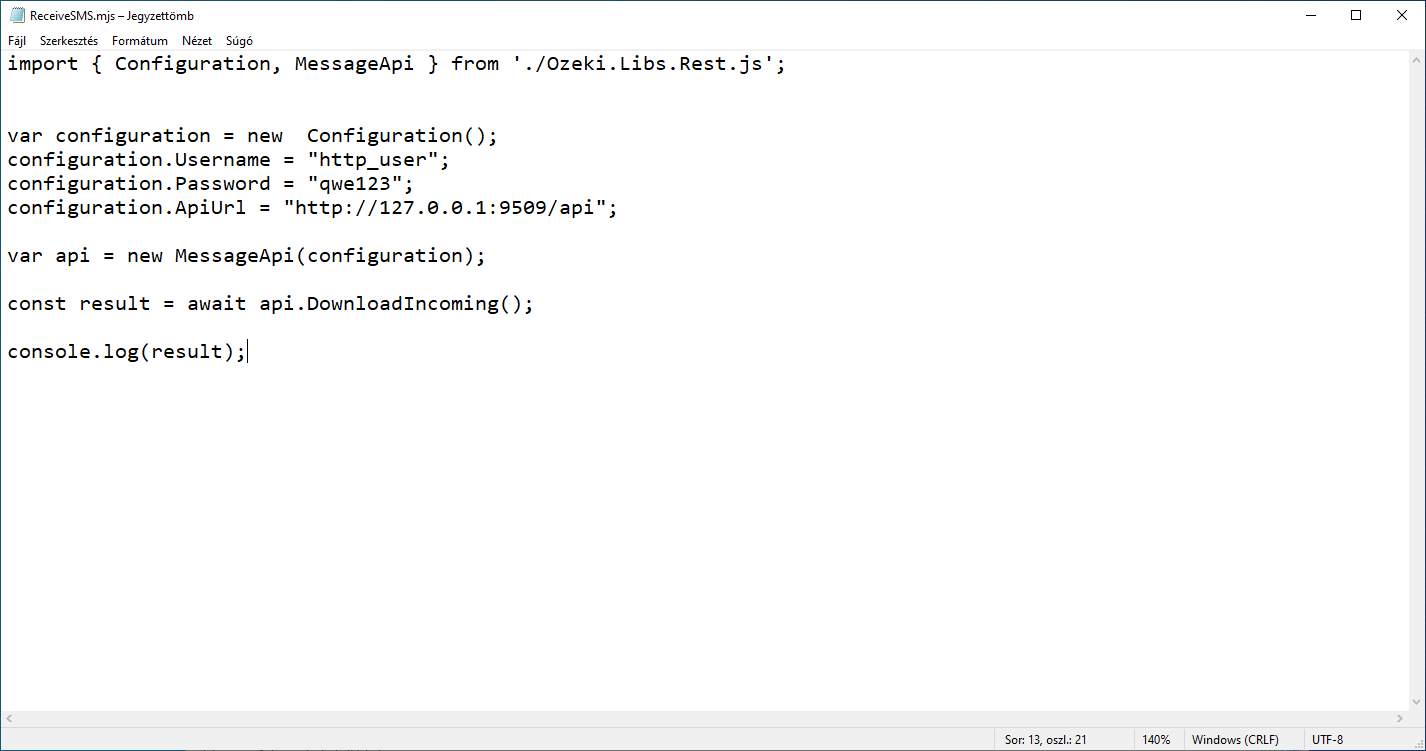
On the following picture, you can see the ReceiveSMS.mjs source code opened (Figure 3). In this case, we used Notepad to open the source code, which can be used to edit it as well. As you can see, the code contains a pre-set username and password variable. If you are familiar with the Node.js programming language, feel free to change the values of the variables to fit your HTTP user login credentials.

Node.Js sms example: ReceiveSms.mjs (in Visual Studio Code)
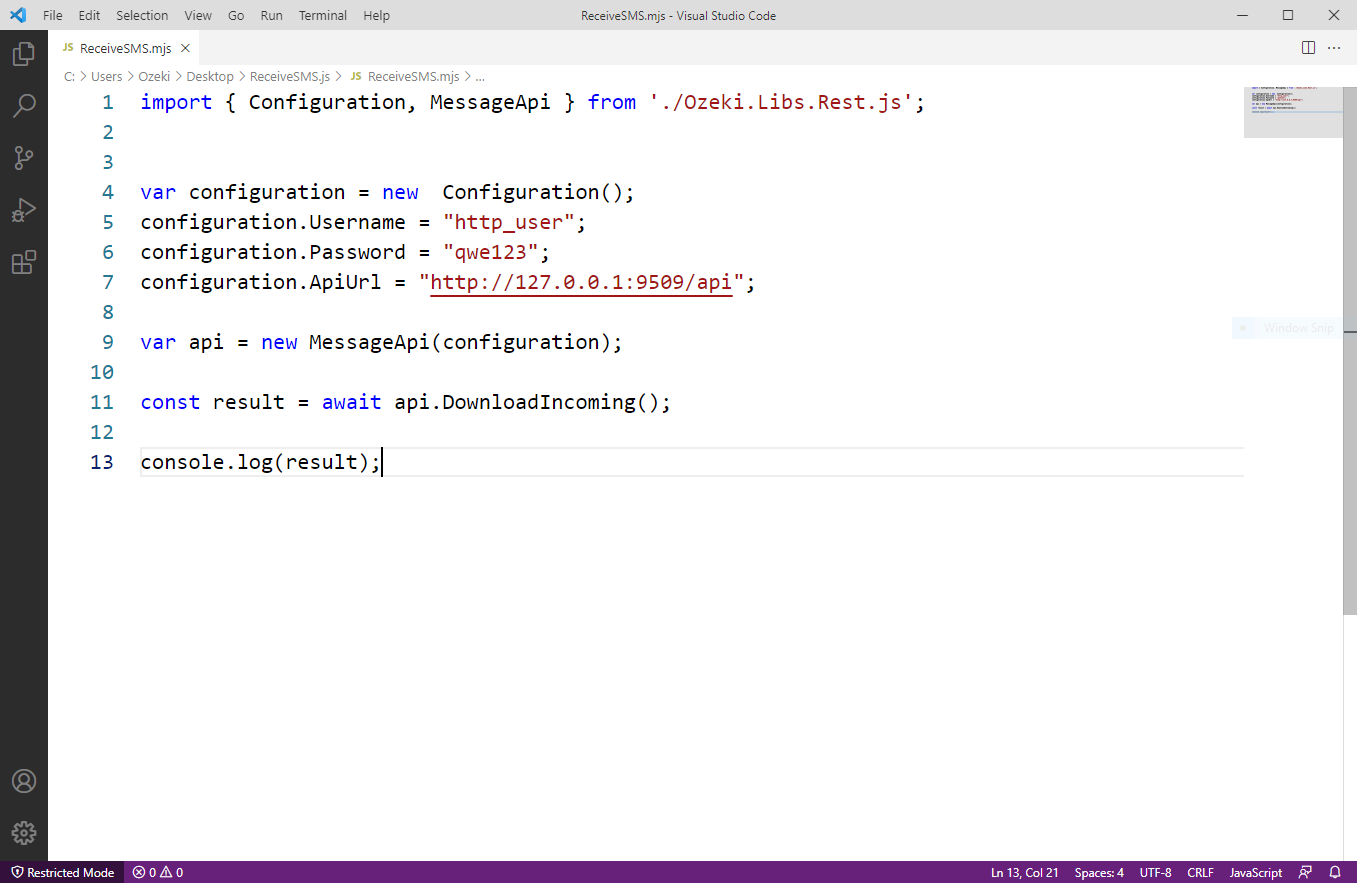
If you want to use an IDE with built-in colour coding, helpful documentation, and extensions, use the Visual Studio Code. It is a lightweight and free-to-use programming environment that you can use to edit code in many different languages. As you can see, we coded the example username and password into the source code. If you are familiar with the Node.js programming language, feel free to edit them to fit your HTTP user.

How to check that the SMS has been accepted by the HTTP user
After the request has been submitted, it is a good idea to check your SMS gateway, to see what it has received. You can check the log by opening the HTTP user's details from the Ozeki SMS Gateway management console. The following video shows you what to look for.
Summary
The guide explained how to set up this SMS API to receiving SMS with the Node.js program using the HTTP user of the Ozeki SMS Gateway. This solution helps you to organize your incoming messages by moving them from the Inbox folder to your Node.js application. Applying this program gives you the ability to keep your messaging system organized and let the important information flow to you.
I bet you want to learn more about effective message managing, you will find what you need on the Ozeki webpage. It helps a lot if you assort the messages and keep just what you need, so read the next article about How to delete an SMS in Node.js.
Set up the Ozeki SMS Gateway now and use what you got!
