How to set the default sender ID of an SMS connection
If you send an SMS message from an application, such as Ozeki SMS Gateway, you can set a custom phone number or alphanumeric sender ID as the sender telephone number for your SMS messages. The option is available for SMPP client connections,, UCP client connections and CIMD2 client connections. The configuration steps are similar for each protocol.
To change the sender ID for SMPP connections follow these steps:
- Install Ozeki SMS Gateway
- Install an SMPP client connection
- Open the configuration form of the SMPP client
- Enter the SMPP server's host name or IP address
- Enter the SMPP server's port number
- Enter the SMPP system ID and password
- Enter the SMPP sender ID into the telephone number field
- Tick overridable
- Enable SMPP low level logging on the advanced tab
- Send a test SMS
- Find the submit_sm PDU in the log
- Copy the submit_sm PDU to the PDU decoder
Change the SMS sender ID (Video tutorial)
Send bulk sms with personalized sender name. Yes, you can modify the sender ID of your SMS. Using your company or brand name in the sender ID text can boost brand awareness. The following video shows how you can set the sender ID in the sms gateway.
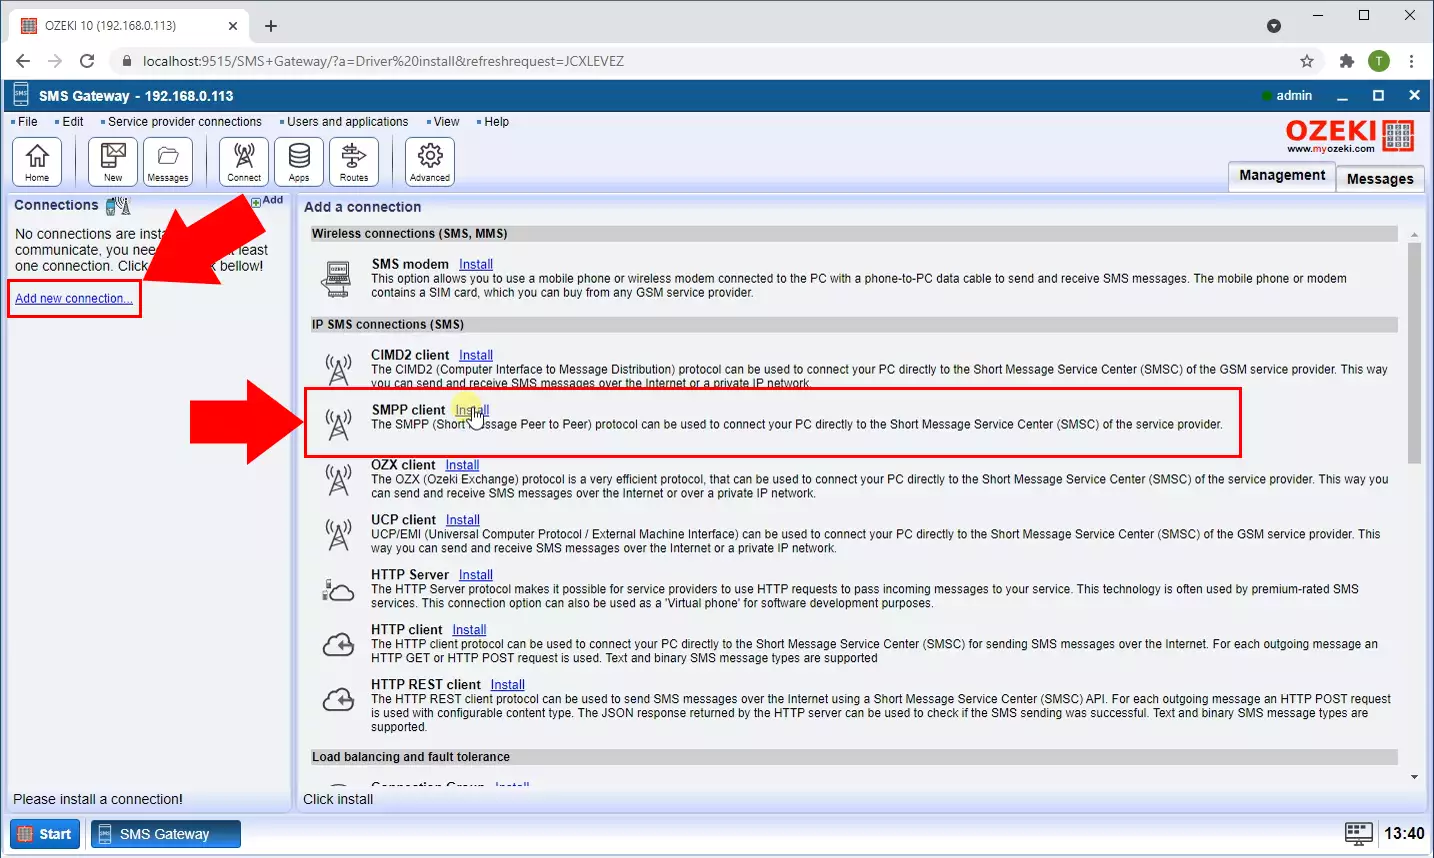
To get started, the initial step is to either sign in to your existing Ozeki SMS Gateway account or, if you don't have one yet, obtain it from the https://ozeki.hu website. Once you are prepared to log in, launch the Ozeki Desktop application and locate the SMS Gateway icon. At the Ozeki Desktop, you will be presented with the primary interface of the SMS Gateway. Next, navigate to the Connections panel and click on the "Add new connections" link, or simply use the "Connect" icon in the toolbar. This action will display a list of available connections that can be installed. From this list, choose the "SMPP client" option by clicking on the "Install" link highlighted in blue.
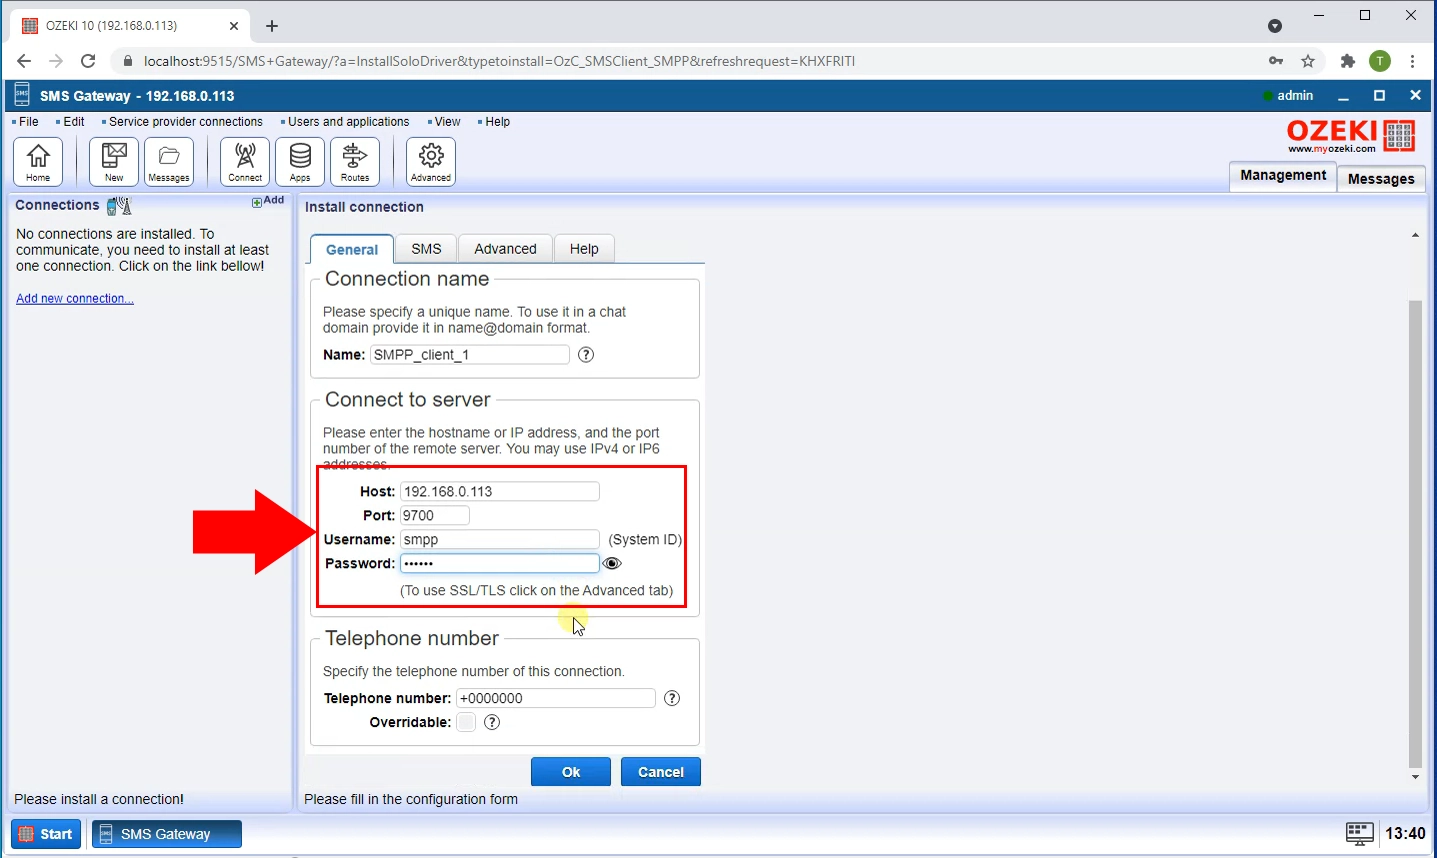
Once the connection installation is complete, you will be required to provide specific details for the connection. First, enter a name that you'd like to use for the chat. This name will identify your connection in the system. Next, you'll need to enter the hostname or IP address of the remote server into the designated box. The hostname or IP address represents the location of the server where the SMPP service is running. The port number serves as a communication endpoint through which your application can interact with the SMPP service on the server.
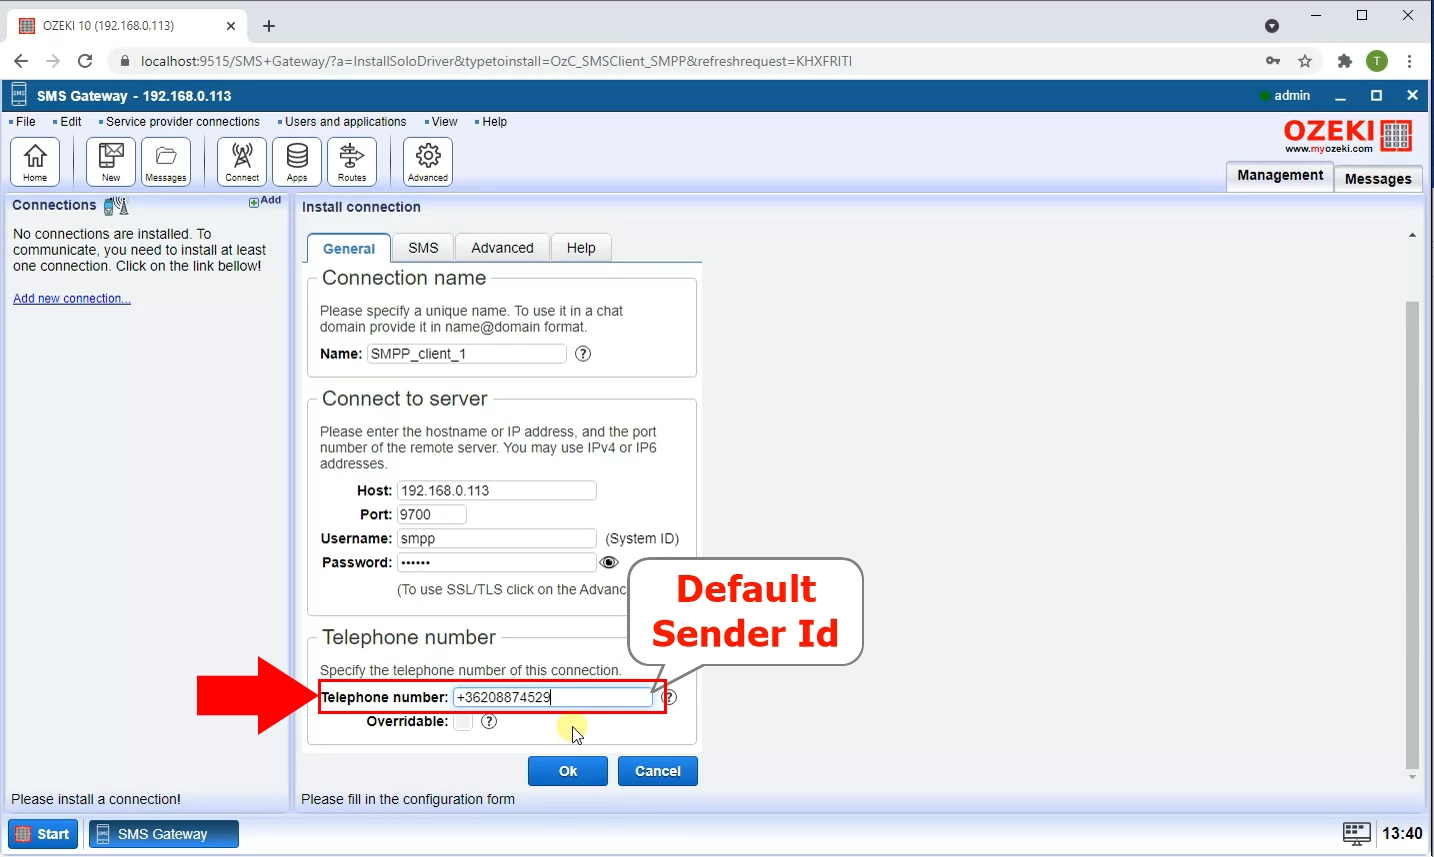
Now, you need to enter a telephone number as a Default Sender ID. The Default Sender ID is the phone number that will be displayed as the sender when your SMS messages are delivered to the recipients.
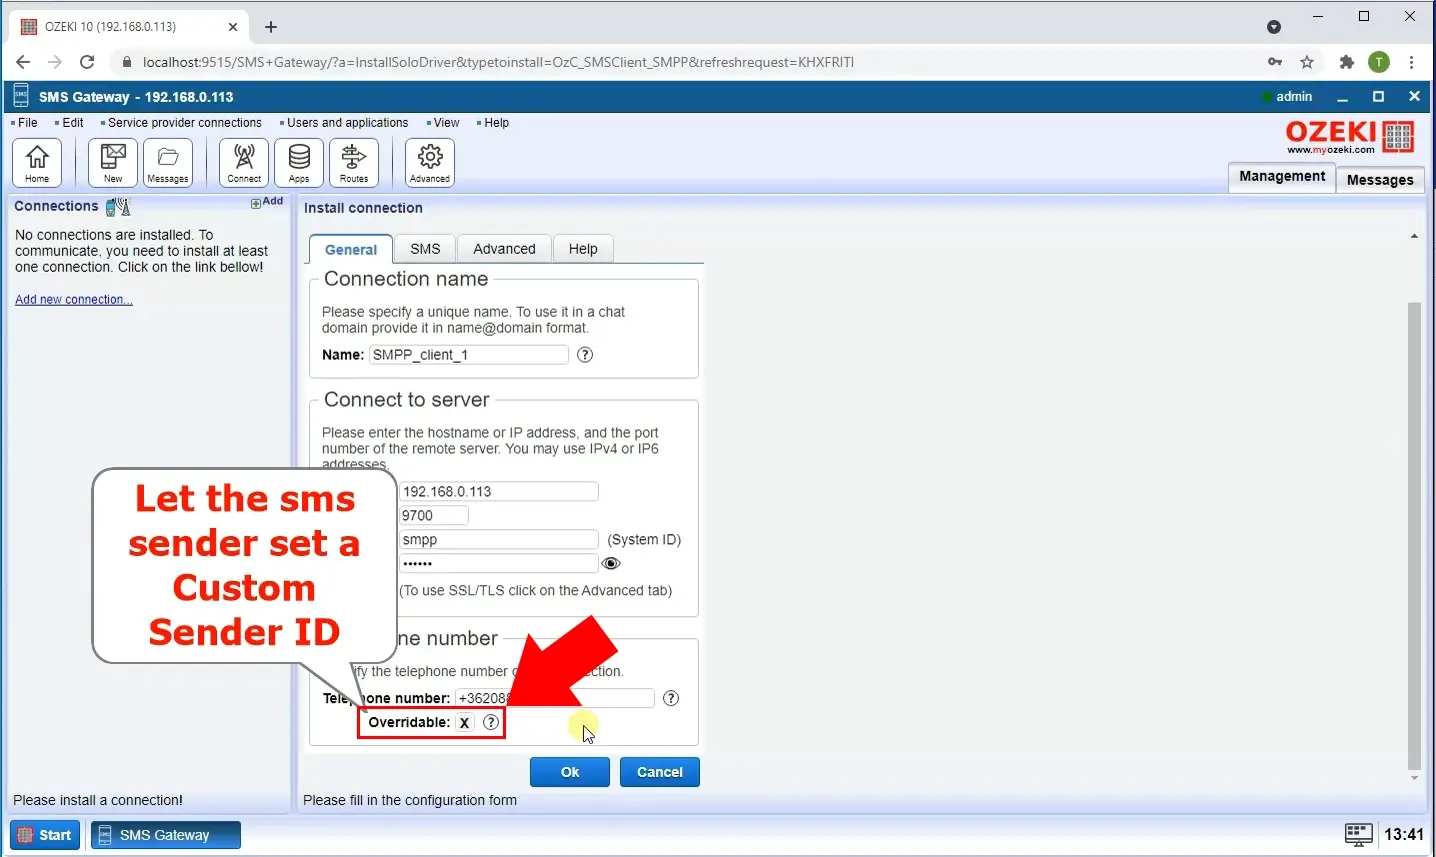
Let the SMS sender set a Custom Sender ID, by marking the "Overridable" option
with a cross. When the "Overridable" option is selected, it means that the Default
Sender ID you previously entered can be overridden or replaced with a custom
alphanumeric identifier of the sender's choice for each individual SMS message.
After that, you need to click on the "Advanced" tab. There, set the log level, by
marking the essential options, like "Log communication events", "Log messaging events",
and "Attach log to every message". Completing these setups, click on the "Ok" button.
By saving the previous setups, you need to make the connection work, so switch the
Connection slider button to green, which is placed on the left connection panel.
If the connection has established, you will receive a notification about successful
installation.
Now, create a new message. Click on the "New" icon at the toolbar. A Message Composer will bring up, where you need to specify the details of your SMS. Fill out the Address field with the recipient's mobile phone number, then enter your text message into the Message field.
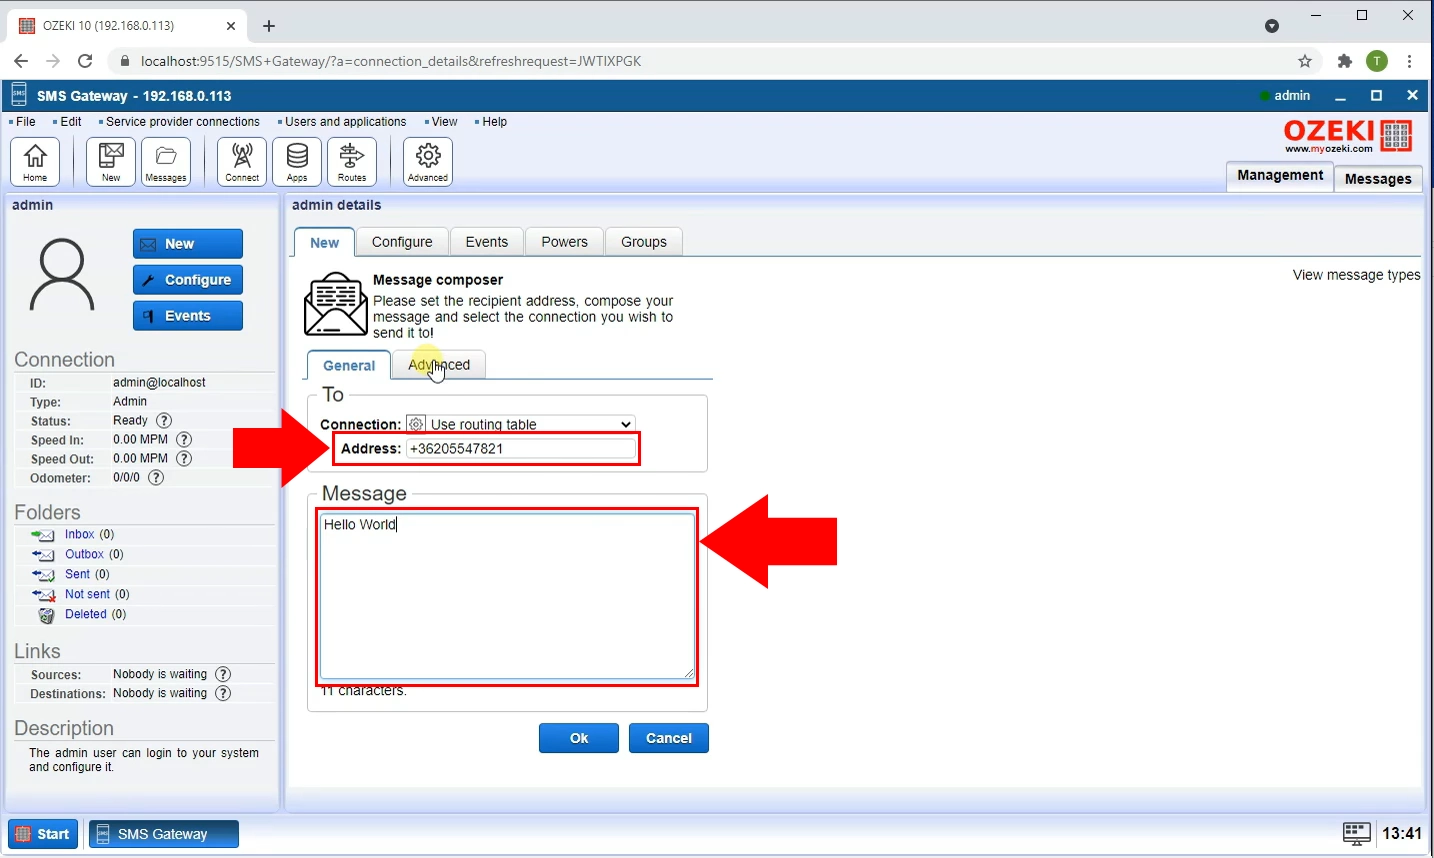
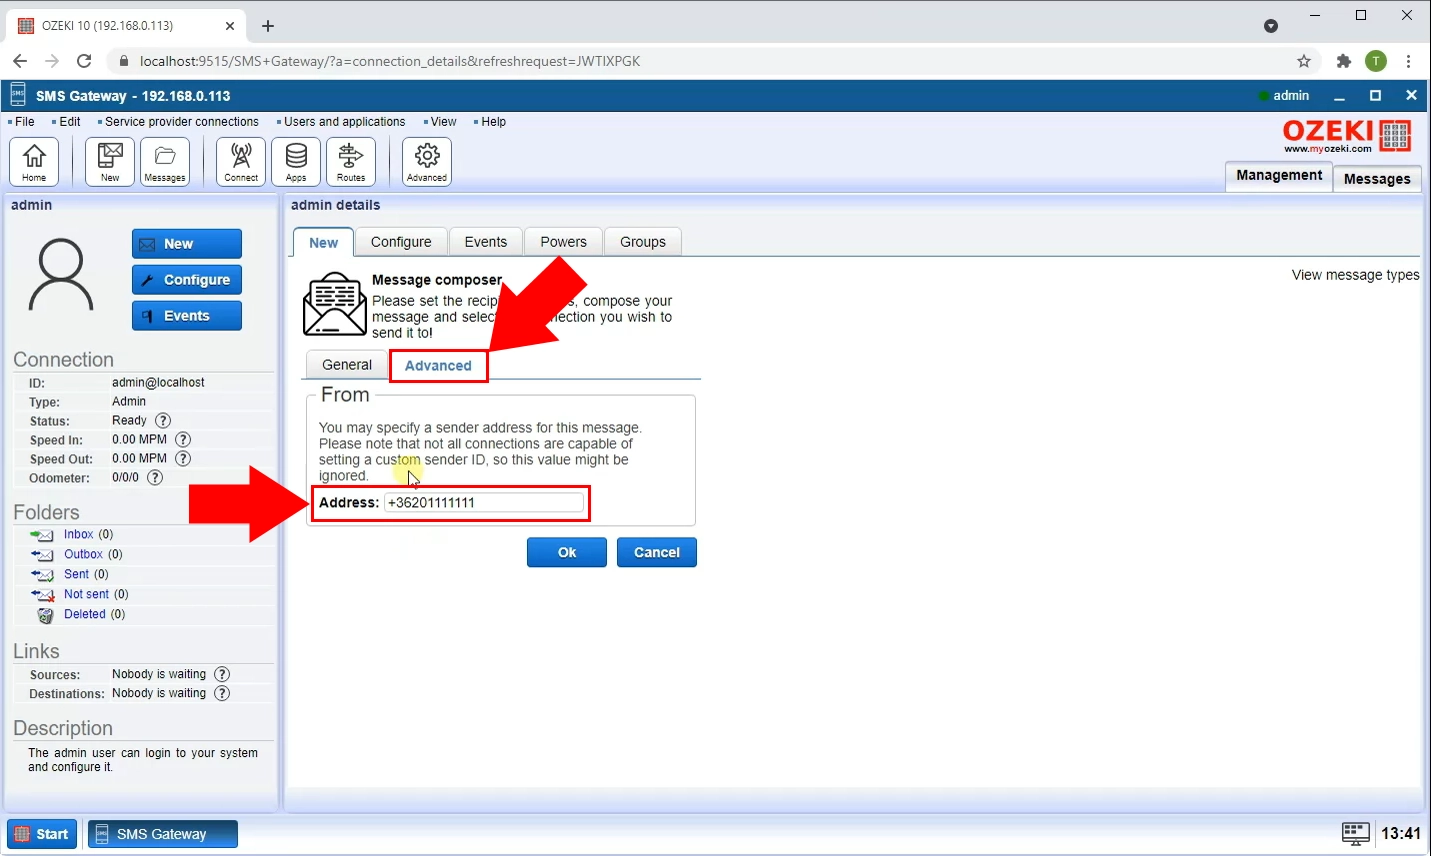
Open the "Advanced" tab, then specify the sender address for the message. Fill out the Address box with your phone number. After that, save it with the "Ok" button. As soon as the message was sent, you will receive a notification, including the message delivery history, where you can see the details. Bring up the Home page, by selecting the "Home" icon at the toolbar.
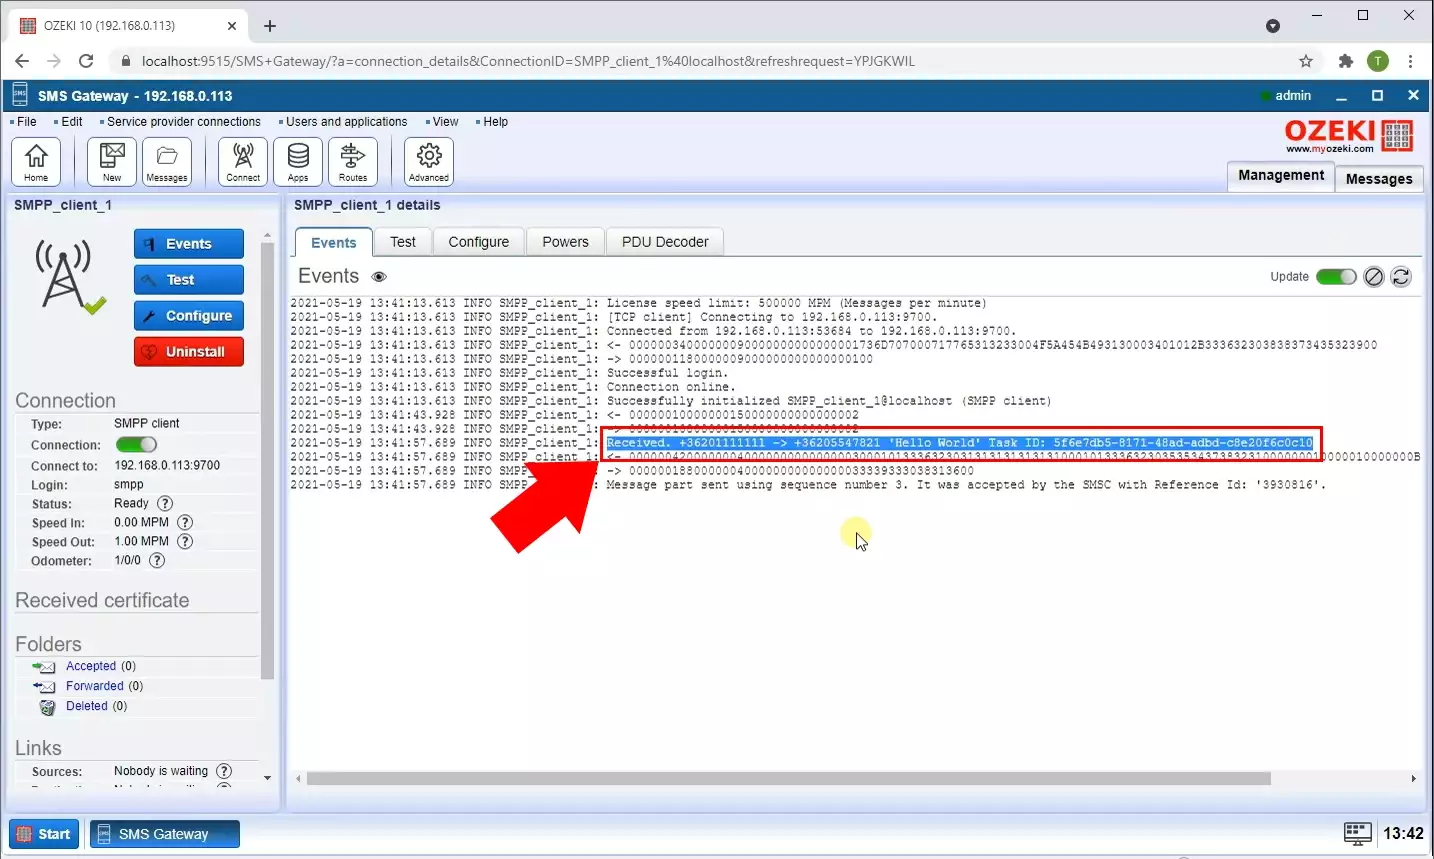
By clicking on the "SMPP_client_1" connection at the Home page, will show up the
Events tab, where you can track whether your message has received or not.
Once you have entered all the required information accurately, proceed with confirming
the details and saving the connection settings. At this point, your Ozeki SMS Gateway
will be ready to establish a connection to the remote server using the SMPP client
option you installed earlier.
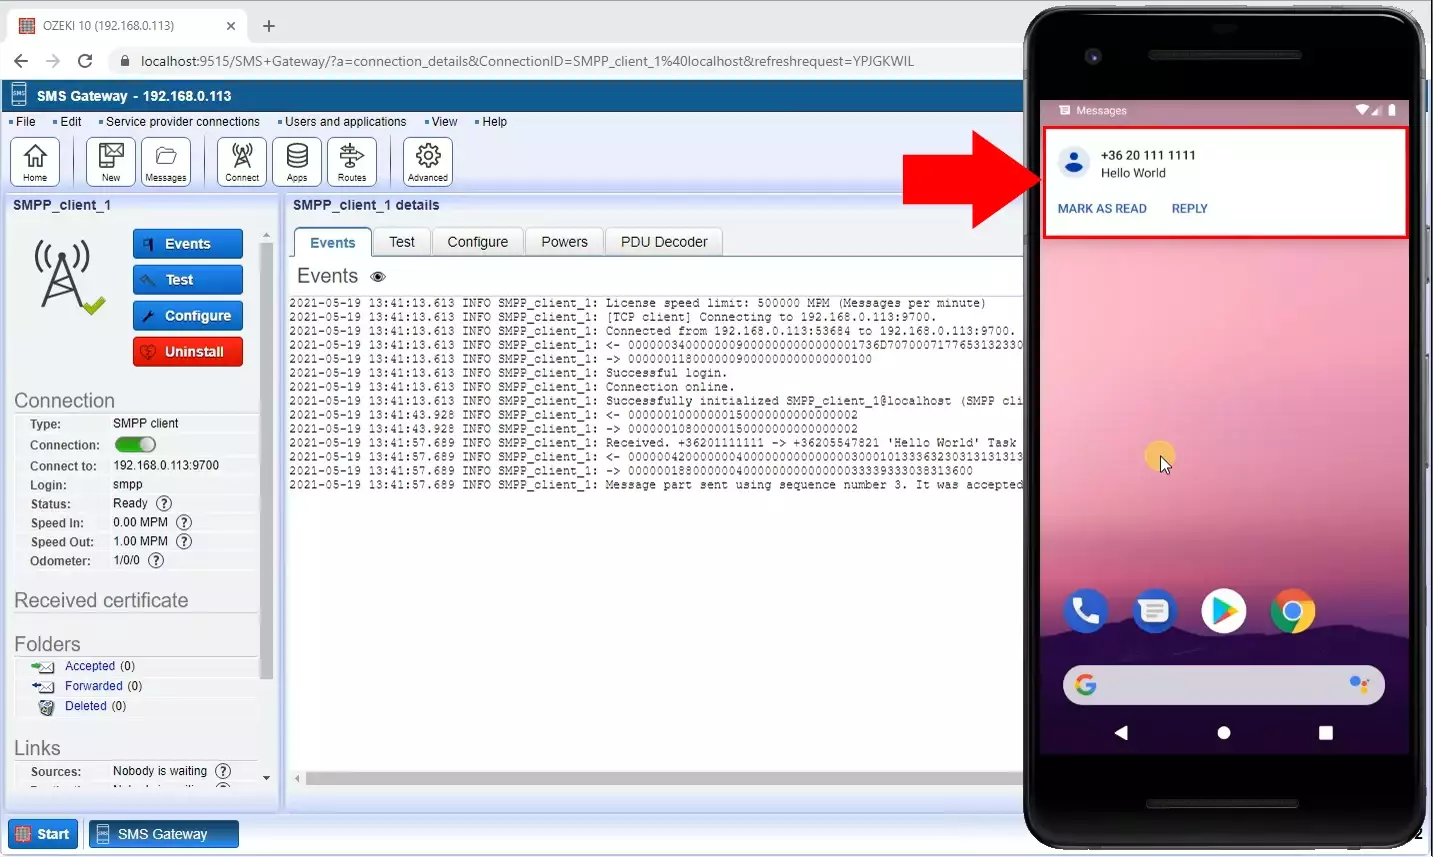
If the SMS was sent successfully, it will indeed appear on the recipient's mobile phone screen. Once the notification is received, the recipient can access the message directly from their phone's messaging app. When the recipient opens the message, they will be able to view the content of the SMS. The appearance of the SMS on the recipient's mobile phone screen will follow the standard messaging format of the phone's operating system.
FAQs
How do I change the sender ID on my text messages?
Typically, to customize the sender ID on your text messages, you must use a third-party SMS gateway provider or an app. Due to spam and security issues, it's significant to know that several nations and carriers impose limitations on changing sender IDs. Before making any changes, make sure you comply with local laws and receive the necessary authorizations.
What is sender ID for text messages?
When a text message is delivered to a recipient's phone, a special identification number known as the sender ID appears as the "from" address. Before opening the communication, it enables receivers to identify its sender.
Is the SMS sender ID the phone number?
Sender IDs are used to establish trust and authenticity in SMS communication and can either be alphanumeric (such as a company name) or numeric (such as a phone number).
Is SMS spoofing Legal?
SMS spoofing is generally illegal in many jurisdictions as it is considered a fraudulent and deceptive practice that can be used for malicious activities. Always comply with the laws and regulations regarding SMS usage to avoid legal consequences.
Summary
In this quick guide, you could learn how to set a custom phone number or alphanumeric sender ID as the sender telephone number for your SMS messages through the Ozeki SMS Gateway. With this feature, you can add a personal touch to your communications and improve brand recognition. By following these simple instructions, you can improve your SMS marketing, notification, and communication strategies, and make use of Ozeki SMS Gateway ability to send customizable messages.
