How to use the SMS NuGet library in F#
What is a NuGet?
Nuget is the package manager of the .NET framework. You can use a Nuget package in any .NET based application. If you are using Visual Studio 2019 you are able to install a Nuget pakcage with a few clicks. In the following videos I'll show you how to create a F# console application, and how to use the Ozeki.Libs.Rest nuget package in that console application written in F#.
How to use the SMS NuGet library in F# (Quick Steps)
- Create a new F# console application in Visual Studio
- Install the Ozeki.Libs.Rest NuGet package
- Import the previously installed NuGet package with open Ozeki.Libs.Rest;
- Create a new Configuration, Message and a MessageApi object using the Ozeki.Libs.Rest pakcage
- Using the MessageApi object send the previously created message
Step 1 - How to create a new F# console application
Step 2 - How to install the Ozeki.Libs.Rest NuGet package
To install a NuGet package in Visual Studio you need to right click onto the icon of the project, then select the Manage NuGet Packages from the dropdown menu. After that you have to search for the package you want to install, in this case it is the Ozeki.Libs.Rest package. When you have found the Ozeki.Libs.Rest package you have to install it by clicking on the Install button. When it is installed, you are able to import and use the package in your project.
Open the NuGet package settings
Open the SendSMS project in Visual Studio. In the Solution explorer panel on the left-side, you can see the SendSMS solution. Right-click it and choose the ‘Manage NuGet Packages…’ option (Figure 1). This will open the settings of a NuGet Packages. The NuGet Package is a ZIP file with the .nupkg extension. It contains the compiled and other files related to the code.
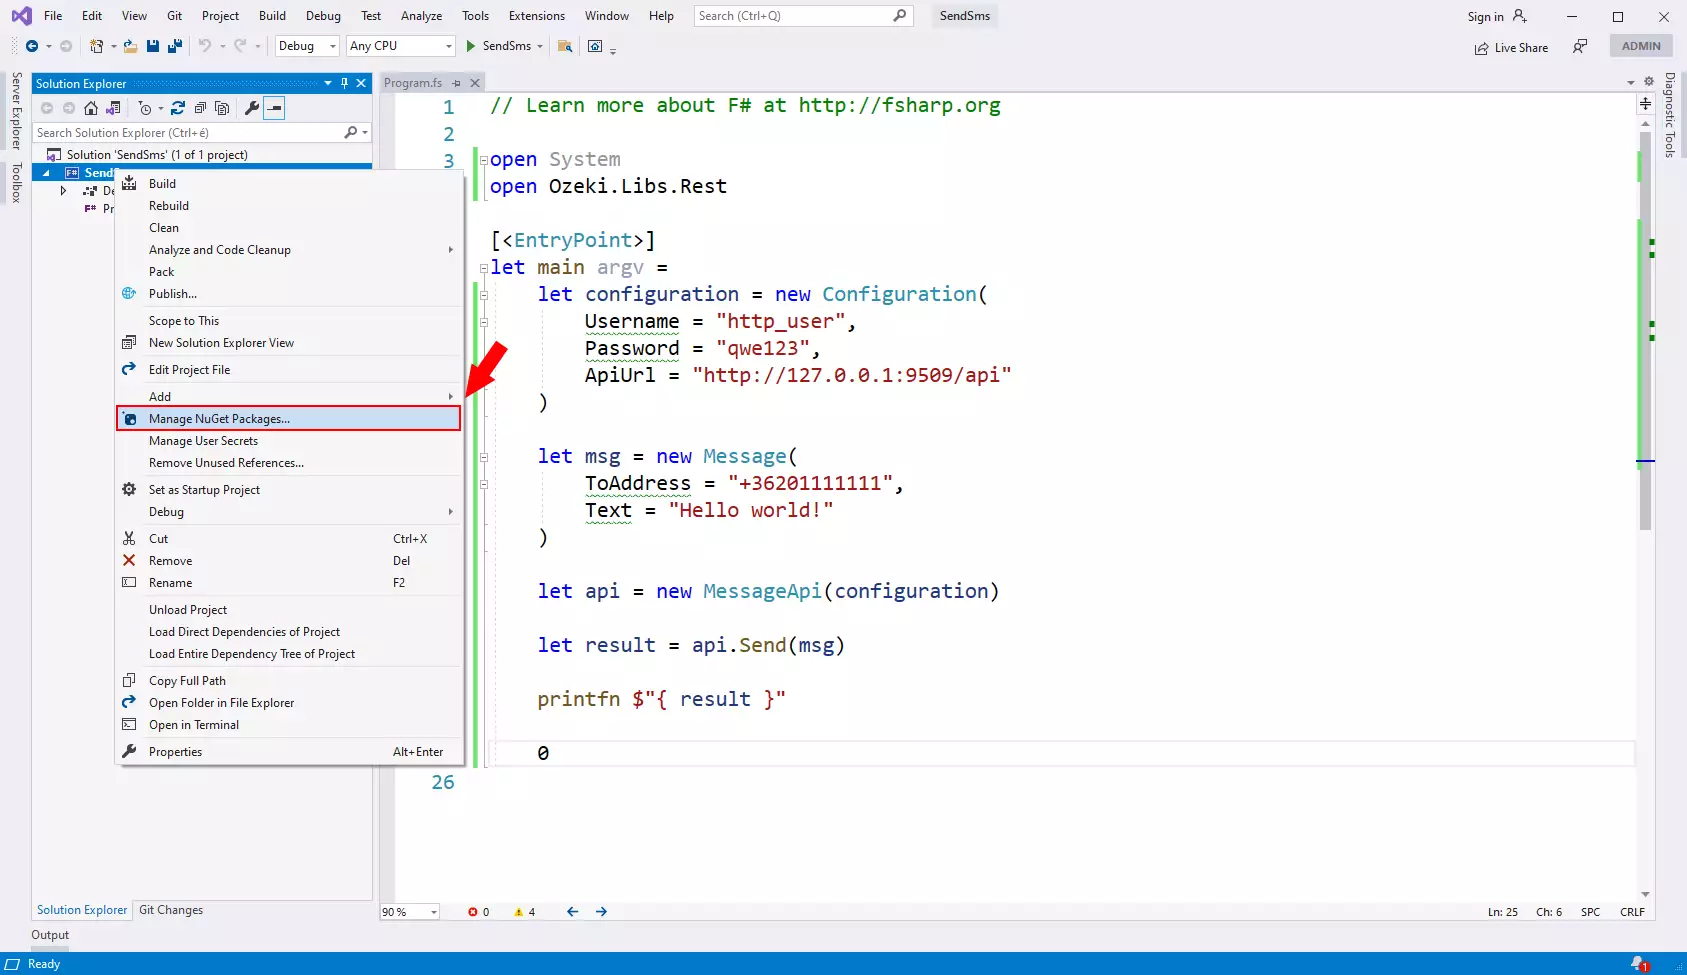
Find the Ozeki.Libs.Rest package
In the NuGet package settings, you can find a search bar located under the ‘Browse’ tab. Type in the Ozeki.Libs.Rest text. Now Visual Studi will find the Ozeki.Libs.Rest NuGet package. If you click it, you will see the details about the package in the right-side panel. You can find an Install button next to the version number. Click it to start the installation process (Figure 2).
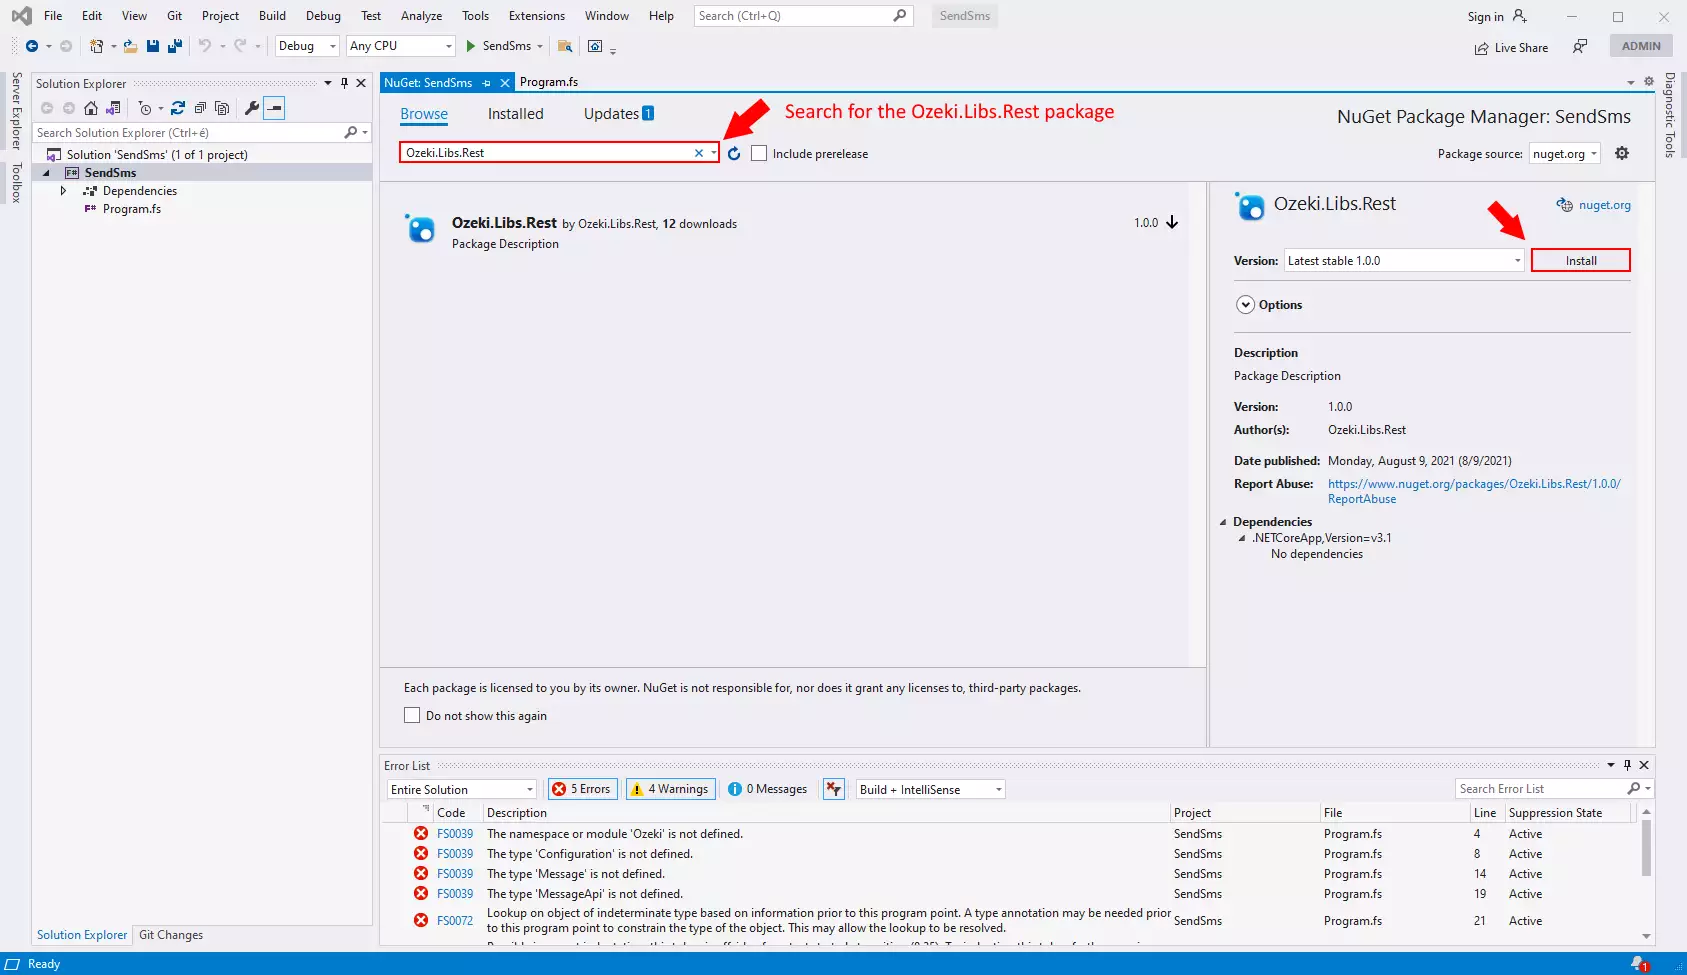
Install Ozeki.Libs.Rest
Wait for the installation process to finish. If you have a green tick in the logo of the Ozeki.Libs.Rest, it means that the NuGet Package is installed. To have a stable package, you need to update it. To check if you have the latest version, expand the list using the ‘Version’ drop-down menu (Figure 3). Select the latest version and click the Update button. It will automatically update your package.
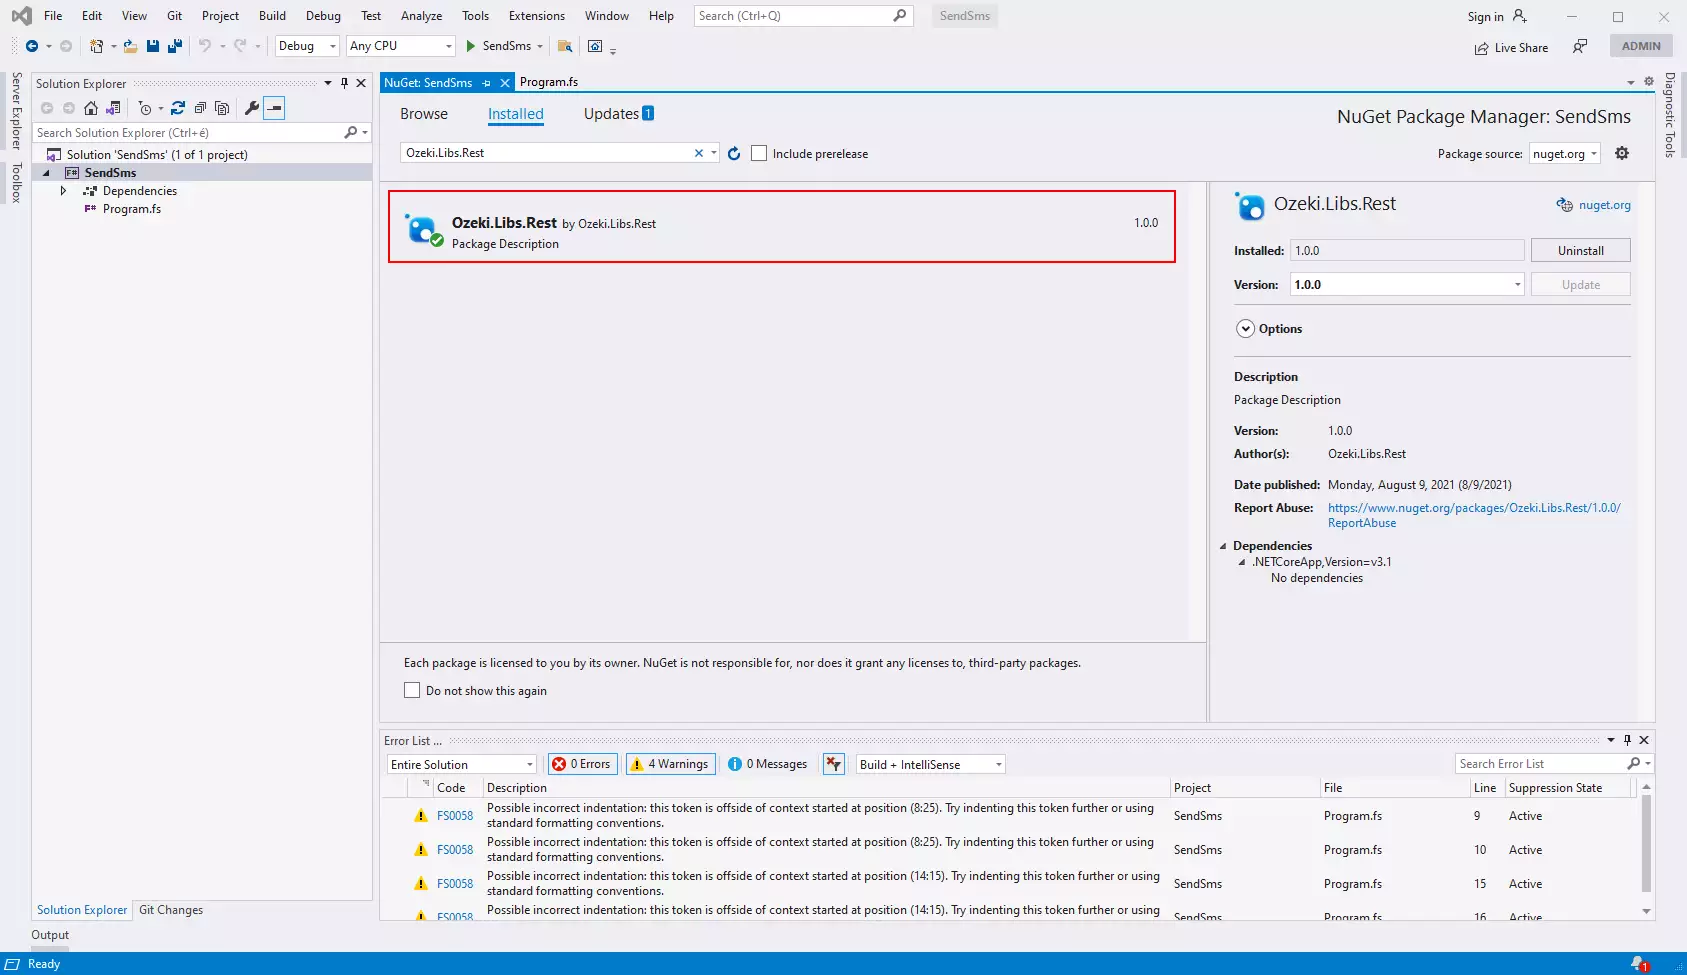
Step 3 - How to use the Ozeki.Libs.Rest package in your C# application
In order to use the contents of the Ozeki.Libs.Rest package, you need to import it by using the following line of code:
open Ozeki.Libs.Rest
Open the SendSMS.sln
To test your solution, you need to execute it. Open the SendSMS.sln using Visual Studio. There you will see the code in the code editor panel. Press the green triangle in the toolbar of Visual Studio next to the SendSMS title, to launch the solution. It will execute the code and will present you the output. (Figure 4)
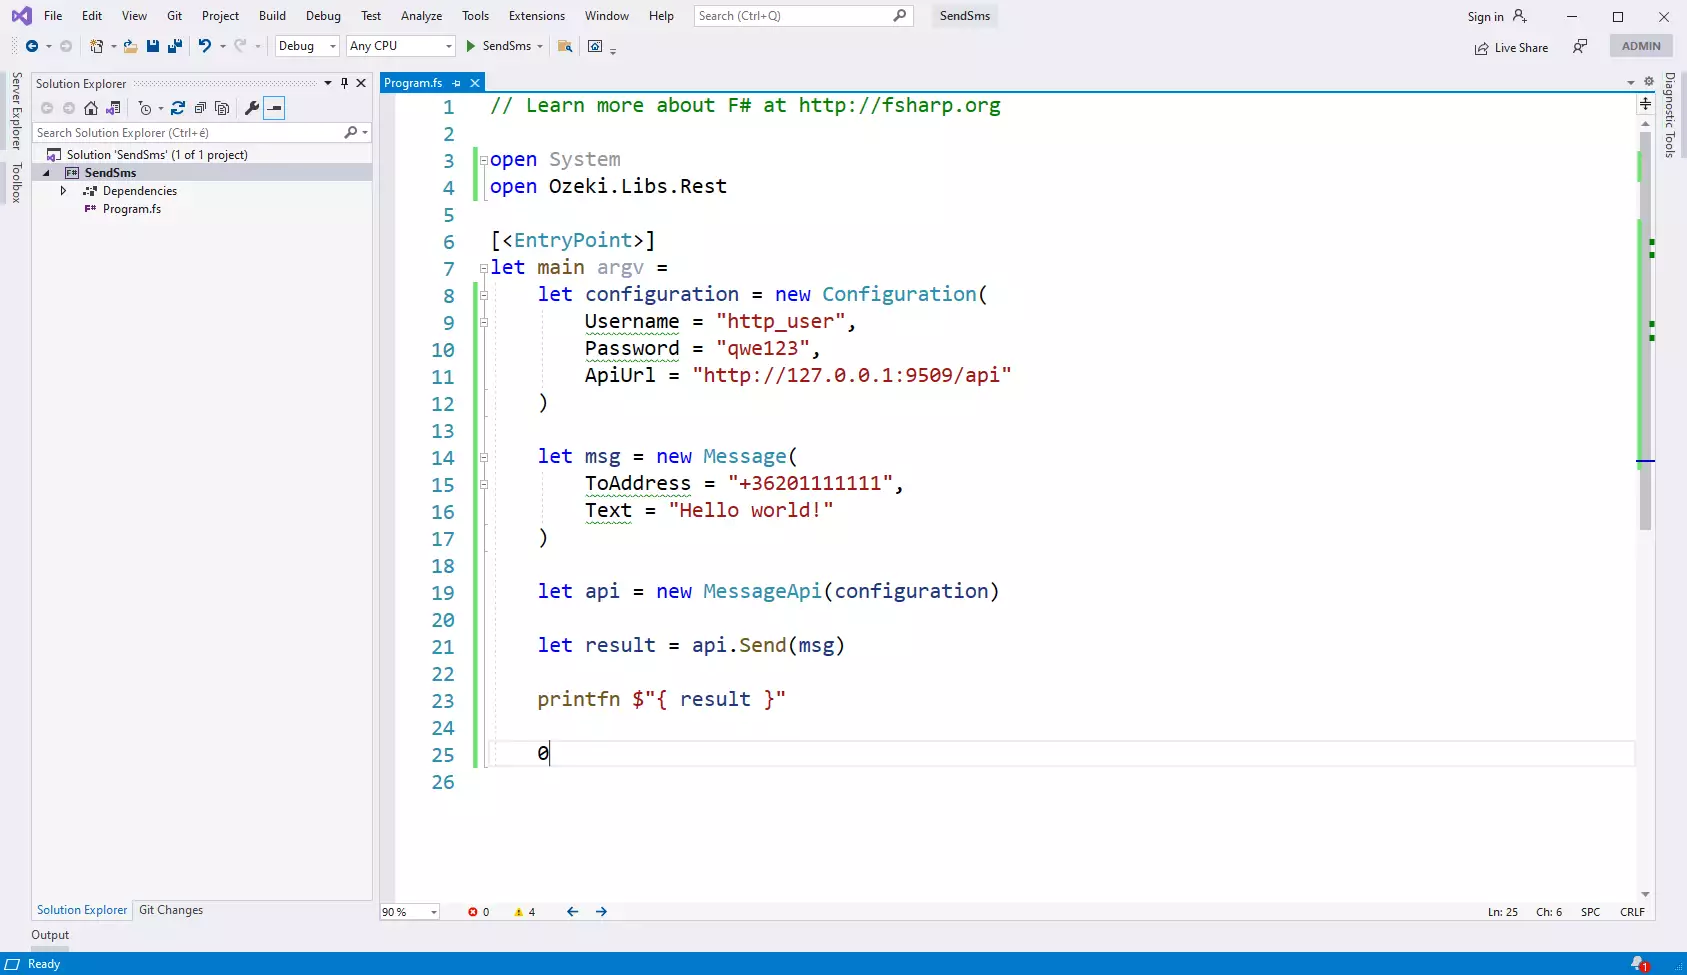
The output of the SendSMS.sln file
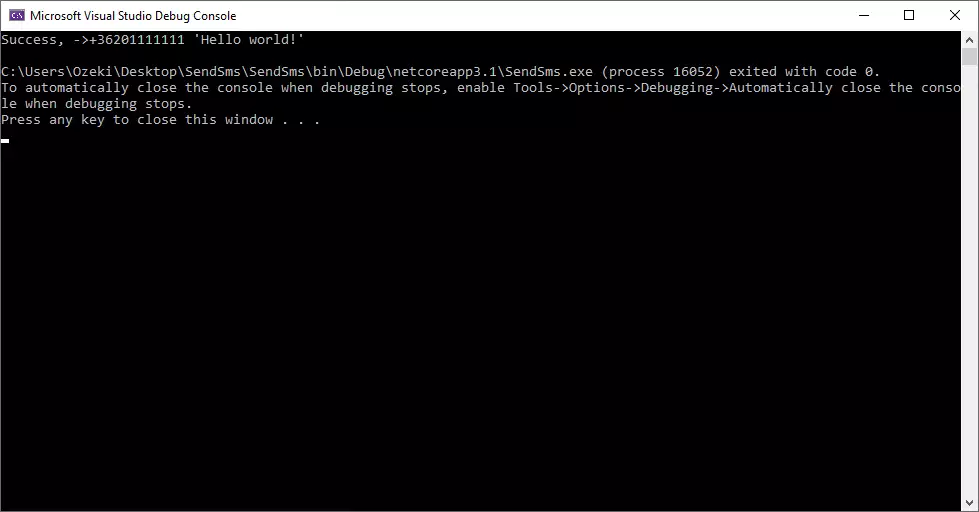
If you execute the SendSMS solution in Visual Studio, a debug console will pop-up. If you have successfully sent the SMS, you will see the phone number and the text of the SMS in the debug console. You can find more information about the debugging process below the success message in the debug console. To close the window, press any key on your keyboard (Figure 5).
Result of the solution
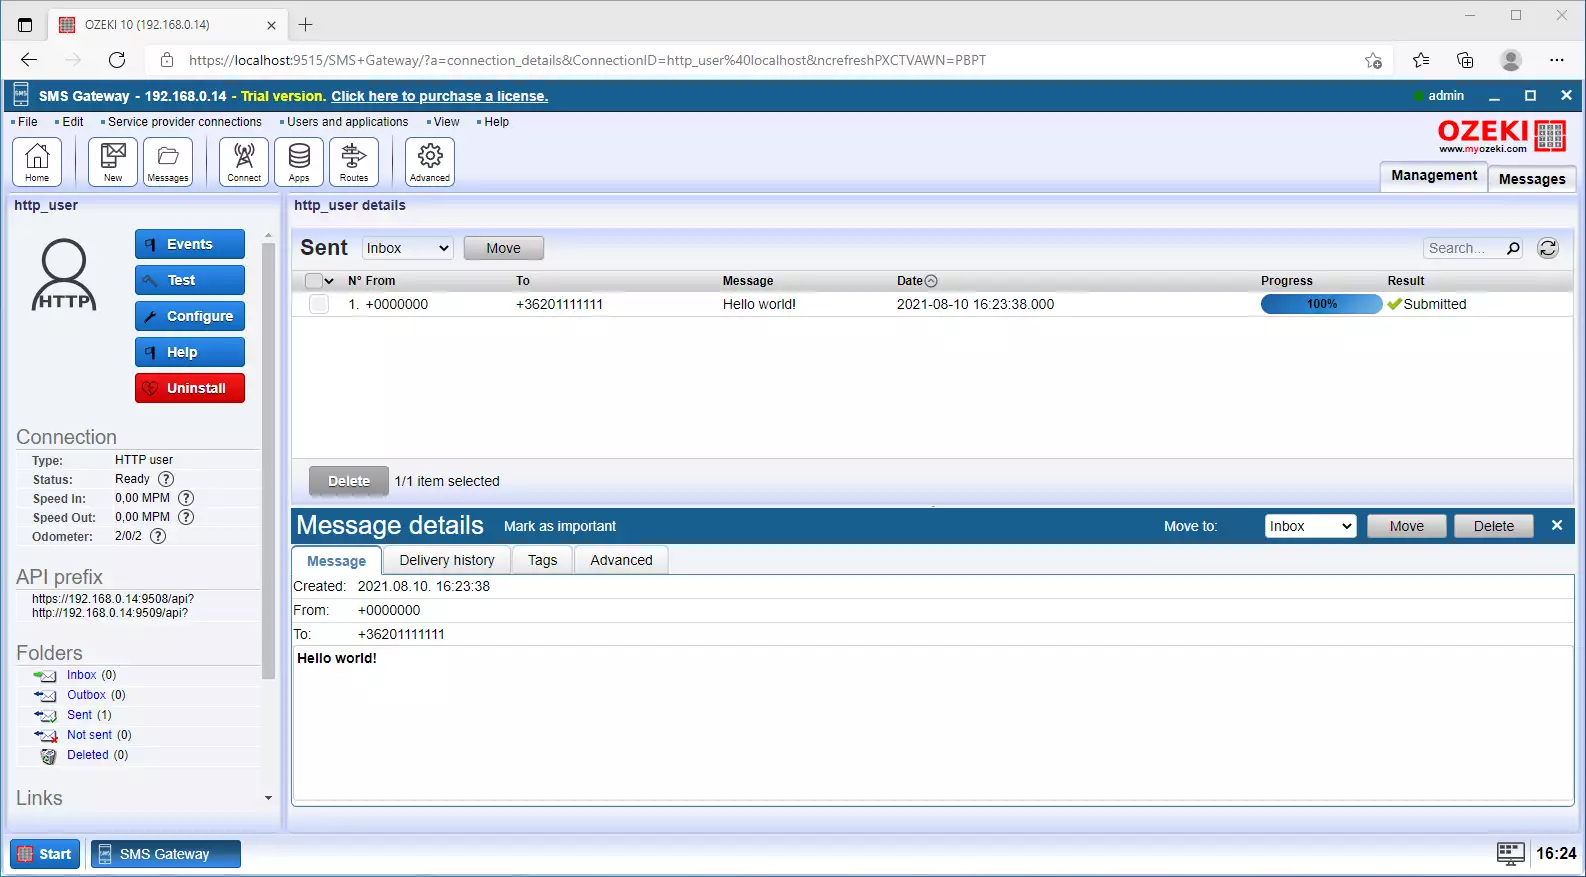
The important result of the solution is the sent SMS. To make sure that the SMS message was sent, you can check the Sent folder in the Ozeki SMS Gateway. To do so, open the Ozeki SMS Gateway and search for the http_user. Find the Sent folder in the Folders list. Click it to see if you message was sent successfully. You can find more information about the message using the Message details panel below the sent message list (Figure 6).
Summary
In this article, you have learned how to install the Ozeki.Libs.Rest NuGet Package. The NuGet packages provide tools for developers. It allows them to create publish and consume packages. On the other hand, it offers a reference list of packages that are used in a project. It is simply a ZIP file with the .nupkg extension. It makes adding, updating and removing libraries in the Visual Studio application.
If you wish to learn more about F# SMS solution with the Ozeki SMS Gateway, feel free to discover more articles about this topic. For example, you can learn more about how to send SMS using F#, or how to receive SMS using F#.
All you have to do to start using F# with the Ozeki SMS Gateway is to download it and start developing your solution.
