How to execute a power script with Windows Task Scheduler
This guide shows you how to set up Windows Task Scheduler in order to run a power script with it every 10 minutes. It is helpful if you enable SQL Text logging for high performance configurations.
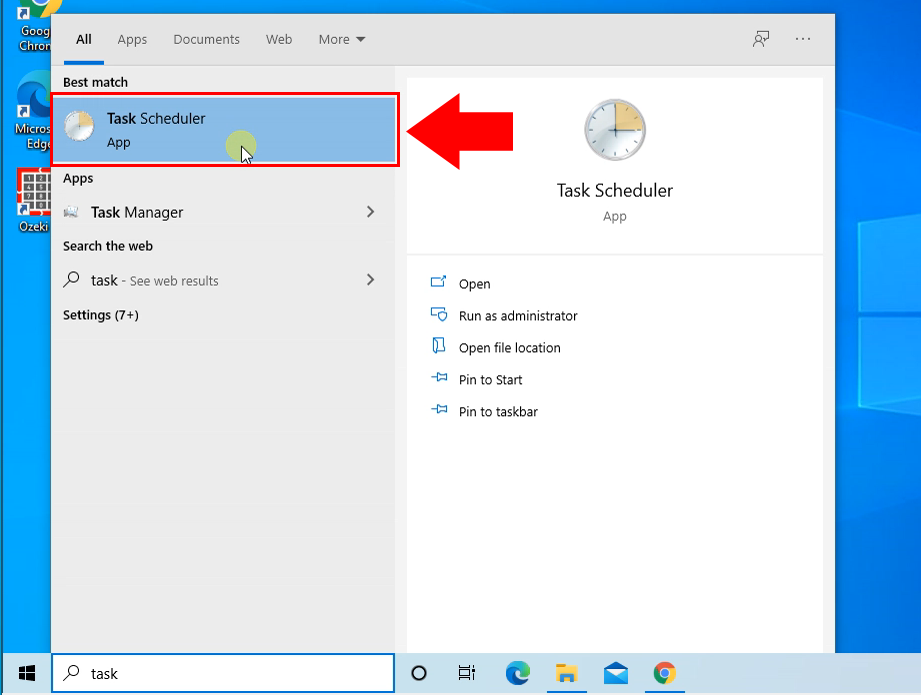
Task Scheduler allows you to automate many tasks on Windows 10. With this tool, you can start applications, run commands, and execute scripts at a particular day and time, or you can also trigger tasks when a specific event occurs. To create a task using advanced settings using the Task Scheduler open the windows start menu and search for Task Scheduler, click the top result to open the experience (Figure 1).
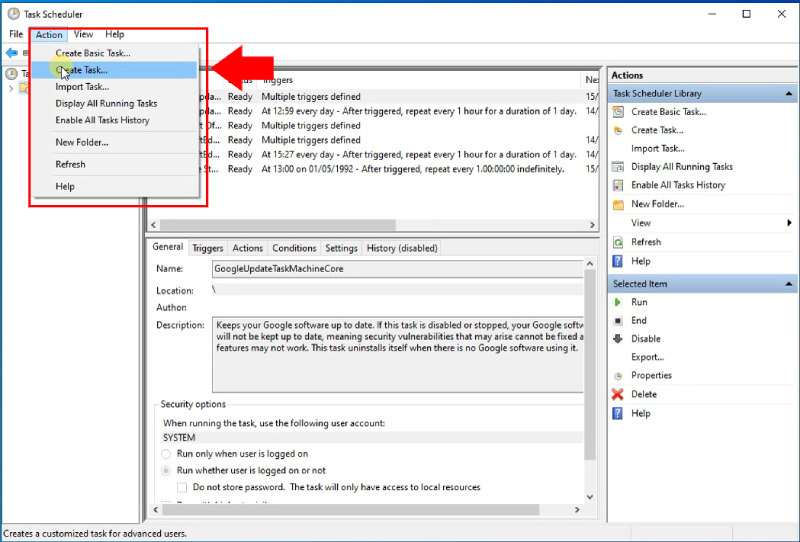
Expand the "Task Scheduler Library" branch, and click the Action menu. Then select the Create Task option as you can see it in the Figure 2.
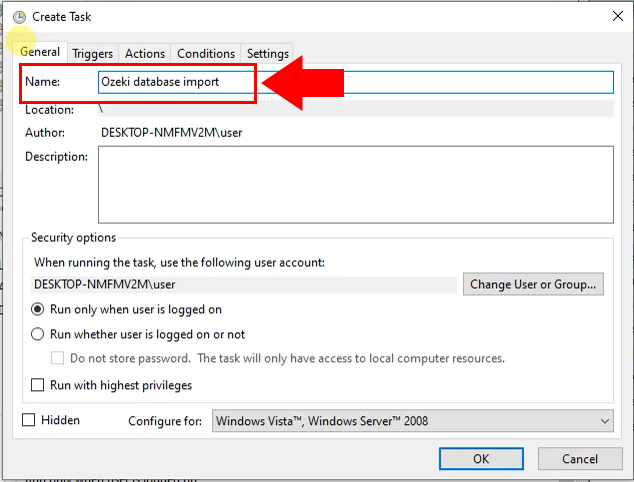
In the "Name" field, type a short descriptive name for the task. For example, Ozeki database import. (Figure 3)
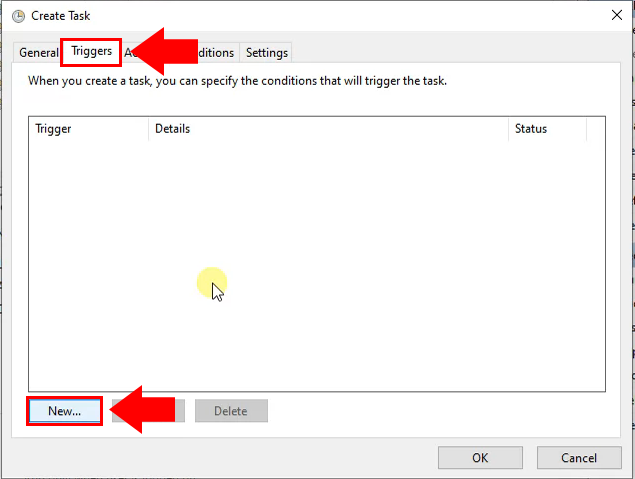
Now select the Trigger tab and click the New button. When you create a task, you can specify the conditions that will trigger the task (Figure 4).
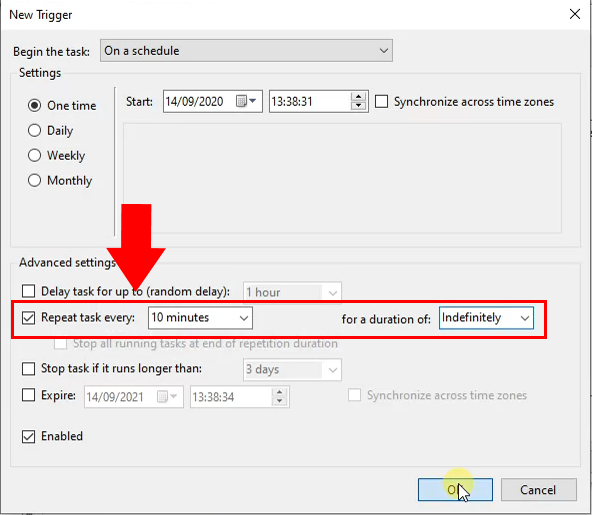
In the new trigger page Advanced section check the "Repeat task every:" option. Here select the 10 minutes option and the "for a duration of:" will be indefinitely as the Figure 5 shows.
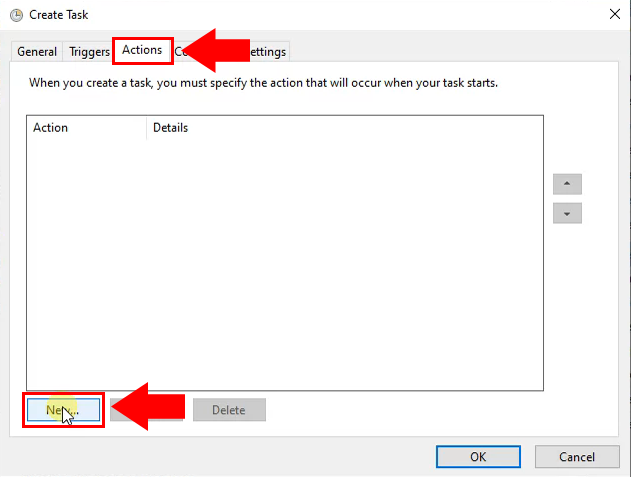
Now back in the Create Task page select the Action tab and click the New button. When you create a task, you must specify the action that will occur when your task starts (Figure 6).
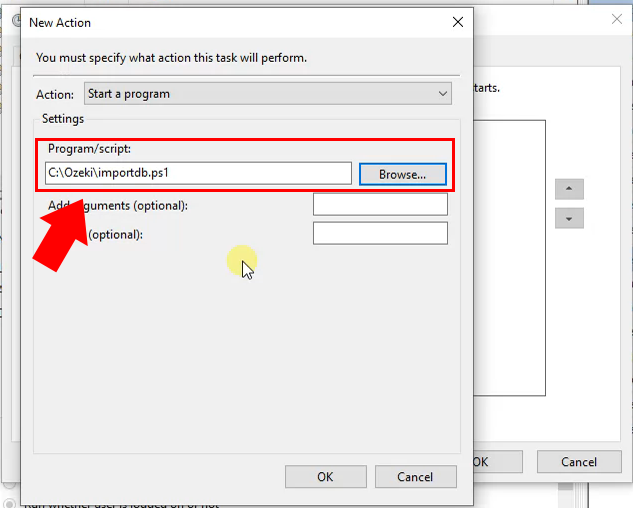
In the New Action page under the "Settings" section, in the "Program/script" field, specify the path for the Ozeki import database power shell script. In this example it is located in C:\Ozeki as you can see in the Figure 7.
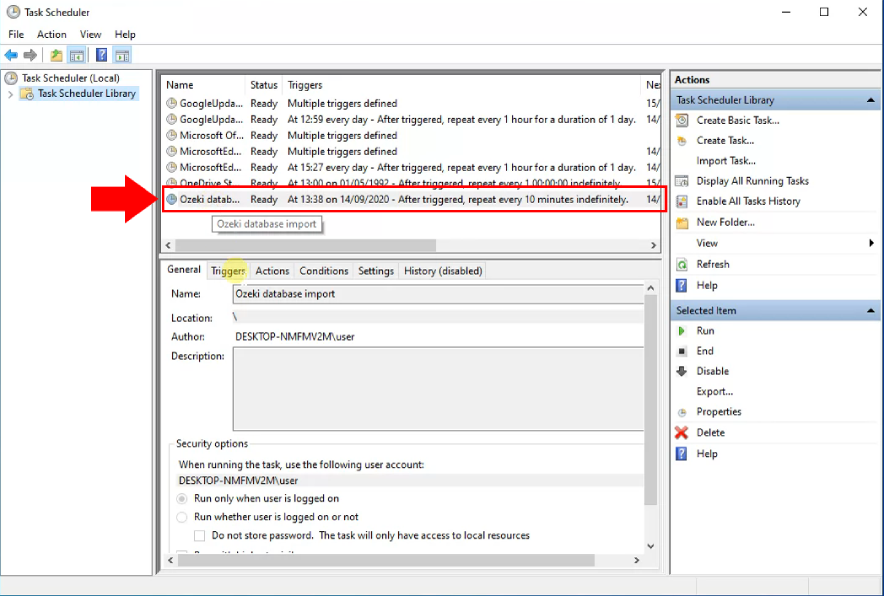
Finally in the Task Scheduler Library you will see the newly created scheduled task (Figure 8).
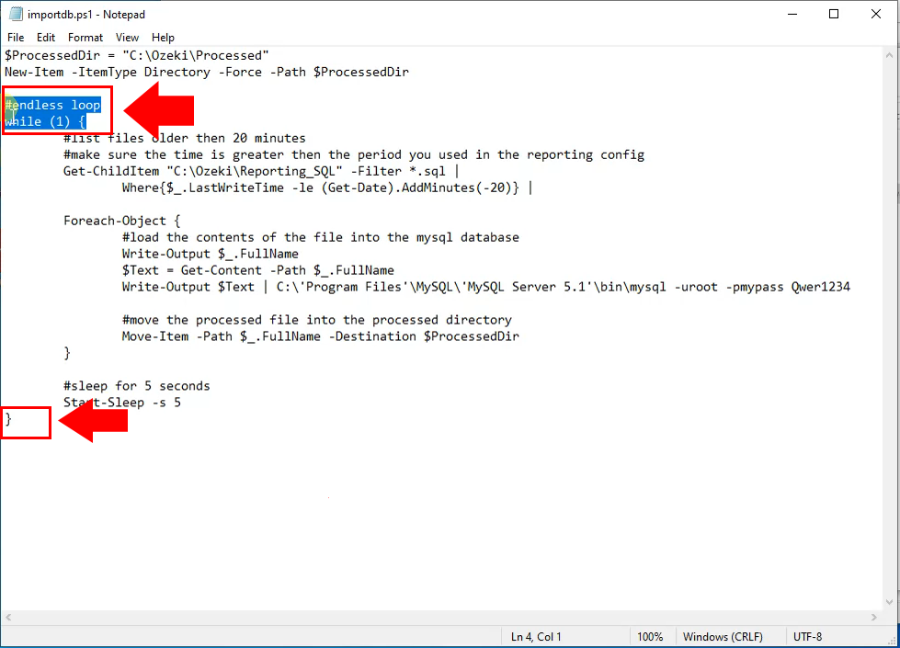
The last but very important step is to remove the endless loop from the script so delete that section form the importdb.ps1 file as you can see in the Figure 9.
