How to send a scheduled SMS
This guide gives information on how to send a scheduled SMS message, and how to get reports from Ozeki SMS Gateway when the message is submitted to the mobile network and when it is delivered to the recipient handset. (Video 1, Figure 1)
Step 1 - Install HTTP API User
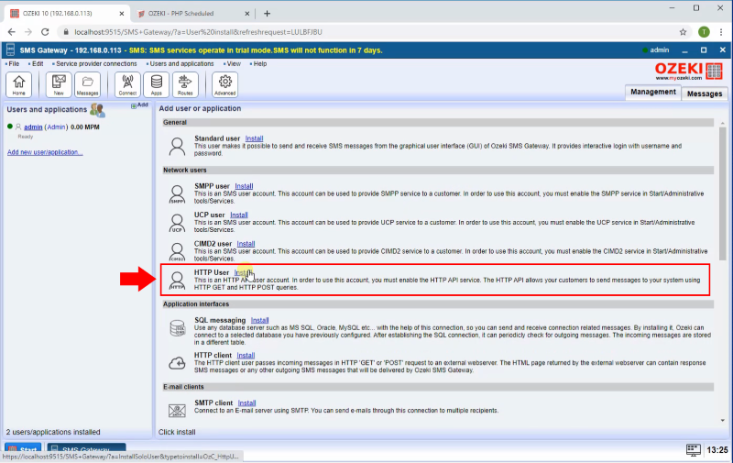
You can simply install the HTTP API User on the Management console by clicking Add new user/application... in the Users/Applications panel. An interface will open consisting of two panels. The right-side panel contains the users and applications you can install with a brief description next to them. Find the HTTP API User and click the blue 'install' button next to it (Figure 2).
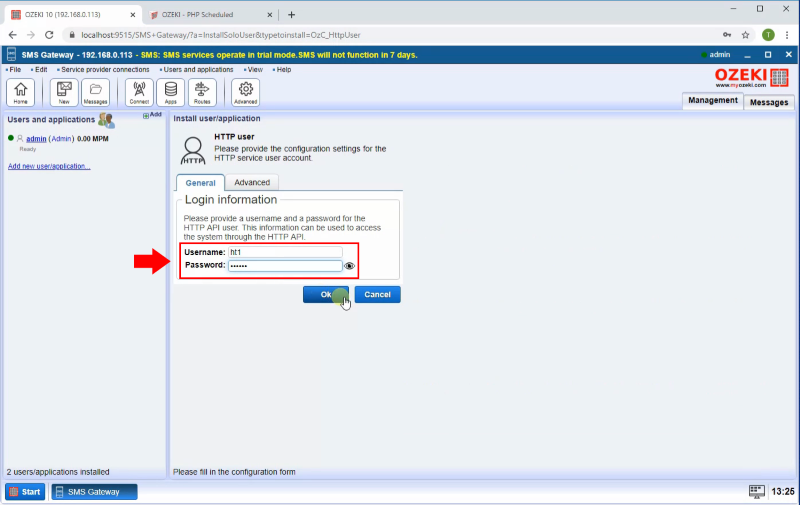
On the Name section provide the unique name for the HTTP API User and provide the username and password for the authentication (Figure 3).
Step 2 - Enable Log communication events
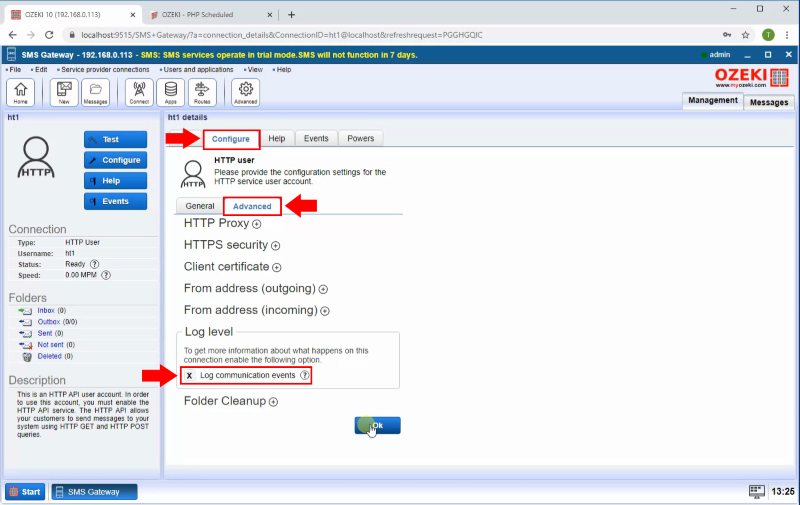
In order to able to see the HTTP communication in the HTTP API user Events tab you need to enable log communication events. To make this. open the HTTP user Configure tab. Under it in the Advanced tab Log level section check the Log communication events option as the Figure 4 shows.
Step 3 - Create PHP Code for send message
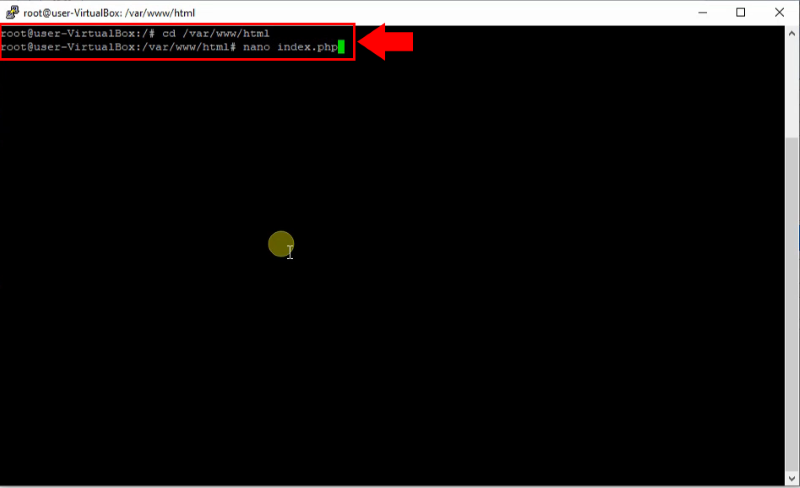
The next step is to create the php files in the Apache web server www root. Go to the /var/www/html folder and create the index.php file (Figure 5).
After you pasted the php code modify the Server connection, change the URL, username and password to your SMS Gateway IP and HTTP API user username and password. Then modify the Report URL-s IP to the Apache webserver IP (Figure 6).
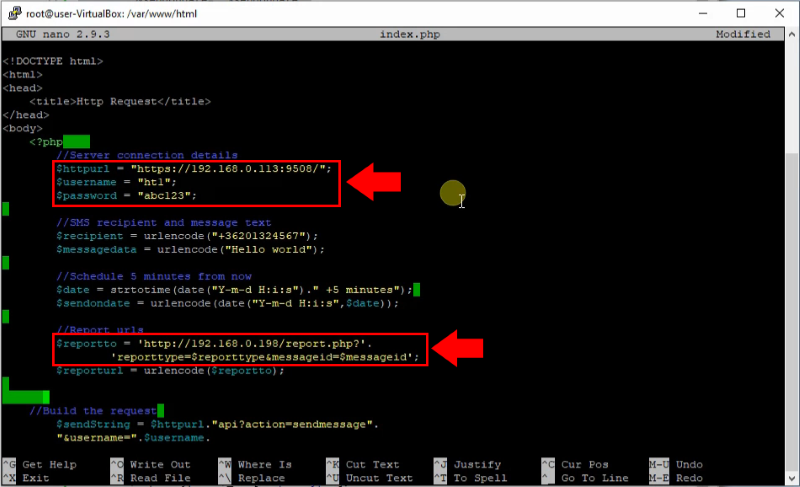
Example code to submit a scheduled SMS
<!DOCTYPE html>
<html>
<head>
    <title>Http Request</title>
</head>
<body>
    <?php
        //Server connection details
        $httpurl = "https://192.168.93.133:9509/";
        $username = "ht1";
        $password = "qwe123";

        //SMS recipient and message text
        $recipient = urlencode("+36201324567");
        $messagedata = urlencode("Hello world");

        //Schedule 5 minutes from now
        $date = strtotime(date("Y-m-d H:i:s")." +5 minutes");
        $sendondate = urlencode(date("Y-m-d H:i:s",$date));

        //Report urls
        $reportto = 'http://192.168.93.242/report.php?'.
                'reporttype=$reporttype&messageid=$messageid';
        $reporturl = urlencode($reportto);


	//Build the request
        $sendString = $httpurl."api?action=sendmessage".
		"&username=".$username.
		"&password=".$password.
		"&recipient=".$recipient.
		"&recipient=".$recipient.
		"&sendondate=".$sendondate.
                "&reporturl=".$reporturl.
                "&messagedata=".$messagedata;

        echo '<p><b> Sending http request:</b><br> '.$sendString.'</p>';
        $aContext = array(
            'http' => array(
                'method'  => 'GET',
            ),
            'ssl' => array(
                'verify_peer' => false,
                'verify_peer_name' => false,
            )
        );
        $cxContext = stream_context_create($aContext);
        $response = file_get_contents($sendString, true, $cxContext);

        echo '<p><b> Http response received :</b> </p>';
        echo '<xmp>' . $response. '</xmp>';
    ?>
</body>
</html>
Step 4 - Create PHP Code for message reports
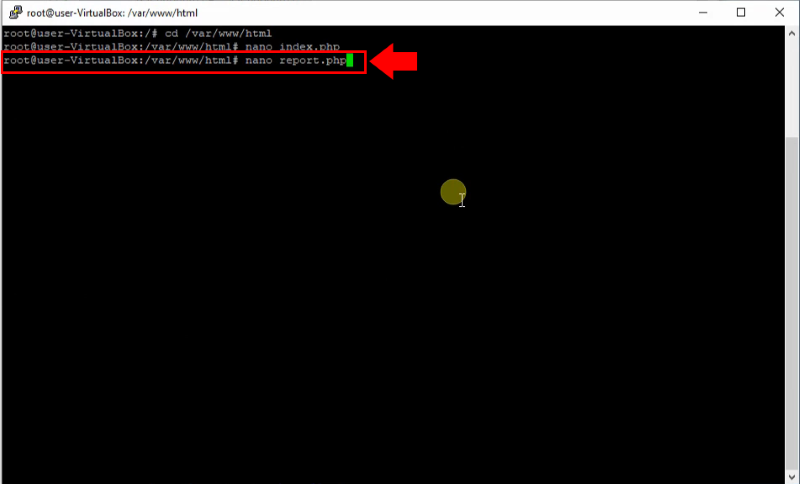
Now create the report php file in the Apache web server www root. In the /var/www/html folder create the report.php file as you can see in the Figure 7.
In the report php file paste the below php code for the SMS report receiving. This code saves all the received SMS report into an smsreport.txt file under the tmp folder (Figure 8).
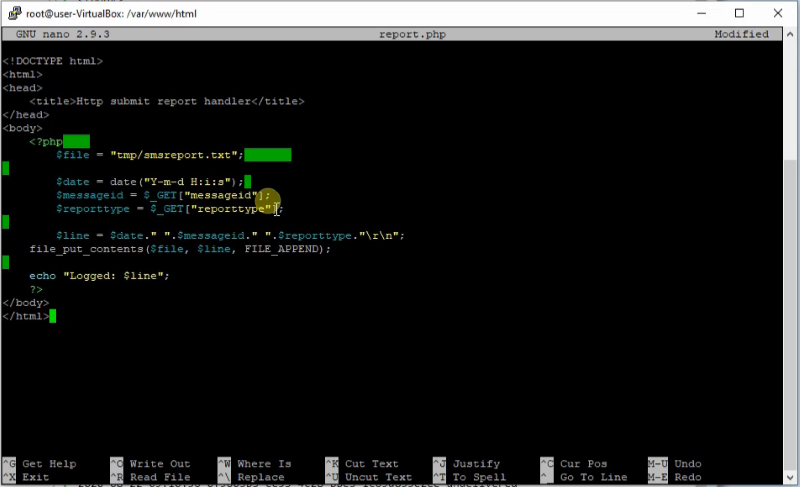
Example code to process incoming reports
<!DOCTYPE html>
<html>
<head>
    <title>Http submit report handler</title>
</head>
<body>
    <?php
        $file = "tmp/smsreport.txt";

        $date = date("Y-m-d H:i:s");
        $messageid = $_GET["messageid"];
        $reporttype = $_GET["reporttype"];

        $line = $date." ".$messageid." ".$reporttype."\r\n";
	file_put_contents($file, $line, FILE_APPEND);

	echo "Logged: $line";
    ?>
</body>
</html>
Step 5 - Send SMS Message
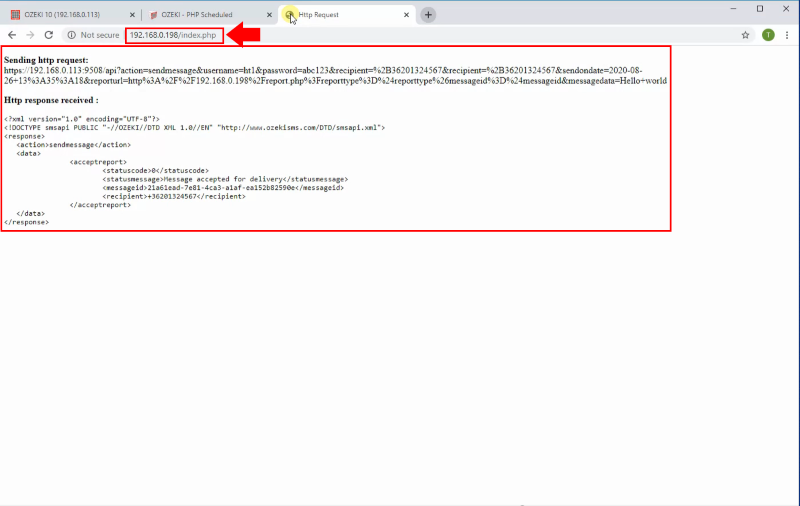
After the PHP files are created in the Apache server you are able to send SMS using it. In a browser open the index.php and you will see the sent http request and the SMS gateway's HTTP response (Figure 9).
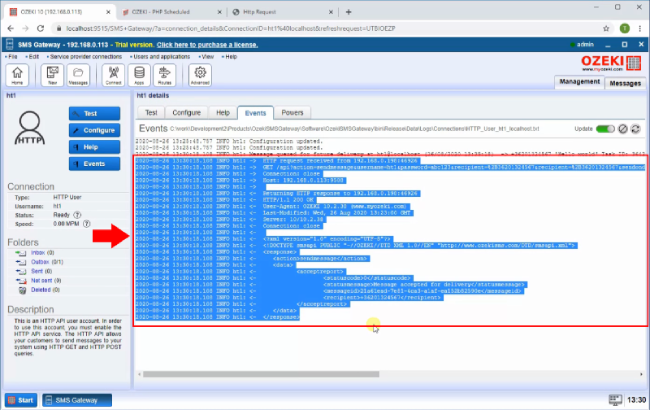
In the Ozeki SMS Gateway events tab you can also see the http communication (Figure 10).
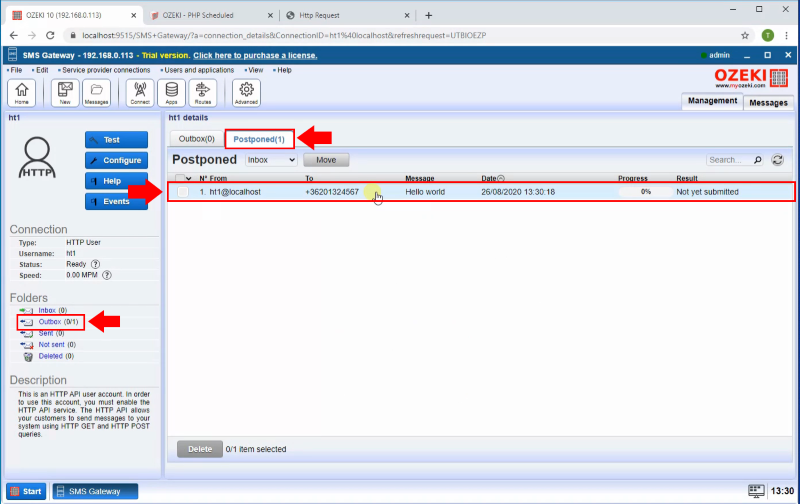
If you open the Ozeki SMS Gateway outbox folder, you are able to see that the message is stored in the Postponed folder because it will be send in the future (Figure 11).
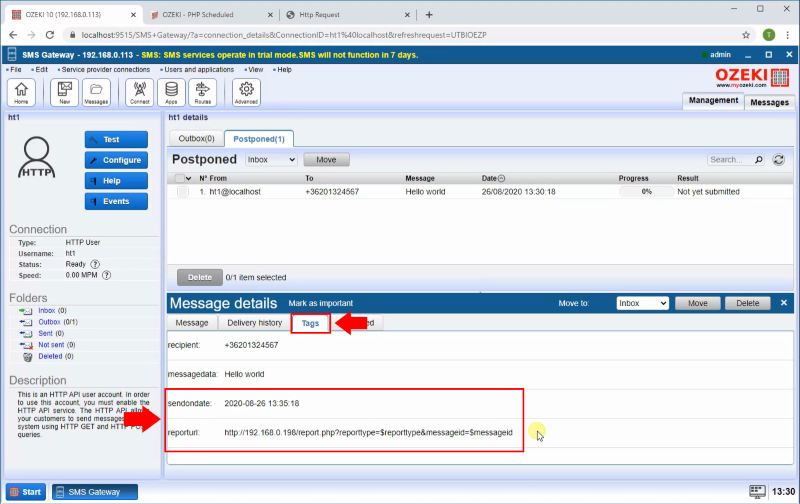
In the message details Tags tab, you can check when will the SMS be send and the report URL what will call the Ozeki SMS Gateway if the SMS is sent. (Figure 12)
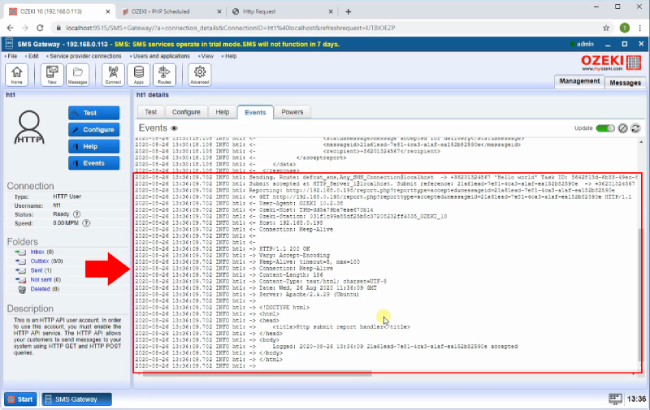
Finally, you will see the Ozeki SMS Gateway is send the message on the send on date time as you can see it in the Figure 13.
Step 5 - Message report received
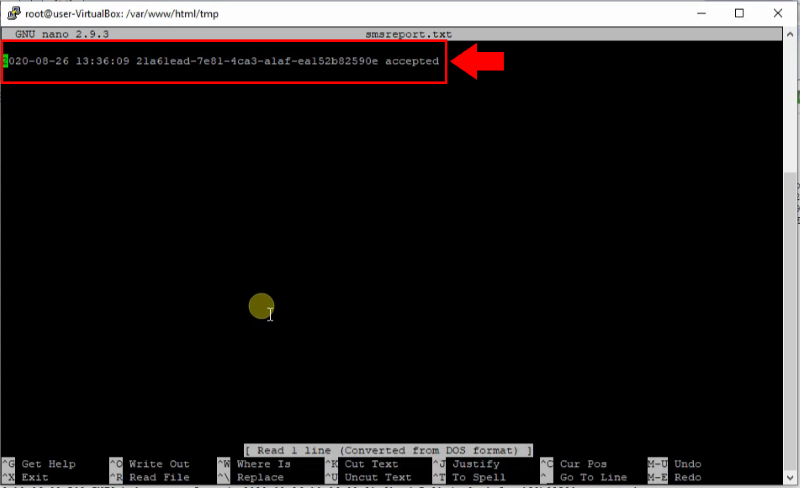
Then the SMS report is sent back to the Apache web server and it store it in the smsreport.txt (Figure 14).
Example report file
2020-08-22 09:06:27 9b457df4-7a38-4fef-b03f-a11d4cf73e70 accepted
2020-08-22 09:07:11 9b457df4-7a38-4fef-b03f-a11d4cf73e7 accepted
2020-08-22 09:07:54 617c6ec4-5844-4895-9a5c-af98d3ecace5 accepted
2020-08-22 09:10:33 617c6ec4-5844-4895-9a5c-af98d3ecace5 delivered
2020-08-22 09:10:40 9b457df4-7a38-4fef-b03f-a11d4cf73e70 delivered
2020-08-22 09:10:54 0f9603b3-ce53-4c28-bbe5-1c69d855e2ee accepted
2020-08-22 09:10:56 0f9603b3-ce53-4c28-bbe5-1c69d855e2ee undelivered
2020-08-22 09:11:27 f531af05-462d-4a74-8eb2-40ad29f06351 accepted
2020-08-22 09:11:32 f531af05-462d-4a74-8eb2-40ad29f06351 delivered
2020-08-22 09:13:34 7ad2c5e2-fa46-472f-adc1-fe2a28bbfa7c accepted
2020-08-22 09:13:45 7ad2c5e2-fa46-472f-adc1-fe2a28bbfa7c delivered
2020-08-22 09:14:35 0e2286bb-5a29-4d59-b636-ff42e2eec375 accepted
2020-08-22 09:17:35 4079feb1-2cf5-4d0f-92e6-4d97e086b918 accepted
2020-08-22 09:17:40 4079feb1-2cf5-4d0f-92e6-4d97e086b918 undelivered
Summary
You have learned about sending scheduled SMS messages from the article above. Sending scheduled SMS messages can optimize your bulk SMS marketing plan, by sending messages when the customer can truly focus on the information you wish to give them. Also, if you have some important information that you wish to send to a recipient, you could setup a scheduled SMS. This way you will not forget to send the message.
If you would like to find out more about the technology behind the scheduled SMS function, visit the Ozeki webpage where you will find useful article about many topics. First of all, you should start with receiving SMS in PHP. If you would like to use SMS features with other programming languages, maybe start with the SMS with Java article.
Don’t waste any more time. Download Ozeki SMS Gateway and start sending SMS now!
