Node.js tutorial: Hello world
How to write your first Node.js program
This tutorial helps you get started with Node.js. It explains what you need to write your first Node.js program, from where to download the tools need, how to install these tools and how to write your first 'Hello world' program. If you have never written a JavaScript program before this is the place to start.
What is Node.js
Node.js is an open-source, cross-platform, runtime environment that executes JavaScript code outside a web browser. Node.js lets developers use JavaScript to write command line tools and for server-side scripting—running scripts server-side to produce dynamic web page content before the page is sent to the user's web browser.
What is syntax error?
Syntax error means I don't understand. If you talk to somebody in English and he does not understand what you say, he will reply with "I don't understand". If you talk to a computer in JavaScript and the computer does not understand what you say, he will reply with "Syntax error".What is Visual Studio Code
Visual Studio Code is a text editor that helps you during the process of writing your JavaScript code. It is like a usual text editor, but it offers highlighting that helps you to identify functions, variables, classes and everything else that can be differ from regular text.
What is a Node.js Hello world program
A hello world program is the simplest program you can write. It simply prints out the sentence: Hello world on the computer screen. The Hello World program is the first program developers write in any programming language.
Prerequisites
Here is what you need to get started. To write your first computer program in JavaScript, you need a Windows computer, Visual Studio Code, Node.js and the example code presented below.
- Windows 10 or 11 computer
- Visual Studio Code
- Node.j
- Ozeki Hello World example project
Step 1 - Download Visual Studio Code
Visual Studio Code
In this first video, we are going to show you how to download visual studio code. It is an easy process; you will not have a hard time following it. The video starts with visiting the following URL: https://code.visualstudio.com/download/. Following the steps will take you all the way to having the installer on your computer. From here, you can start the installation process.
Choose the Windows option
To have an installer that is compatible with Windows, choose the option suitable for Windows 7, 8, 10. It is located under the Windows logo (Figure 1). Now your browser will start the download process and you will have the installer ready to start in no time.

Step 2 - Download Node.js
Node.js
The purpose of this video is to show you how you can download Node.js to your computer. The video will start with visiting the download page of Node.js. The tutorial will take you until you have installed the runtime environment. The video itself in only a little longer than 1 minute and it features all the information you need to complete the process. You may download node.js from the following URL: https://nodejs.org/en/download/current/
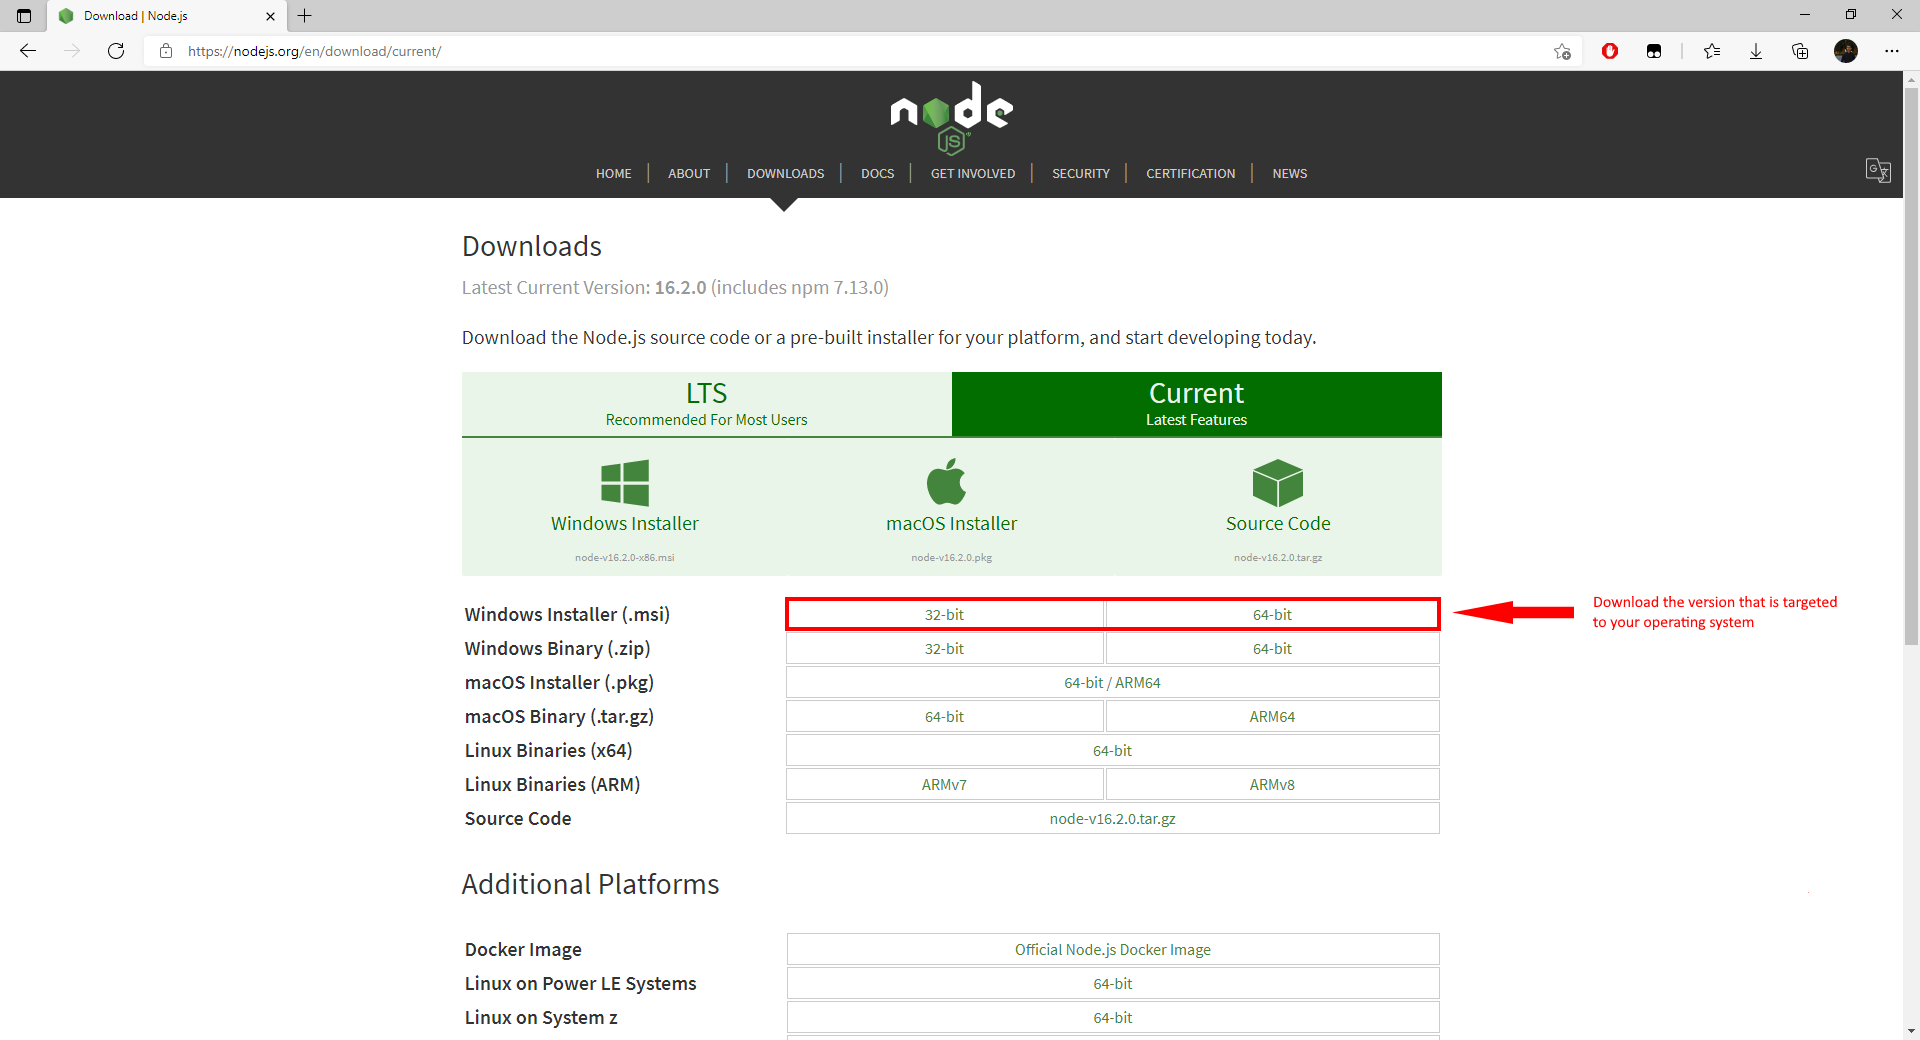
Download page of Node.js
On Figure 2, you can see the download page of the Node.js runtime environment. You can see multiple options of installing methods. In this case, please choose the version targeted to your operating system. For most people, the Windows Installer will be the correct option.
Step 3 - Install Visual Studio Code
To write your first Node.js program, you will need a text editor such as the visual studio code. In the following video you can see how to install visual studio code onto your computer. The video will start with visiting the download page of the Visual Studio programming environment. It will end with the downloaded installer ready to use. In the process, you will learn what download option you need to choose. This video is worth watching because after it you will be able to download Visual Studio Code any time you wish. It is only 1 minute long but it contains all the information you need.
Step 4 - Install Node.js
To write your first Node.js program, you need to install Node.js runtime environment. The following video shows you how this installation can be done. It will start with the installer on your computer. At the end of the video, you will have the program installed successfully. The process is easy to do, and the video is very detailed. You will have no problem with following it.
To test if Node.js is installed, you have to open the Command Prompt.
- Open the Start menu
- Type "cmd" into the search field
- Click Enter
- You will see a black window
- Type the code into the terminal what is in (Code 1)
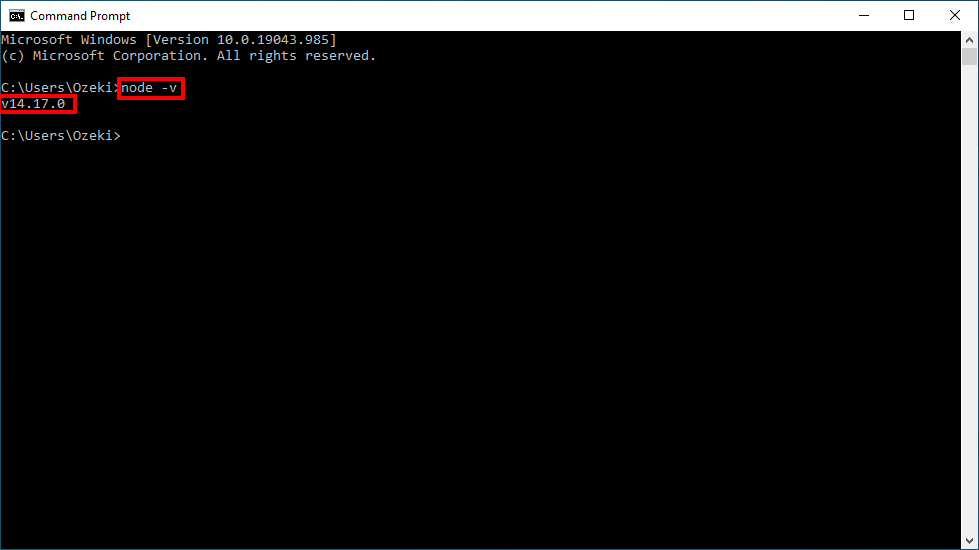
node -v
Test Node.js
To test if Node.js is installed on your computer, you need to open a command prompt and type in the code above. It will print out the version number of the runtime environment if it is successfully installed (Figure 3).
After these steps, we can continue our journey to write our first 'Hello world!' program in JavaScript, and to run this in the Node.js environment.
Step 5 - Setting up the environment
We have to create a folder to store our codes. We can do that before launching the Visual Studio Code, but we can do it that while opening a folder.
In Visual Studio Code we have the ability to have a terminal inside Visual Studio Code, so we set up a terminal inside the program.
The following video will show you how to create a new project in Visual Studio Code. In the process, you are going to create a new folder for the project. The video is only 52 seconds long and it is very detailed. You will learn the process by watching the video.
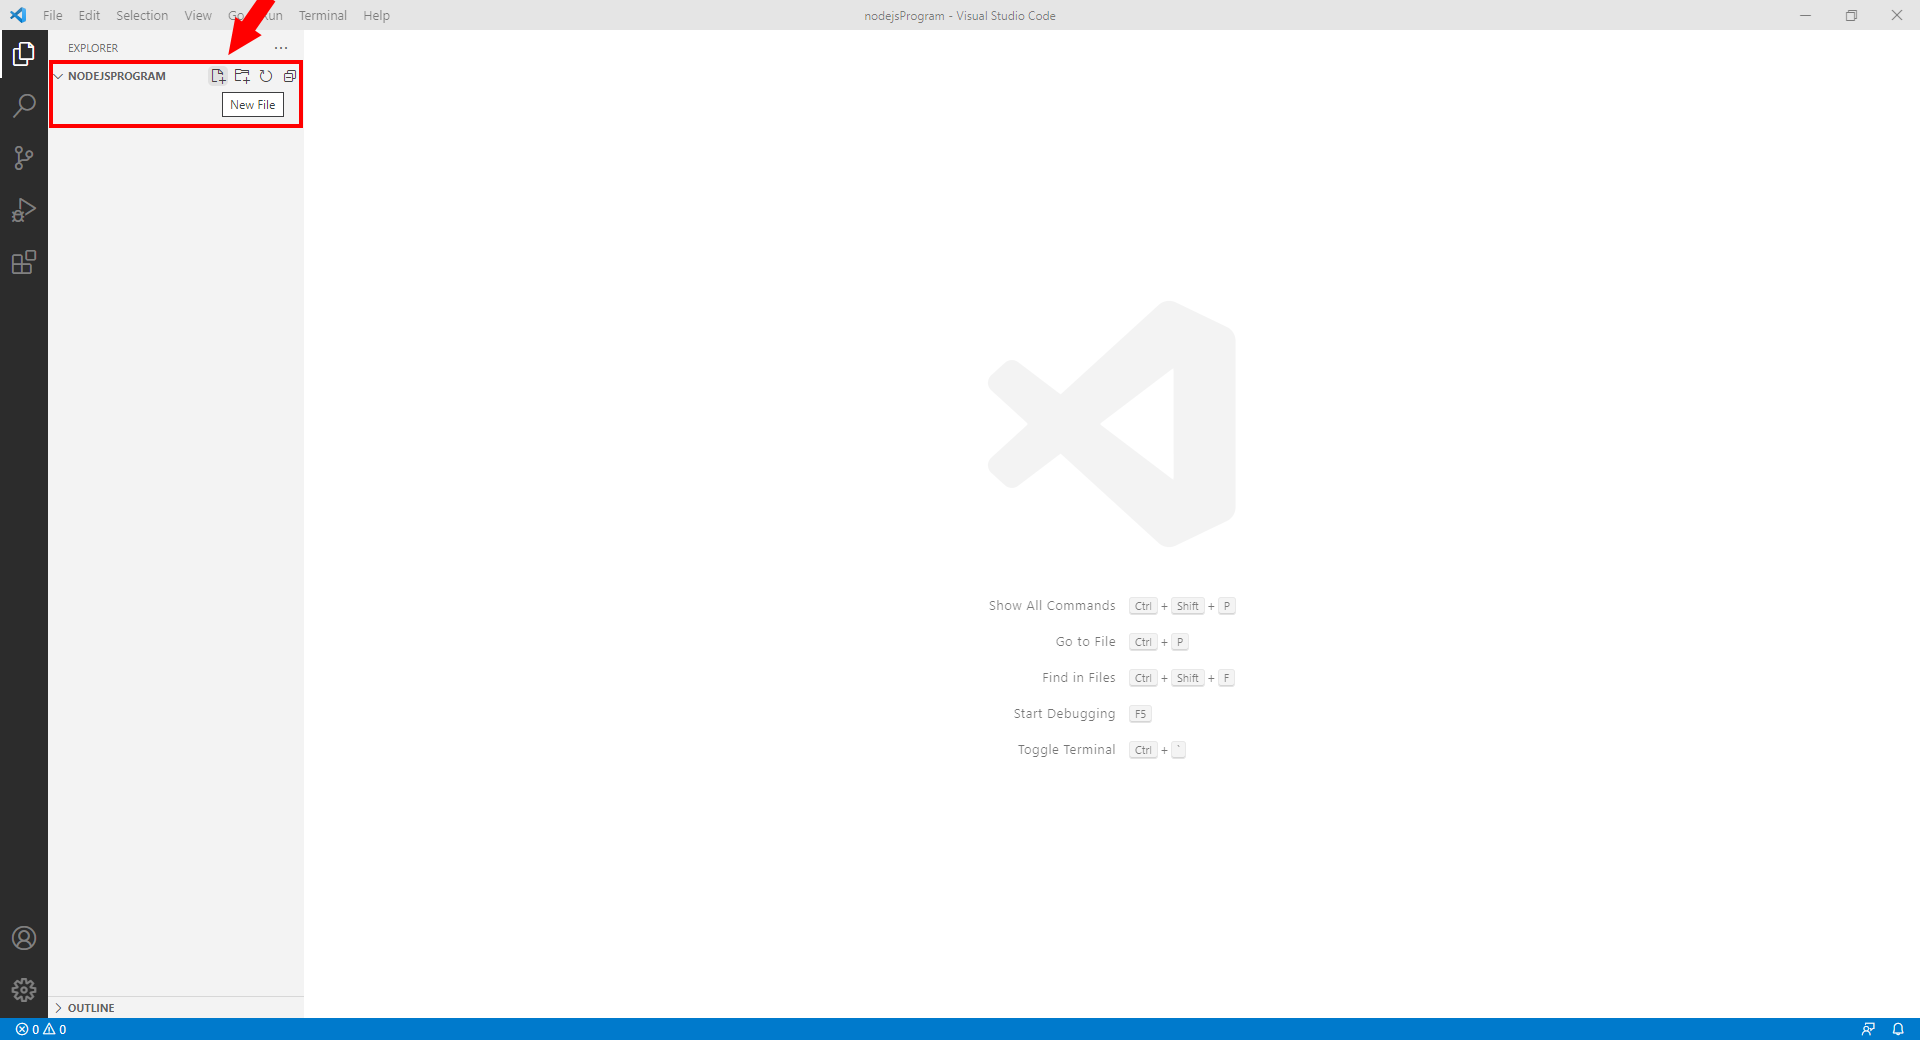
Creating a new file in Visual Studio Code
On Figure 4, you can see which button you need to press to create a new file inside the project. It will open a textbox under the button, where you need to provide a name for the project. After naming the project, you can see that the code editor section changed. Now you can start typing in the code and it will be saved in the project.
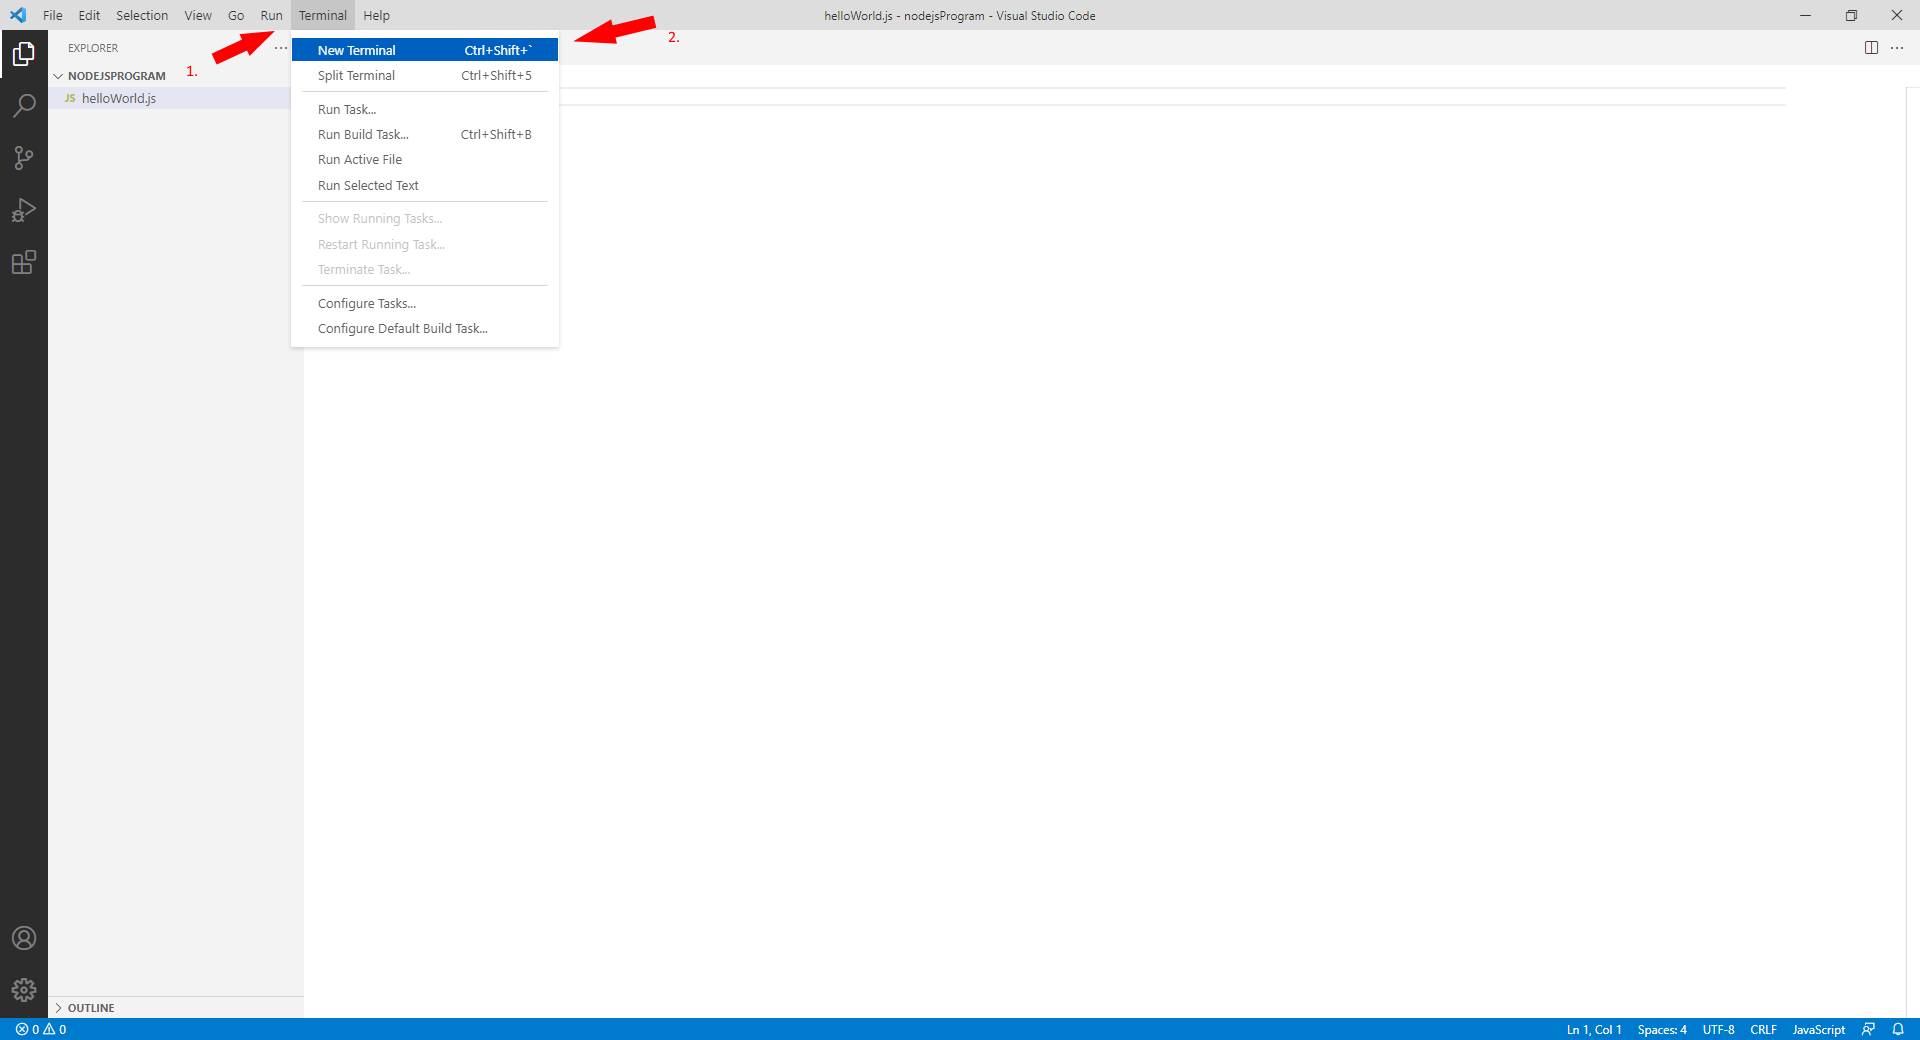
Create a new terminal
To run your first program, you will need a terminal. You will be able to use the terminal to see the output of your program. To create one, click the Terminal button located in the Visual Studio Code menu bar. There, you will be able to find the New Terminal button. This button will create a terminal where you can run your program. (Figure 5)
Step 6 - Write your 'hello world' program in JavaScript
The first program you write in any programming language is the 'Hello world' program. The sole aim of this program is to print the term 'Hello world' to the computer screen. In this example the program is contains only one line: console.log("Hello world!"); and this line will return 'Hello world!' to the screen.
console.log("Hello world!");
Writing a 'Hello World' script (Video tutorial)
The purpose of the following video is to help you write your first program. As in most cases, the first program we will write is the 'Hello World' program. It will simply put 'Hello World' in the console. The video will start with the empty code editor section end will end with the finalized program. The video is short but very detailed. It only takes 14 seconds to watch. You will have no problem understanding it.
Step 7 - Running the code inside the terminal
To run your code, you have to open a terminal and write the following code into it:
//If you named your file something else you should replace the 'helloWorld' part with that
node helloWorld.js
This will translate your JavaScript code, and the words inside the parentheses of the console.log(); will be displayed on your terminal.
Step 8 - What happens if I make a mistake in JavaScript
The Visual Studio Code has a built-in syntax error detection, so if you make an error in your JavaScript code the IDE will look after it and will be displayed among the problems. If there's an error in your code, and you run it. Your error will be displayed in the terminal also. In the next video, you can see this happening. You will learn how it looks like if you make a spelling mistake in the code. You will also learn how to correct the mistake. The video is only 48 seconds long and it contains all the information you need to complete the process. You will have no problem with following the steps.
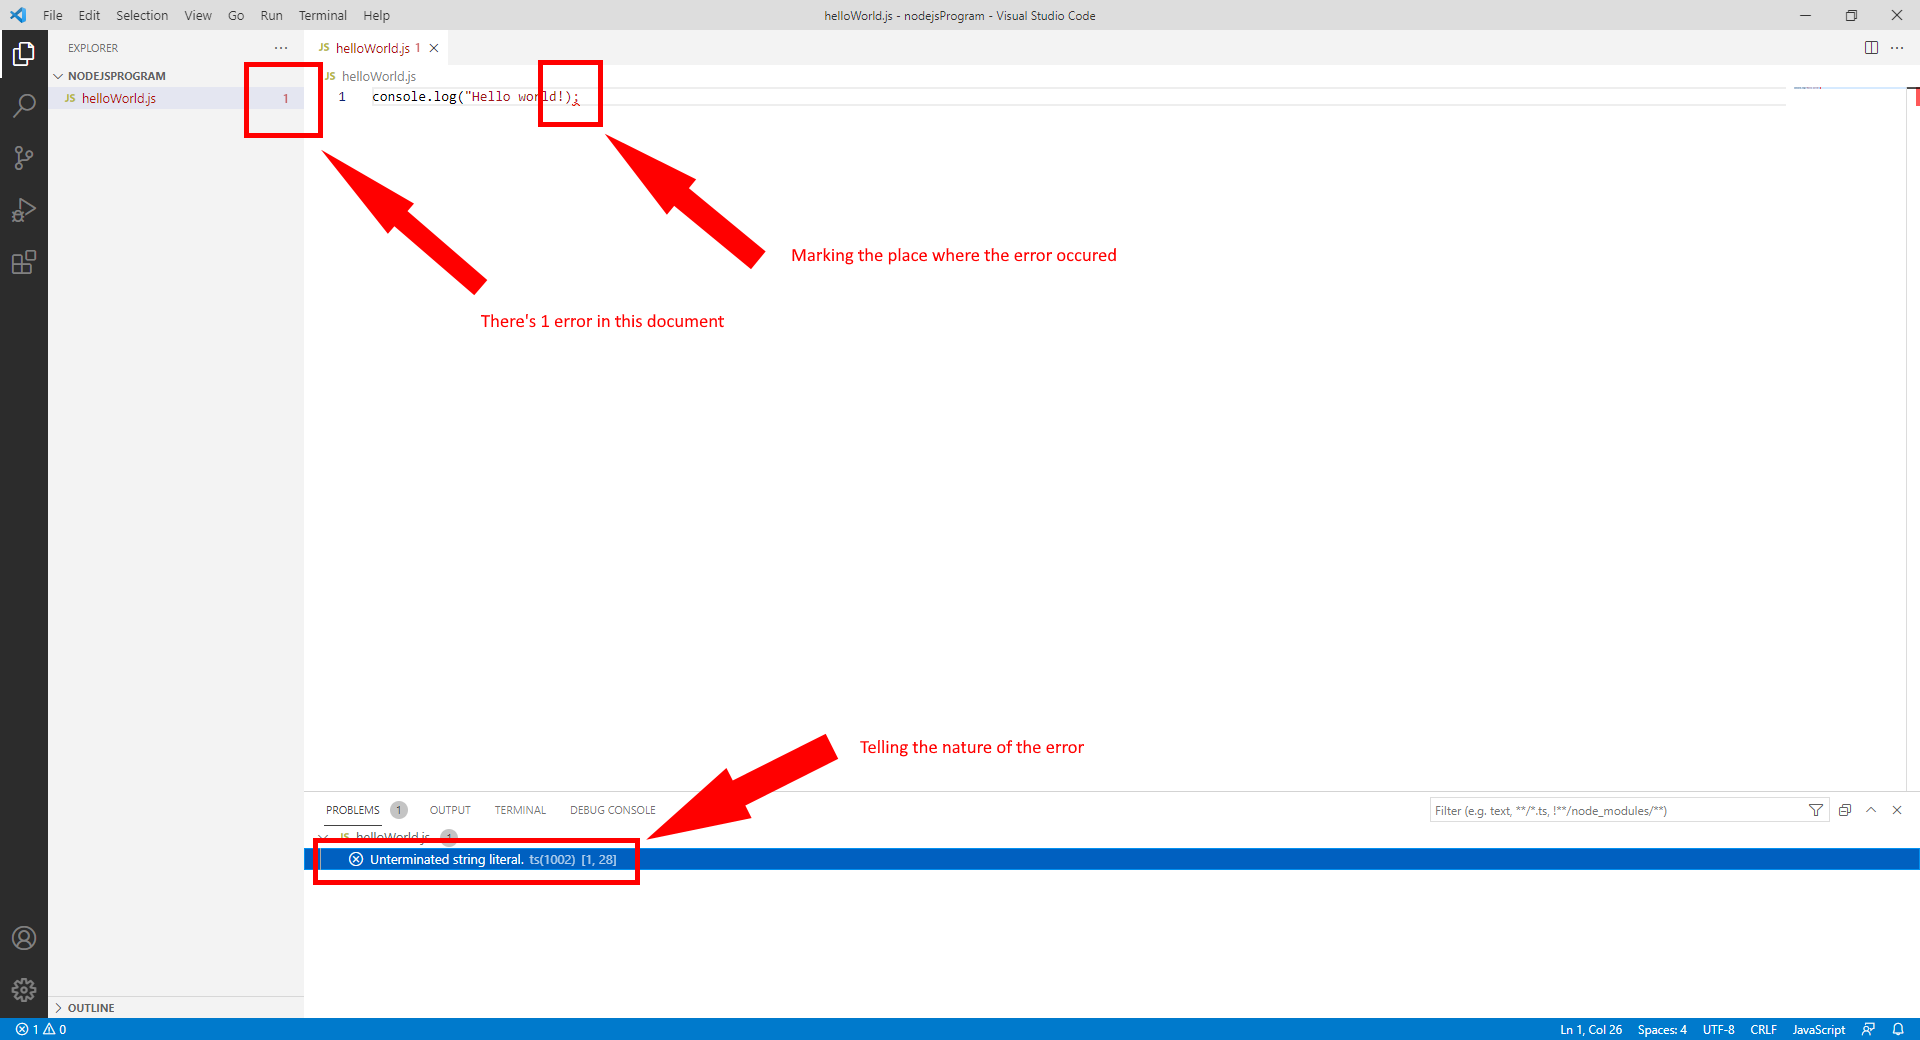
Mistakes in the code
On Figure 6, you can see how it looks like if you make a spelling mistake in the code. You can see the notification about the error in the project list, in the terminal, and the code editor. It makes correcting an error very easy. Make sure to correct the mistakes and run your program again.
Summary
Now that you have completed the five simple steps above, you have made your first step in becoming a Node.js software developer. This program may seem simple, and it may not do much, but this is how great things start. The next step in your learning journey will be creating an HTTP request.
More information
- Node js send SMS with the HTTP rest API (code sample)
- Node js send multiple SMS with the HTTP rest API (code sample)
- Node js schedule SMS with the HTTP rest API (code sample)
- Node js receive SMS with the HTTP rest API (code sample)
- Node js delete SMS with the HTTP rest API (code sample)
- Github Node js SMS API
- Node js tutorial Hello world