How to use the Ozeki Rest SMS Api Nuget Package
Nuget is the package manager of the .NET framework. You can use a Nuget package in any .NET based application. If you are using Visual Studio 2019 you are able to install a Nuget pakcage with a few clicks. In the following videos I'll show you how to create a C# console application, and how to use the Ozeki.Libs.Rest nuget package in that console application written in C#.
- Create a new C# console application in Visual Studio
- Install the Ozeki.Libs.Rest NuGet package
- Import the previously installed NuGet package with using Ozeki.Libs.Rest;
- Create a new Configuration, Message and a MessageApi object using the Ozeki.Libs.Rest pakcage
- Using the MessageApi object send the previously created message
What is NuGet?
NuGet is the official package-manager for NET, mad by Microsoft.
Step 1 - How to create a new C# console application
Step 2 - How to install the Ozeki.Libs.Rest NuGet package
To install a NuGet package in Visual Studio you need to right click onto the icon of the project, then select the Manage NuGet Packages from the dropdown menu. After that you have to search for the package you want to install, in this case it is the Ozeki.Libs.Rest package. When you have found the Ozeki.Libs.Rest package you have to install it by clicking on the Install button. When it is installed, you are able to import and use the package in your project.
Manage NuGet Packages
To reach the menu where you can manage your NuGet Packages, right-click the project title in the Solution Explorer. It will bring up a sub-menu where you can find the 'Manage NuGet Packages...' button (Figure 1). Click it to open the NuGet package installer.

Install the Ozeki.Libs.Rest package
Type in the following text in the search bar of the NuGet Packet manager: 'Ozeki.Libs.Rest'. The search engine will show the one package you need. Choose it by clicking. As you can see on Figure 2, on the right side of the panel, you will find an 'Install' button. Click it and it will start the installation process.

The installed package
Now the previously empty 'installed' packages list, contains a package. It is the installed Ozeki.Libs.Rest. Now you can start using it. If you would like to install more packages to Visual Studio Code, repeat the process, but search for other packages.

Step 3 - How to use the Ozeki.Libs.Rest package in your C# application
In order to use the contents of the Ozeki.Libs.Rest package, you need to import it by using the following line of code:
using Ozeki.Libs.Rest;
Creating a program that uses that Ozeki.Libs.Rest
In this video, we are going to show you how to use the Ozeki.Libs.Rest NuGet package in a C# application. The video will start with an empty code editor, and you will see the working SMS sending application at the end of the video. You will learn how to write a code that uses the Ozeki.Libs.Rest to send SMS messages through the Ozeki SMS Gateway. The video is very detailed, you can see all the lines of code you need to provide in order to have a working system. It takes only 1:46 to watch the video, but you will understand the process by the end of it.
The source code of the project
On Figure 4, you can see the source code of the project. As you can see, the 'username' and the 'password' variables contain the login credentials for the HTTP user. The 'Toaddress' and the 'Text' variables contain the address and the text of the message. If you are familiar with the C# programming language, feel free to change the values of the variable to send a customized message.

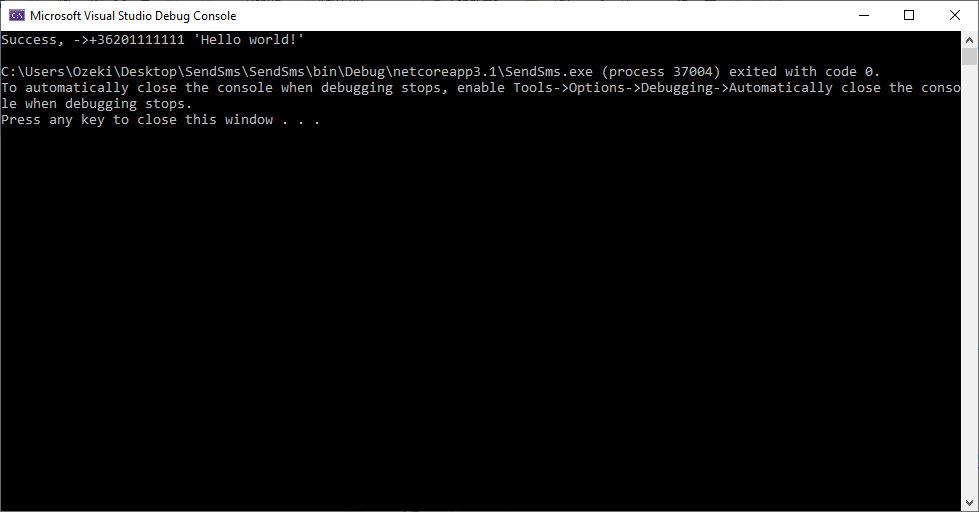
The output of the program
If you run your program, you will see the result of it in the 'Debug Console'. You will see the text 'Success' and some information about the message after. It means that the message sending was successful. Press and key to close the debug console.
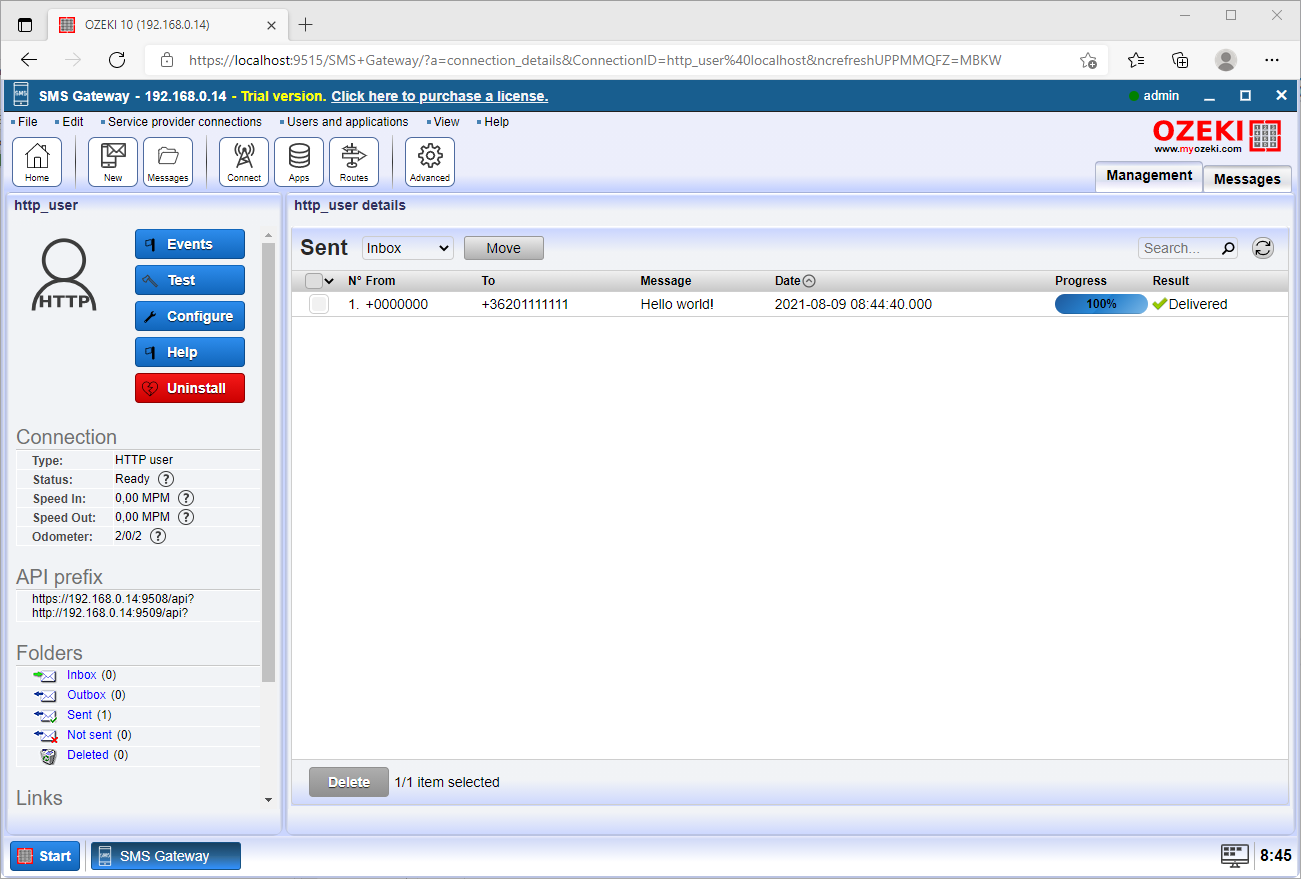
Check the sent folder
After you have done the process, you can check the Sent folder in Ozeki SMS Gateway (Figure 6). There you will see your test message, with any other message sent before. You can find out more information about any message by clicking them.
Summary
This article explained how to use the Ozeki Rest SMS Api Nuget Package. This innovation can be really helpful if you want to send text messages from C#.
The synergy between C# codes and Ozeki SMS Gateway ensures that you get the highest possible performance. The Ozeki SMS Gateway offers excellent logging capabilities, which means you can track down errors quickly and reduce downtime.
Make sure that you don't finish reading here, visit Ozeki's tutorial page where more information can be found about topics like SMS sending and receiving in C#. Now the only thing to do is to download Ozeki SMS Gateway and let the work begin!