How to create an SMPP user account
This guide explains how you can create an SMPP user account on your SMPP server and how you can assign a custom Sender ID to this user account. This user account can be used by your customer or office users to connect to your system through the SMPP protocol, to send and receive SMS messages.
How to create an SMPP user account
To create an SMPP user account
- Access your Ozeki SMS Gateway account
- Open Ozeki Home screen
- Choose Add new user option
- Install SMPP user
- Define username and password
- Save the changes
- Make sure that your new SMPP account is created
- Use this new SMPP user account in Ozeki SMS Gateway
How to setup an SMPP user account (Video tutorial)
In this short video, you will see how to set up an SMPP user account in the Ozeki SMS Gateway. This step is essential if you want to connect a user to your system through an SMPP protocol. If you follow the given instructions, it won't be complicated to create an SMPP user account in the future. The video is really short and can be followed easily.
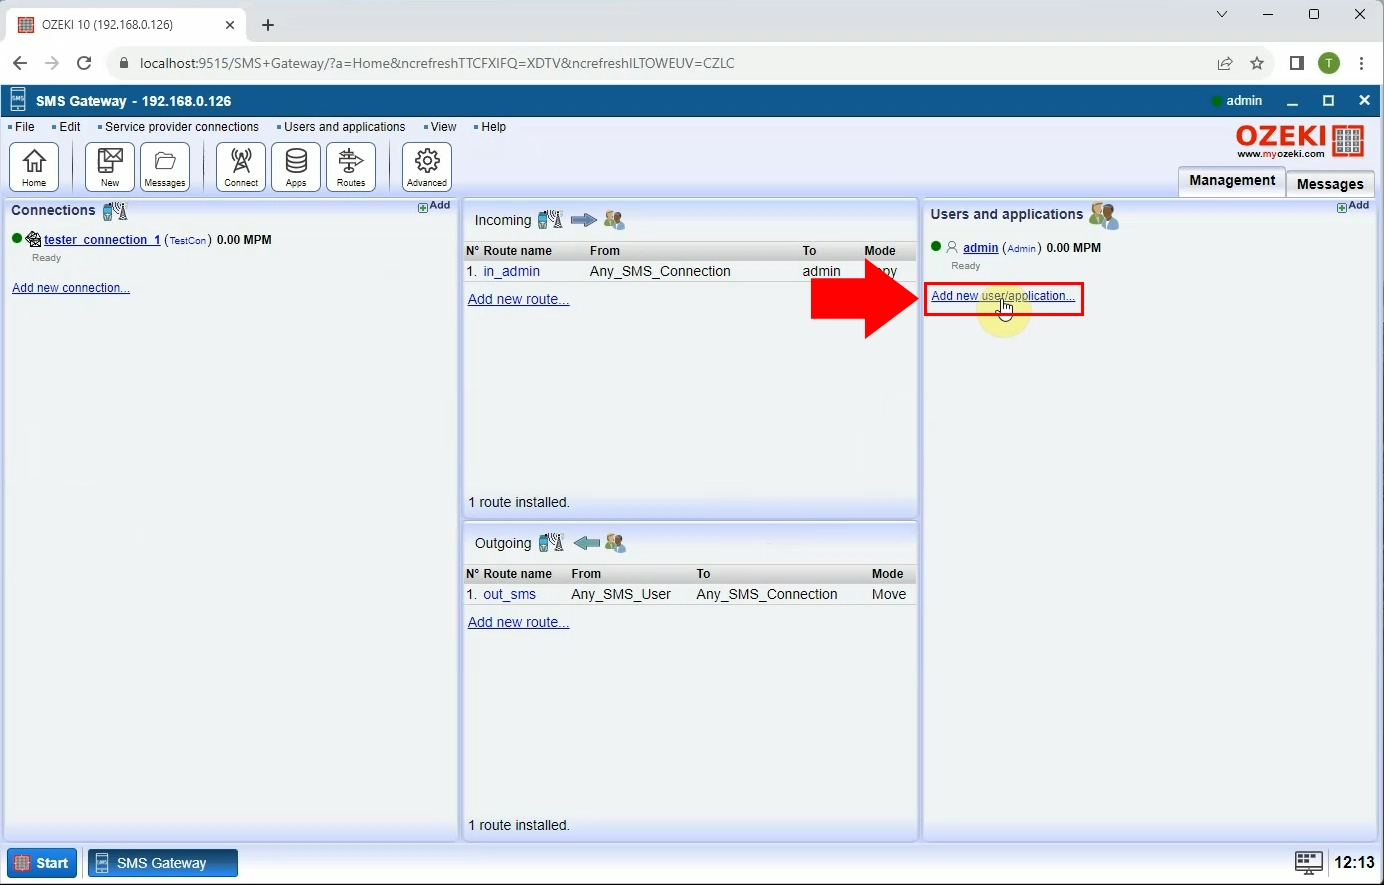
As the first step, you need to open your Ozeki SMS Gateway and log into your user account. To log in use your login credentials. In case, if you do not have an account yet, then create one. Download the Ozeki SMS Gateway from the www.ozeki-sms-gateway.com website and create a user account. Enter a username and a password which can be used as your login data. After creating the account, log in to your Ozeki profile. Load the Home screen of the Ozeki SMS Gateway and choose the "Add new user/application..." option from the Users and Applications panel.
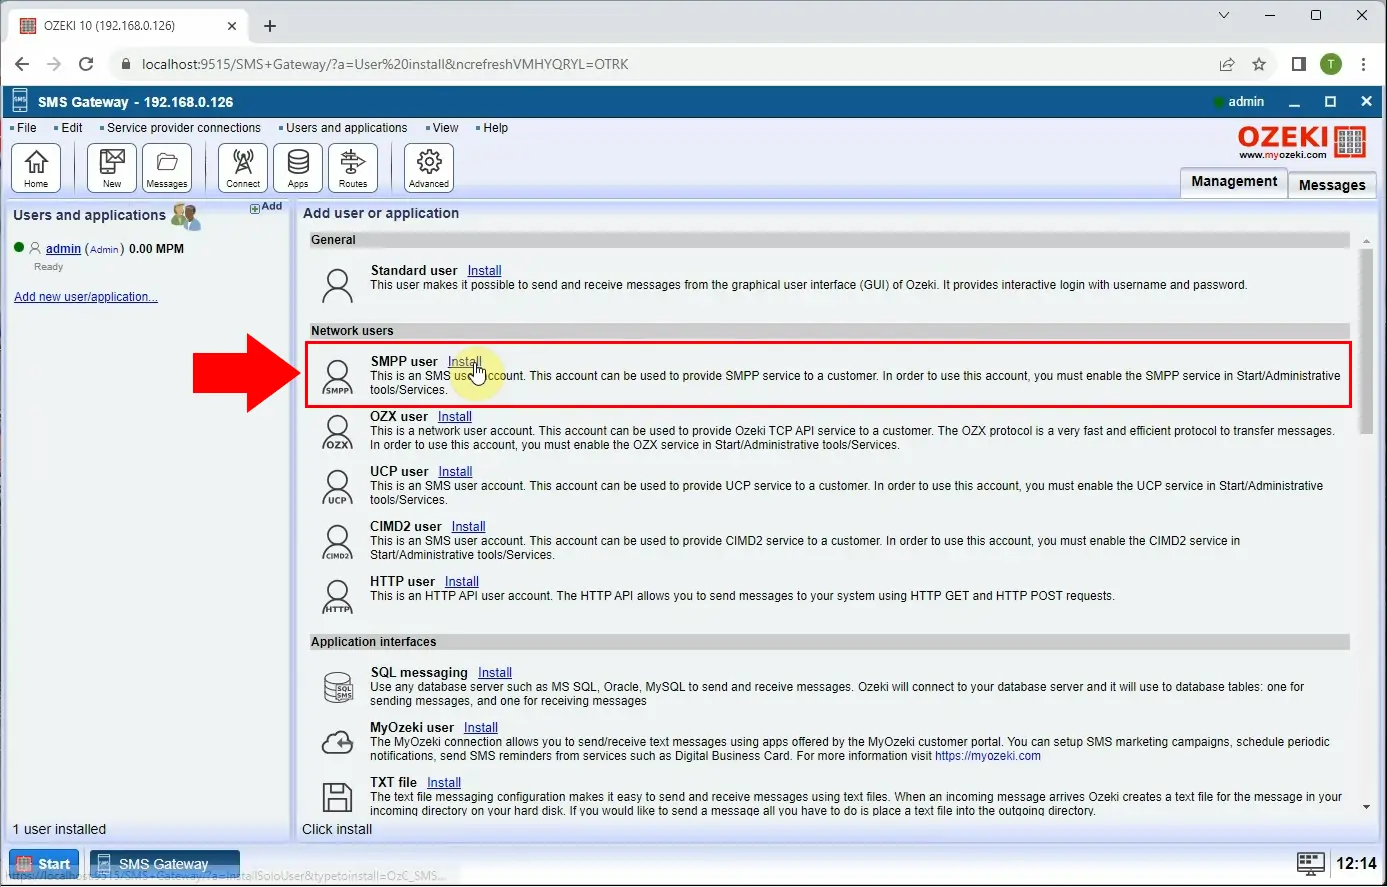
Clicking on the link, will bring up a list that includes applications that can be installed. To add a new user, choose the "SMPP user" option by clicking on the "Install" link next to the SMPP user icon. To use this account, you need to enable the SMPP service.
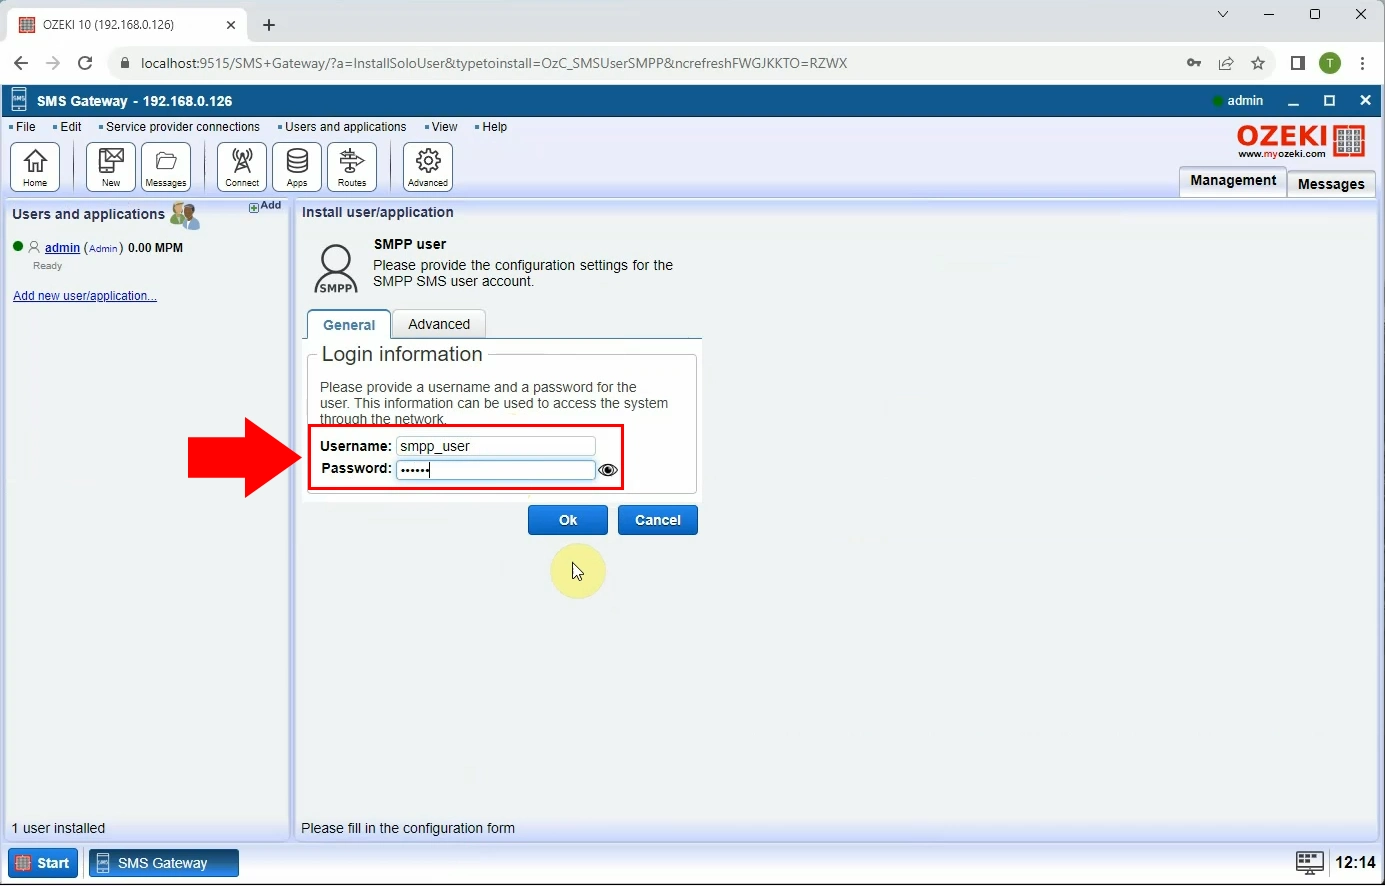
After you choose the appropriate SMPP user option, you need to enter your user details. Type your Username and Password to certain cells. This information provides to access the system through the network. When is done, click on the "Ok" button, highlighted in blue.
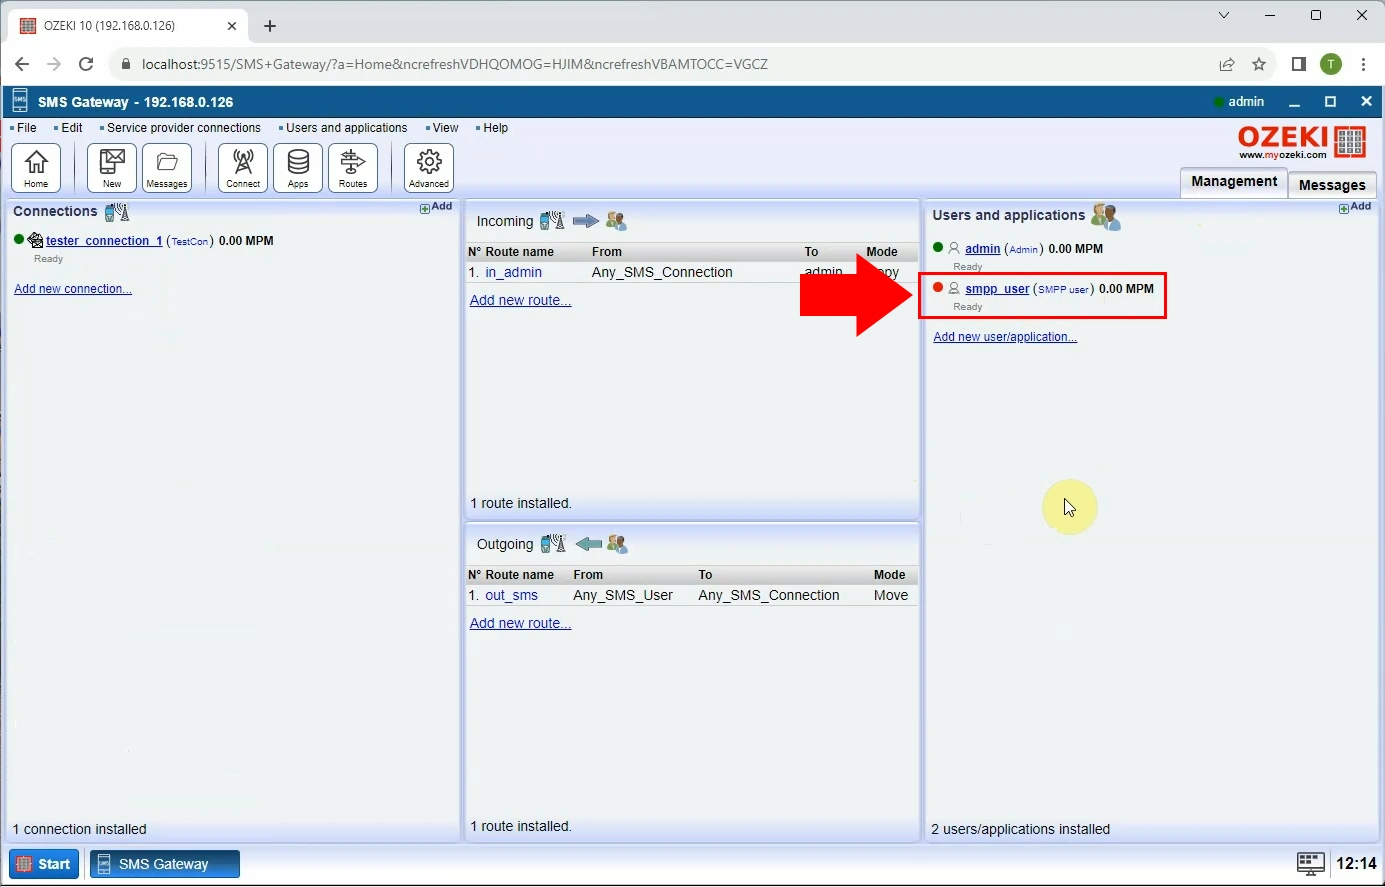
Load the Management panel in Ozeki SMS Gateway to check if the new SMPP user has already appeared. If you can recognize the new user, the process has reached its end, and your new SMPP user has been added to the system.
How to print the SMPP login details for your customer
Providing SMPP login details is crucial for transparency, account verification, and troubleshooting. In this subsequent phase of the article, you will gain insight into how to print the SMPP login details for your customers. Follow the given instructions included in the video below and read the accompanying text information. In this way, you can learn the process easily.
How to print the SMPP login details for your customer (Easy instructions)
To print the SMPP login details for your customer
- Log in to your Ozeki SMS Gateway account
- Load Ozeki Home page
- Open SMPP user details
- Copy SMPP connection information
- Paste the copied data into Notes
- Print the created Note
- Save the document for further searches
- Repeat the process when it is needed
Print SMPP login details for customers (Video tutorial)
The video will provide you with essential information on how to print SMPP user data to your customers. Providing SMPP login details to customers may be needed when they subscribe to an SMS messaging service and require access to their own messaging accounts for configuration and monitoring. By following the given steps, you can do it with ease.
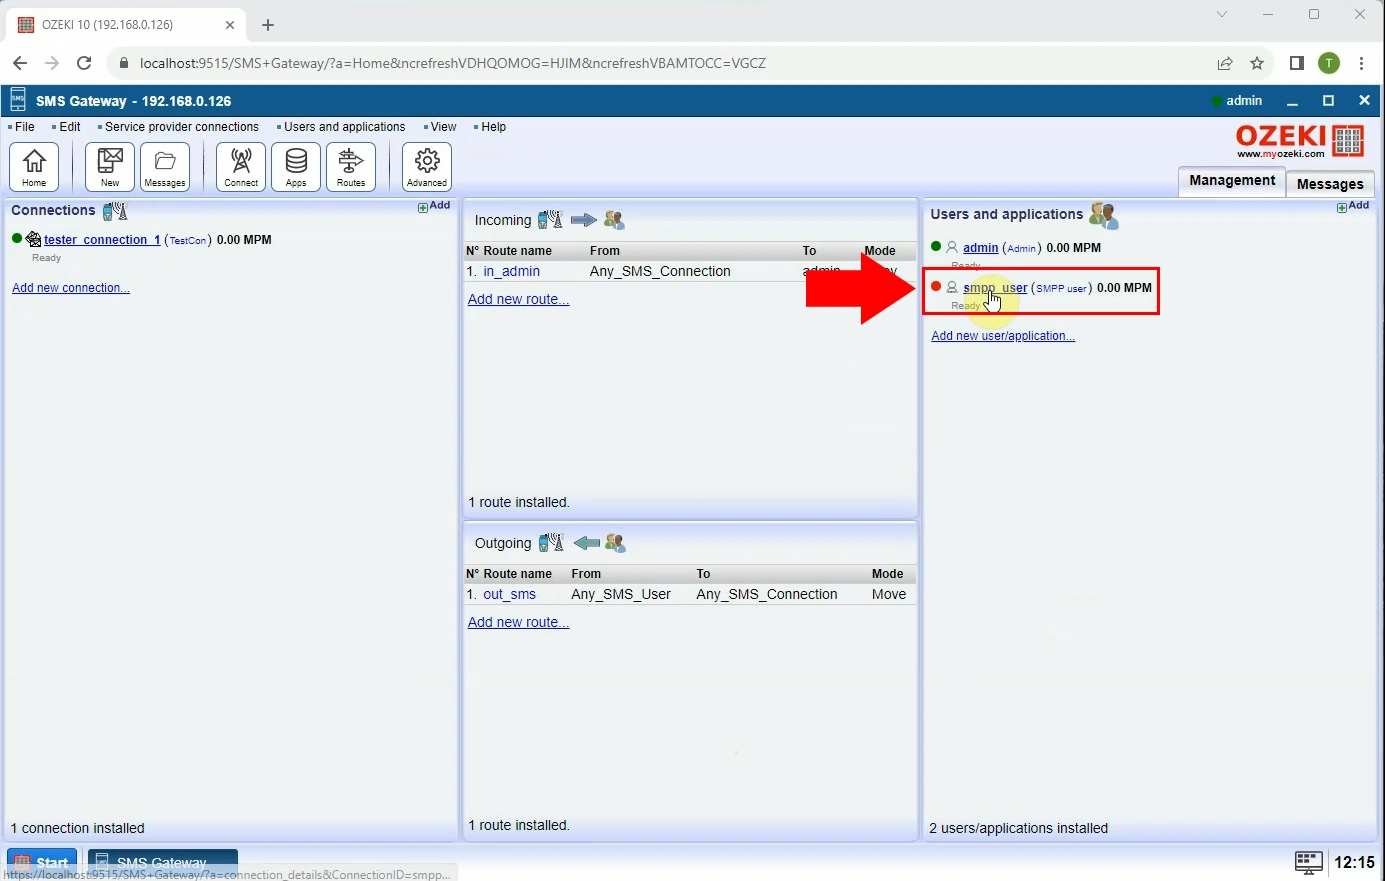
First of all, log into your Ozeki SMS Gateway account, by using your login information. Load the Ozeki Home page, then find the "smpp_user" option in the Users and applications panel. Click on the link and wait until the SMPP user details appear. There, you can get information about the SMPP user and make configurations, or other setups.
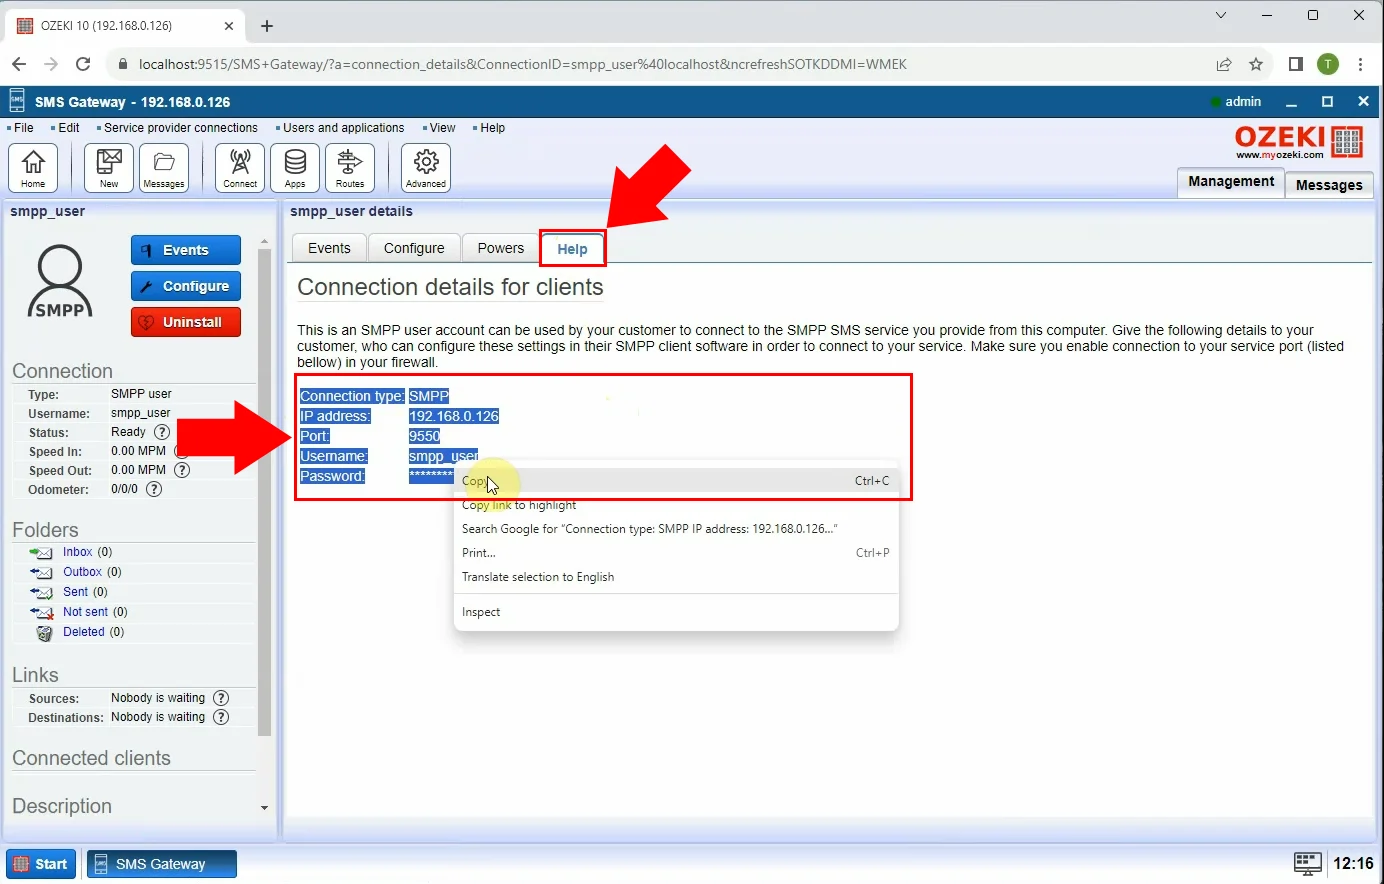
When you have loaded the SMPP details page, you have to find the connection details. Open the "Help" tab, to find this information. The Help tab includes the necessary connection details for clients. You need to give these data to your customer who can configure these settings in their SMPP client software to connect to your service. Make sure that you enable the connection to your service port in your firewall. Copy the "Connection type SMPP" data.
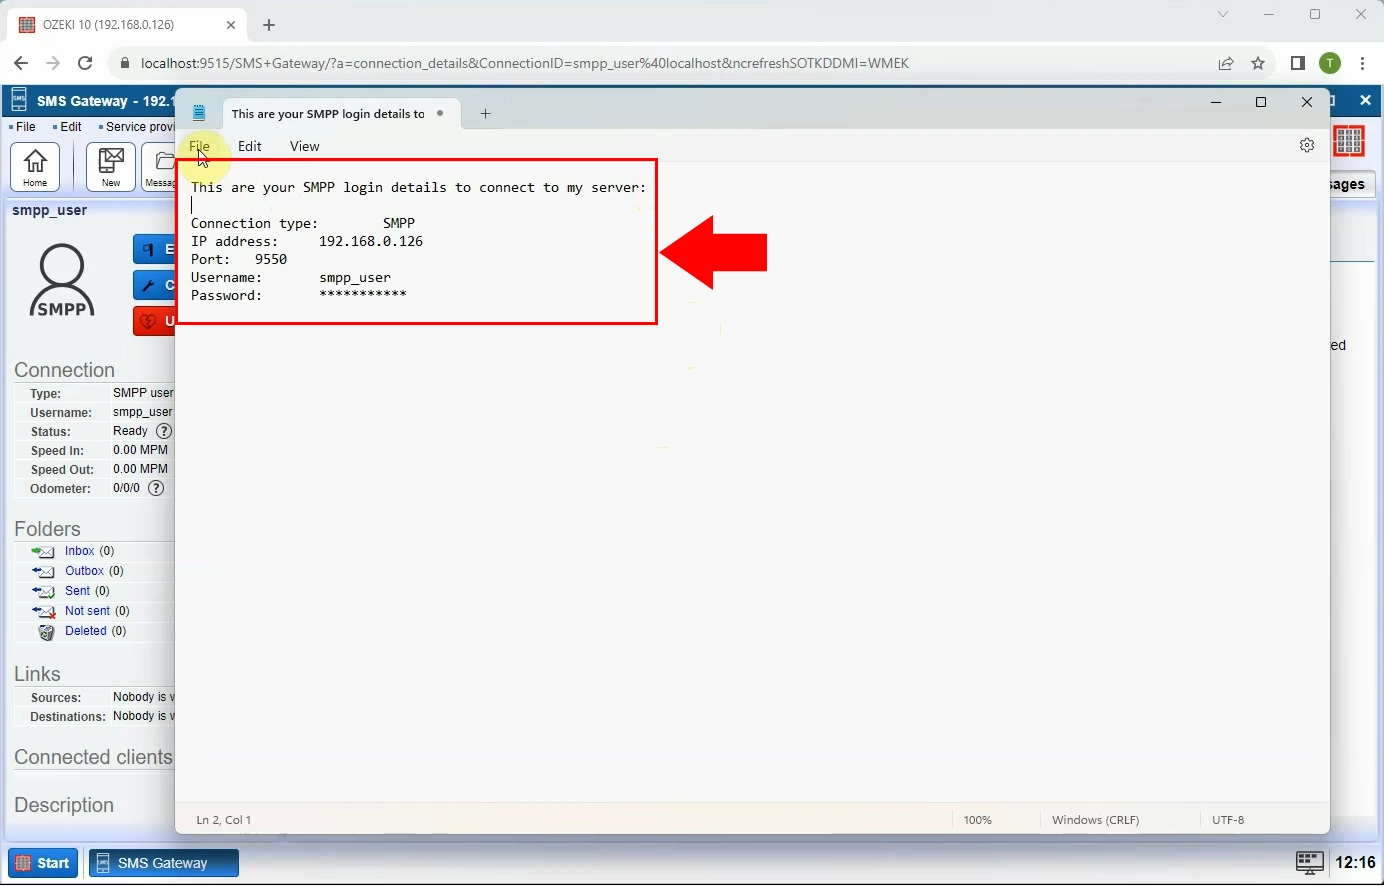
After copying the SMPP connection details, open a Notes program on your computer. Paste the copied information to a blank note, then try to print it. Make sure that all the necessary details have been pasted in. You need the Connection type, IP address, Port number, Username and Password.
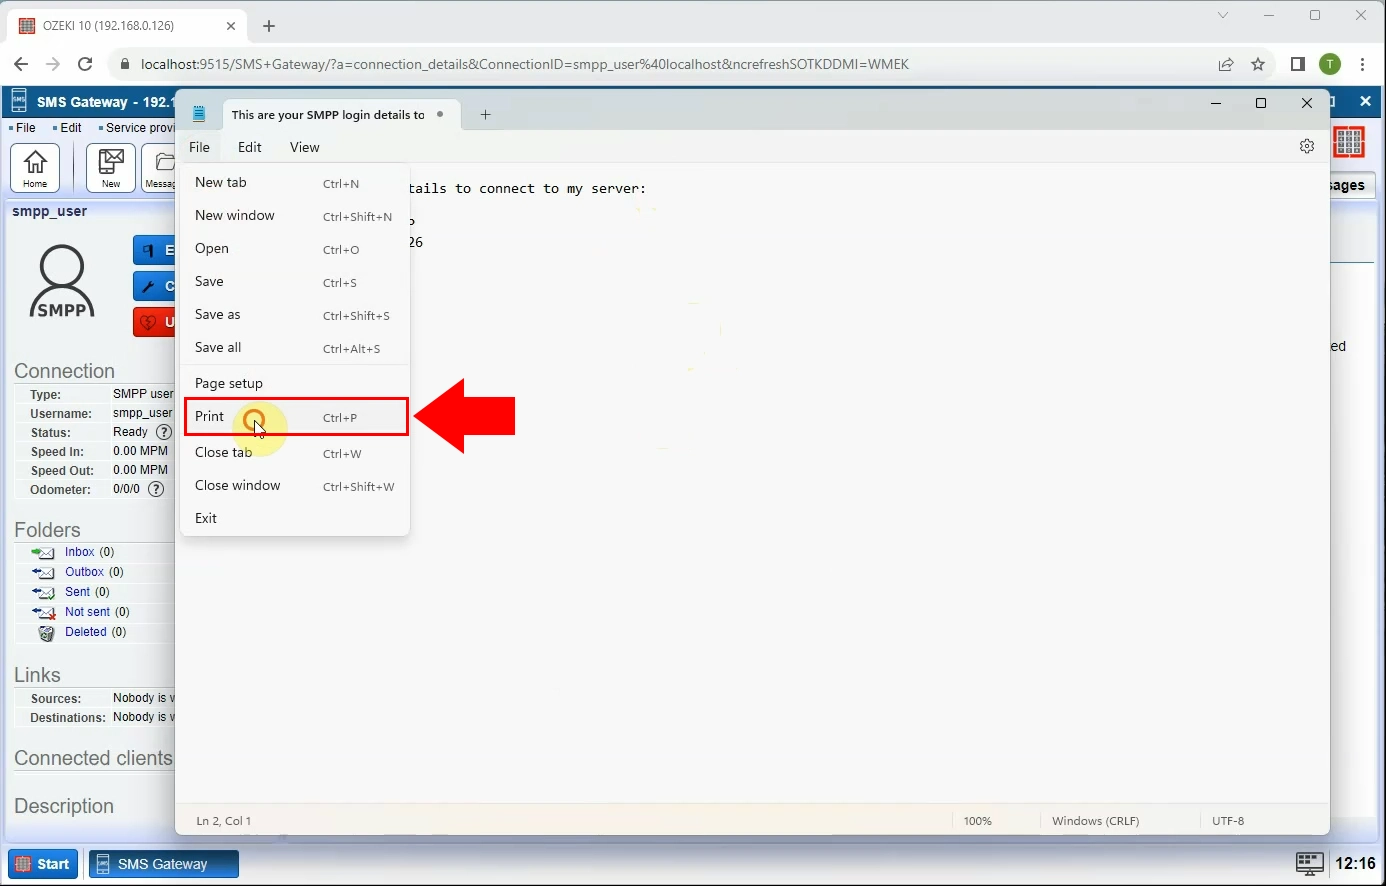
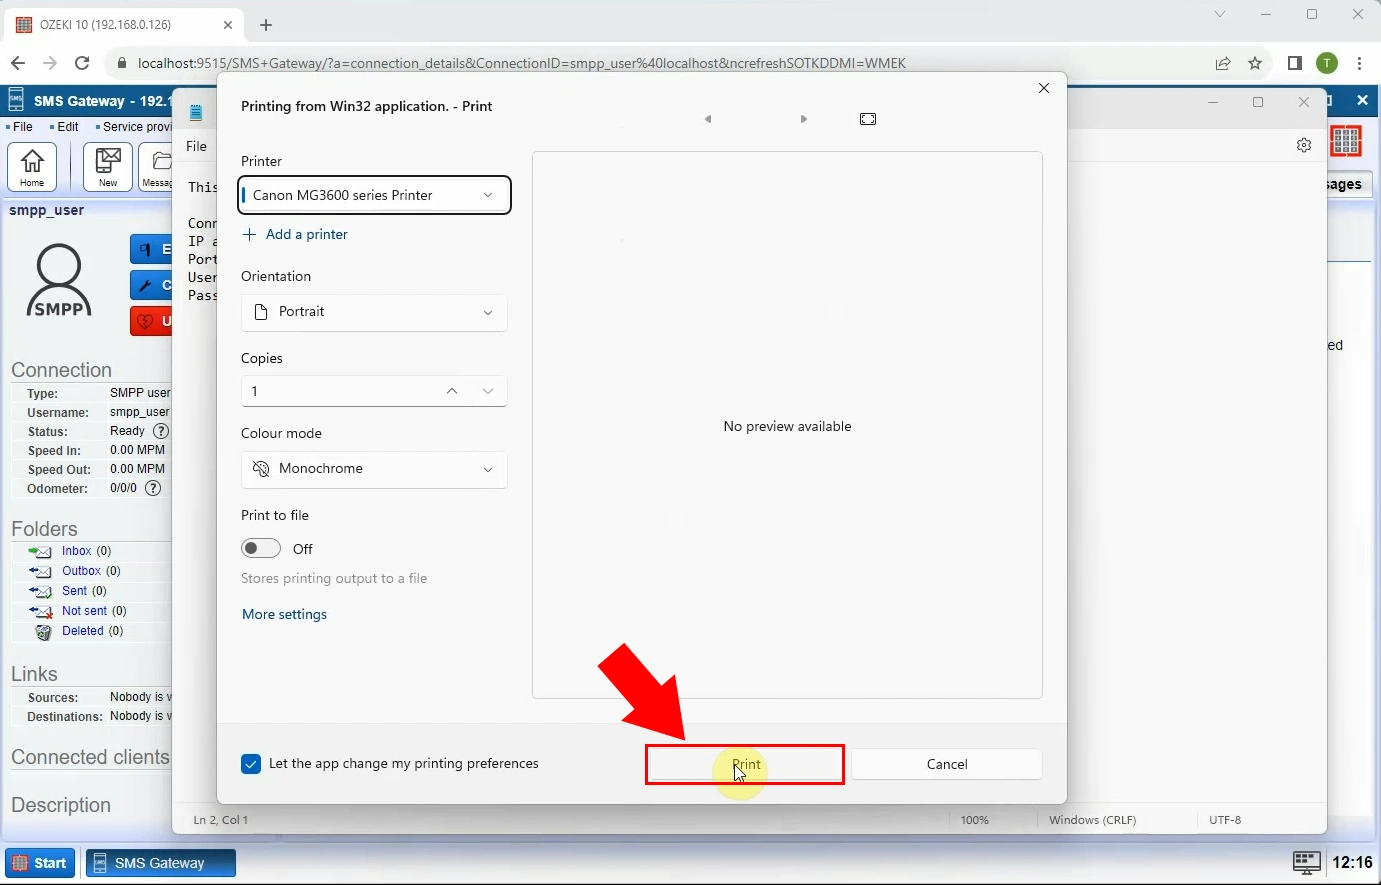
To print the connection details, first, open the "Print" menu under the "Files" tab, or use Ctr+P keyboard shortcut. Set up the printing details, like number of copies, printer, or other special settings.
After you have set up the printer, click on the "Print" button to start the process. When it is done, you can give it or send it to your client. If you have printed it to PDF document type, then save it as PDF to your computer. You can save the Notes file as a .txt type, so you can search it or modify it for further printings.
How to configure a custom Sender ID for an SMPP user
In the final part of this article, you can learn on how to configure a custom Sender ID for an SMPP user. Configuring a custom Sender ID for an SMPP user is needed to enhance branding, personalization, compliance, security, message categorization, and message deliverability while adhering to local regulations and network-specific guidelines. Follow the instructions to achieve your goals in your SMS communication.
How to configure a custom Sender ID for an SMPP user (Plain guidelines)
To configure a custom Sender ID for an SMPP user
- Load your Ozeki SMS Gateway account
- Open Ozeki Home page
- Choose SMPP user details
- Add new Sender ID power
- Specify the sender address
- Save changes
- Send SMS message to your recipient
- Check the sent message
Configuring custom Sender ID for SMPP users (Video tutorial)
The following video will provide you a step-by-step guide on how to configure custom Sender ID for SMPP users. These steps are essential when you want to ensure brand recognition and compliance with local regulations, optimize message delivery, and enhance the overall messaging experience for your audience. Follow the steps to make your SMS communication as productive as possible.
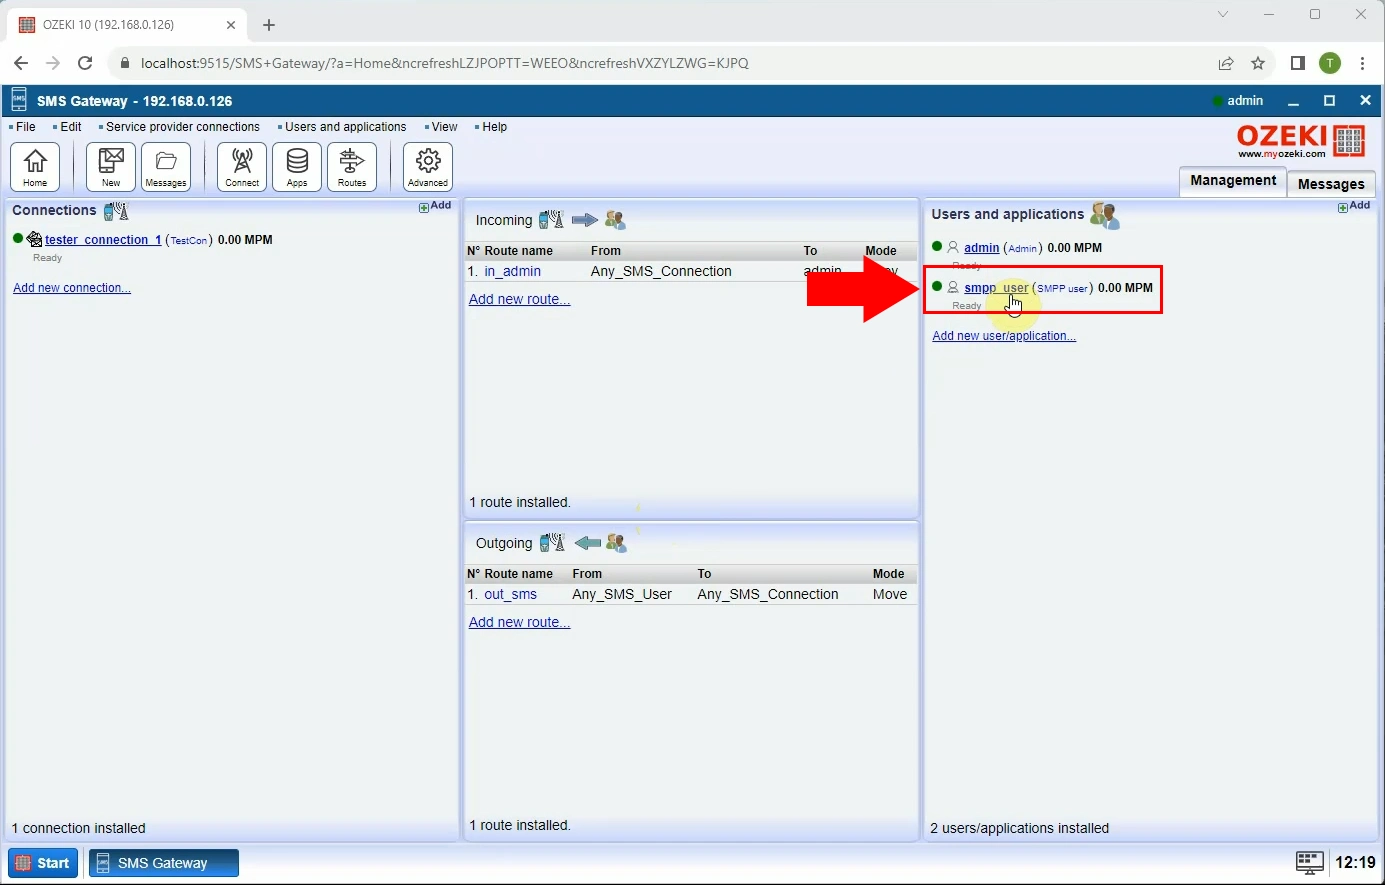
To begin the configuring process, open your Ozeki SMS Gateway and log into your account. Enter your login details, then open the Ozeki Home page. On the home page, choose the "smpp_user" option from the Users and applications panel. Click on it to access the SMPP connection details. In case, if it is needed, you can make changes, and modifications here.
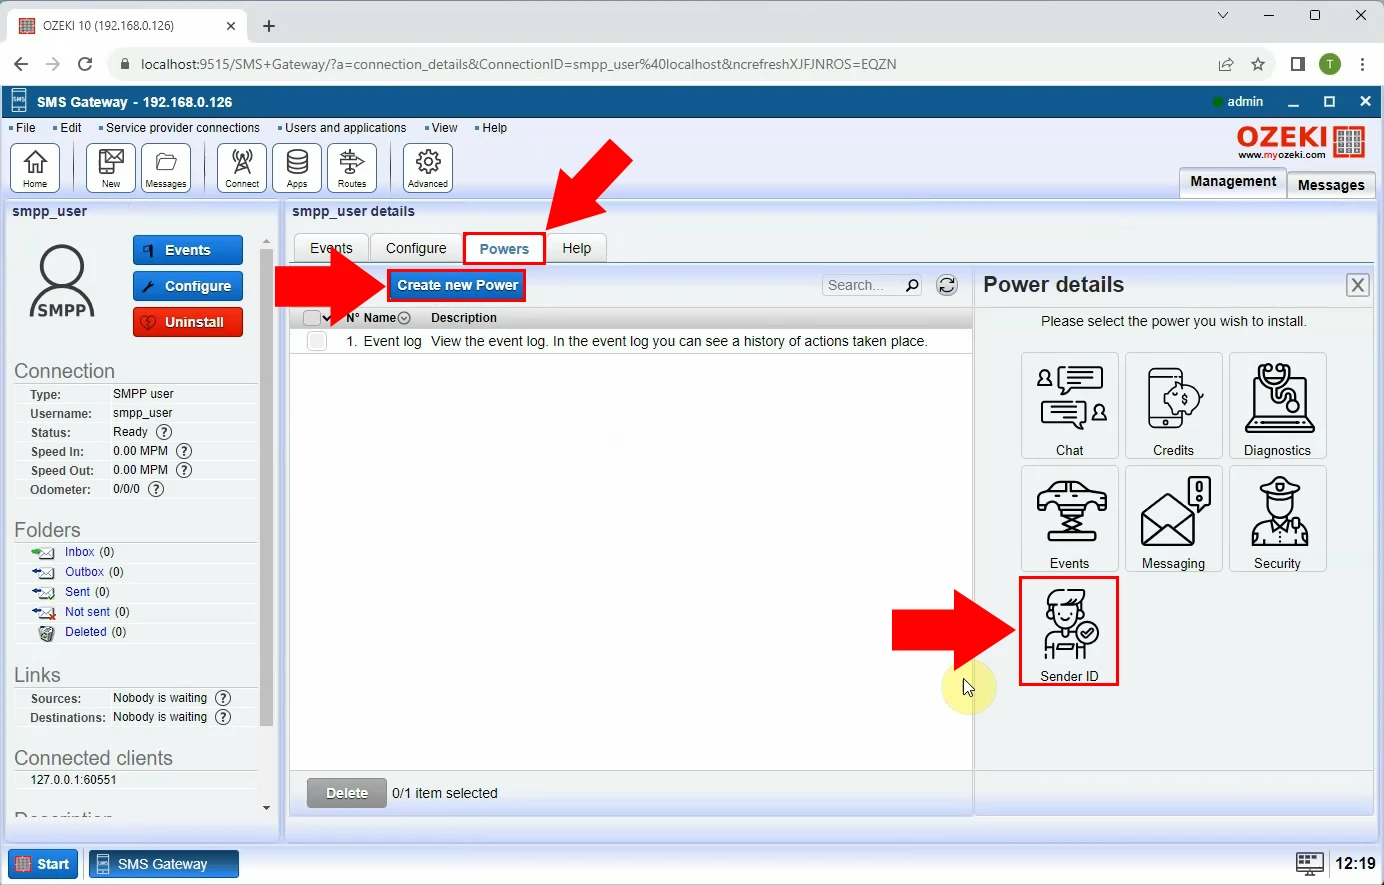
After loading the SMPP connection details page, you need to choose the "Powers" tab, to install new Sender ID power. Click on the "Create new power" button, highlighted in blue, then opt for the "Sender ID" icon from the given power options. This will open an identification page, where you have to configure Sender ID power details.
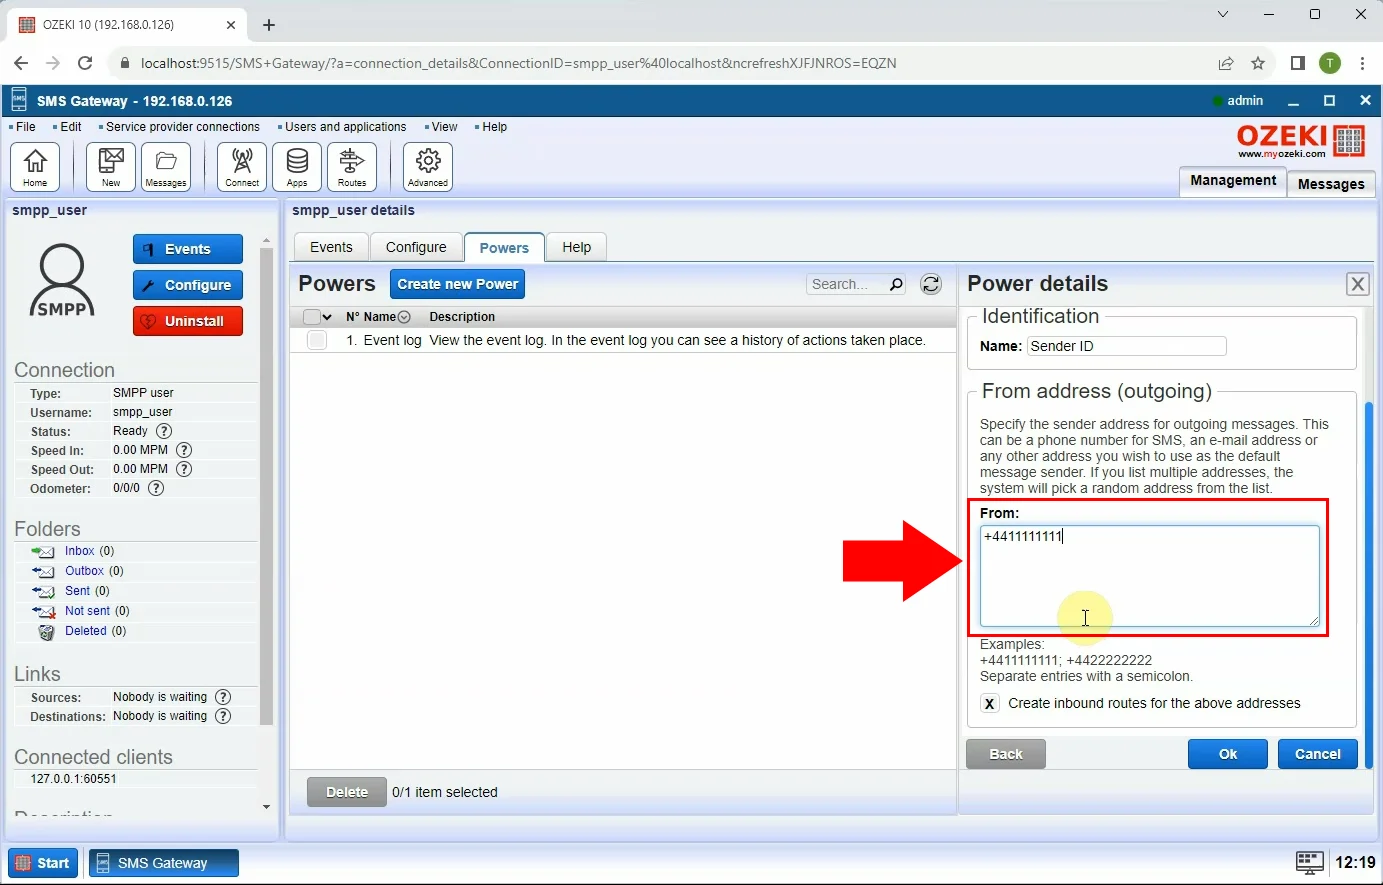
At the identification part of the page, you can see the name of the Sender ID, and specify the sender address for outgoing SMS messages. This can be a phone number for SMS messages, an e-mail address, or any other address you wish to use as the default message sender. If you list multiple addresses, the system will pick a random address from the list. Enter the Sender address to the appropriate field, then click on the "Ok" button to save the settings.
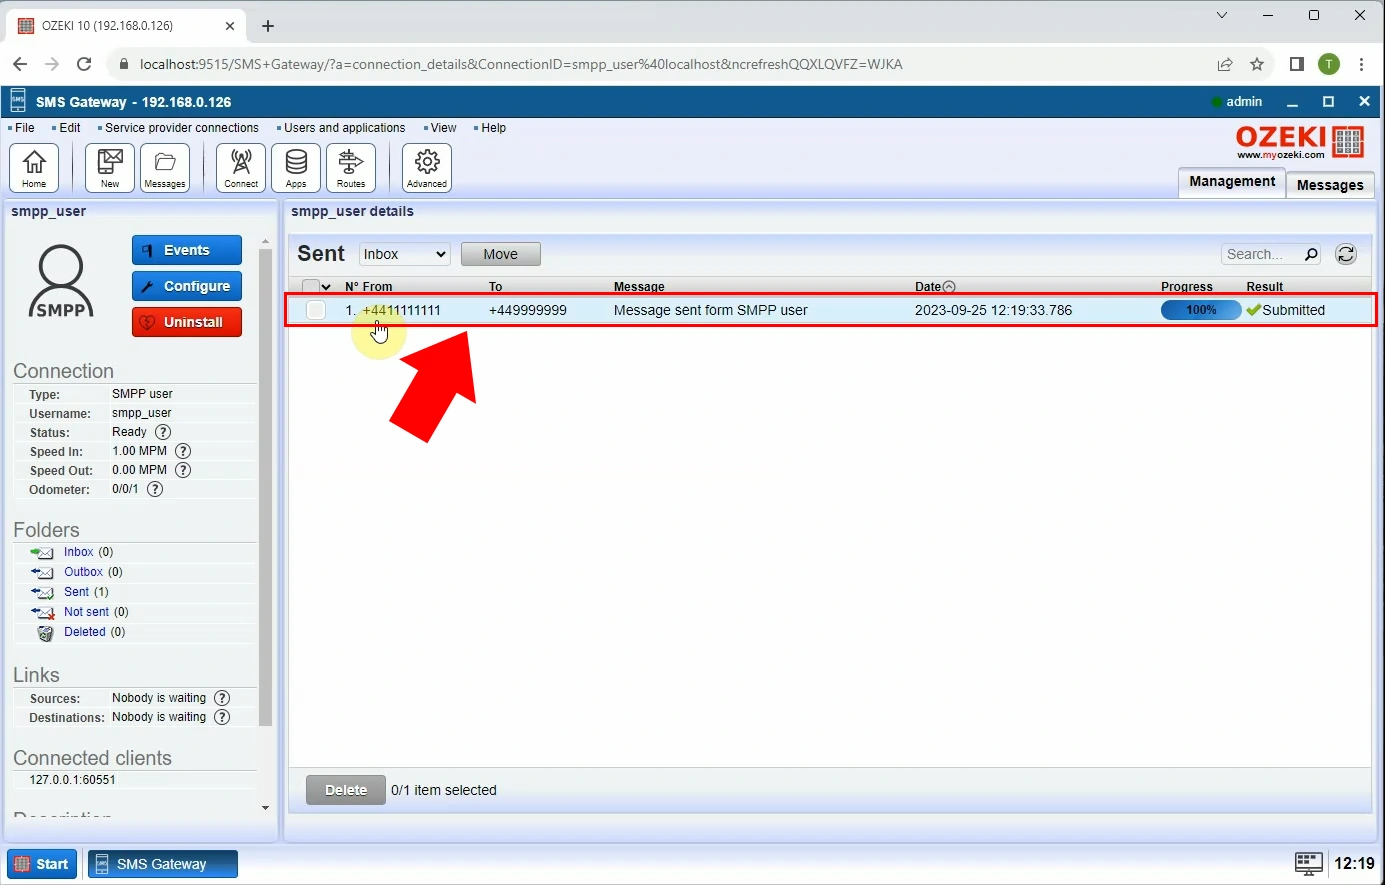
Clicking on the "Ok" button will send it as a message. Open the details from the "Sent" folder. There you can see all the essential details about your message. You can see the sender ID, the recipient's address, the message itself, the date, and the status of the process in percentage. If the SMS message was sent successfully, then a "Submitted" notification will appear in the details page.
Summary
All in all, this step-by-step guide provides comprehensive instructions on creating an SMPP user account and configuring a custom Sender ID, enabling users to connect to their system through the SMPP protocol for sending and receiving SMS messages. You could learn the process of printing the SMPP login details for customers, and how to manage modifications in the Ozeki SMS Gateway. If you have followed the steps properly, then your SMS communication will soon level-up and be more successful.
FAQs
What is an SMPP account?
An SMPP account is a user account provided by a Short Message Peer-to-Peer (SMPP) service provider, which enables users to send and receive SMS messages through the SMPP protocol. It typically includes login credentials and settings necessary for connecting to the SMPP server.
What is an SMPP client?
An SMPP client is a software application or system that uses the SMPP protocol to connect to an SMPP server, usually provided by a telecommunications or messaging service provider. It allows users to send, receive, and manage SMS messages programmatically and is commonly used in applications like bulk SMS services or two-way messaging systems.
What is the SMPP account details?
SMPP account details typically include the SMPP server address, port number, username, and password, which are essential for establishing a connection with the service provider's SMPP server. These details are necessary to authenticate the SMPP client and enable the exchange of SMS messages.
What is the sender ID of SMPP?
The sender ID of an SMPP message is the alphanumeric or numeric identifier that appears as the sender of an SMS message when it is delivered to the recipient's device. It can be customized to display a brand name or a specific identifier, and its format and usage may vary depending on the service provider's policies and local regulations.
Can I become an SMPP service provider?
Ozeki SMS Gateway empowers you to establish your own SMS service through the built-in SMPP server. This server functionality allows you to:
- Create SMPP User Accounts: Define user accounts with usernames and passwords for entities that wish to connect to your SMPP service and exchange SMS messages.
- Manage Access and Permissions: By creating user accounts, you can control who can access your SMPP service and potentially assign specific permissions for sending or receiving messages.
With Ozeki SMS Gateway, you gain the tools to create a robust and customizable SMPP service to meet your specific needs.
Which SMPP version is the most common?
Ozeki SMS Gateway supports the two most commonly used versions of the SMPP protocol for connecting to SMS Service Centres (SMSCs):
- SMPP v3.3: This is the widely adopted standard version, offering basic functionality for sending and receiving SMS messages.
- SMPP v3.4: This version builds upon v3.3 by introducing transceiver support. This means a single connection can be used for both sending and receiving messages, simplifying the configuration process.
