How to create a secure SMPP server using TLS/SSL
When a secure TCP/IP connection is used for SMPP connections, the network traffic between your system and the SMPP clients will be encrypted. This will prevent unwanted parties access to the data that goes through the network. The two communicating endpoints will also verify each other using certificates. This verification procedure prevents man in the middle attacks. This guide explains how you can create an SSL certificate using the security app of Ozeki 10, and how you can use this SSL certificate to setup a secure SMPP service, that operates using SSL/TLS.
Is SMPP secure?
The Short Message Peer to Protocol (SMPP) is the most widely used technology to transport SMS messages over the Internet. SMPP is often used to deliver value added SMS content services, and is frequently used for mobile banking, payment reminders, SOS calls, stock and news alerts, railway and flight enquiries etc. These types of messages contain sensitive information which need to be protected.
The SMPP protocol is an application layer protocol used to send messages over TCP/IP connections. In default setups the SMPP protocol has no security at all. Since the data travels through the Internet in an unencrypted format it can be captured by eavesdroppers. Compromised messages or loss of messages can cause lot of revenue loss and fatal consequences. Security for the SMPP protocol can be implemented by introducing Transport Layer Security (TLS). The TLS is a protocol layer that resides between the SMPP and the TCP/IP protocol stack. If it is installed, the protocol stack is built up from the following layers:- SMPP layer
- TLS/SSL layer
- TCP layer
- IP layer
Ozeki 10 SMS gateway offers TLS support for both SMPP client and SMPP server connections.
Video tutorial for Secure SMPP (SMPPS)
Secure SMPP is often called as "SMPP Secure" or "SMPPS". This term simply refers to the fact that the TLS layer is added to the protocol stack. The following video gives you the configuration steps on how to add the TLS layer to your SMPP server.
Create an SSL certificate
You can create an SSL certificate by opening the Security app of Ozeki 10 from the Ozeki 10 Start menu (Figure 1).
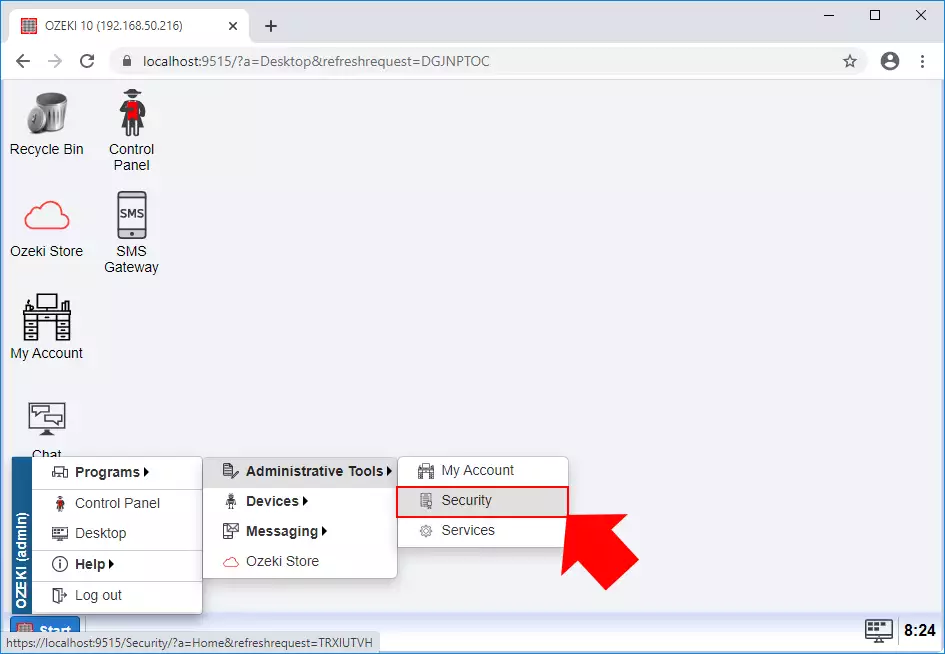
Figure 1 - Open Security app
Create an SSL CA certificate
The term CA certificate stands for "Certificate Authority" certificate. A Certificate Authority is the top-level organization that can issue certificates and can sign these certificates using it's secret private key. With Ozeki 10 you can become your own Certificate Authority, and you can issue certificates to your customers. You will than be able to verify incoming SSL connections and see if they use the certificate you have assigned to them. You can create your CA certificate in the security app. (Figure 2)
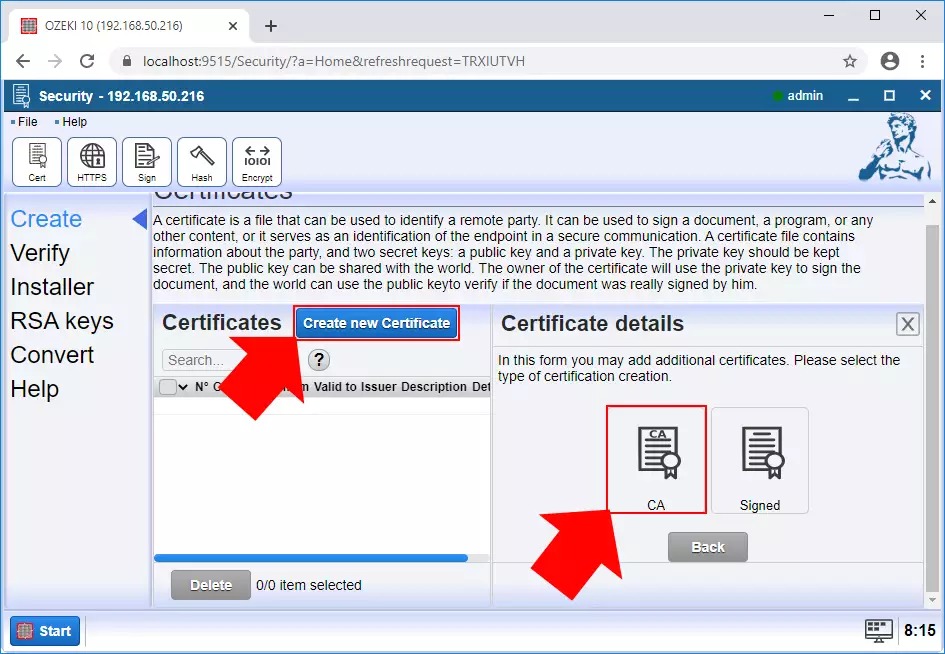
Figure 2 - Create CA certificate
Specify the certificate details and provide the password for the created certificate (Figure 3). Then click OK.
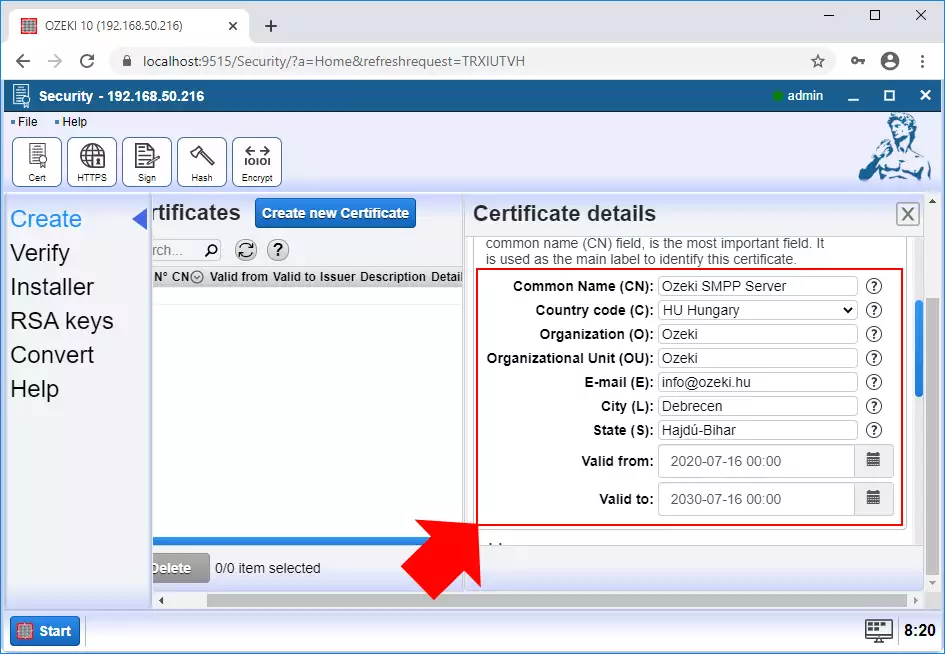
Figure 3 - Provide certificate details
If you scroll down on the Certificate details menu, you can find a setting where you could provide a filename where the communication will store you certificate files, and a password for it. You can see the example on Figure 4.
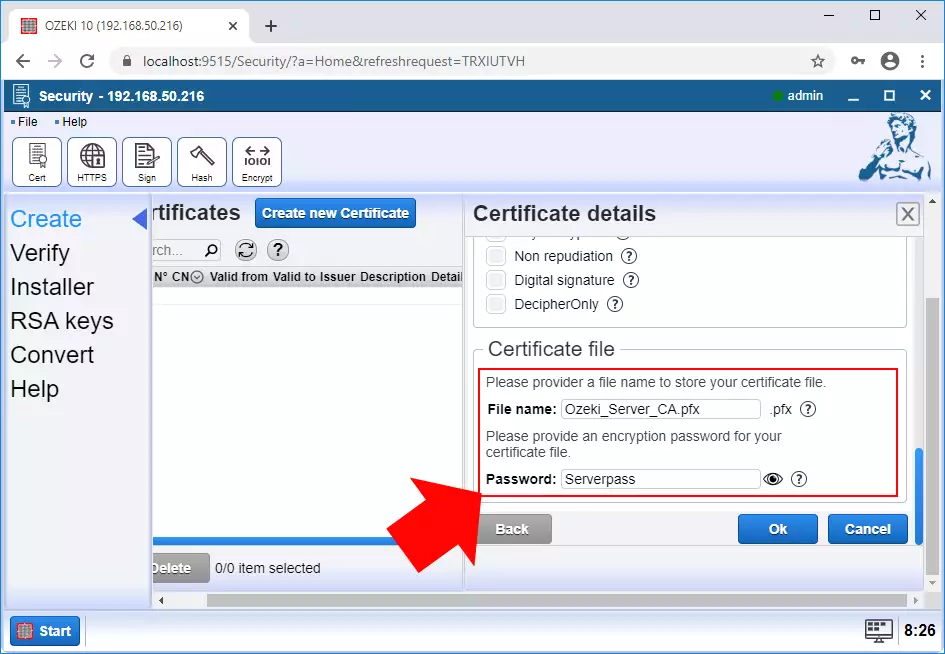
Figure 4 - Provide certificate file details
Download the created SSL certificate
Now you can start downloading the created certificate, from the certificates list. Click the Details button next to the name of your new certificate, to open the window from where you have access to the certificate file. You can find the button on Figure 5.
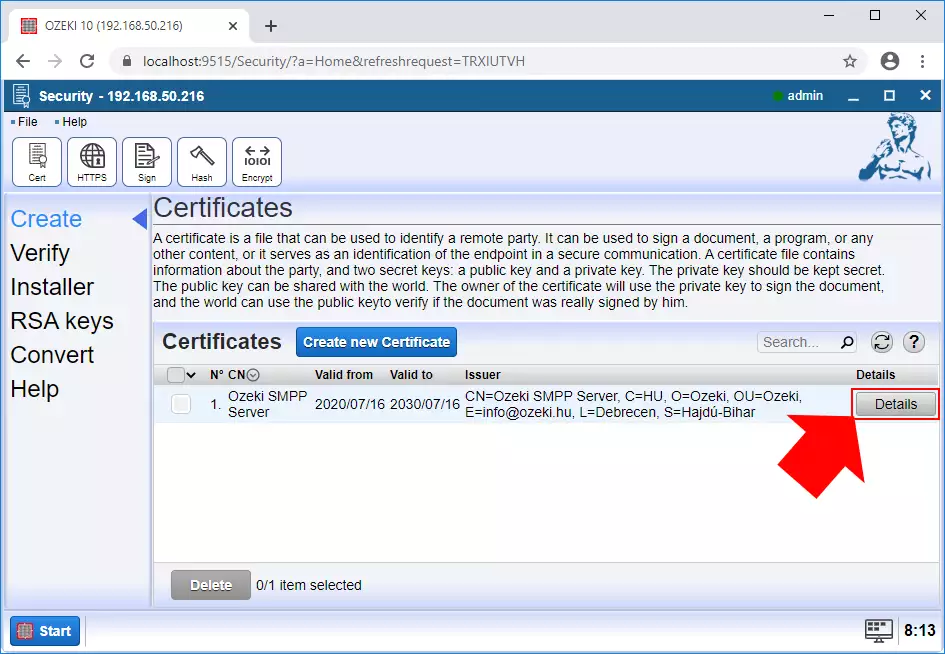
Figure 5 - Select details of certificate
Here you are at the details page of the certificate. Here, on the left side, you could find a blue link under the Files title, which will start the download process of the certificate file. You can see the link on Figure 6.
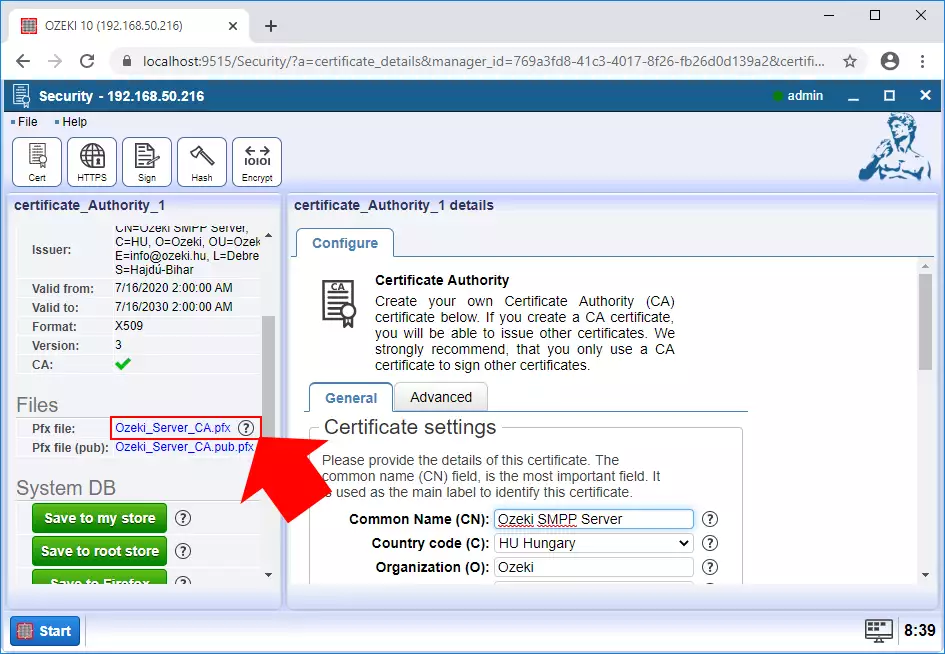
Figure 6 - Download certificate
Install the created SSL certificate into your SMPP server
To use the created SSL certificate to secure your SMPP connection, it must be installed. To do this open Advanced page form the management screen of the SMS gateway. (Figure 7)
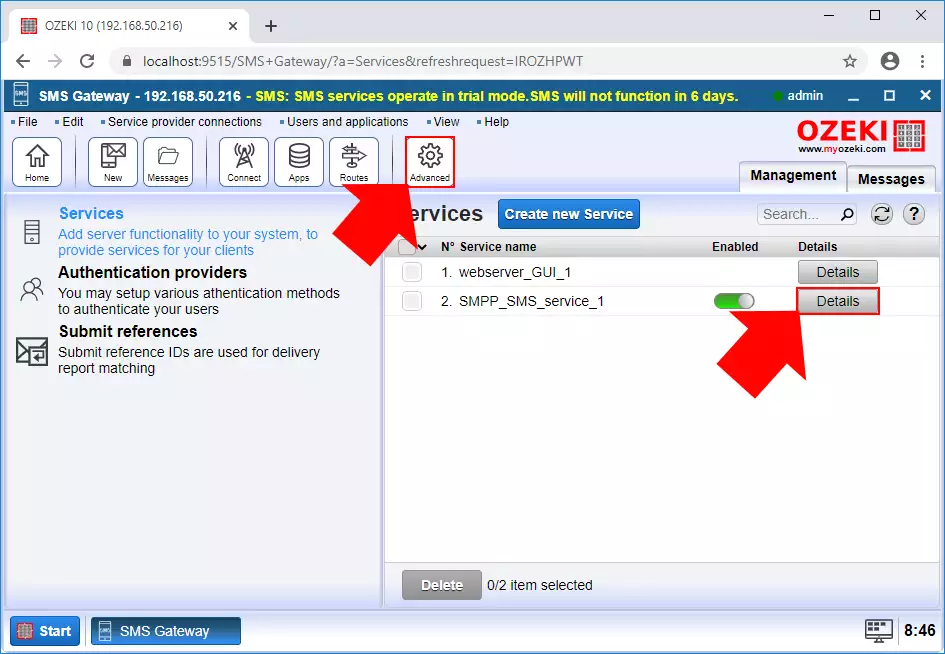
Figure 7 - Open Advanced menu
To have access to the SSL options, please open the Configure tab from the SMPP service details page, click the Advanced button and choose the SSL option. Click it and it will open the SSL settings. You can see all the button you need to look for on Figure 8.
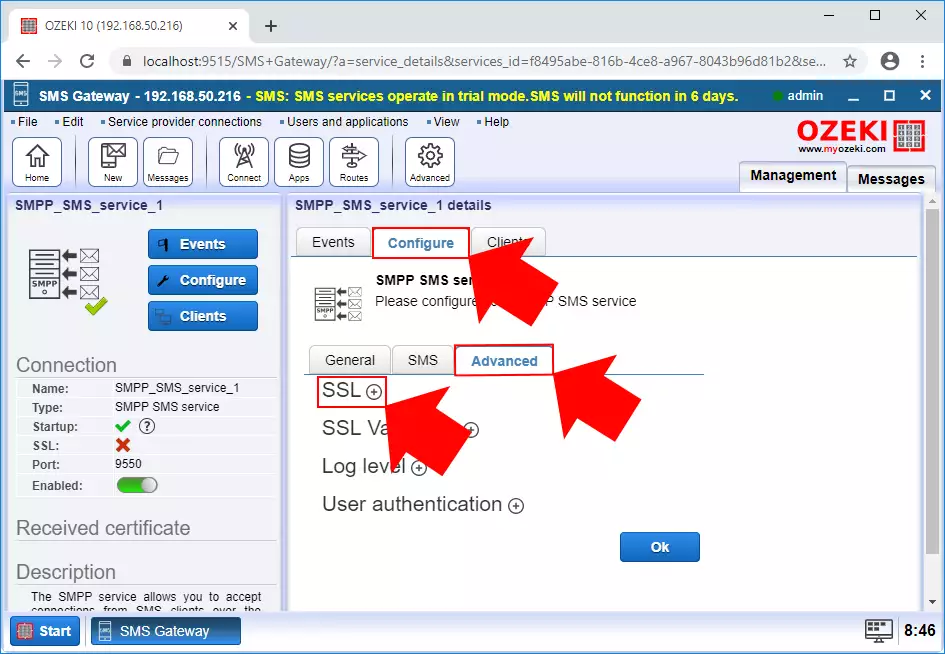
Figure 8 - Open security option
Now you need to tick in the Use SSL connection option. Click the box next to the title as you can see on Figure 9.
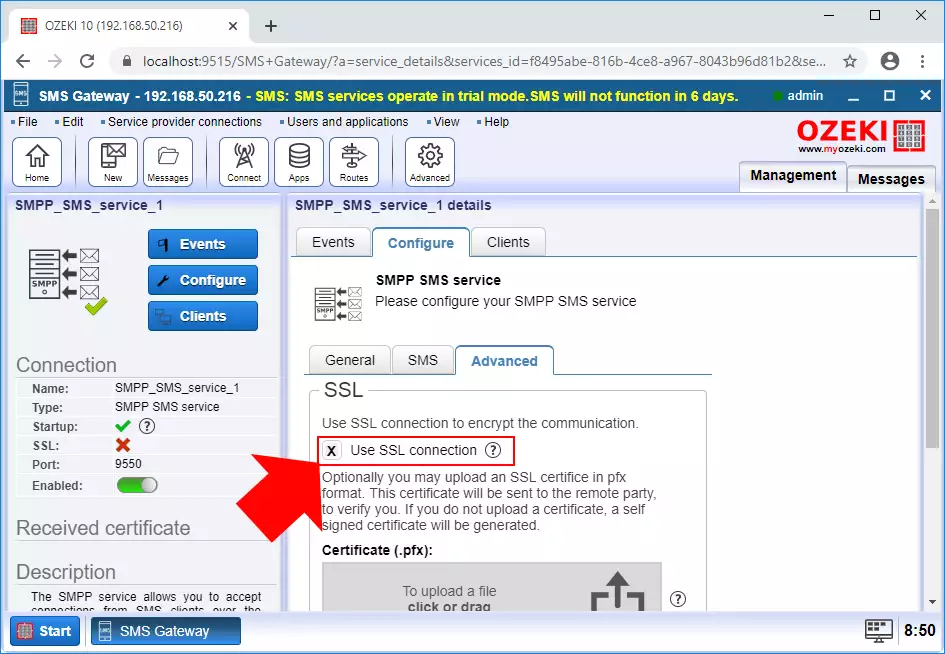
Figure 9 - Enable SSL connection
Now you need to upload the previously downloaded certificate file. Look for the .pfx file and upload it by clicking the button visible on Figure 10. Also, you can provide a password to protect the certificate. Click the OK button to finish the setup.
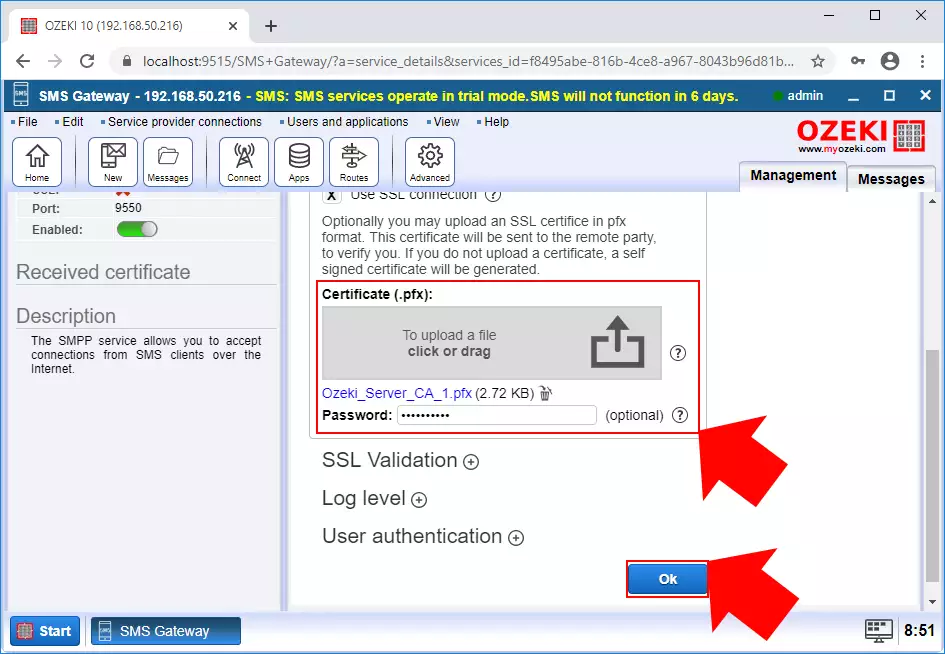
Figure 10 - Upload certificate
Restart your SMPP server to let the changes take effect
To make sure that the certificate works, pleas restart you server by turning it off and on again with the help of the Service menu. You can see the switch on Figure 11.
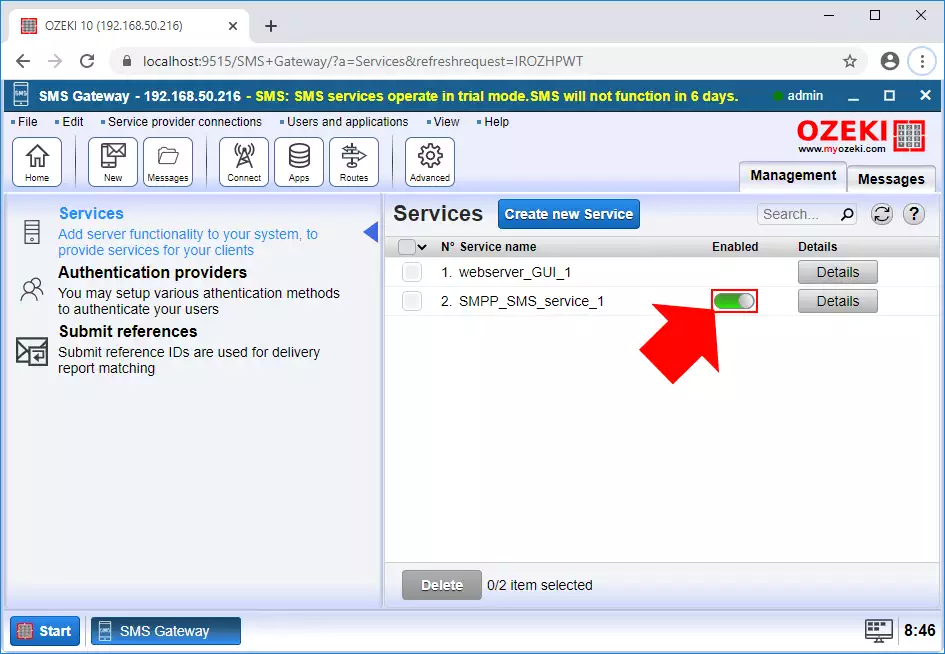
Figure 11 - Enable service
In the events log, you can see that your server is successfully started, and it is working as intended. On Figure 12, you could see the Event log of the example server.
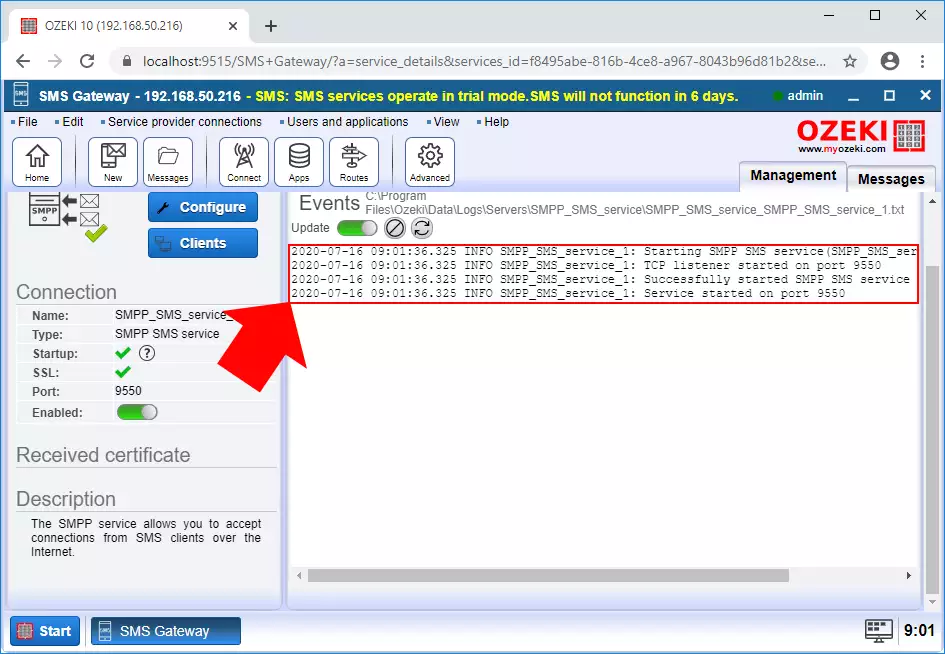
Figure 12 - Service started