How to setup an SSL connection with CA verification
Configuring SSL connection with CA verification for SMS messaging using the Ozeki 10 - SMS Gateway software is essential for ensuring secure and authenticated communication between the SMS Gateway and external systems. This documentation provides detailed instructions on how to configure SSL connection with CA verification SMS messaging using the Ozeki 10 - SMS Gateway software. This user guide will show you how to set up a strong SSL connection with CA verification for your Ozeki SMS Gateway.
I. Create certificates
To begin, first log in to your Ozeki SMS Gateway. If you don't already have an Ozeki account, then download the Ozeki SMS Gateway from the https://ozeki-sms-gateway.com/ website. After logging in, choose the Administrative tools at the Start menu, then click on the Security application.
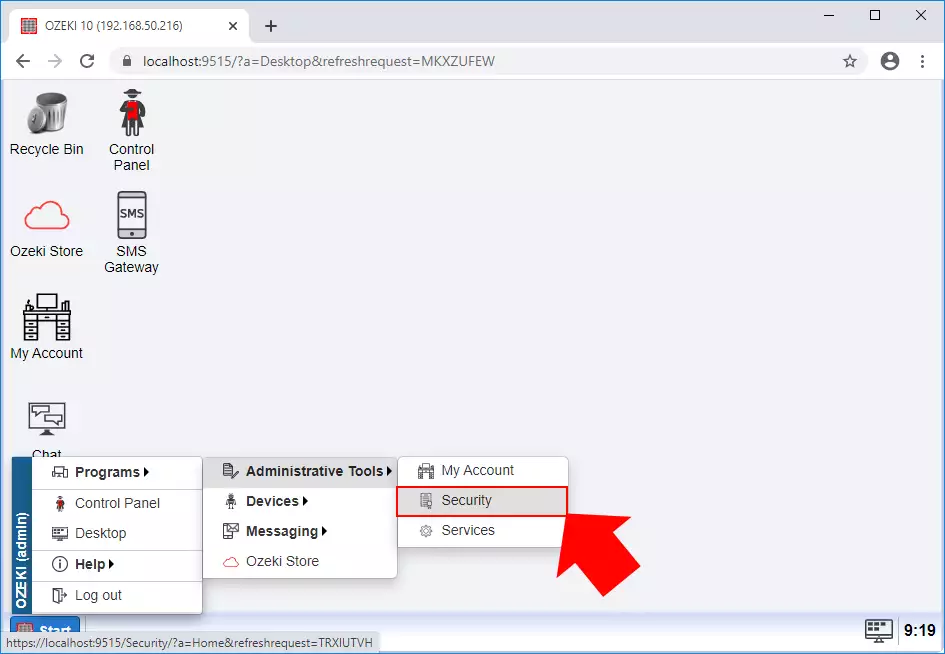
Figure 1 - Open Security app
Create a CA certificate to enable remote party identification. Certificates can be used for document signing and it serves as an identification of the endpoint in a secure communication. Click on Create new Certificate button, then select the Create option. There, you can add your preferred type of certificate, so choose Create CA option. By clicking on the Create new Certificate button, you have the opportunity to upload an already existed certificate. For upload, click on the "Upload" button.
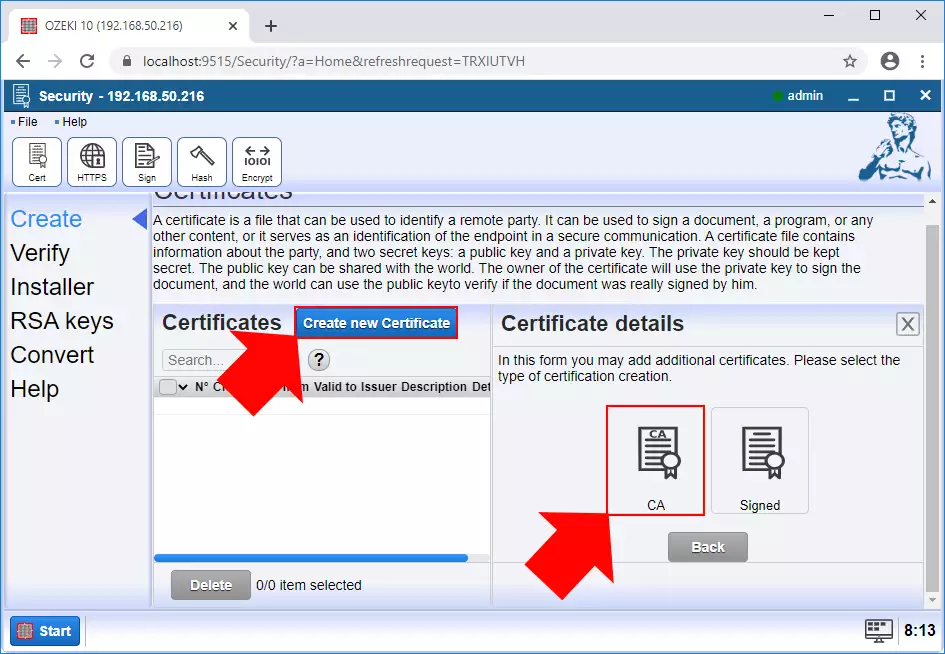
Figure 2 - Create CA certificate
The next step of the creation process is to specify some necessary details on the general tab. Enter the data of the certificate into the certain fields. You need to provide data such as, Common Name, Country code, Organization name, Unit, E-mail address State and Validation periods.
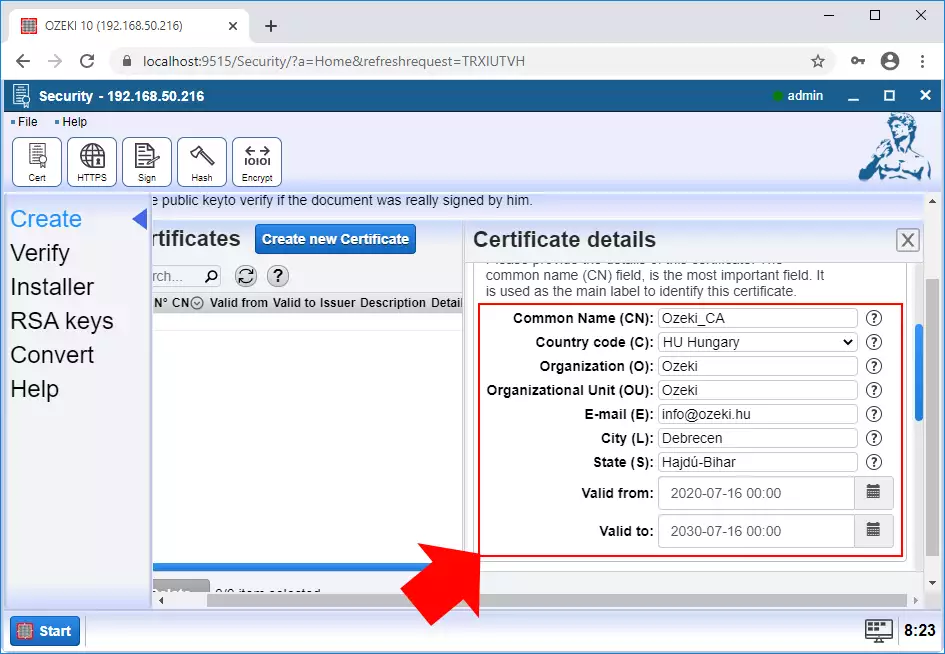
Figure 3 - Provide CA certificate details
Choose the specific usage or purpose for the action you intend to perform, and provide the filename associated with the task, as well as the corresponding password. Select the Usage and Specify the File name and the Password.
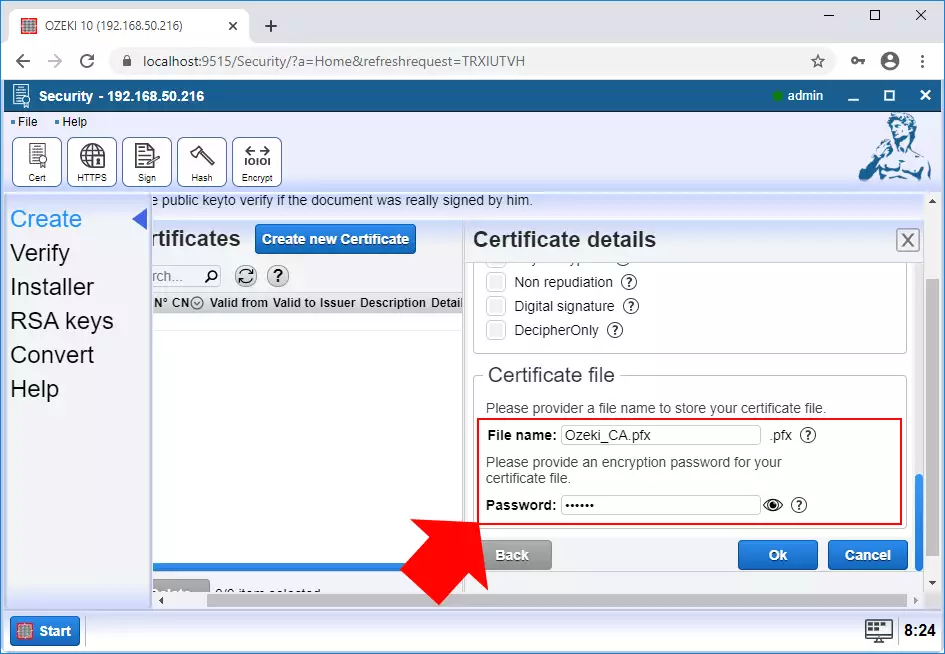
Figure 4 - Provide usage, file name and password
Following the completion of the previous step, you will be able to proceed with generating the signed certificates. Click on the Create new Certificate button and then pick the Create Signed option.
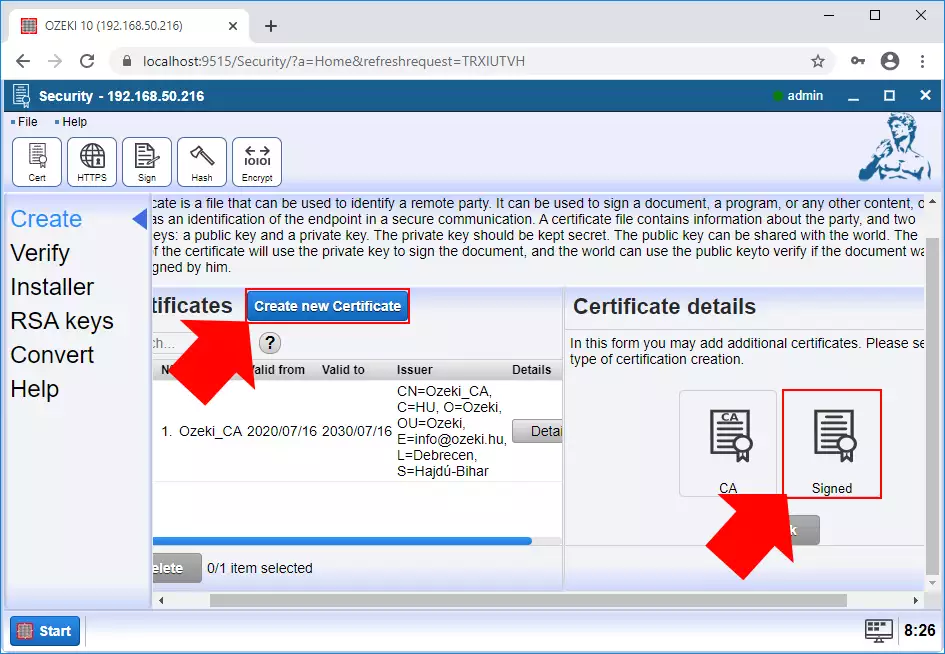
Figure 5 - Create signed certificate for the server
Afterward, provide the details of the server's certificate. Share relevant information such as the certificate's name, Organization, validity period, and any other essential details associated with the server's certificate.
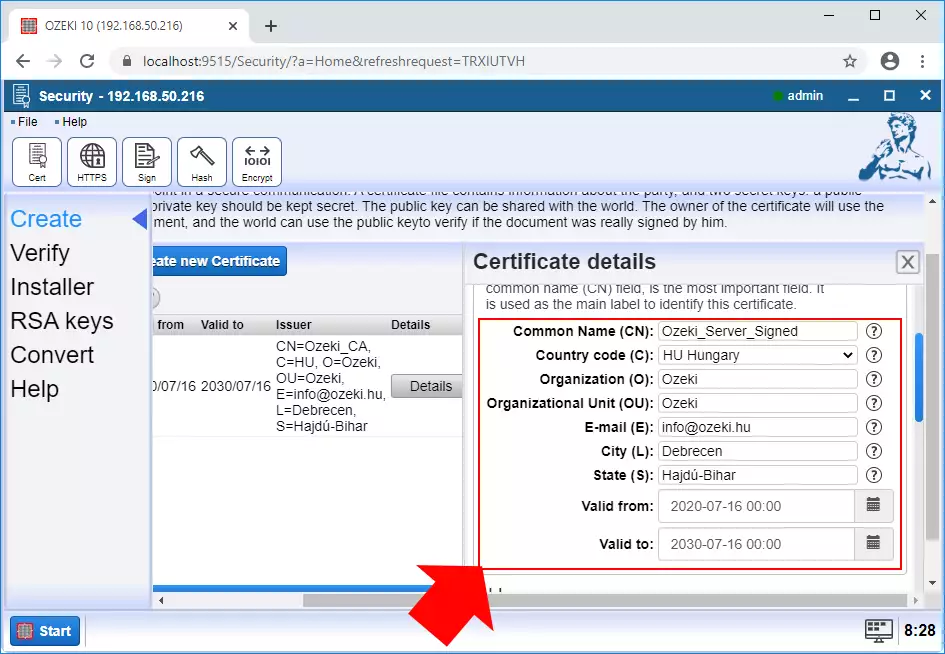
Figure 6 - Provide server's signed certificate details
Supply the details regarding the usage of the server's signed certificate.
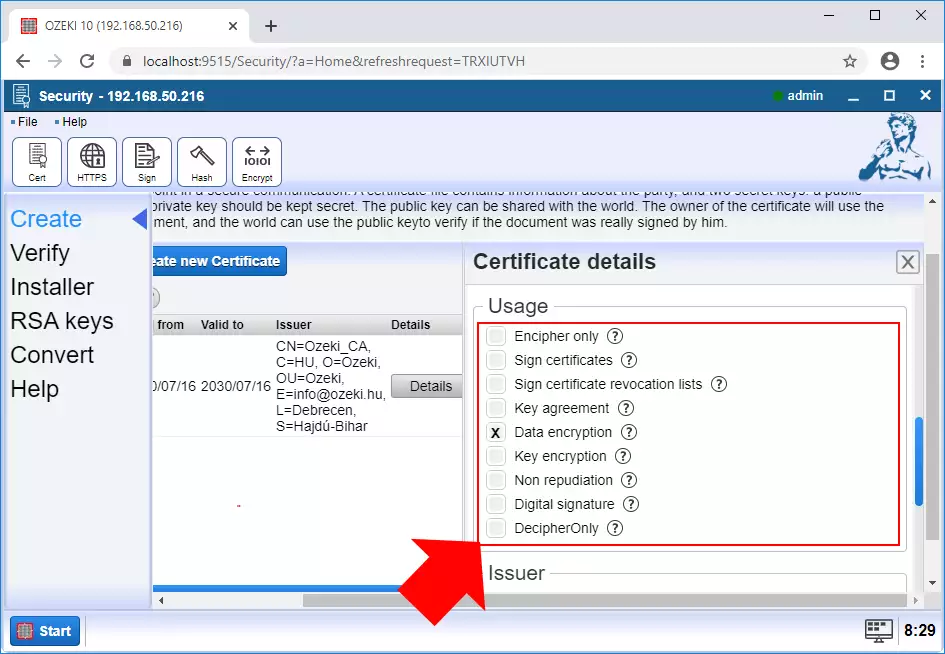
Figure 7 - Provide server's signed certificate usage details
Choose the specific usage or purpose for the action you intend to perform, and provide the filename associated with the task, as well as the corresponding password. Select the Issuer and Specify the File name and the Password. For saving, click on the "Ok" button.
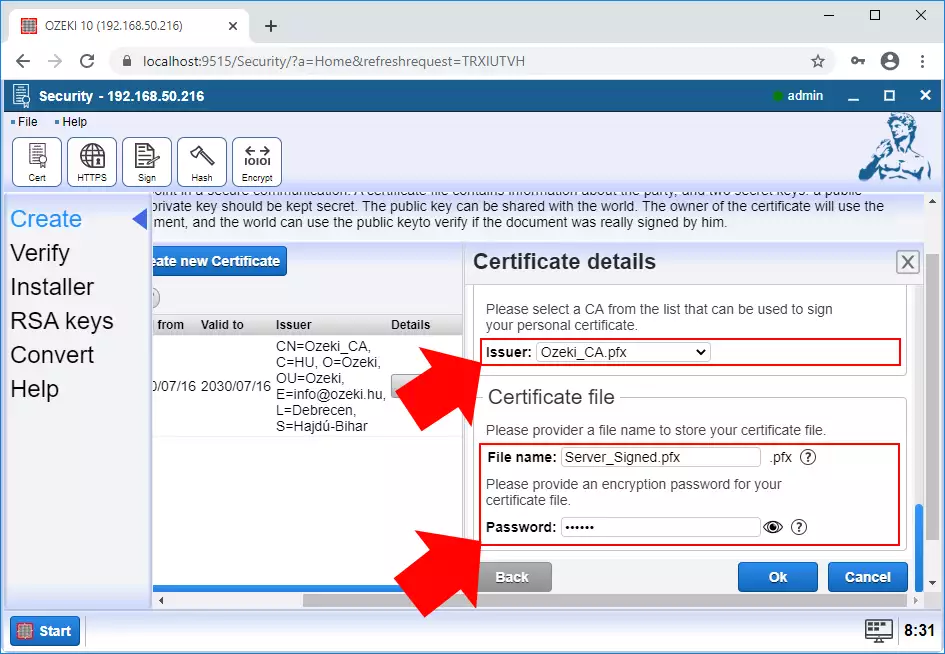
Figure 8 - Provide usage, issuer, file name and password
Lastly, proceed to generate the client's signed certificate by clicking on the Create new Certificate button and selecting the Create Signed option. These procedures will enable you to successfully produce the client's required signed certificate.
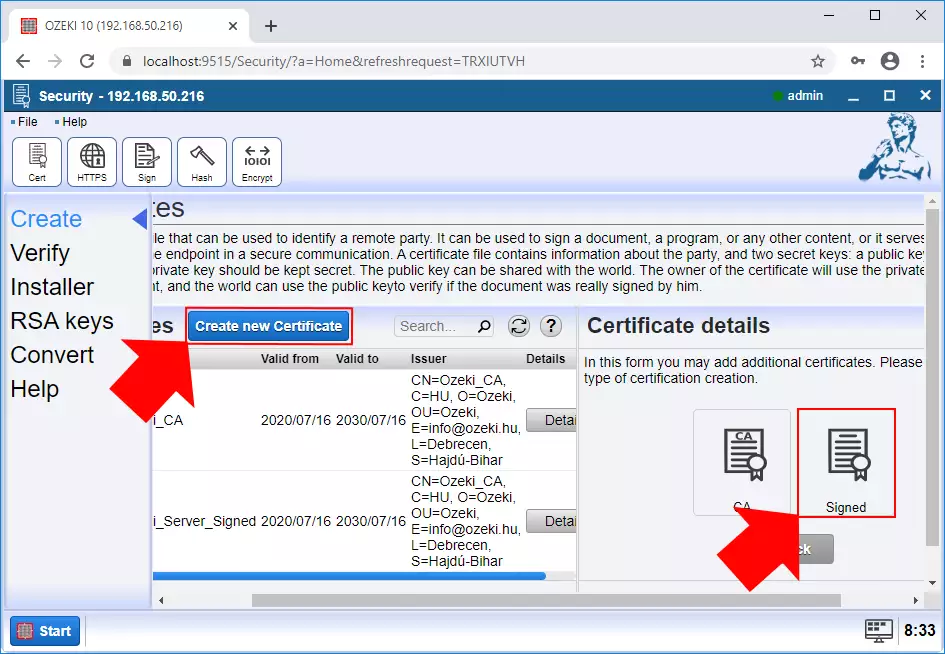
Figure 9 - Create signed certificate for the client
Provide the details of the client's certificate. Enter the data of the certificate into the certain fields. You need to provide data such as, Common Name, Country code, Organization name, Unit, E-mail address State and Validation periods.
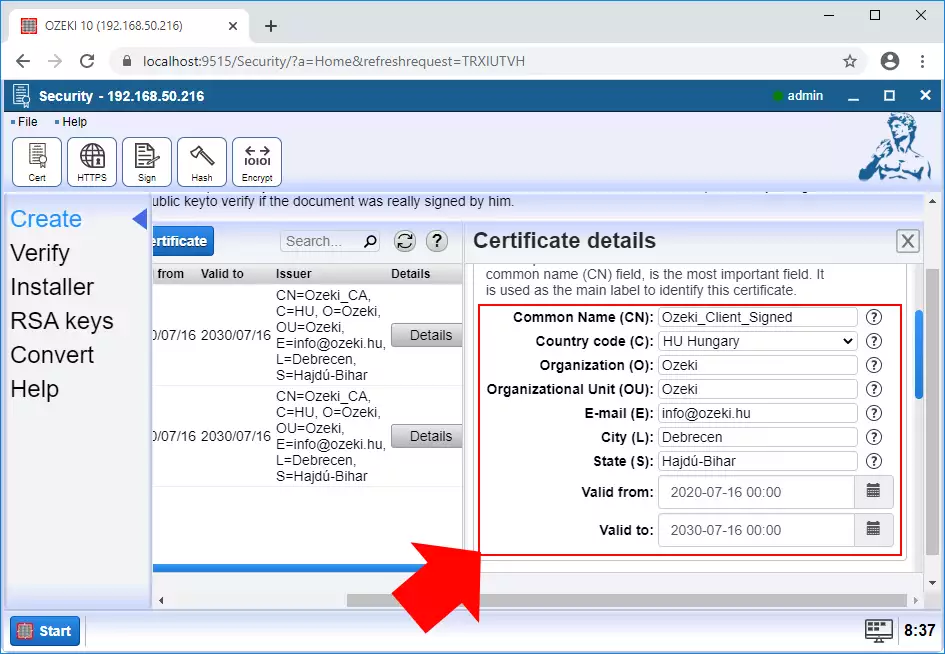
Figure 10 - Provide client's signed certificate details
Provide information on how the client's signed certificate was used.
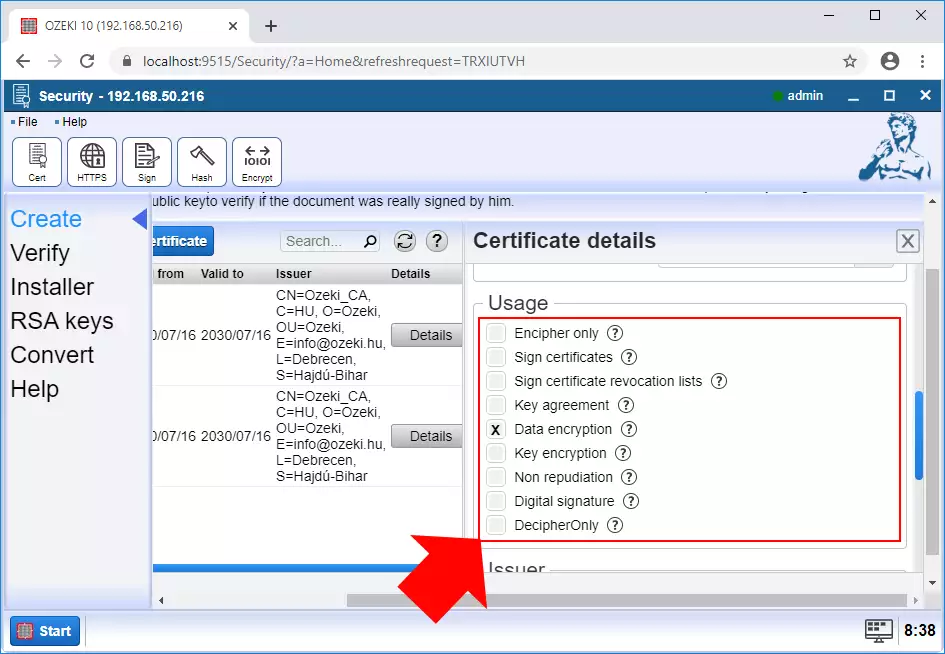
Figure 11 - Provide client's signed certificate usage details
Select the issuer, the file name and password.
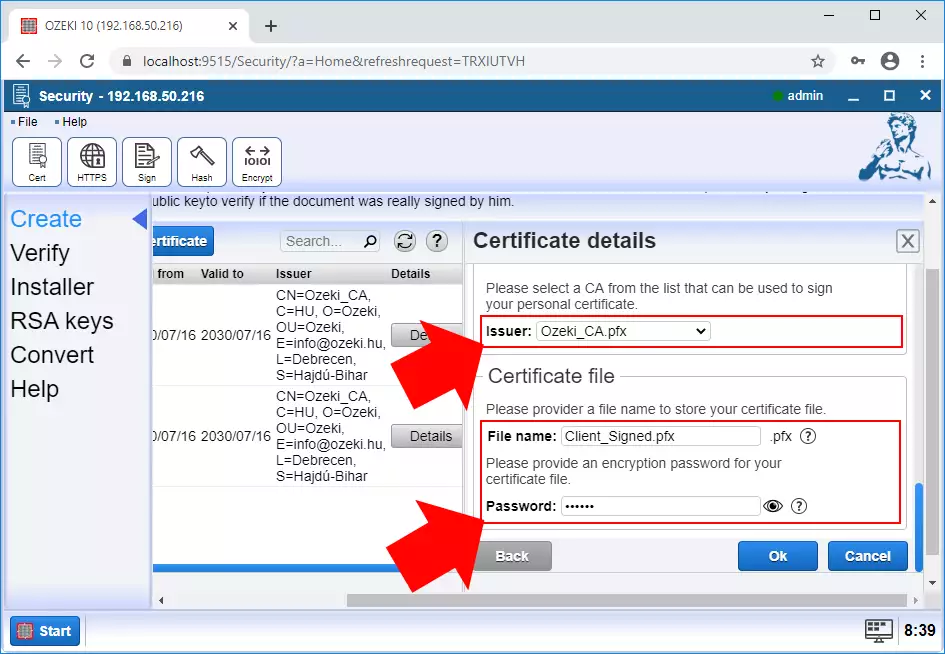
Figure 12 - Provide usage, issuer, file name and password
Once the certificates have been successfully created, you must proceed to download them. Access the Certificate Authority (CA) certificate Details page.
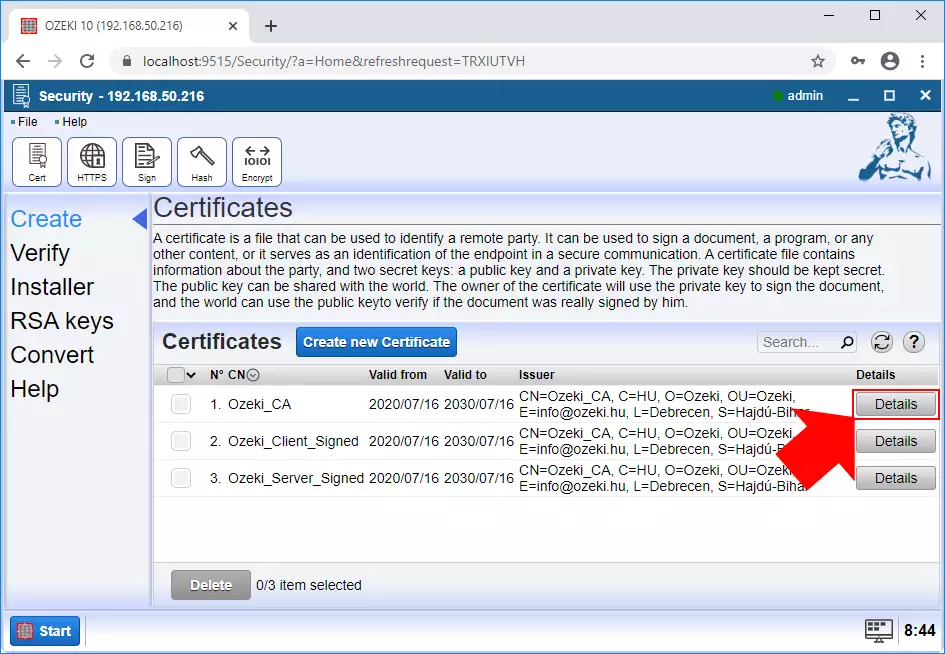
Figure 13 - Open CA certificate details page
Download the Public CA certificate to establish trust and validate certificates in the certification chain for secure communication and transactions. For download, find the Public CA certificate, which is located on the left side of the details page.
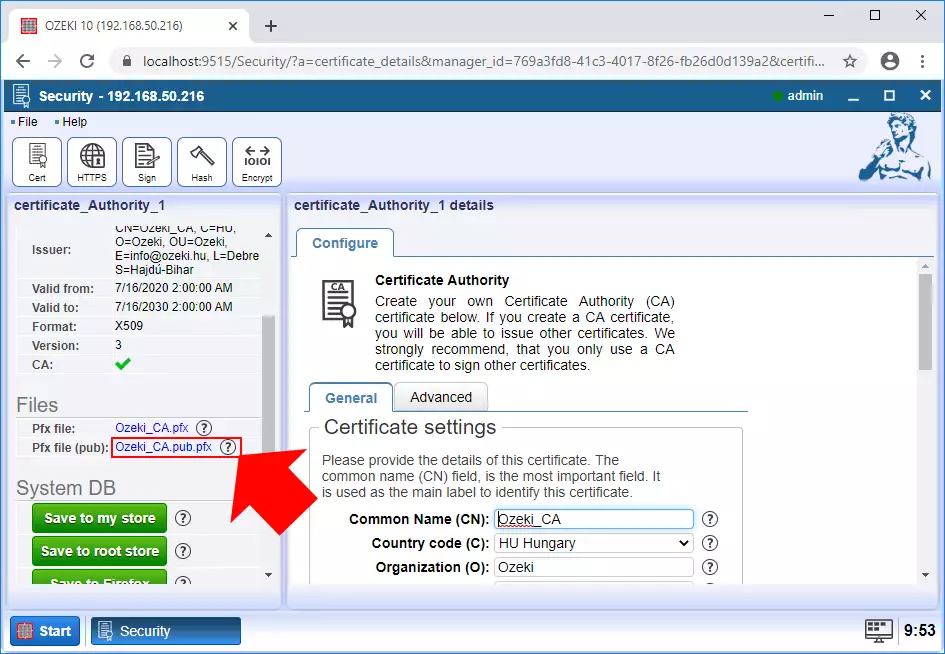
Figure 14 - Download Public CA certificate
Afterwards, repeat the same steps for downloading the client certificate by the client certificate Details page.
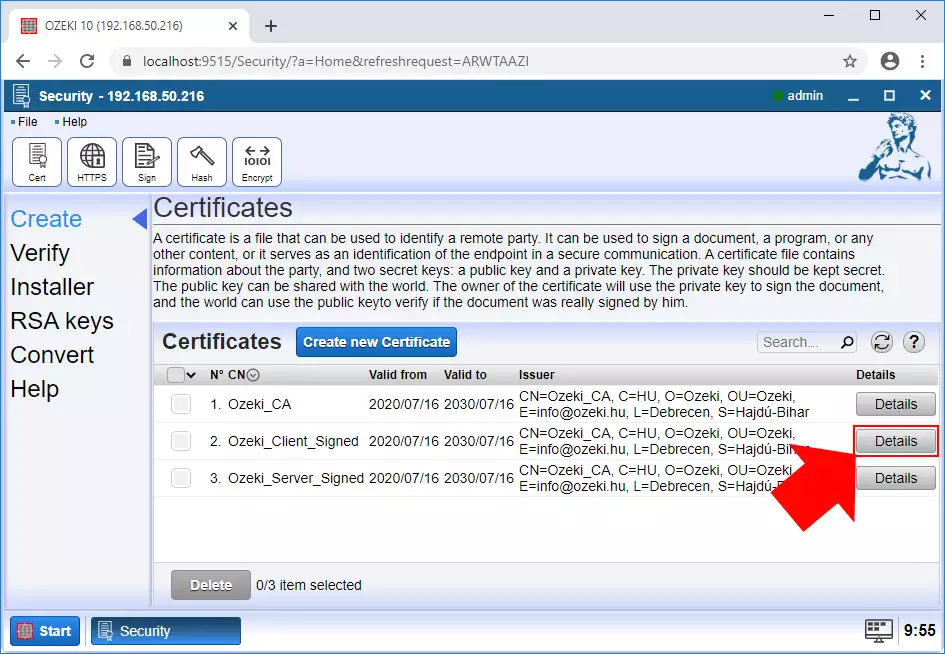
Figure 15 - Open client certificate details page
After it, download client's certificate.
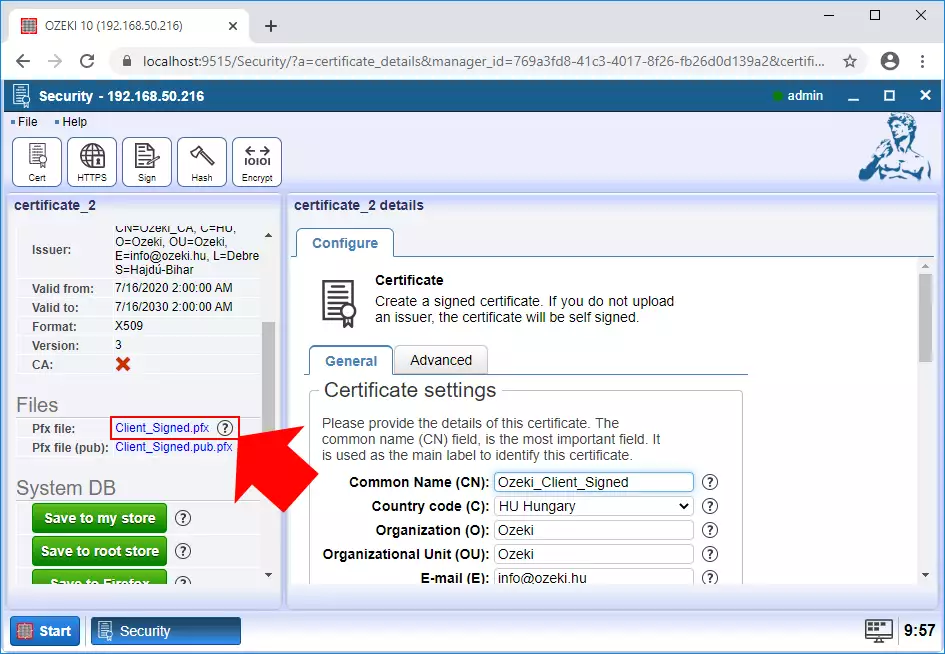
Figure 16 - Download client's certificate
And finally open server certificate Details page for complete downloading.
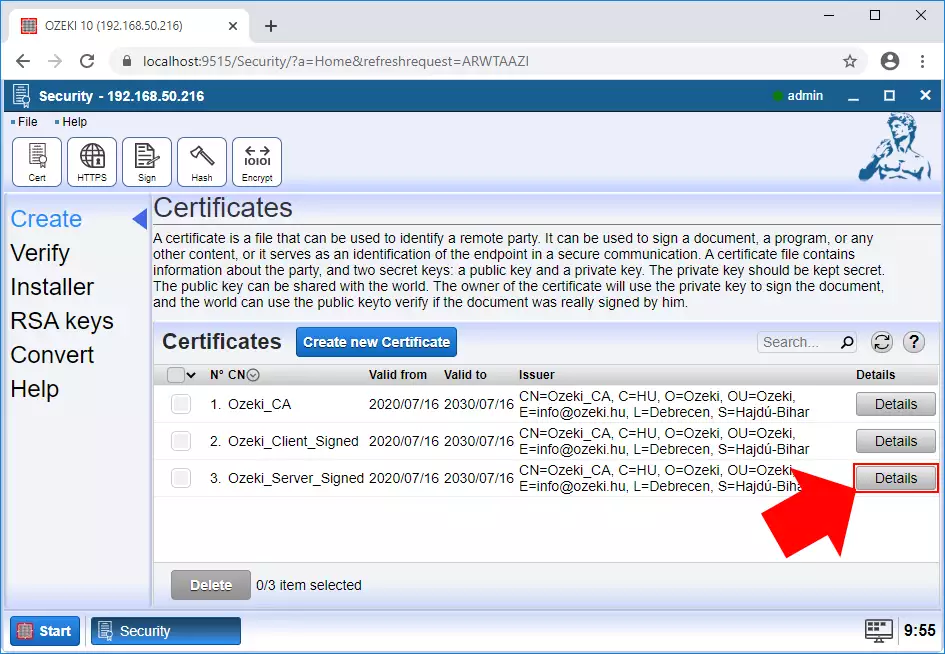
Figure 17 - Open server certificate details page
Thereafter download server's certificate.
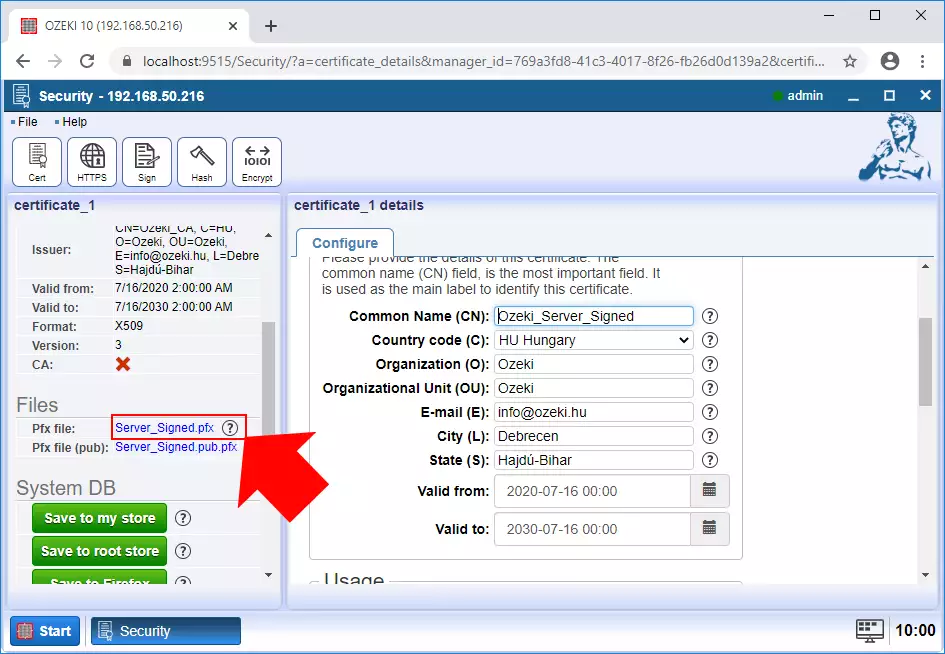
Figure 18 - Download server's certificate
II. Configure SSL connection for the server
After completing the previous setups, click on the "SMS Gateway" button at the bottom of the page, highlighted in blue. Open the Advanced menu in the toolbar and select the Details option at the services.
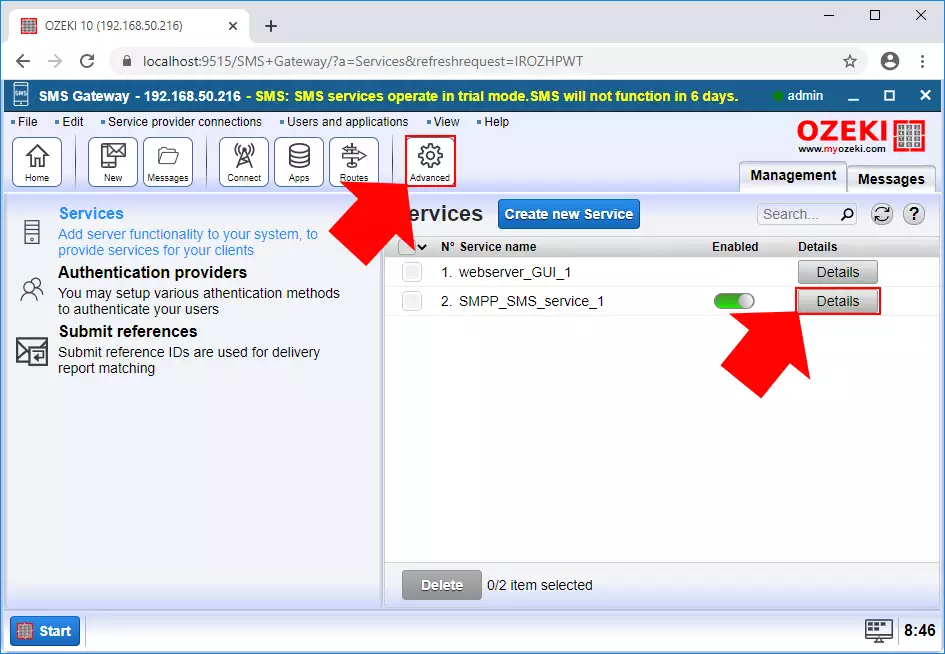
Figure 19 - Open Advanced menu on the server
By opening the Details menu, open the Configure menu to modify the SSL settings.
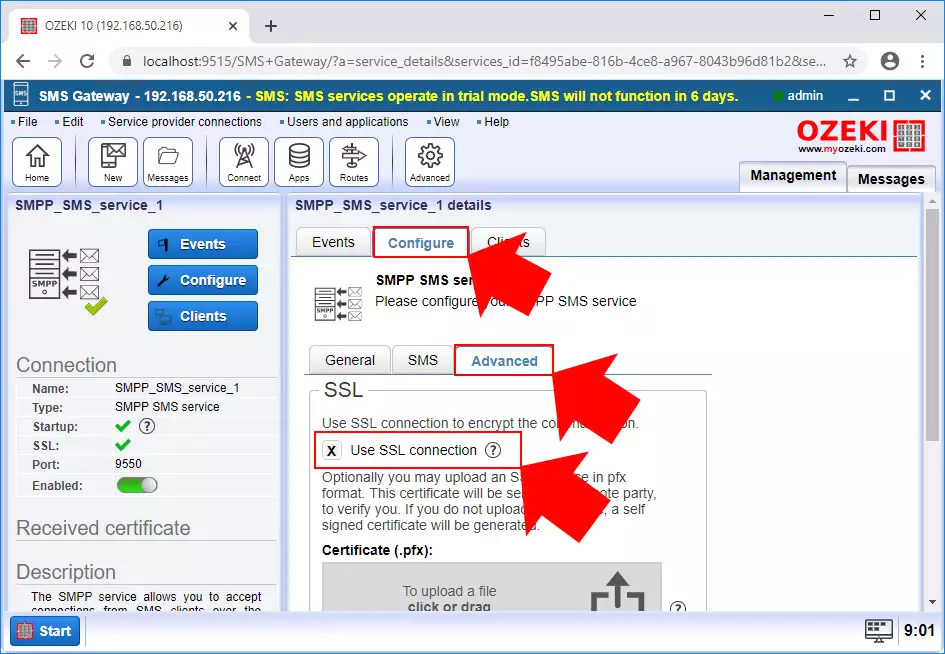
Figure 20 - Open service details page
To enable SSL connection, in the Configure menu select the Advanced tab and open SSL. Under SSL section mark the Use SSL connection option. Upload the server signed certificate and provide an optional password for it.
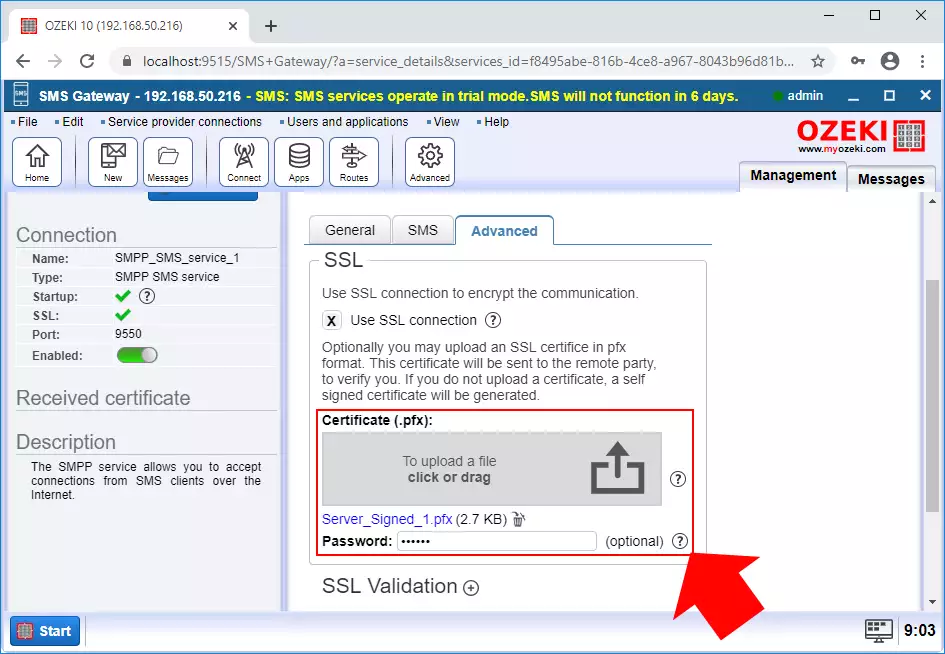
Figure 21 - Enable SSL connection for the service
For CA validation open the SSL Validation section. Select the "Accept CA verified certificate" form the drop-down-list and upload the public CA certificate.
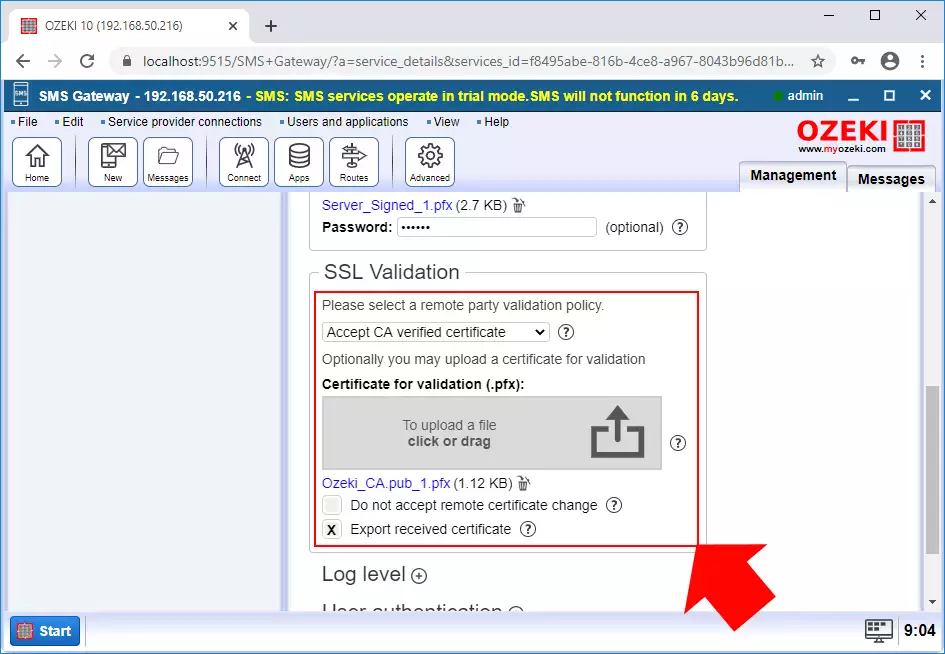
Figure 22 - Configure CA validation
III. Configure SSL connection for the client
For client SSL Connection configuration, you need to load a new Ozeki SMS Gateway page on your browser. Open the SMPP client connection on the home page to allow secure communications and transactions.
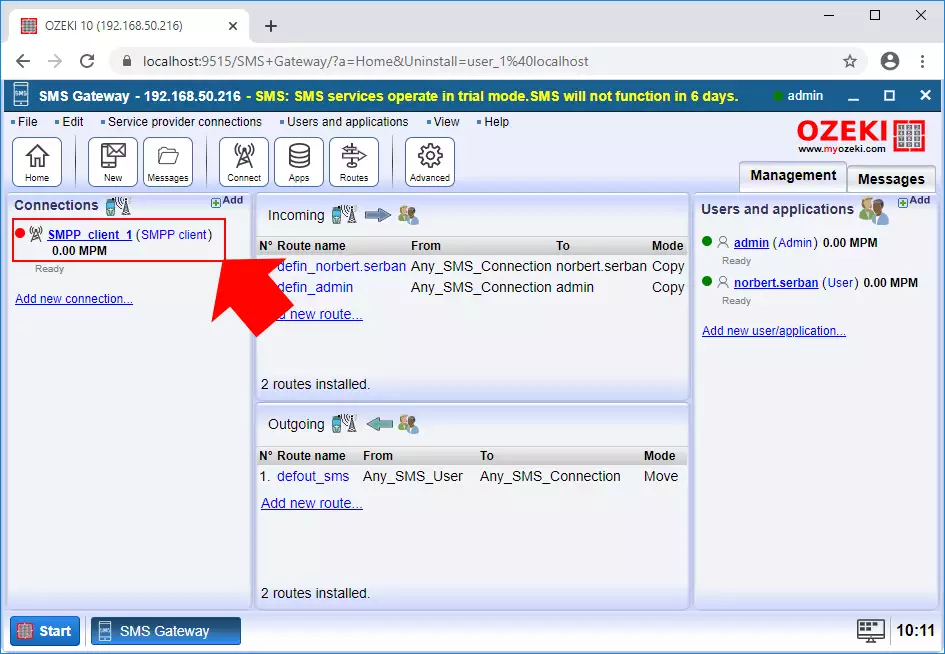
Figure 23 - Open client connection
The SSL connection configuration on the server page is identical to that of the Configure menu. To set up the SSL connection, navigate to the Advanced tab and access SSL n the Configure menu. Under SSL section mark the Use SSL connection option. Upload the server signed certificate and provide a password to it.
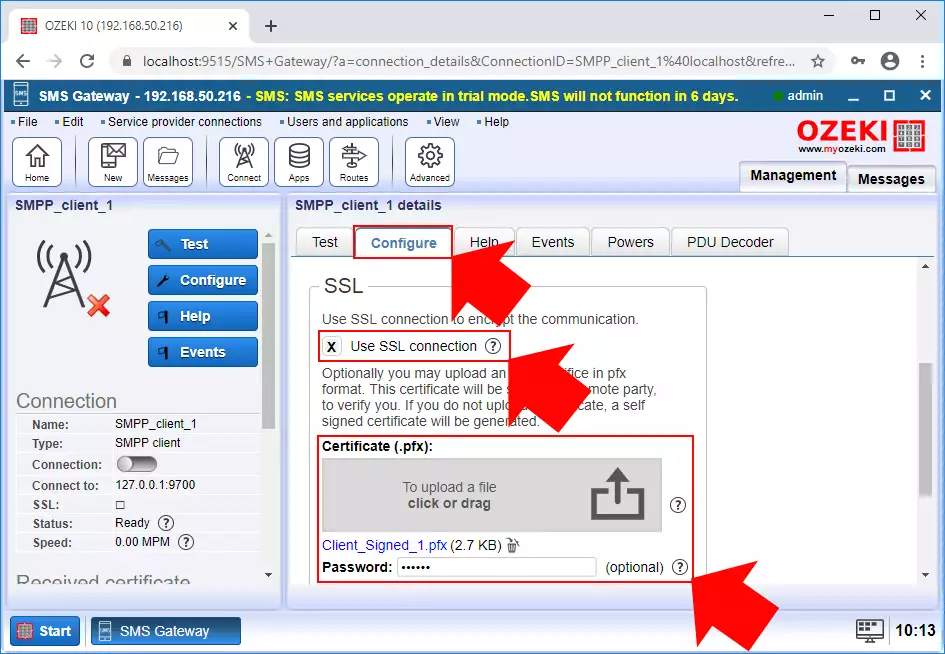
Figure 24 - Enable SSL connection for the client
For CA validation open the SSL Validation section. Select the Accept CA verified certificate form the drop-down-list and upload the public CA certificate.
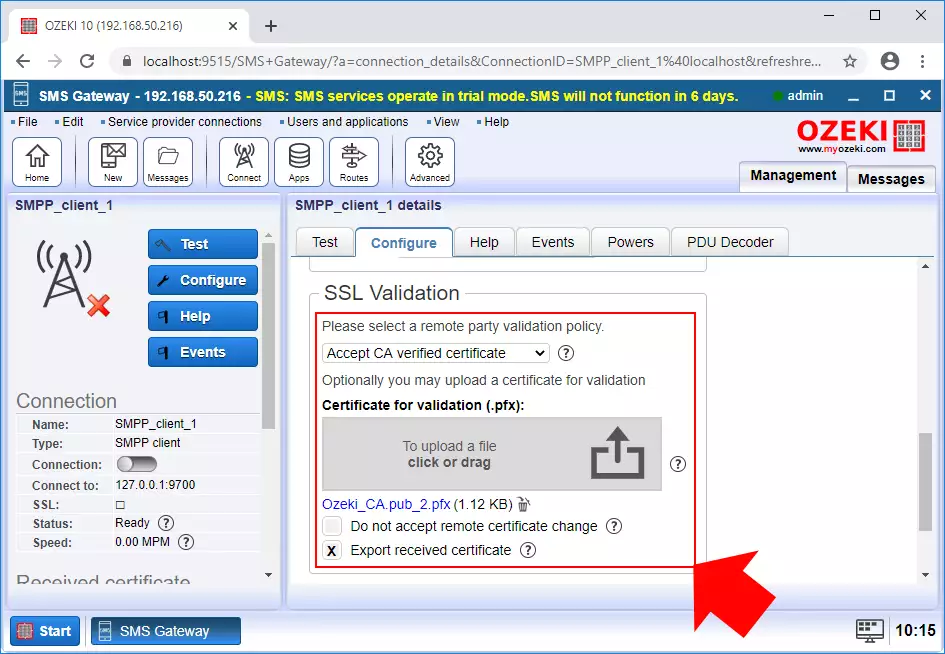
Figure 25 - Configure CA validation
Upon completing the configuration process, you will notice on the client page that the secure connection has been successfully initialized. This confirms that the required procedures have been done to guarantee a secure and encrypted communication route between the client and server, allowing secure data transmission and interactions.
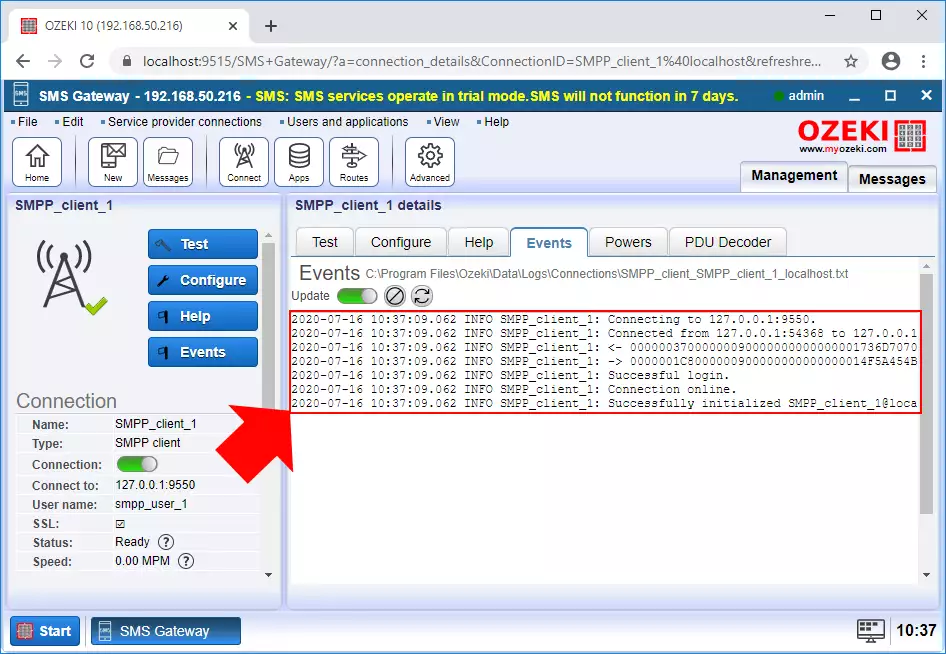
Figure 26 - Client successfully connected
As a result, the server side has also been linked successfully, further providing a secure and reliable connection between both ends and enabling seamless data exchange and interactions.
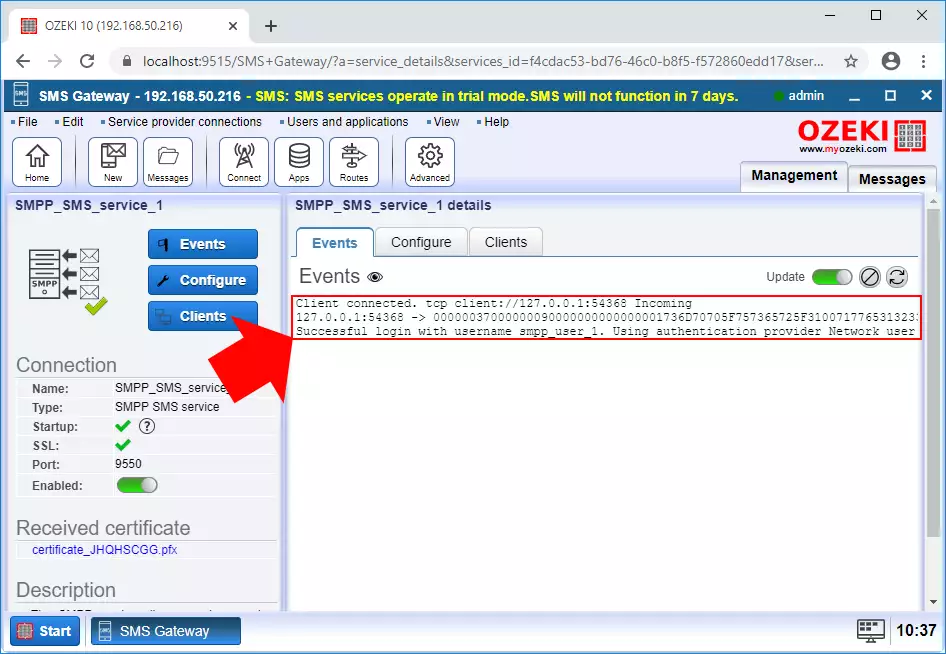
Figure 27 - Server successfully connected
Summary
This page provides a comprehensive guide on how to set up an SSL connection with CA verification for SMS messaging using the Ozeki 10 SMS Gateway software. In this tutorial you can learn about its enhanced security and data protection for SMS communication, ensuring that messages are transmitted securely between the server and clients. Users may setup SSL certificates and execute CA verification by carefully following the step-by-step instructions, which adds another level of authentication and confidence to the SMS communication process. Overall, this article gives users the knowledge they need to manage and configure SSL certificates, enabling them to build an effective and secure SMS gateway infrastructure.