How to Receive an SMS in Kotlin
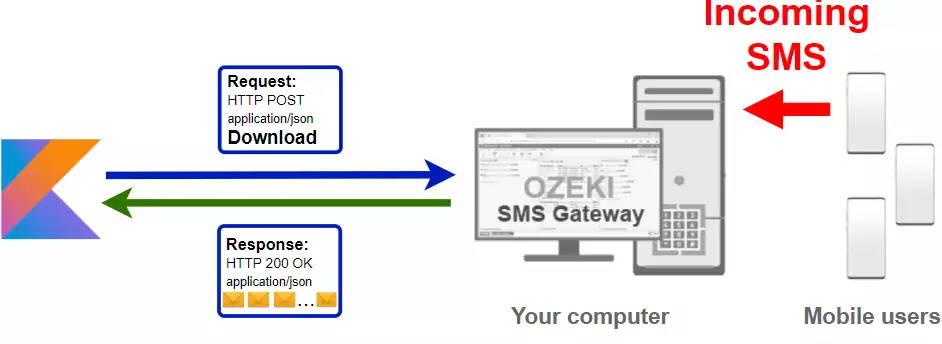
The simplest way to send SMS from Kotlin is to use the built in HTTP/Rest SMS api of Ozeki SMS Gateway. When you use this API, you will send SMS messages by issuing a HTTP Post request to the SMS gateway. The HTTP Post request will contain a message formatted in json format. The SMS gateway will send this SMS to the recipient phone, and it will return a HTTP 200 OK response to your request. (Figure 1)

Kotlin code to receive sms to mobile
The Kotlin sms code sample below demonstrates how you can receive SMS message(s) using the http rest sms api of Ozeki SMS Gateway using the Kotlin Ozeki.Libs.Rest library. This library is provided to you free of charge, and you may use it and modify it in any of your projects.
MainActivity.kt
package receive.sms

import androidx.appcompat.app.AppCompatActivity
import android.os.Bundle
import Ozeki.Libs.Rest.*
import android.widget.ArrayAdapter
import kotlinx.coroutines.*

class MainActivity : AppCompatActivity() {
    @DelicateCoroutinesApi
    override fun onCreate(savedInstanceState: Bundle?) {
        super.onCreate(savedInstanceState)
        setContentView(R.layout.activity_main)

        val listMessages:android.widget.ListView = findViewById(R.id.listMessages)
        val btnSendRequest:android.widget.Button = findViewById(R.id.btnSendRequest)

        val configuration = Configuration(
            username = "http_user",
            password = "qwe123",
            apiurl = "http://10.0.2.2:9509/api"
        )

        val messages_label : ArrayList<Message> = arrayListOf()

        val arrayAdapter = ArrayAdapter<Message>(this, android.R.layout.simple_list_item_1, messages_label)

        listMessages.adapter = arrayAdapter

        val api = MessageApi(configuration)

        btnSendRequest.setOnClickListener {
            GlobalScope.launch(Dispatchers.IO) {
                val result = api.DownloadIncomming()
                val messages = result.Messages
                for (index in 0 until messages.size) {
                    messages_label.add(messages.get(index))
                }
            }
            arrayAdapter.notifyDataSetChanged()
        }
    }
}
<?xml version="1.0" encoding="utf-8"?>
<androidx.constraintlayout.widget.ConstraintLayout xmlns:android="http://schemas.android.com/apk/res/android"
    xmlns:app="http://schemas.android.com/apk/res-auto"
    xmlns:tools="http://schemas.android.com/tools"
    android:layout_width="match_parent"
    android:layout_height="match_parent"
    tools:context=".MainActivity">

    <Button
        android:id="@+id/btnSendRequest"
        android:layout_width="320dp"
        android:layout_height="wrap_content"
        android:layout_marginTop="24dp"
        android:backgroundTint="#FF3F3F"
        android:text="Download incoming"
        app:layout_constraintEnd_toEndOf="parent"
        app:layout_constraintHorizontal_bias="0.505"
        app:layout_constraintStart_toStartOf="parent"
        app:layout_constraintTop_toBottomOf="@+id/listMessages" />

    <TextView
        android:id="@+id/textMessages"
        android:layout_width="320dp"
        android:layout_height="wrap_content"
        android:layout_marginTop="24dp"
        android:text="Messages"
        android:textAlignment="center"
        android:textSize="22sp"
        app:layout_constraintEnd_toEndOf="parent"
        app:layout_constraintHorizontal_bias="0.505"
        app:layout_constraintStart_toStartOf="parent"
        app:layout_constraintTop_toTopOf="parent" />

    <ListView
        android:id="@+id/listMessages"
        android:layout_width="320dp"
        android:layout_height="500dp"
        android:layout_marginTop="24dp"
        app:layout_constraintEnd_toEndOf="parent"
        app:layout_constraintStart_toStartOf="parent"
        app:layout_constraintTop_toBottomOf="@+id/textMessages" />
</androidx.constraintlayout.widget.ConstraintLayout>
How to use the Kotlin sms example:
You can use the MessageApi class to receive SMS message(s) from the SMS gateway. Your request from your device will be forwarded to the SMS gateway through the internet.
Download ReceiveSms.kt
The source code explained in this article can be downloaded and used and modified free of charge.
Download: ReceiveSms.kt.zip (148Kb)
What is in the ReceiveSms.kt.zip file?
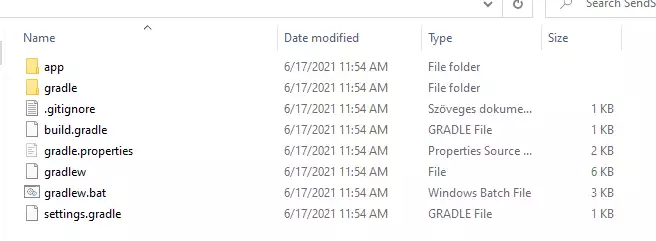
The ReceiveSms.kt.zip file contains the an example project, which has the Ozeki.Libs.Rest library in it. With this library you can send, delete, mark and receive sms messages by creating a MessageApi and using the Send(), Delete(), Mark(), and Receive() methods. (Figure 2)

How to receive SMS with Kotlin (Quick steps)
To a receive sms with Kotlin:
- Install Ozeki SMS Gateway
- Connect Ozeki SMS Gateway to the mobile network
- Send a test sms from Ozeki GUI
- Create a HTTP sms api user
- Android Studio
- Download the example project above
- Create an api to download your incoming messages
- Use the DownloadIncoming() method to receive your messages
- Read the response message on the console
- Check the logs in the SMS gateway
Install Ozeki SMS Gateway and create an HTTP API user
To be able to receive SMS with Kotlin, first you need to install Ozeki SMS Gateway. The SMS gateway can be installed on the same computer, where you develop your Kotlin code in Android Studio. After installation, the next step is to connect Ozeki SMS Gateway to the mobile network. You can send a test sms from the Ozeki GUI to verify, that your mobile network connection works. The final step to prepare your environment is to create a HTTP sms api user. Create a user with a username of "http_user", and with a password of "qwe123" to make the example work without modification.
After the environment is setup, you can run your Kotlin code.
HTTP API url to use send sms from Kotlin
To receive SMS with Kotlin, your Kotlin will have to issue an HTTP request to the SMS gateway. The API url is shown below. Note that the IP address (127.0.0.1) should be replaced to the IP address of your SMS gateway. If Ozeki SMS Gateway is installed on the same computer where the JavaScript sms application is running, this can be 127.0.0.1. If it is installed on a different computer, it should be the IP address of that computer.
http://127.0.0.1:9509/api?action=rest
HTTP authentication to use receive sms with Kotlin
To authenticate the Kotlin sms client, you need to send the username and password in a base64 encoded string to the server in a HTTP request. The format used is: base64(username+":"+password). In Kotlin you can use the following code to do this encoding:
var usernamePassword = "%s:%s".format(username, password)
return "Basic %s".format(Base64.getEncoder().encodeToString(usernamePassword.toByteArray()))
For example, if you encode the username 'http_user' and the password 'qwe123', you will get the following base64 encoded string: aHR0cF91c2VyOnF3ZTEyMw==. To send
HTTP request header to send SMS from Kotlin
To receive the SMS message(s), you need to include the following lines as headers in the HTTP request. Note that we include a content type and an Authorization header.
Content-Type: application/json
Authorization: Basic QWxhZGRpbjpvcGVuIHNlc2FtZQ==
HTTP request to receive SMS with Kotlin
To receive the incoming SMS message(s), your Kotlin application will send an HTTP request similar to the one below. Note, that this request contains a HTTP header part and a http body part. The HTTP body is a JSON encoded data string. It contains the recipient's number and the message's text.
GET /api?action=receivemsg&folder=inbox HTTP/1.1
Connection: Keep-Alive
Accept-Encoding: gzip
Authorization: Basic aHR0cF91c2VyOnF3ZTEyMw==
Host: 10.0.2.2:9509
User-Agent: okhttp/4.2.2
HTTP response received by the Kotlin sms example
Once the SMS gateway receives this request, it will generate a HTTP response. The HTTP response will contain a status code, to indicate whether the SMS submit request was successful or not. It will also return a JSON encoded structure to provide you useful details about the message's submission.
HTTP/1.1 200 OK
User-Agent: OZEKI 10.3.120 (www.myozeki.com)
Content-Type: application/json; charset=utf8
Last-Modified: Thu, 17 Jun 2021 16:10:48 GMT
Server: 10/10.3.120
Transfer-Encoding: chunked

{
	"http_code": 200,
	"response_code": "SUCCESS",
	"response_msg": "",
	"data": {
	  "folder": "inbox",
	  "limit": "1000",
	  "data": [
	    {
	      "message_id": "ada7ee44-aefc-e746-9376-b76e3674442a",
	      "from_connection": "http_user@localhost",
	      "from_address": "+36203333333",
	      "from_station": "%",
	      "to_connection": "http_user@localhost",
	      "to_address": "http_user",
	      "to_station": "%",
	      "text": "Hello world 3",
	      "create_date": "2021-06-17 16:09:11",
	      "valid_until": "2021-06-24 16:09:11",
	      "time_to_send": "2021-06-17 16:09:11",
	      "submit_report_requested": true,
	      "delivery_report_requested": true,
	      "view_report_requested": true,
	      "tags": [
	        {
	          "name": "Type",
	          "value": "SMS:TEXT"
	        }
	      ]
	    },
	    {
	      "message_id": "fccc6211-c710-c80e-a28f-664ff8b0e964",
	      "from_connection": "http_user@localhost",
	      "from_address": "+36201111111",
	      "from_station": "%",
	      "to_connection": "http_user@localhost",
	      "to_address": "http_user",
	      "to_station": "%",
	      "text": "Hello world 1",
	      "create_date": "2021-06-17 16:09:11",
	      "valid_until": "2021-06-24 16:09:11",
	      "time_to_send": "2021-06-17 16:09:11",
	      "submit_report_requested": true,
	      "delivery_report_requested": true,
	      "view_report_requested": true,
	      "tags": [
	        {
	          "name": "Type",
	          "value": "SMS:TEXT"
	        }
	      ]
	    },
	    {
	      "message_id": "ba782a64-05cd-8ba8-9f4c-e8597ca30b59",
	      "from_connection": "http_user@localhost",
	      "from_address": "+36202222222",
	      "from_station": "%",
	      "to_connection": "http_user@localhost",
	      "to_address": "http_user",
	      "to_station": "%",
	      "text": "Hello world 2",
	      "create_date": "2021-06-17 16:09:11",
	      "valid_until": "2021-06-24 16:09:11",
	      "time_to_send": "2021-06-17 16:09:11",
	      "submit_report_requested": true,
	      "delivery_report_requested": true,
	      "view_report_requested": true,
	      "tags": [
	        {
	          "name": "Type",
	          "value": "SMS:TEXT"
	        }
	      ]
	    }
	  ]
	}
}
How to receive SMS messages with Kotlin using the sms api and the example project above (Video tutorial)
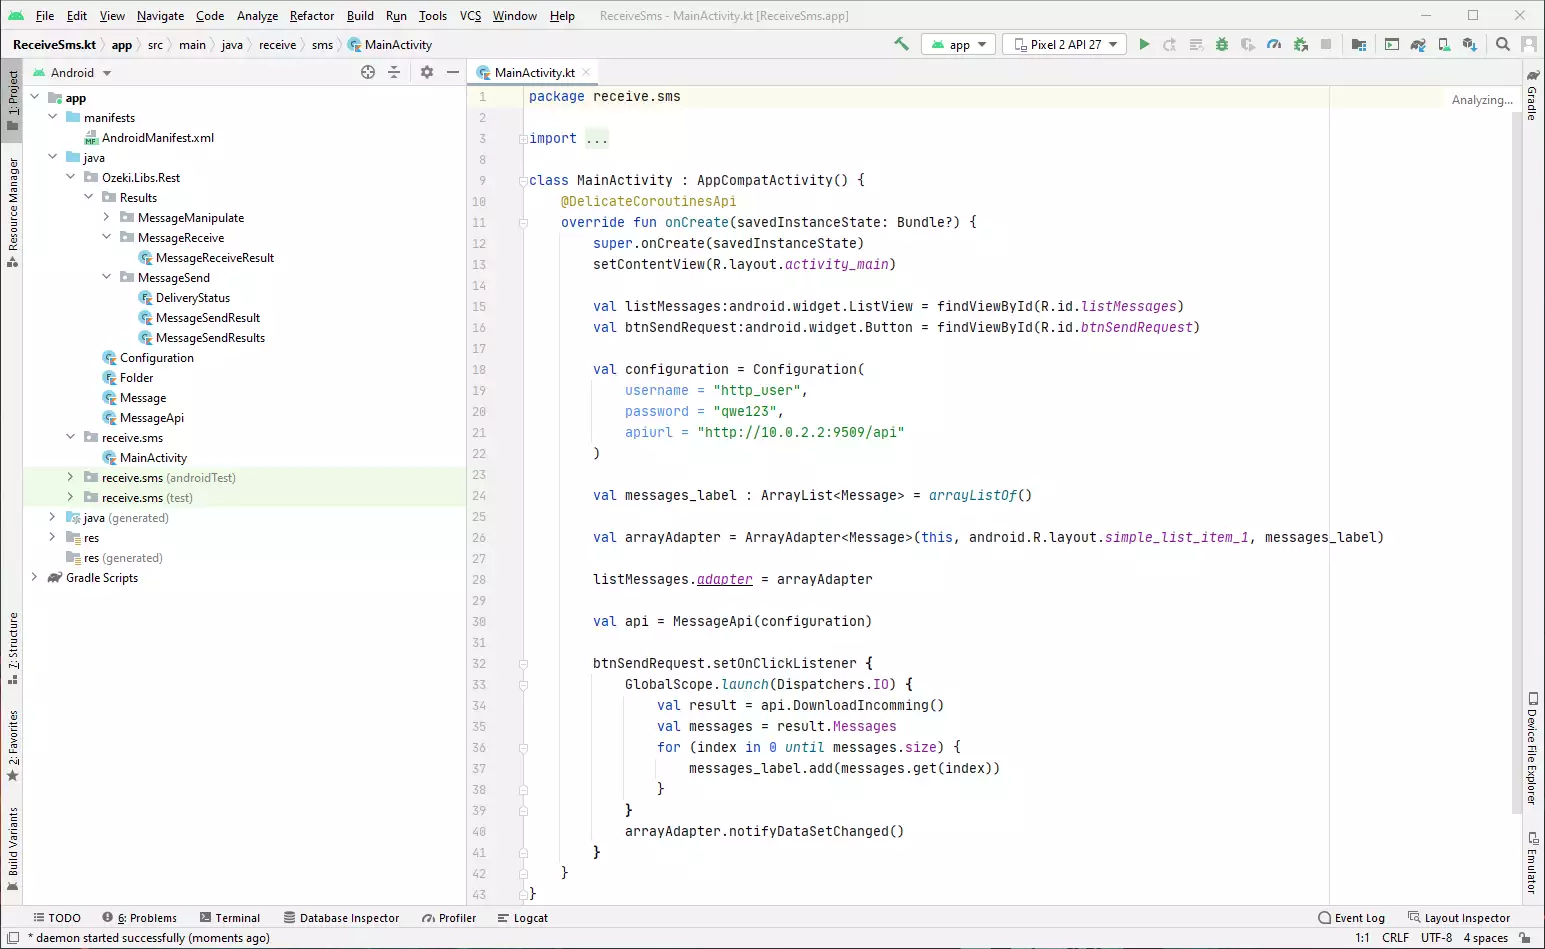
This video shows you how to download and use the ReceiveSms.kt project. Once you opened the example project, you might notice that a there is a package called Ozeki.Libs.Rest This is the package that contains the MessageApi and all the stuffs you need to receive SMS message(s) using Kotlin.
How to check that the request has been accepted by the HTTP user
After the SMS has been submitted, it is a good idea to check your SMS gateway, to see what it has received. You can check the log by opening the HTTP user's details from the Ozeki SMS Gateway management console. At the end of the video above you can see how to check if the request has been received by the http_user. (Figure 3)

How using the app on a phone looks like (video tutorial)
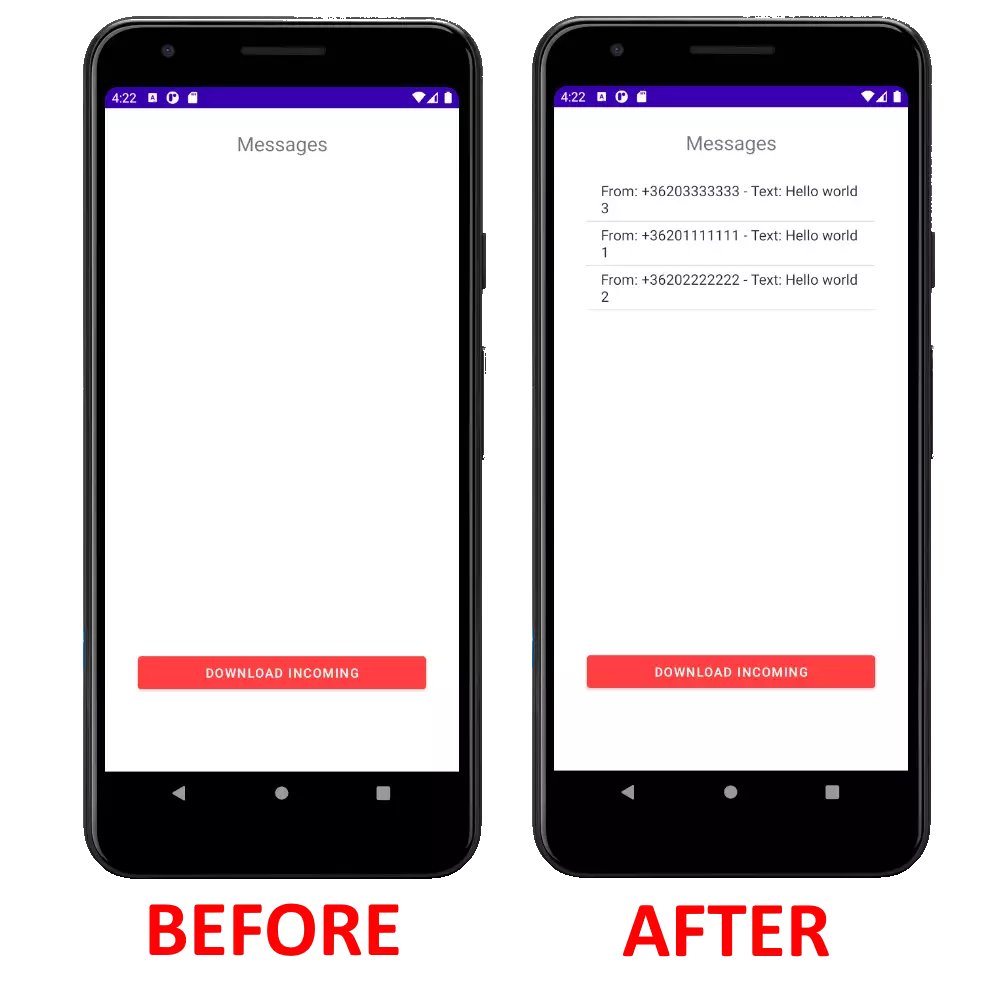
On Figure 4, you can see how it looks like to use the app on a phone. As you can see on the Before picture, at default you have no incoming messages. Press the 'Download Incoming' to get the messages sent for you. On the After photo, you can see that all the information about a message is visible when you download it.

How to add Ozeki.Libs.Rest to your own project
The Ozeki.Libs.Rest library can be downloaded and used and modified free of charge.
Download: Ozeki.Libs.Rest.kt.zip (7.66Kb)
If you decide to create your application on your own only with the Ozeki.Libs.Rest
library, there are few things you should change in your base application.
In order to use the Ozeki.Libs.Rest library you have to put it into the java folder
of the main directory
In the following video I will show you how to download and add the Ozeki.Libs.Rest
library to your own project.
Dependencies
It is important to mention, that the Ozeki.Libs.Rest library has some dependencies. In order to use it you have to add these dependencies into the Gradle Scripts.
implementation "com.squareup.okhttp3:okhttp:4.2.2"
implementation 'org.jetbrains.kotlinx:kotlinx-coroutines-core:1.5.0'
implementation 'org.jetbrains.kotlinx:kotlinx-coroutines-android:1.5.0'
Add the dependencies (Video tutorial)
In the following video, you will see how to attach the previously mentioned dependencies. It will start with copying the code and will take you to the successfully added dependencies. The video is only 53 seconds long, but it contains all the required steps to complete the method. You can follow this tutorial with no effort.
Internet access
In order to make it possible for your application to send
an HTTP request, you have to enable your application
to connect to the internet.
In the following video I'll show you how to enable internet access
for your Kotlin application.
<uses-permission android:name="android.permission.INTERNET" />
android:usesCleartextTraffic="true"
How to add internet connection to your project (Video tutorial)
You need to add both of these lines to the AndroidManifest.xml file.
In the next video, I'll show you where you should insert the codes above.
The video will start with copying the code and will take you to the successfully added internet connection.
This video is accurate and easy to follow.
Conclusion
This guide was written to show the steps of SMS receiving in Kotlin using the HTTP user of the Ozeki SMS Gateway. This solution helps you to collect the messages you receive in the Inbox folder and move them to your Kotlin program. Using this solution gives you the ability to keep your messaging system organized as you planned.
This is just the beginning, learn more about managing your messages on the Ozeki webpage. To stay effective and up to date, assort the messages, read the next article about How to delete an SMS in Kotlin.
Let's get to work, set up the Ozeki SMS Gateway now!
