How to send SMS from OleDB
This article provides all necessary information for you to send SMS using OleDB. Sending SMS using OleDB is incredibly useful for sending SMS in bulk. The article below contains all the necessary steps to complete this procedure with ease. Sending SMS from OleDB only requires Ozeki SMS Gateway and an SMS service provider. OleDB uses the SQL language and a database to send text messages, therefore it requires basic knowledge of SQL and SMS technology. We hope you find this tutorial helpful and let's get started!
What is OleDB
OLE DB (Object Linking and Embedding, Database, sometimes written as OLEDB or OLE-DB), an API designed by Microsoft, allows accessing data from a variety of sources in a uniform manner. The API provides a set of interfaces implemented using the Component Object Model (COM) it is otherwise unrelated to OLE. Microsoft originally intended OLE DB as a higher-level replacement for, and successor to, ODBC, extending its feature set to support a wider variety of non-relational databases, such as object databases and spreadsheets that do not necessarily implement.
What is Ozeki SMS Gateway
Ozeki SMS Gateway is a communication software that routes messages between real world entities. It allows you to build up simple communication between shared hardware and software resources of your system. It offers real time information and provides various configuration options to route messages.
How to send SMS from OLEDB (Quick steps)
To send SMS from OLEDB:
- Launch Ozeki SMS Gateway
- Add new SQL messaging app
- Install OLEDB connection
- Configure connection settings
- Enable logging for OLEDB
- Switch OLEDB connection on
- Read the logs on Events tab page
- See the inserted SMS on SQL tab page
- Send SMS from the database
- Check the SMS sent from OLEDB
How to receive SMS with OleDB database
This database system lets you receive messages with your application. It consists of an OleDB Database Server, a computer with Ozeki SMS Gateway running on it, and a phone that will be used to send messages. To understand how this system works, take a look at the diagram (Figure 1). The phone will send a message to the address of the Ozeki SMS Gateway running on the PC. It will store the message on the OleDB Database Server. From there, your application could download it. It is that simple.

How to send SMS from OleDB database
This other database system will make it possible to send SMS messages from your application using an OleDB Database Server. The system consists of an OleDB Database Server, a computer with Ozeki SMS Gateway running on it, and a phone. To understand how this system works, take a look at the diagram (Figure 2). Your application will send a message to the OleDB Database Server which will store it. The Ozeki SMS Gateway will then download the message and forward it to the predefined phone number. It is a really simple system.

How to send SMS from OleDB (video tutorial)
Install SQL messaging connection
Start by opening Ozeki SMS Gateway. Under "Users and applications" click on Add new connection (Figure 3). Locate SQL messaging under Application interfaces. Click on Install highlighted in blue next to it. This will take you to a new screen where you can select the type of SQL messaging connection you wish to create.
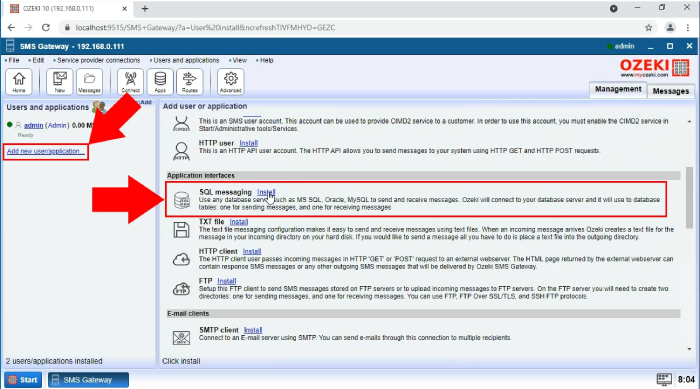
Create OLEDB connection
Find OLEDB in the SQL messaging section (Figure 4). Click on Install next to it highlighted in blue. You will then be taken to a configuration screen where you are able to set up your new OLEDB connection.
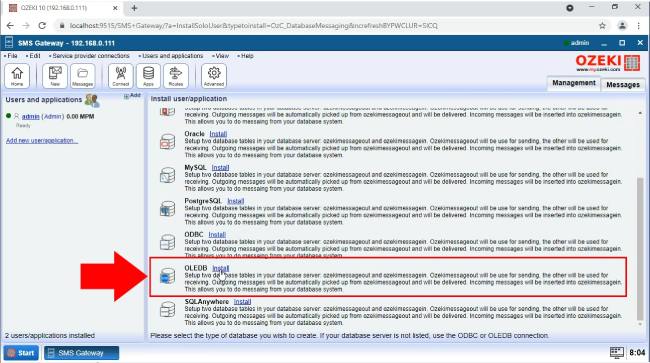
Configure OLEDB connection
Next you need to fill in a configuration form. Under connection settings you must provide the details for all items listed (Figure 5). First type in your password and User ID. You must also enter the service provider, data source and database as well.
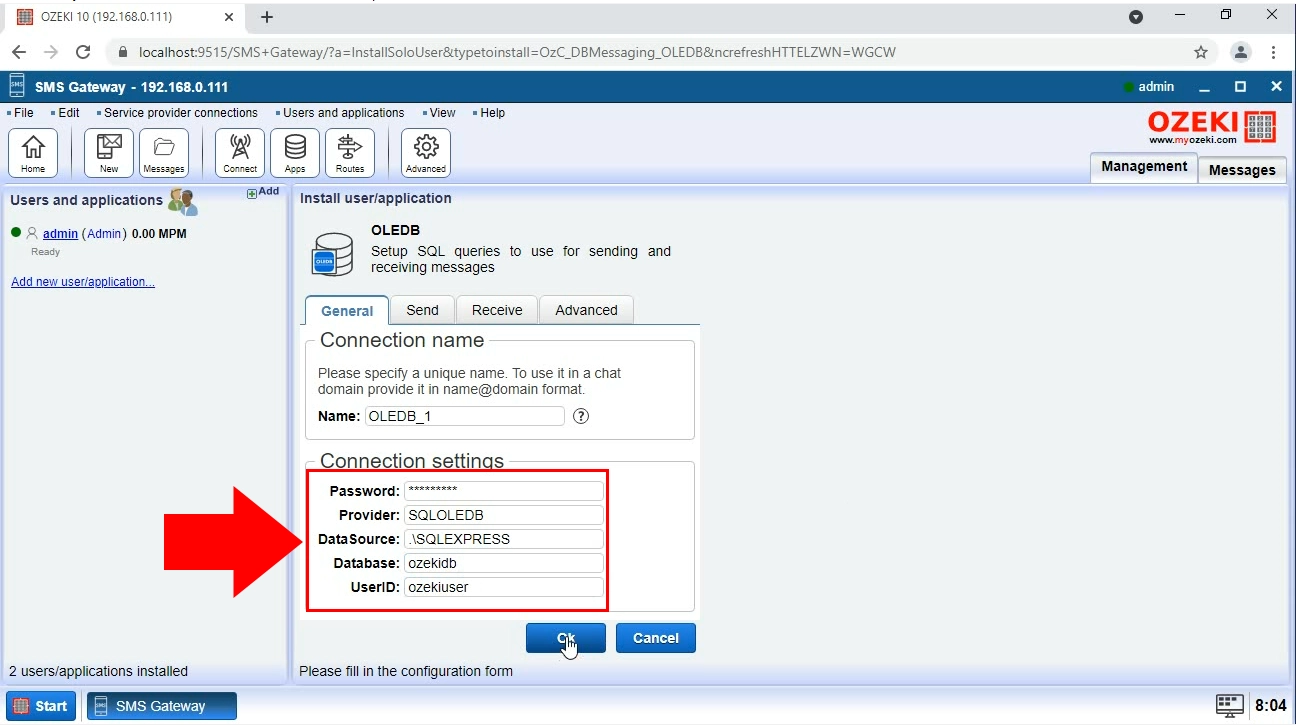
Enable logging
The next step is to enable logging. This is useful for monitoring your SMS traffic. Click on the advanced tab, then enable every single option under Log level (Figure 6). This is done by clicking on the checkboxes next to them. Click on the OK button to continue. Logging is now enabled for all types of traffic.
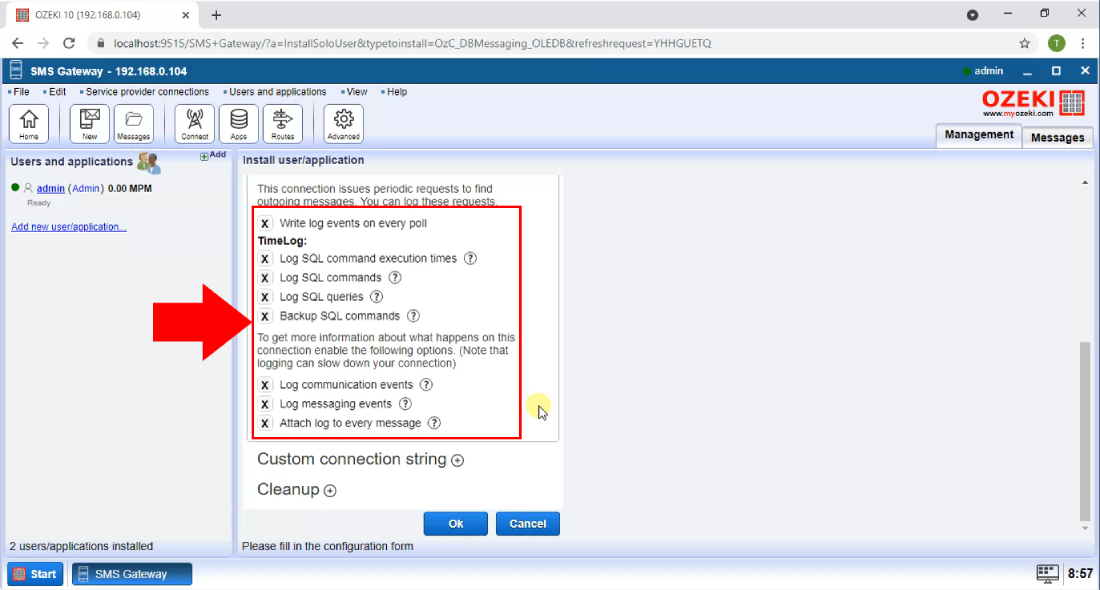
Database connection established
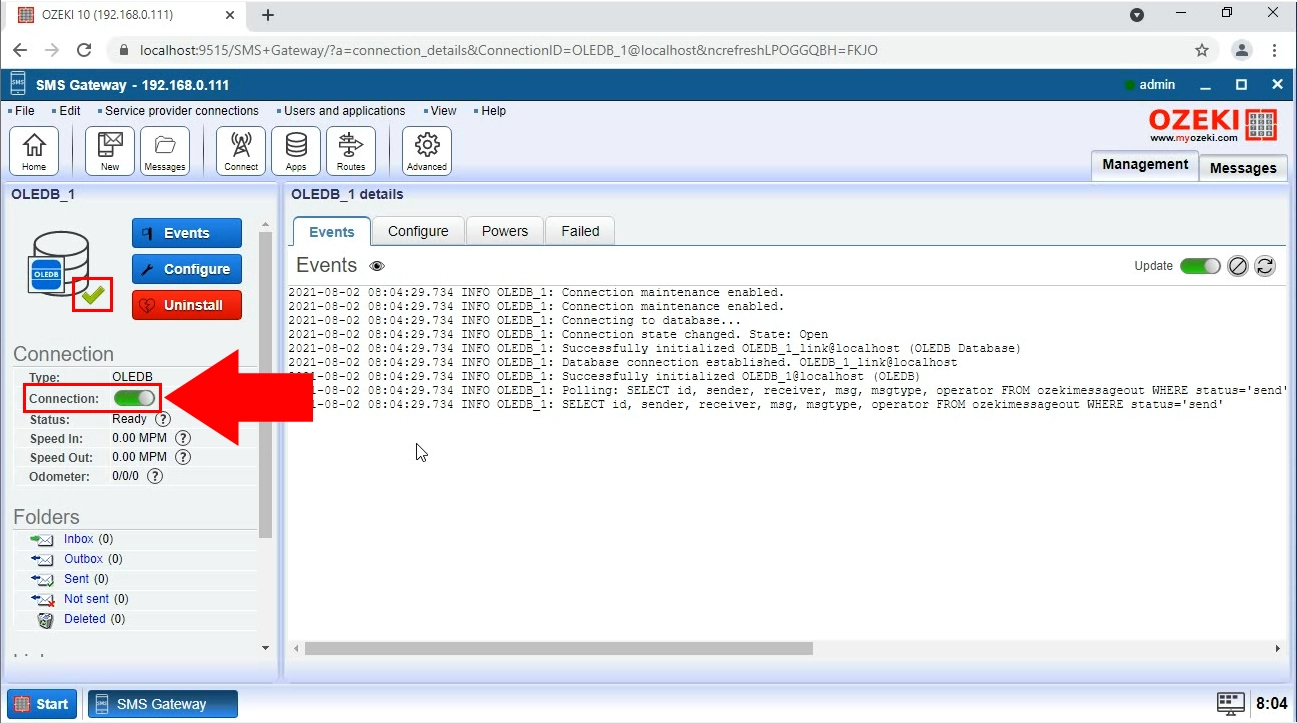
Turn your connection on by clicking on the switch button (Figure 7). The button turns green to indicate that it has been enable. You also get notified in forms of log messages, that the database connection has been established. These messages can be viewed in the Events tab.
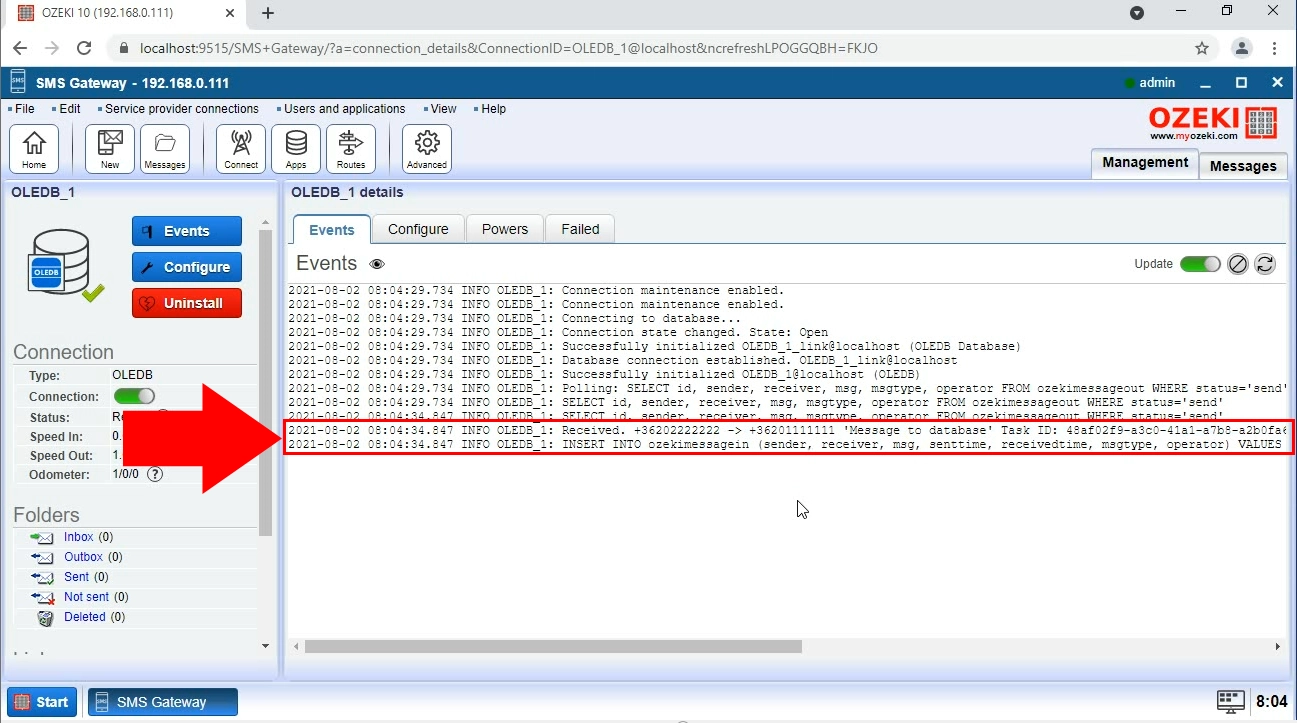
Message received
You can see that a log message indicates that an SMS message has been received (Figure 8). This log information is always accessible in the Events tab.
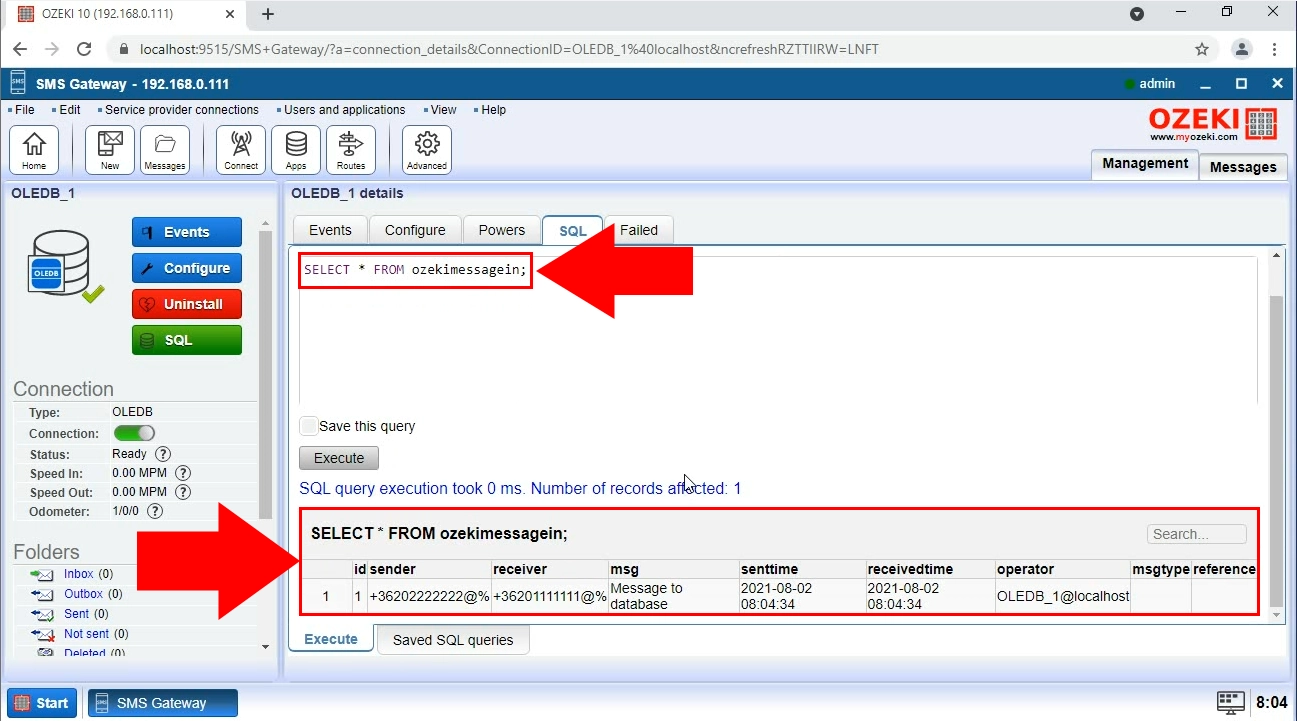
Message inserted into database
Using an OleDB connection, you can view if the message has been inserted into the database. First, click on the SQL tab (Figure 9). Here you can a piece of SQL code. This code in particular is a query that returns all the messages from the inbox. In this case we can see that the message was returned as the result of the query.
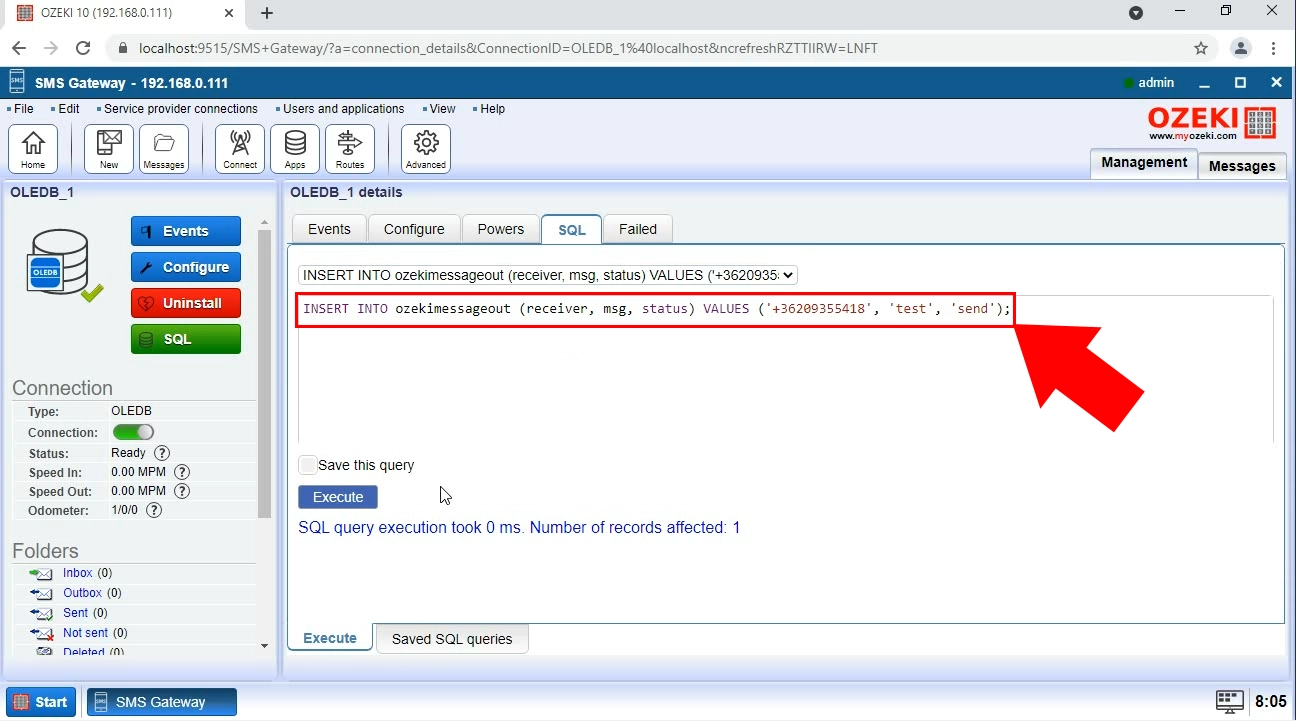
Send message from the database
You can send messages from the SQL tab via SQL code. Type the code found in Figure 10 into the text editor (Figure 10). When you click on the Execute button, the message will be sent from the database.
SMS message sent
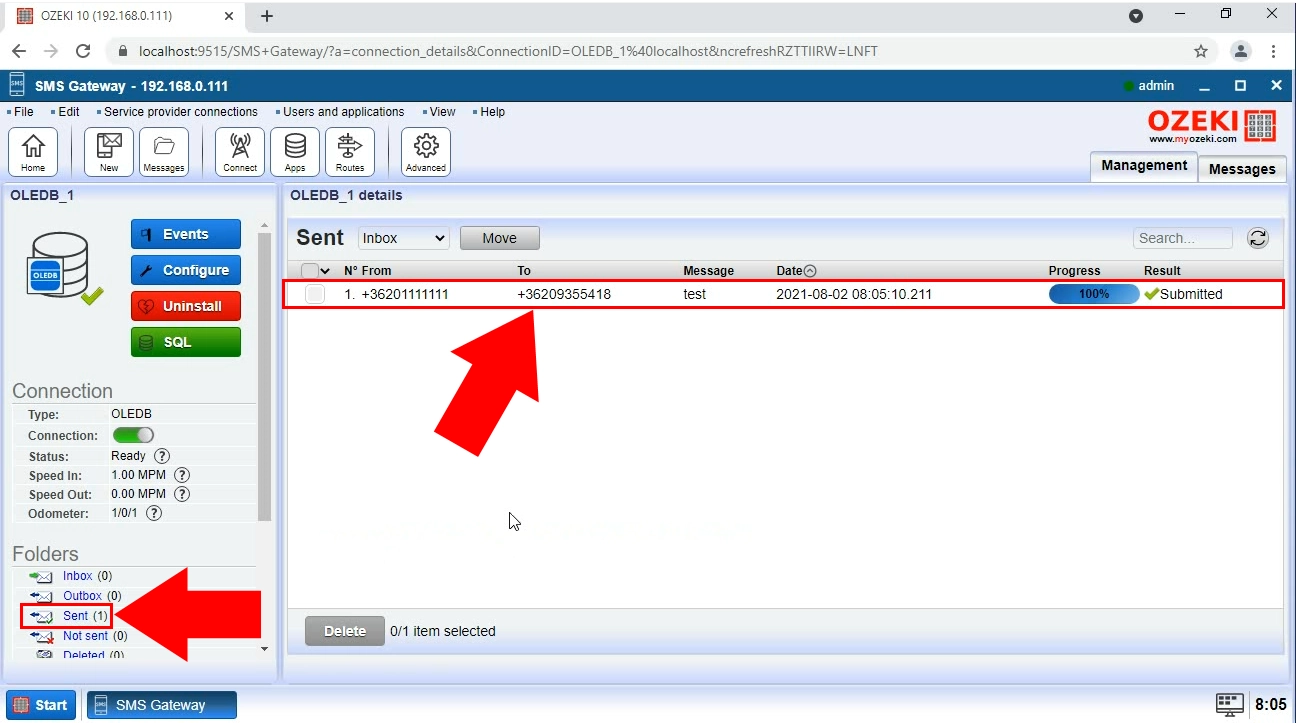
To make sure that the message was sent successfully on the database, we need to open the Sent folder in the left side menu (Figure 11). Inside this folder, already sent messages should always appear.
Summary
Now everything is set up for you to send SMS using OleDB using Ozeki SMS Gateway. We hope you found this article informative, and the steps listed above were sufficient. For more information, make sure to check out our other articles on Ozeki SMS Gateway.
