How to send SMS from TXT files
The following guide shows how you can send messages from a file or collect the received messages in a file as well. This SMS from TXT and SMS to TXT guide will show you how to install and configure a TXT File connection in SMS Gateway. This connection is capable of handling multiple file formats, and you can also select the location of the following message boxes: Inbox, Outbox, Sent, Failed, Delivered.

What is SMS from and to TXT?
SMS from TXT means Ozeki SMS Gateway reads a phone number and message straight out of a text file and sends it as an SMS, using one of five supported file formats. SMS to TXT works the other way around: every incoming SMS the gateway receives gets written out to a text file instead of only showing up inside the application. Used together, an entire messaging workflow can run through a folder of plain text files.

How does it work?
A TXT File connection watches a set of folders on disk, one each for outgoing, sent, failed, delivered, and incoming messages, using whichever file format was chosen during setup. To send a message, you drop a file with the recipient's number and text into the outbox folder, and the connection picks it up on its next poll and forwards it through an SMPP connection to the mobile network. When a reply or new message arrives, the same connection writes it into the inbox folder as a new file, so both directions of the conversation stay readable as plain files on disk.

The process of sending SMS from TXT files (video tutorial)
In this quick video tutorial, you'll discover how to send SMS from TXT files with Ozeki SMS Gateway. By eliminating manual SMS handling using Ozeki's user-friendly features, you can simplify your communication procedures. Ozeki can handle both single messages and mass campaigns thanks to its flexible TXT file capabilities. Get ready to revolutionize your SMS communication by following the given instructions.
How to send SMS from TXT files
To send SMS from TXT files:
- Launch Ozeki SMS Gateway
- Select the Apps toolbar icon
- Install TXT File app
- Configure the TXT File connection
- Click on the Connect toolbar icon
- Choose the SMPP client to install
- Set up the SMPP client connection
- Send an SMS message from a TXT file
- Check the Sent and the Inbox folders
Step 1 - Create a TXT File connection
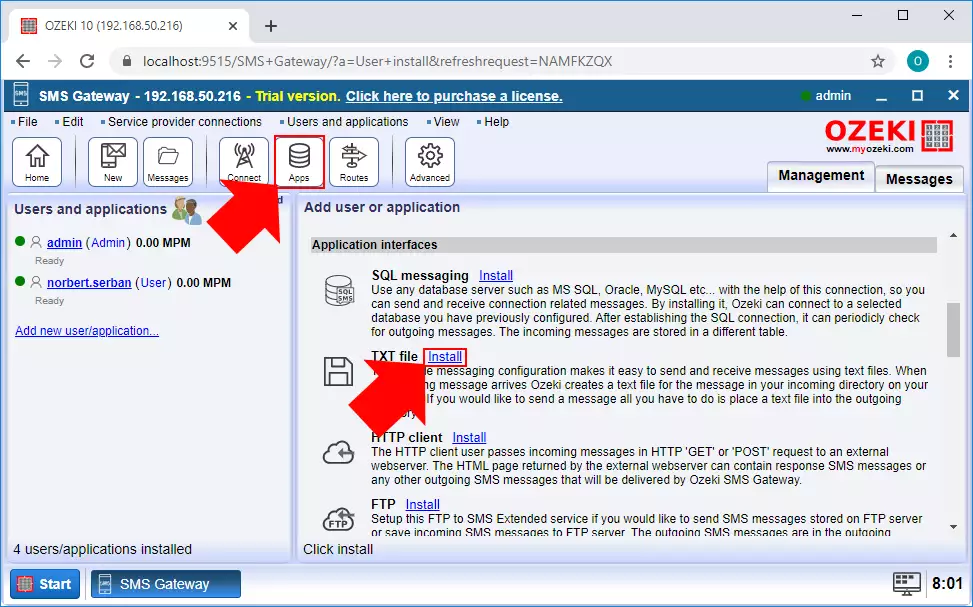
The first step of the guide is to create the TXT File connection in SMS Gateway. First of all, you need to open the SMS Gateway application, and here, select the Apps menu from the toolbar. In this menu, go to the 'Application interfaces' section, and, as shown in Figure 1, click on the Install button of the TXT File connection.
Step 2 - Configure the TXT File connection
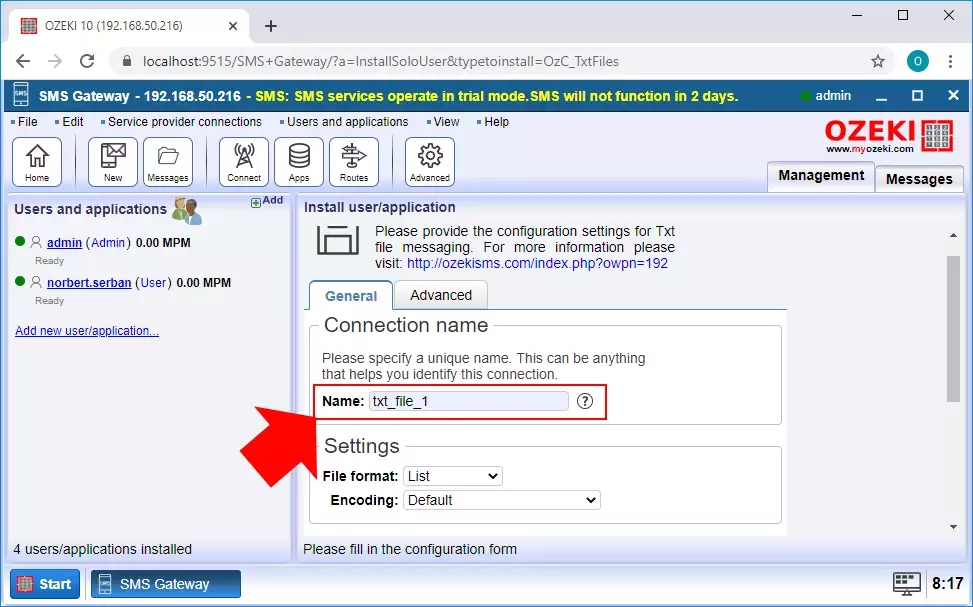
After you select the TXT File connection, you will be navigated to the configuration menu of the connection. In that menu, first you need to define a name for that connection (Figure 2). Then, you have to select a file format for the SMS messages. These file formats will be discussed in the next step. Lastly, you can select folders for the messages.
Step 3 - Select a file format
For that connection, you can select from multiple file formats. These formats handle the messages differently. The first format is the 'Simple' format. The format can handle one message per file. The name of the file needs to be the recipient's phone number, and the content of the file is the SMS message itself.
c:\smsout\+3620310536
The next file format is the 'Verbose' format. This format also handles one message per file, but you can specify the phone number of the sender in the file. The file extension of the Verbose format needs to be .sms.
c:\smsout\anyname.sms
The 'List' file format is capable of handling multiple messages and multiple recipients in the same file. Each row of the file contains the phone number of the recipient and the message. The file extension of the List format is .sml.
c:\smsout\list.sml
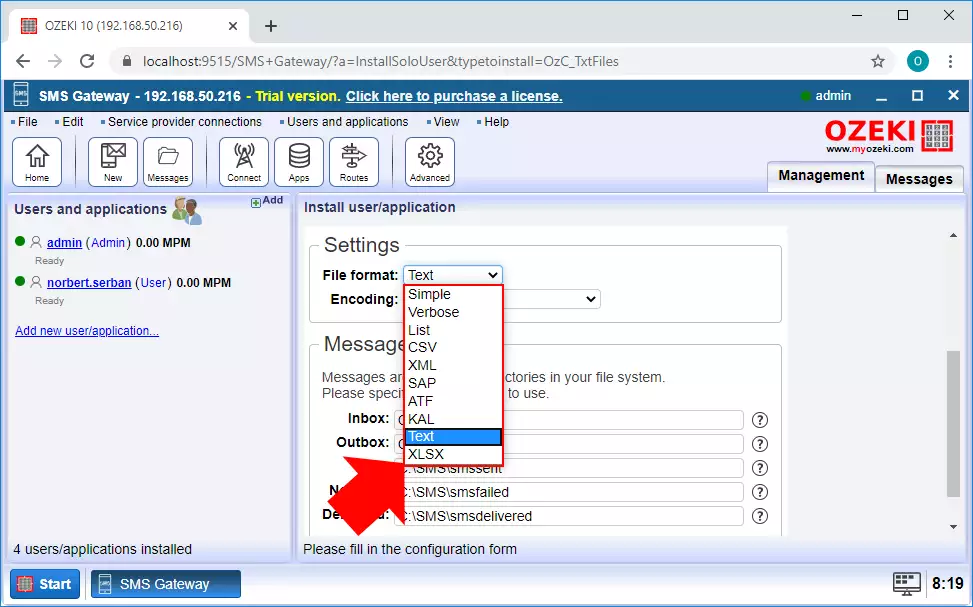
The 'Text' file format handles the messages the same way as the List format. The only difference between these two formats is the file extension. The List format uses the .sml format to manage the messages, while the Text format uses the simple .txt format, so it is a little bit easier to create and manage.
c:\smsout\outbox.txt
The 'XML' format is a great way to clearly organize your message in a dedicated XML file. This format uses tags to define the parts of a message. The 'originator' stores the phone number of the sender, and the 'recipient' stores the recipient's phone number. The 'text' tag contains the message, while the 'time' tag shows the time when the message should be sent. Lastly, the 'messagetype' is for defining the type of the message. This format is also capable of handling many messages in one file.
c:\smsout\outbox.xml
Figure 3 below shows all the file formats that are available in SMS Gateway.
Step 4 - Select folders for the messages
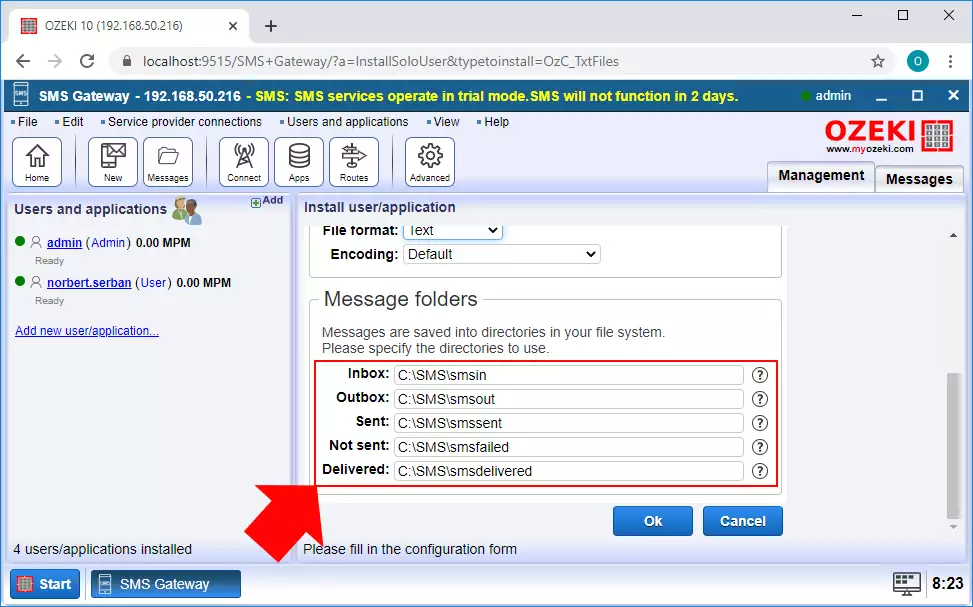
In the next step, you need to set the location for the different types of messages, depending on whether they are about to be sent or received. The messages are stored in five folders, as you can see in Figure 4: Inbox, Outbox, Sent, Not Sent, and Delivered.
Step 5 - Advanced configuration of the TXT File connection
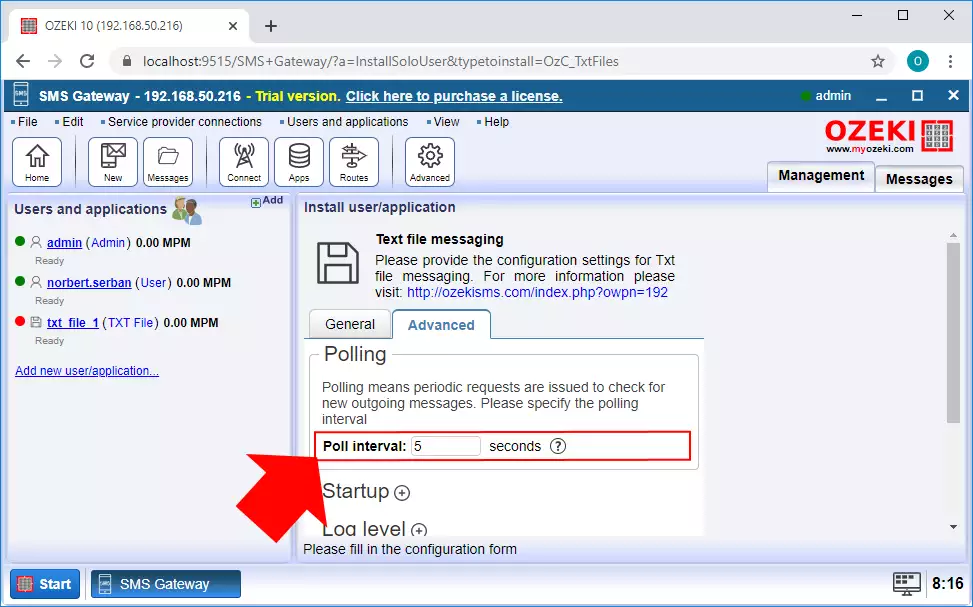
The TXT File connection can be further configured by clicking on the Advanced tab, as Figure 5 shows. Here, the main setting is the Polling. This option defines the time interval when the outbox folder will be checked, and the connection tries to deliver the messages from all files that are in that folder at that point. Once you have finished with the configuration, just click OK.
Step 6 - Create an SMPP service provider connection
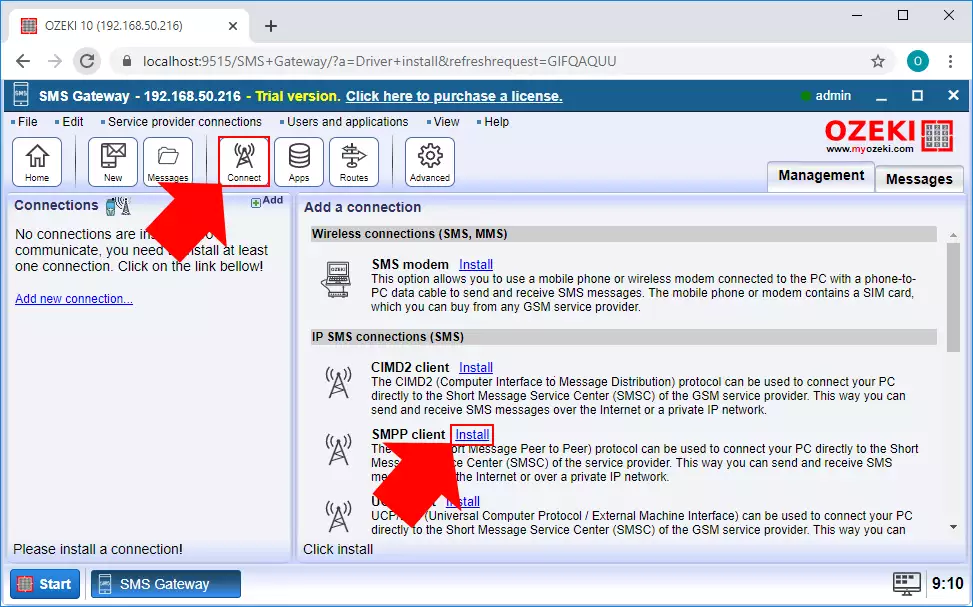
To be able to communicate with the members of the mobile network, you need a connection that creates that link. This connection will be the SMPP client connection. To create this connection, just select the Connect menu from the toolbar, and here, as you can see in Figure 6, click on the Install button of the SMPP client connection.
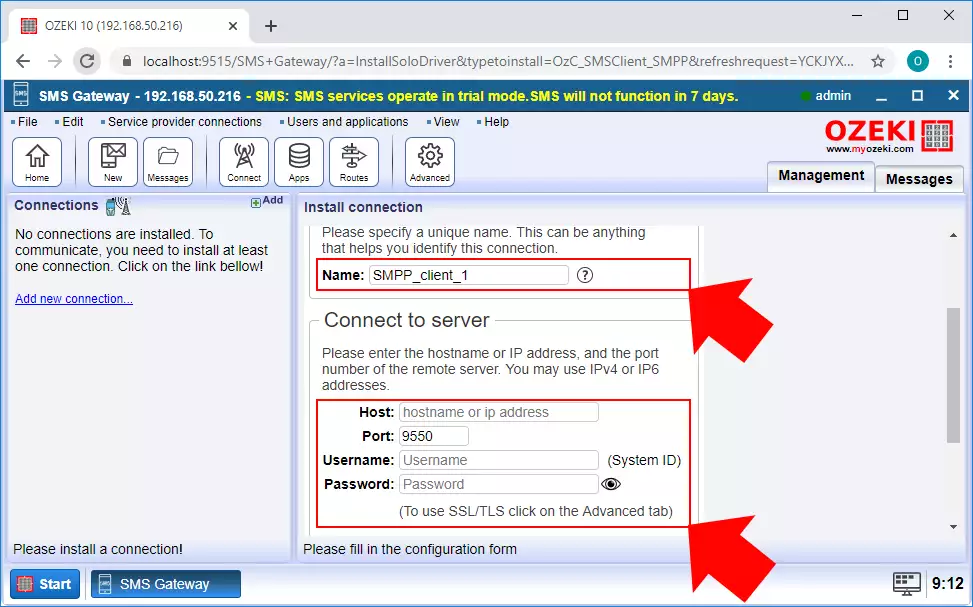
In the configuration menu of the connection, first you need to type a name for the connection. Next, you have to provide the details of the SMPP server that you want this connection to connect to (Figure 7). Lastly, type the phone number that the connection will use to communicate with the mobile network. Once you have finished with everything, just click OK.
Step 7 - Send a message from file
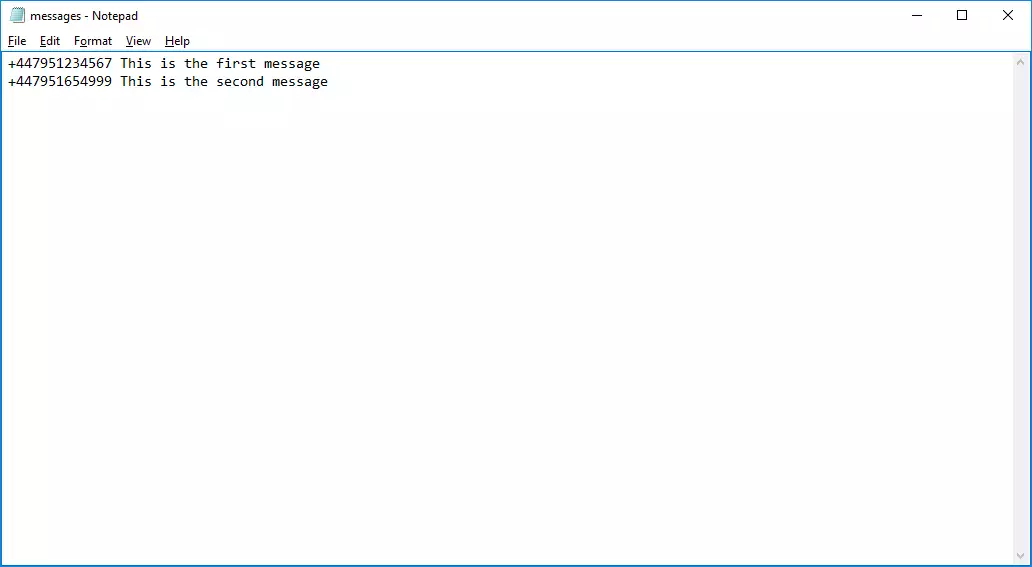
After you have created the TXT File connection, you will be able to send SMS messages using this connection. To do that, open the outbox folder in the File Explorer. Here, you can create a new text file, and as the format shows above, you can write multiple messages to multiple recipients in that file (Figure 8). Once you are finished, just save the file.
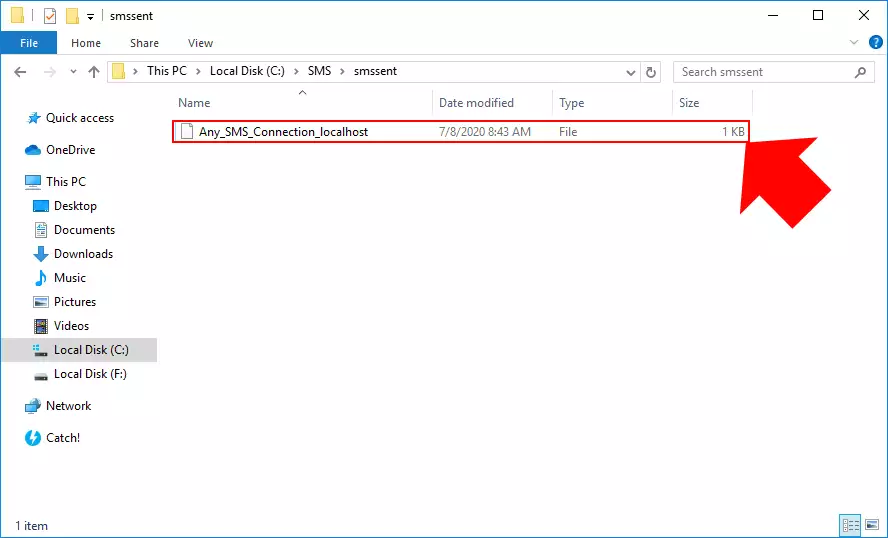
As soon as the TXT File connection polls the folders for files, the file from the outbox folder will disappear. This means the connection is now processing the message file. As soon as it delivers the message, the message file will appear in the Sent folder as you can see in Figure 9.
Step 8 - Receive message with the TXT File connection
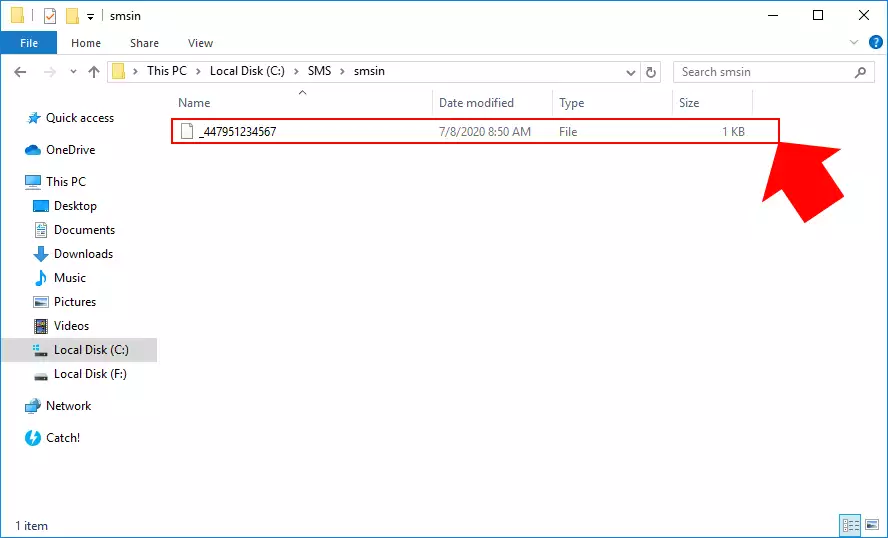
The creation of the TXT File connection also created a routing rule. This routing rule ensures that all the messages that the SMS Gateway receives will be routed to that TXT File connection. In case of an incoming message, the connection will create a file in the Inbox folder, as you can see in Figure 10. The format of this file is the same as the one you defined in the settings of the connection.