How to use a local AI model to answer SMS messages
In this article, we will guide you through the process of setting up a local AI model to automatically answer SMS messages using Ozeki AI Server and Ozeki SMS Gateway. This setup enables you to deploy an AI-powered chatbot that can handle incoming SMS queries efficiently.
What is a Local AI Model?
A local AI model is an artificial intelligence model that is installed, stored, and executed directly on a local machine or server, rather than relying on cloud-based systems. It allows users to run AI applications offline, providing full control over data privacy, security, and customization.
What is Ozeki AI Server?
Ozeki AI Server is a powerful software platform that integrates artificial intelligence (AI) with communication systems, enabling businesses to develop and deploy AI-driven applications. It supports various automation tasks like text messaging, voice calls, chatbots, and machine learning processes. By combining AI with communication networks, it enhances customer service, streamlines workflows, and improves user interactions across different industries. Ozeki AI Server provides a comprehensive solution for organizations looking to boost communication efficiency using AI technology.
What is Ozeki SMS Gateway?
Ozeki SMS Gateway is a versatile software solution designed to enable businesses to send and receive SMS messages via multiple communication channels. It integrates seamlessly with applications, databases, and APIs, offering features like automated messaging, two-way communication, and bulk SMS sending. Commonly used for notifications, alerts, marketing, and customer support, it provides a reliable tool for enhancing communication through SMS technology.
How to download a GGUF model from Huggingface (Quick Steps)
- Open Huggingface Website
- Select GGUF Models
- Search for Model
- Download Model File
- Save Model File
How to configure local AI chatbot in Ozeki SMS Gateway (Quick Steps)
- Open Ozeki AI Server
- Create New AI Model
- Select Model File
- Open Ozeki SMS Gateway
- Add New Application
- Install AI Chatbot
- Select AI Model
- Enable Chatbot
Send test SMS message what is answered by AI chatbot (Quick Steps)
- Open AI Chatbot
- Configure System Prompt
- Send Test SMS
- Receive AI Response
How to download a GGUF model from Huggingface (Video tutorial)
In this video, you will learn how to download a GGUF model file from the Huggingface website and where to correctly place it on your system for use with Ozeki AI Server.
Step 1 - Open huggingface.co page
First, go to the Huggingface website. You should see a similar page (Figure 1).

Step 2 - Select GGUF models
Select the Models menu at top of the window, then Libraries, then filter for GGUF files (Figure 2).

Step 3 - Select model library
In the search bar, type "Meta-Llama-3.1-8B-Instruct-hf-Q4_K_M-GGUF" and select the model titled "Meta-Llama-3.1-8B-Instruct-hf-Q4_K_M-GGUF". This is the model we will be using (Figure 3).

Step 4 - Download model file
Click on the "Files and versions" tab, select the "meta-llama-3.1-8b-instruct-hf-q4_k_m.gguf" version and download it, you can download with the down arrow (Figure 4).

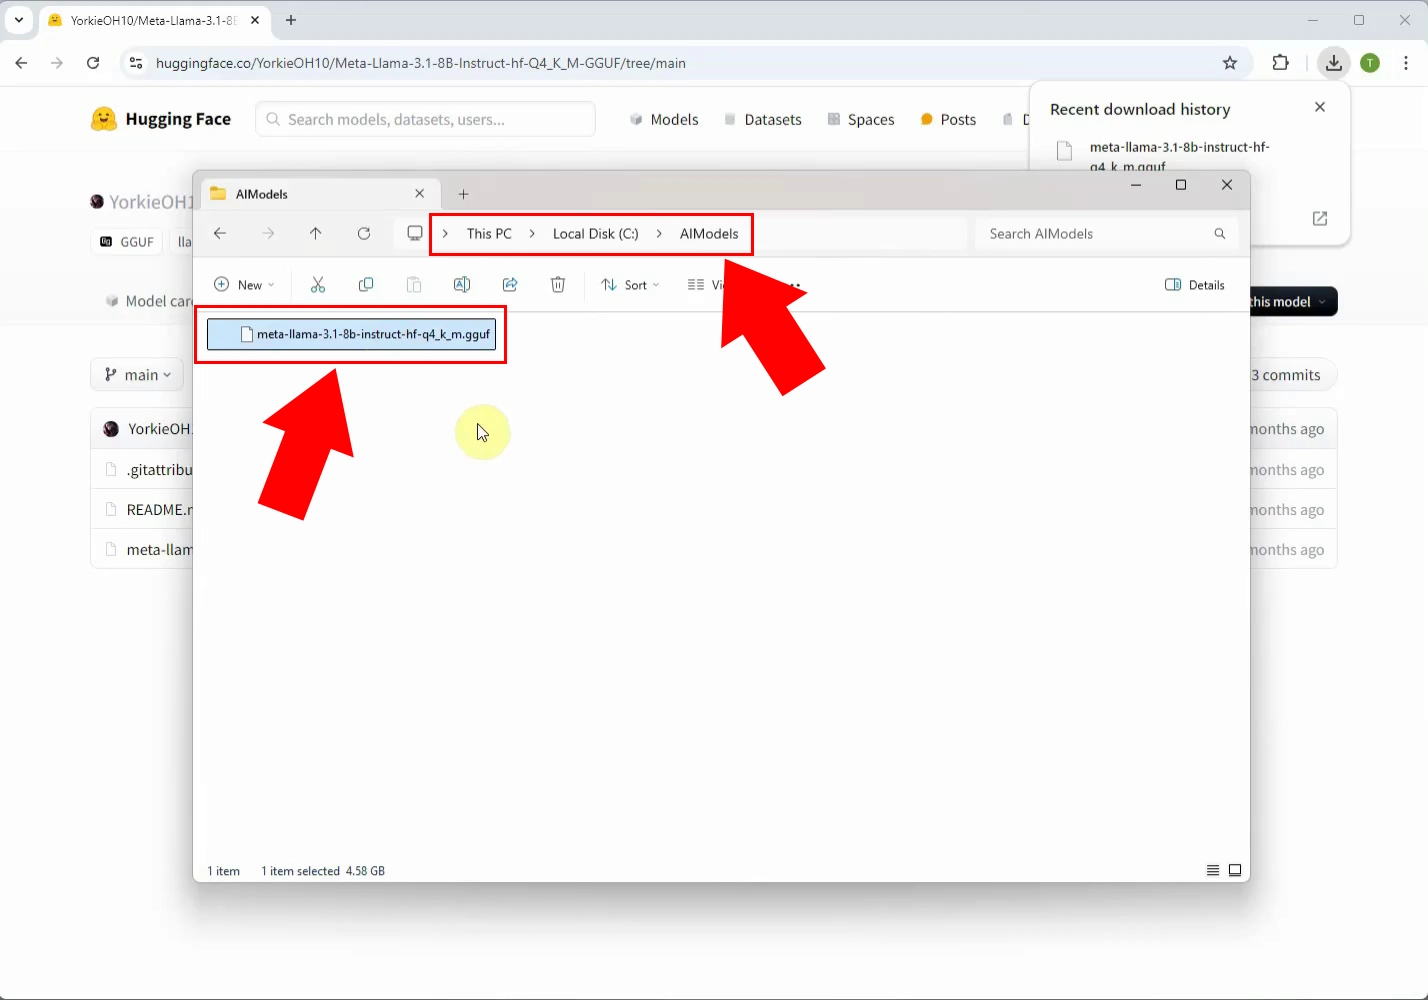
Step 5 - Copy GGUF model file to C:\AIModels
Place the previously downloaded .gguf file in the following path: C:\AIModels (Figure 5).
How to configure local AI chatbot in Ozeki SMS Gateway (Video tutorial)
In this video tutorial, you will learn how to configure a local AI chatbot within the Ozeki SMS Gateway using the previously downloaded GGUF model. The step-by-step guide will show you how to properly integrate the AI model with Ozeki AI Server to enable automated responses to incoming SMS messages.
Step 6 - Open Ozeki AI Server
Launch the Ozeki 10 app. If you don't already have it, you can download it here. Then open the Ozeki AI Server (Figure 6).

Step 7 - Create new GGUF AI model
The Ozeki AI Server interface is now visible on the screen. To create a new GGUF model, start by clicking on "AI Models" at the top of the screen. Next, click the blue button labeled "Create a new AI Model". On the right side of the interface, you will see various options, select the "GGUF" menu (Figure 7).

Step 8 - Select model file
After selecting the "GGUF" menu, select the "General" tab, select the "C:\AIModels\Meta-Llama-3.1-8B-Instruct-Q4_K_M.gguf" Model file then click "Ok" (Figure 8).

Step 9 - Open SMS Gateway
Launch Ozeki SMS Gateway in Ozeki 10 (Figure 9).

Step 10 - Add new user/application
After launching Ozeki SMS Gateway, navigate to the right panel under "Users and Applications" and click on "Add new user/application..." to create a new application (Figure 10).

Step 11 - Install AI chatbot
From the available options, go to the "Chat bots" section and select "AI Chat Bot", then click on "Install" (Figure 11).

Step 12 - Select AI model
In the "General" tab, deselect "Send welcome message" and choose the appropriate model, which in this case is "GGUF_Model_1". Finally, click "Ok" (Figure 12).

Step 13 - Enable chatbot
To establish the connection, flip the switch to green on the left side (Figure 13).

How to configure SMPP client connection for AI SMS (Video tutorial)
In this video, we will guide you through the process of creating, configuring, and connecting an SMPP client for use with AI SMS. You'll learn how to set up the SMPP client connection step-by-step, configure the required settings, and successfully integrate it with the AI SMS system.
Step 14 - Add new connection
To create a new connection, click on "Add new connection..." on the left, in the "Management" tab (Figure 14).

Step 15 - Install SMPP Client
In the "IP SMS connections (SMS)" section, find the "SMPP client" option and click "Install" to continue (Figure 15).

Step 16 - Configure SMPP client
Configure the "SMPP client" by filling in the following inputs in the "General" tab: Host, Port, Username, Password (Figure 16).

Step 17 - Enable logging
In the "Advanced" tab, under "Log level", tick all four options for logging (Figure 17).

Step 18 - SMPP Client connected
To establish the connection, switch the "Connection" toggle to green on the left. Once connected successfully, you can view the logs under the "Events" tab (Figure 18).

Step 19 - Create new incoming route
To set up a new incoming route, click the "Routes" button located at the top of the screen. Then, select "Create new Route" and configure the sender and receiver routes on the right side (Figure 19).

Step 20 - Create new outgoing route
To create a new outgoing route, click on "Create new Route" once more, but this time, switch the sender and receiver settings (Figure 20).

Send test SMS message what is answered by AI chatbot (Video tutorial)
In this video, we will guide you through the process of configuring the system prompt and demonstrate how SMS sending and receiving function in real-time. You'll learn how to set up the system prompt to generate AI-powered responses and observe the complete workflow of sending and receiving SMS messages effectively.
Step 21 - Open AI chatbot
To set up the chatbot, select AI_Bot_1 on the right and click on it (Figure 21).

Step 22 - Configure system prompt
To configure the chatbot, navigate to the "Configure" tab and select the "AI" section. In the "System Prompt" field, enter the desired prompt that will guide the chatbot's responses and check the "Use system prompt" (Figure 22).

Step 23 - Send SMS message
If you've reached this point, it's time to test the system. Send an SMS, and you can monitor the process by logging the message within the SMPP client (Figure 23).

Step 24 - AI generated answer received
Once the SMS is sent, you will receive the chatbot’s response on your phone, and you can also view it recorded in the AI_Bot_1 log (Figure 24).
