Create an MSSQL connection in Ozeki
This guide explains, how you can create a database connection in Ozeki SMS Gateway to your MS SQL database server. This connection will be used to SELECT your outgoing messages from the outgoing database table, and to INSERT your incoming SMS messages into the incoming database table. If everything goes well these steps can be completed in about 5 minutes.
Content1. install
2. provide
3. connect
If you have created the database in MS SQL, you can jump to the next video. Although you can precisely examine the sequence by looking through the screenshots.
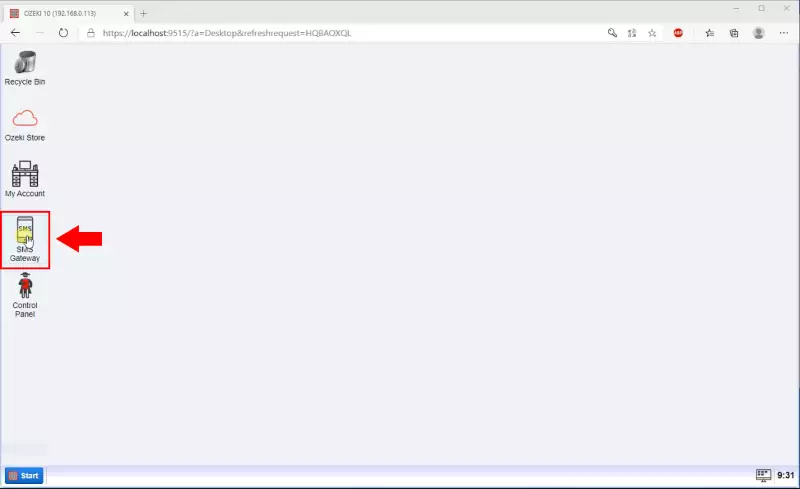
First you will need to create a new SQL messaging application. To do this, please start the Ozeki SMS Gateway. You can find the SMS Gateway icon on the Ozeki 10 Desktop if you have it installed. Click on it twice to launch the application. You can find the icon on Figure 1.
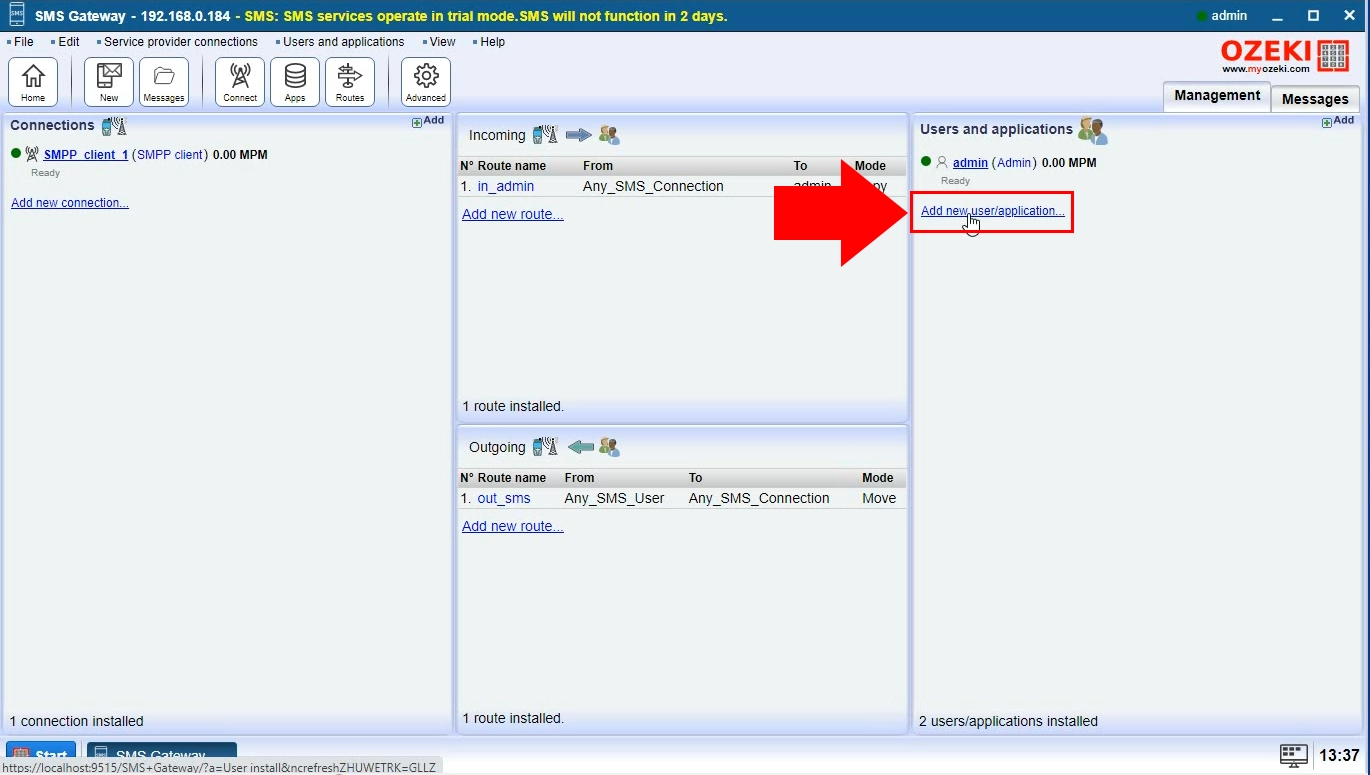
Now add a user application. To do this, please search for the “New user application” button on the right. You can find it with the help of Figure 2. Click it to get to the screen where you can choose the interface of the new user application.
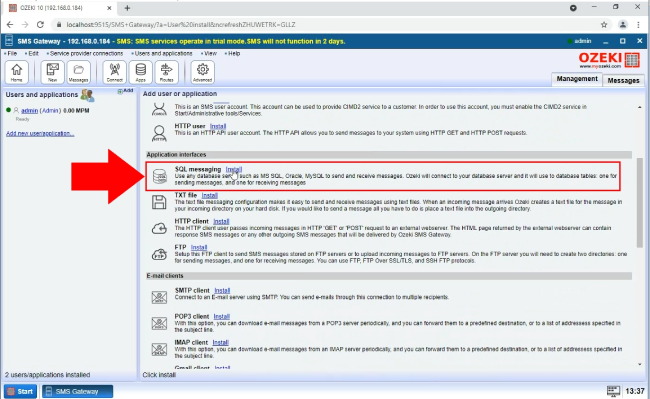
The Ozeki SMS Gateway handles various interfaces. You can send and receive SMS messages with a TXT file, HTTP client or an FTP server. Now please choose the SQL messaging option. Click on the “Install” button to proceed. You can see your options on Figure 3.
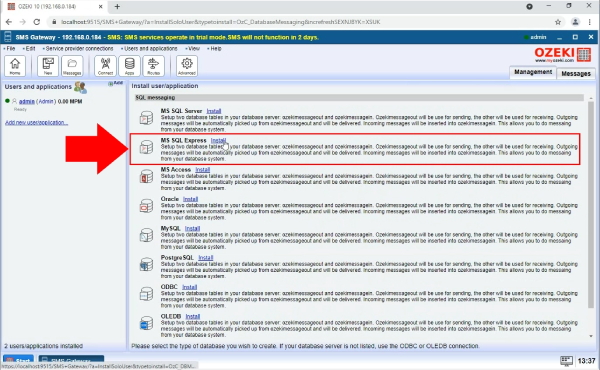
On this step, you get to decide which SQL Management tools you wish to use. The Ozeki SMS Gateway will establish a connection with the selected software. You can see your options on Figure 4. Click on the “Install” button to proceed to the next step.
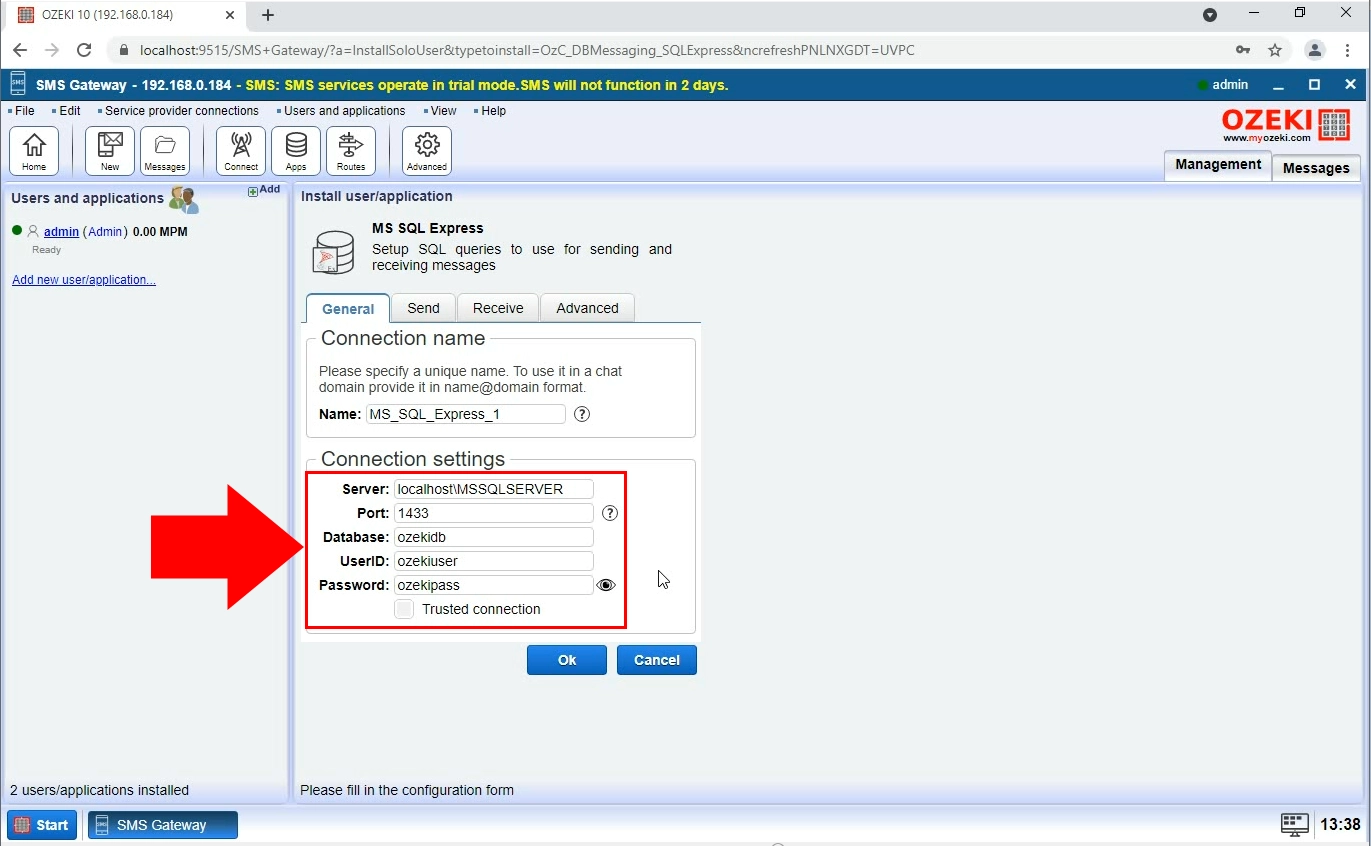
Now you get to configure your new SQL connection. You need to provide a unique name for your connection. This can be anything that helps you identify it later. On the fields below, you need to provide your server’s properties. You can see our example configurations on Figure 5. Click the “OK” button to proceed to the final step.
You have finished the configuration of your MS SQL Server. You can see the connection properties on the left side of the window. You can see that now the “connection” in turned off. You need to enable it by clicking on it. If you have done it, it should look like on Figure 6. Now you have your connection properly set up.
