Configure Database User
In this video series you can see how to connect Ozeki SMS Gateway to your PostgreSQL database server for SMS messaging. This video shows how to install and configure a Database User on Ozeki SMS Gateway. This database user is used to communicate with the database. You will also learn how to provide a connection string that is necessary to connect the user to the database.
Video content1. Install Database User
2. Provide connection String
3. Connect to Database
How to configure a Database User (Video tutorial)
In this video, you will learn how to configure a new database user in Ozeki SMS Gateway. It will start with the home page of the Ozeki SMS Gateway and will take you all the way to a working user. You will see how to name your PostgreSQL user, how to provide connection settings and how to provide the connection string. The video is only 37 seconds long and very easy to understand. You will have no problem following the steps.
Please scroll down> to copy the PostgreSQL connection string used in the video. If you have created the database in PostgreSQL, you can jump to the next video. Although you can precisely examine the sequence by looking through these screenshots.
Open the SMS Gateway
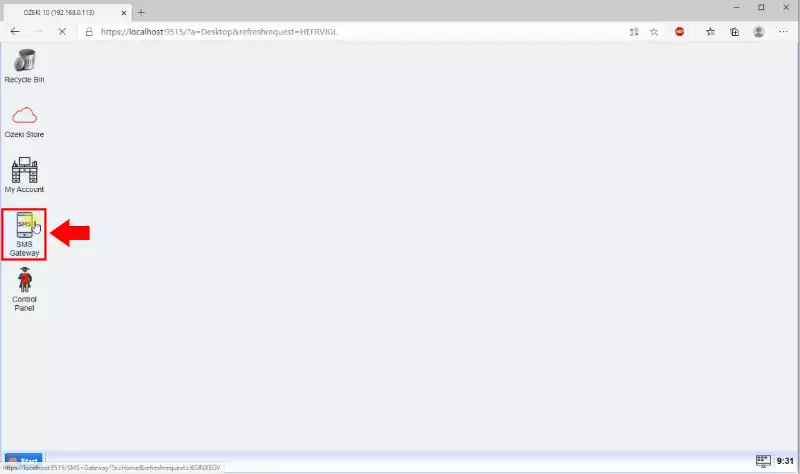
The first step of creating a Database User is to open the Ozeki SMS Gateway application. You can find the icon of the application on the Desktop of Ozeki 10 (Figure 1). In this application you can create or modify existing ones, manage connections and constantly check the events on your connection with the log feature.
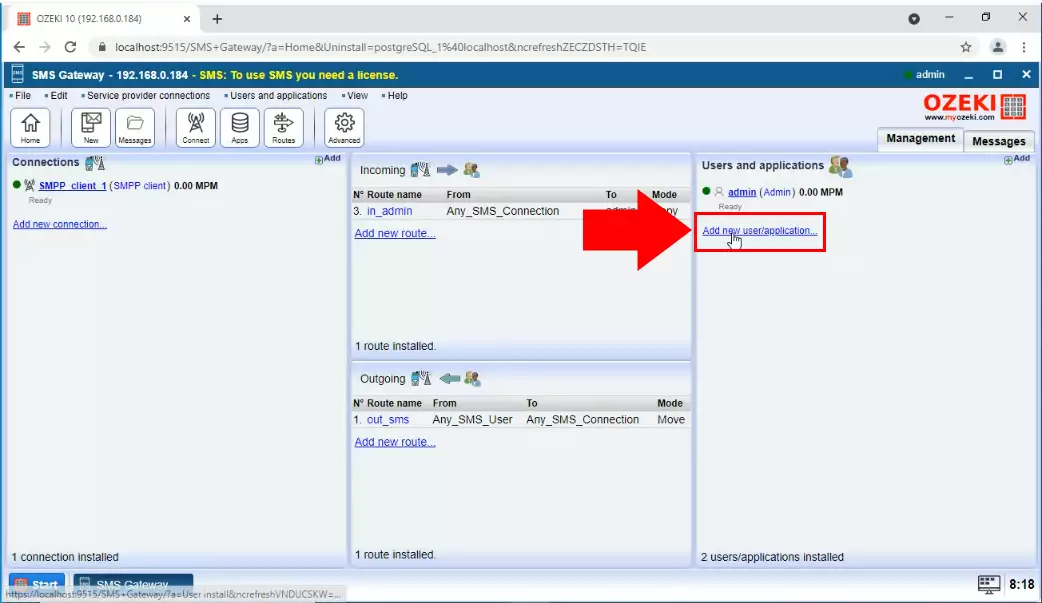
Add new user/application
The next step is to search for the blue Add new user / application button. It is located in the Users and application panel on the right-side of the window (Figure 2). Clicking the button will take you to the user or application install list. There you can see all the users or application that you can install.
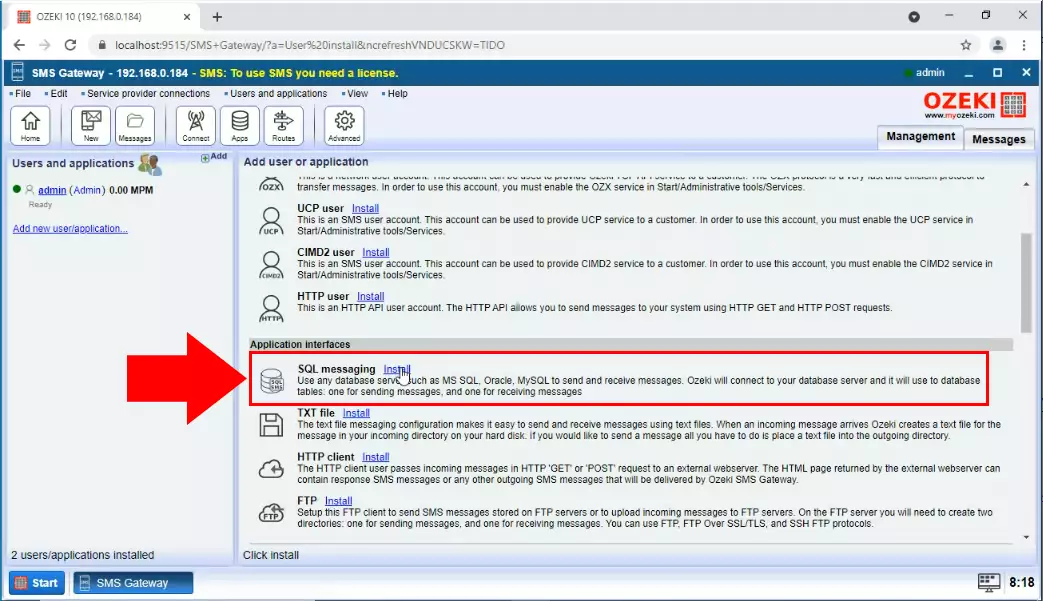
Install an SQL messaging application interface
From the Application Interfaces install list, choose the SQL messaging option (Figure 3). This will create an interface which can be used to communicate with any database service, for example MySQL or Oracle. You will need to provide the connection string in this interface.
Choose the PostgreSQL option
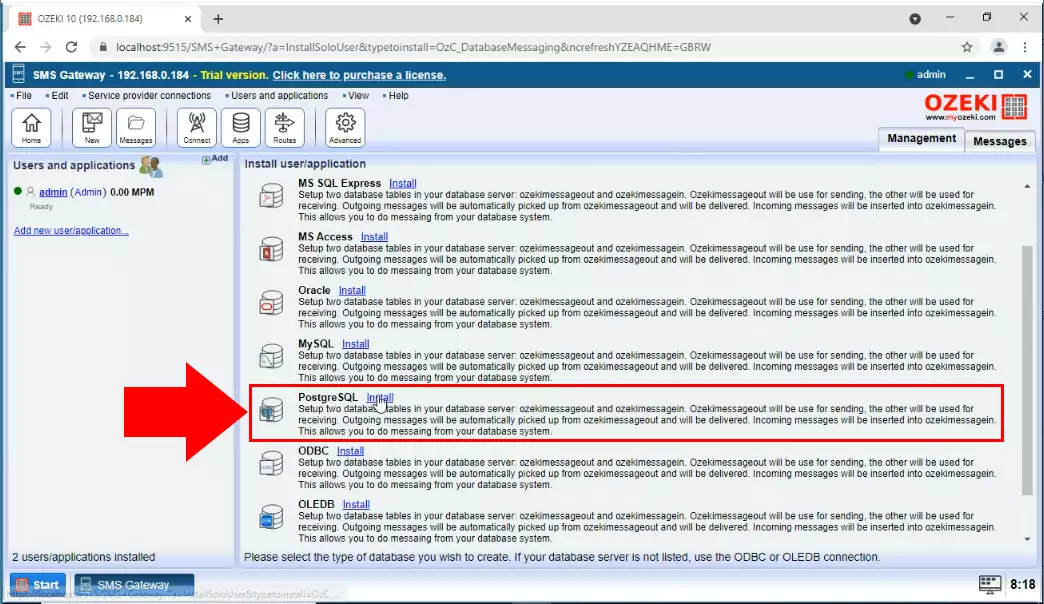
To communicate with a PostgreSQL database, you will need to choose the PostgreSQL option (Figure 4). This will setup a table which can be used to receive messages and another one used to send SMS messages. This way you can communicate using a PostgreSQL database system
Configure the connection settings
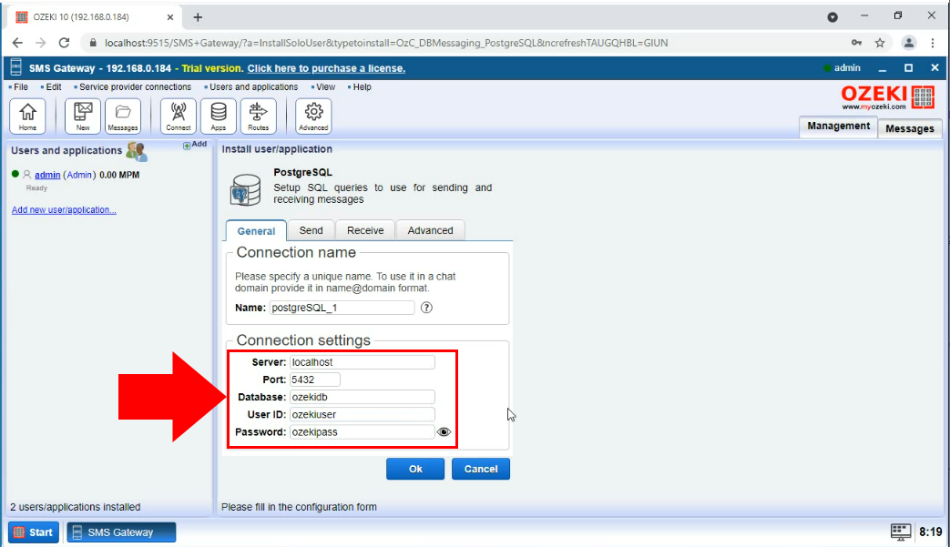
Configure the connection settings in the General tab of the PostgreSQL user. You need to provide a server address and a port number for the server. You need to provide the name of the Database, a user ID, and a password for login. Click the OK button when you filled in the configuration form. (Figure 5).
Turn on the connection
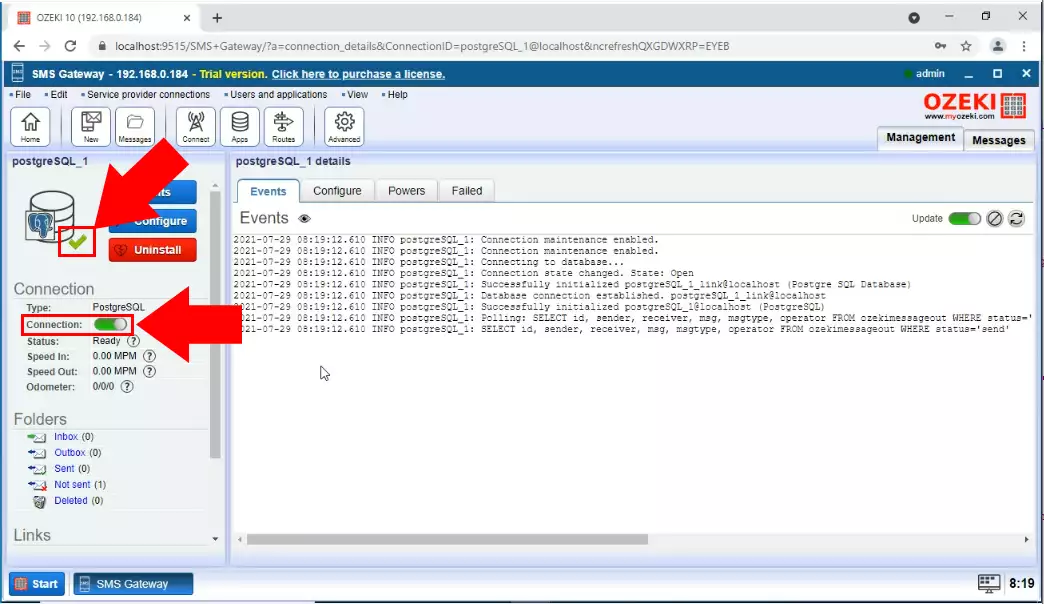
To start using the created PostgreSQL user, you need to turn it on. As you can see on Figure 6, you can flip the switch button and start the user. You can see every step of the startup and details of all the events happening on the server. If you see a green tick under the icon of the PostgreSQL database user, it means that you have a working user.
