Send SMS from Microsoft Access 2013
You will see detailed information on this page to show how to send and receive SMS messages with Microsoft Access 2013 database tables. Please follow these steps and screenshots to configure the connection to perfectly read lines from the outgoing message table and paste lines to the incoming message table. The default table names are 'ozekimessagein' and 'ozekimessageout'.
On the previous page, you might have read how to connect to the Access 2013 database and set the SQL statements, but on this page, you can see it from the aspect of your Microsoft Access database. At the bottom of this page, you can see how to send and receive messages with simple examples.
| This example contains a database that you can download from here: | ozeki_database.accdb |
What is Microsoft Access?
Microsoft Access is a database management system that is a product of Microsoft. It is one of the most commonly used database management system.
To send SMS in Microsoft Access 2013:
- Download the database
- Create two tables
- Open the Database user
- Remove apostrophes the statements
- Execute the Insert statement
- Send a message
- Watch the log of received message
- Run the SELECT statement
- Read the incoming messages
How to connect SMS Gateway to this Access database example
After you have downloaded 'ozeki_database.accdb', please place it to a selected folder. In this tutorial, it has been saved to the desktop (Figure 1) Although you can save it to any other location. Just make sure that there is enough place on the destination drive, and you can remember the access path of the file.
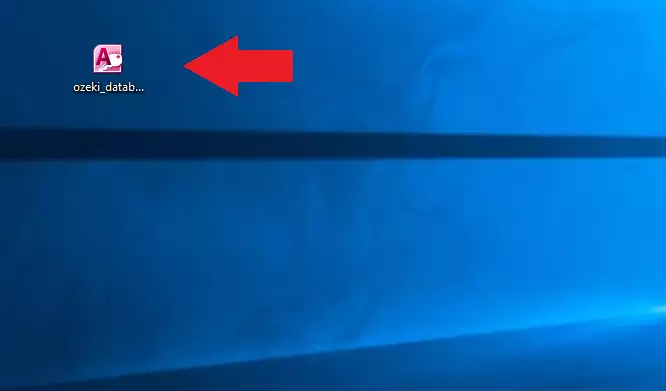
Open the location of the file
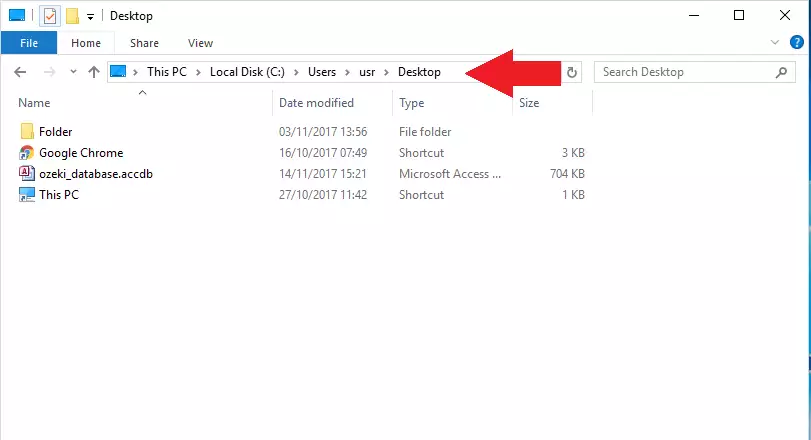
Please memorize the file's location. Later on, you will have to use this path in the connection string. You can check the path from the 'File Explorer' (Figure 2). The file is an Access 2013 database file that is recognizable by the .accdb file extension. Open the file to start working with it in Microsoft Access 2013.
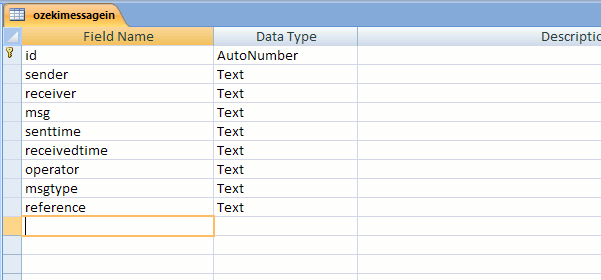
The 'ozekimessagein' table
Just before you start configuring your database connection, please create these two database tables: 'ozekimessagein' table. (Figure 3) This will serve as an inbox folder. The incoming messages will be downloaded and stored here. You will have to create two tables for the database to work.
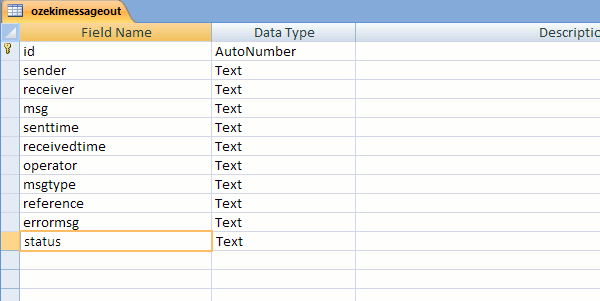
The 'ozekimessageout' table
The other table will be the 'messages to send' table. The 'ozekimessageout' table will be the table where you create messages. The database user will send these messages, to an address defined in the designated field. (Figure 4)
Provide connection settings
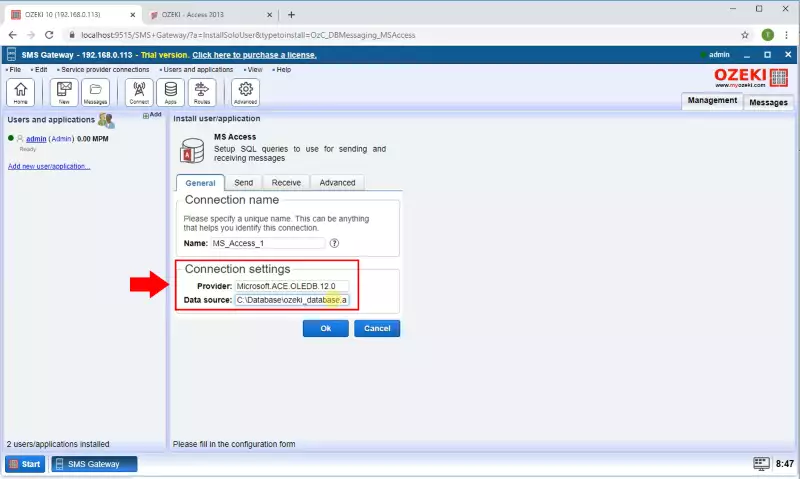
It is assumed that you have already created the Database User. The Database User can be installed on your Ozeki SMS Gateway. It will be used as a way of communication between the database and the Ozeki SMS Gateway. It is a necessary aspect of the system we are creating now.
Keep in mind to change the 'Data Source=' parameter to the location of 'ozeki_database.accdb' (Figure 5).
Remove apostrophes from all the statements
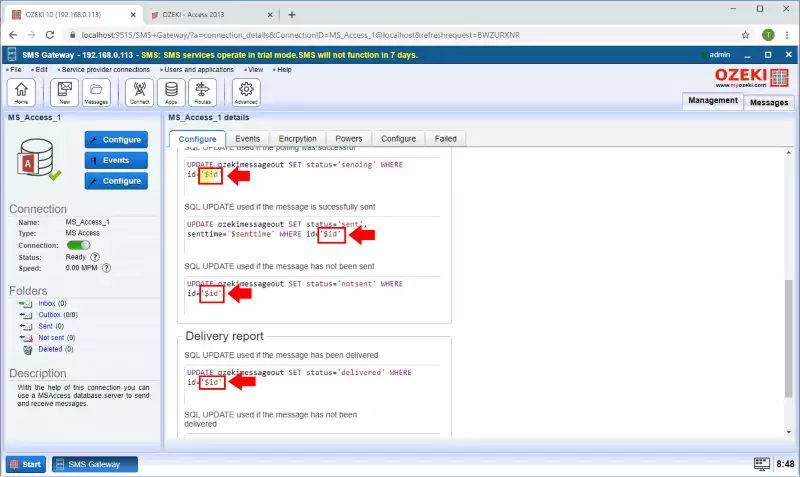
After creating the new MS Access user, you need to go to the configure tab page. There you will find code snippets. You can get more information about the codes from the little explanation text under the code (Figure 6). Make sure to delete the ' ' characters from the $id parts. This way all the codes will work correctly.
Now it is ready to use the configuration of the connection.
Testing the configuration
When testing, you should use both tables. The one which was created for incoming messages and the one which was created for outgoing messages. In these examples, these tables are called 'ozekimessageout' and 'ozekimessagein'.
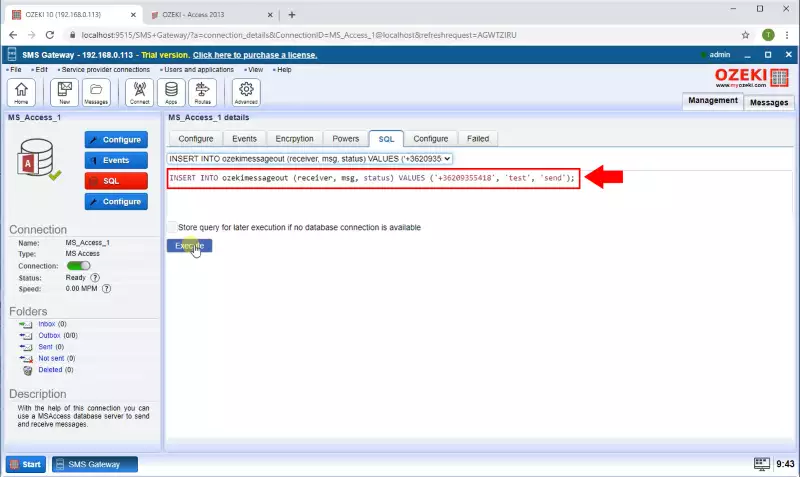
To test the configuration, you should INSERT a message record into the outgoing messages table (Figure 7),
which is called 'ozekimessageout' in the current example. These messages can be SELECT-ed (polled) by configuring the Database User here:
'SQL for sending' tab page and 'Polling' sub-tab page. Please search these options in the SMS Gateway's browser GUI.
The sent message
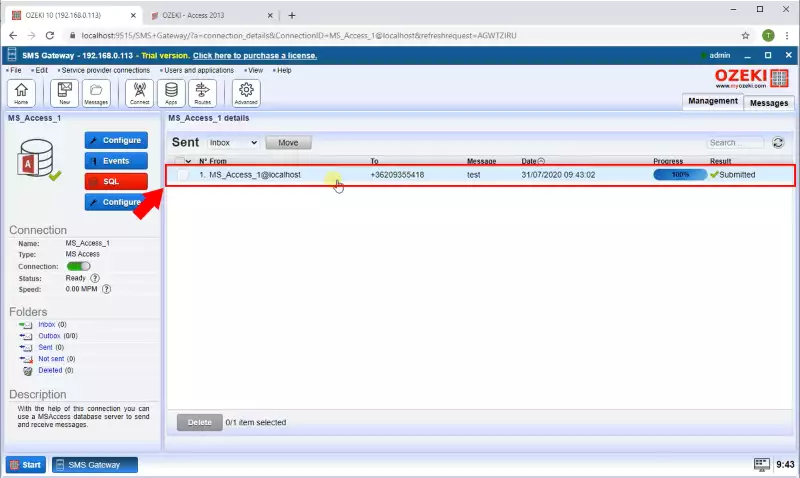
The 'status=' parameter of the message record will change from 'Sending' to 'Sent' to 'Delivered'. The sent message will be visible in the Database User's Sent folder (Figure 8).
Receiving messages
If an incoming message log event is displayed in the Database User's event log (Figure 9), the message entry will be INSERT -ed in the incoming message database table. The INSERT statement can be configured in the 'SQL for receiving' tab page of this Database User's configuration panel. This is the statement which INSERT-s incoming messages.

Run the SELECT statement
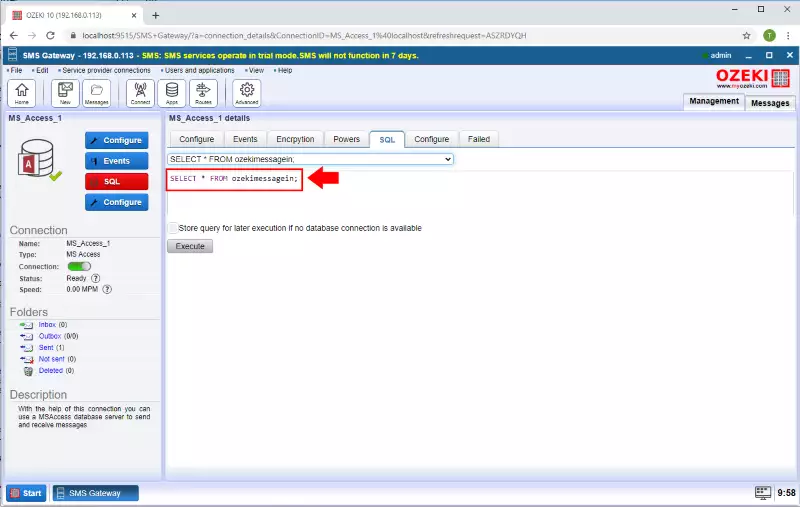
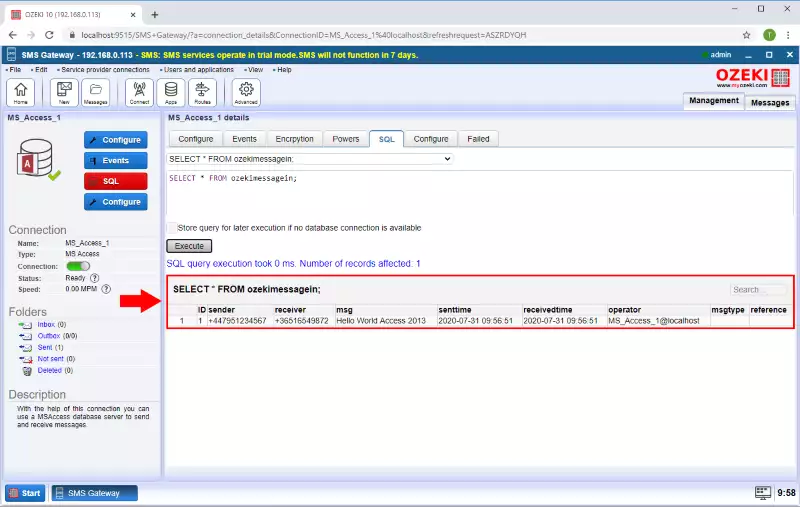
In this example, the incoming message table is called 'ozekimessagein'. This is where those SMS messages are INSERT-ed, which are received by the Database User. You should run a SELECT statement on it (Figure 10) to read all of the messages (Figure 11).
Read the incoming messages
All of the incoming messages can be read after running a SELECT query on 'ozekimessagein' (Figure 11). With this SELECT statement, you can always check your incoming messages.
To sum it up
We hope you found it easy to follow the steps. We did our very best to make it simple and to walk you through all the details as painlessly as possible. If you have followed the steps closely, you should be able to save SMS in MS Access 2013. If you have already completed the steps, I am sure, if you let your girlfriend (or boyfriend) know, you will be rewarded. If you would like to get to know more about the benefits of other similar solutions, please open ozeki-sms-gateway.com.
