How to send SMS from Microsoft Access 365
You will see detailed information on this page to show how to send and receive SMS messages with Microsoft Access 365 database tables. Please follow these steps and screenshots to configure the connection to perfectly read lines from the outgoing message table and paste lines to the incoming message table. The default table names are 'ozekimessagein' and 'ozekimessageout'.
On the previous page you might have read how to connect to the Access 365 database and set the SQL statements, but on this page you can see it from the aspect of your Microsoft Access database. At the bottom of this page, you can see how to send and receive messages with simple examples.
This example contains a database which you can download from here: ozeki_database.accdb
What is Access 365?
Access 365 is a widely used information management tool. Its most frequent usage is information storage, report and analysis making.
How to send SMS from Microsoft Access 365 (Video tutorial)
In this video, you will learn about the process of sending SMS messages from Access 365. It will start with opening the previously created database and will take you all the way to reading your incoming messages. You will learn how to configure the connection settings and how to test your solution. This video is only 2:27 long but it contains all the information you need to finish the project. We are using the Ozeki SMS Gateway application in this tutorial which offers a very intuitive user interface, so you will have no problem with completing the tutorial.
How to connect SMS Gateway to Access database
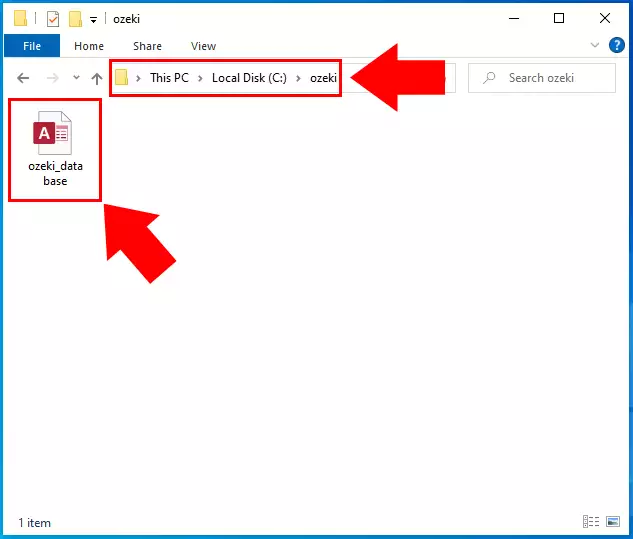
After you have downloaded 'ozeki_database.accdb', please place it to a selected folder. In this tutorial it has been saved to the C:\Ozeki\ folder (Figure 1) Although you can save it to any other location. Please memorize the file's location. Later on, you will have to use this path in the connection string. You can check the path from the 'File Explorer' (Figure 1). The file is an Access 365 database file.
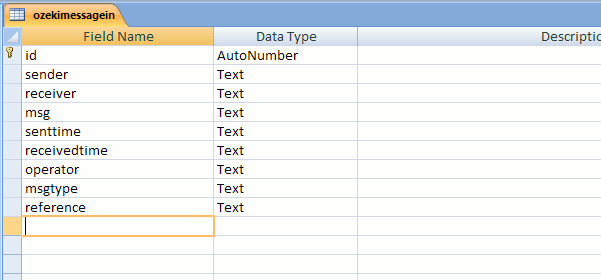
'ozekimessagein' table
Just before you start configuring your database connection, please make sure that the 'ozekimessagein' table is created on your computer. On the previous tutorial page, we discussed the process of creating the 'ozekimessagein' and the 'ozekimessagout' table. Make sure to check it if you have yet to create the tables.(Figure 2).
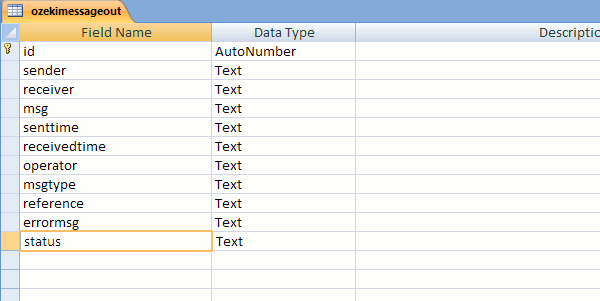
'ozekimessageout' table
On figure 3, you can see the 'ozekimessageout' table. Make sure that this table is also created on your computer. Without the two tables, the system will not work. These tables are responsible for storing your incoming and outgoing messages.
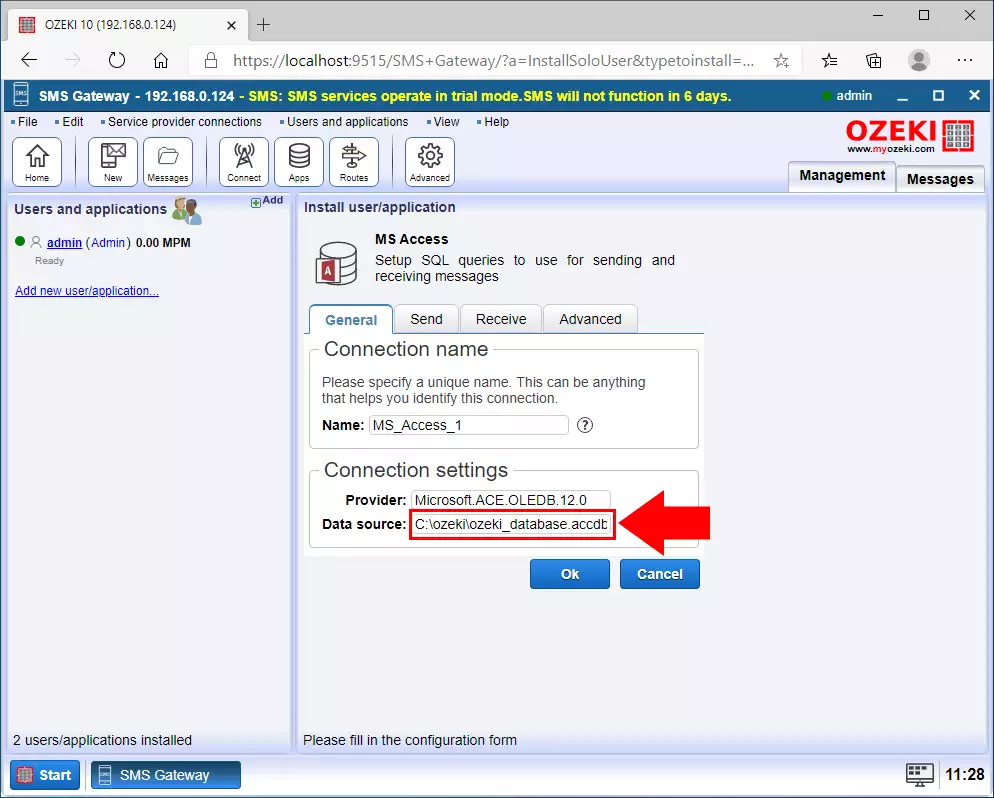
Configure the connection settings
It is assumed that you have already created the Database User. The Database User can be installed on your Ozeki SMS Gateway. Keep in mind to change the 'Data Source=' parameter to the location of 'ozeki_database.accdb' (Figure 4).
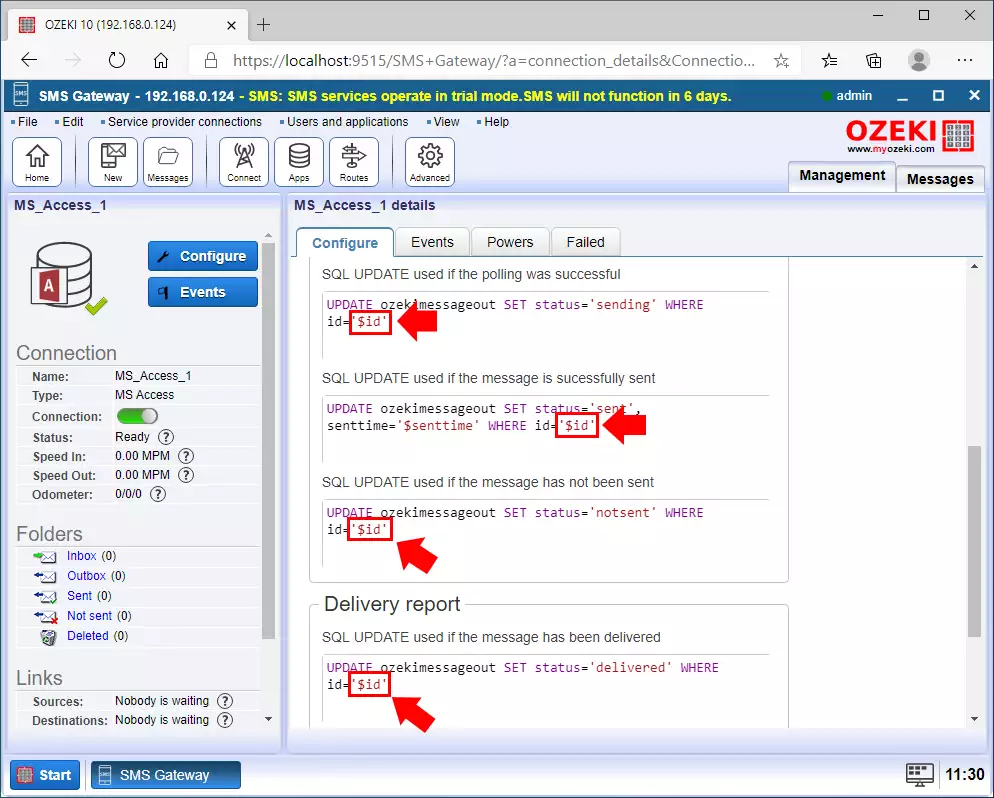
If you wish to use Microsoft Access to send and receive messages, the next step is very important because, without it, Select queries will not work. Switch to the 'Sending' tab page and remove the apostrophes (' ') around $id (Figure 5).
Testing the configuration
When testing, you should use both tables. The one which was created for incoming messages and the one which was created for outgoing messages. In these examples these tables are called 'ozekimessageout' and 'ozekimessagein'.
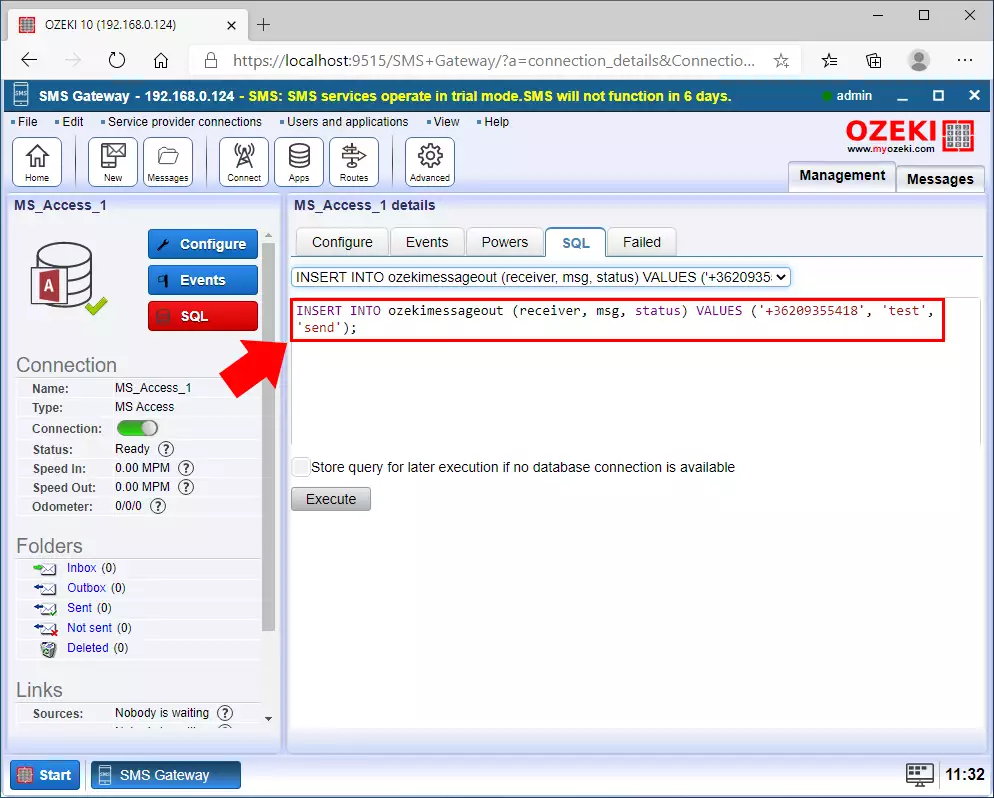
To test the configuration, you should INSERT a message record into the outgoing messages table (Figure 6),
which is called 'ozekimessageout' in the current example. These messages can be SELECT-ed (polled) by configuring the Database User here:
'SQL for sending' tab page and 'Polling' sub-tab page. Please search these
options in the SMS Gateway's browser GUI.
Check the sent folder
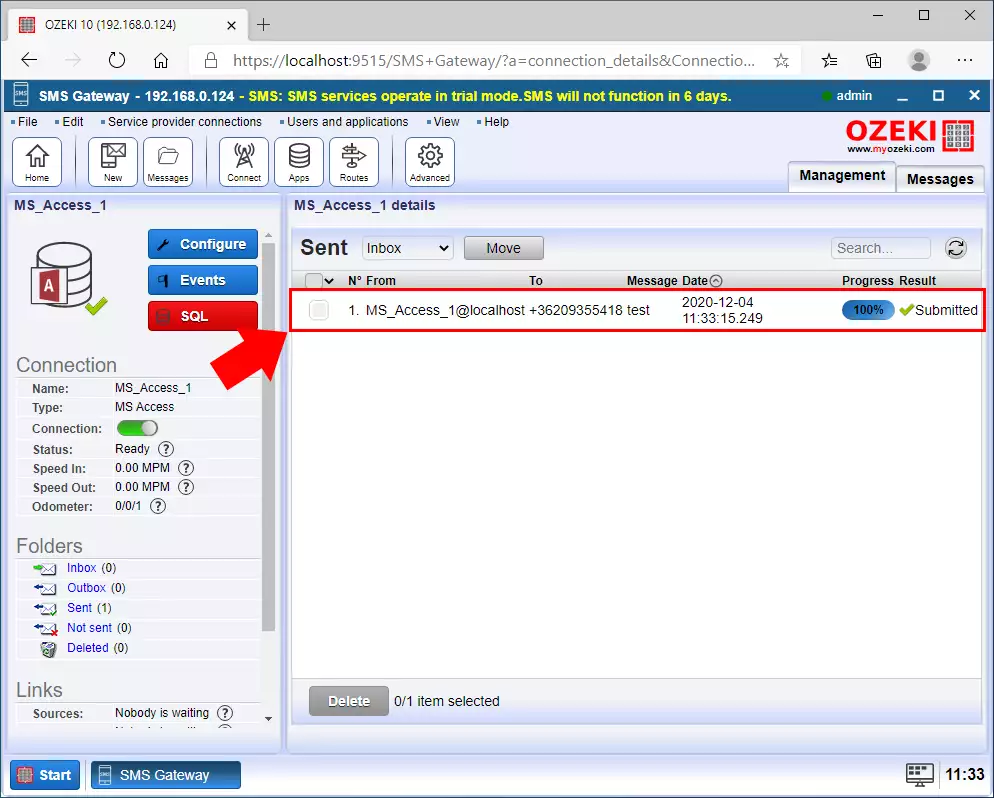
The 'status=' parameter of the message record will change from 'Sending' to 'Sent' to 'Delivered'. The sent message will be visible in the Database User's Sent folder (Figure 7), with all the previously sent messages. You can get more information about all the messages here, such as the recipient's address and the time of sending.
Review the Events tab
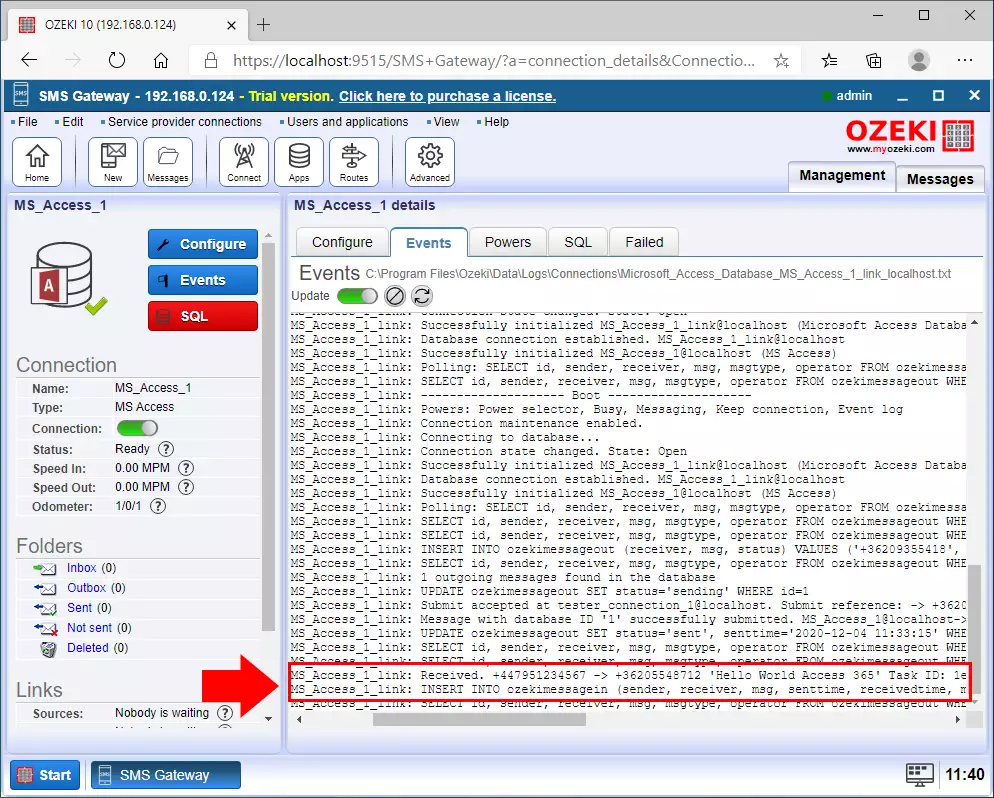
If an incoming message log event is displayed in the Database User's event log (Figure 8), the message entry will be INSERT -ed in the incoming message database table. The INSERT statement can be configured in the 'SQL for receiving' tab page of this Database User's configuration panel. This is the statement which INSERT-s incoming messages.
Execute the select query
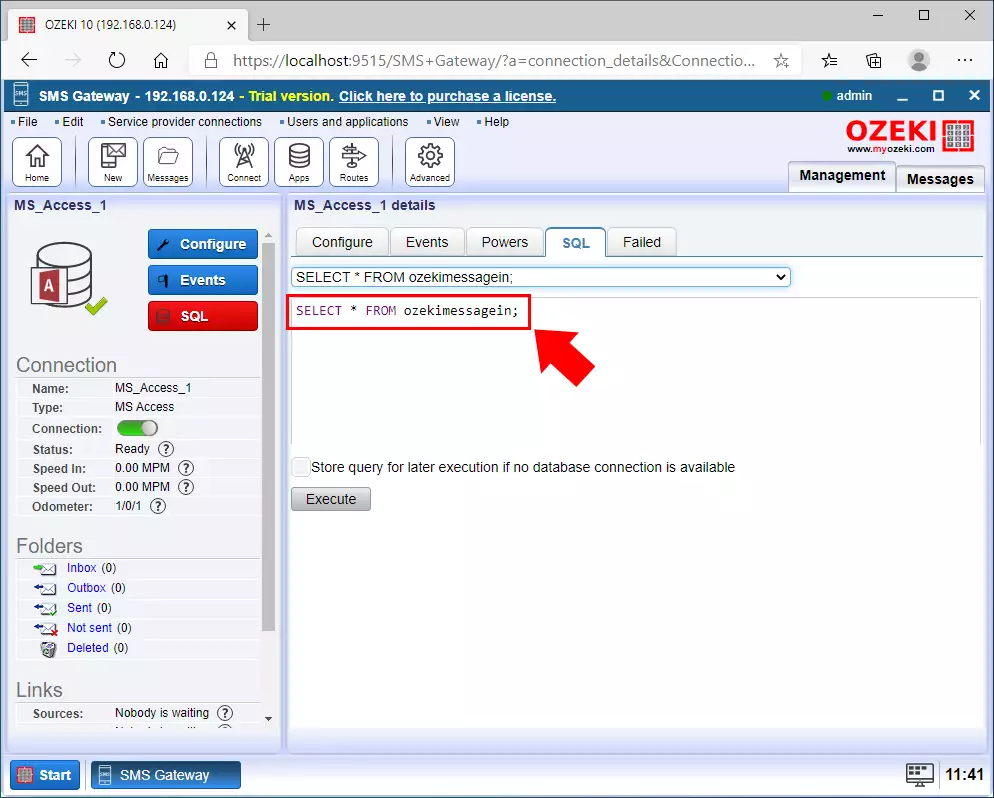
In this example the incoming message table is called 'ozekimessagein'. This is where those SMS messages are INSERT-ed, which are received by the Database User. You should run a SELECT statement on it (Figure 9) to read all of the messages (Figure 10).
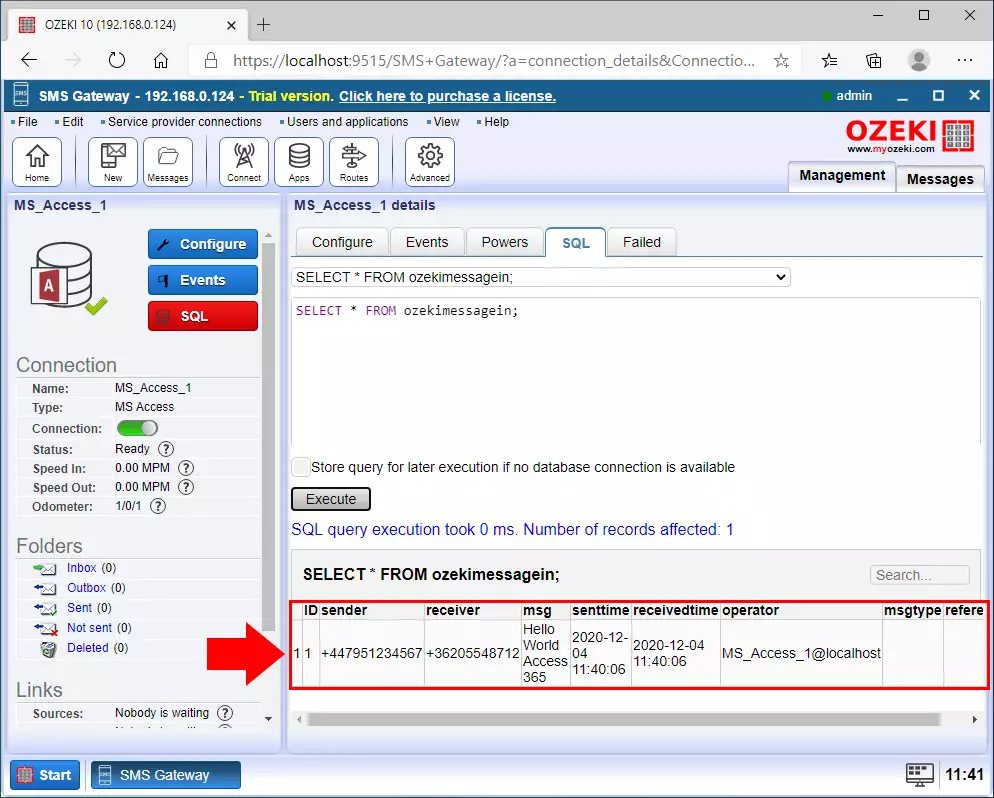
The result of the query
All of the incoming messages can be read after running a SELECT query on 'ozekimessagein' (Figure 10). You can see all the important information about the messages in the result field of the query located at the bottom of the window. You can find out the receiver, the message, the time of sending, and the operator which sent the message.
To sum it up
Congratulation, you are finished a tutorial about how to use Access 365 to send SMS messages.
By following the directions above, you can now create a solution that can be used to make your SMS sending system more efficient. Worth noting that by using the Ozeki SMS Gateway, you can provide an SMS service to your customers, employees, or business applications, and it can help you control the messaging activity of these users.
If you wish to use the Ozeki SMS Gateway at its full potential, we advise you to visit the ozeki-sms-gateway.com page, where you can read all our tutorials. I hope this article will be helpful to all the readers and especially to beginners.
