How to forward an SMS to multiple recipients
This article is about how to forward a received SMS to multiple recipients. We will talk about what is forwarding is, what are the benefits of it and how to setup an automated system for it. If you study this article carefully, you will be able to setup a new SMPP client and add an application that forwards the message to multiple recipients. It takes about 10 minutes to perform this task and the Ozeki SMS Gateway is an easy-to-use application. With standard knowledge of SMS technology, it will not be hard to follow the tutorial. We hope you will find the presented information beneficial.
What is sms forwarding?
SMS forwarding is the process of sending an SMS or email on to a further destination.
How to forward an SMS to multiple recipients
To forward an SMS to multiple recipients:
- Launch Ozeki SMS Gateway
- Add new SMPP client connection
- Configure SMPP client
- Enable connection
- Choose the Apps toolbar icon
- Install Autoreply service
- Provide auto reply script
- Enable logging
- Test to forward SMS to multiple recipients
- Check the Events
How to forward an SMS to multiple recipients(Video tutorial)
The following video shows the steps of setting up a system that can send received messages to multiple addresses. It starts with setting up an SMPP connection to receive messages end ends with reviewing the log after successful forwarding to multiple addresses. In the video we are using the Ozeki SMS Gateway. It is any easy to use and powerful SMS gateway that and the video is detailed and only 3 minutes long. You will have no problem following the steps and perform the setup.
Install a new SMPP Client
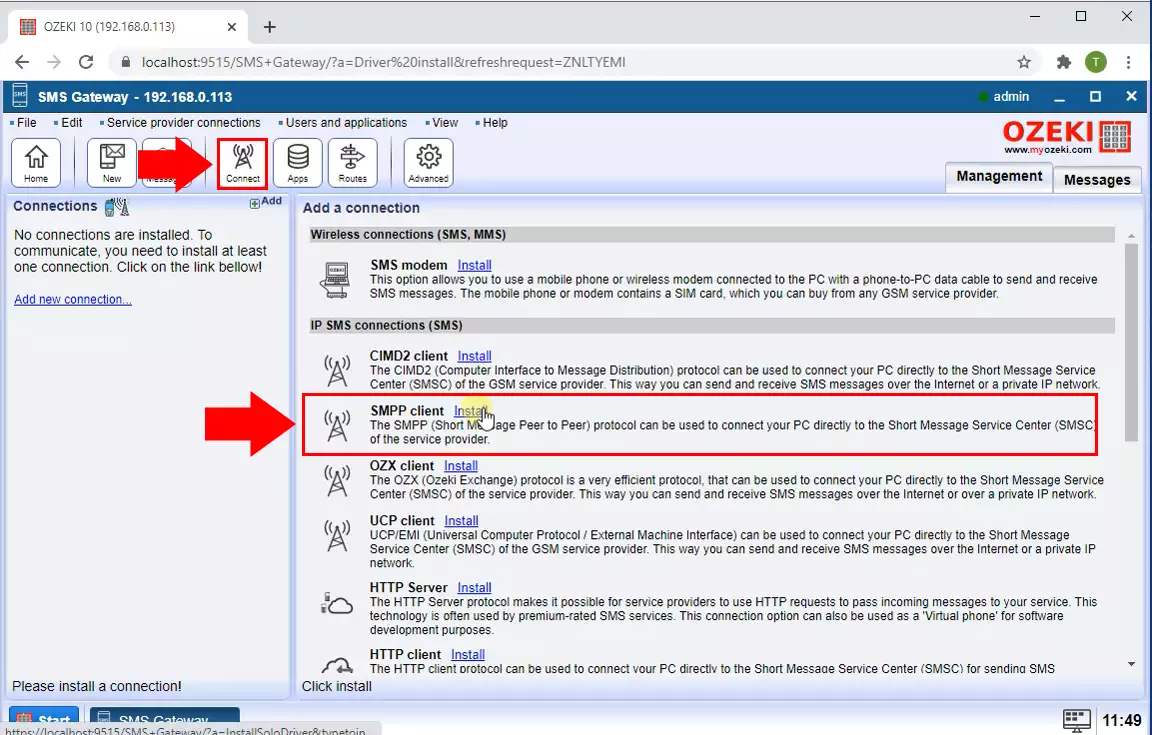
On the Toolbar of the Ozeki SMS Gateway, you can find the Connect button, located next to the messages toolbar icon. Click it to access the IP SMS connections install section (Figure 1). In the list, you can find the SMPP client list item. Click the blue Install link next to the title. It will take you to the Install connection panel.
Configure the new SMPP client
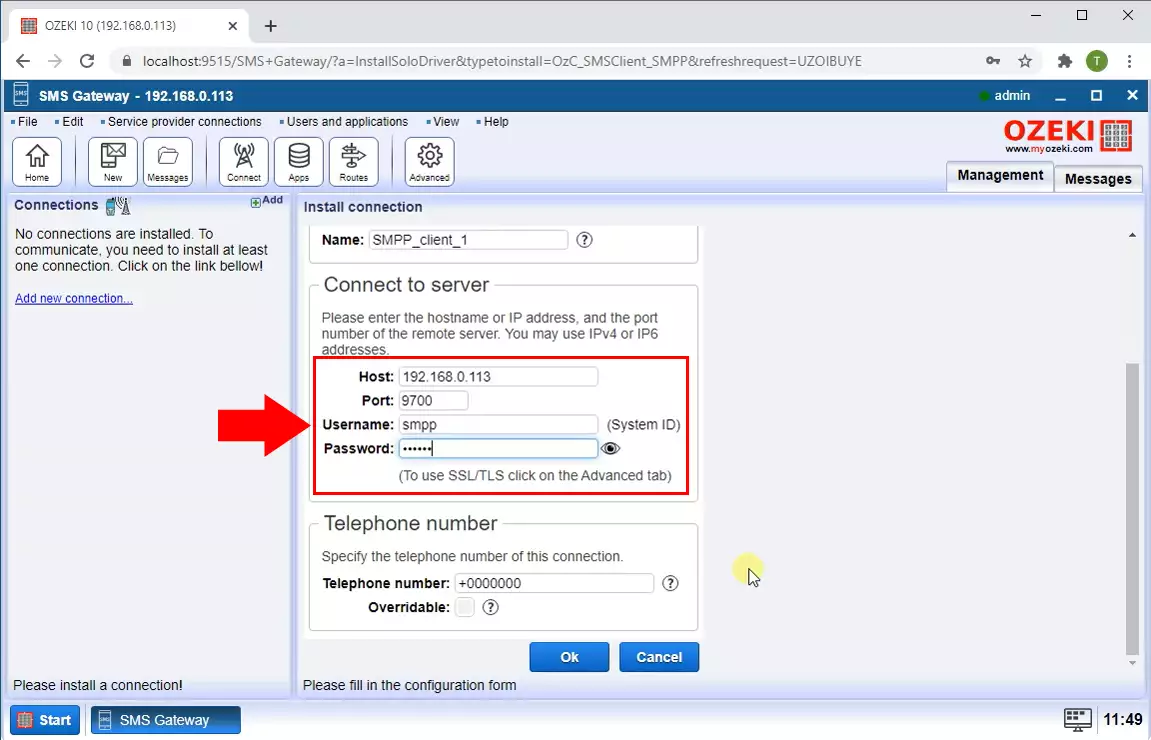
In the install connection panel, you can find the settings for the new SMPP client. There are multiple group boxes here. Look for the one titled Connect to server (Figure 2). Here you can add the properties of the server you connect to. Please provide the hostname (or IP address) and the port number for the server of choice. This way the SMPP client will connect to that server.
Enable logging for the SMPP client
Having a log file for a connection is the key in error handling. You can turn on the logging for the connection by scrolling down and looking for the Log level group box (Figure 3). Click the group box show/hide icon to see all the Log level settings. To log every event on the connection, tick every checkbox. This way the client will make a record for communication events and messaging events, and it will attach those to every message. Click the ok button to proceed to the next step.

Connect the SMPP client to the server
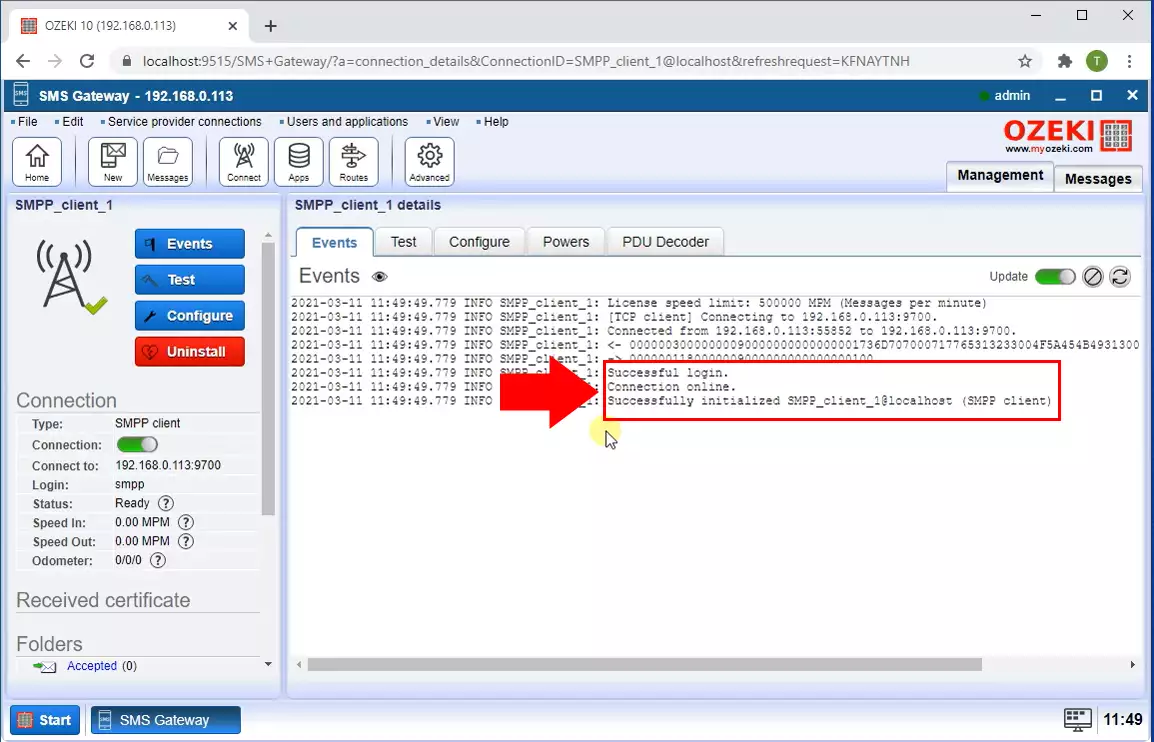
After you clicked the Ok button, you will see the empty events tab page of the client. This means that the connection is not active, and nothing is happening. On the left-side panel, you can see a switch button titled Connection. Click it to turn on the connection. This way, you will be able to see the process of connecting to the server in real time. In the Events tab (Figure 4), you will see the process of initializing the SMPP client.
Add a new Autoreply user
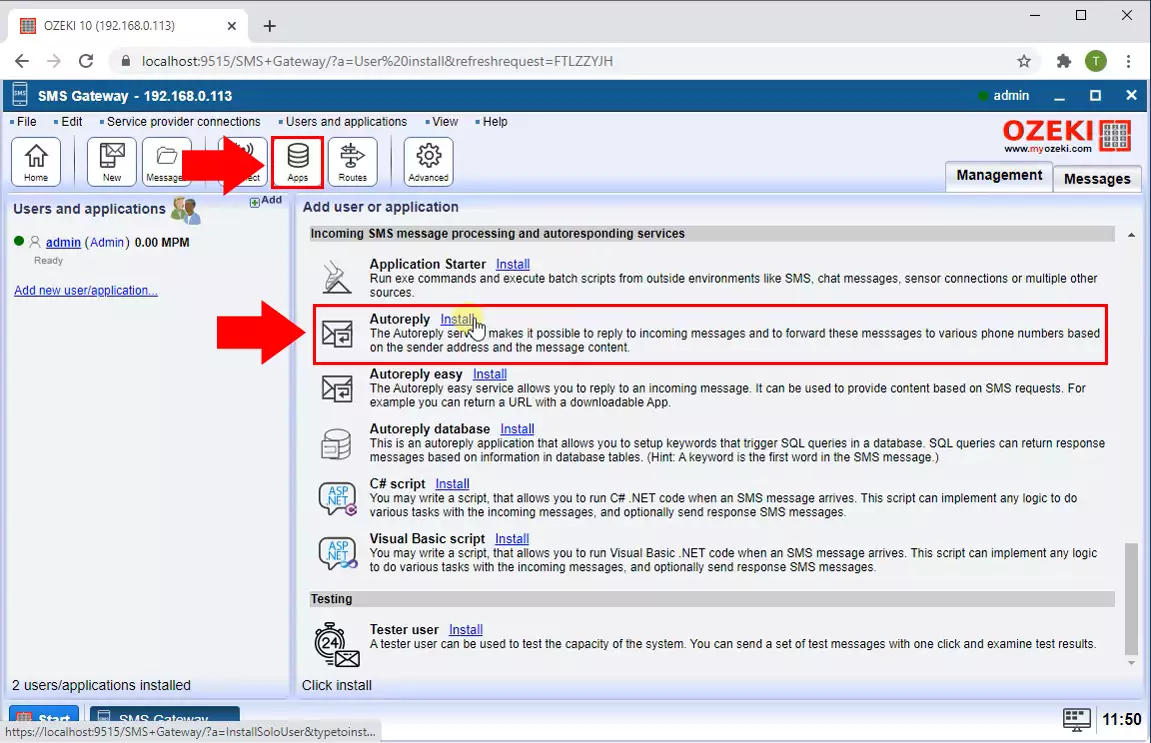
Now you have a new client that could handle message sending and receiving. The next step is to create an application that will detect the message and forward it automatically. To do so, click the App button located on the Toolbar of the Ozeki SMS Gateway (Figure 5). It will take you to the Add user or application install section. In the Incoming SMS message processing and auto responding services list, you will find an autoreply list item. Click the blue link next to it to access the Autoreply script configurator page.
Provide a script for autoreply
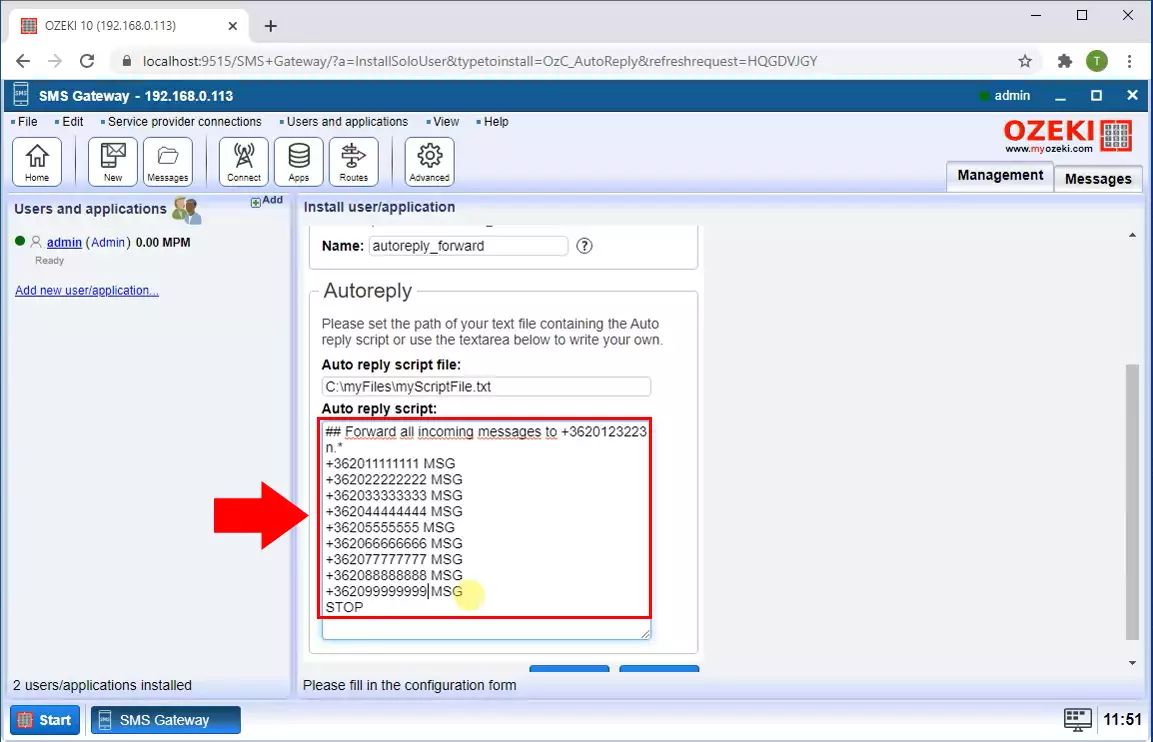
Now you need to configure your Autoreply bot. The script that you write in the Autoreply group box will define what the automated user will do. When you first scroll down to the Autoreply group box, you will see example scripts in the Auto reply script input field, with short explanation. You can also name your autoreply bot here. The script you see on Figure 6 will forward all incoming messages to the provided 9 phone numbers.
Enable logging on the Autoreply bot
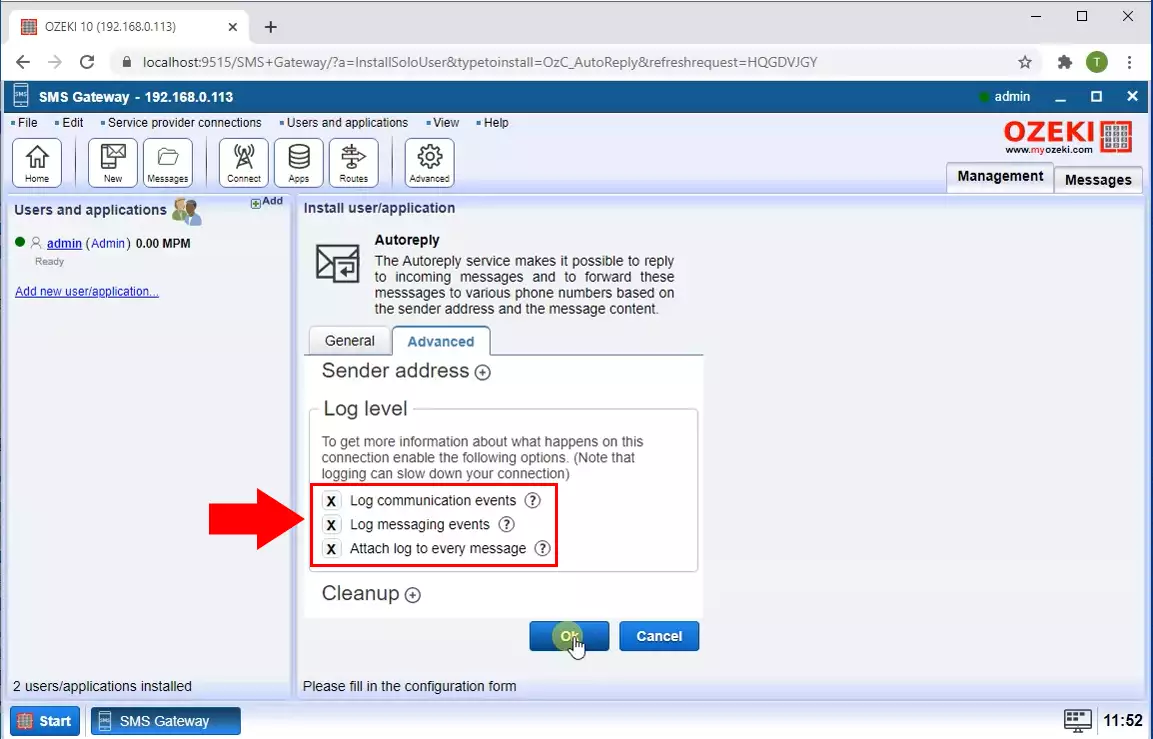
Having a log is important in the case of an autoreply application too. Tick in all the checkboxes in the Log level group box (Figure 7). This way, the application will record all events. Click the Ok button to finalize your configuration.
Message received record in the events tab
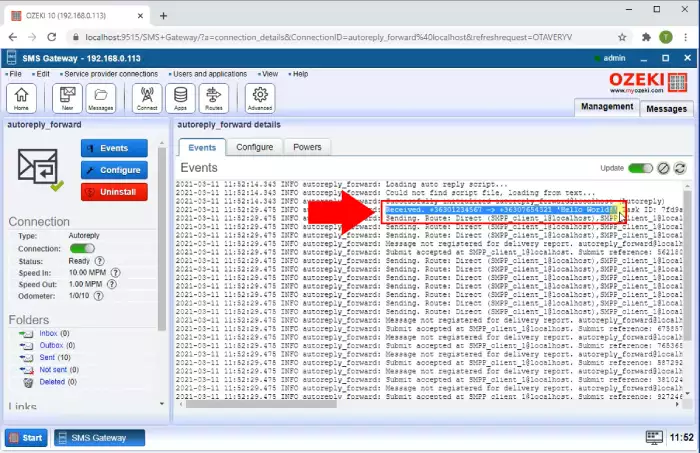
If the SMPP client receives a message, the autoreply bot will detect it and you will see the record of the incoming message in the events tab page. To reach it, search for the events tab in the tab bar of the autoreply forward section. You will find much more information about the events in the client here, as you can see on Figure 8.
Messages successfully forwarded
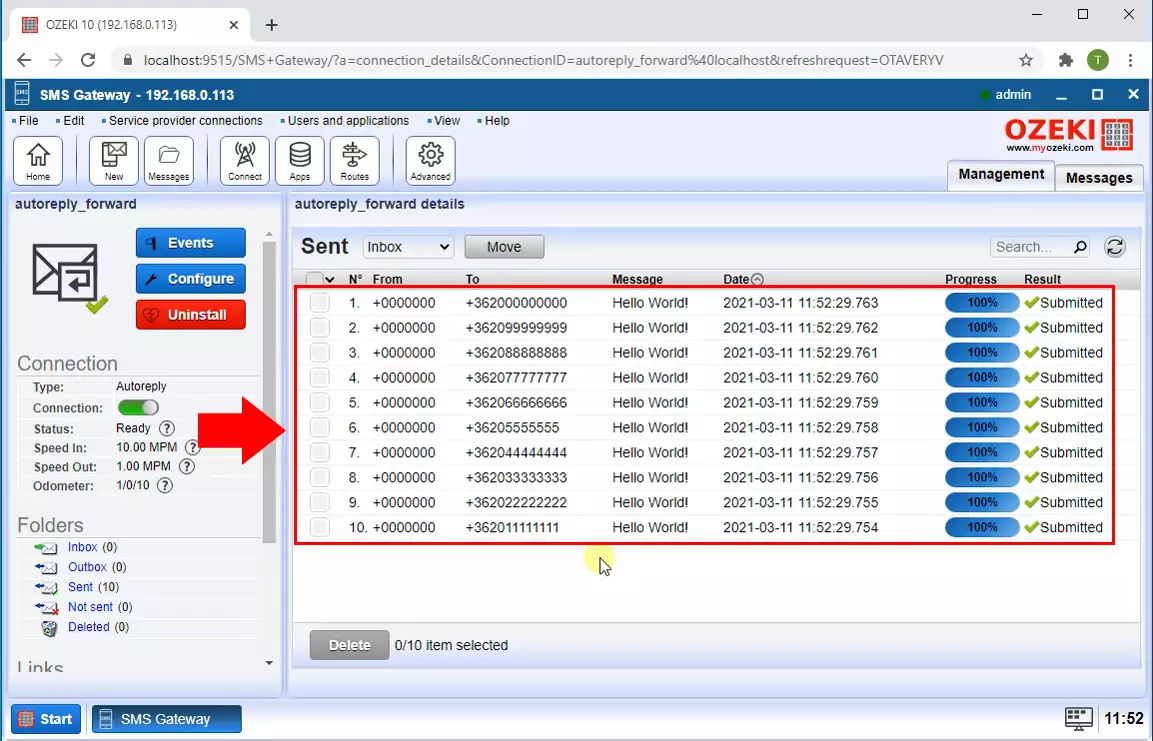
In the Sent folder of the autoreply application, you can see the message was successfully sent to all the addresses. To reach this folder, open the blue Sent folder in the left-side panel. Here you can see all the previously sent messages. If the Result column show a checkmark and the Submitted text (like on Figure 9), it means that the SMPP connection sent the message to the address.
