How to forward an SMS to multiple recipients
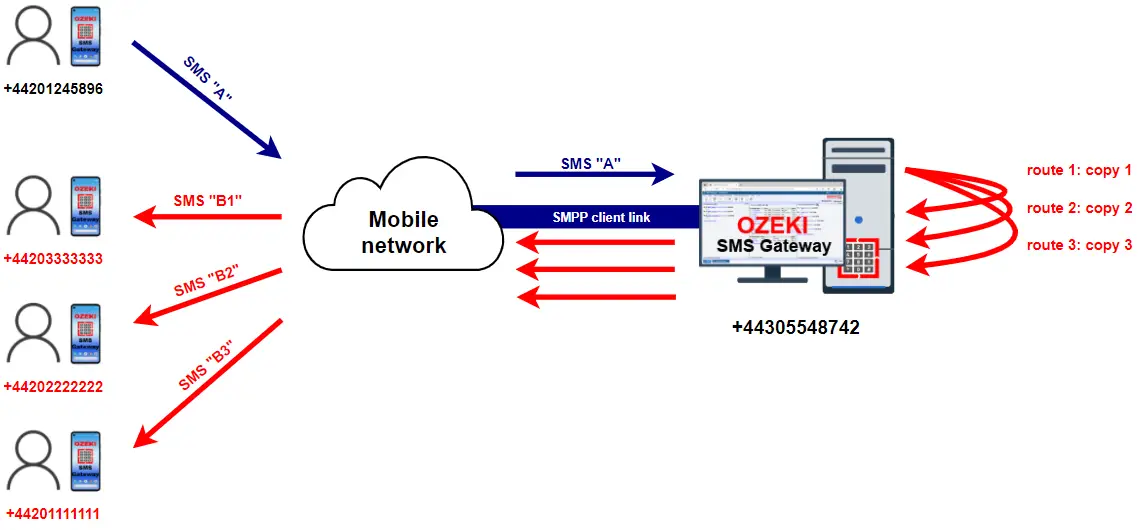
This video tutorial shows you the configuration to use if you wish to forward incoming SMS messages to multiple recipients. The guide uses the Ozeki sms routing table to achieve this result. The key is to create a route for every recipient with "Copy" mode. If a message comes in it will go through the routing table, and a new message will be created for every route. An interesting choice in this solution is that we send out the messages on the same connection where the original messages come in. In other words, the messages are routed back to the same connection, but their recipient address is modified during routing.
What is Ozeki SMS Gateway?
Ozeki SMS Gateway a powerful on-premise SMS gateway software, that can be used to create SMS services. It has a built in very high performance SMPP server and SMPP client protocol implementation. The system can delivery up to 1000 SMS messages per second, which makes it an ideal choice for SMS service providers. Ozeki SMS Gateway also offers UCP SMS protocol, CIMD2 protocol implementations and the best HTTP SMS API. Ozeki SMS Gateway is also a great choice if you wish to provide SMS notification or SMS content services to customers and developers. This is a high performance, very reliable SMS gateway system. It can send over 1000 SMS per second on SMPP connections.
How to forward an SMS to multiple recipients (Easy directions)
To forward an SMS to multiple recipients (Figure 1):
- Launch Ozeki SMS Gateway
- Install SMPP client
- Configure SMPP connection
- Tick check boxes in Log level group box
- Inspect the connection status logs
- Create new routing rule for all recipient
- Send test SMS message to multiple numbers
- Check the logs
How the system works
How to forward an SMS to multiple recipients (video tutorial)
Add new SMPP client
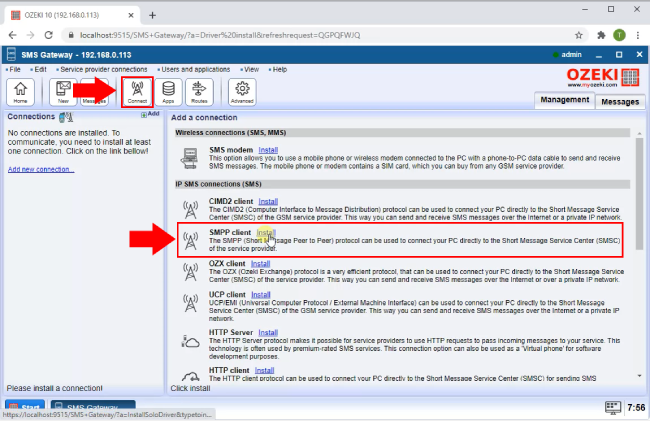
To get started, you fist need to open Ozeki SMS Gateway. Click on the Connect tab in the top toolbar (Figure 2). This will display the types of connections you can create. Find SMPP client. Click Install next to it to begin configuring the new SMPP client.
Configure SMPP connection
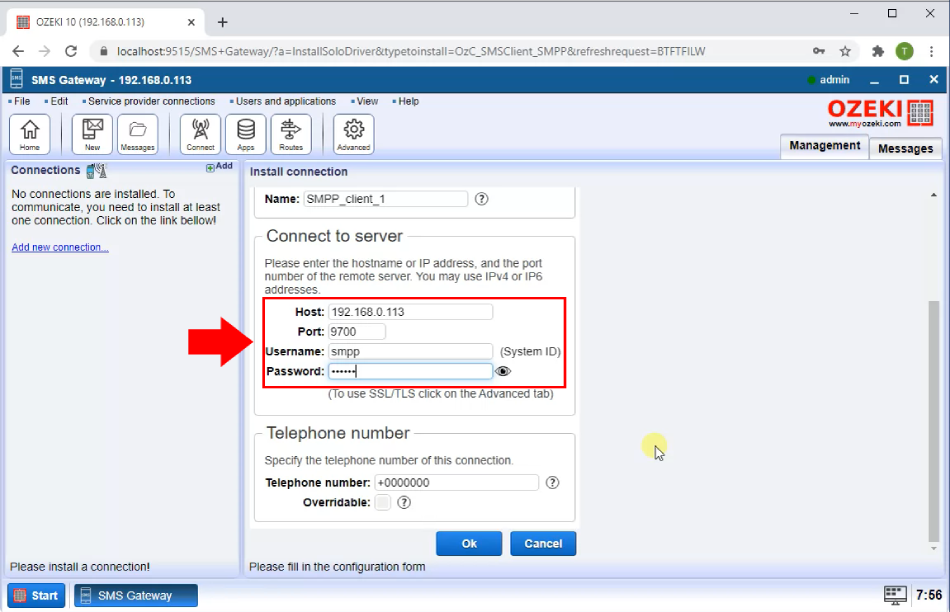
In this window you need to provide connection details to configure your SMPP connection (Figure 3). Type your IP Address next to Host, along with the Port below. Then, enter your username and password into the respective textboxes. Now head over to the Advanced tab to configure logging options.
Enable logging
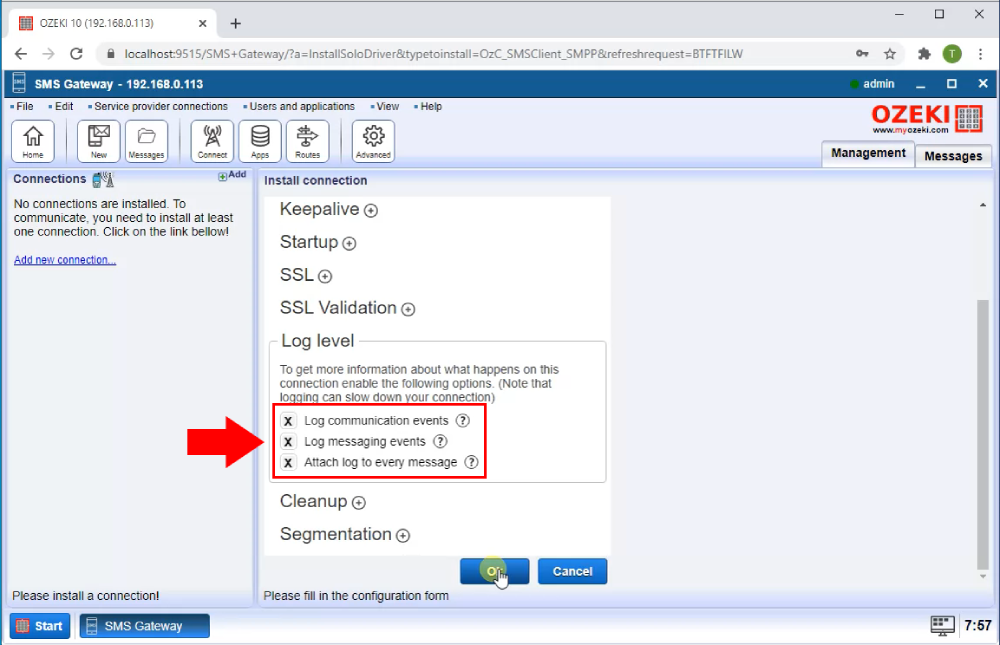
Scroll down in the advanced tab. Enable every option under Log level by clicking on the checkboxes next to them (Figure 4). Click on OK to save your settings and create the connection.
SMPP client connected
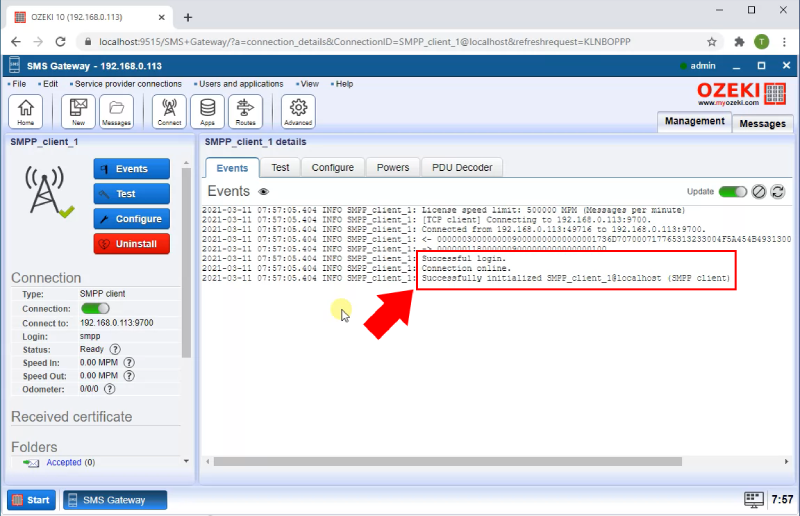
After you created the SMPP client, you will be brought to the details page of the connection. When the switch button on the left is green, it means that the client is connected. You also get a message in the Events tab, indicating that the connection has been established (Figure 5).
Add new routing rule
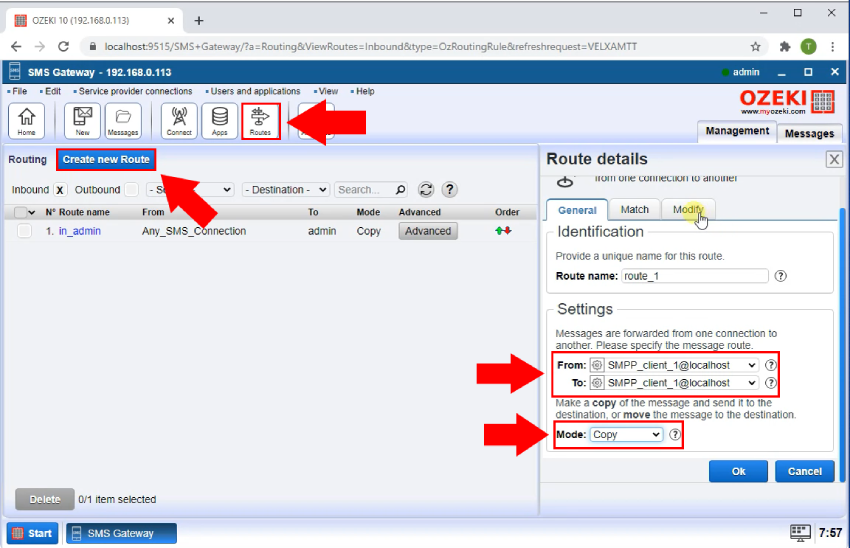
After successfully starting the SMPP client, you need to add a new routing rule. Click on Routes inside the toolbar on the top (Figure 6). Click on the blue Create new Route button on the top. Navigate to the Settings menu on the right. Here you need to select SMPP_client_1 for both the From and To combo boxes. Then, select Copy for Mode.
Configure new recipient address
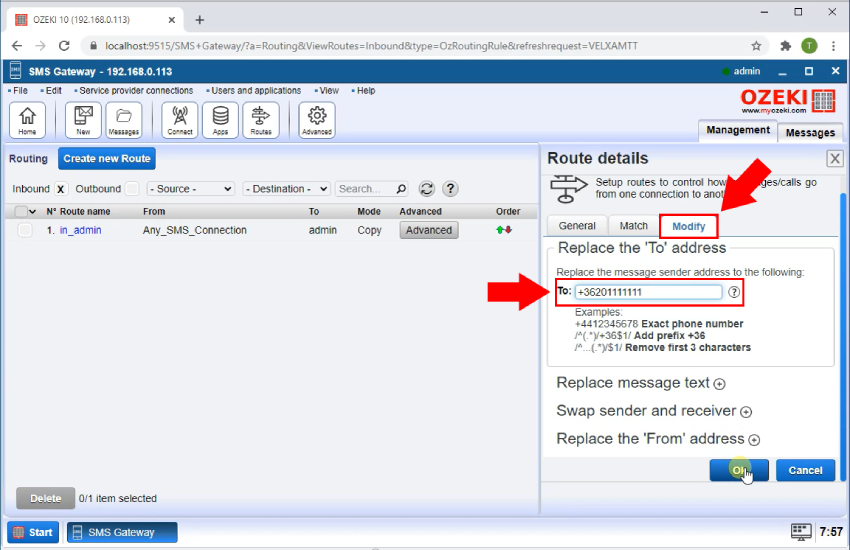
Next you need to configure a new recipient address. Click on the Modify tab in the Route Details menu on the right (Figure 7). Enter your phone number into the To textbox. Click OK to save your settings.
Create route for all phone number
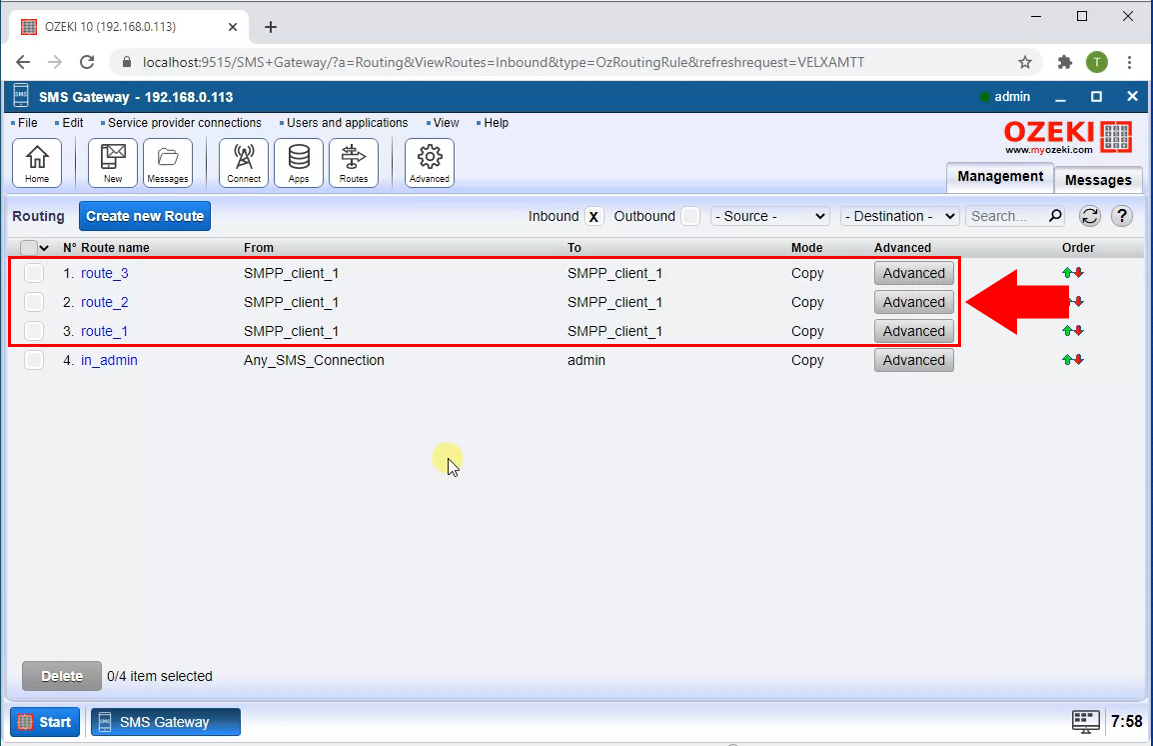
In order to send SMS to multiple recipients, you need to repeat the precious two steps found above and create a route for each phone number. While creating the routes, you must leave all the settings the same way as before, only change the phone number. All your created routes can be found in the Routes tab, which you can access in the toolbar on top (Figure 8).
Forward received message to all phone numbers
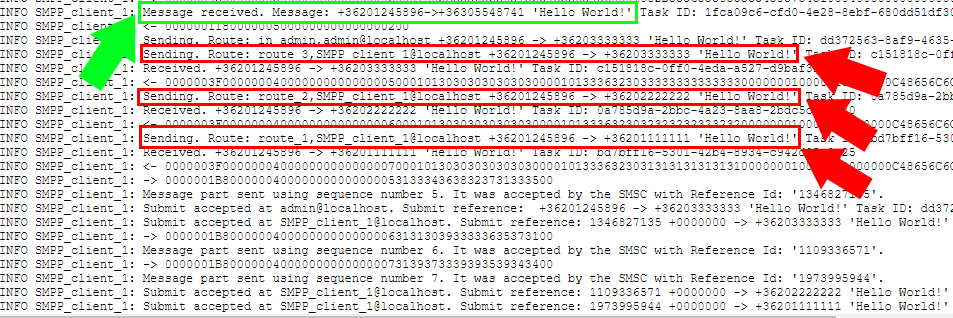
Now you can see in the Events tab, that your messages have been forwarded to the specified phone numbers (Figure 9).
Summary
Everything is now set up for you to send SMS to multiple recipients with one click. We hope you find this article helpful in implementing this solution. For more information, check out our various other guides on Ozeki SMS gateway and other Ozeki Software.
