How to swap the sender and recipient phone numbers
The next document is about to show how easy you can swap the sender and the recipient phone numbers, so the sender becomes the recipient and the recipient becomes the sender. This operation is great to generate an autoreply message by changing the text as well and send it back to the sender as a response. The guide does not take more than five minutes to complete because it contains step by step instructions and each step demonstrated with a screenshot as well which makes it easier to complete.
Step 1 - Open a routing rule
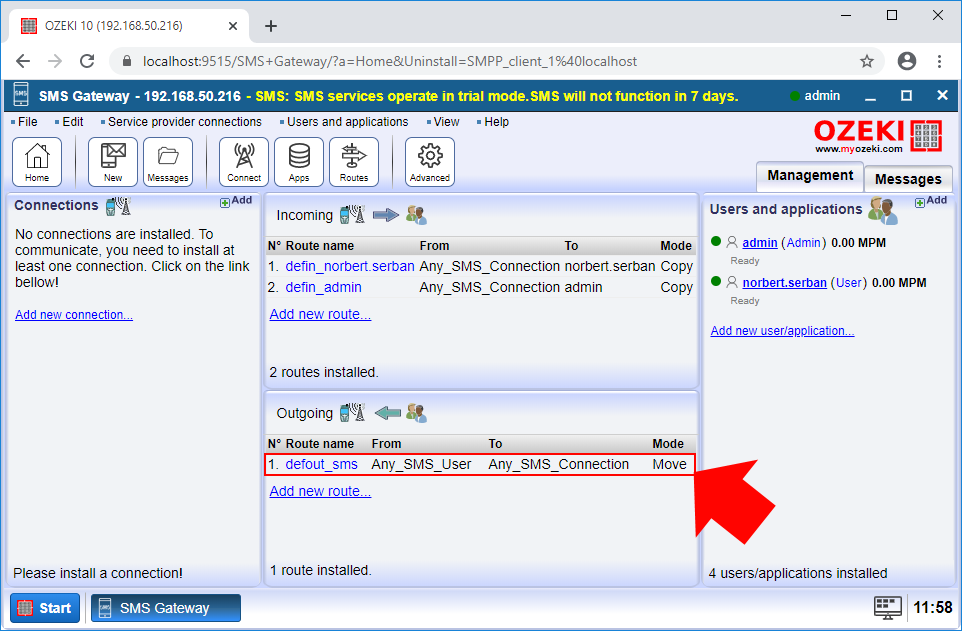
The first step is to select a route that you want to modify. If you are not familiar with routing rules, here you can learn about SMS routing in SMS Gateway. SMS Gateway creates default routes, so you can simply select the default outgoing route as you can see it in Figure 1.
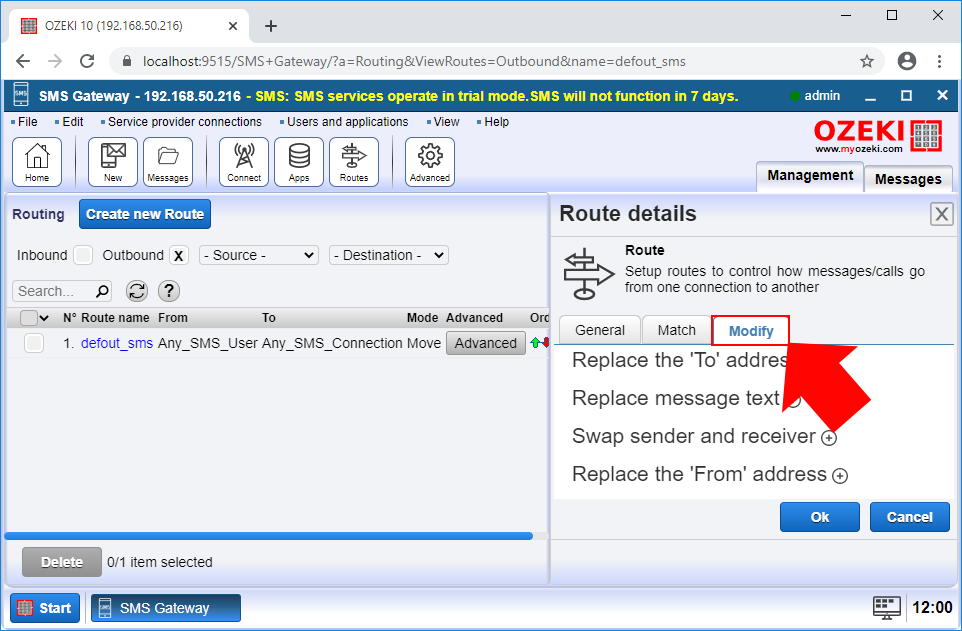
The next menu, that you will be able to see is the details menu of the selected routing rule. Here you can configure it and specify how it should handle your outgoing messages. To swap the sender and recipient phone number, first you need to select the 'Modify' tab, like in Figure 2.
Step 2 - Swap the sender and receiver addresses
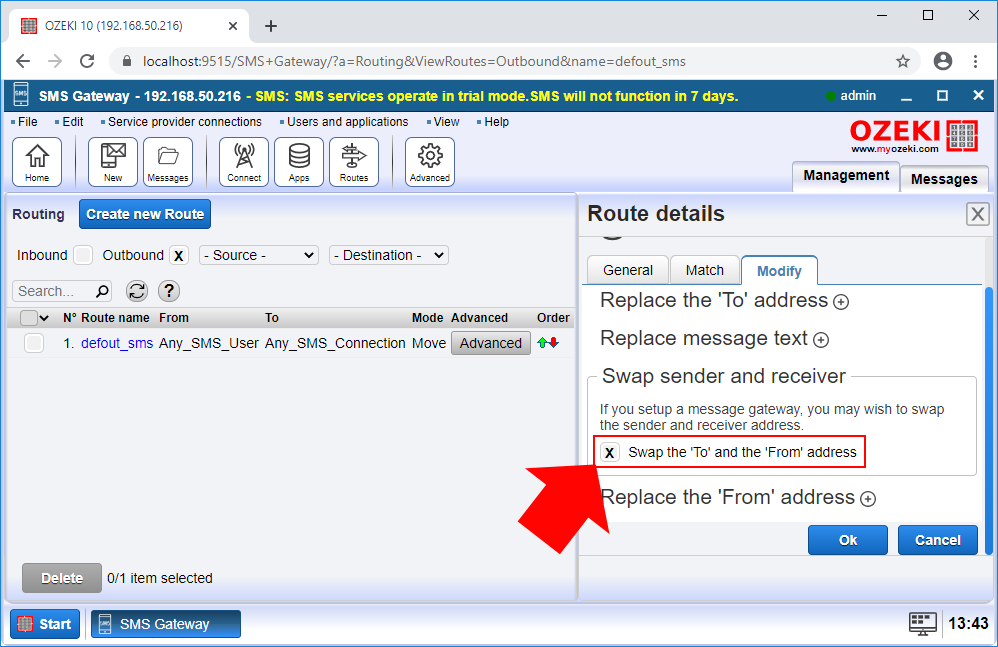
In the Modify menu, you need to select the 'Swap sender and receiver' option, where you can set up the swapping of the sender and recipient address. This operation can be done easily by just ticking the 'Swap the 'To' and the 'From' address' option like in Figure 3. Then, you can modify or replace the original message. If you are not familiar with these operations, you can learn more about how to change the message text or how to add text to the message. To save all modifications, just click OK.
Step 3 - Send a test message
Next, you can test the solution. For that, you need to create two connections to see if the response message arrived without any problem. These connections can be HTTP server connections. If you don't know about how to create the HTTP Server connection, you can check it at this point. After you created the two HTTP server connections, open the first connection, and open the HTML form like in Figure 4.
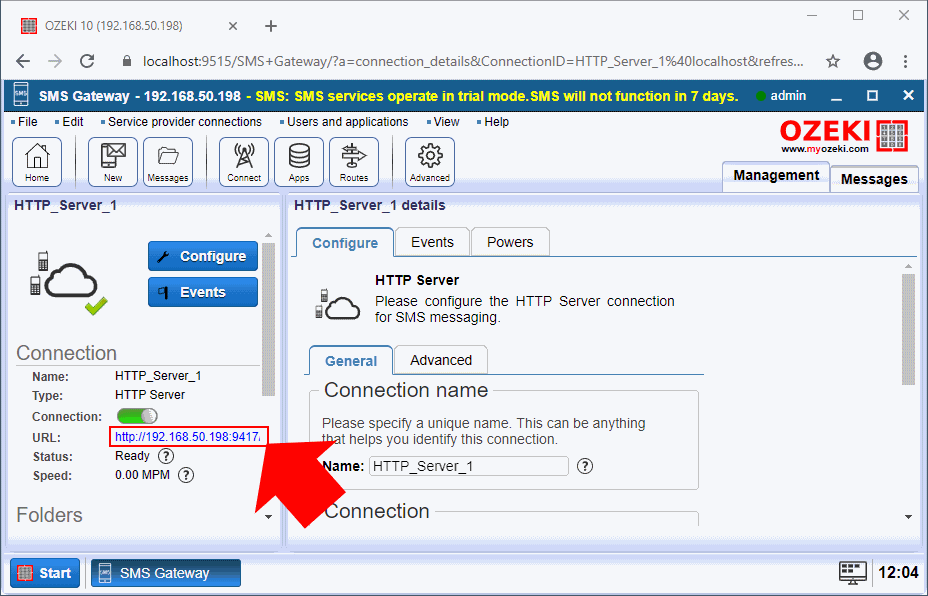
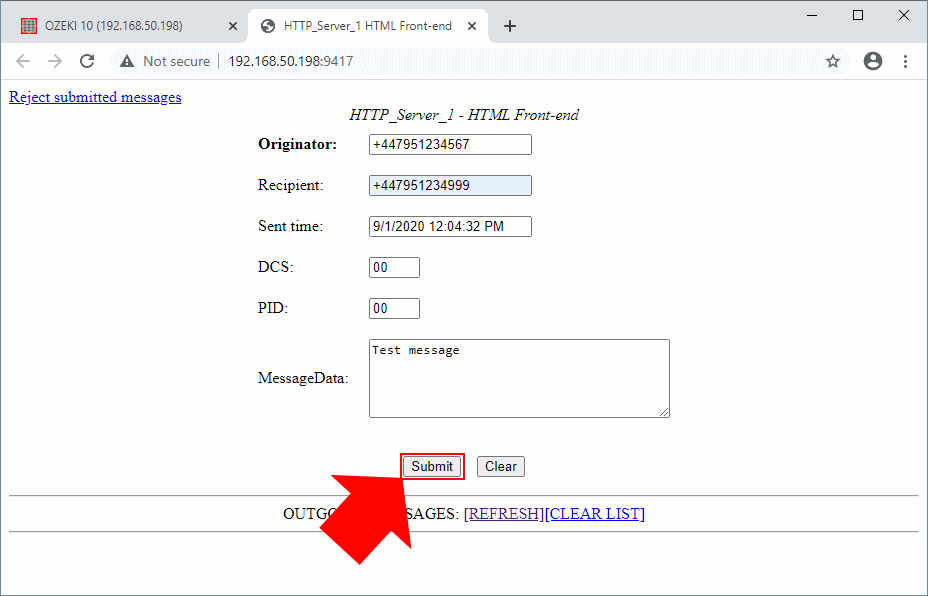
The HTML form allows you to send test messages to other connections or phone numbers. Here, type the recipient phone number that you specified for the second HTTP server connection as Figure 5 demonstrates it. Then, just write a simple test message in the textbox. If you finished, just click on 'Submit' to send the message.
Step 4 - View the results in the event log
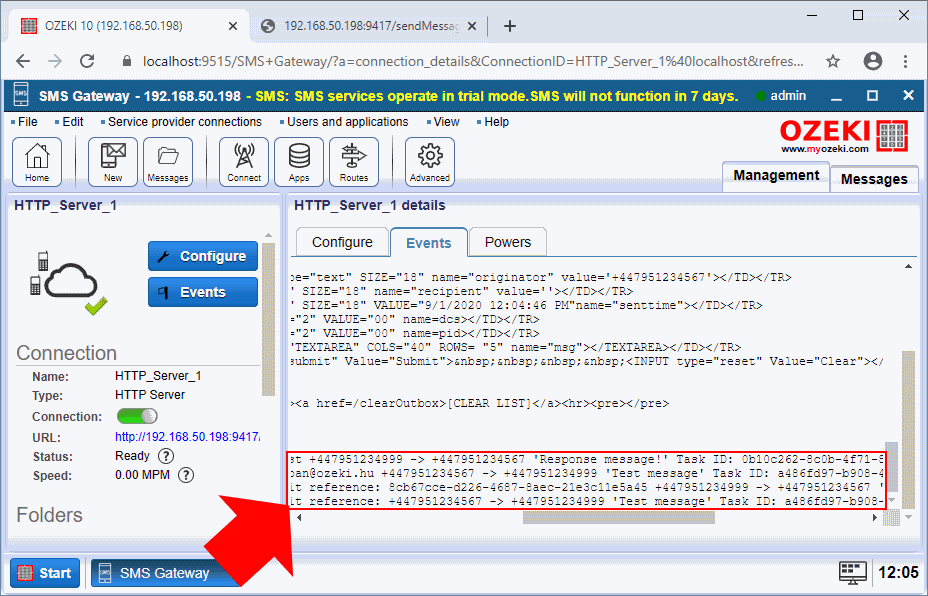
The last thing that you need to perform is to check if both the original and the response message arrived successfully to the sender and the recipient as well. For that, you can check the Event menu of the HTTP server connection. Here, as you can see it in Figure 6, the connection lists every event that occurred during its uptime. Here you can see the two lines that logged, first the delivery of the original message to the recipient, then the delivery of the response as well.
