How to add text to the end of the SMS
This section is going to demonstrate that you can append a text message to the end of the SMS. This solution is quite useful if you want to add an advertisement or a signature to the end of the SMS. To achieve this goal the SMS routing table is used. An SMS routing rule, that matches the sms appends the desired text to the end of the existing message. By following the steps in this document, you will be able to see how you need to set up the routing rule to add text at the end of the message. The document demonstrates every step with a short description about what you have to do next. You can also find screenshots at each step to be able to visually check if you have done everything correct.
Step 1 - Open a routing rule
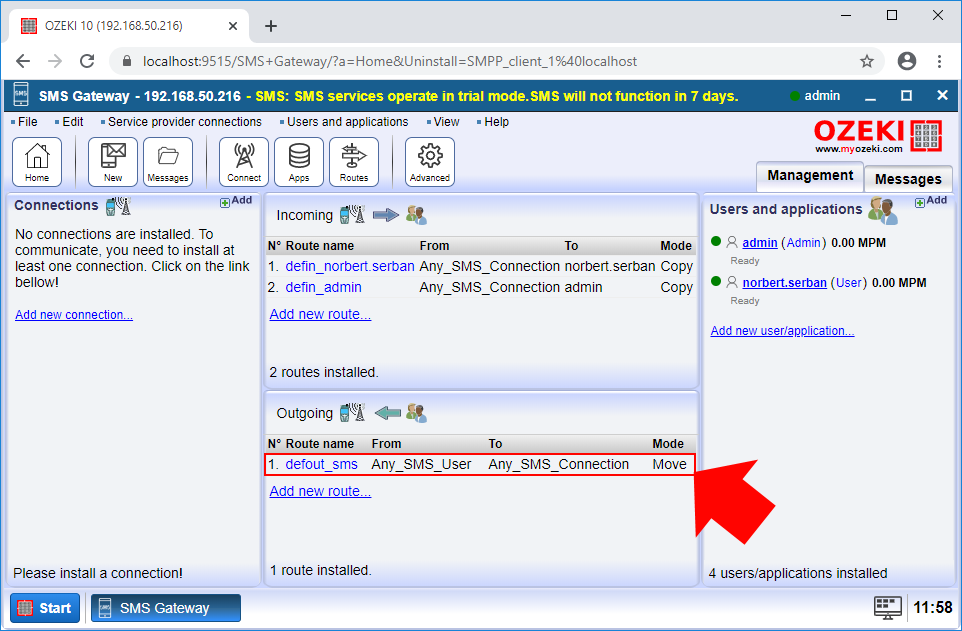
The first step is to select a route that you want to modify. If you are not familiar with routing rules, here you can learn about SMS routing in SMS Gateway. SMS Gateway creates default routes, so you can simply select the default outgoing route as you can see it in Figure 1.
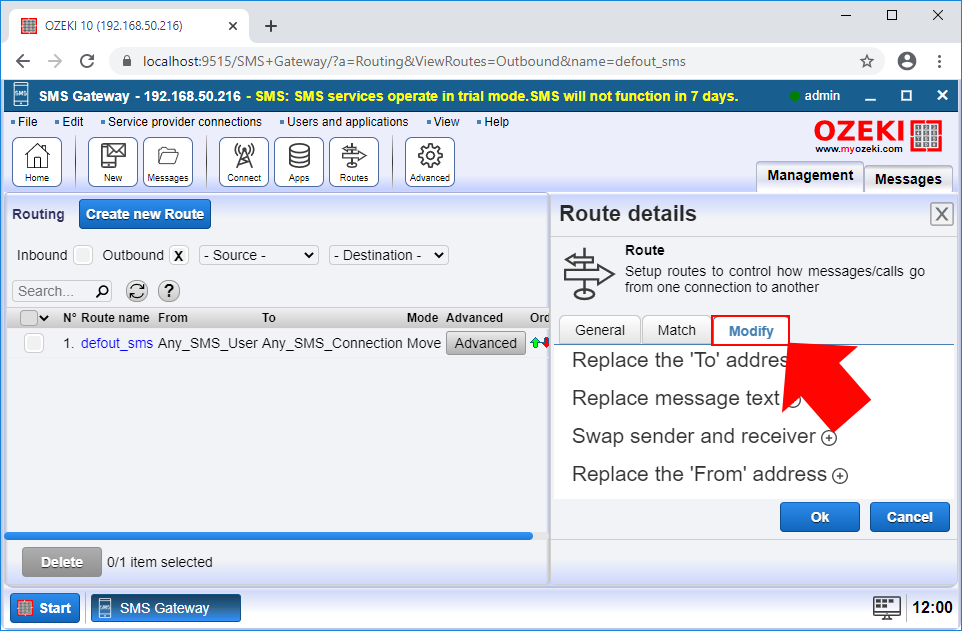
Here, you can see the setting menu of the routing rule. To be able to modify the messages on this route, you just need to select the Modify tab as you can see it in Figure 2.
Step 2 - Configure the message to add a postfix
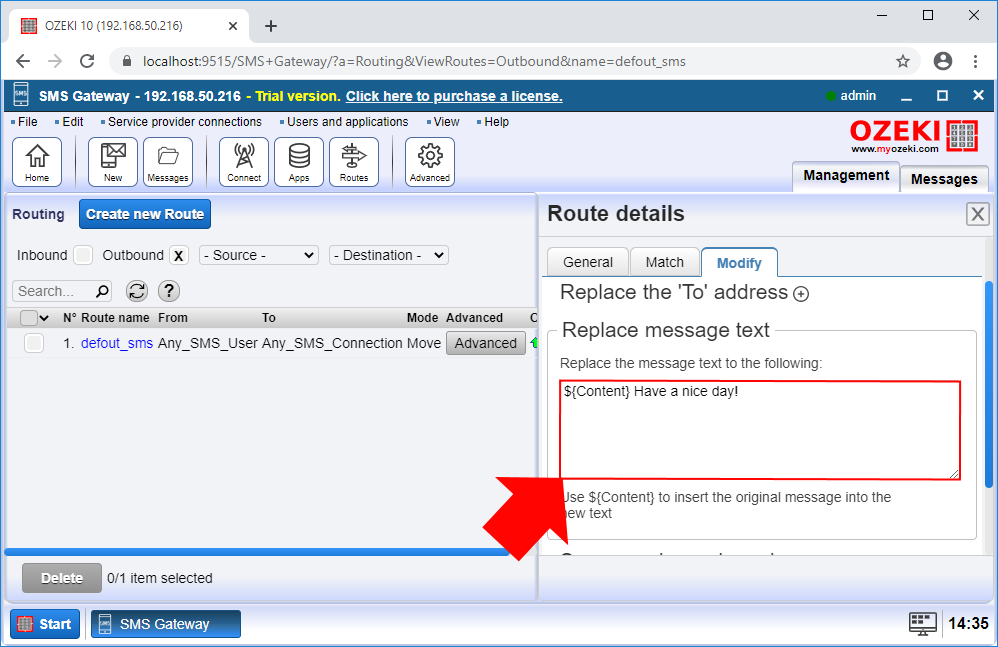
In the Modify menu, you have to select the 'Replace message text' submenu to be able to modify the message. To keep the original message, you can use the '${Content}' tag as in Figure 3. This tag represents the original message, so if you write something after that, the routing rule appends it to the original message. To save this setting, click on OK.
Step 3 - Send a test message
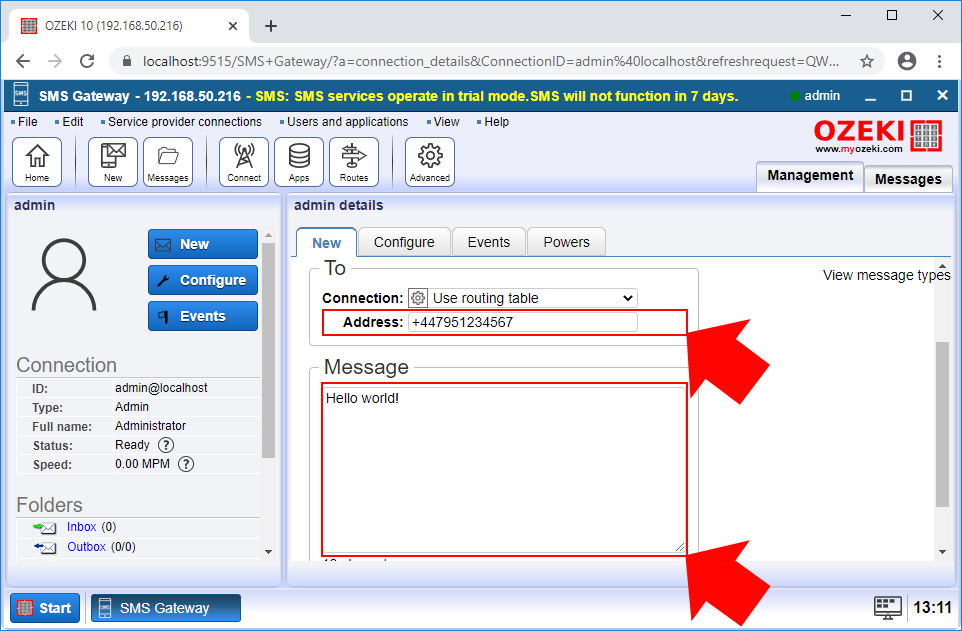
After you configured the outgoing routing rule, you just need to write a test message. For that purpose, you can set up a SMPP client, which will forward the message to the recipient. Here, you can learn how to set up a SMPP client connection. To write the message, just open the admin account, and like in Figure 4, just write a simple test message.
Step 4 - View the results in the event log
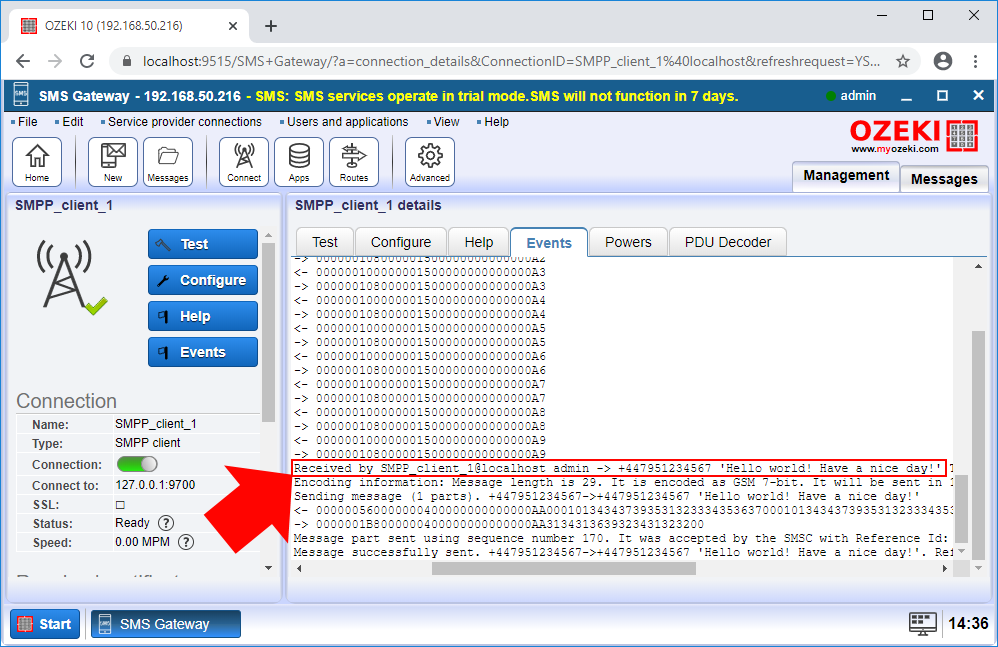
You can simply check if you have done everything correctly by just opening the SMPP client and here, select the Events tab. Here, you can see every event of the SMPP client connection. Figure 5 shows that the original text is merged with the text, that you wrote before so it will be sent together.
