How to send sms with an SMS REST api?
This tutorial explains how to use the sms rest api in Ozeki SMS Gateway. It will start with defining the term of what an sms rest api is and will move on to show you how to use it to access SMS services. We understand you will use these steps to construct a solution to serve important business users and business applications, so we take care to provide you with instructions that will help you create a high-quality solution. This guide requires standard knowledge of the http technology. You will be provided some important definitions, detailed step by step instructions and easy to understand examples. We hope you will enjoy it.
What is an SMS REST api?
An sms rest api is a http api application programming interface. REST (REpresentational State Transfer) uses the HTTP protocol (HTTPS) for conveying SMS messaging. We can use http apis to send sms or receive sms. One of the reasons an sms rest api is frequently used in business applications and http api services is because it is stateless, meaning requests cannot interfere with each other. Http apis are used by businesses because it is easier to use than a prescribed protocol like SOAP.
How to send SMS with the SMS REST API (Quick steps)
To send SMS with the SMS REST API:
- Add new connection in Ozeki SMS Gateway
- Install HTTP REST client connection
- Configure URL to SMS service
- Specify the Data fields
- Type the telephone number of the connection
- Test send SMS text message with REST API
- Check the test SMS message's status on the Events
- Review the received test SMS message on the phone
How to send SMS through a REST SMS Client
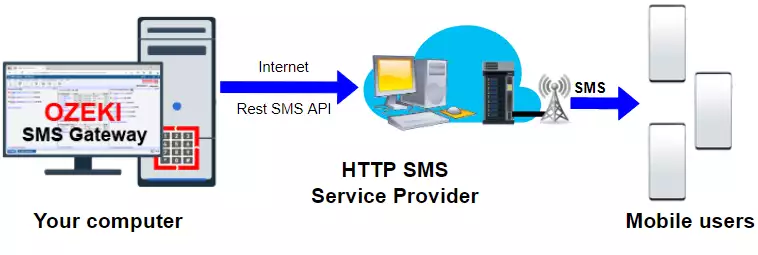
This SMS communication solution makes it possible to use your computer for sending SMS messages to any mobile phone. The solution consists of a computer with Ozeki SMS Gateway installed, an HTTP SMS service provider and the mobile users. The computer and the Ozeki SMS Gateway are responsible for configuring a message. The HTTP SMS service provider is responsible for sending the message to the mobile users. After compiling the message, the computer will submit the message for sending. The HTTP SMS service provider will get the submission and send the SMS to the provided address. (Figure 1)
How do you use the sms rest api?
This video tutorial will show you the steps on using the HTTP rest sms api. First add and configure a new HTTP rest client connection using Ozeki SMS Gateway. Then we enable the connection and send a text message from the test tab. When the message was successfully sent, it shows up int the Events tab, as well as on your mobile device.
Add a new connection
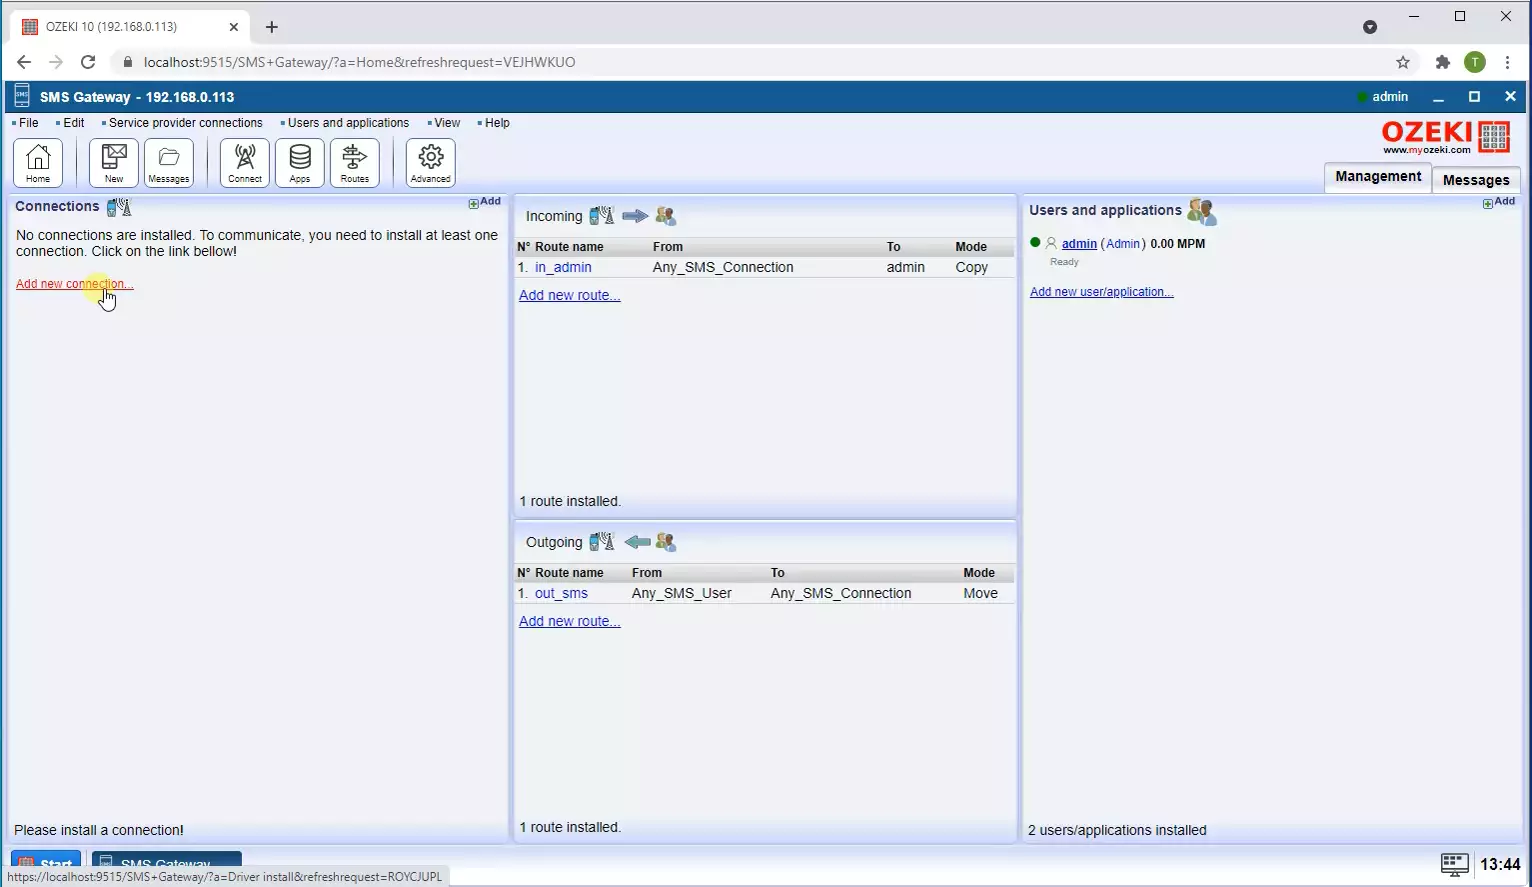
To begin the configuration, you have to have an installed connection. If you don't have one, you can install a new connection in the Ozeki SMS Gateway Dashboard's Connections panel, located on the left-hand side. Here you have to select the Add new connection... install link to start the installation. (Highlighted in Figure 2)
Install HTTP REST client
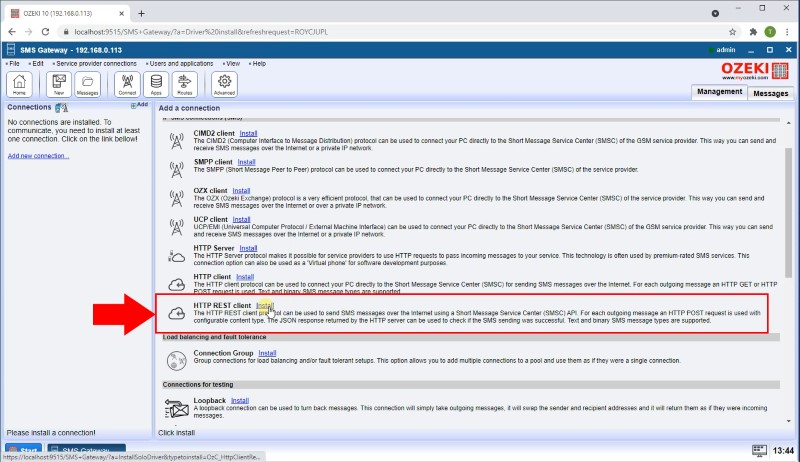
In the Add a connection list you can find the IP SMS connections install section where you have several options to select a connection. Select the HTTP REST client install item from this list with the install link. This will allow you to configure the SMS service. REST is considered to easier to work with than other solutions. (Figure 3)
Configure URL and Data fields
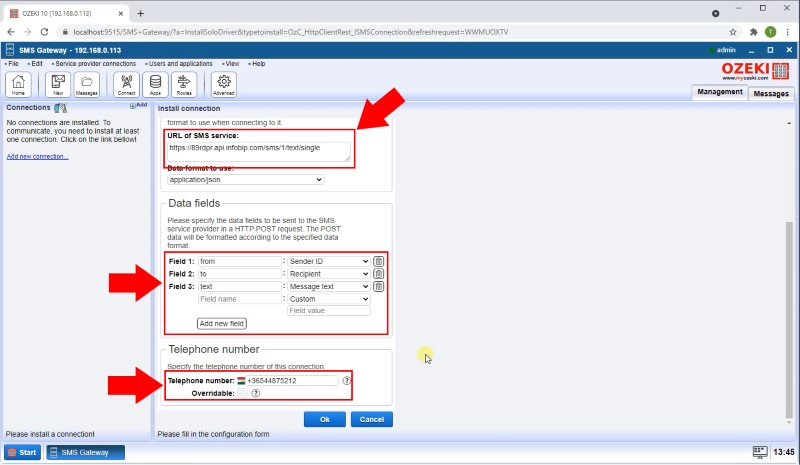
To configure URL and Data fields properly, you have to give a unique connection name with the right format, enter the URL of the SMS service and specify the Data fields. These pieces of datas will be formatted according to the data format that you select. Next, give the connection's telephone number in the Telephone number textbox. Finally, click on add new header and enter a name and the value. You can add new Data field with the Add new field button. Click the Ok button to confirm the configuration form. (All highlighted in Figure 4)
Send test SMS
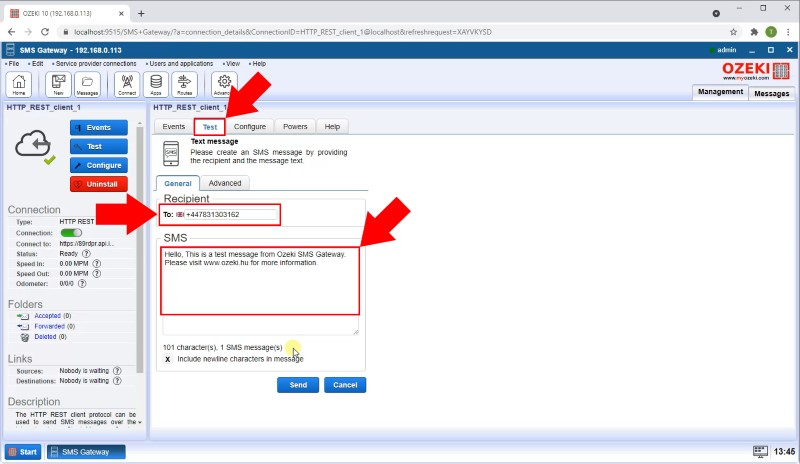
In the HTTP_REST_client_1 details page, select the Test tab page. The General tab allows you to give the recipients phone number who will get the test message in the To textbox. You can specify the test message in the SMS group box. You can write whatever you want, and it will be sent as a regular SMS to the given phone number. (Shown in Figure 5)
Check that the message was sent successfully
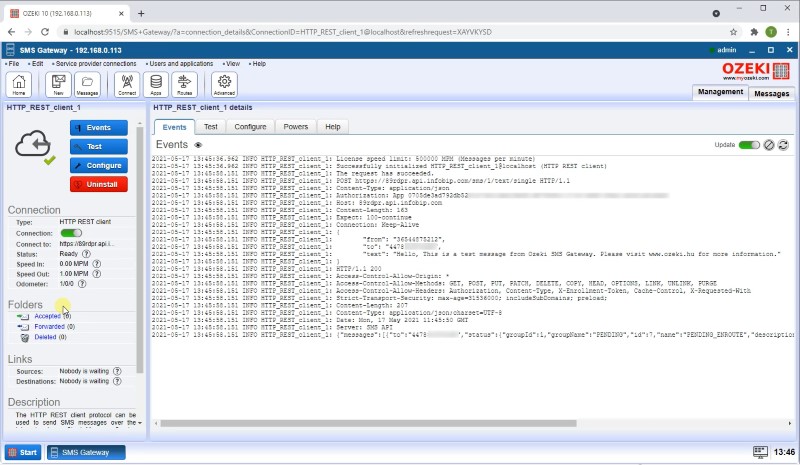
Switching to the Events tab allows you to read the event log where you can check the connection's work in a written form. If you read it carefully you can see that the previously sent test message has been delivered successfully. (Figure 6)
Check your phone
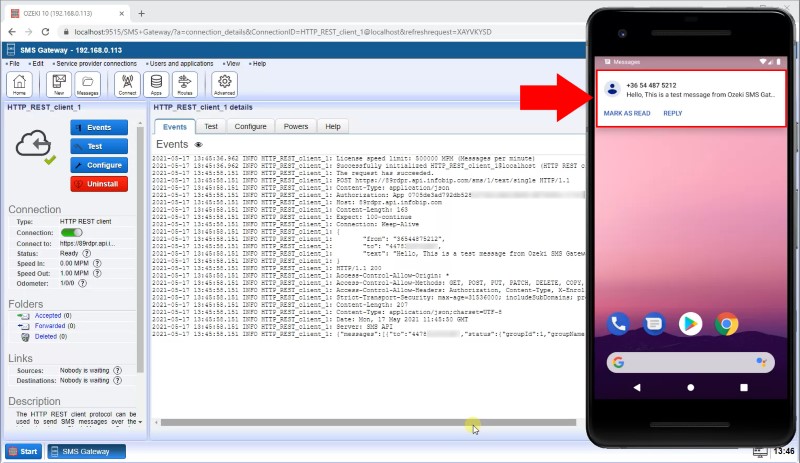
The final step is to check the phone with the provided phone number. If you did everything in the right way you will see that the text that you wrote in the Ozeki SMS Gateway came as an SMS. This indicates that every step of the configuration is good, and you can start sending messages with the REST SMS client. (Figure 7)
Conclusion
As you could see in this guide, sending messages with HTTP REST is easy to learn. If you are interested in sending SMS from your computer, this solution is perfect for you. REST is fast, uses less bandwidth than SOAP and easy to integrate it with your existing websites. Installing an SMS REST connection is available in Ozeki SMS Gateway.
Do not finish your work here, learn about SMPP and OZX connection in our website.
Now your next thing to do is to download Ozeki SMS Gateway and start working!
