SMS modem installation (Ozeki 4G SMS Modem)
This article shows you how to send SMS wirelessly using an SMS modem. The article explains these steps using the Ozeki 4G LTE SMS Modem. The Ozeki 4G LTE SMS Modem is high speed professional wireless modem that can be connected to a PC using an USB port. It is an excellent choice for most SMS solutions. It operates at 115200 baud and features excellent support with Ozeki SMS Gateway.
What is a 4G modem?
A 4G modem is a hardware device designed to make connections to cellular networks. After connecting to the network, you can use it to send and receive SMS messages. It is a great choice for created automated text messaging services like SMS alarms or sending bulk marketing sms messages.
How does sending SMS through a 4G modem work
Sending SMS from a 4G modem requires the modem itself, a computer, Ozeki SMS Gateway and the recipient's mobile device. The connected computer will compile the text message for the SMS message using Ozeki SMS Gateway. It only needs the address and the message text. The computer will use the modem to send the SMS message to the service provider. The service provider will forward the text message to the recipient's phone. (Figure 1)

Compatibility with Ozeki SMS Gateway
The Ozeki 4G Modem is the perfect choice to use with Ozeki SMS Gateway. When we built the modem, we paid extra attention to compatibility with Ozeki SMS Gateway and other Ozeki Services, as well as high speed, small form factor and ease of setup. We also provide up to date information and setup guides for all our devices.
How to send SMS with a 4G modem
To send SMS with a 4G modem:
- Insert the SIM card into the modem
- Plug the antenna into the modem
- Connect the modem to your PC with USB cable
- Launch the Ozeki SMS Gateway
- Run the sms modem autodetection
- Specify the recipient phone number
- Write the content of the SMS message
- Click on Send to send the SMS
- Review the test SMS message you sent
Ozeki 4G LTE SMS Modem setup (video tutorial)
In this guide video, we will show you how to set up the Ozeki 4G modem. For this setup you need the Ozeki 4G modem, a SIM card, two antennas and a USB cable. First, we insert the SIM card into the modem, then we connect the antennas to the modem. Now all we have to do is connect the modem to the PC. Once the modem is successfully connected to the PC, the power led will light up to indicate that it is working.
More information about the product
Get the parts that you need to connect the modem successfully
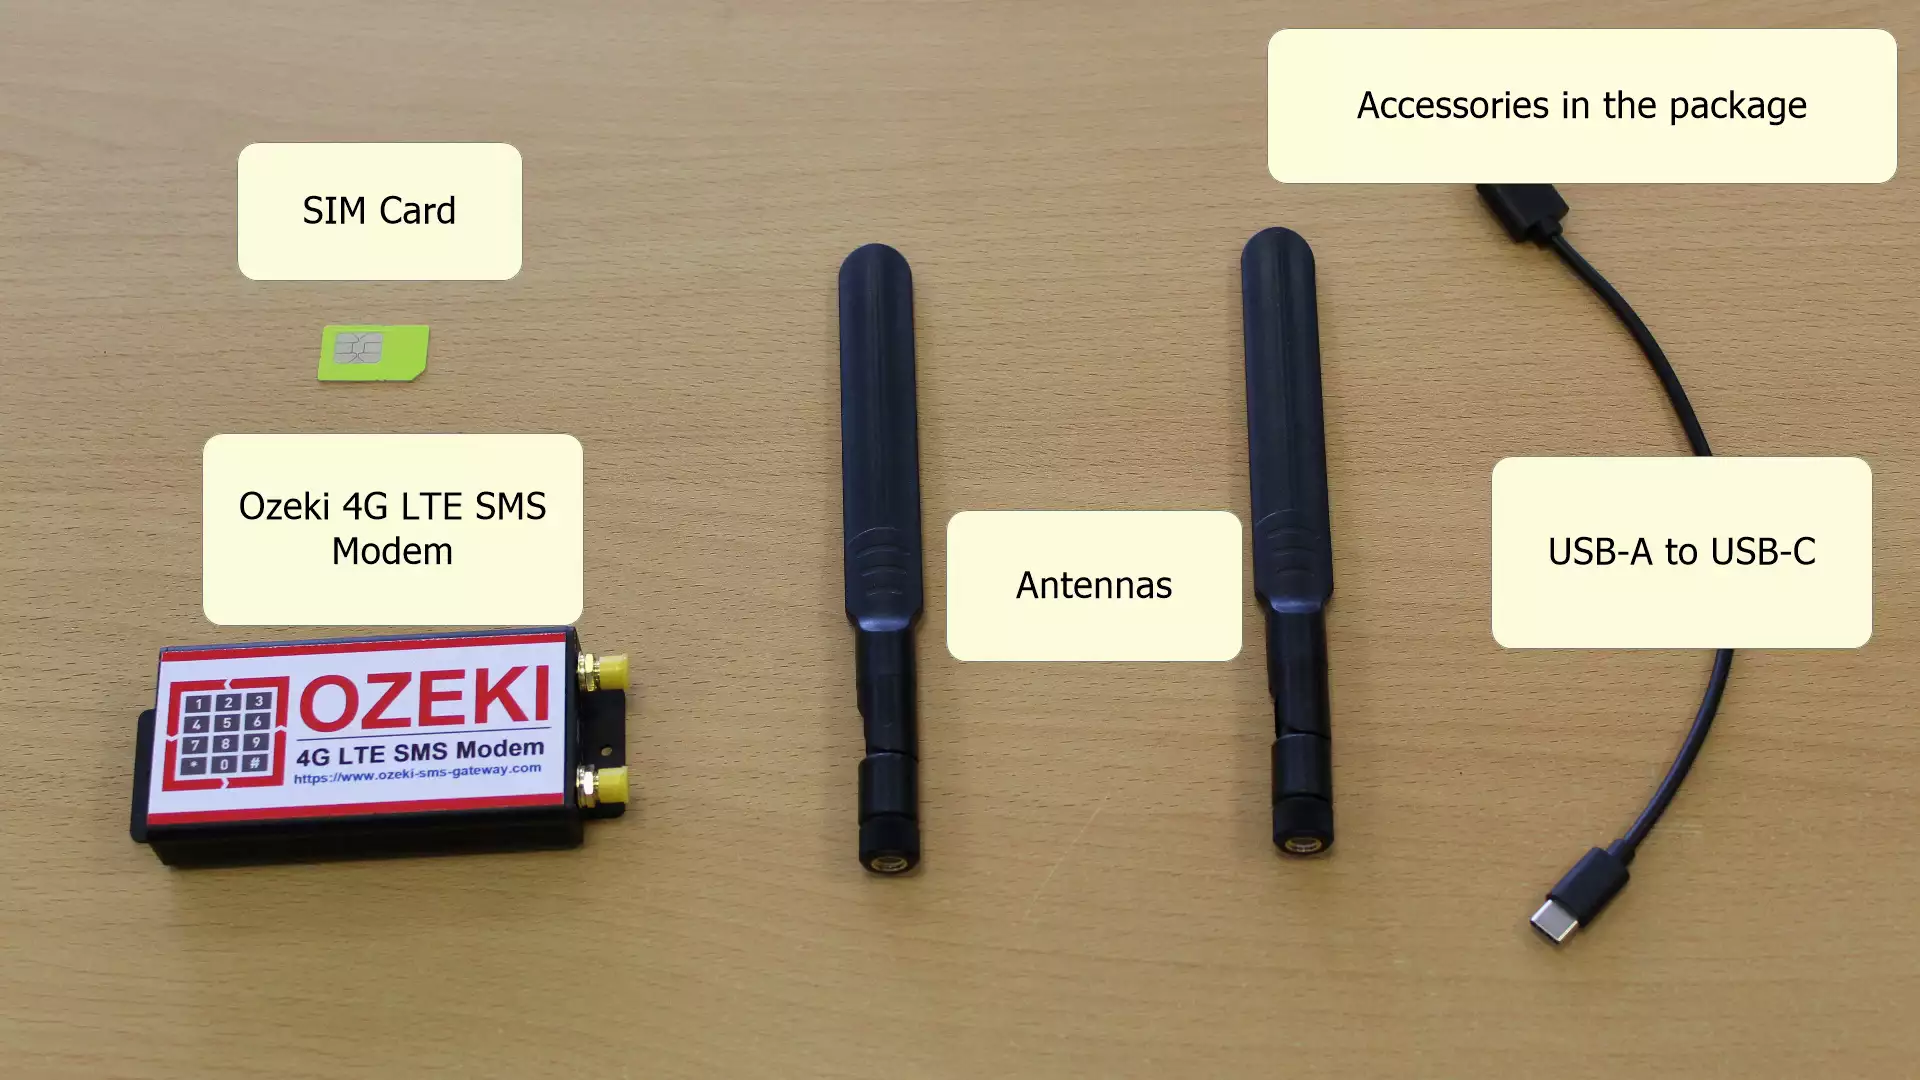
To connect the modem to a PC, you'll require the following components, (Seen on Figure 2) a SIM card, two antennas, a USB cable, and the modem itself. Make sure that you have all necessary accessories for utilizing the modem, as even the smallest details are significant.
Insert the SIM card into the modem
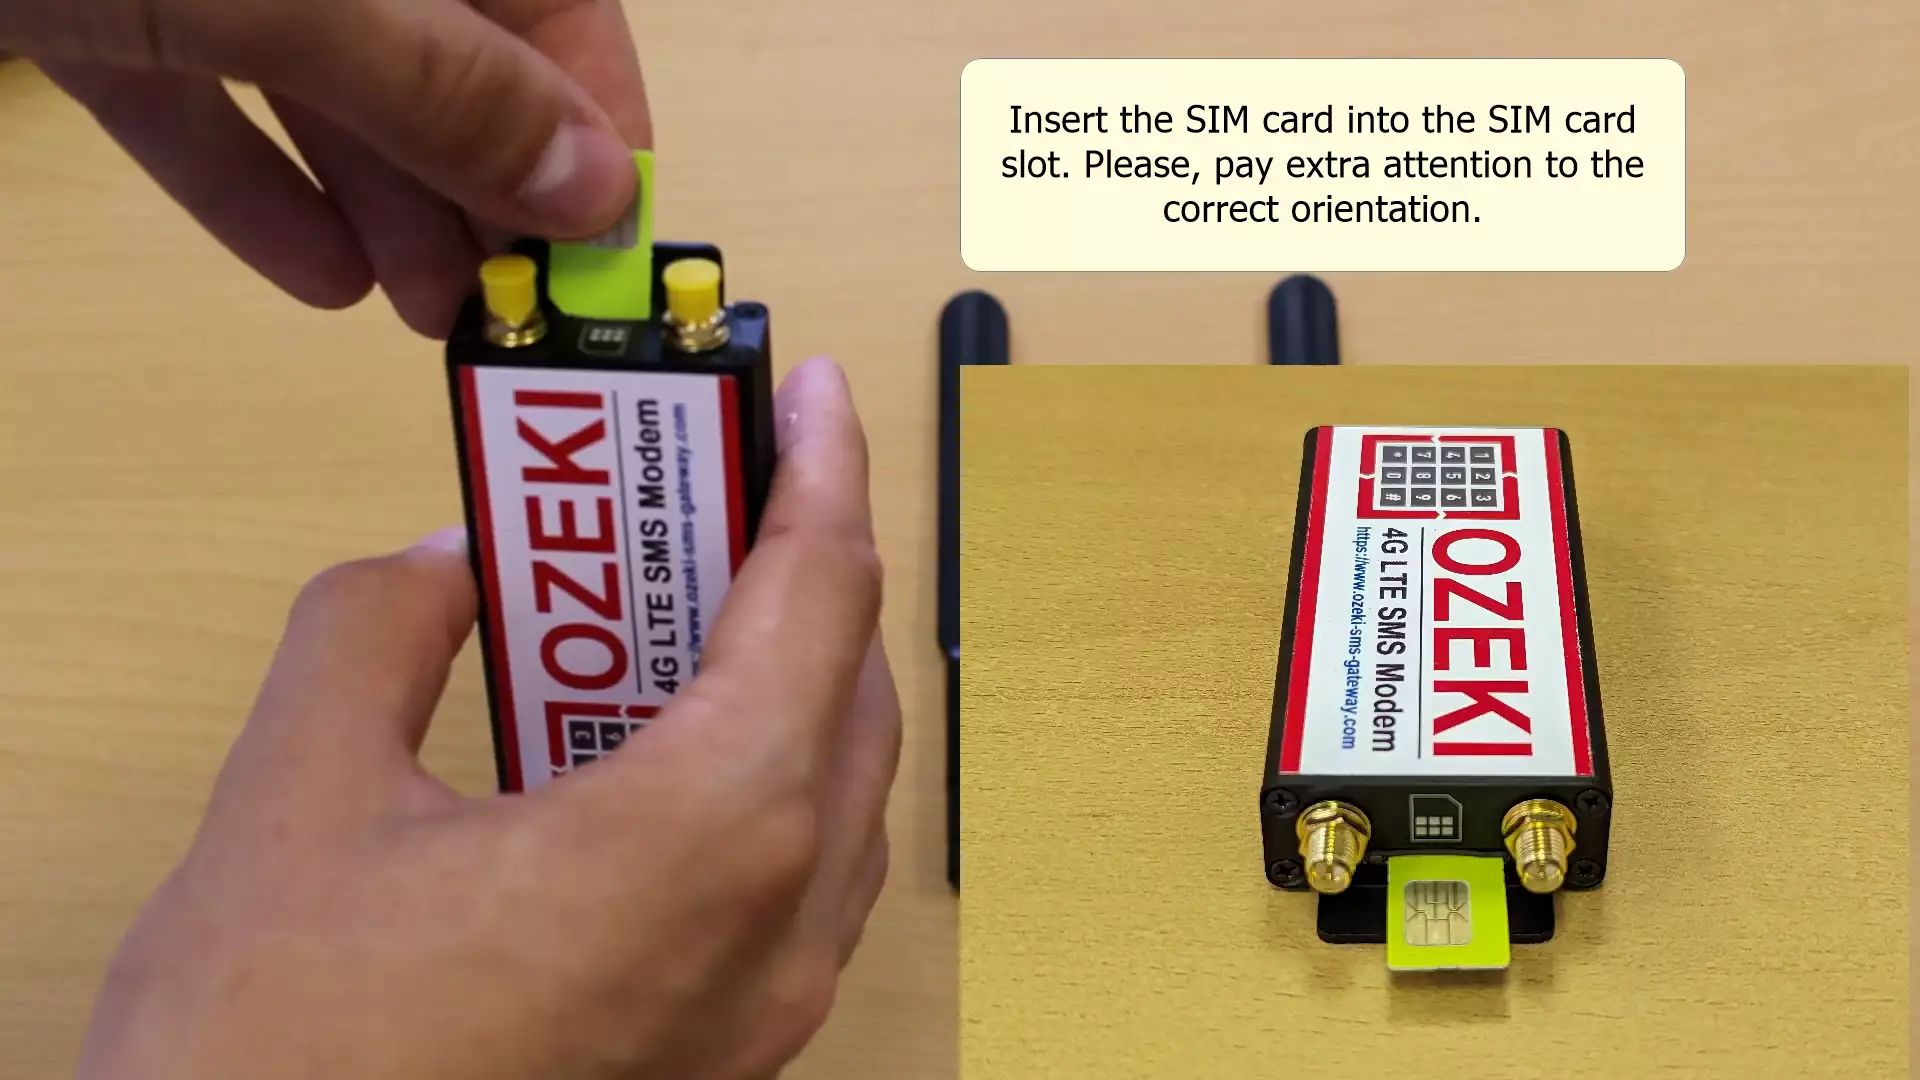
Begin by inserting the SIM card into the modem, which is the initial step in the process. This action closely resembles inserting a SIM card into a mobile phone. The SIM card serves to establish the connection between the modem and the network. (Illustrated in Figure 3)
Important settings for SIM card
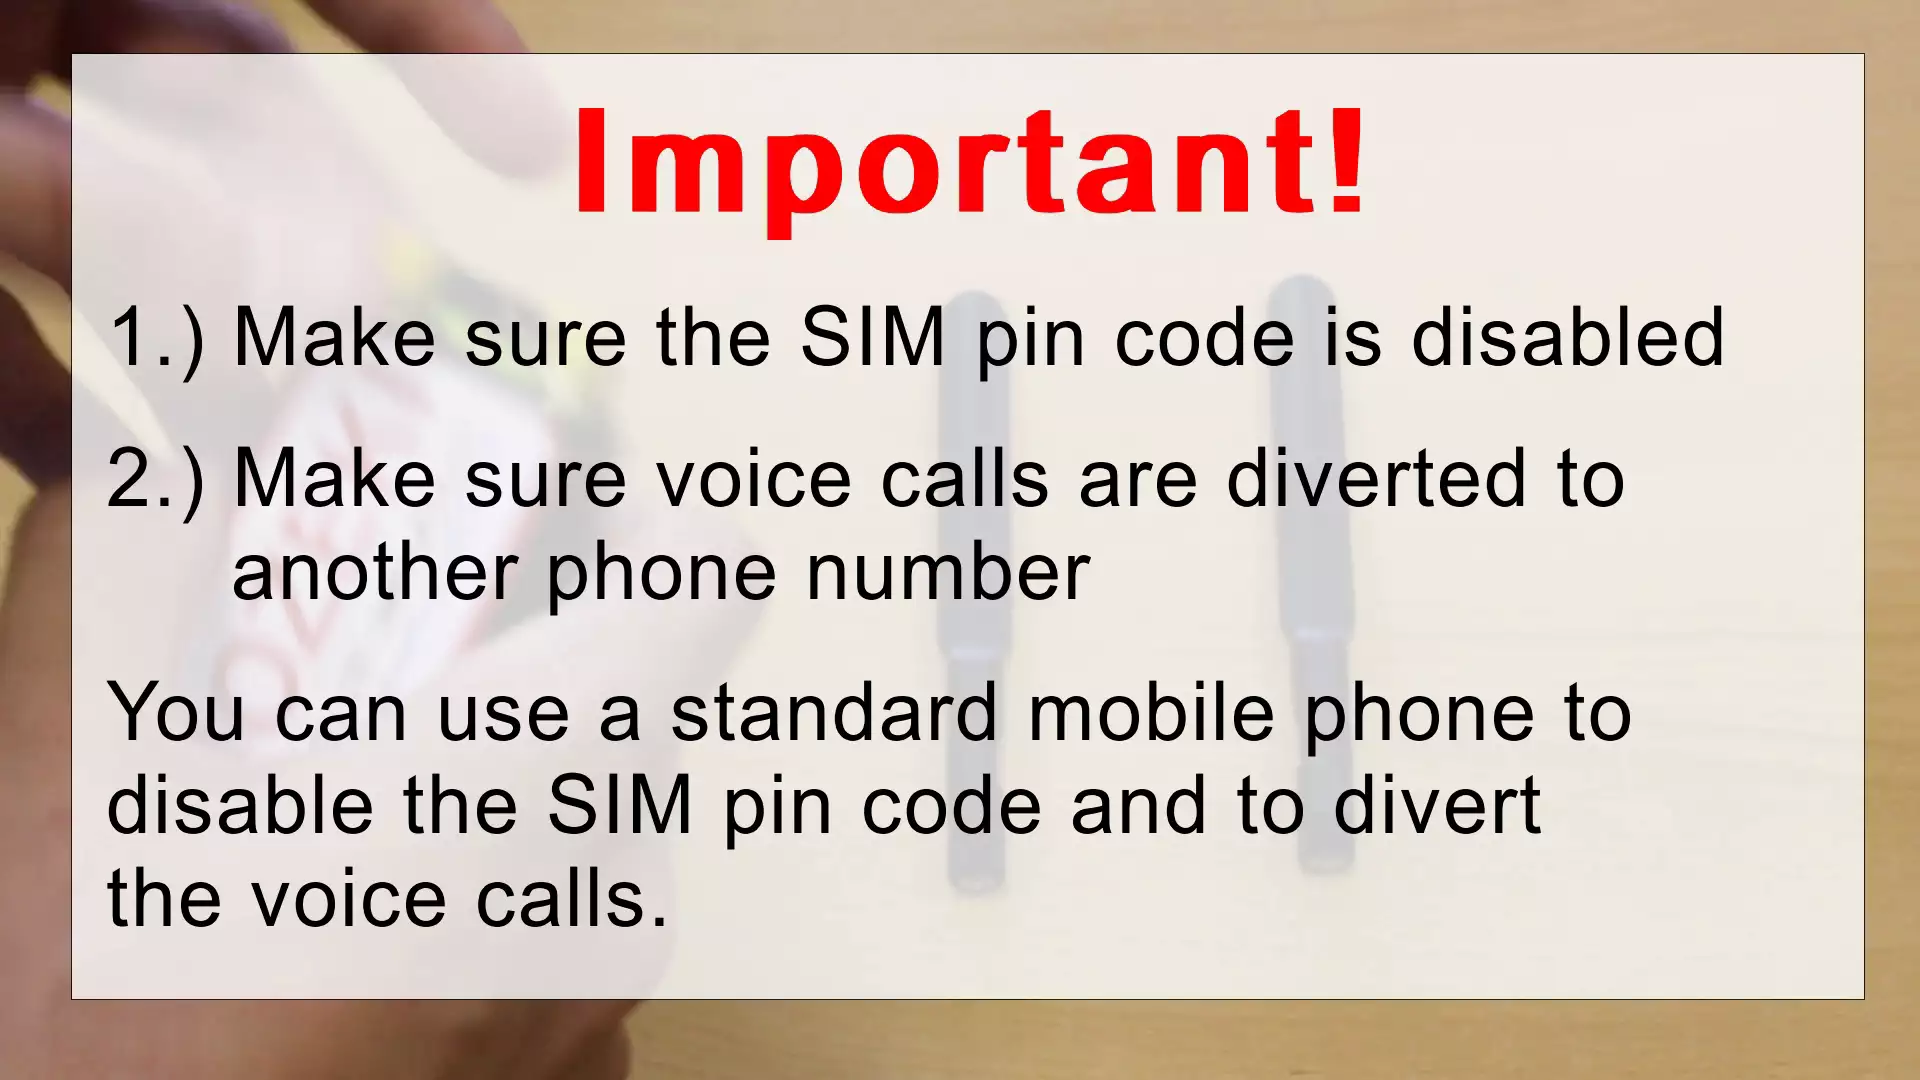
The settings outlined here are very important. Failing to complete these steps will result in the incompatibility of your SIM card with Ozeki 4G Modem. It's crucial to disable your PIN code and divert phone calls to an alternate number. These actions can be performed on a conventional mobile phone (Refer to Figure 4).
Connect the antenna to the modem
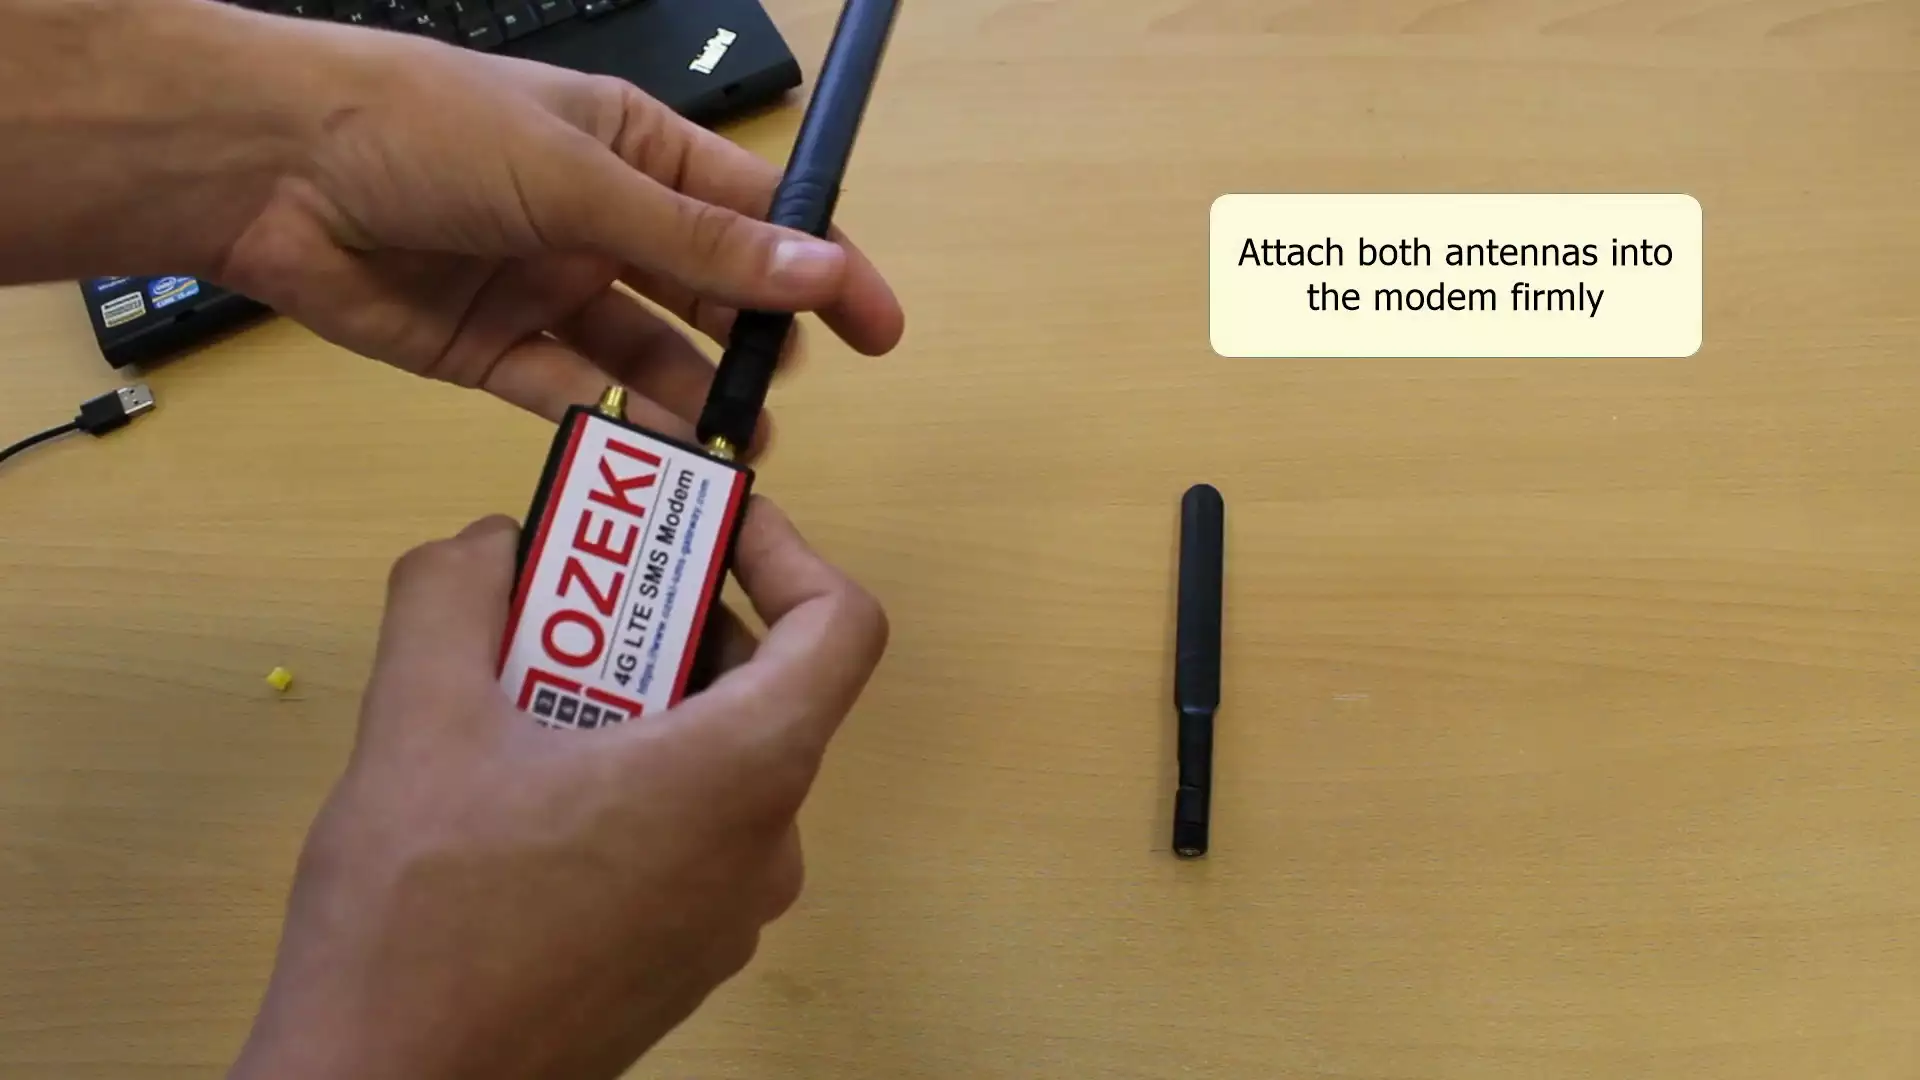
Once the SIM card is inserted, proceed to attach the antennas to the modem. Ensure proper and accurate connection for optimal performance. The antenna's role involves both signal transmission and reception. (Visualized in Figure 5).
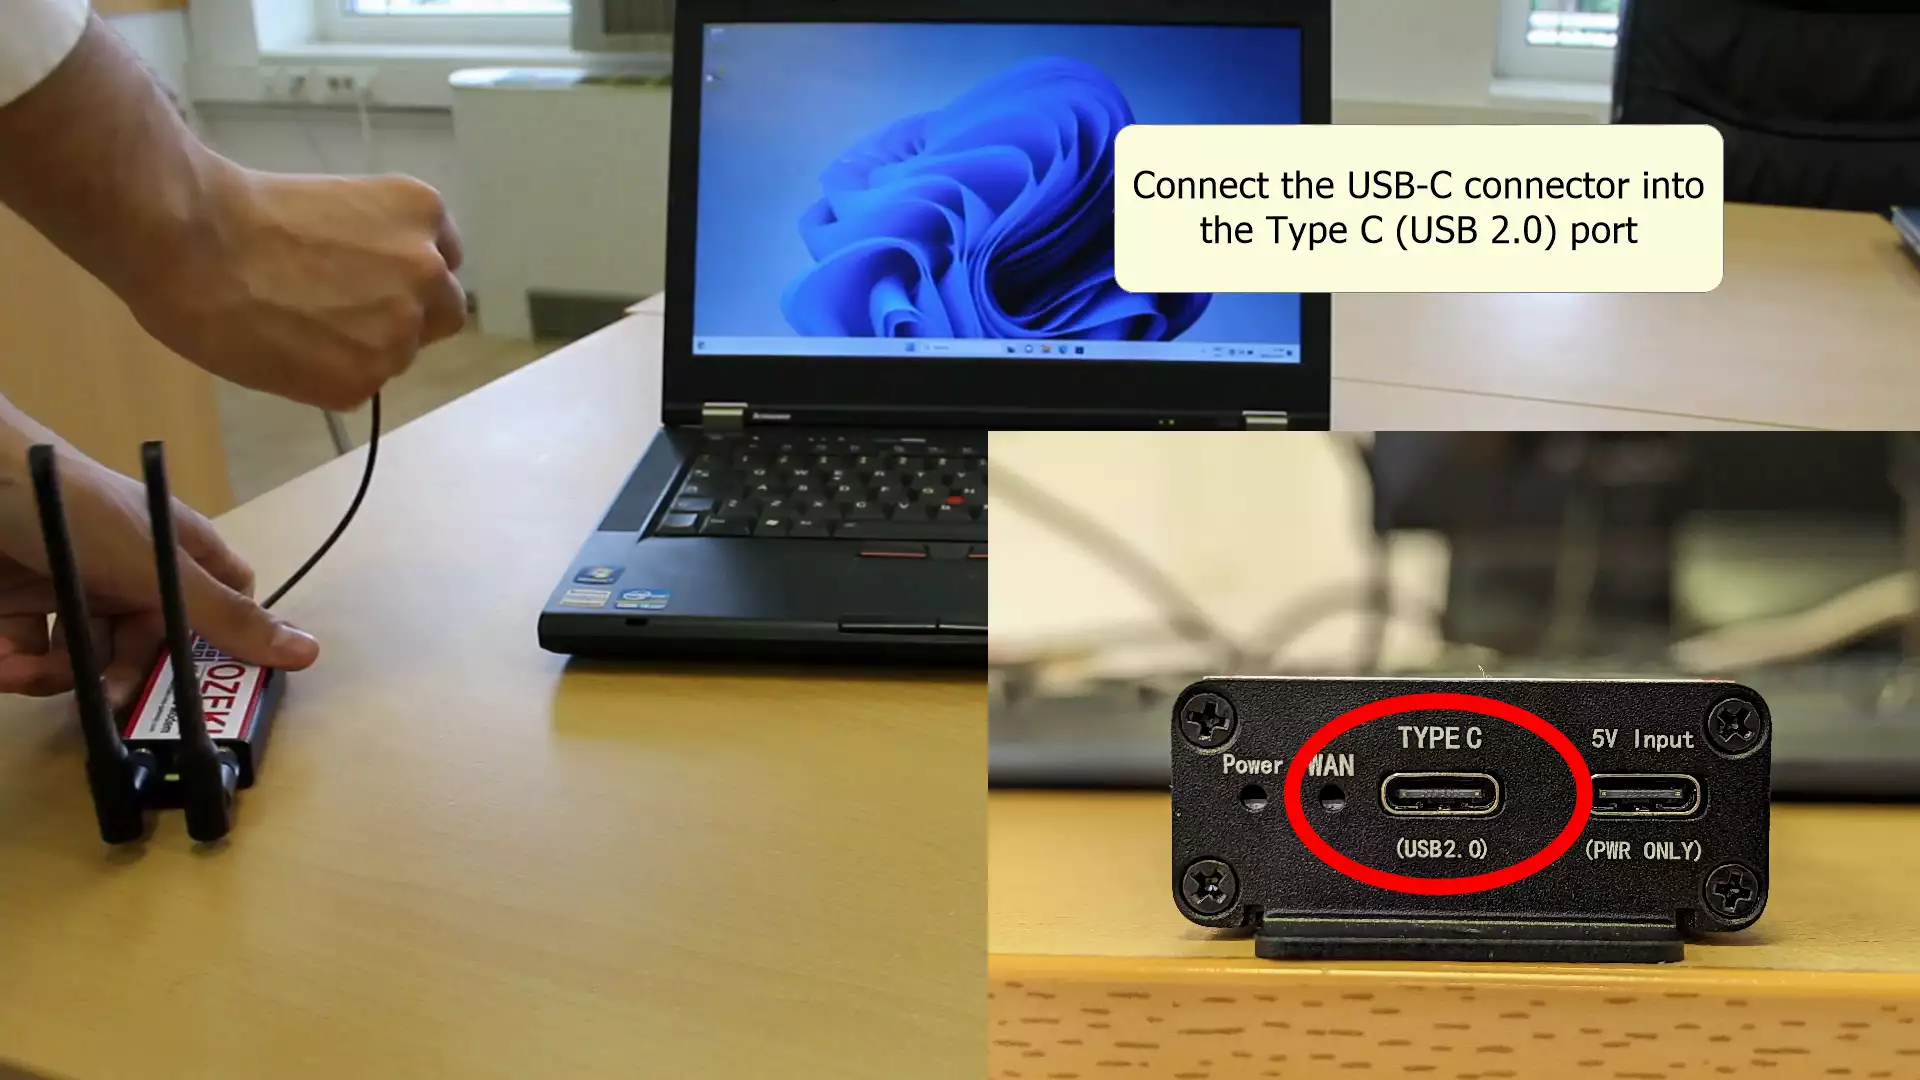
Insert the USB cable into the modem
The next step is to insert the USB cable into the modem. This action establishes a connection between the modem and your computer. It is recommended to employ a fully functional cable to prevent any potential disconnections. (Refer to Figure 6).
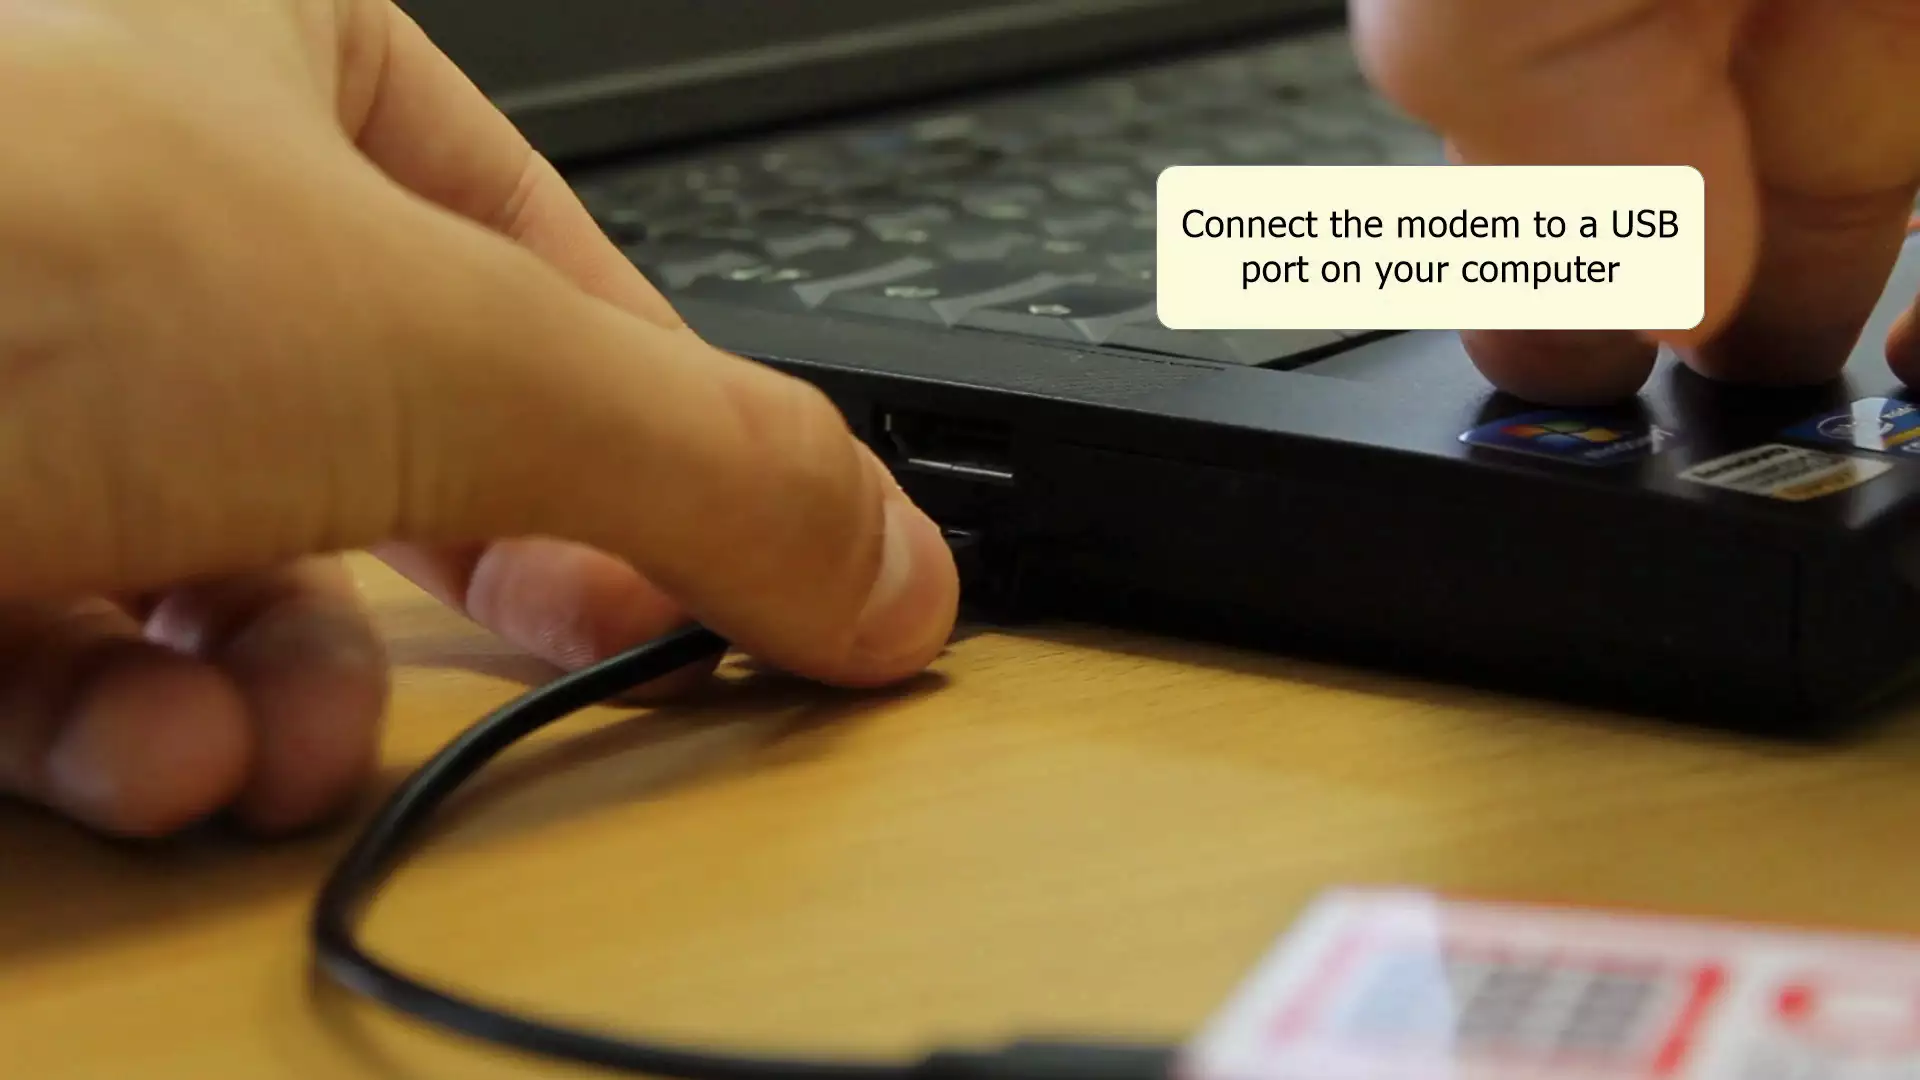
Plug the USB cable into your computer
Finally, attach the opposite end of the USB cable to your PC. Insert it into your computer's port. (As depicted in Figure 7).
Ozeki 4G LTE SMS Modem Software setup (video tutorial)
In this video you will learn how you can set up an Ozeki 4G LTE SMS Modem to send text messages (SMS) using a USB cable. For this setup, you need to have a connected Ozeki 4G Modem and Ozeki Software Platform installed. We will install the drivers and use Ozeki SMS Gateway to install a new SMS Modem to send our first test message. Once we send the message we check it on our recipient device.
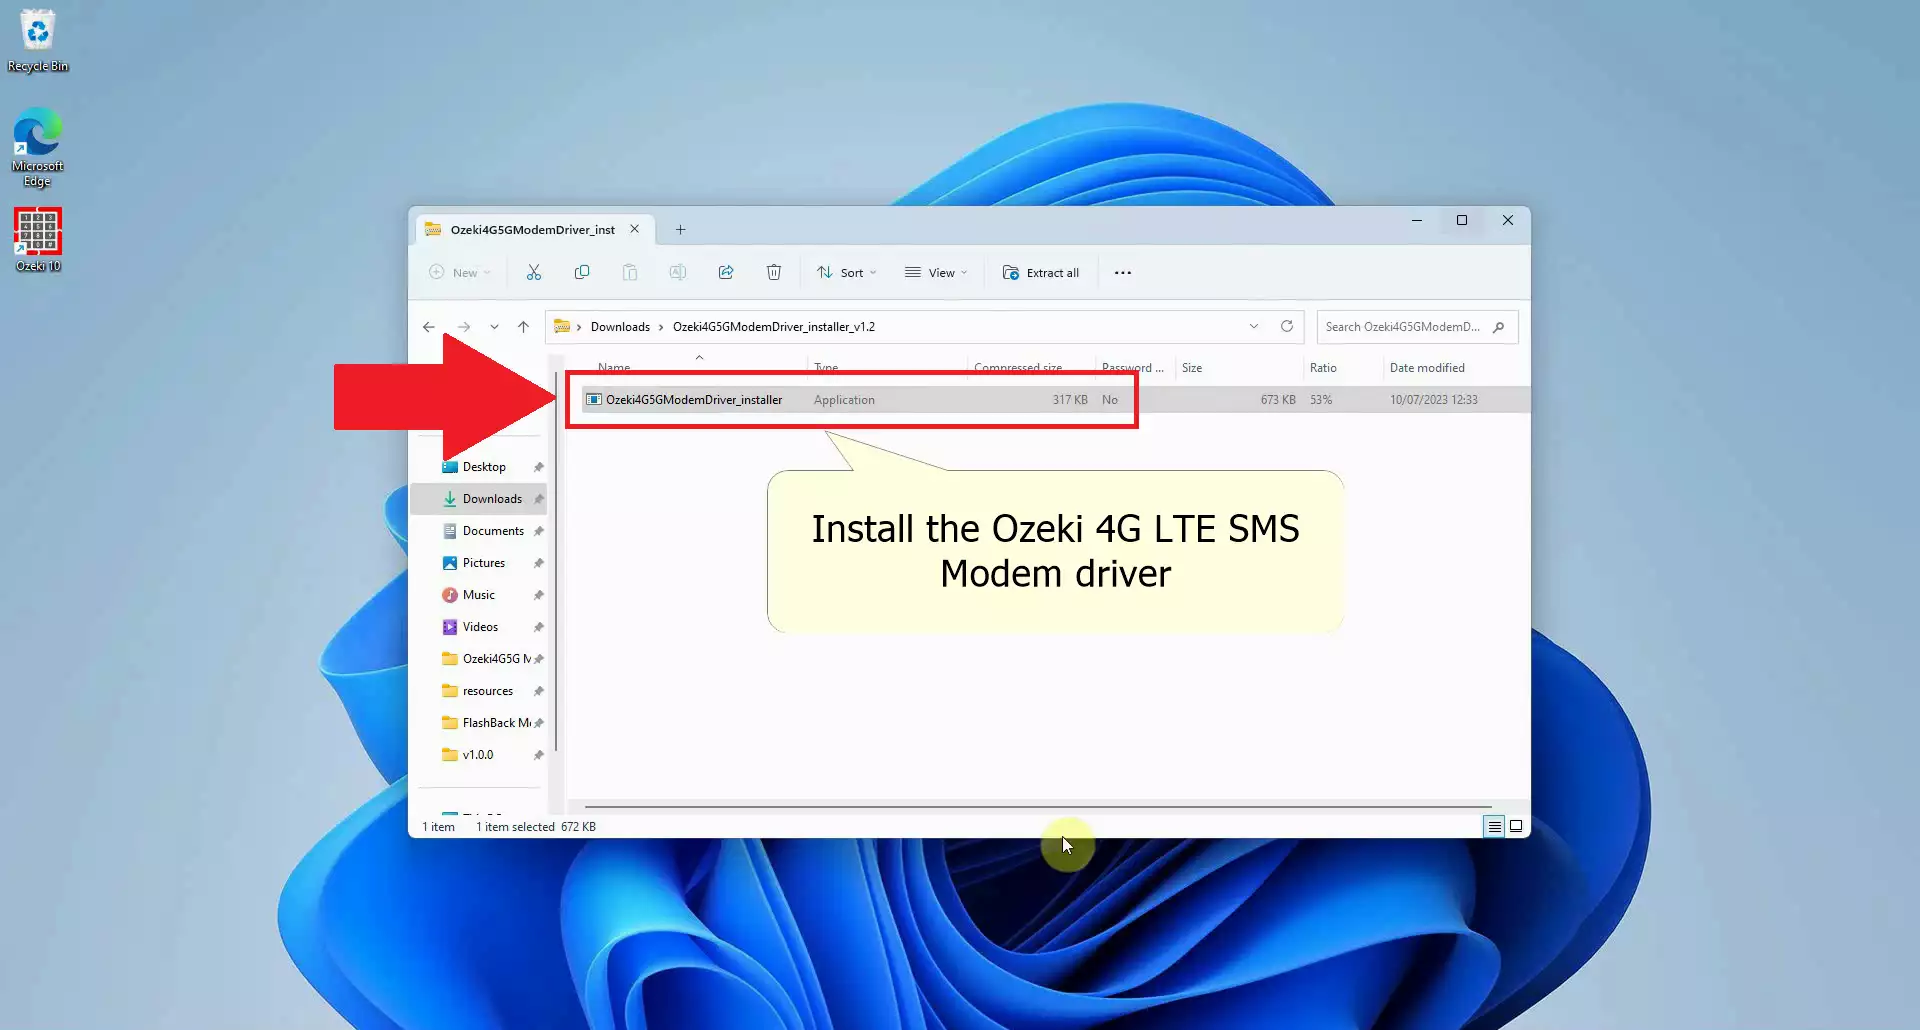
Install the Ozeki Modem Driver
To install the Modem Driver, access the folder where the downloaded file is located. Unpack the downloaded files into a new folder and locate the Driver Executable File. Start the installer by double-clicking on it; if prompted for Administrator rights, click on Allow. (Refer to Figure 8 for an example).
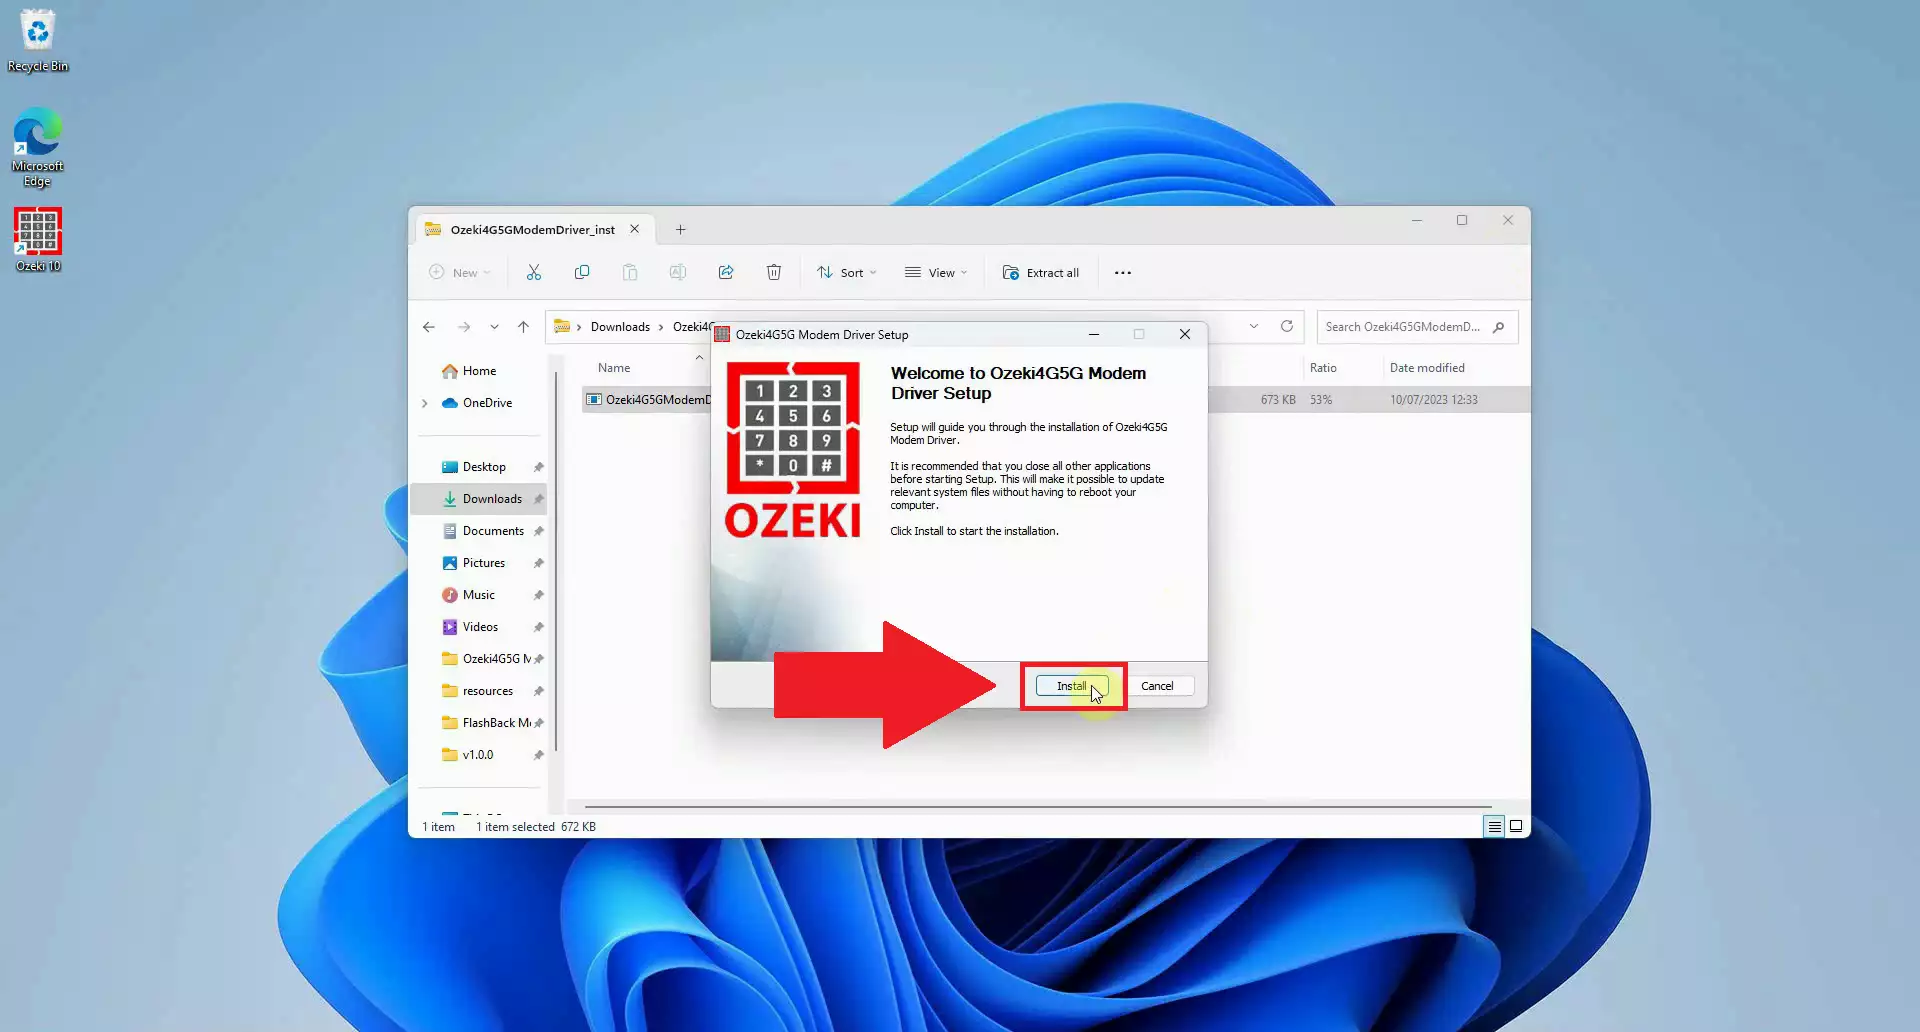
Proceed with Installing
To start the driver installation, after opening the installer window, simply click the Install button and patiently wait for the completion of the install. Once the installation is finalized, click the Finish button to conclude the setup procedure. (Shown in Figure 9).
Open Ozeki SMS Gateway App in Ozeki Software Platform
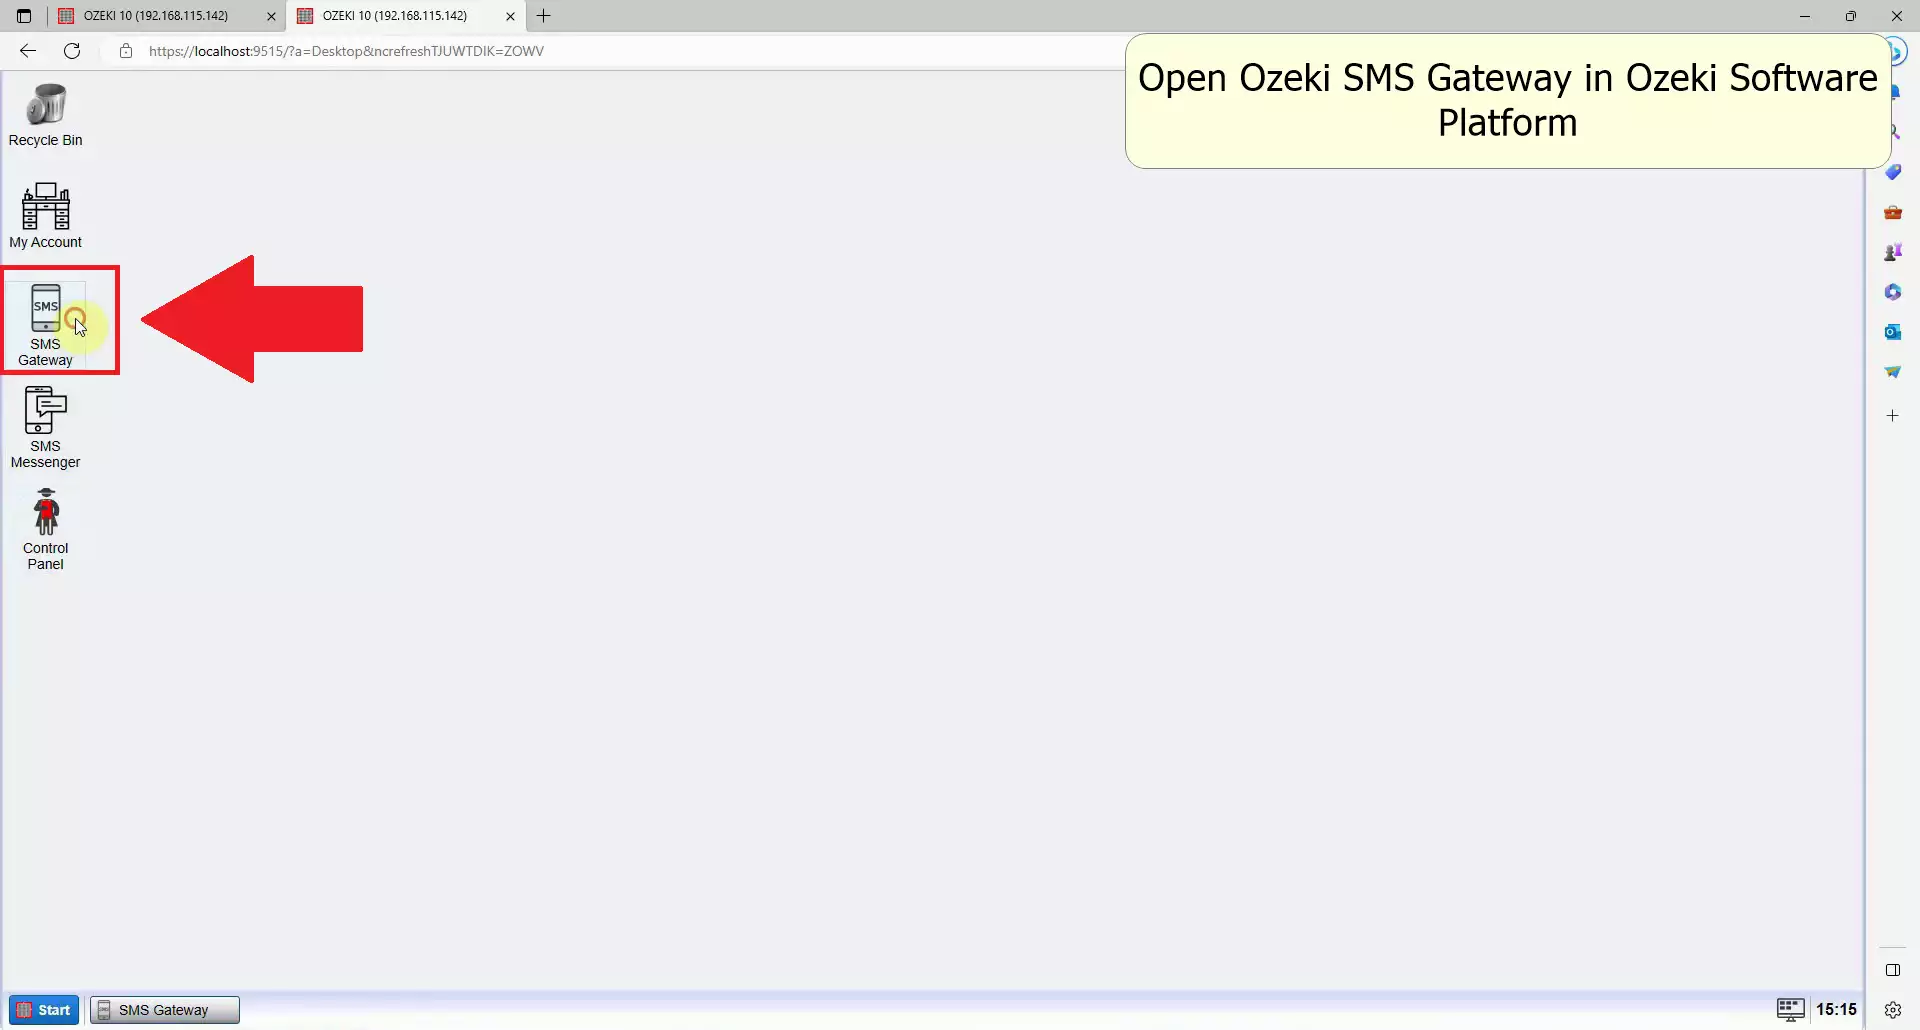
To launch the Ozeki Software Platform, access the search feature within the Windows Taskbar. Input Ozeki 10 and select the corresponding application. The software is supposed to start within a brief period. Within the Ozeki Software Platform, navigate to the Ozeki SMS Gateway. Typically located on the left side, it has various default apps. Locate and open the SMS Gateway application, identifiable by a phone icon with "SMS" text. This will start the SMS Gateway Application. (Refer to Figure 10).
if you have not yet downloaded Ozeki Software Platform, you can download it here: Ozeki Installer Download Page
Add a new connection
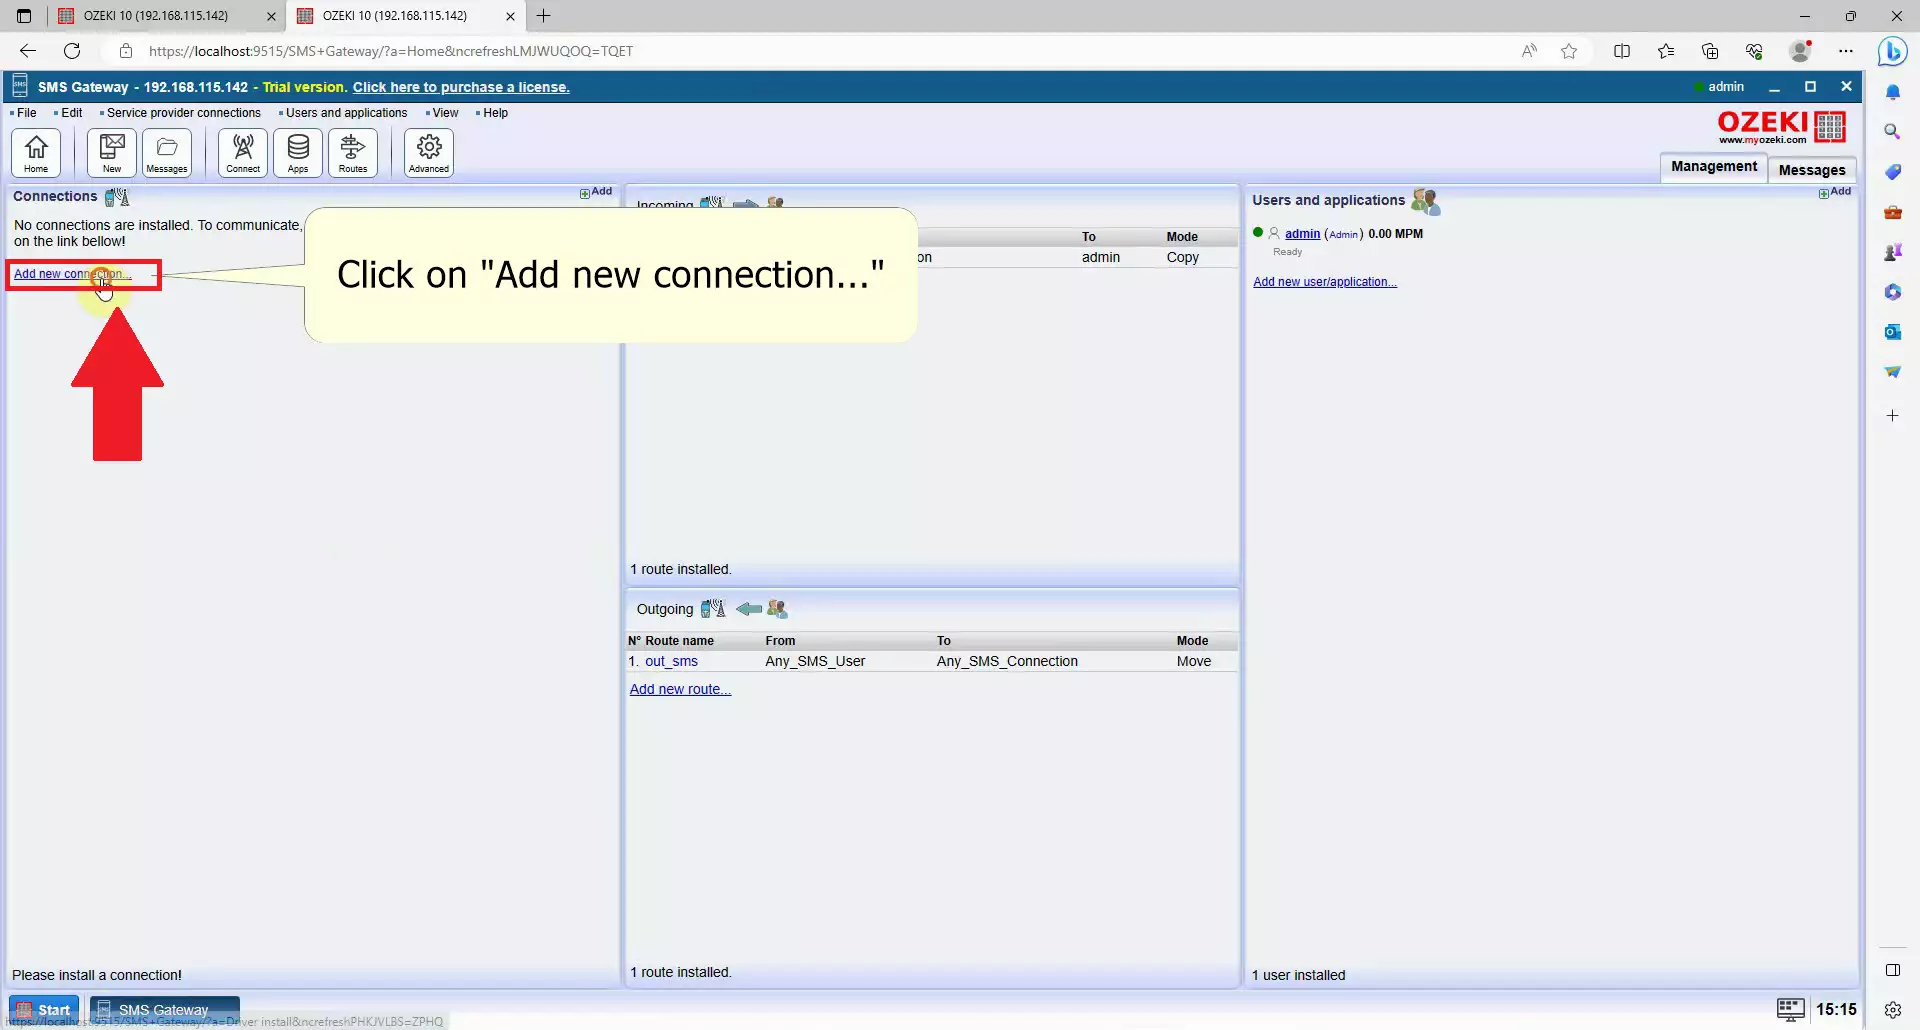
To establish a fresh connection in Ozeki SMS Gateway, locate the add new connection link within the Connections panel on the left-hand side. Click on it to unveil the page containing the connection list, where you can configure an SMS modem. (Visible in Figure 11).
Install a new SMS Modem
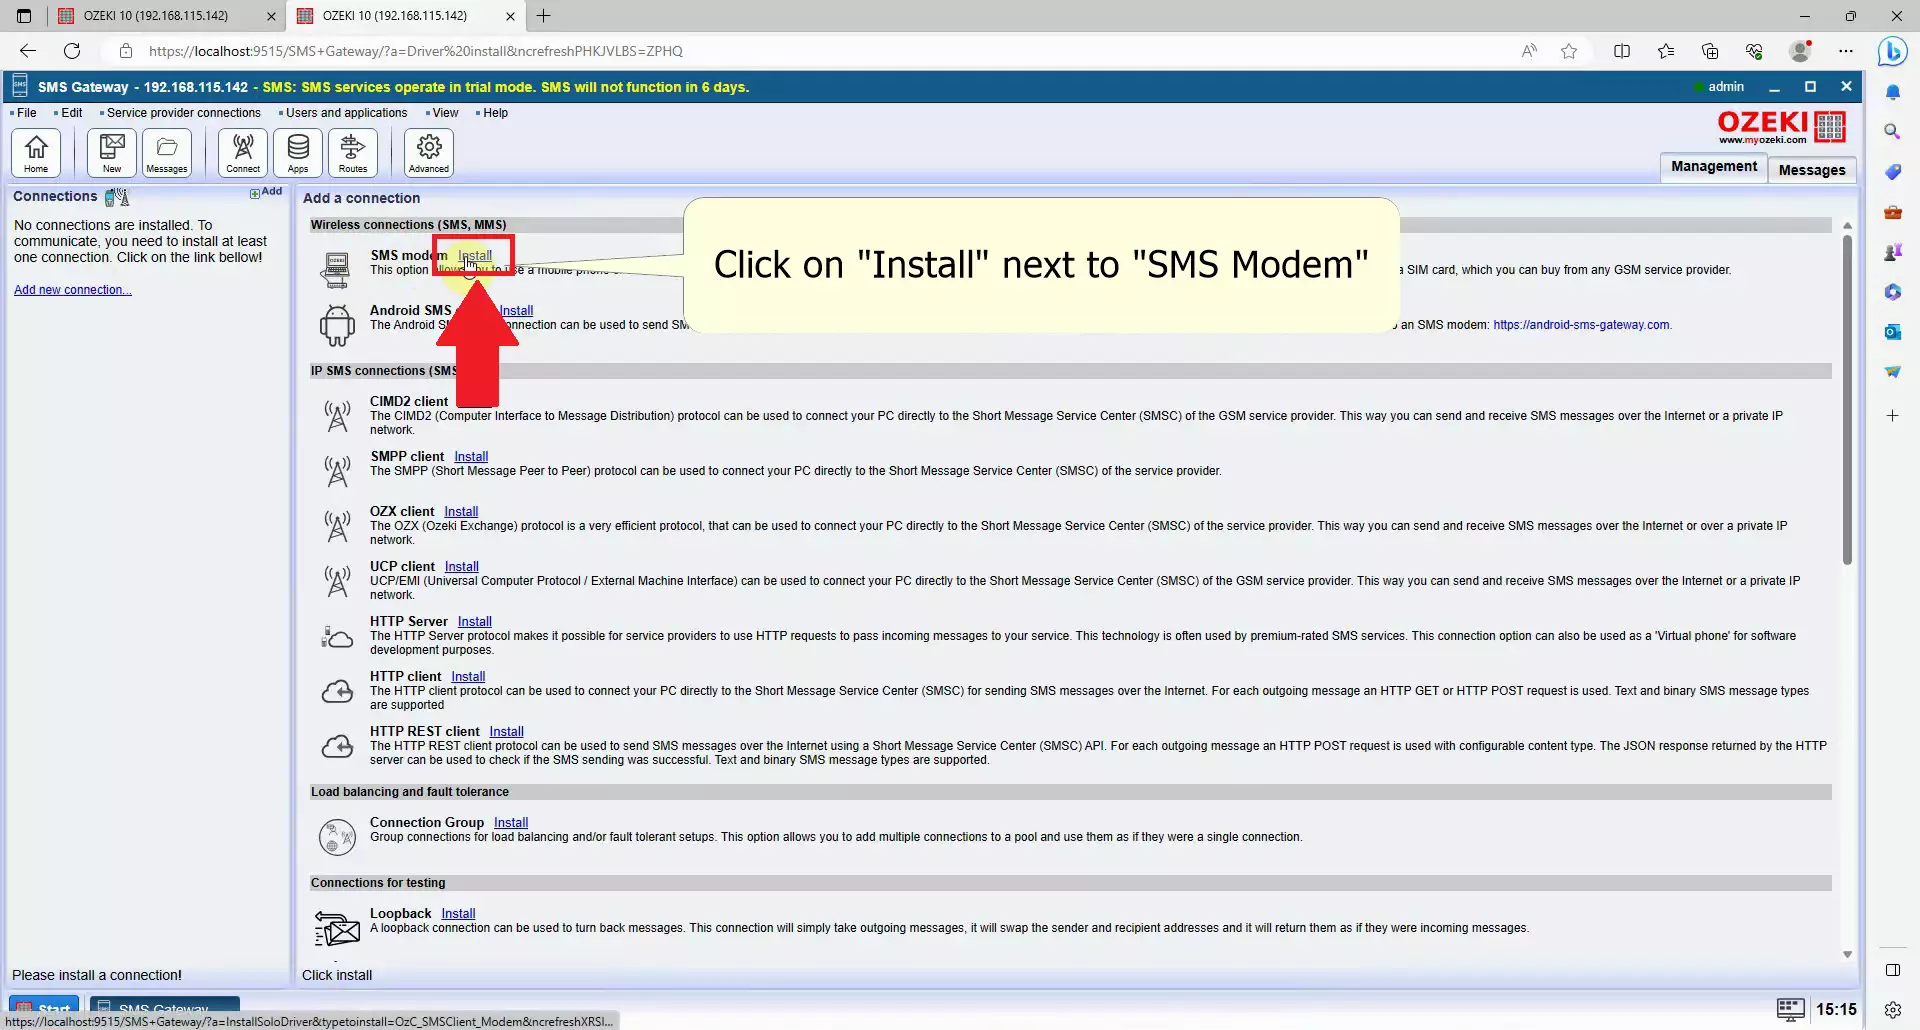
In the next window, you will find a list of available connections you can establish within the SMS Gateway application. Locate the Wireless connections install list and choose the SMS modem installation item. Click on the Install link, that will let you install a new modem in Ozeki SMS Gateway (Exemplified in Figure 12).
Select the Port
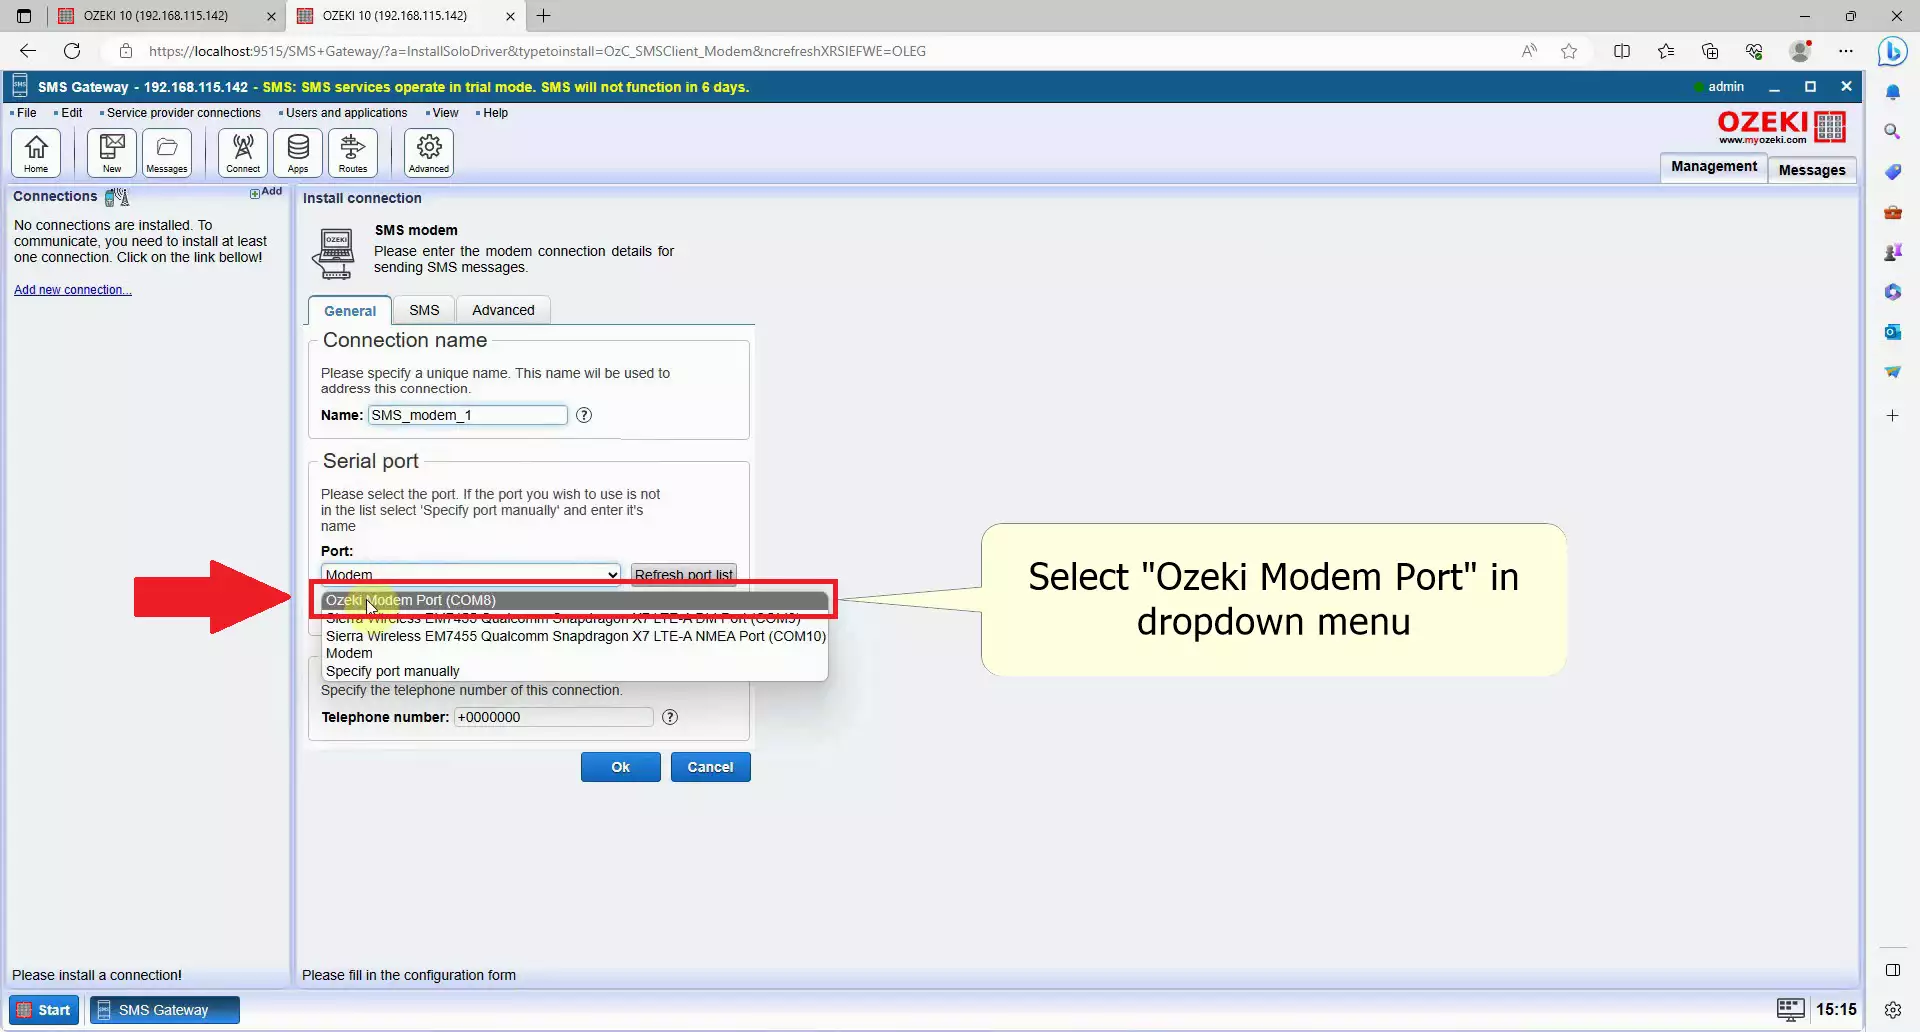
Within the Serial port settings, access the Port dropdown menu. Search for the Ozeki Modem Port entry and click on it. This will select the integrated modem within the Ozeki SMS Gateway Modem, enabling the transmission of messages via 4G. (Refer to Figure 13).
Autodetect properties
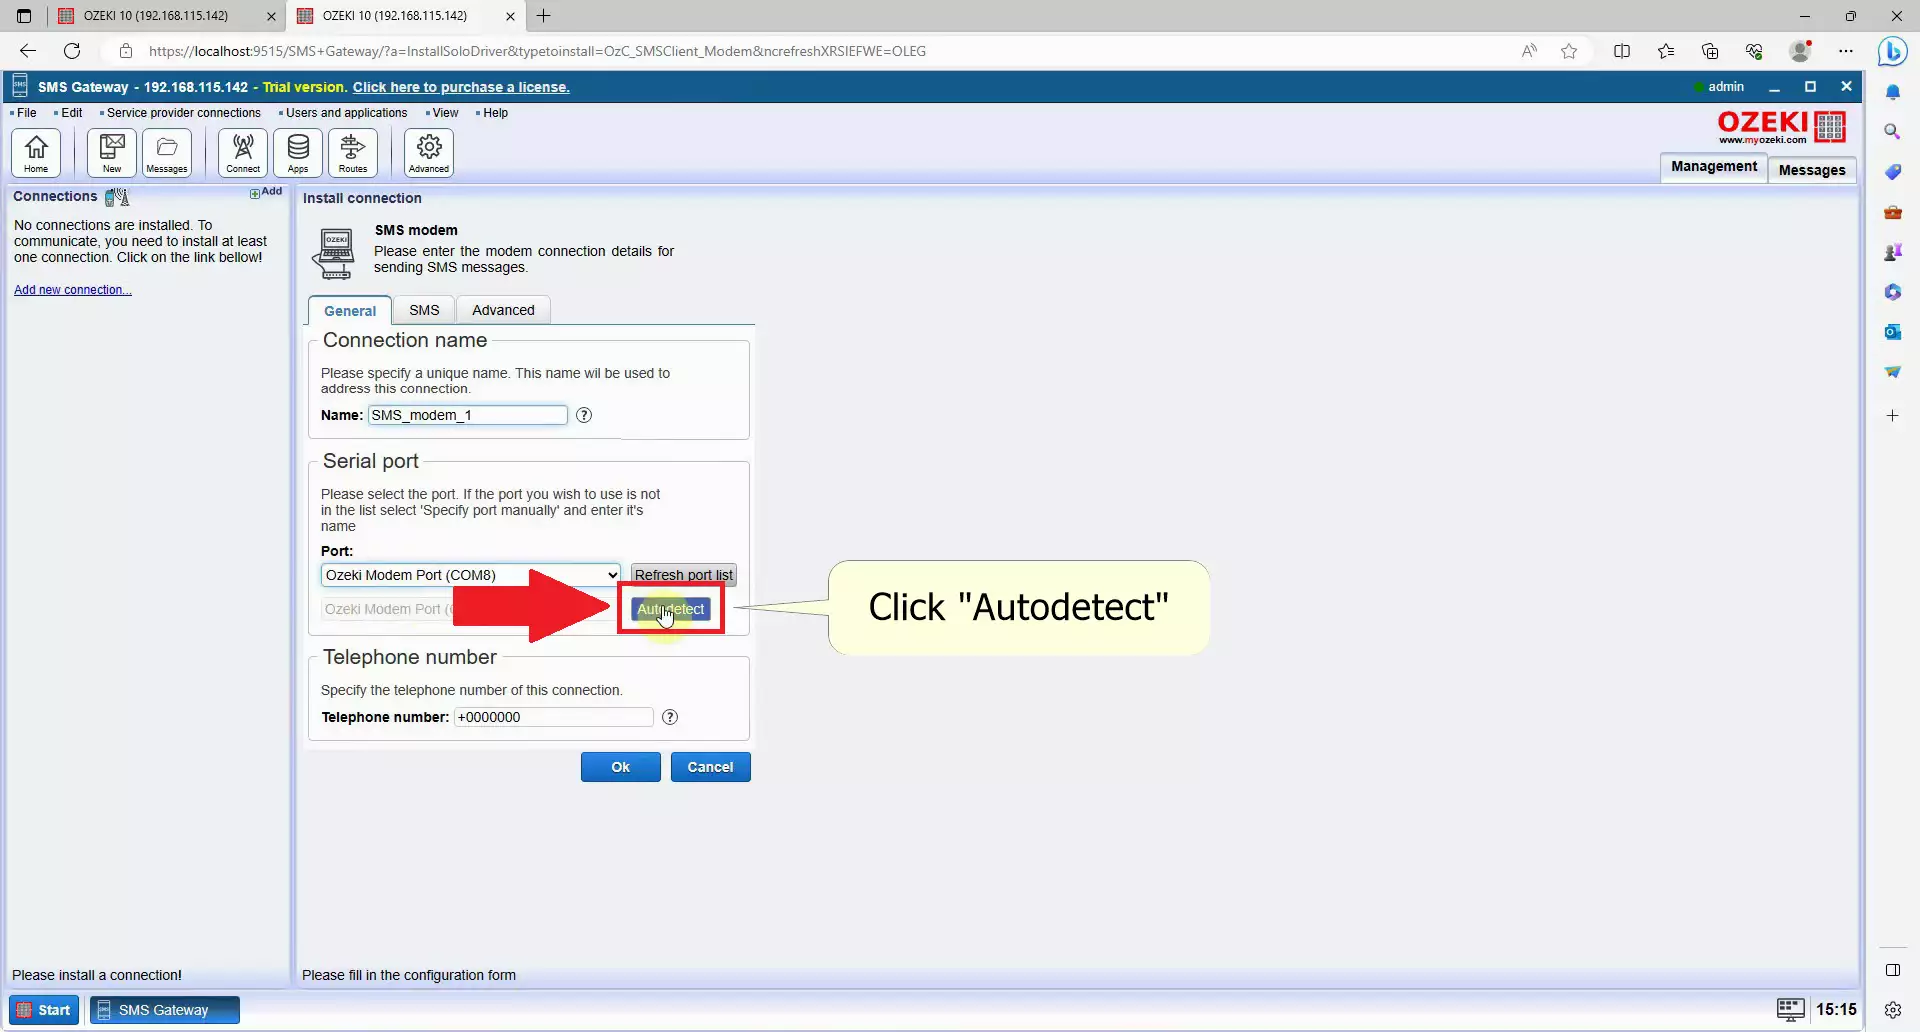
Next to the dropdown menu, find the blue button with the text Autodetect, click this button to automatically get all data from your SIM card like your phone number and configure it, it may take a few seconds. (Figure 14)
Check the information
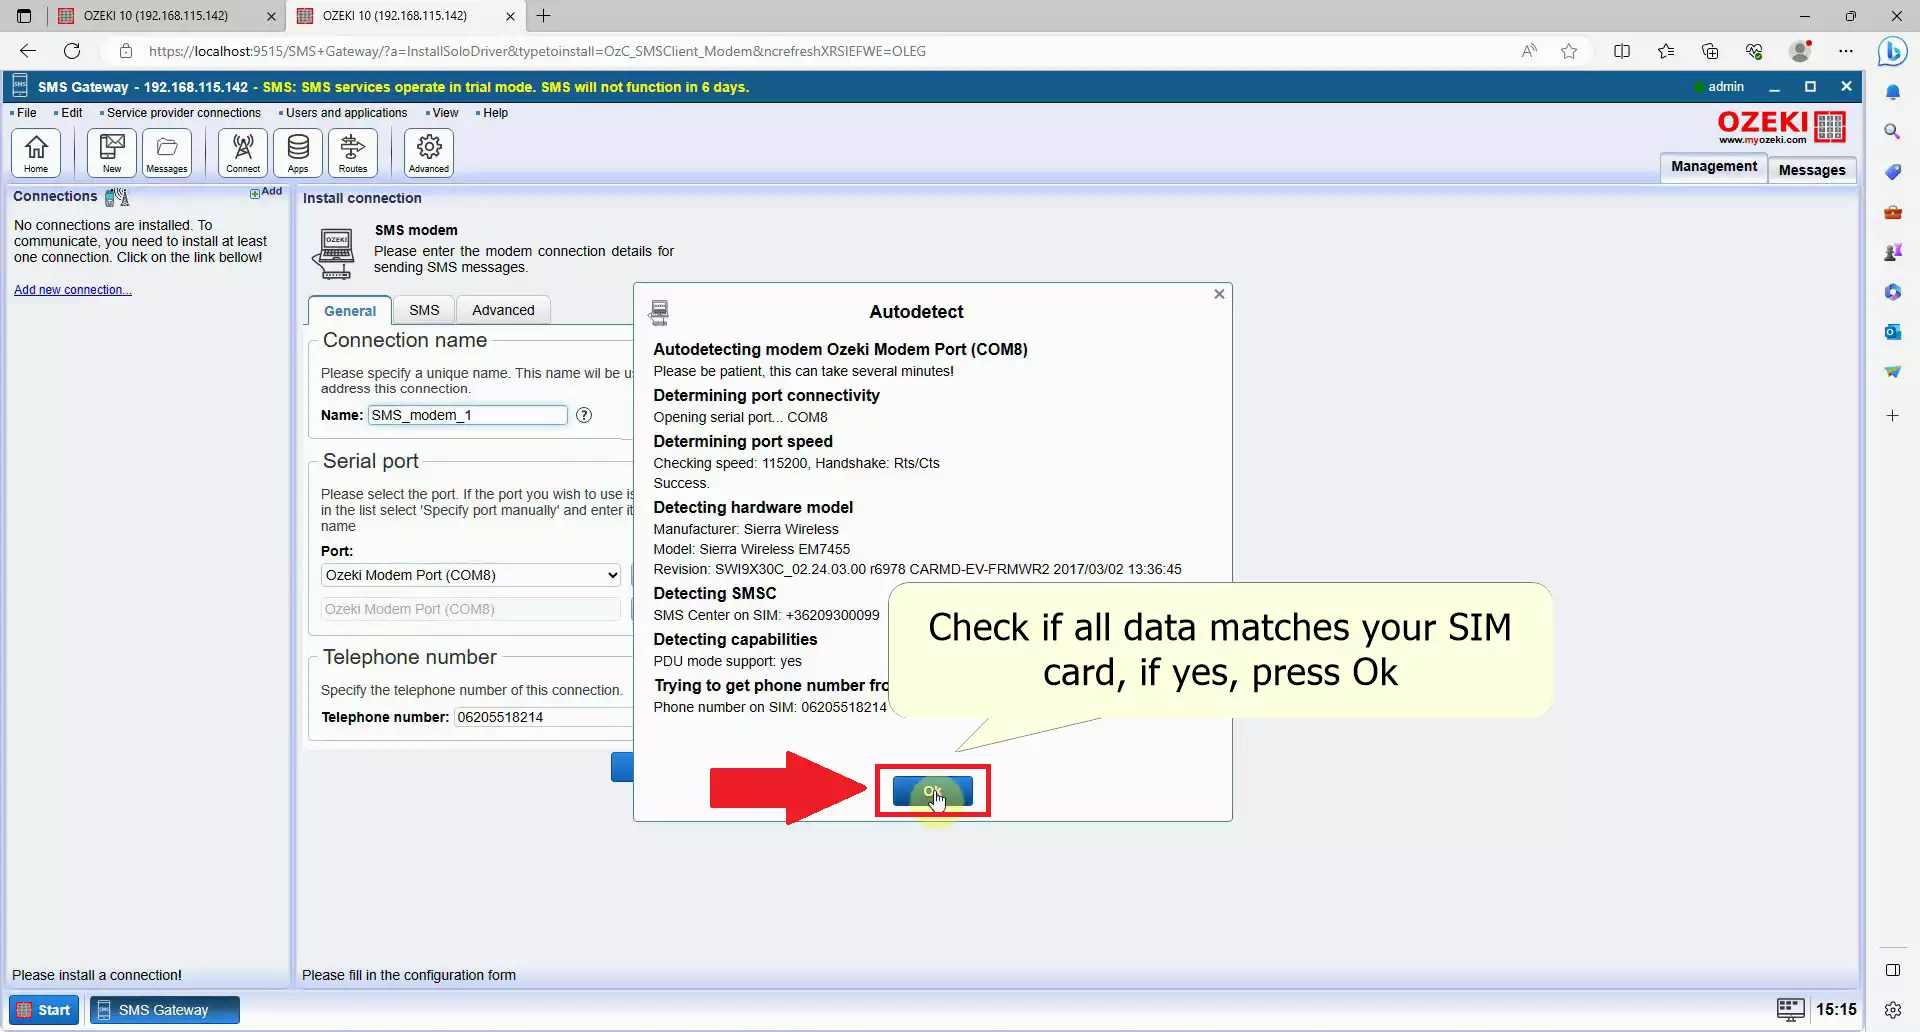
Check your details, a window will pop up named Autodetect, check if every detail matches to your SIM card, you can also see the modem details here. Click on the Ok button at the bottom when you are done checking everything. This will finish the Autodetect procedure and ready your modem for sending sms messages from your computer. (Figure 15)
Finish setting up your modem
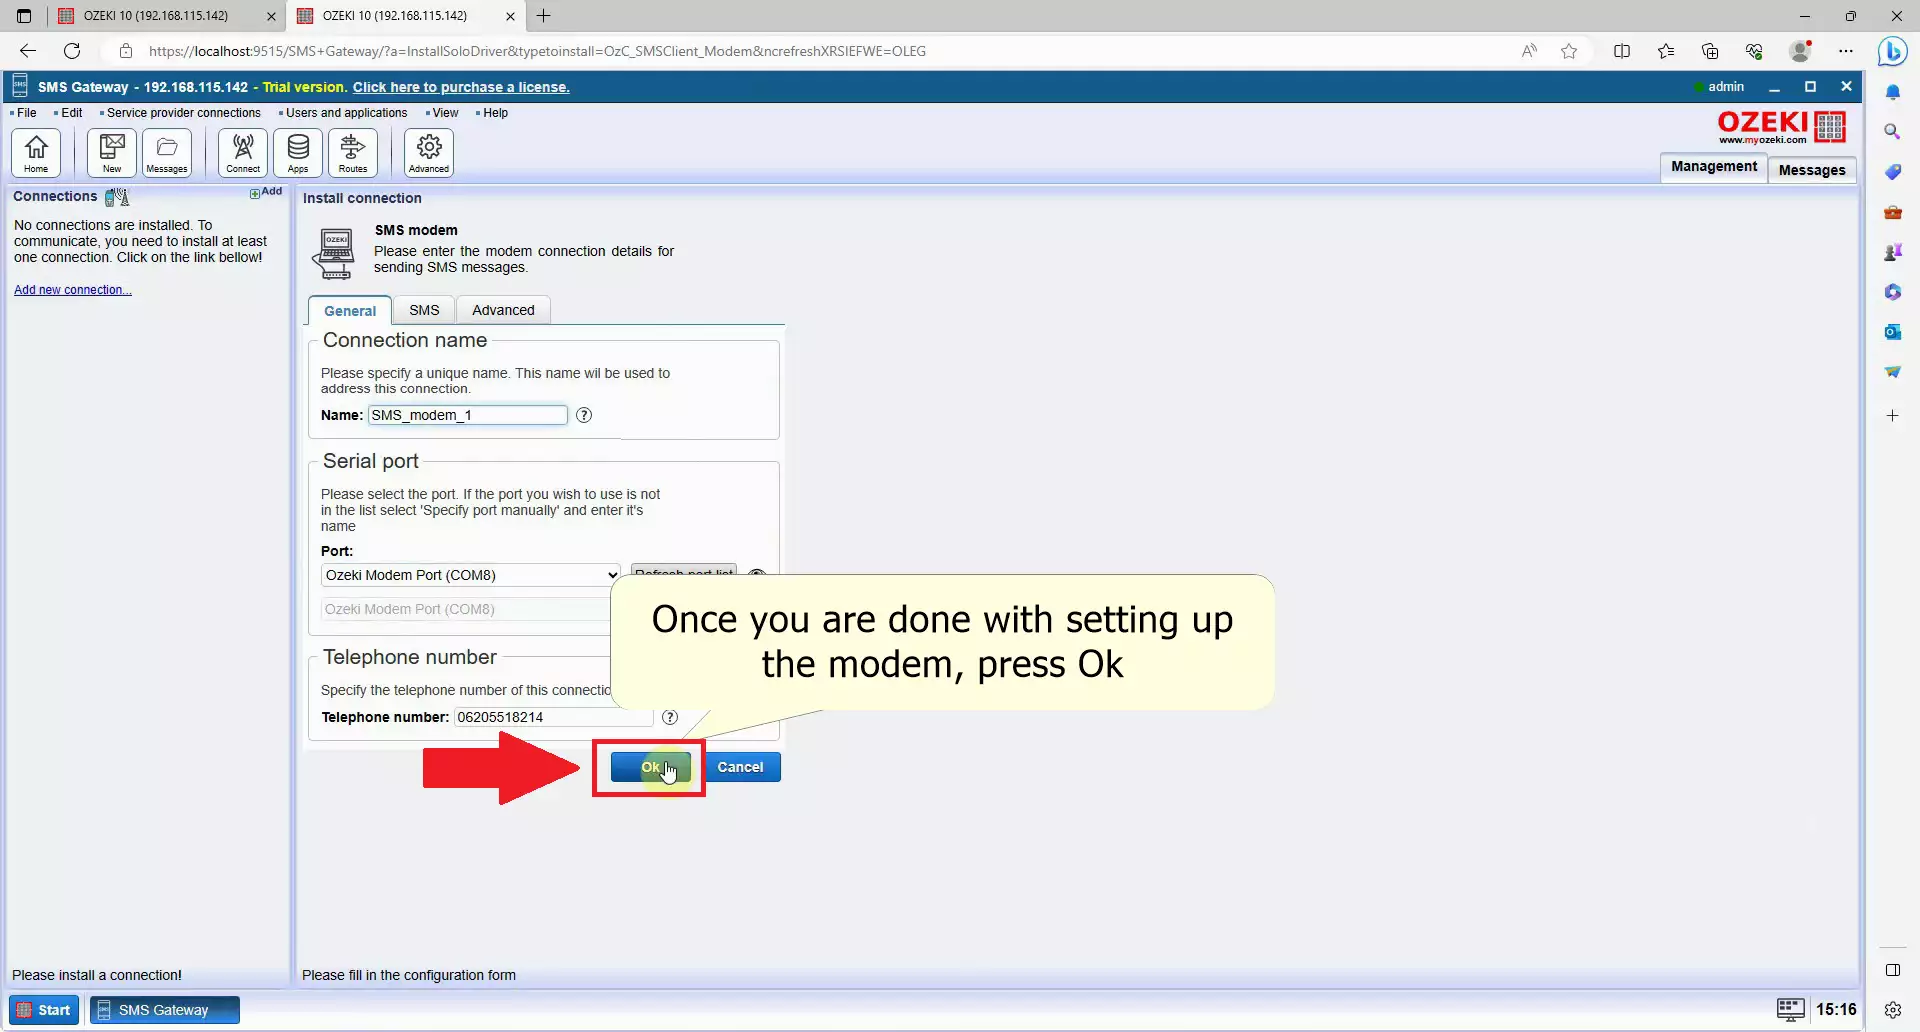
To finalize the setup of your modem, locate the blue Ok button situated at the screen's bottom. If you desire to make additional adjustments to your modem, you can do so under the SMS tab or the Advanced tab. Alternatively, you can return to this tab after clicking Ok and access the Configure tab at a later time. (Can be seen on Figure 16)
Enable SMS Modem Connection
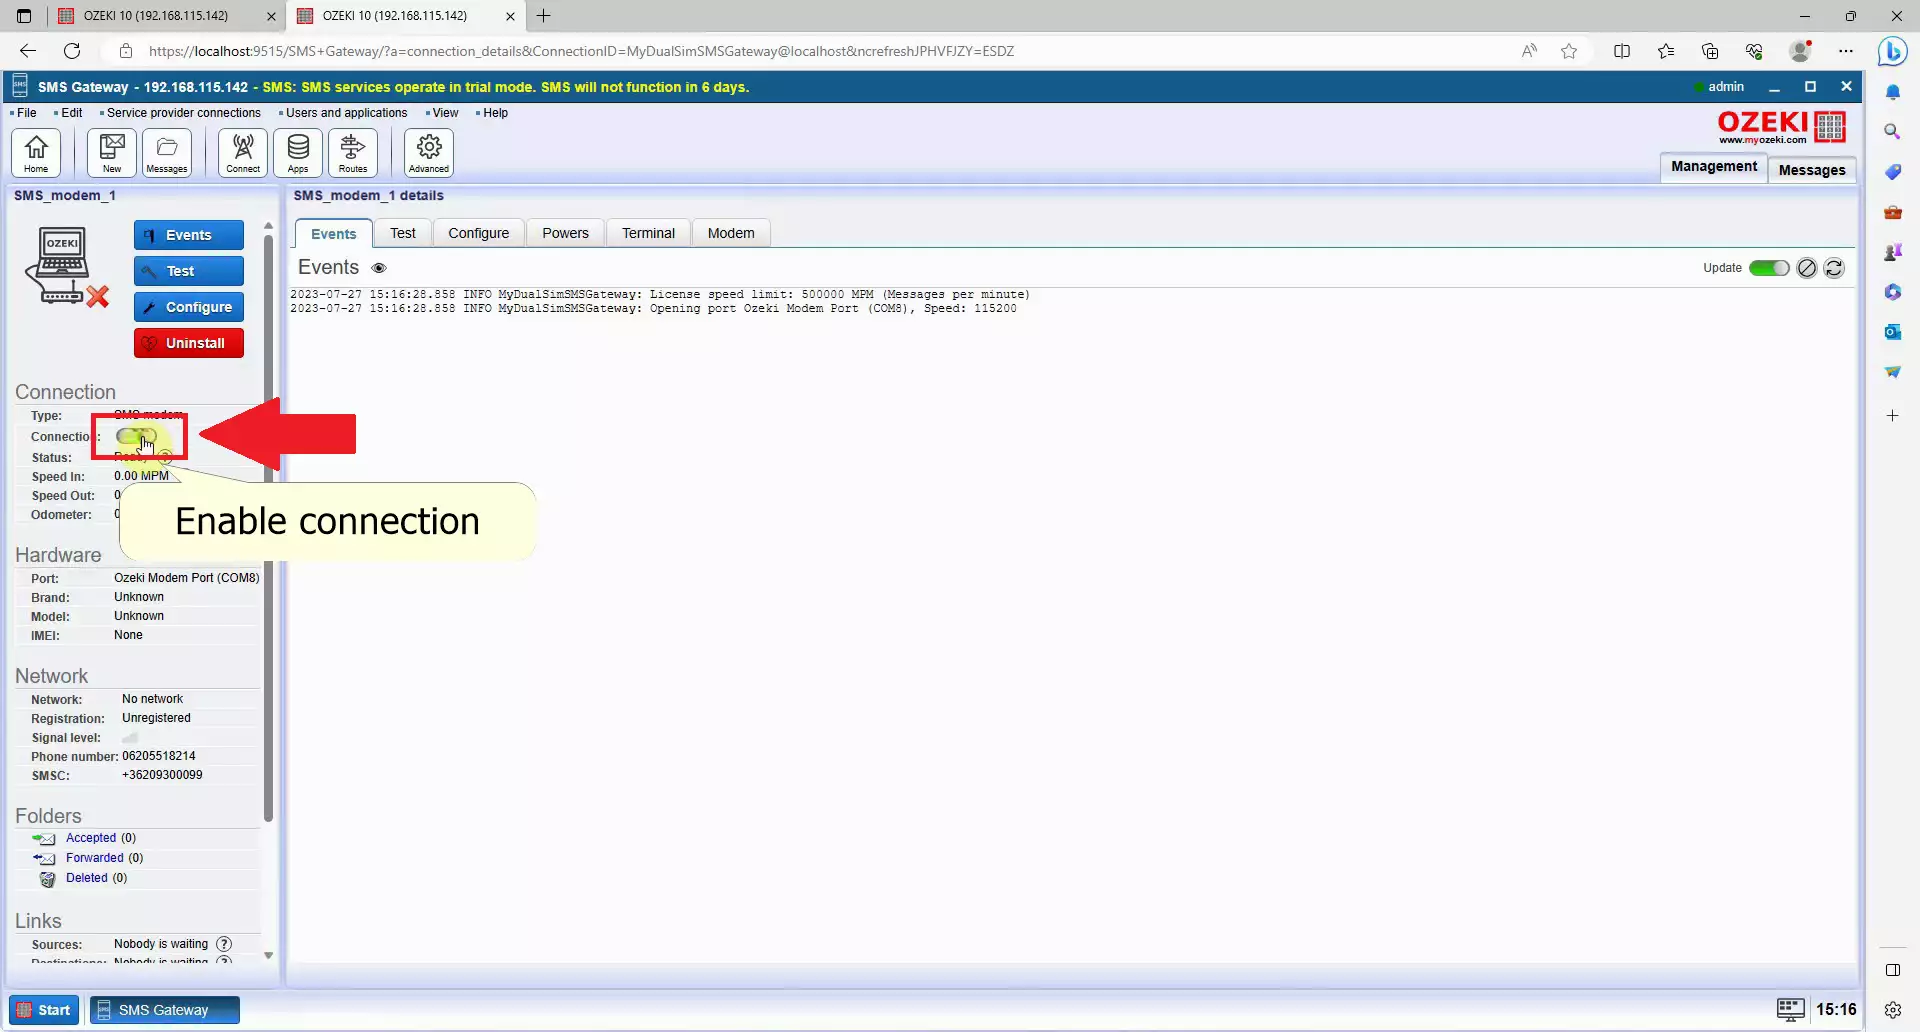
To enable SMS modem connection, find the Connection group on the left, you have to Enable the Connection switch, which is the second option in the group. Click on it to make it green and your modem will start connecting to your service provider. (Figure 17)
Navigate to the Test panel
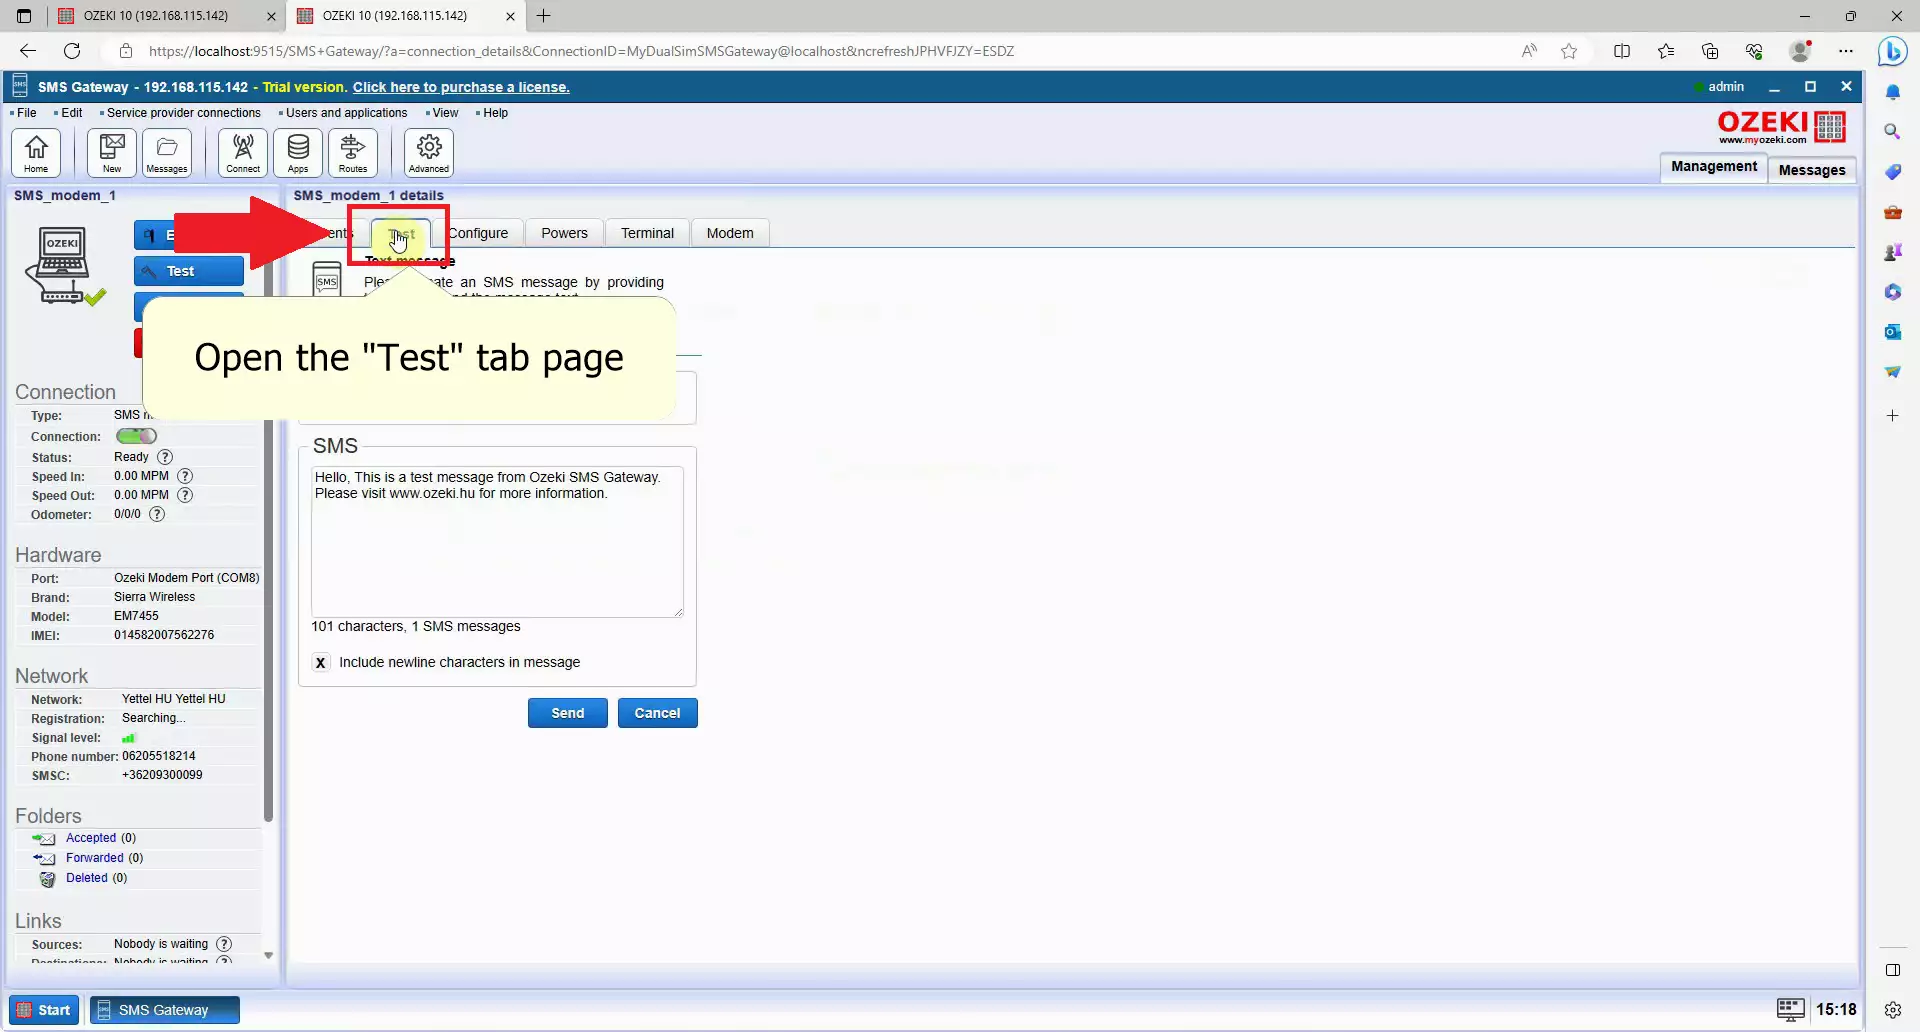
Navigate to the navigation bar in the right panel and click Test to open the Test tab page and enter the Test SMS sending page. You can send test messages from here to anyone with custom content. (Seen on Figure 18)
Fill the recipient's address and test message
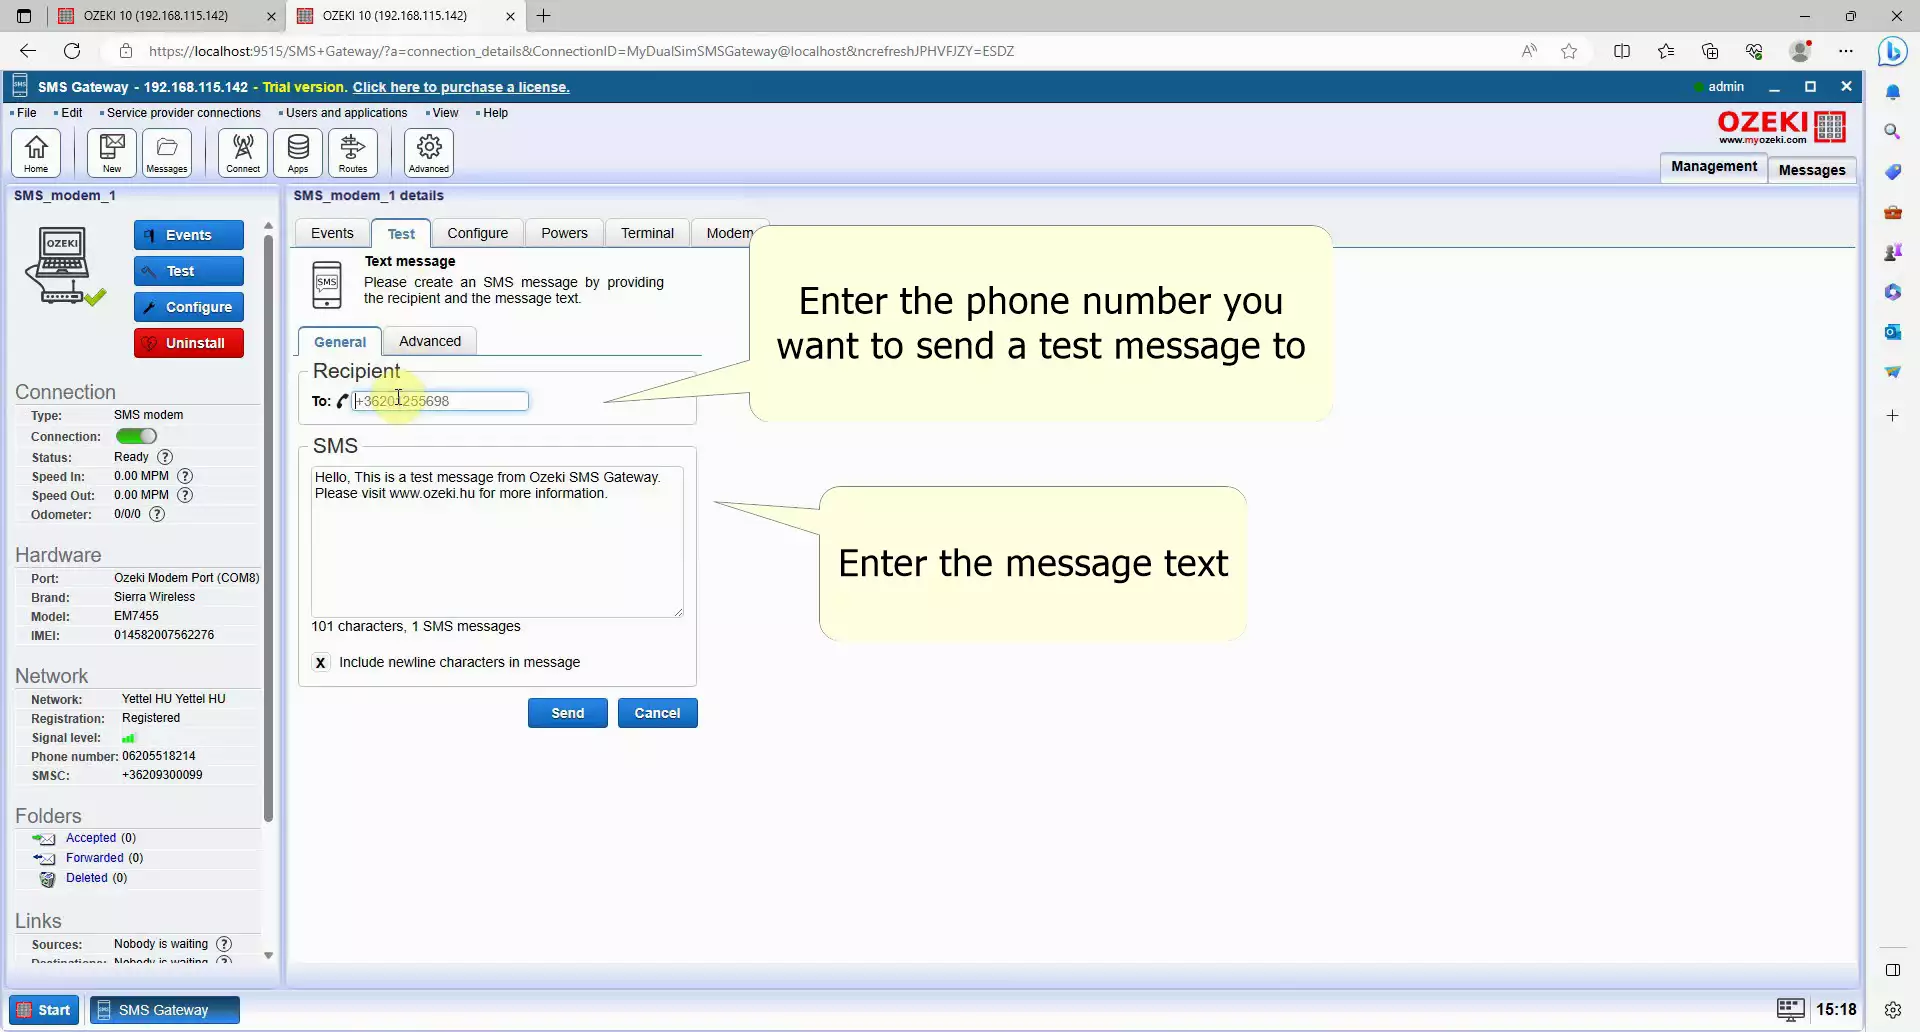
Fill in the recipient's address and enter the test message, look for the To field in the Recipient group, you can enter the phone number there, and type into the SMS text field what you want to send. You can write whatever you want here. (Figure 19)
Send the SMS
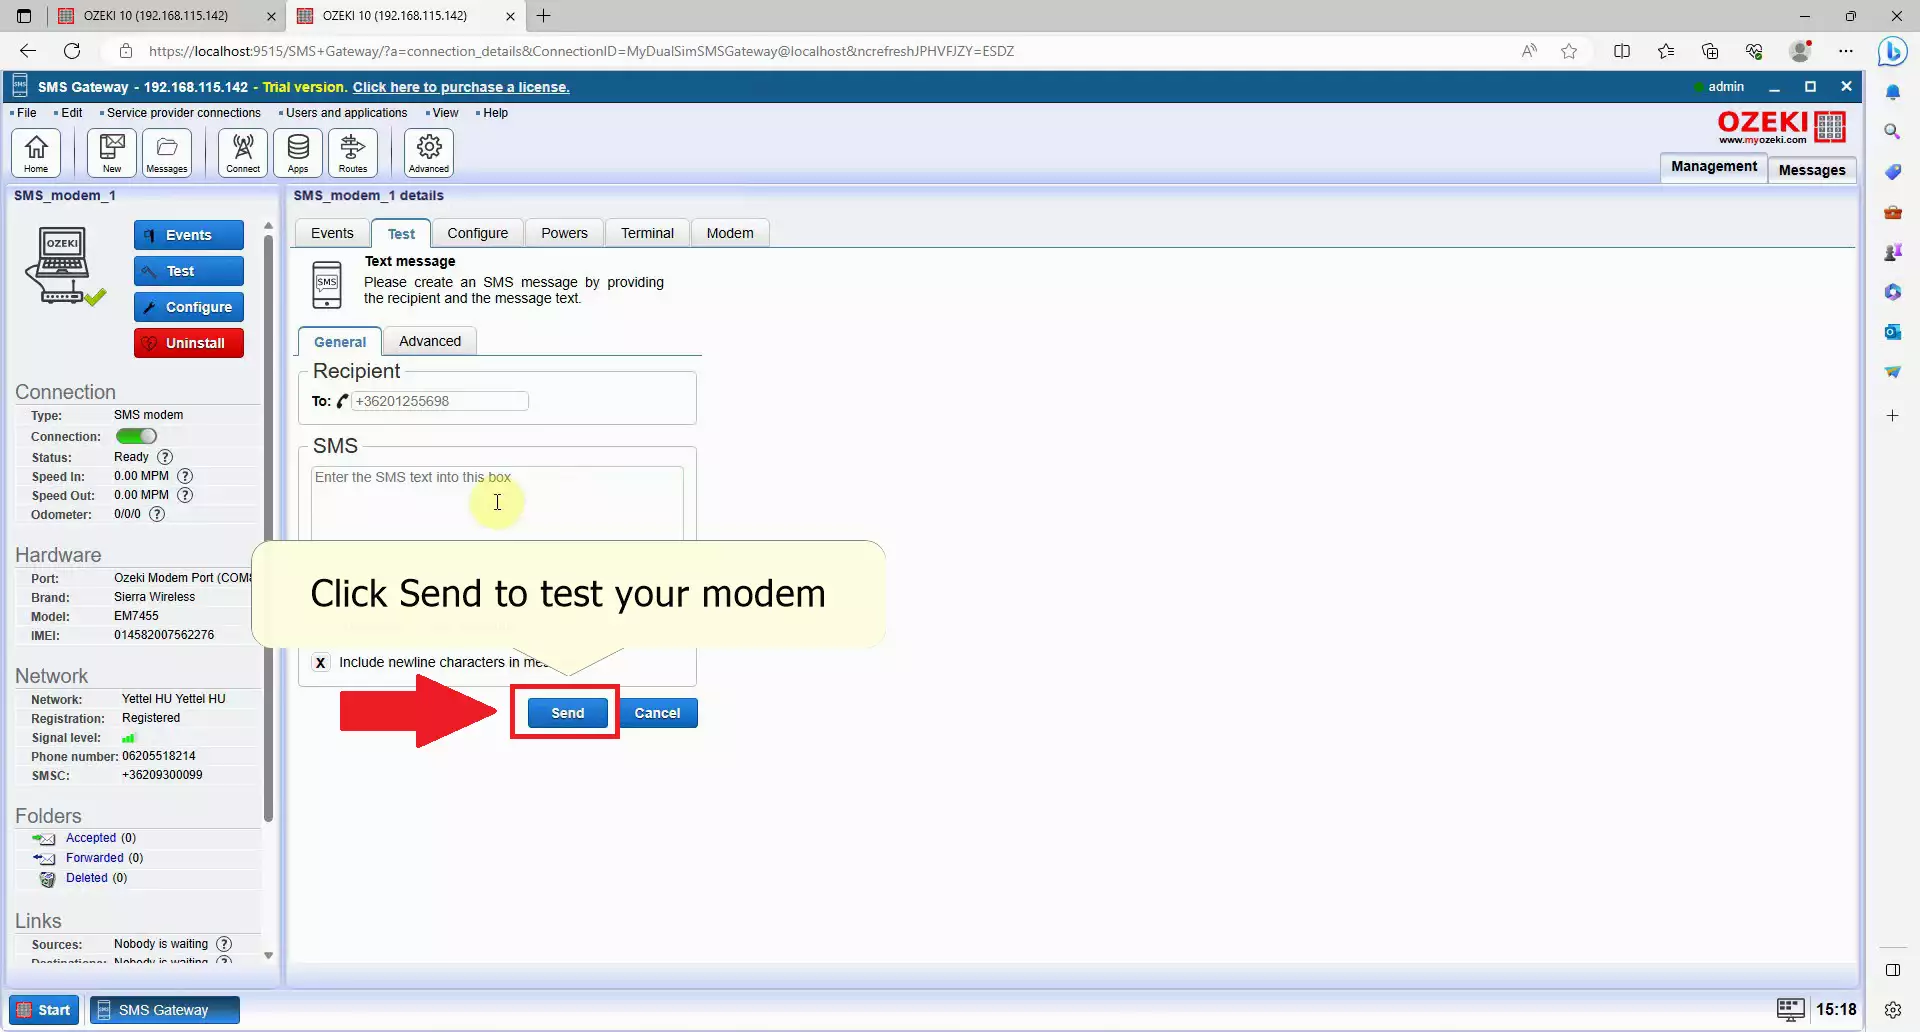
Send the SMS if you are done, look for a blue Send button at the bottom of the screen. Click on the button to send the message and you will soon receive the SMS on the specified phone number. (Figure 20).
Check the test message
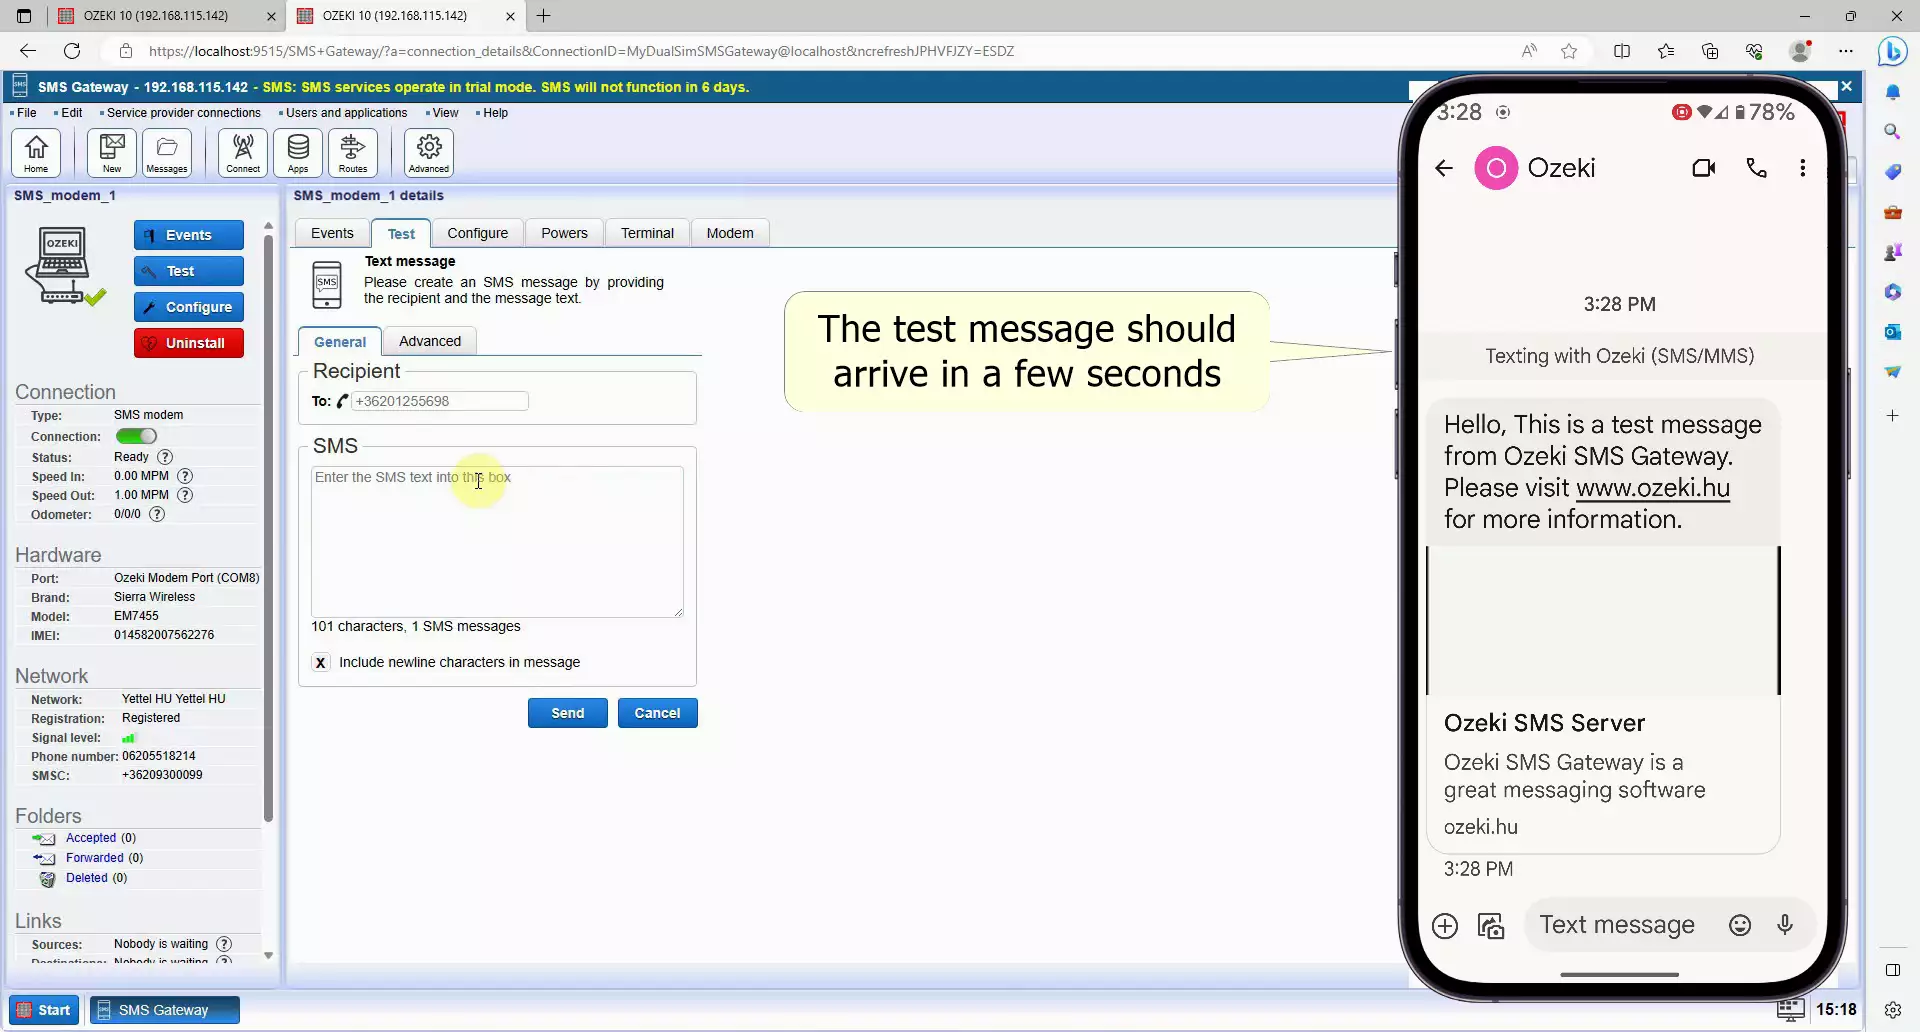
Check the test message on your mobile device, look for an application that handles SMS messages and open it, if you see your test message appear with the correct content, your SMS modem is working correctly, congratulation! (Figure 21)
Summary
As you can see in the guide, the Ozeki SMS Modem works really well with Ozeki SMS Gateway. Using them together lets you send messages from your computer, helping your company to grow bigger. You can use this to send out automated or bulk messages. After you went through the steps, got the needed hardware and software, you will be able to send SMS using your computer.
