Send SMS from Oracle SQL (part 1/4)
Oracle Installation
Oracle is a database management product, which is used not only to store data, but effectively manage, and provide it to other industry-standard software. It works great with the Ozeki SMS Gateway software, but you will need to install it on your computer. This guide will help you with that. It is a very easy process, it should not take more than 15 minutes, depending on your internet connection.
Video content1. Download Oracle
2. Install Oracle
Please jump to the next video or if you scroll down you can find screenshots that describe how to download and install Oracle Database 18c Express and how to set the port numbers and SYSTEM password.
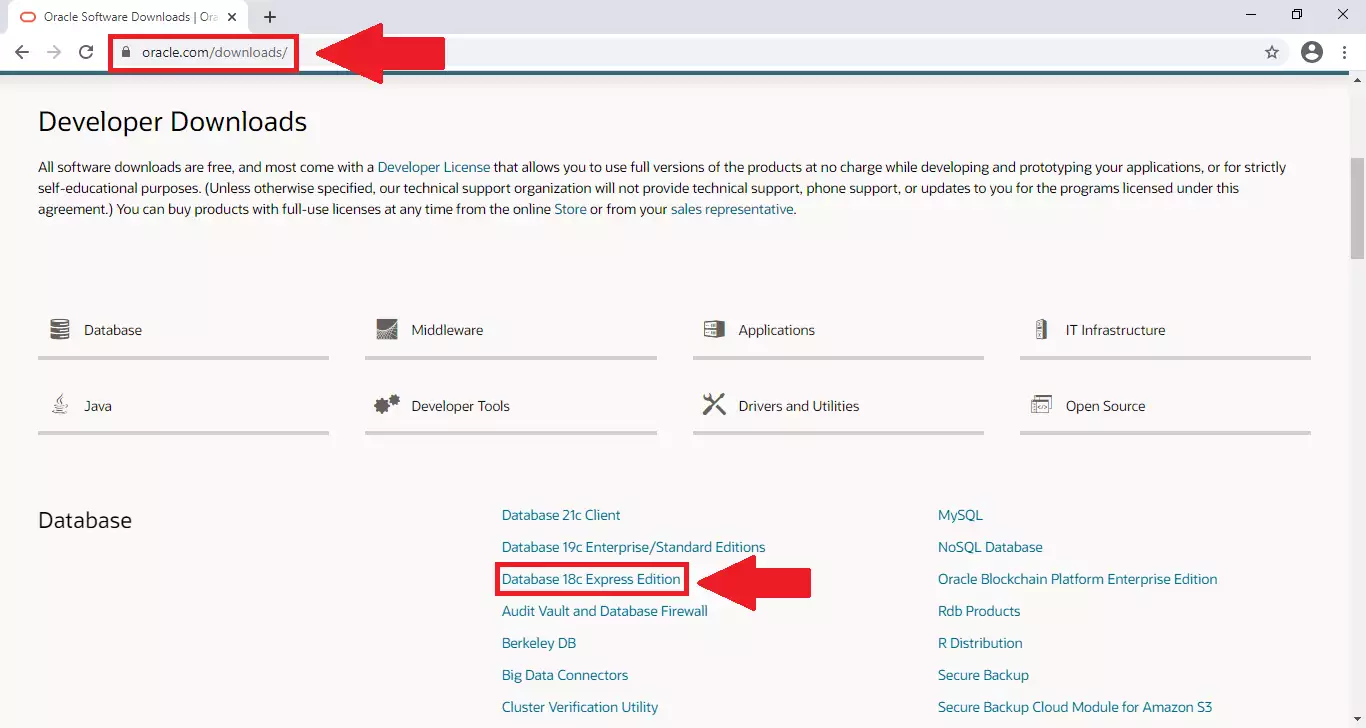
The first thing you want to do, is to install the Oracle 18c Express Edition on your computer. Please head over to oracle.com/downloads, and search for the Database 18c Express Edition download link. If you have found it, proceed to the next step. You can see the download page on Figure 1.
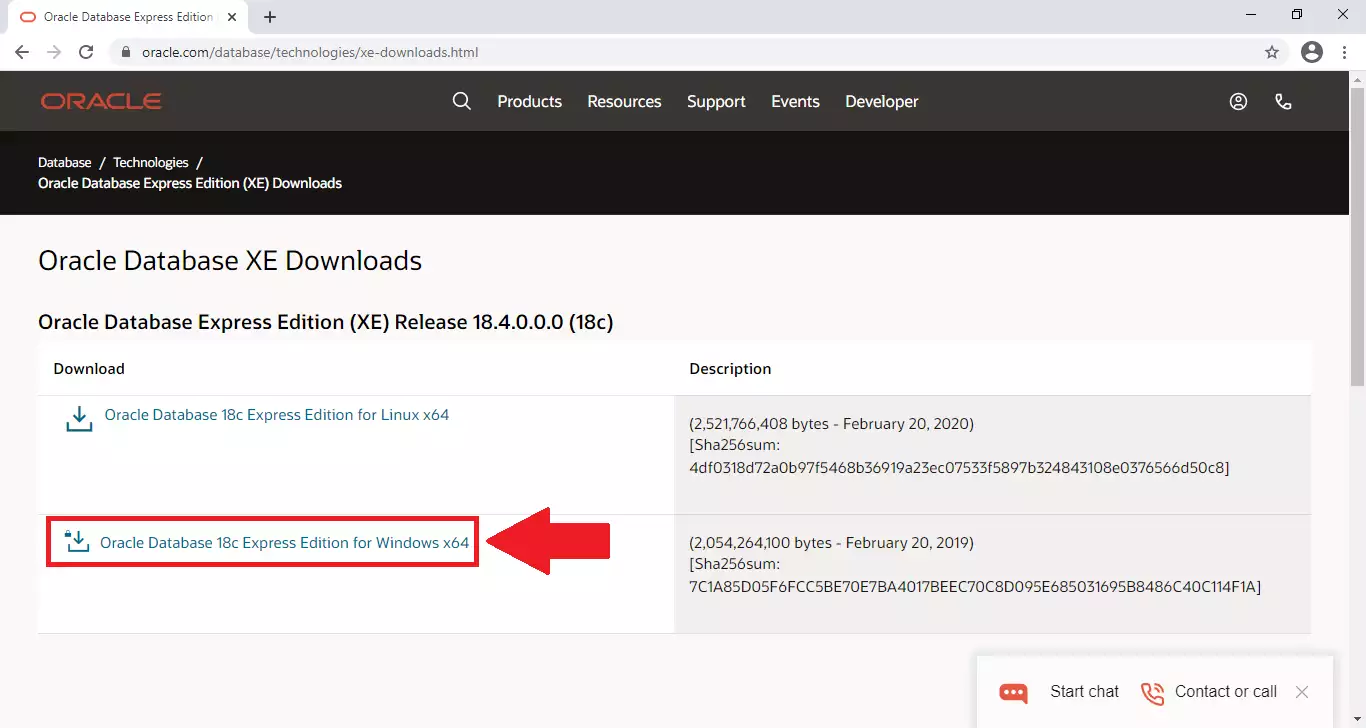
You are now on the download page of the Oracle Database Express Edition. The software is capable of running on Windows, and Linux, so it has two version. Make sure to download the Windows x64 edition. To see where to click, please look at Figure 2.
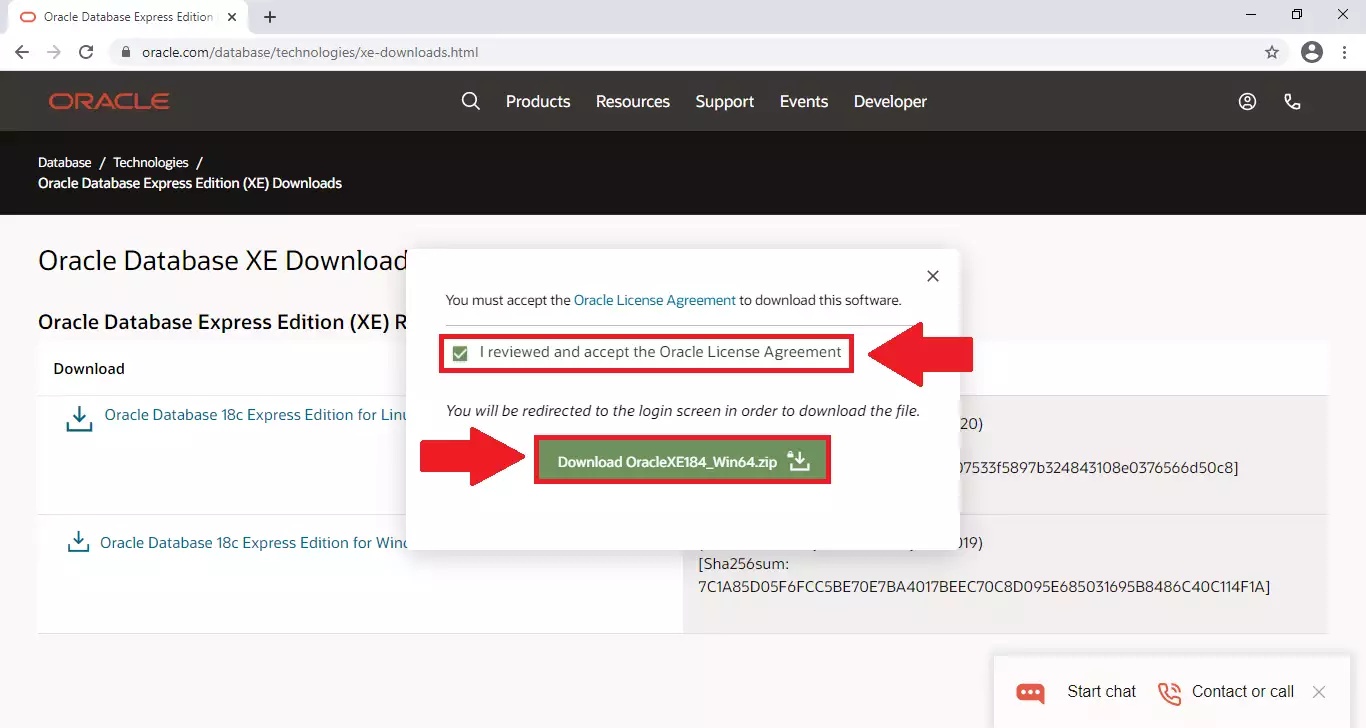
To have a copy of the software on your computer, you need to accept the Oracle License Agreement. Without it, you will not be able to download the required files. Tick in the box for accepting the License Agreement and click the Download OracleXe184_Win64.zip button. You can see the tick box and the button on Figure 3.
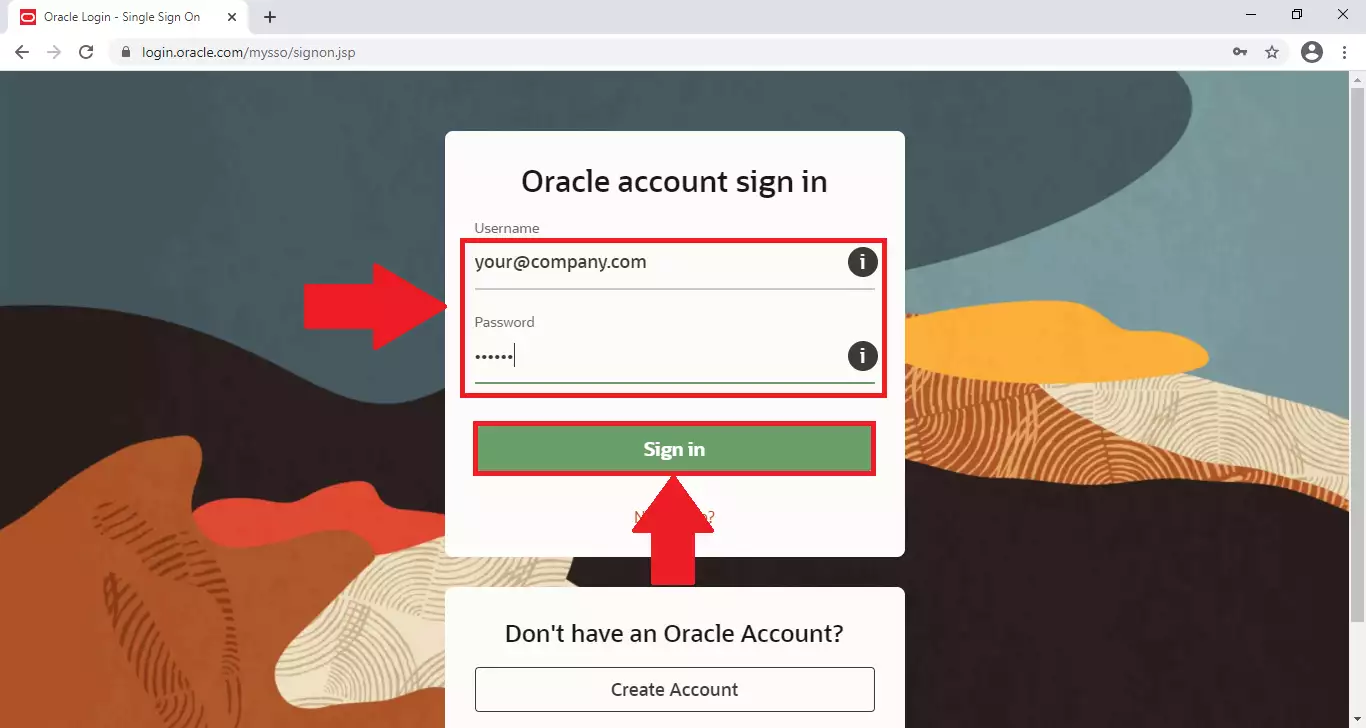
In order to download the files, you need to sign in to your Oracle account. To do that, please provide your username and your password into the appropriate field. If you do not have an Oracle Account, you can create on for free with the Create Account button down below. You can find these on Figure 4. Press the sign in button to proceed.
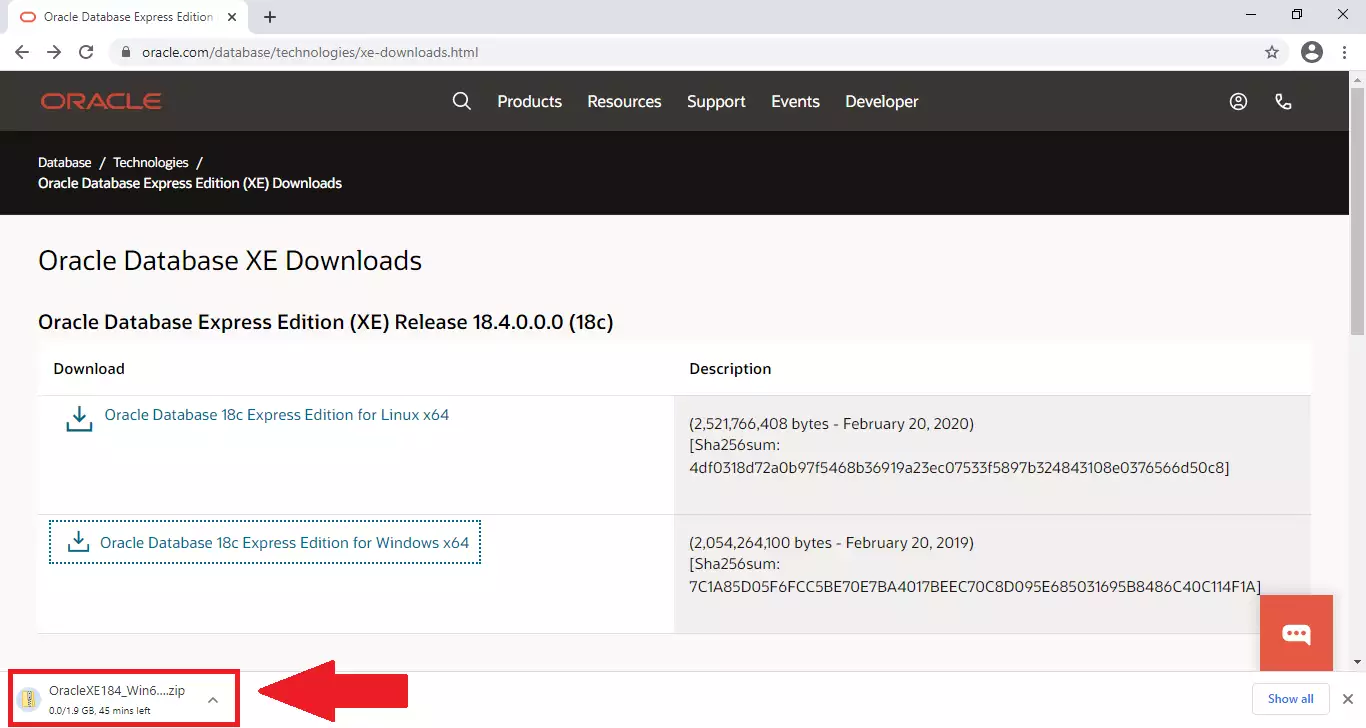
Now, your browser should start the process of downloading all the required files. You can watch the download status on the bottom of your browser window, as you can see on Figure 5.
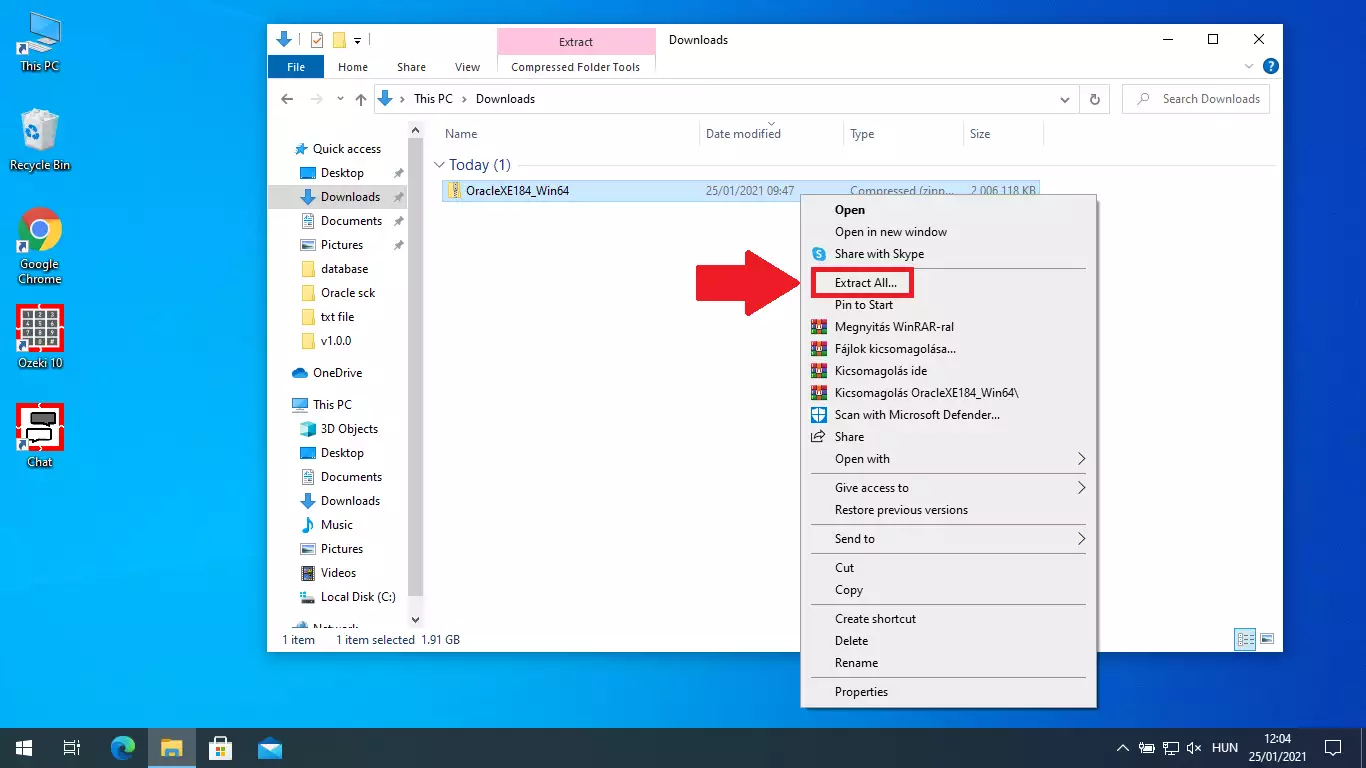
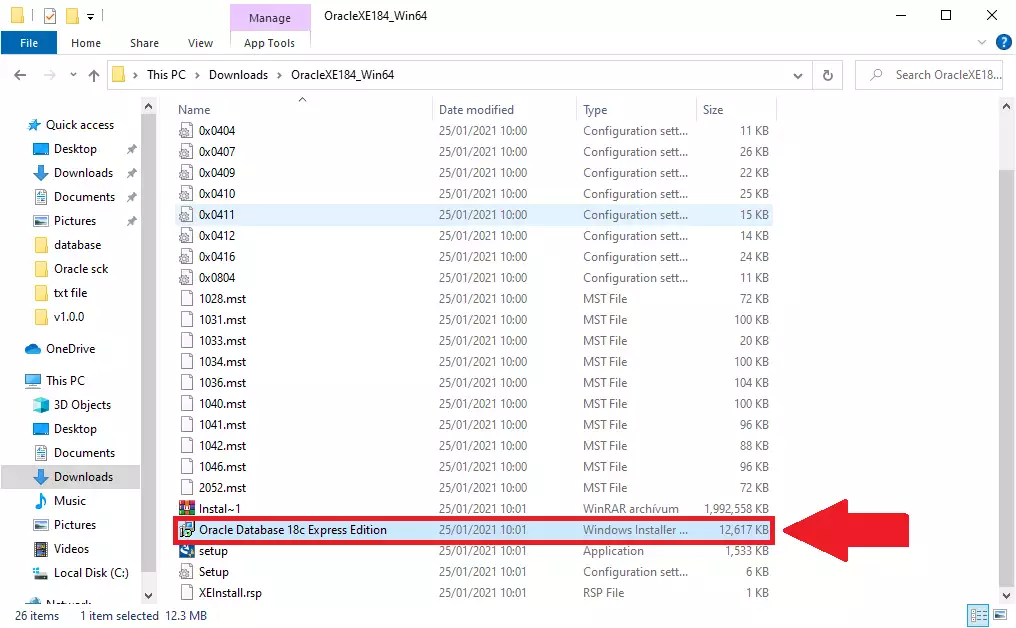
Now that you have the files extracted, search for the installer file. It is the Oracle Database 18c Express Edition executable file. Click on it twice to start the installer. Now we will guide you through the setup process in the following steps. You can see the file you are looking for on Figure 7.
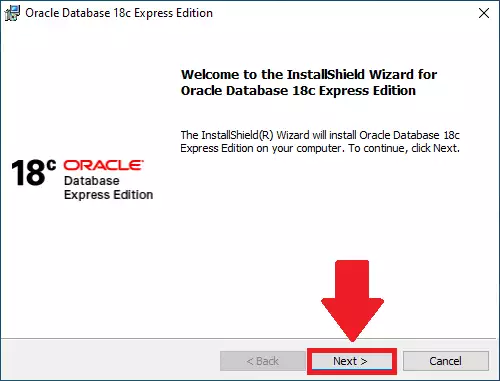
Now you have started the Installation. Click the Next button the proceed to the next step. You can see the first page of the installation on Figure 8.
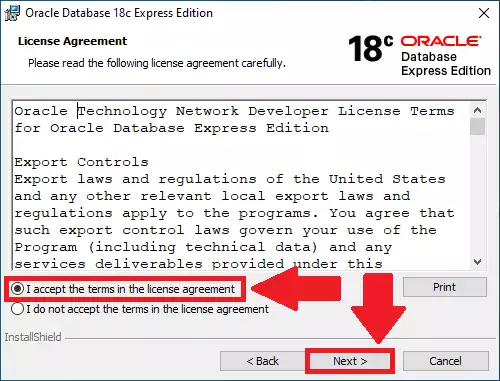
To have an official copy of the software, you need to accept the license agreement of the Oracle database. Simply pick the “I accept” option and click “Next”. You can print of a copy of the license agreement if you want with the “Print” button. You can see the license agreement on Figure 9.
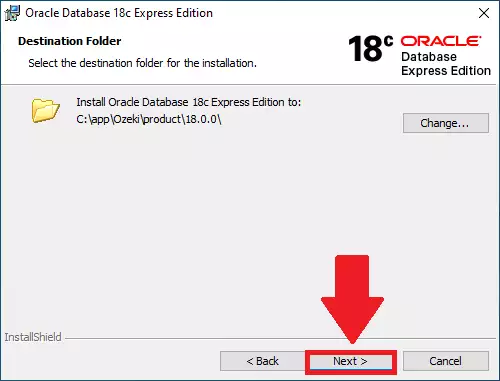
Now you can choose where to install the Oracle Database software. You could choose any destination you wish, just make sure that you have enough free space in the destination. You can change the place using the Change… button. You can see the window on Figure 10.
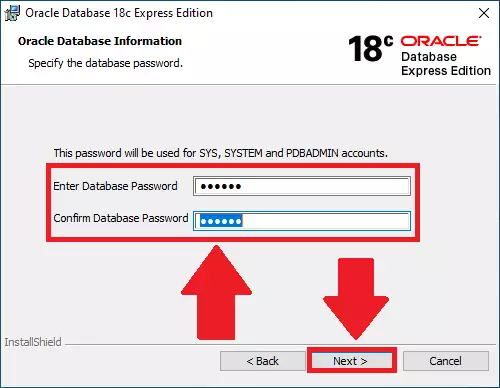
Now you can choose a strong password for the main accounts. Make sure to choose a Database password that you will remember and type it in the first and the second textbox. The second textbox is making sure you have no misspell in the password. Make sure that only those know the password who should have access to the databases. Click Next if you have a good password. You can see the textboxes on Figure 11.
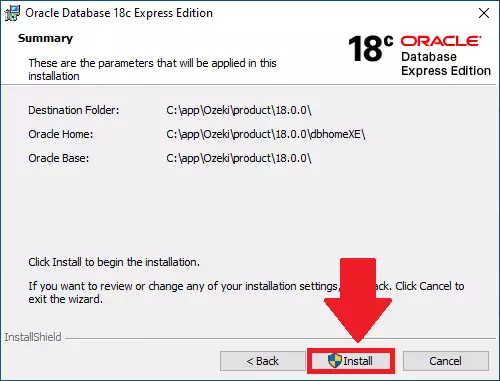
Now you have everything ready, you can start the installation progress. Please click the “Install” button to start the installation itself. The installer will start to set everything up. You can see the button on Figure 12.
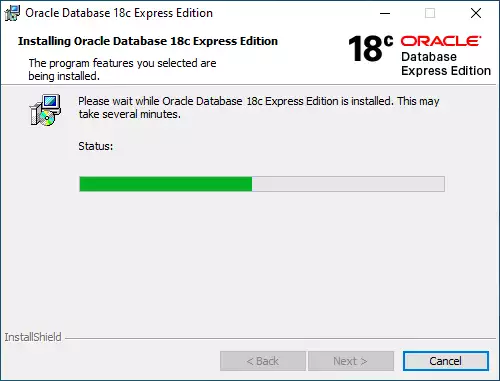
Now all you need to do is wait for the installer to finish the process of installation. As you can see on Figure 13, you get a process indicator bar, which can be used to check the installation progress. If it is filled with green, it means that you have a working copy of the software. You can see the progress indicator bar on Figure 12.
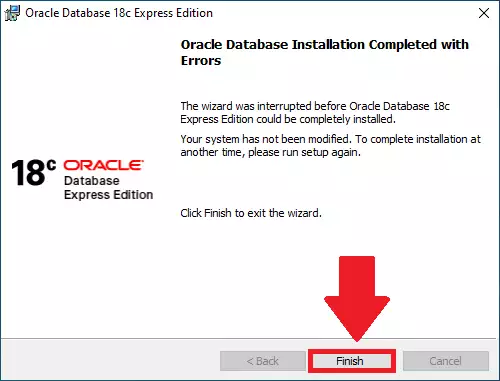
If you see the window you can see on Figure 14, it means that you have a working Oracle Database software. Please click on Finish button. It will close the installer. You can now open the software.
Create ozeki database schema
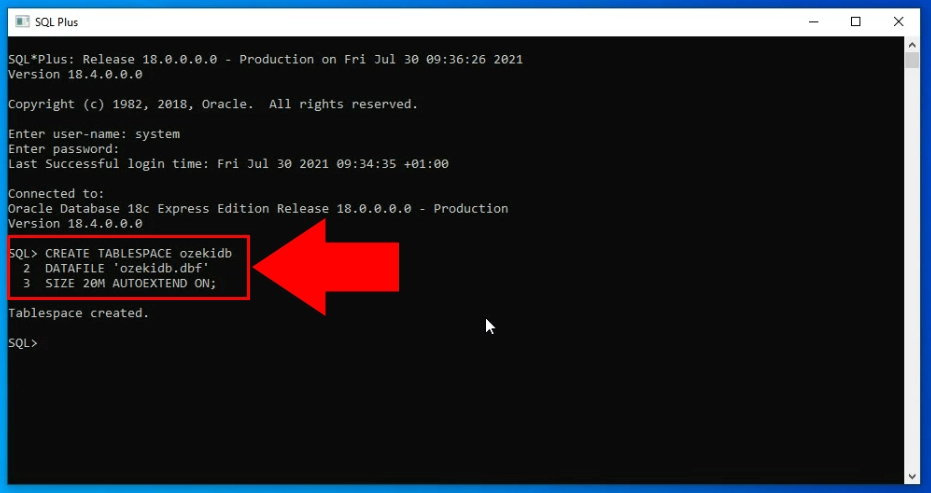
CREATE TABLESPACE ozekidb
DATAFILE 'ozekidb.dbf'
SIZE 20M AUTOEXTEND ON;
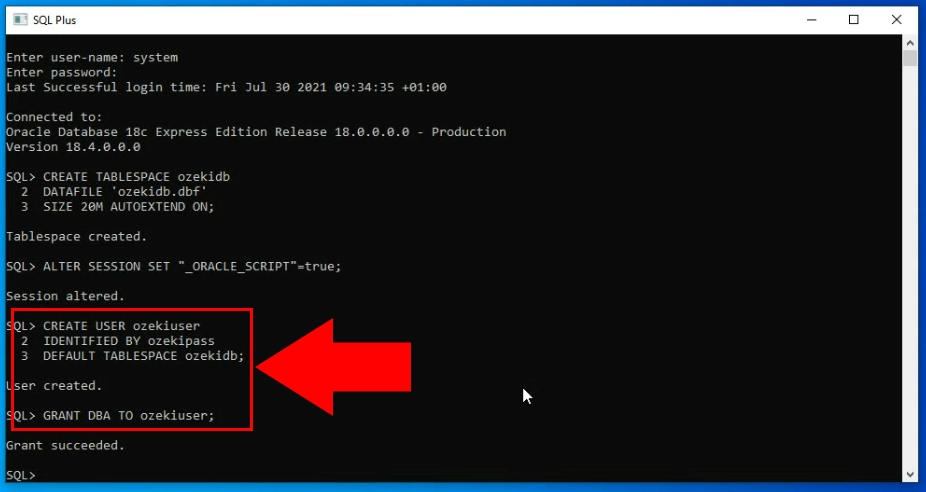
ALTER SESSION SET "_ORACLE_SCRIPT"=true;

CREATE USER ozekiuser
IDENTIFIED BY ozekipass
DEFAULT TABLESPACE ozekidb;

GRANT DBA TO ozekiuser;
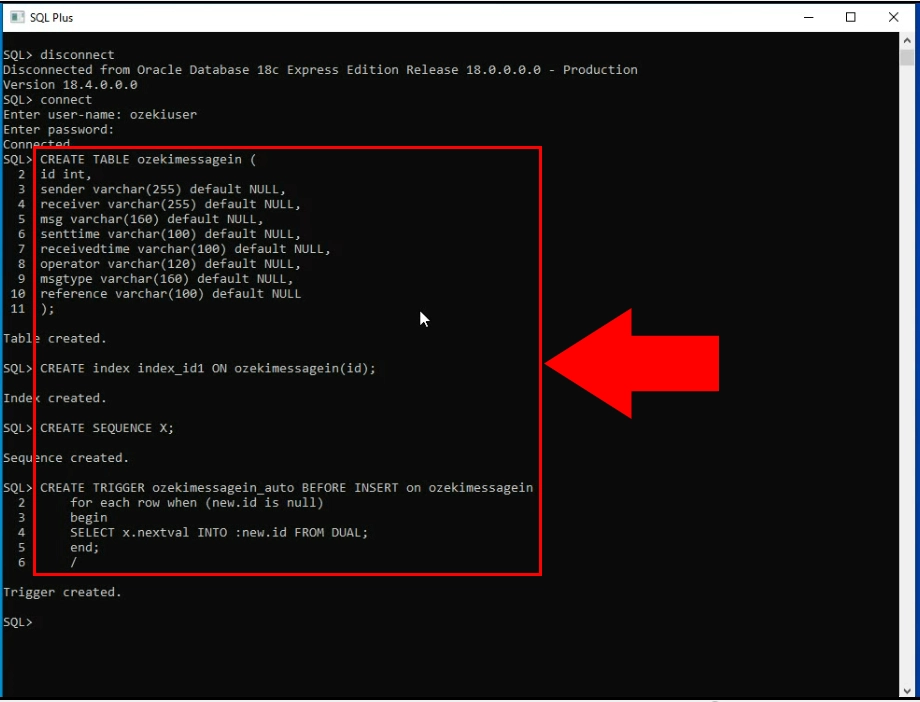
CREATE TABLE ozekimessagein (
id int,
sender varchar(255) default NULL,
receiver varchar(255) default NULL,
msg varchar(160) default NULL,
senttime varchar(100) default NULL,
receivedtime varchar(100) default NULL,
operator varchar(120) default NULL,
msgtype varchar(160) default NULL,
reference varchar(100) default NULL
);
CREATE index index_id1 ON ozekimessagein(id);
CREATE SEQUENCE X;
CREATE TRIGGER ozekimessagein_auto BEFORE INSERT on ozekimessagein
    for each row when (new.id is null)
    begin
    SELECT x.nextval INTO :new.id FROM DUAL;
    end;
    /
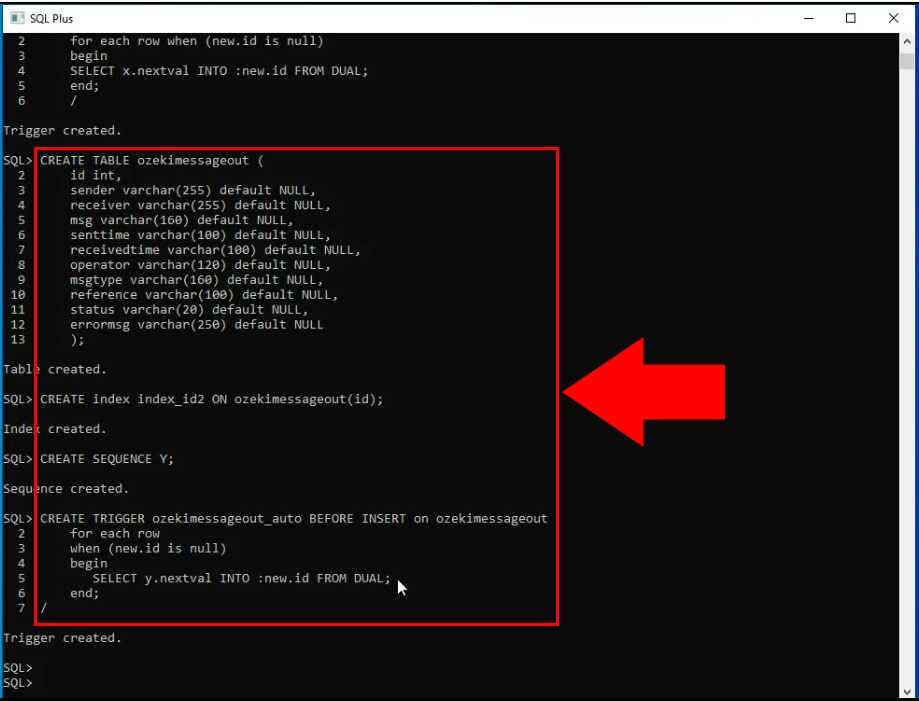
CREATE TABLE ozekimessageout (
    id int,
    sender varchar(255) default NULL,
    receiver varchar(255) default NULL,
    msg varchar(160) default NULL,
    senttime varchar(100) default NULL,
    receivedtime varchar(100) default NULL,
    operator varchar(120) default NULL,
    msgtype varchar(160) default NULL,
    reference varchar(100) default NULL,
    status varchar(20) default NULL,
    errormsg varchar(250) default NULL
    );
CREATE index index_id2 ON ozekimessageout(id);
CREATE SEQUENCE Y;
CREATE TRIGGER ozekimessageout_auto BEFORE INSERT on ozekimessageout
    for each row
    when (new.id is null)
    begin
       SELECT y.nextval INTO :new.id FROM DUAL;
    end;
	/
