How to send an Ozeki Chat message using HTTP
Learning how to send Ozeki Chat messages through an HTTP request can greatly improve your communication strategy. This method lets you automate messaging, link chat functions with other applications, and send real-time updates quickly and easily. By using HTTP requests, you can connect Ozeki Chat with various systems, allowing you to send messages based on specific events or actions. This guide will show you the steps to send messages using HTTP, helping you make the most of this powerful tool to keep your team or clients informed and engaged with minimal effort.
How to send an Ozeki Chat message using an HTTP request (Video Tutorial)
In this brief, easy-to-follow video guide we are going to demonstrate the steps you need to take in order to send an Ozeki Chat message using a HTTP request. From setting up an HTTP user to entering the HTTP-GET details into the URL bar, you will learn everything you need to. By the end of this tutorial you will successfully receive a message in MyOzeki.
Step 1 - Add new user or application
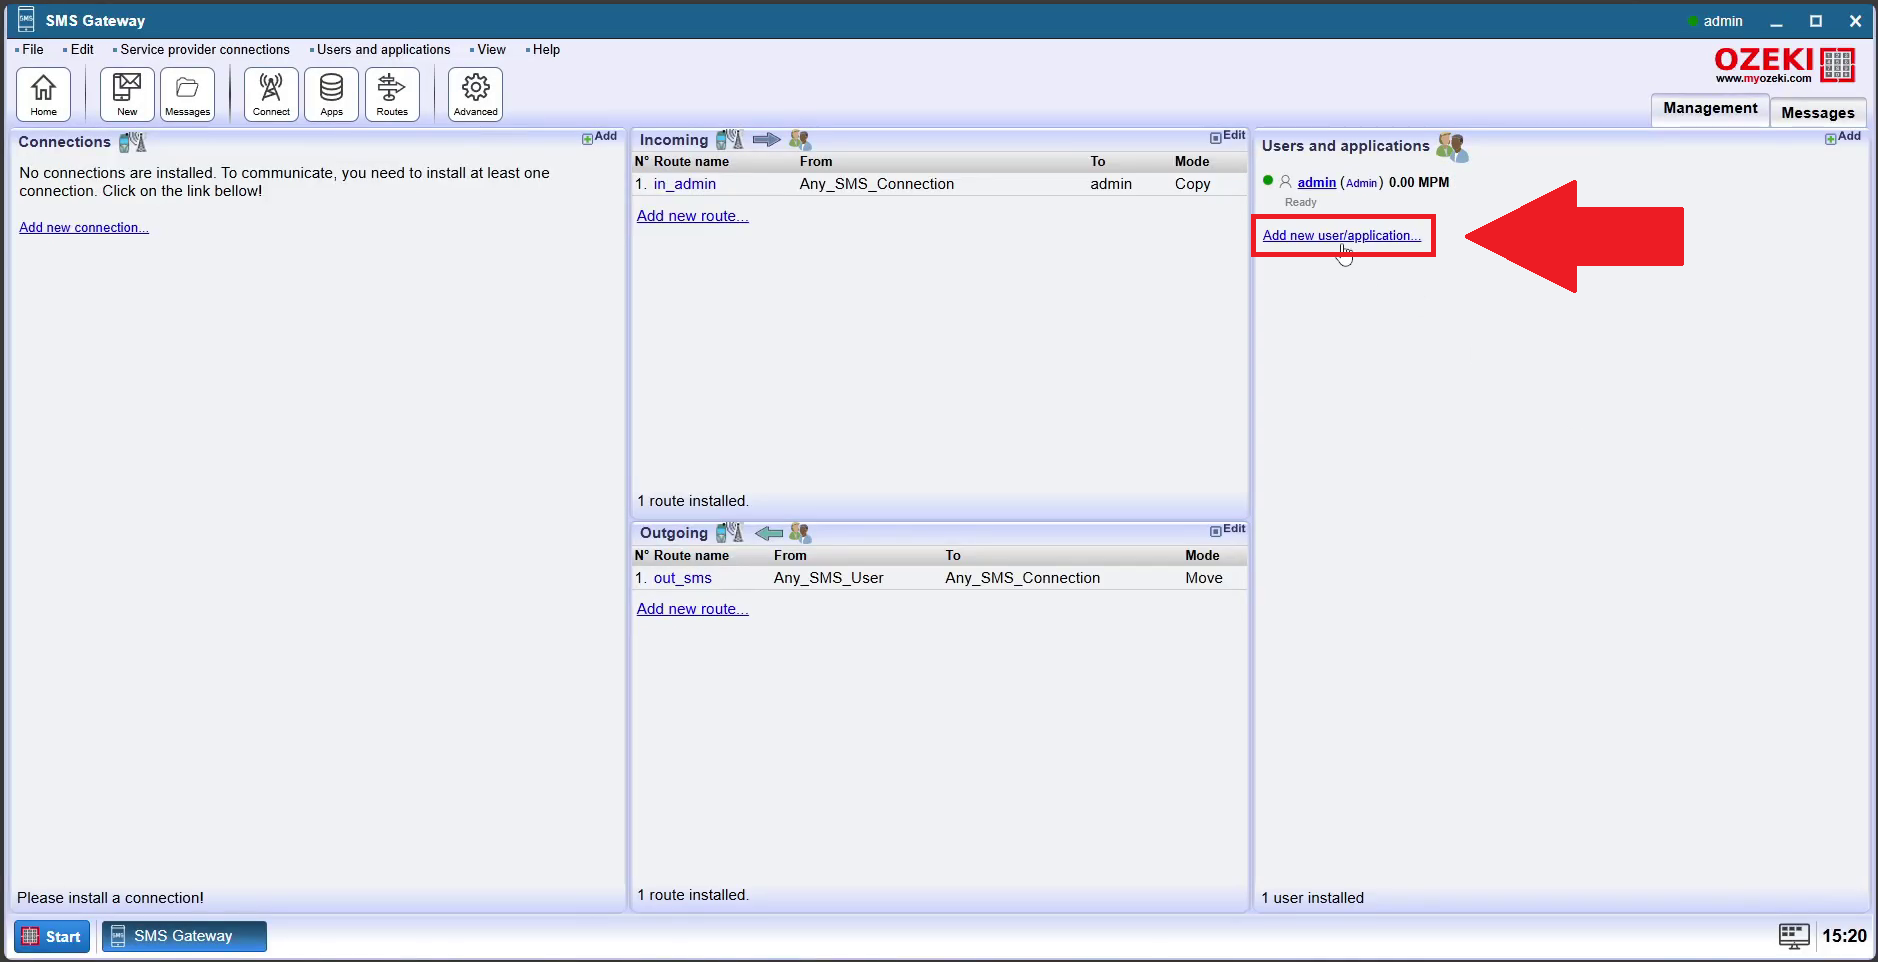
Once you launch the Gateway, you will be directed to the app's home page. To proceed, you must find the 'Users and applications' section. As shown by the red arrow in Figure 1, click on the 'Add new user/application' link, which is highlighted in blue.
Step 2 - Install HTTP User
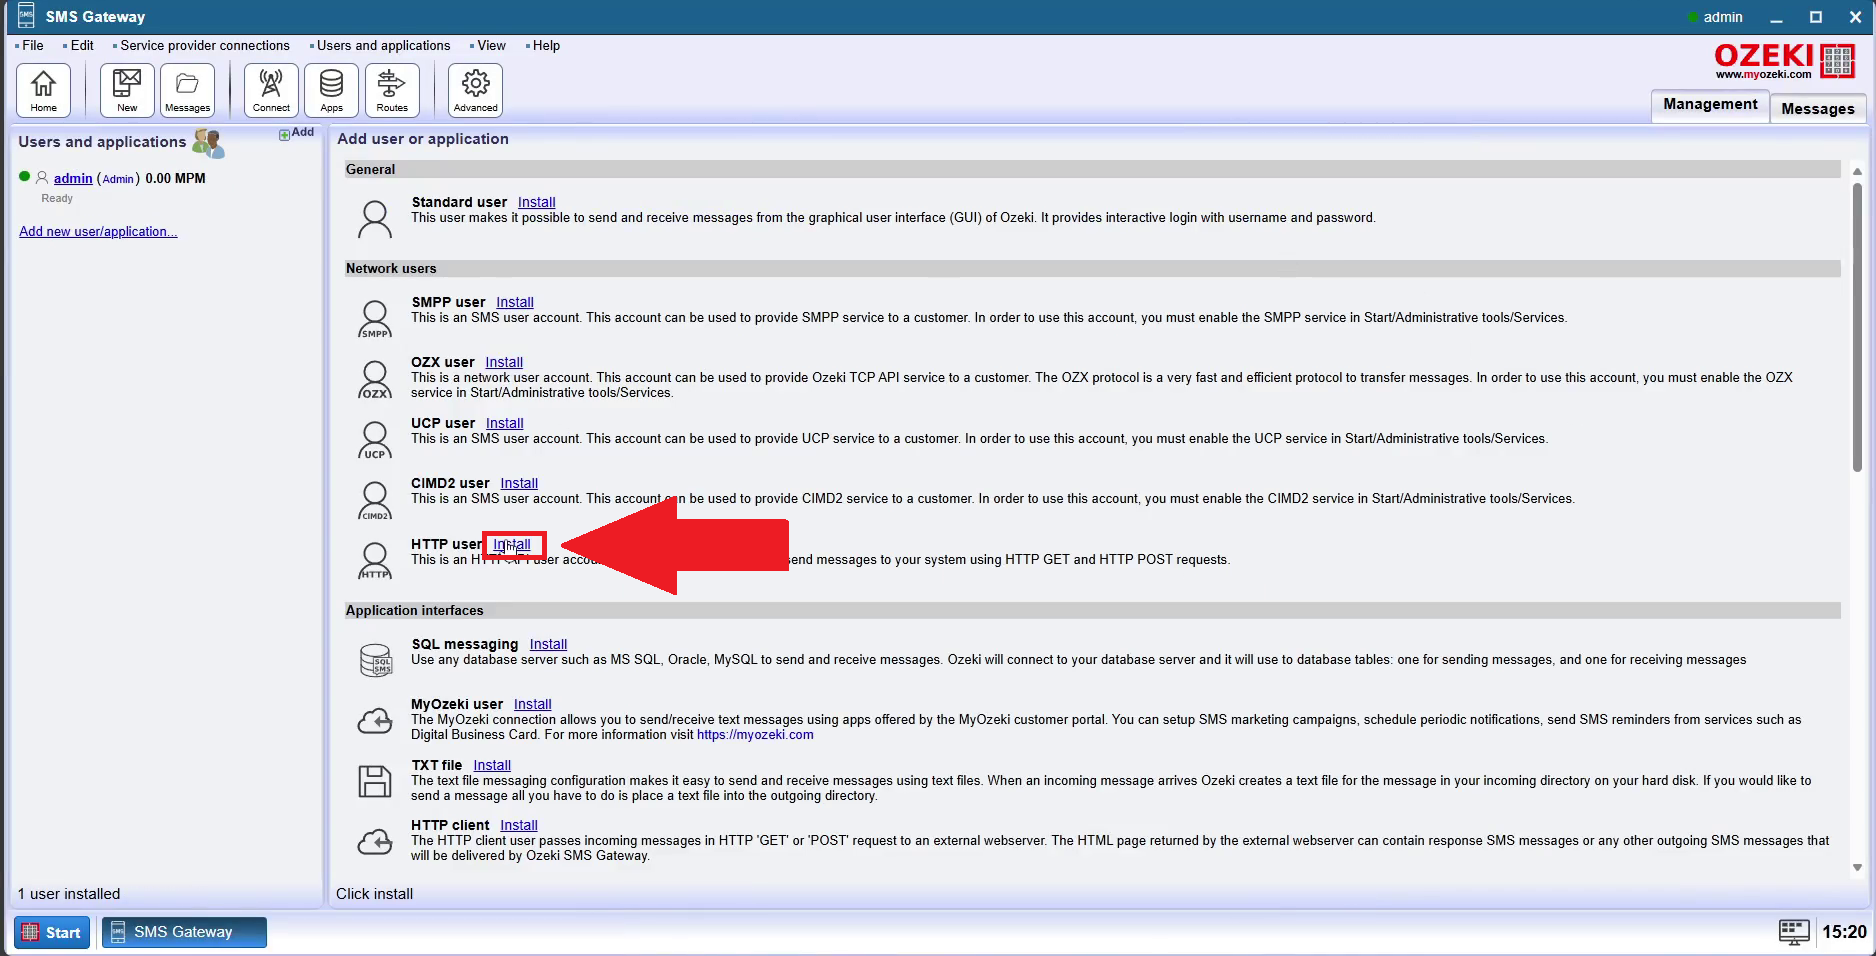
On the Users and applications site, you need to locate 'Network users' section. Search for the 'HTTP user' among the option, and give the 'Install' link next to it a click, shown by the red arrow in Figure 2.
Step 3 - Setup HTTP User
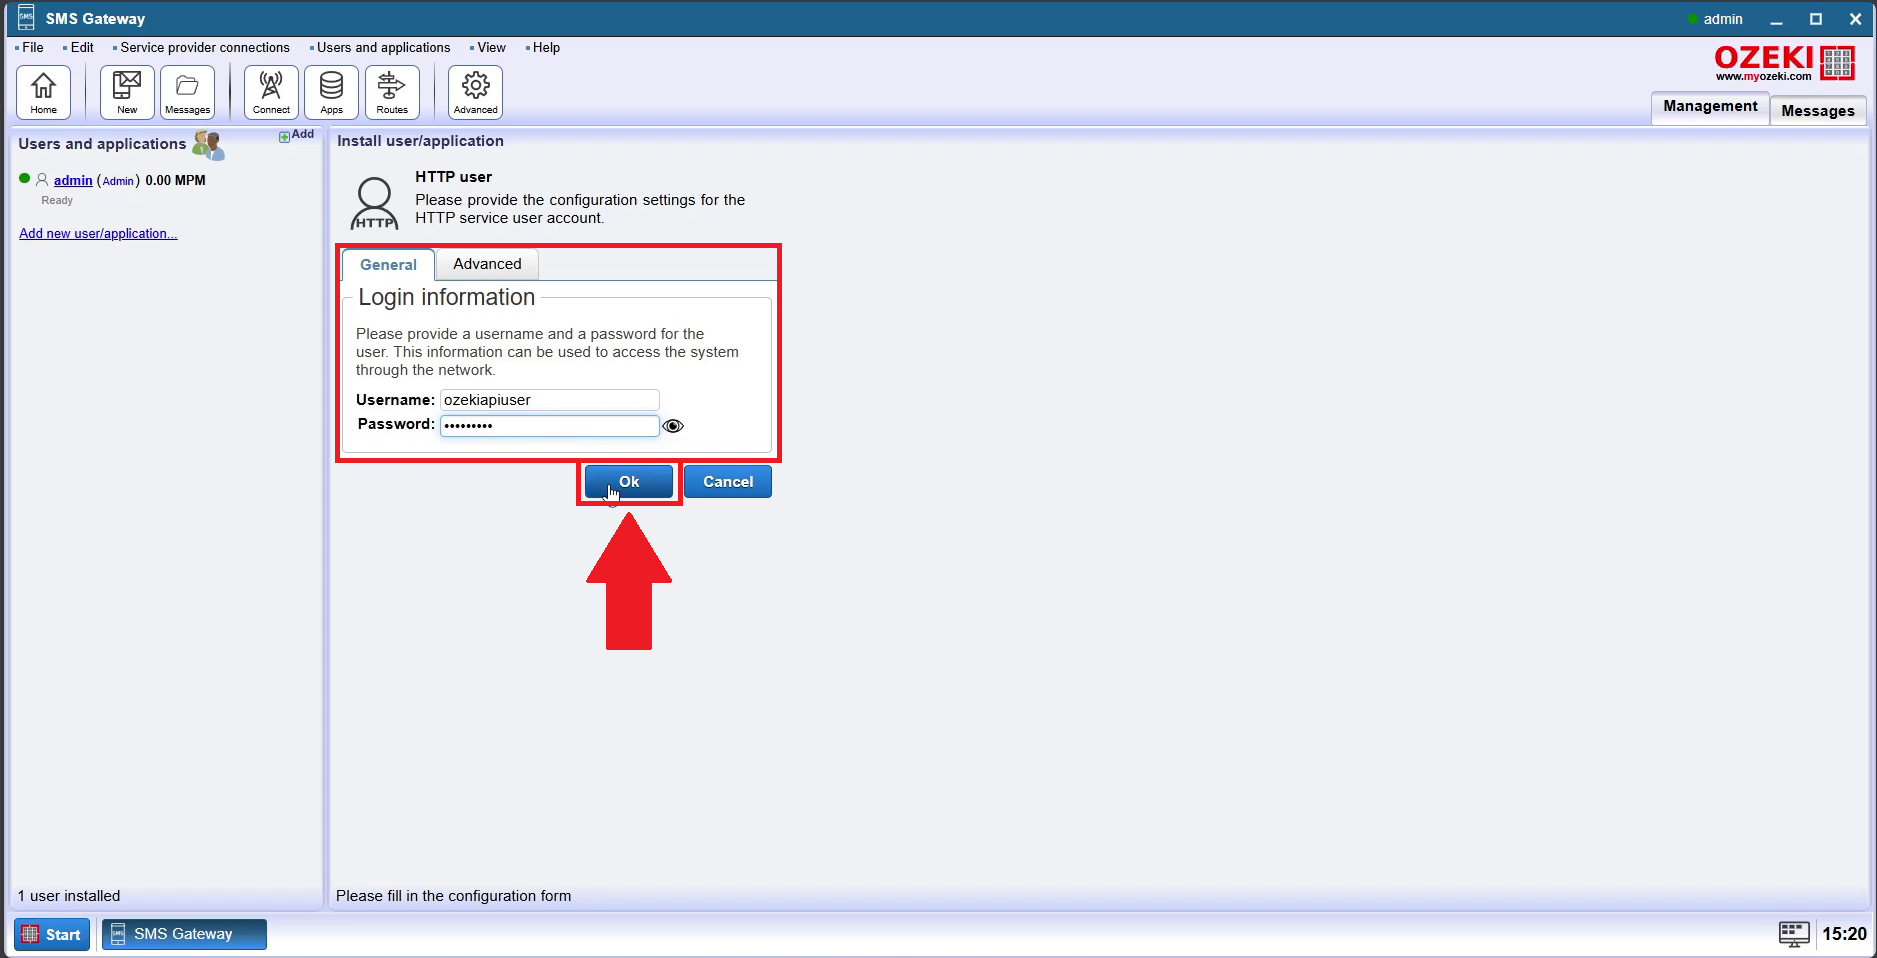
As you can see in Figure 3, in this step, you need to provide the configuration settings for the HTTP user. While remaining in the 'General' tab please enter a username and a password for the HTTP user. This will be used to access the system through the network. Once done, click the blue 'OK' button in the corner.
Step 4 - Open home page
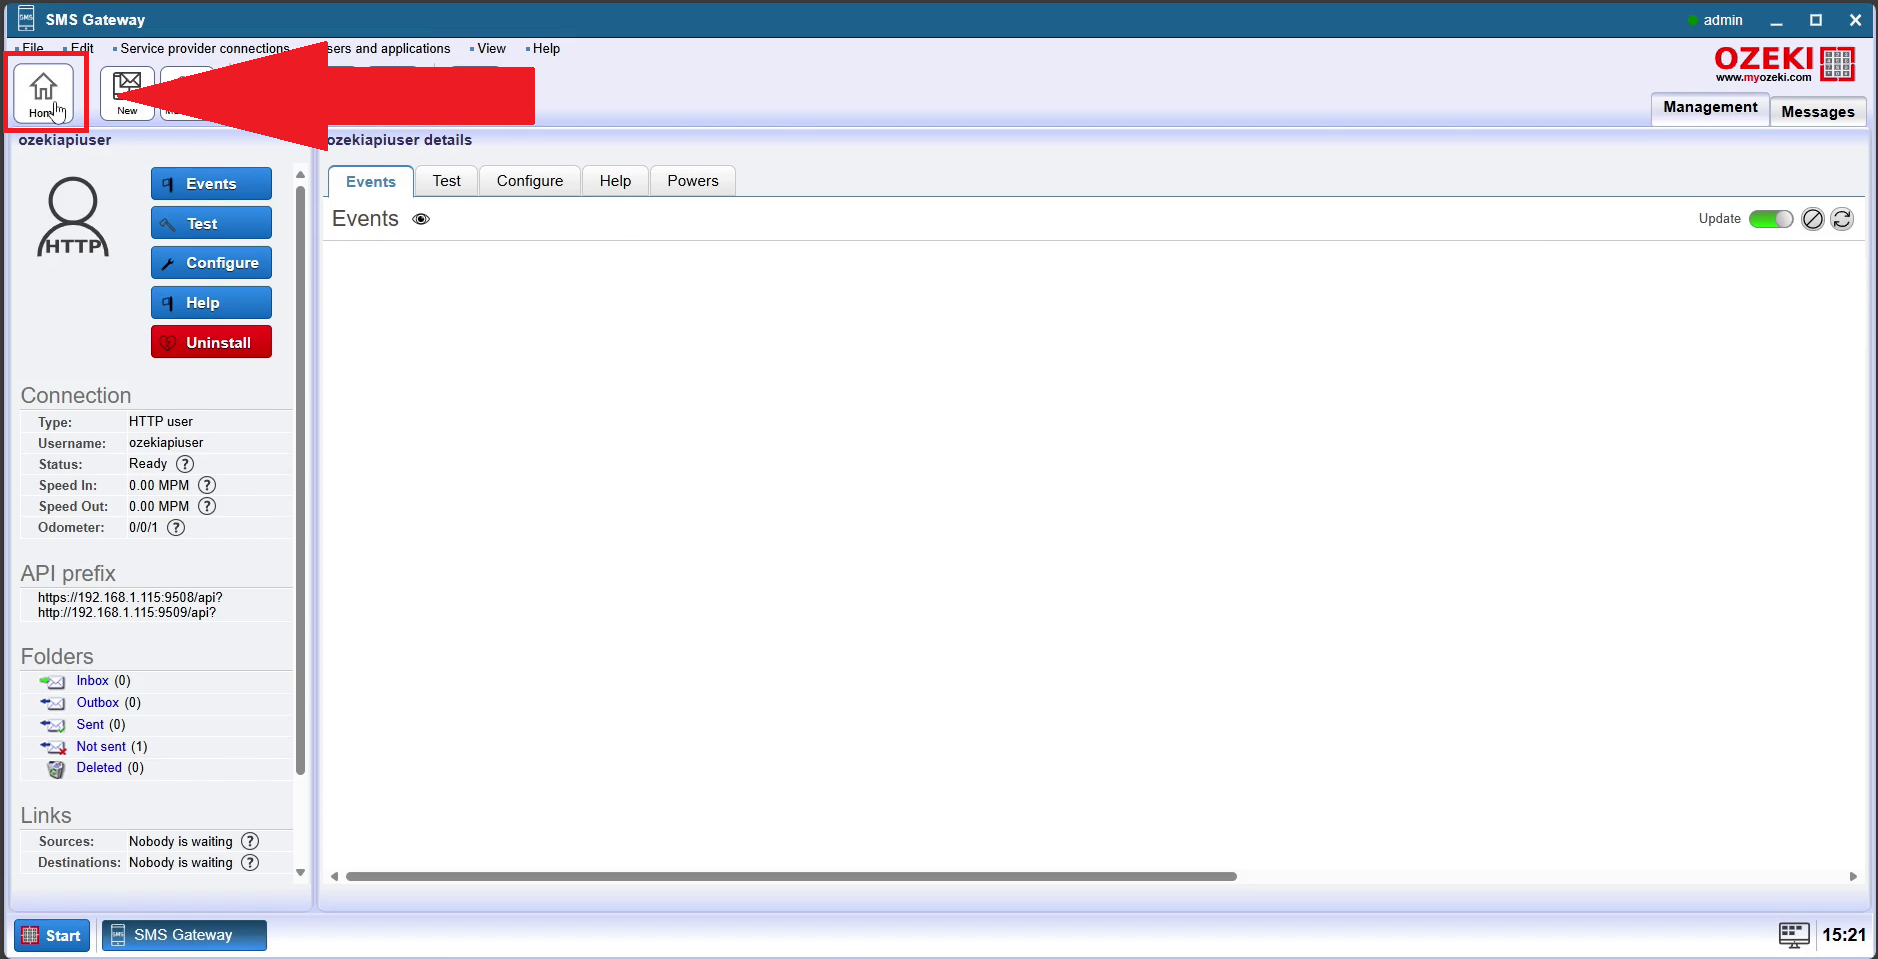
To move on to the next step, navigate back to the home page. Referencing the red arrow in Figure 4, locate the home icon in the upper left corner and click on it.
Step 5 - Add new connection
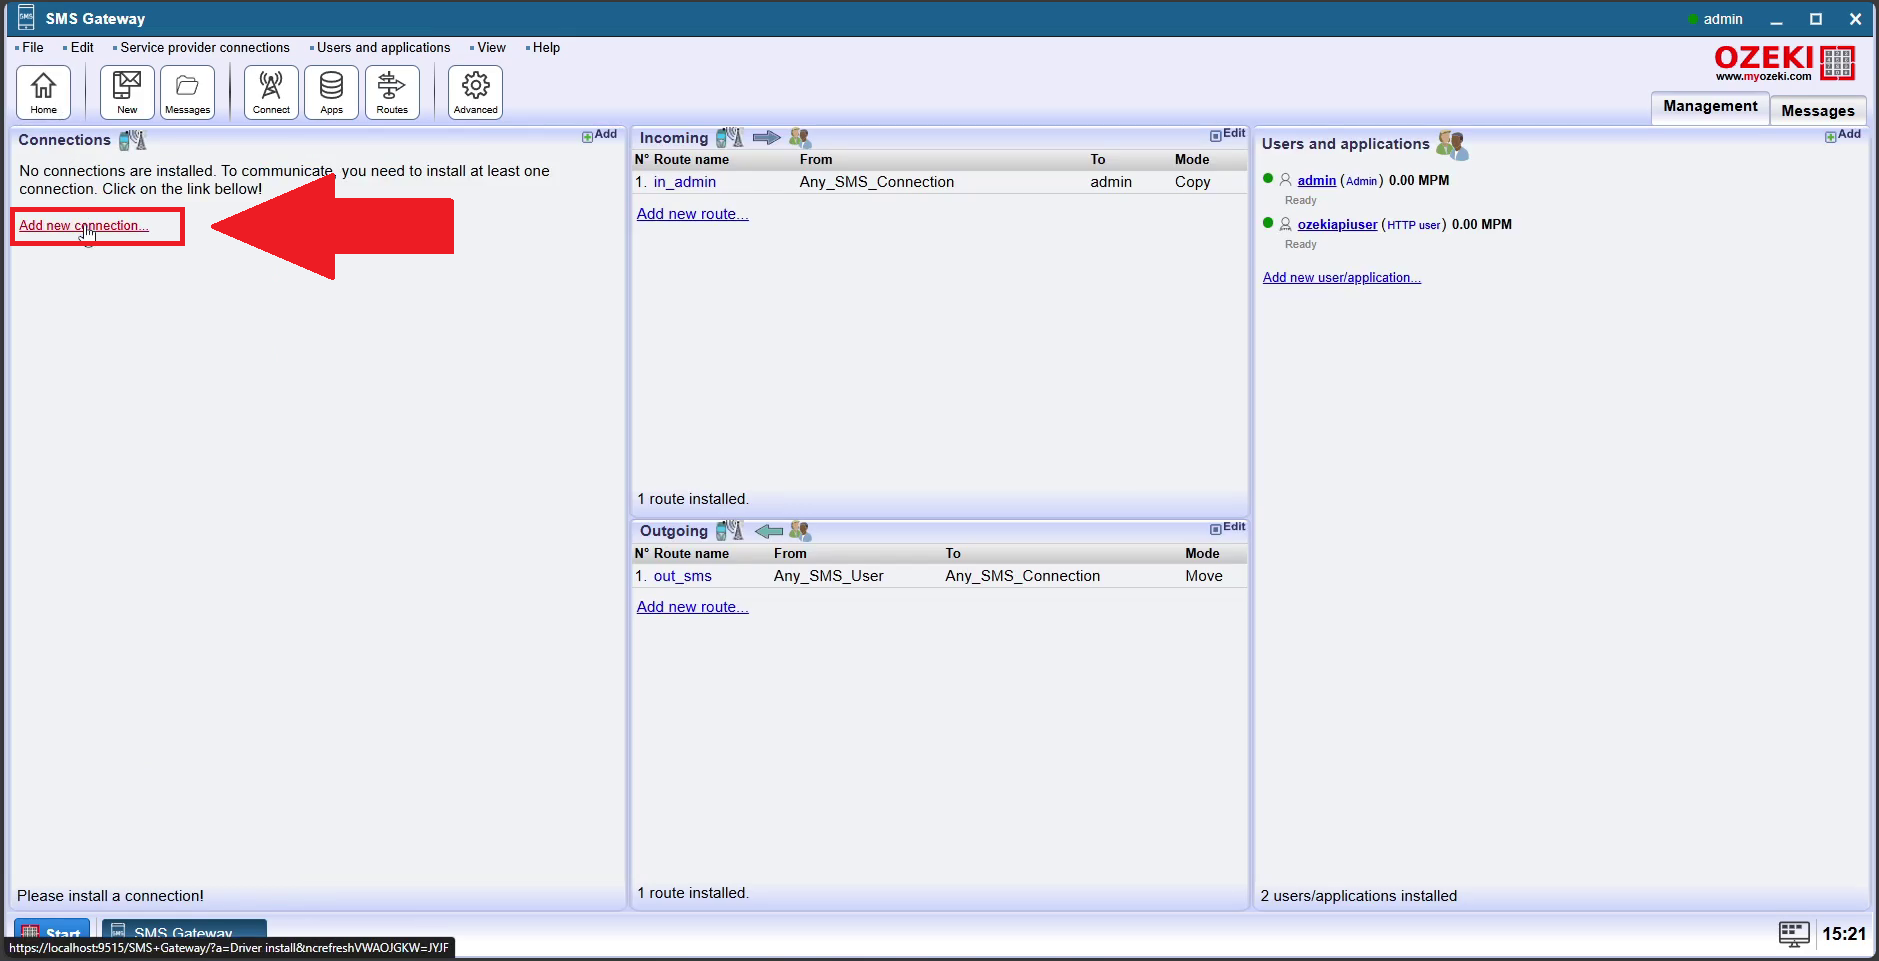
Once you are back on the home page, head to the 'Connections' section in the left panel. As illustrated in Figure 5, click on the 'Add new connection' link.
Step 6 - Install Ozeki Chat Account
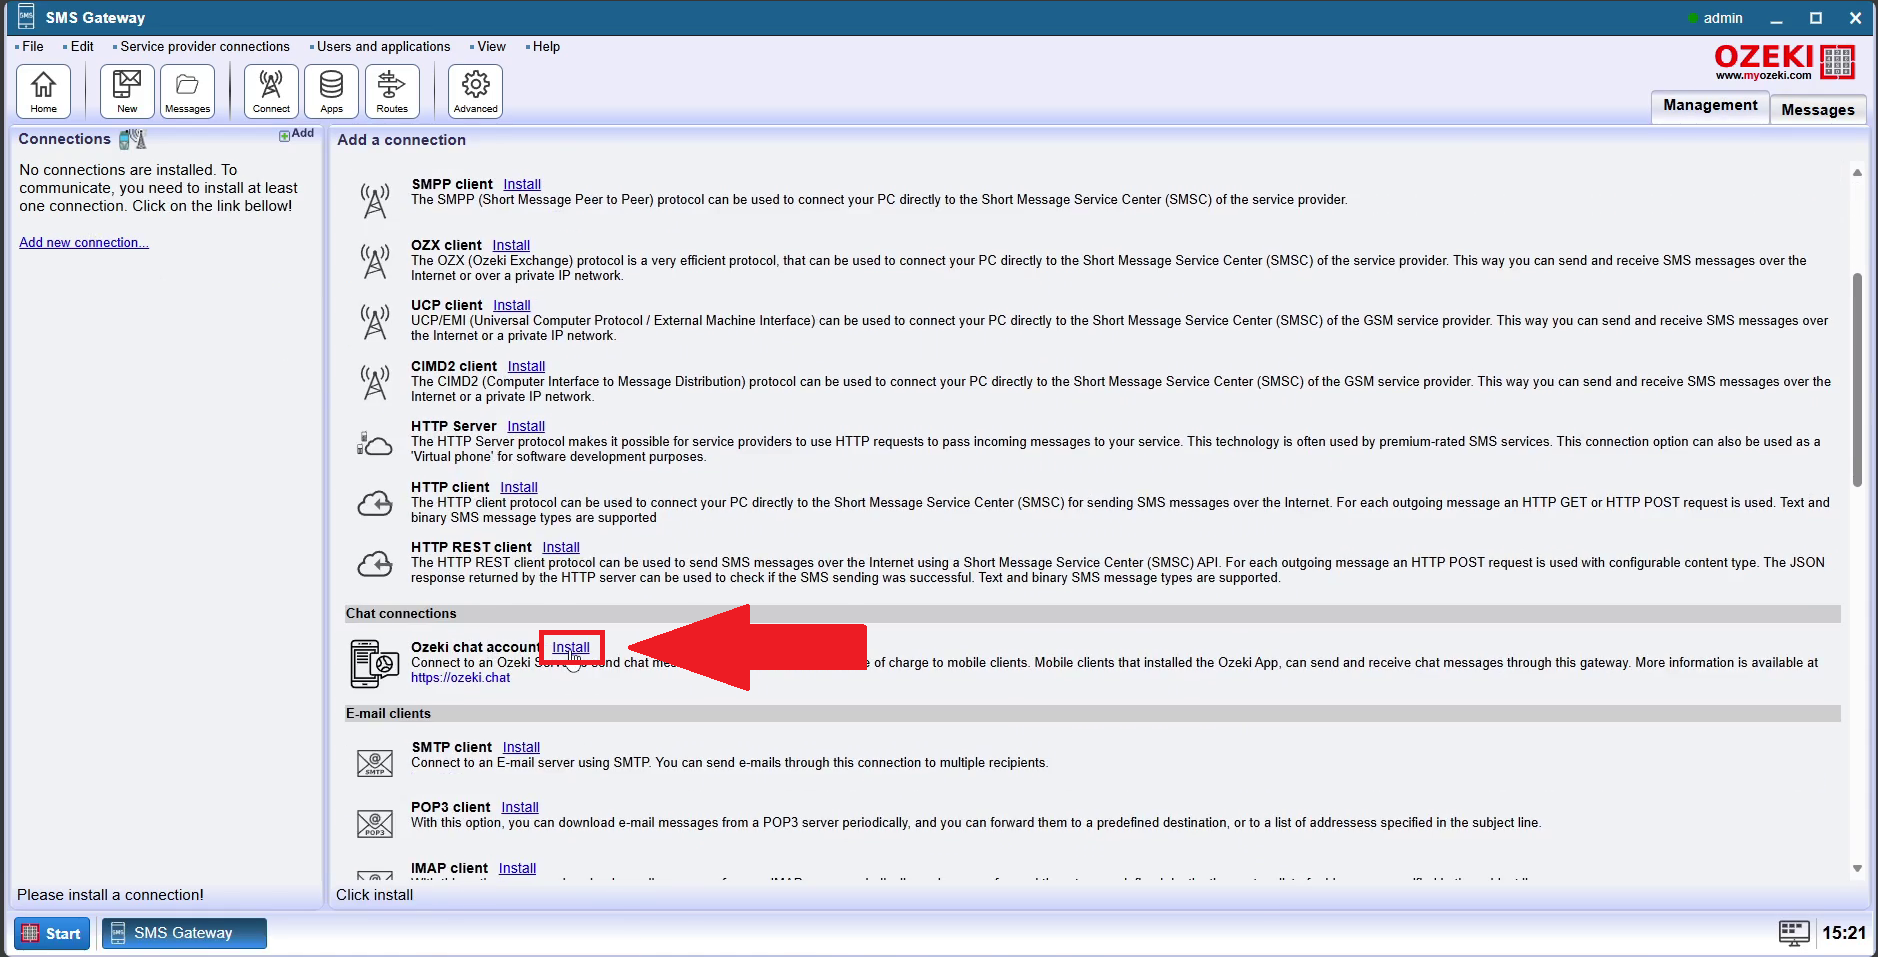
On the 'Connection' site, your next step is to locate the 'Chat connections' section. As shown in Figure 6, click on the blue 'Install' link next to the 'Ozeki Chat account' to proceed with the installation. This will initiate the setup process for the chat connection.
Step 7 - Enter Ozeki Chat Account details
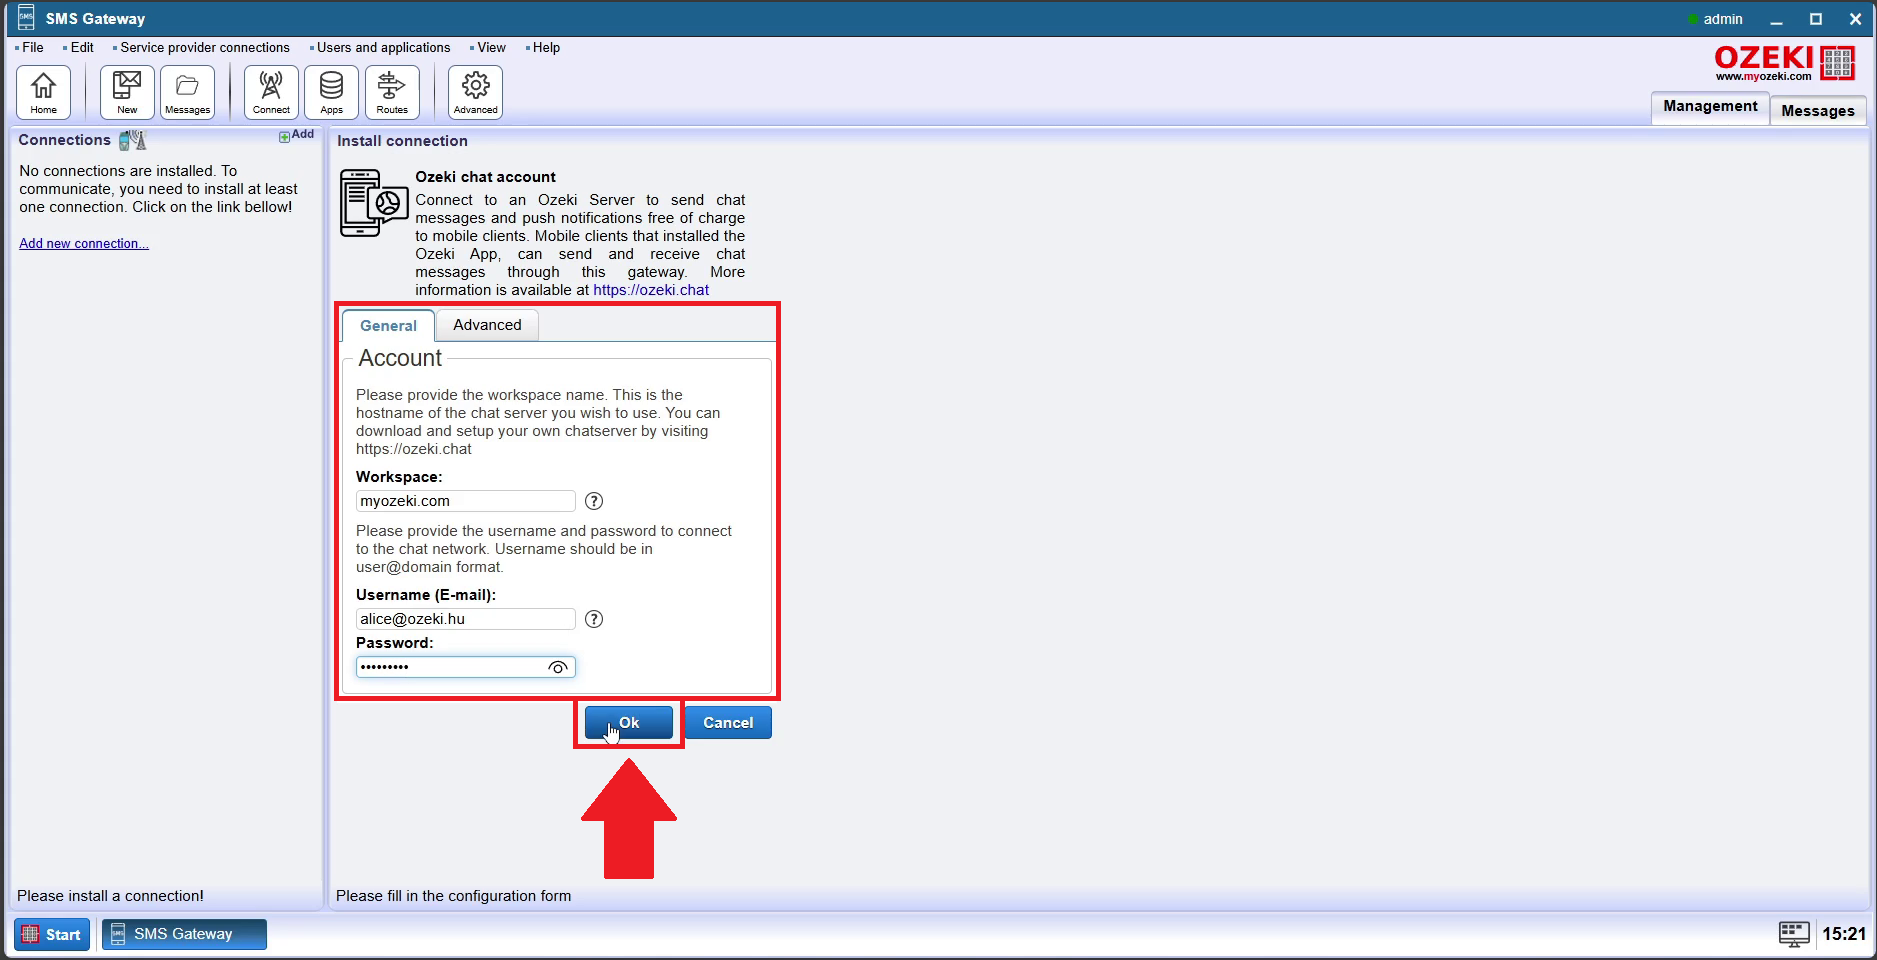
The following important step involves filling out the configuration form for the Ozeki Chat account connection. As shown in Figure 7, you should stay within the 'General' tab to enter the necessary account details. Start by providing the workspace name, which is the hostname of the chat server you intend to use. Next, input the correct username and password combination to establish a connection to the chat network. Once you have entered these details, click the blue 'OK' button to save your settings and finalize the setup.
Step 8 - Open home page
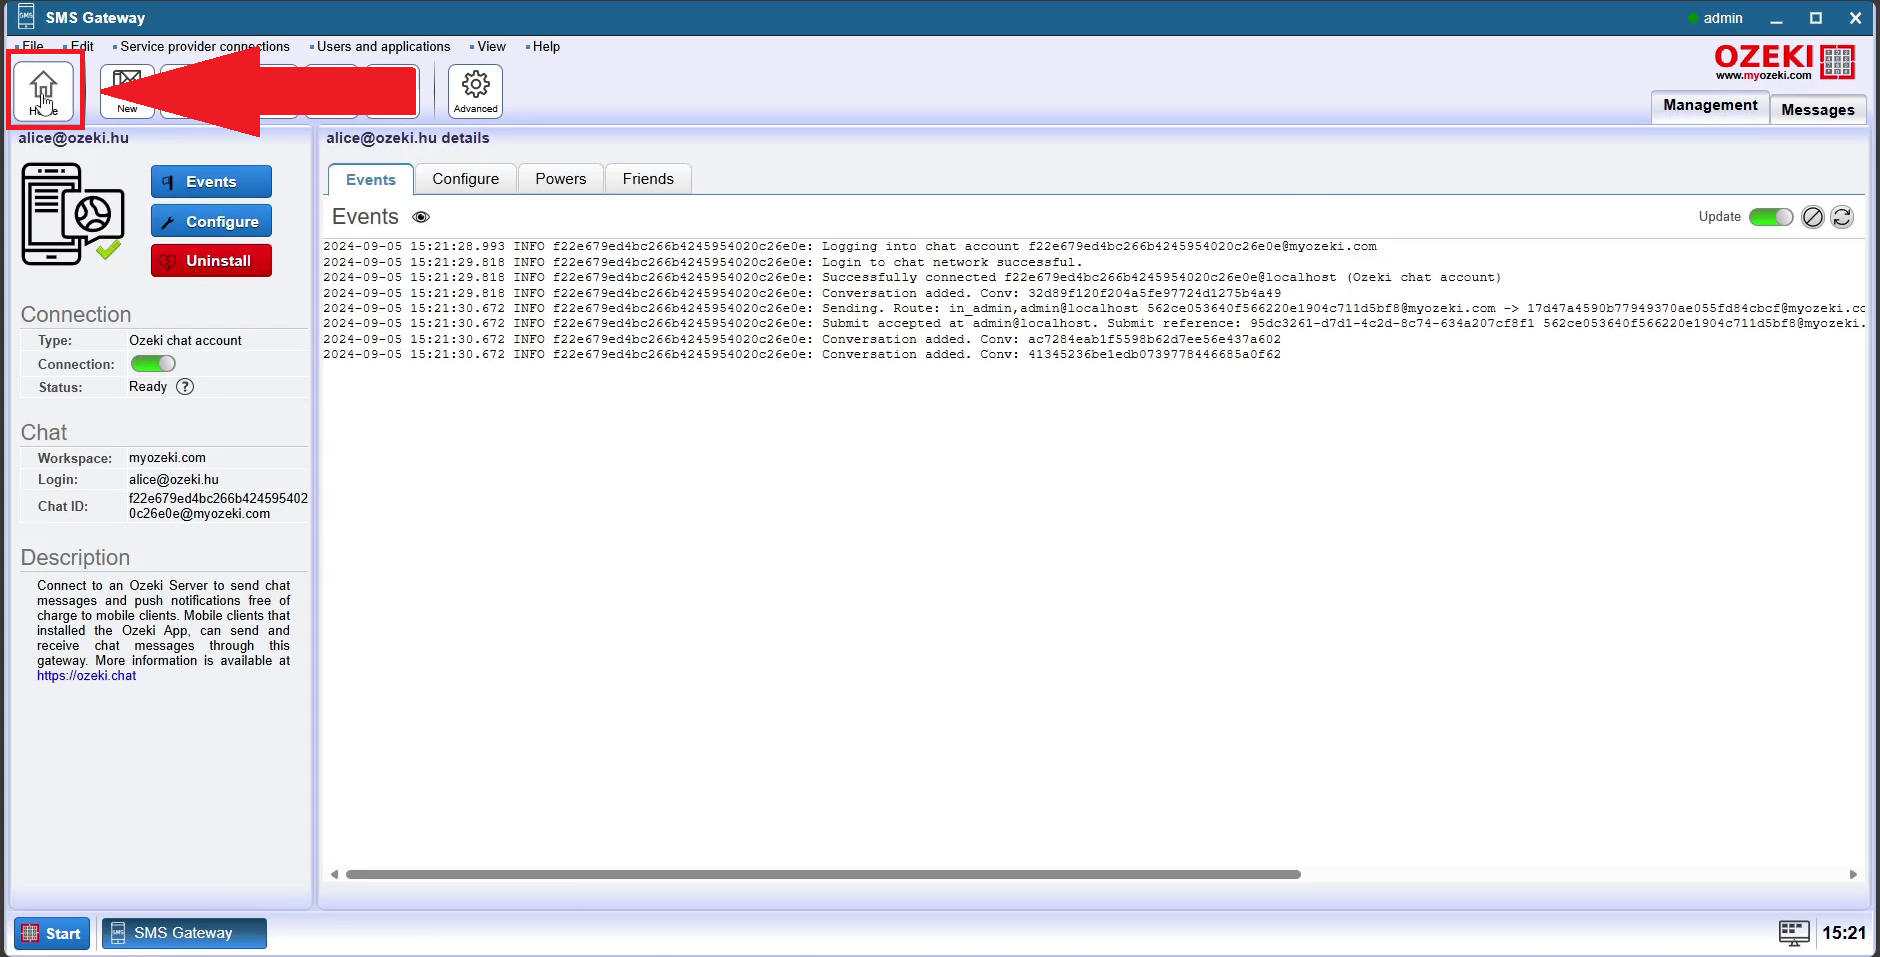
To proceed to the next step, return to the home page. As shown by the red arrow in Figure 8, find the home icon located in the upper left corner of the screen and click on it. This will take you back to the main dashboard, allowing you to continue with the setup process.
Step 9 - Add new route
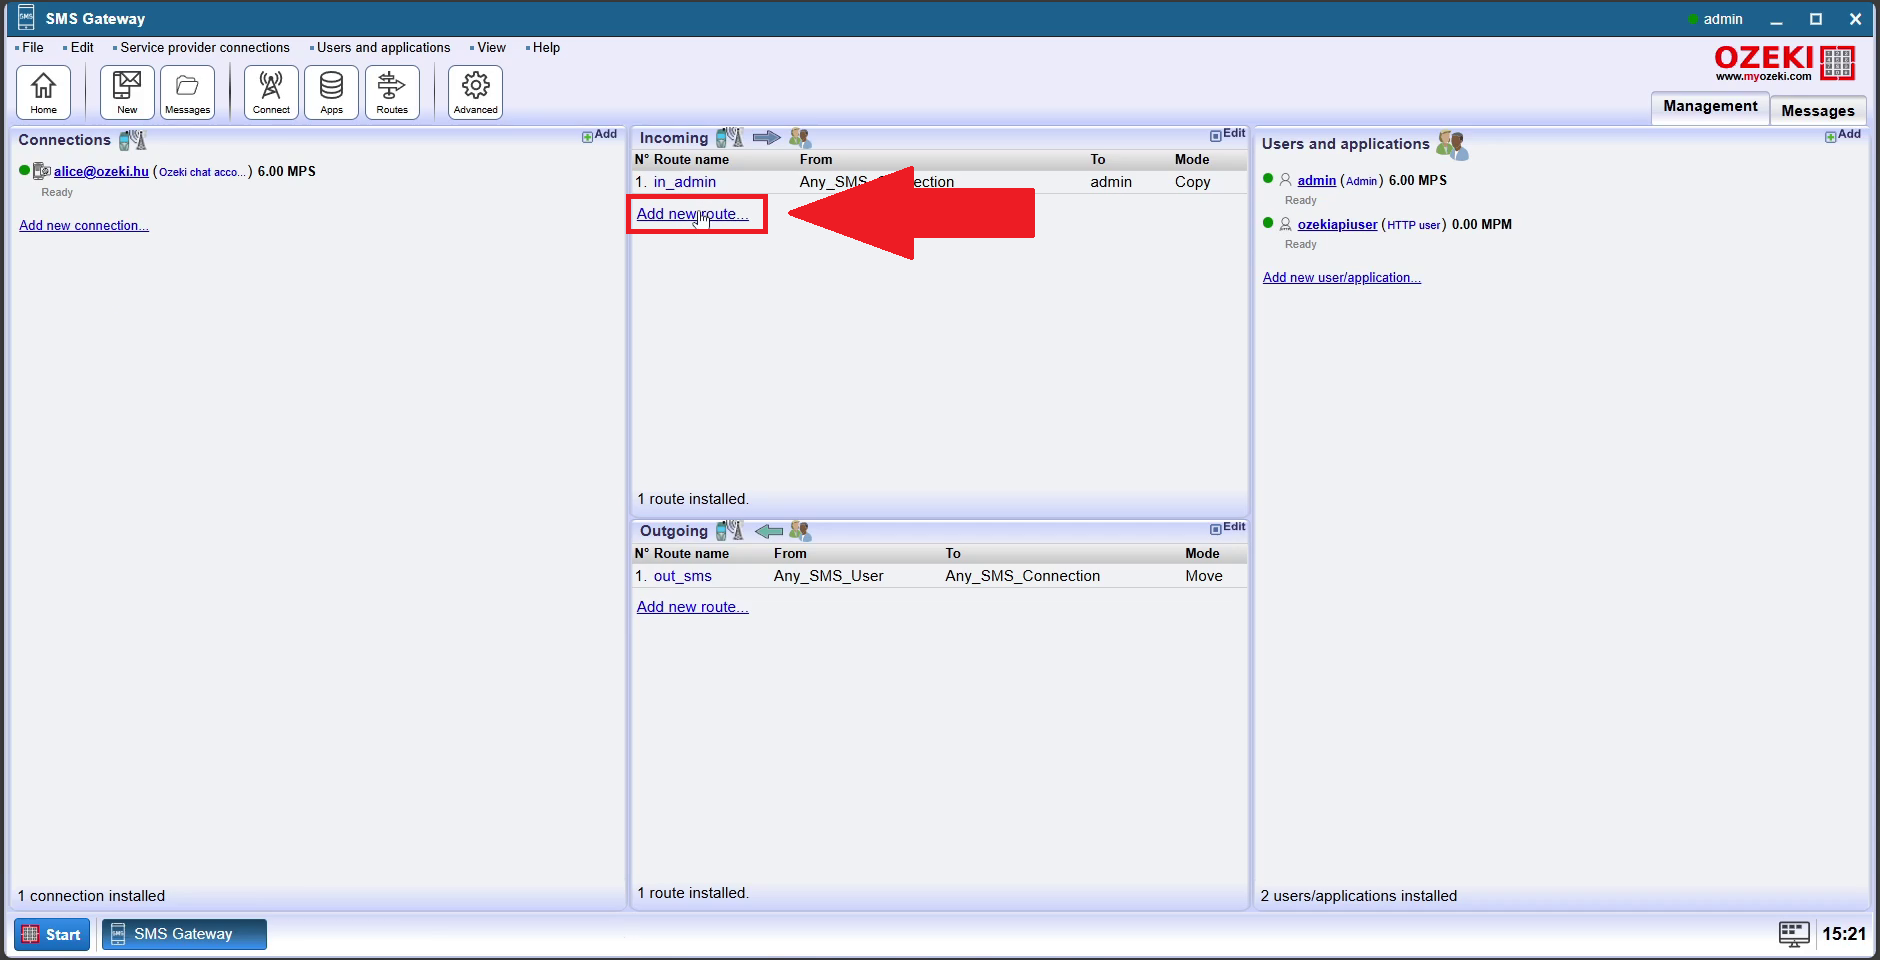
To add a new route, find the 'Add new route' option within the routing section, which is displayed in the interface. As indicated by the red arrow in Figure 9, click on this link to initiate the process of setting up a new connection route.
Step 10 - Enter HTTP to Chat route details
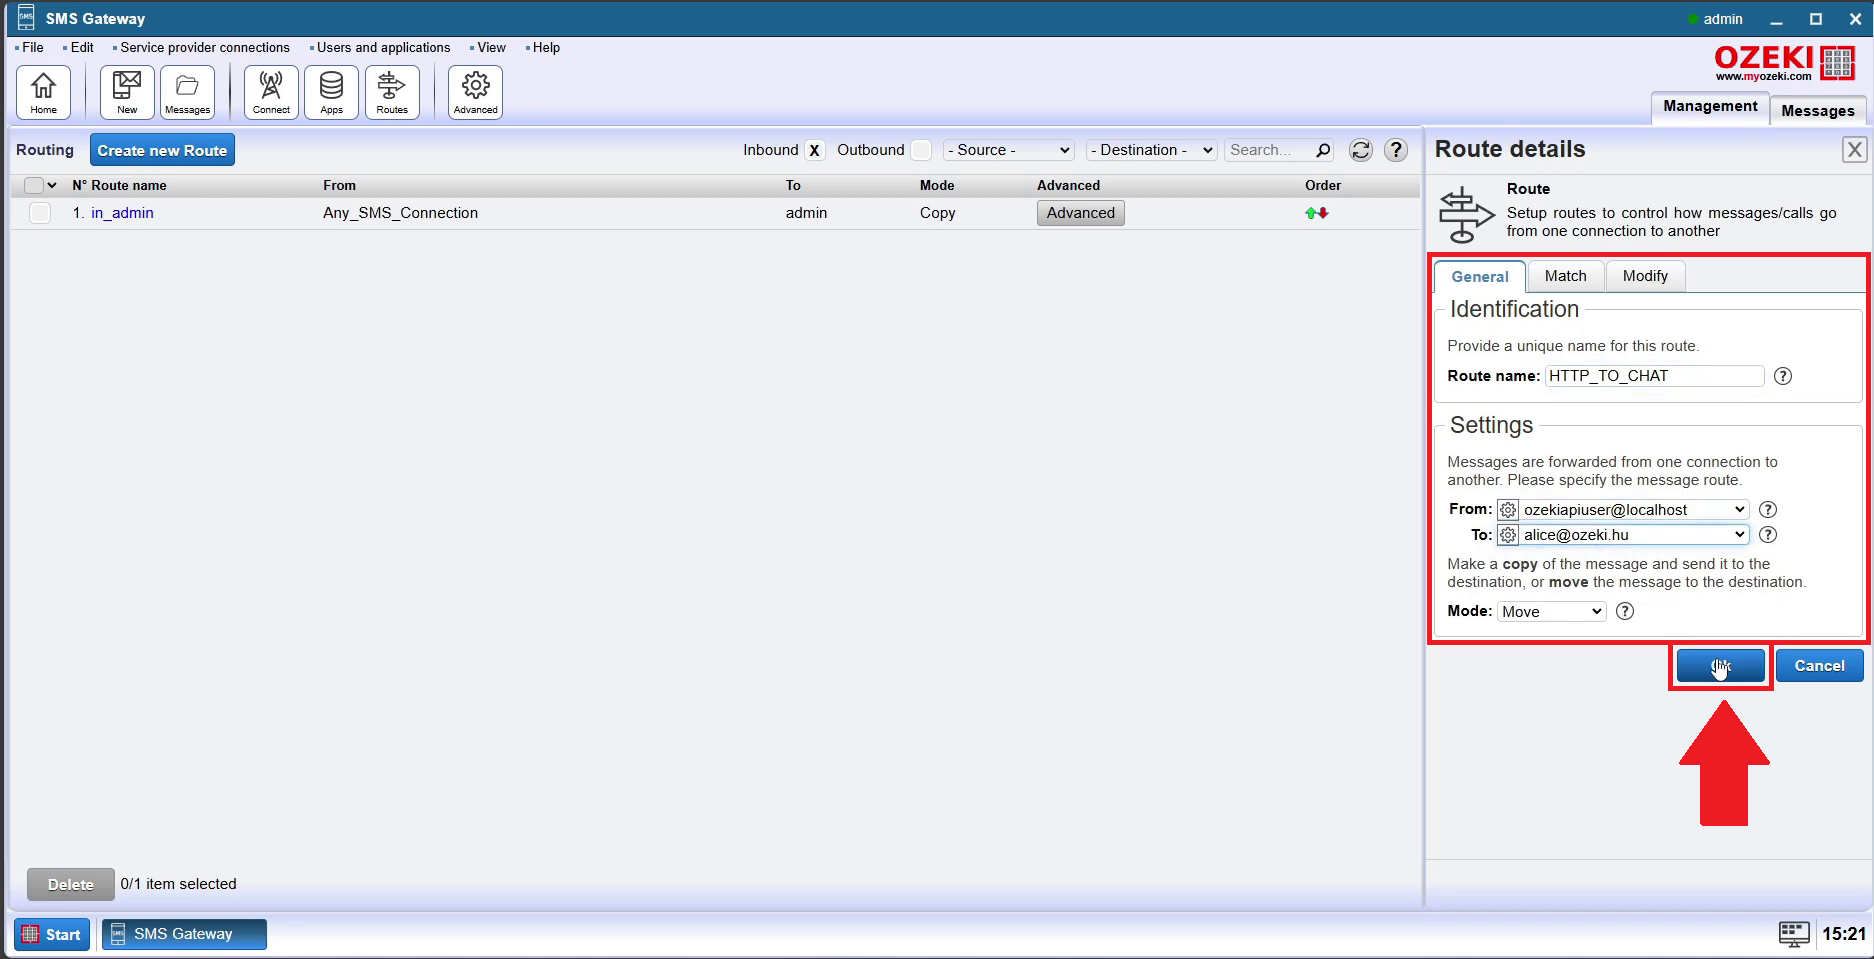
This step involves entering the HTTP to Chat route details.In the 'Identification' section, enter a name for the route, such as 'HTTP_TO_CHAT' which will help you easily find the route later. In the 'Settings' section, you need to specify the source and destination for this route by. Ensure that the 'From' connection is set to the api user at localhost. After providing everything, click the 'OK' button, as indicated by the red arrow in Figure 10 to save your settings.
Step 11 - Open home page
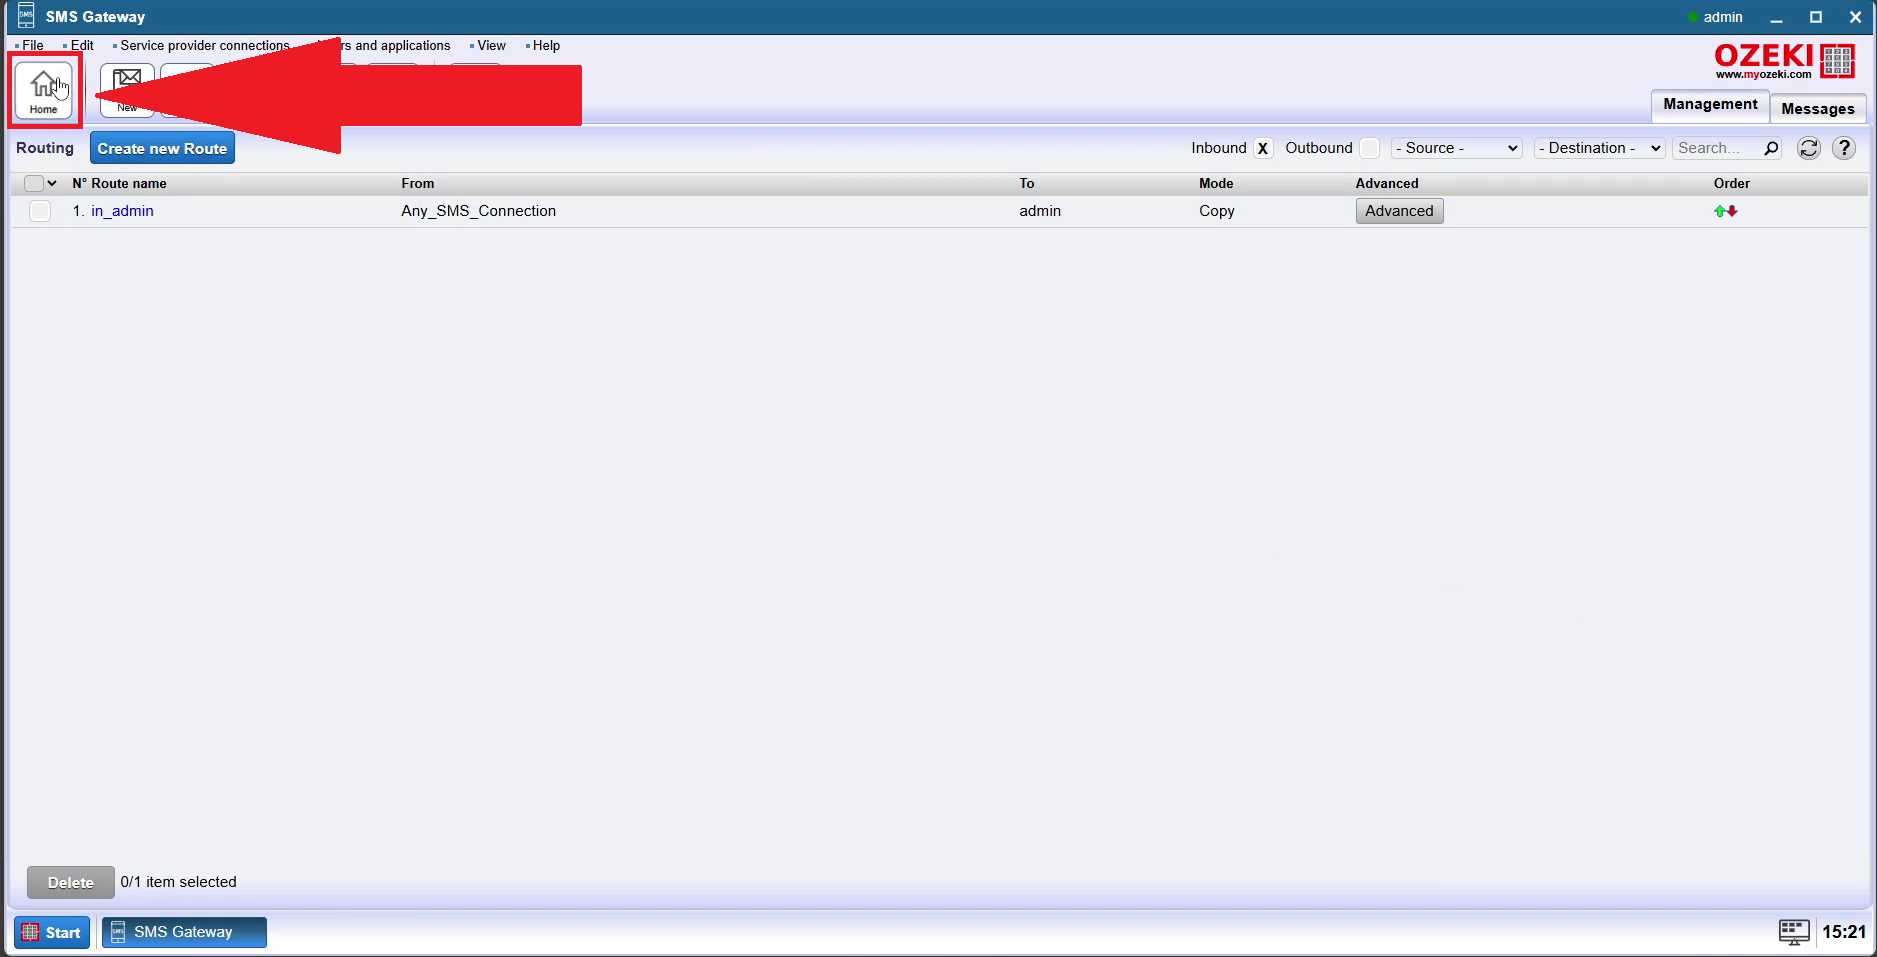
To move on to the next step, return to the home page. As indicated in Figure 11, click on the home icon in the upper left corner of the screen.
Step 12 - Check your API prefix
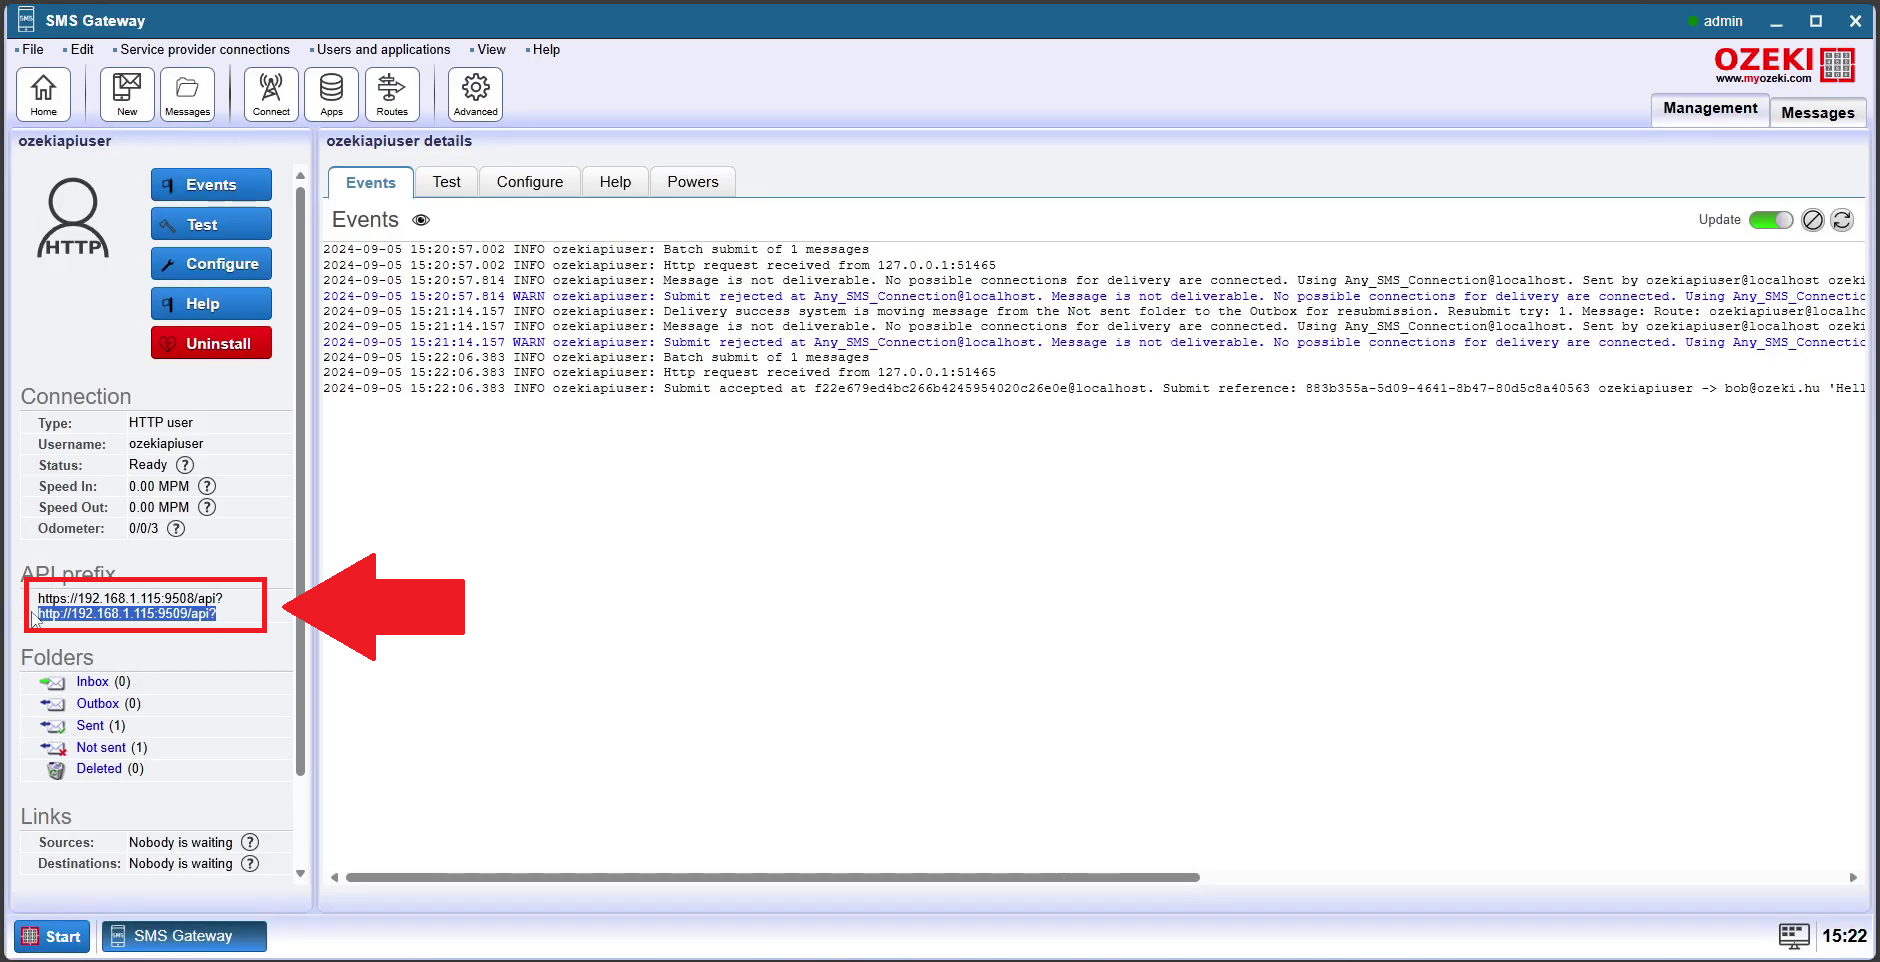
To check your API prefix you need to choose the HTTP user from the Users and applications section. Give the username a click and then navigate to the left panel of its site. As you can see in Figure 12, you need to locate the API prefix section and copy paste the second URL.
Step 13 - Enter HTTP-GET details into URL bar
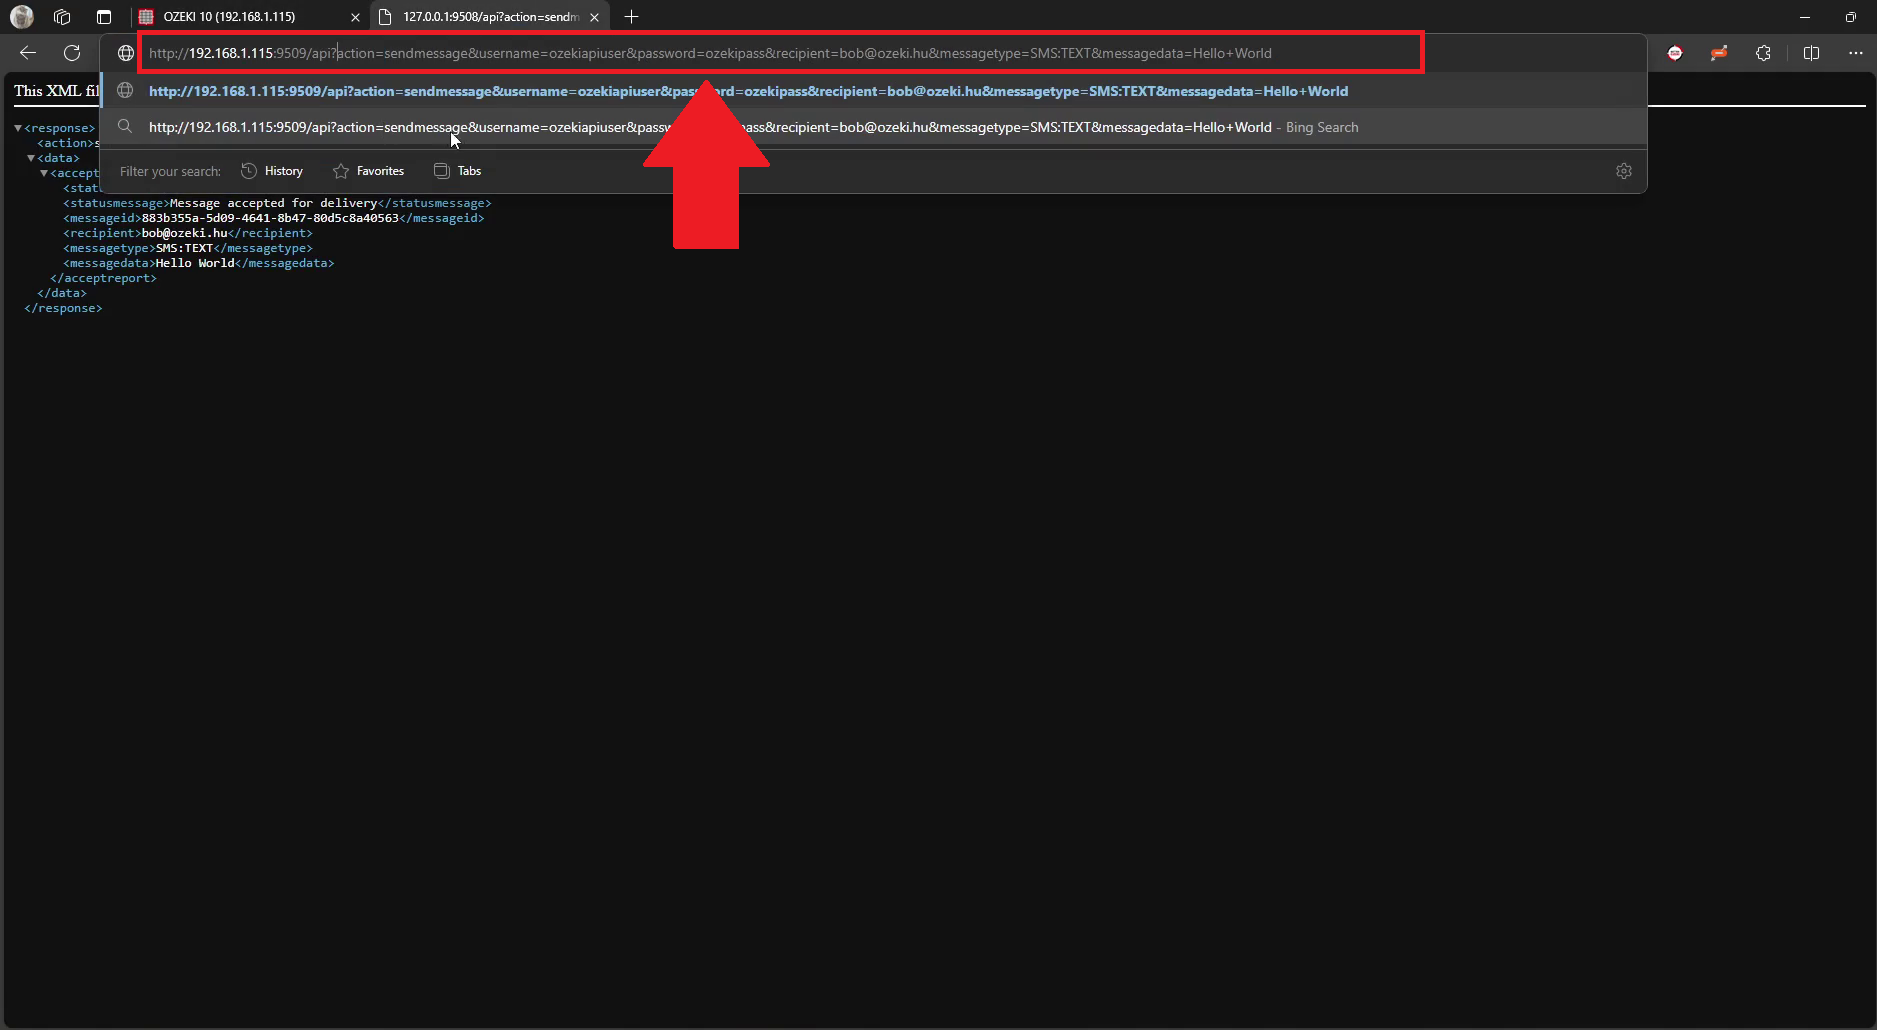
To enter the HTTP-GET details, first locate the URL bar in your browser. Input the necessary HTTP-GET details into the URL bar, ensuring that the format is correct for your request just like in Figure 13. It is important to double-check the URL before proceeding to avoid any errors in the connection. You need to enter the message for the end of the URL.
Step 14 - Message received in MyOzeki
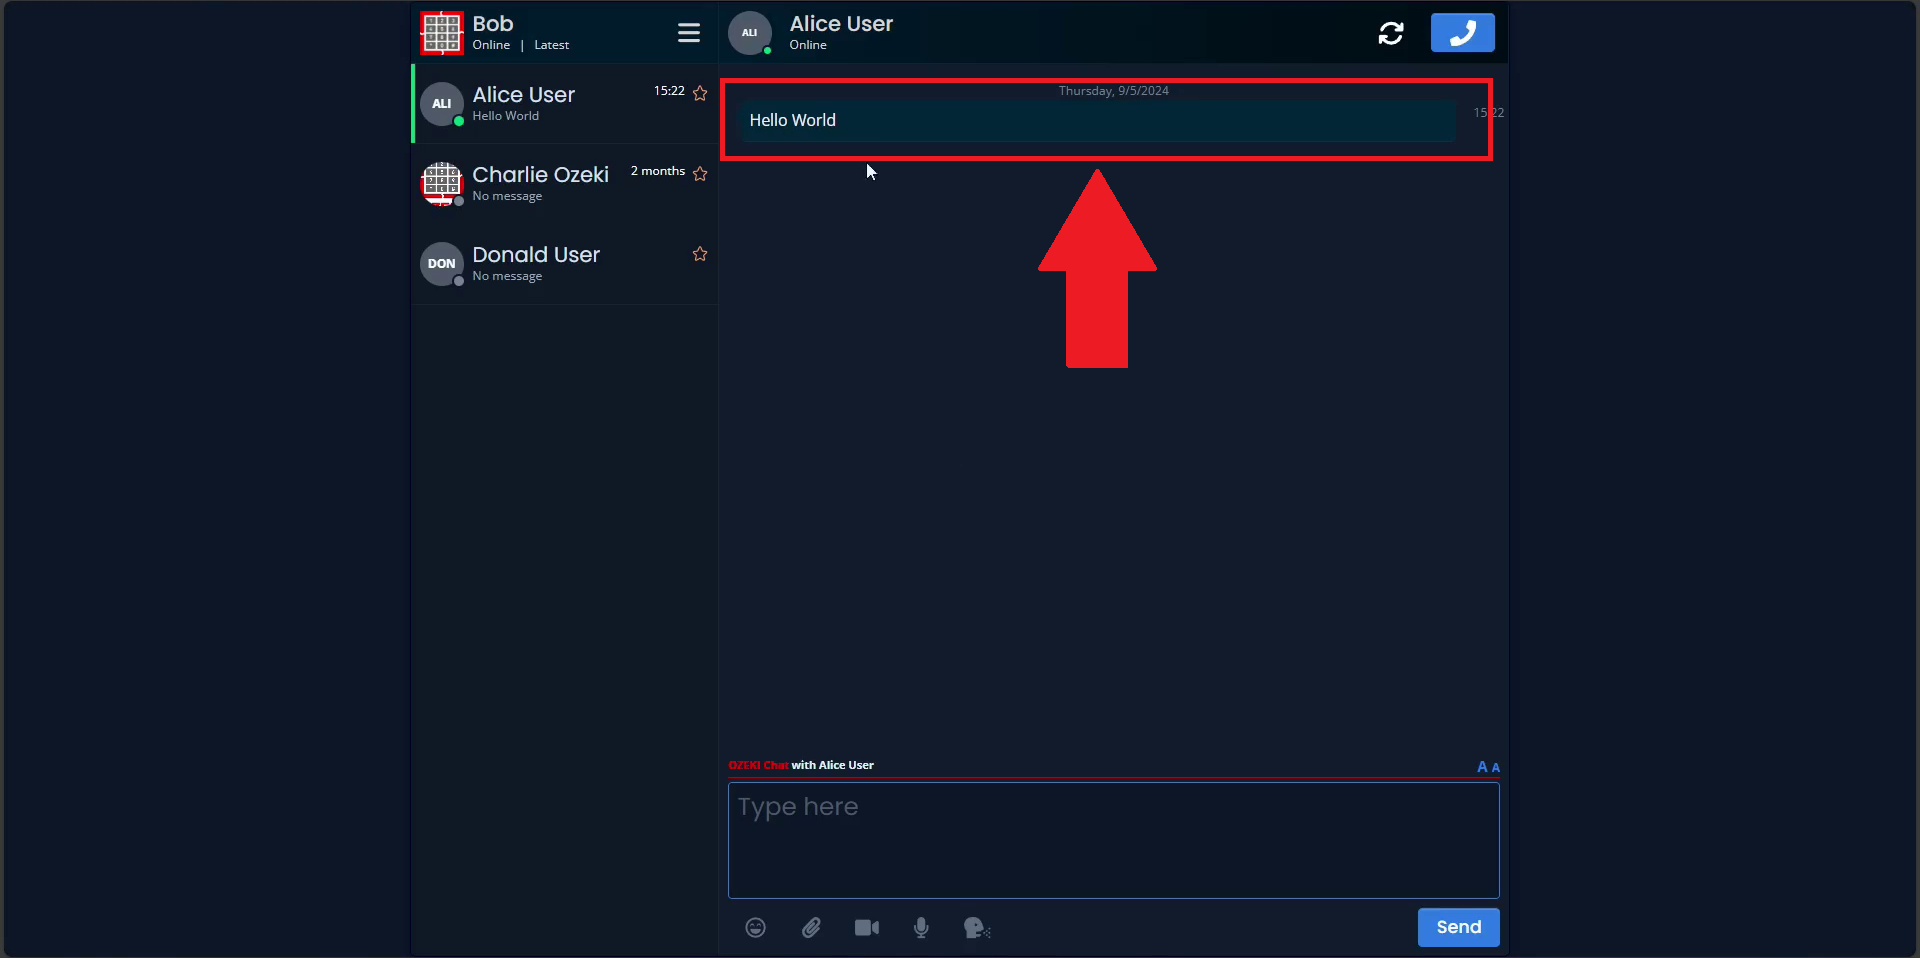
After you enter the HTTP-GET details, the next step is to check for the message received in MyOzeki. Go to the MyOzeki interface. You should see the message related to your request just like in Figure 14, showing that the system has processed it successfully.
Summary
Sending Ozeki Chat messages through an HTTP request can enhance your communication strategy by automating messaging, integrating chat functions with other applications and enabling quick real-time updates. This method allows you to connect Ozeki Chat with various systems, sending messages based on specific events or actions. This guide will walk you through the steps to effectively use HTTP requests for messaging, helping you keep your team or clients informed and engaged with minimal effort.
