How to send sms through the Android SMPP Gateway
This article is about sending SMS through the Android SMPP Gateway using Ozeki SMS Gateway. After reading this, you will be able to send out SMS using SMPP protocol. SMPP (Short Message Peer-to-Peer) and Ozeki SMS Gateway give you the ability to send out text messages from your computer. The distribution is helped by an Android phone, so you will also get to see how to use the Ozeki Android SMPP Gateway on your phone. This guide is highly recommended if your company wants to send out SMS in a simple but rapid way.
This solution was replaced by the latest Android SMS Gateway client solution, which runs on all the latest Android mobile phones in 2026. Please visit the Android SMS Gateway Client for Ozeki page for more information.
What is an Android SMPP Gateway
Az Android SMPP Gateway accepts connections over the Internet (or Lan) from computers. These computers send SMS to the Android mobile phone using the SMPP protocol, and the Android mobile phone forwards these SMS messages to the mobile network.
How to send sms through the Android SMPP Gateway (Simple guidelines)
This SMS communication solution make it possible to use your computer to send SMS messages to any mobile phone. The solution consists of a computer with the Ozeki SMS Gateway installed, your mobile phone with the Ozeki SMPP SMS Gateway application installed and some other mobile users. Your computer and the SMS gateway software is responsible for compiling the message. Your mobile phone will receive the request and will send the message using the gateway application. On the diagram (Figure 1) you will see that the computer will configure the message and submit it for sending. Your mobile phone will get the submission using a wireless connection and will send it to the recipients.

How to send SMS through the Android SMPP Gateway (Quick steps)
To send SMS through the Android SMPP gateway:
- Setup Ozeki Android SMPP Gateway on your phone
- Start the application
- Launch Ozeki SMS Gateway on your desktop
- Add new service provider connection
- Install SMPP client connection
- Enter the parameters from the Android SMPP SMS Gateway app
- Check SMPP connection installation status on Events tab
- Create test SMS text message on Test tab
- Send the test SMS text message via the Android SMPP Gateway
- Read the logs about the message status
Install the Android SMPP App on your smartphone
Download, install and configure the application form Ozeki website: Download Android SMPP Gateway
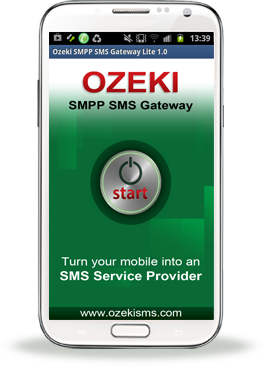
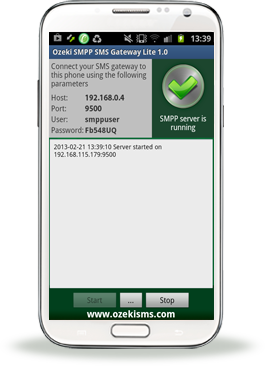
Start the application by clicking on its icon then "Start" button. You will see the followings on the top left-hand side of the screen: Host address, Port number, User name, Password (Figure 2). You need to memorize these parameters because they will be needed later.
|
|
|
|
How to send sms through the Android SMPP Gateway (video tutorial)
In this video tutorial we show you how to configure the SMPP client in Ozeki SMS Gateway and send out a test message. A bit longer than one minute but shows everything step by step, so it is fair to call this tutorial short and detailed. Advised to watch it carefully in order to do every step right. After watching the video, you will be able to configure everything by yourself.
Setup SMS Gateway to use your Android phone
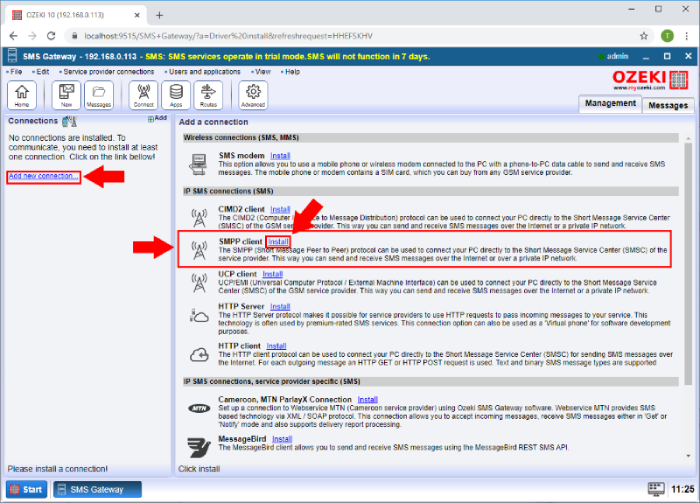
You need to install and configure SMPP connection. Firstly, add new service provider connection by clicking on the left-hand sided Connections panel's "Add new connection" link. After this, the "Add a connection" list will appear on the right side of the GUI. Look for IP SMS connections install list and select the SMPP client install item to use the SMPP protocol. (Highlighted in Figure 3)
Specify the SMPP server settings
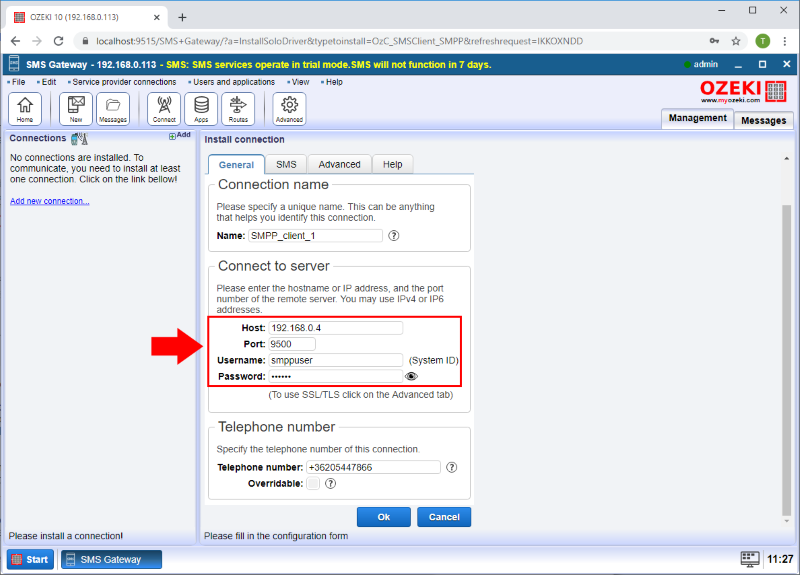
Provide your SMPP credentials on the Install connection page's General tab.
There you can find the Connect to server group box, where you need to enter the following parameters:
Host, Port number, Username, Password.
You can find these parameters in your Ozeki Android SMPP SMS Gateway application.
(see Figure 4)
Check the installation of the SMPP connection
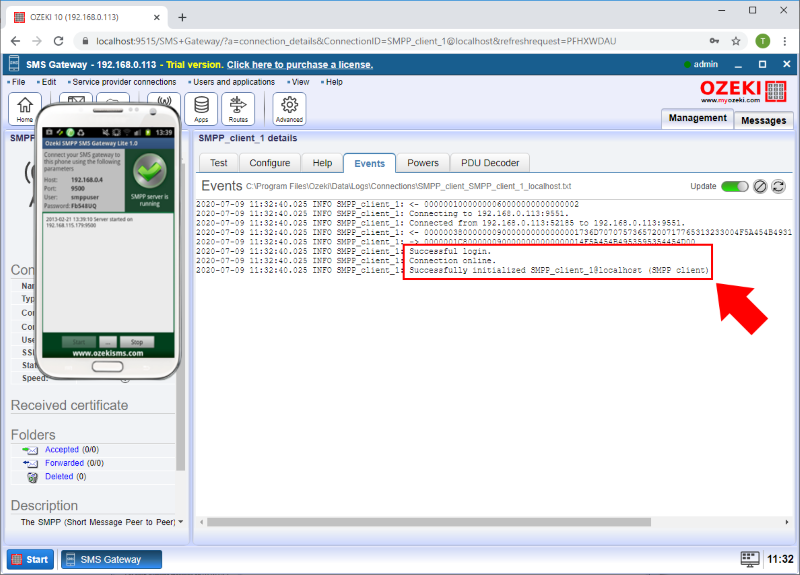
In the SMPP_client_1 details page you can find the Events tab where the "Successful login" and "Connection online" messages indicate that the SMPP connection has been installed successfully. Study the Event log in order to understand what is happening in the connection. You can switch on/off the update of the log, delete the content and update it with the buttons in the right corner of the tab page. (Figure 5)
Send your first SMS
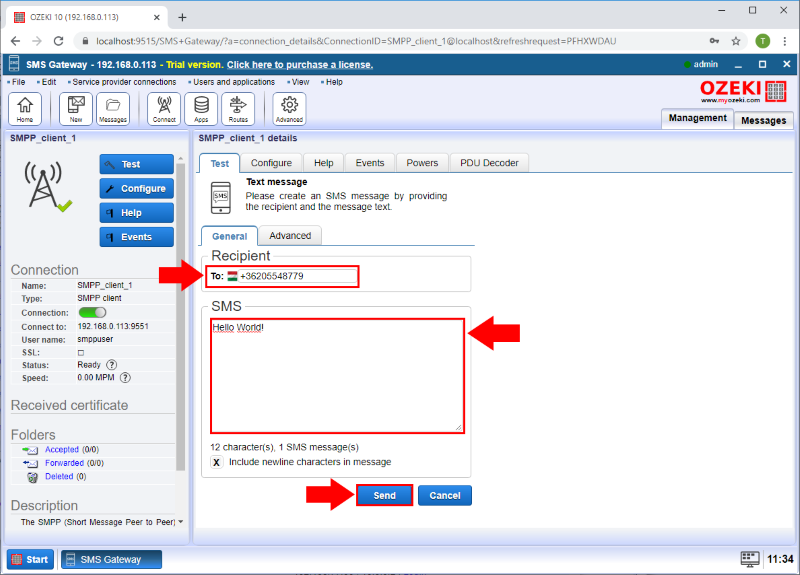
Switching to the Test tab page you can send test SMS message. Go for the General tab and provide the recipient address by writing the phone number to the Recipient group box, write the message to the SMS group box and click on the Send button to create and send out a test message. (All highlighted in Figure 6)
Make sure that the message is sent successfully
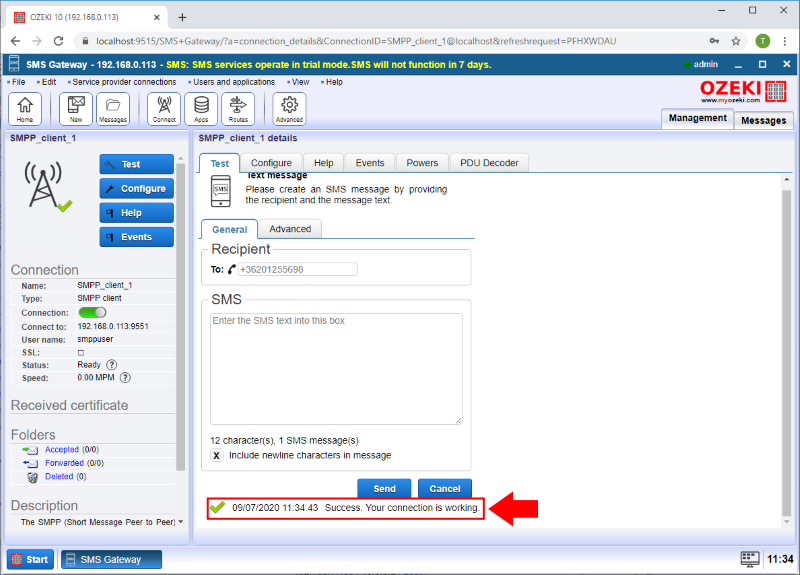
Finally, you can check whether the message is sent successfully or not by looking at the bottom of the page. There you can find information about the time the message was sent, the status of the messaging procedure and the connection. A green check mark shows that sending the test message was successful. (Figure 7)
Summary
In this article we showed you how to send out SMS with SMPP protocol using Ozeki Android SMPP SMS Gateway and Ozeki SMS Gateway. This solution helps you to send out SMS from your computer, you only need Ozeki SMS Gateway installed in your selected computer and a mobile phone with Android SMPP SMS Gateway to transmit these messages to the recipients. The messaging will be easy and fast with this solution.
Do not finish your work here, you can read more about different types of connections, like UCP connection and OZX connection in our website.
Your next thing to do is to download Ozeki SMS Gateway and start using it!


