
 Sign in
 How to send an Ozeki Chat message from MS SQL
In this article, we will show you how you can use MS SQL records as Ozeki Chat message details and use them to send out bulk messages automatically. Follow our step-by-step guide or our Tutorial Video to set up your MS SQL based Gateway.
How to send an Ozeki Chat message from MS SQL (Video Tutorial)
This Video Tutorial will show you how you can connect to your MS SQL database, create routes in Ozeki SMS Gateway and connect to your MyOzeki Account to send out messages with.
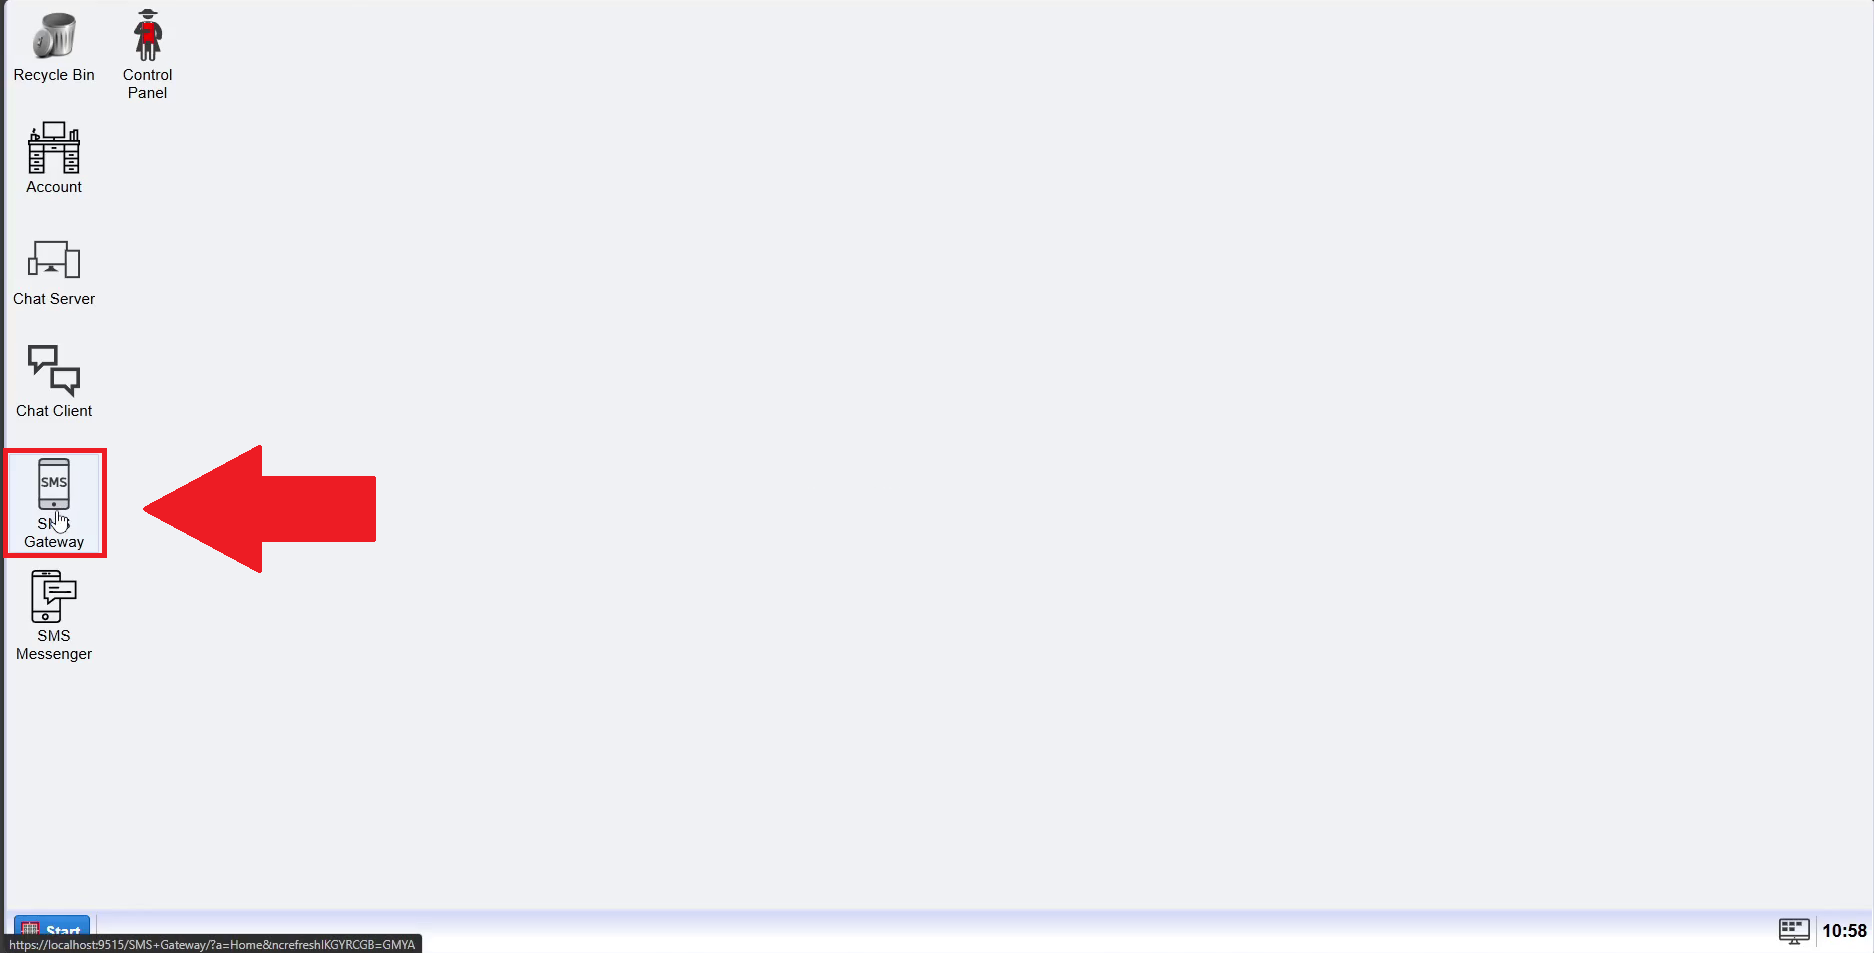
Step 1 - Open SMS Gateway
The first step is to open the Ozeki SMS Gateway to create your automatic Chat messager.
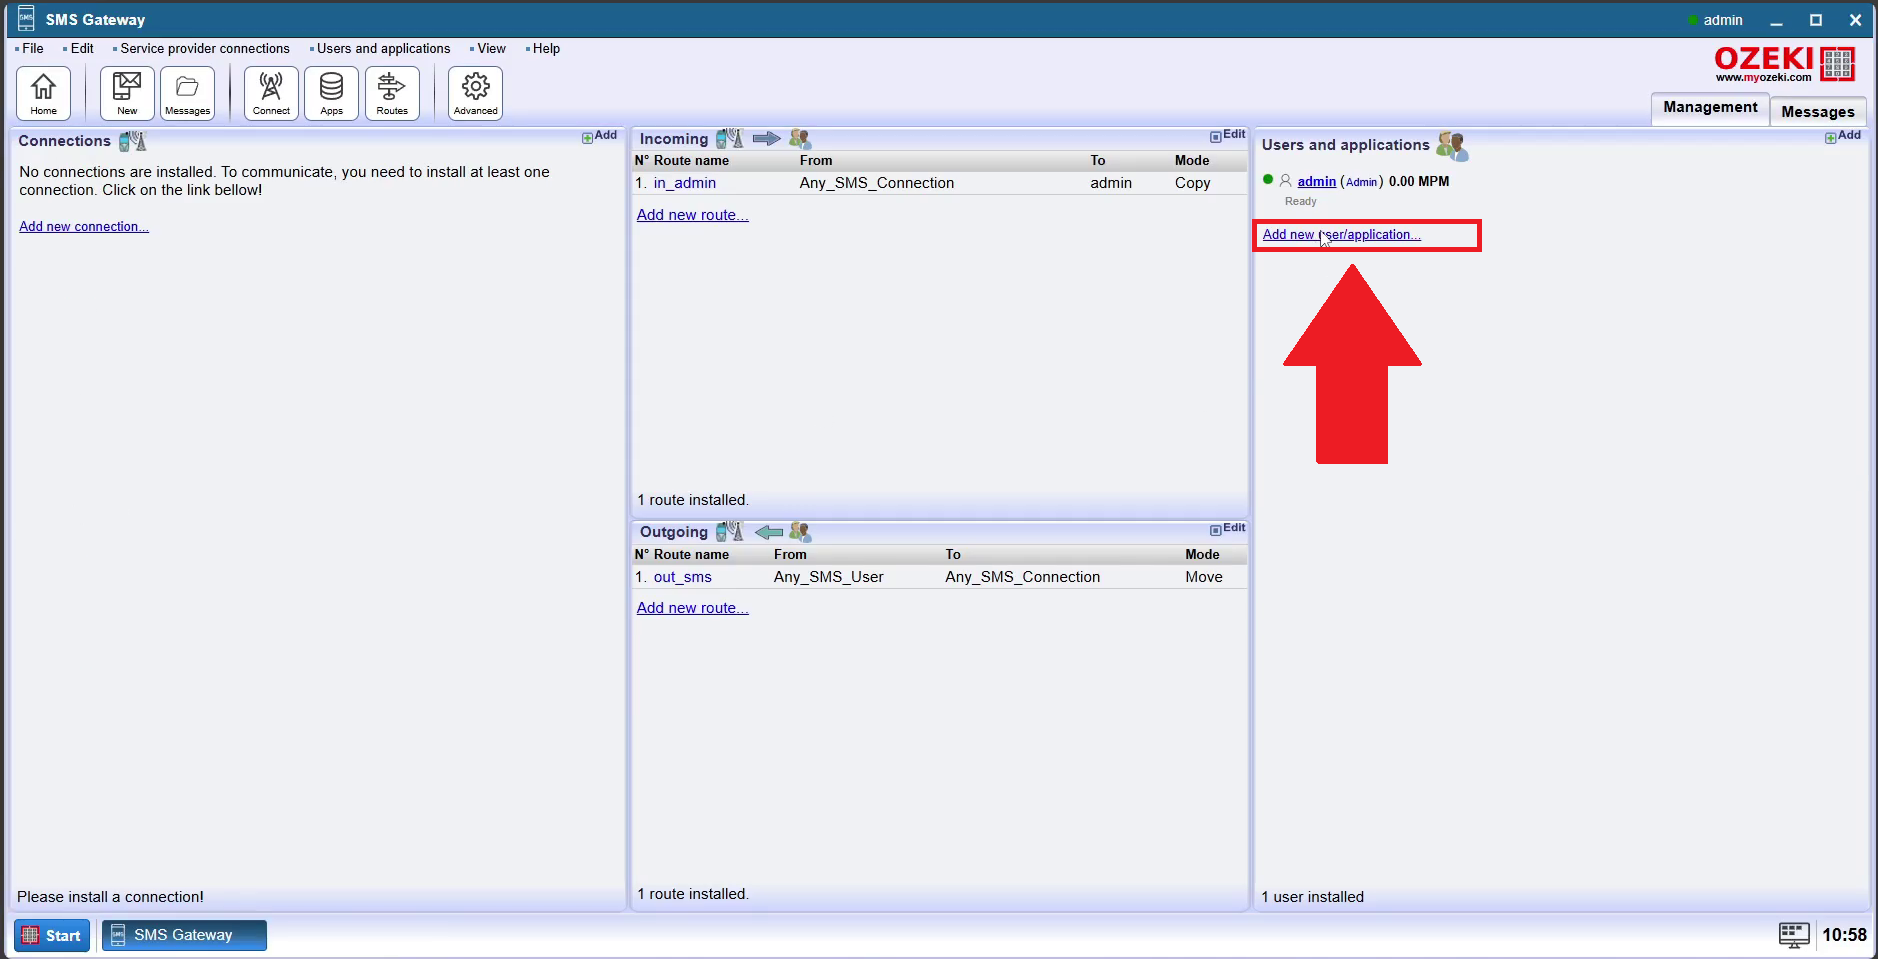
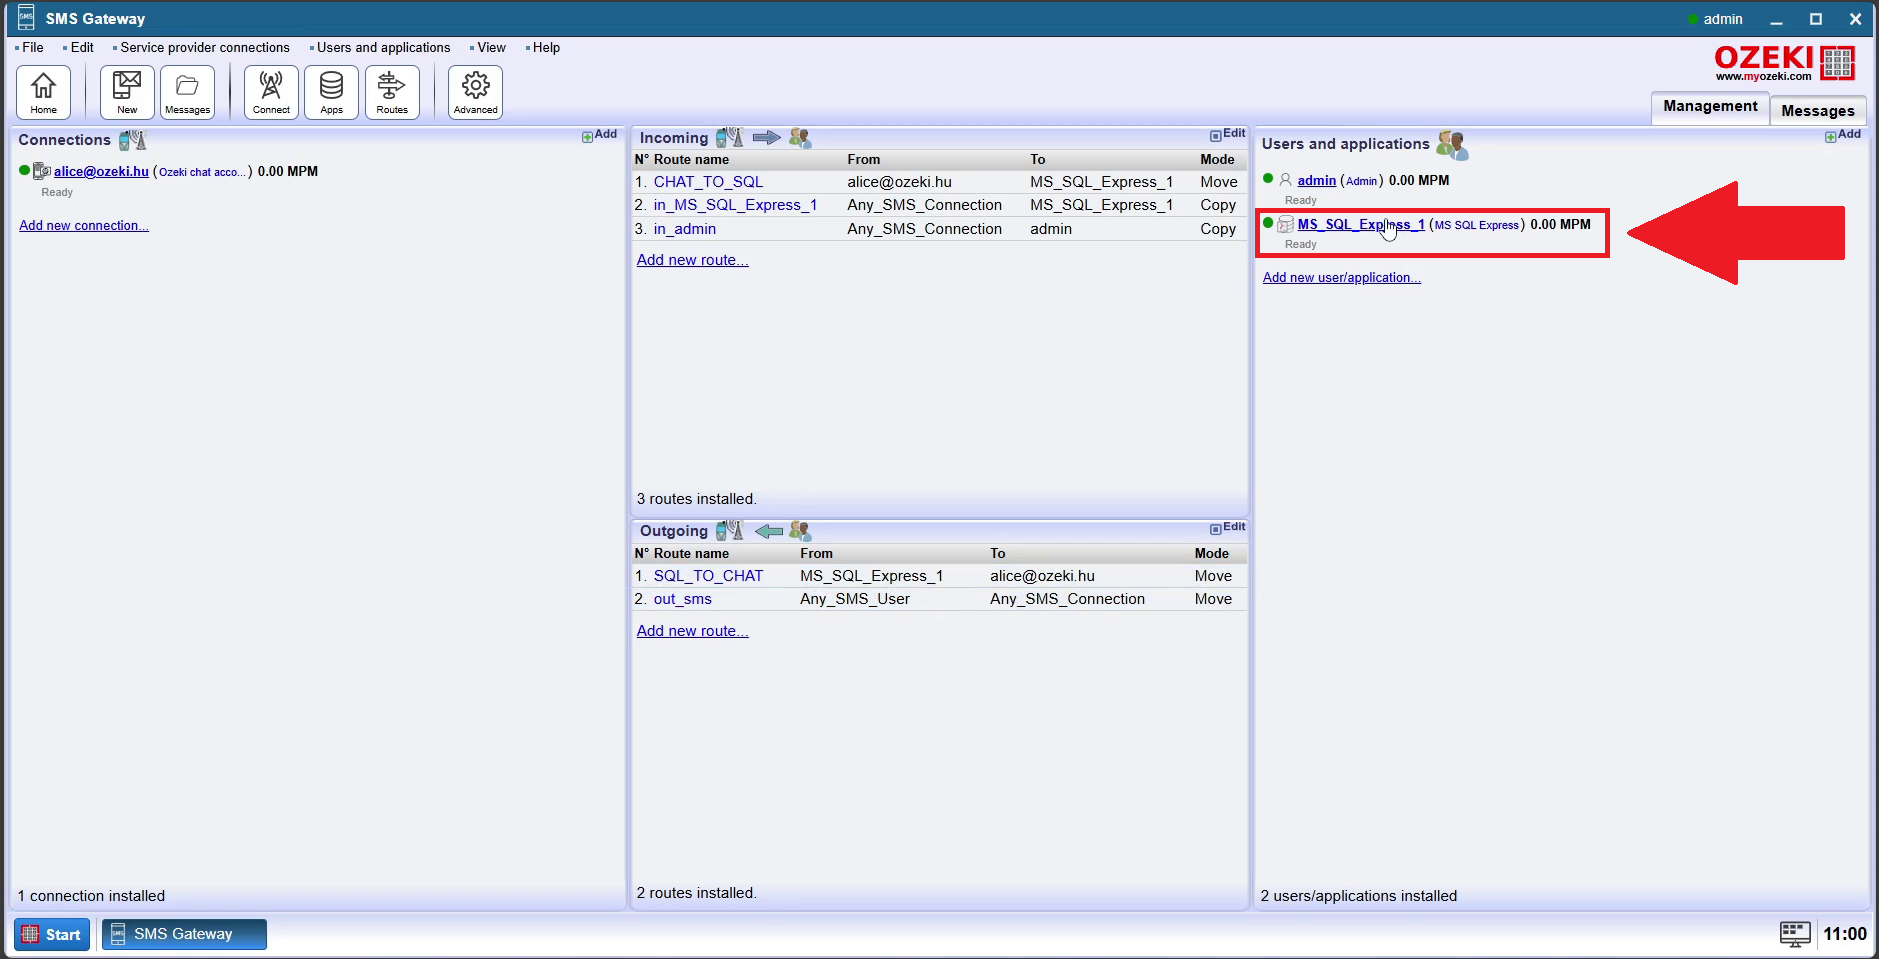
Step 2 - Add new user or application
Click on the "Add new user/application..." button to start creating your MS SQL connection.
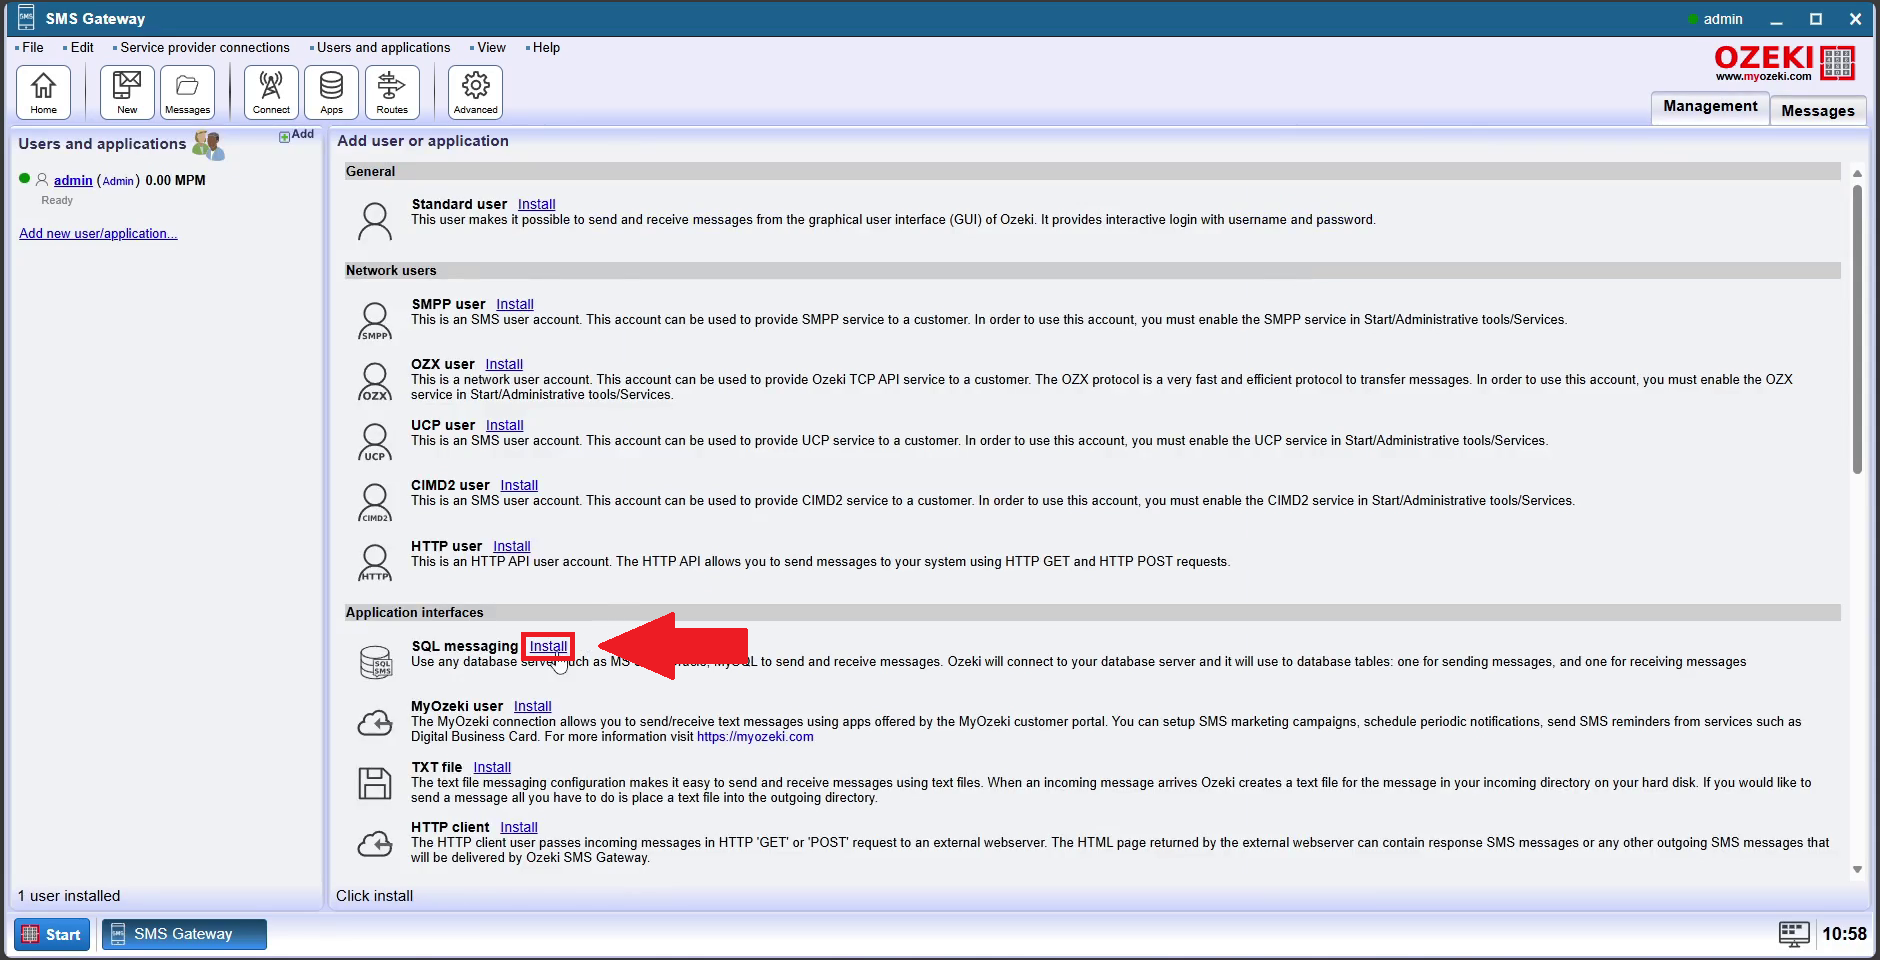
Step 3 - Install SQL Messaging
Click on the "Install" button for SQL messaging to install an SQL messaging manager.
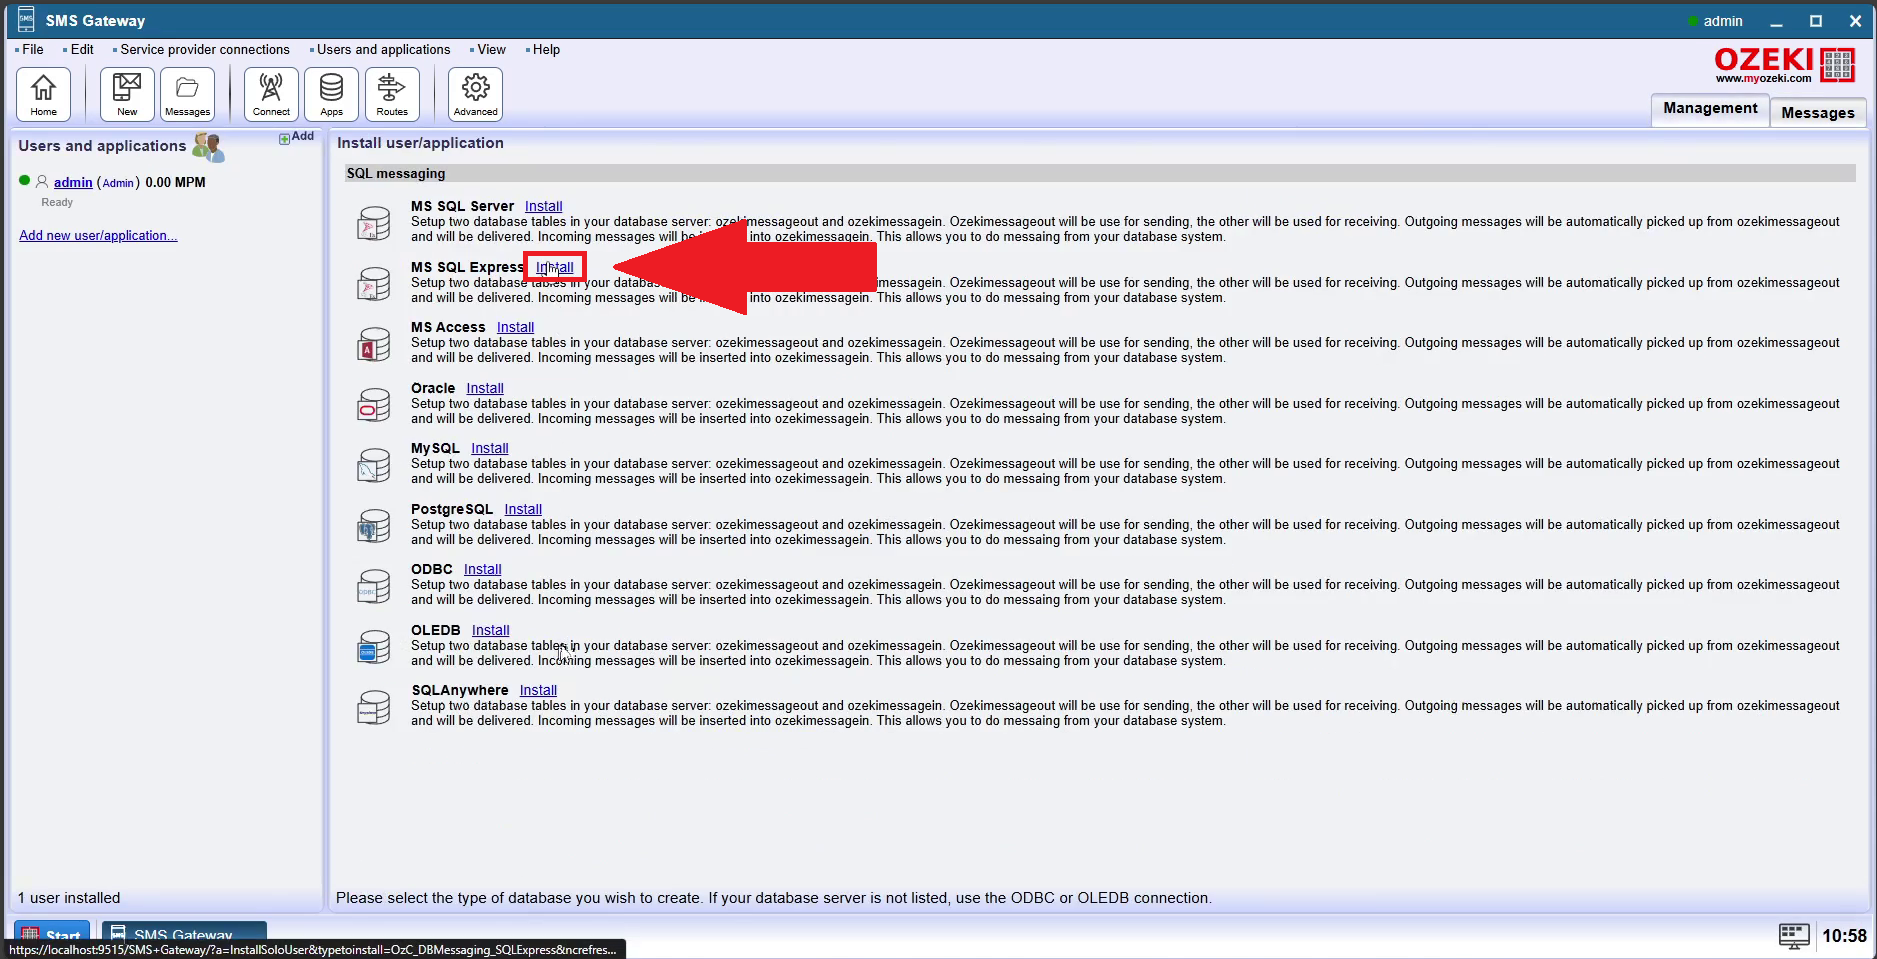
Step 4 - Install MS SQL Express
Click on "Install" for the MS SQL Express option to install MS SQL Express messaging manager.
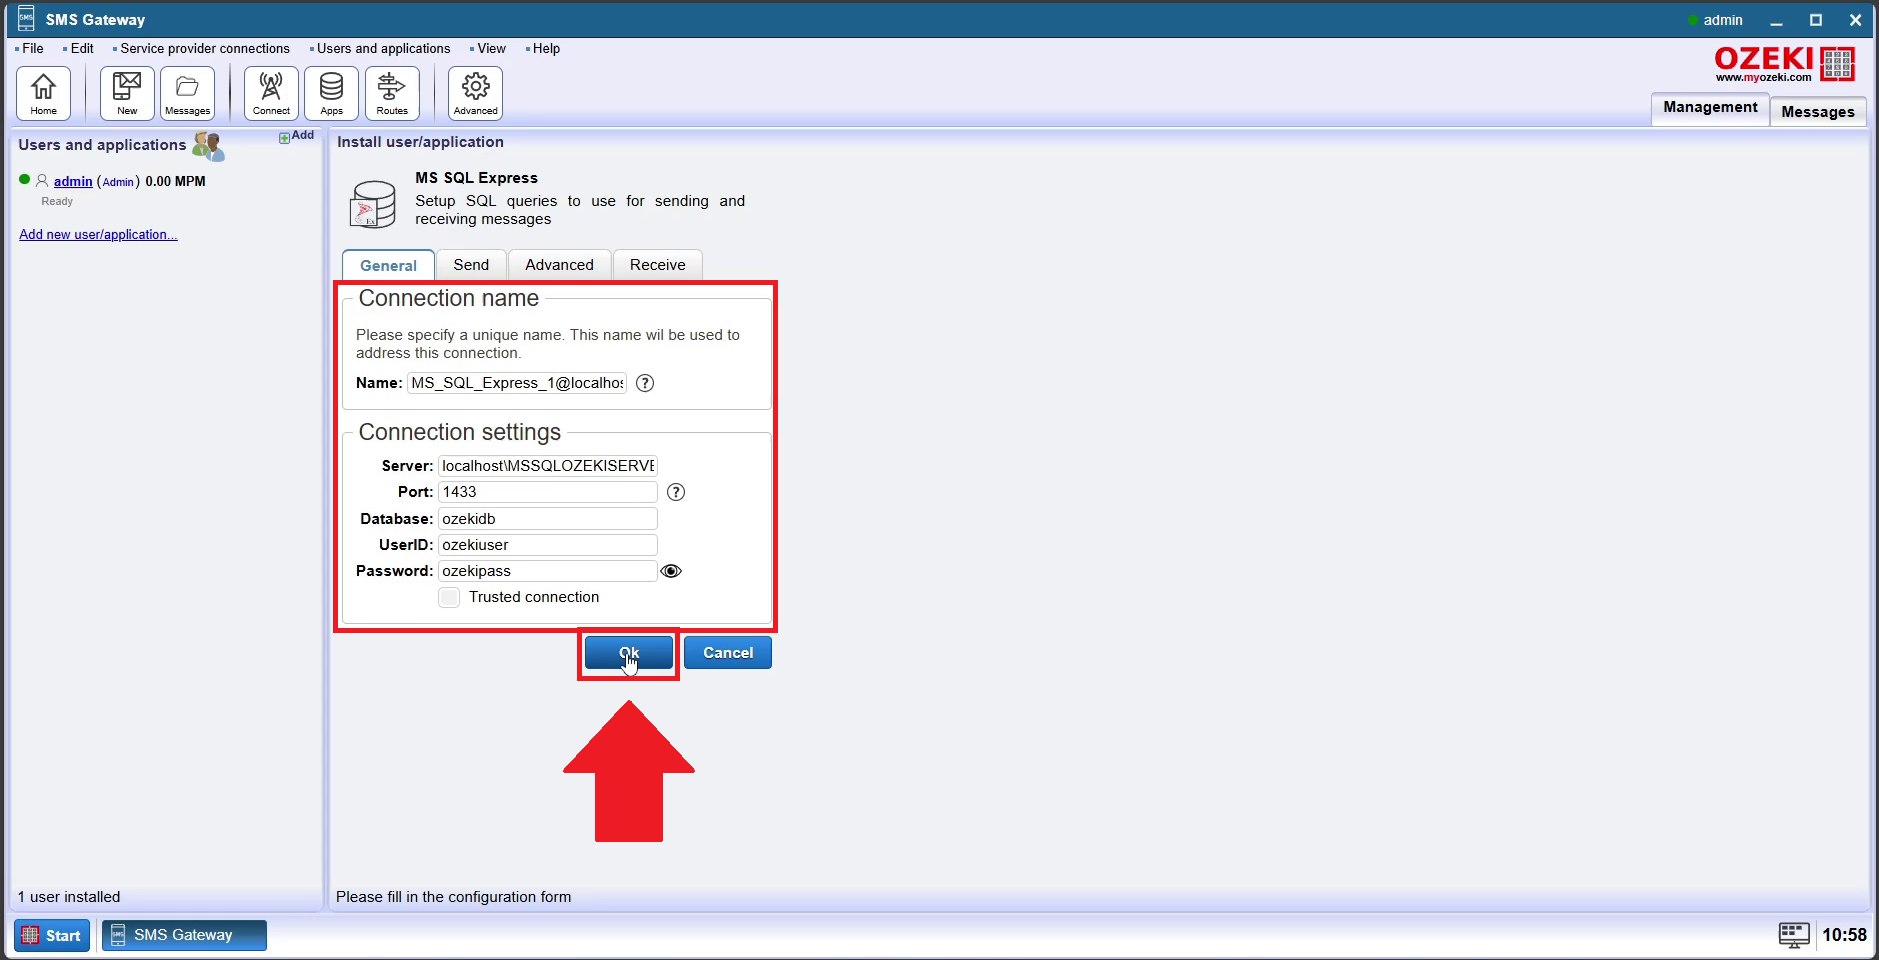
Step 5 - Enter SQL details
Enter the details of your SQL database, if you have set up your MS SQL Express database according to our tutorial, your details should be the same as in this step, but you should change the UserID and Password.
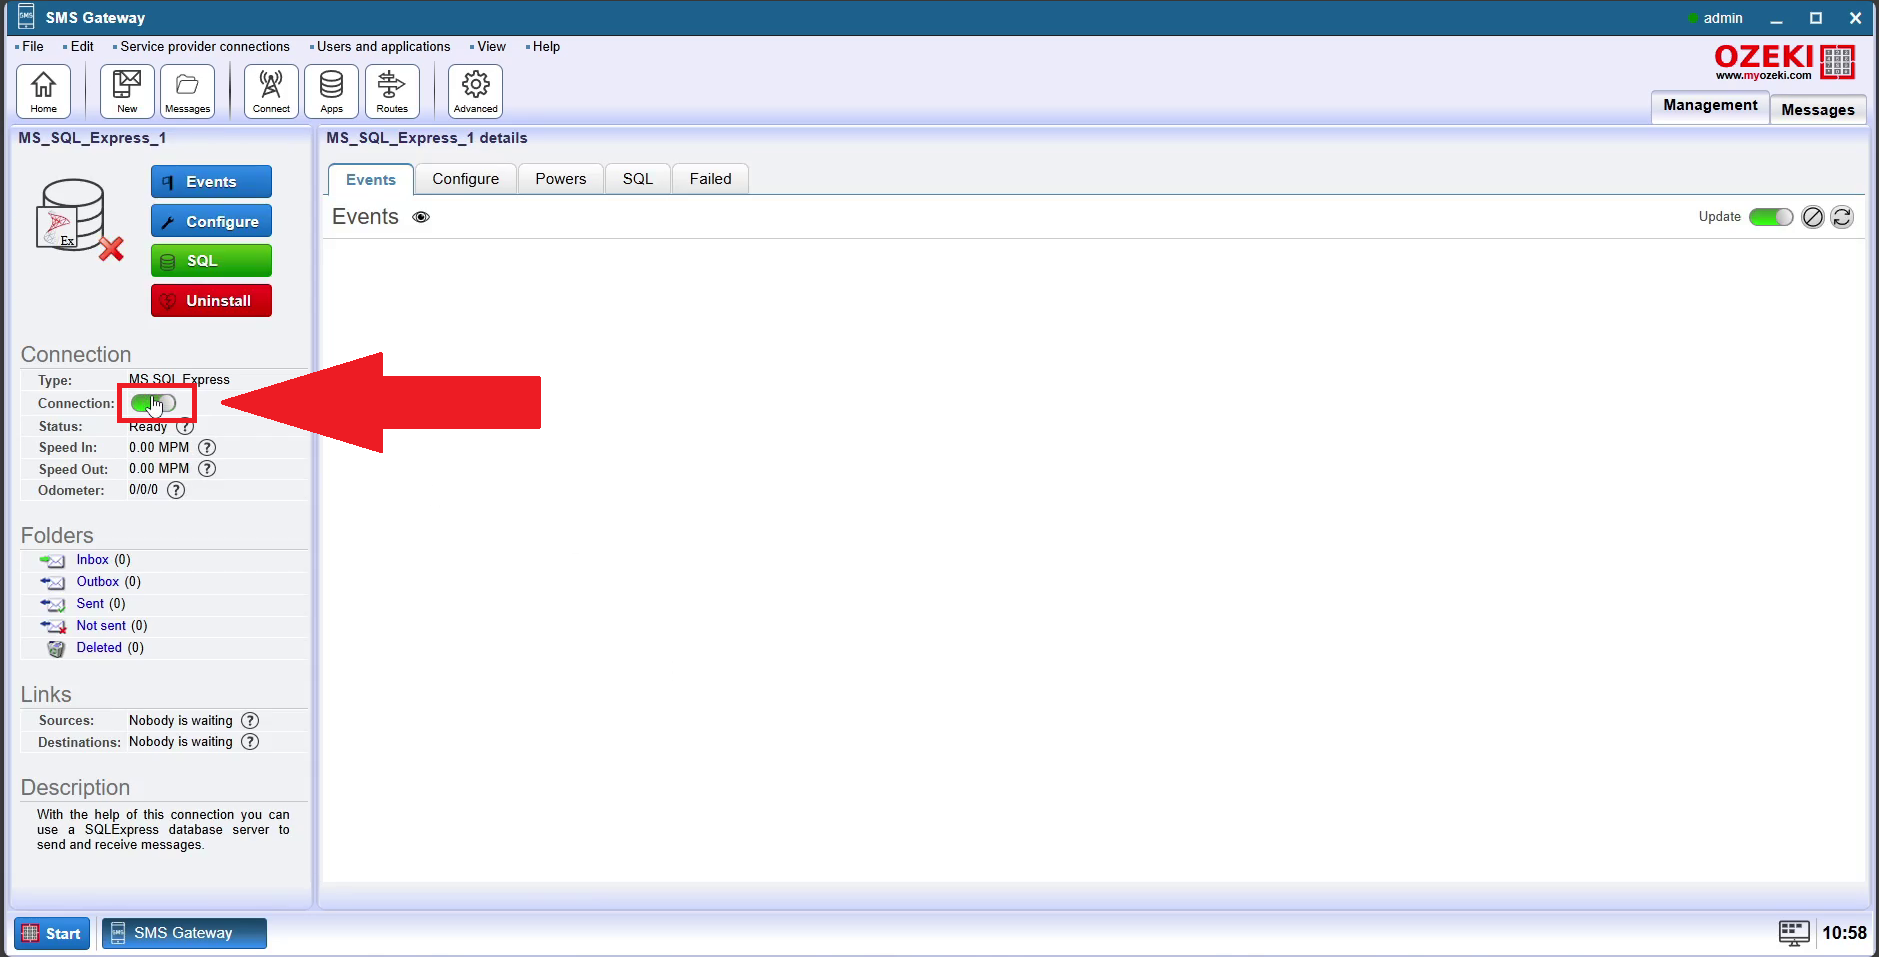
Step 6 - Enable connection
Enable the newly created connection on the left.
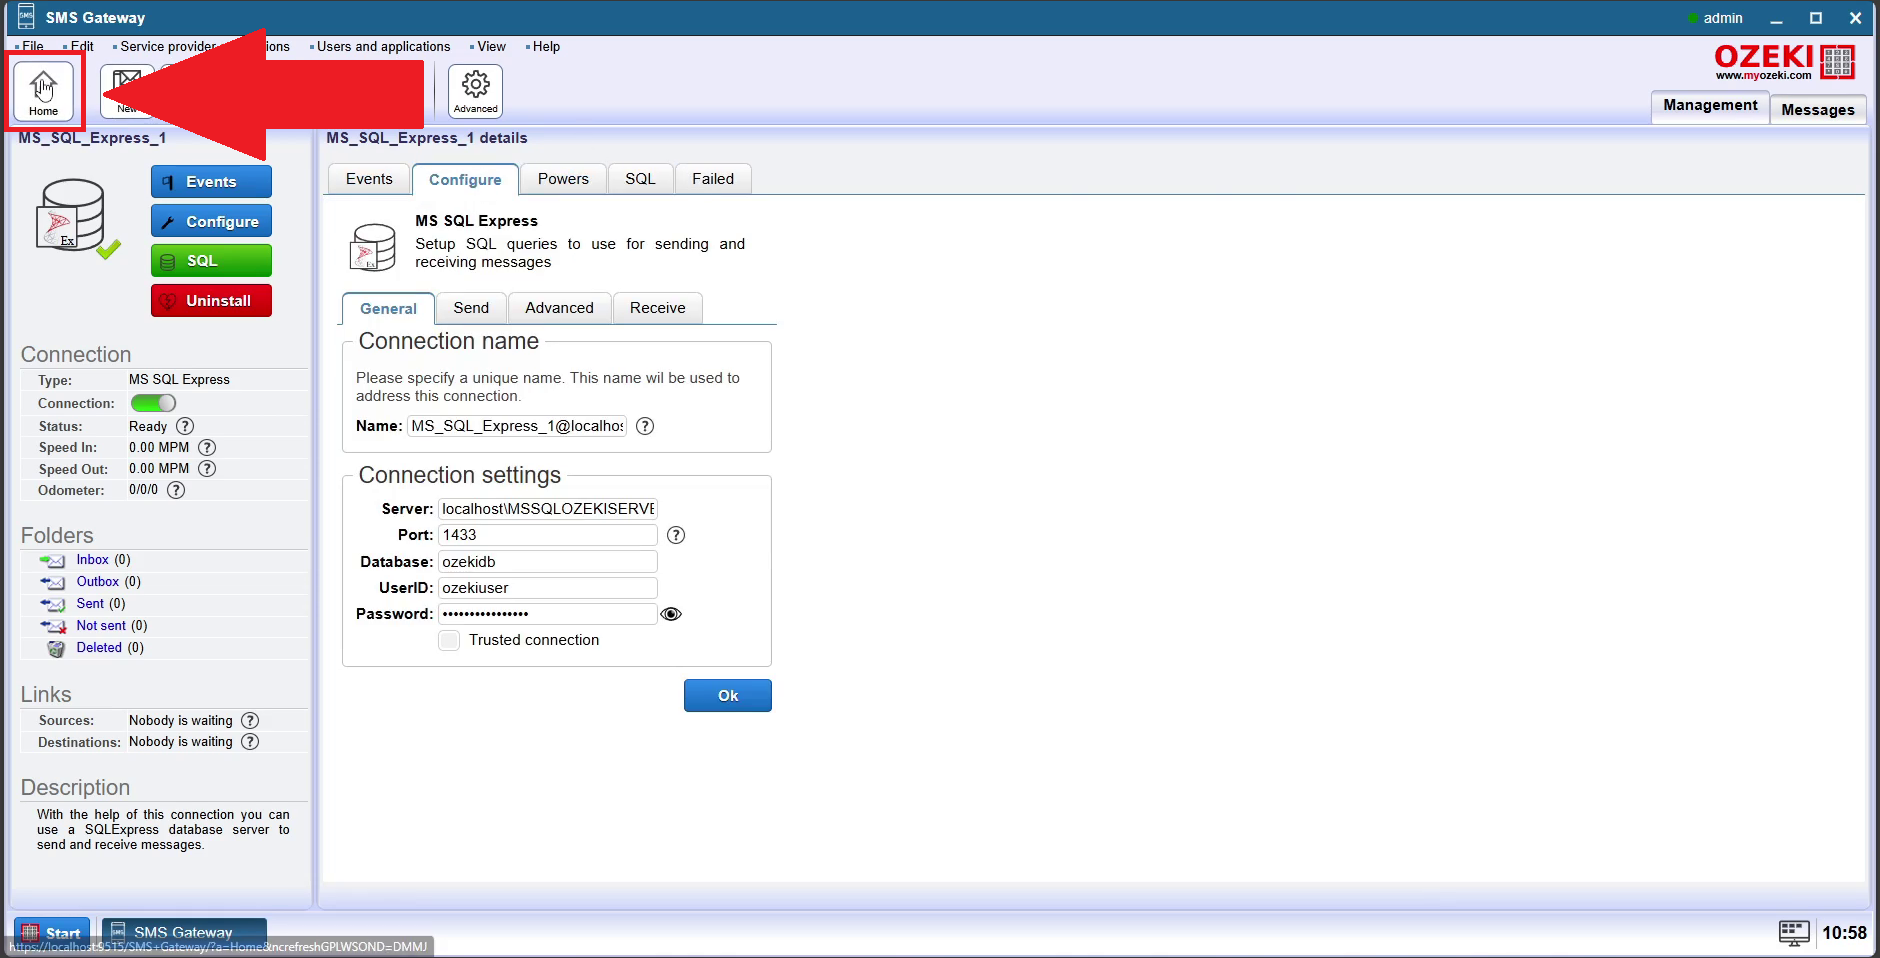
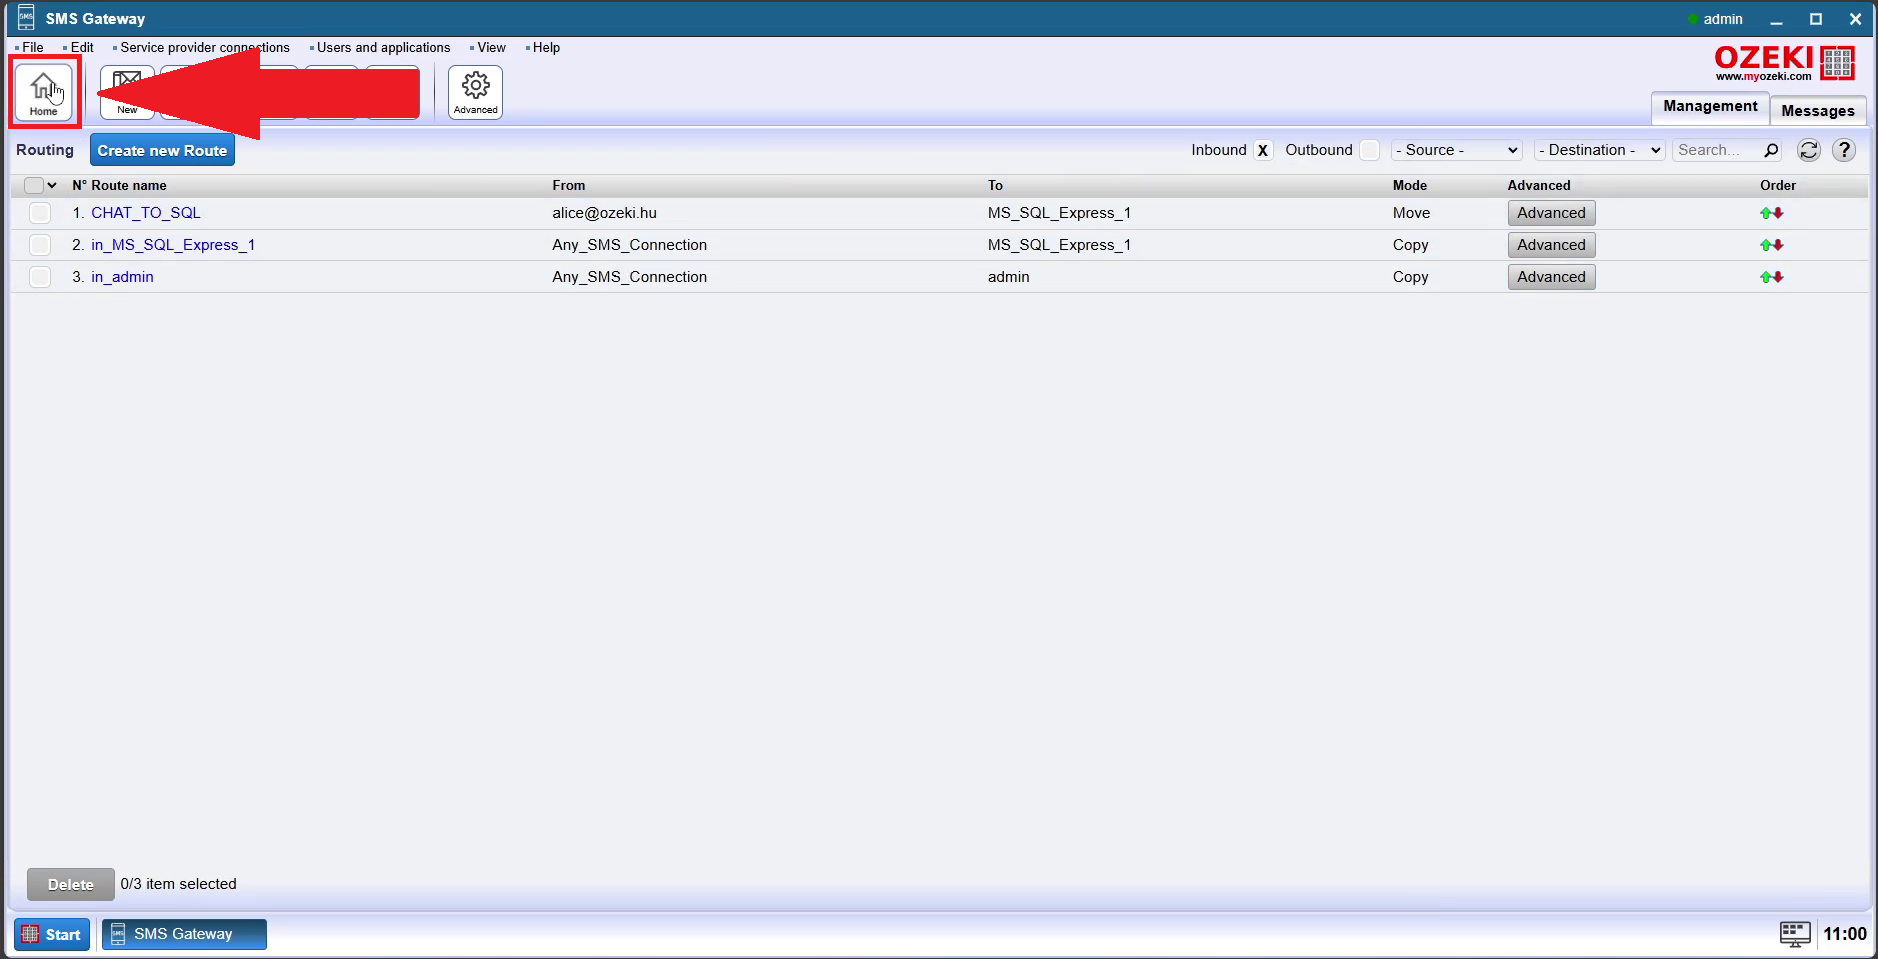
Step 7 - Open home page
Click on the home icon in the top left corner to go back to the Ozeki SMS Gateway home page.
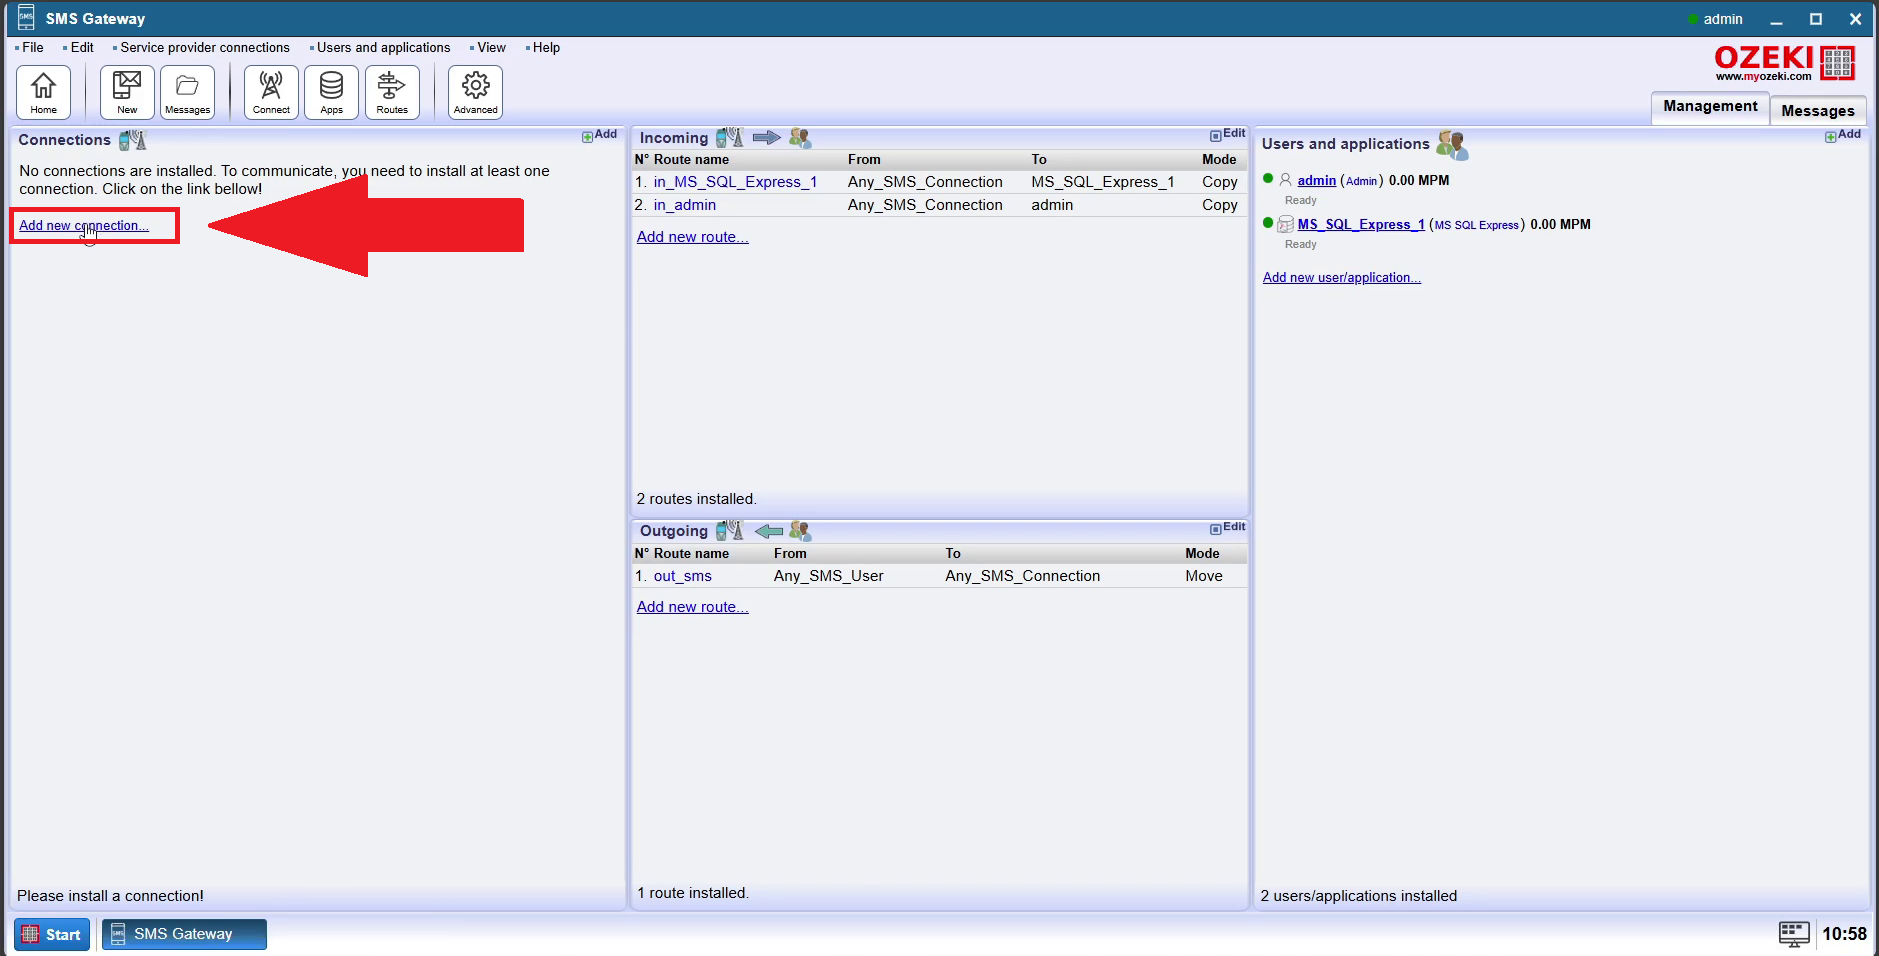
Step 8 - Add new connection
Click on the "Add new connection..." button on the left side of the page, under the Connections tab.
Step 9 - Install Ozeki Chat account
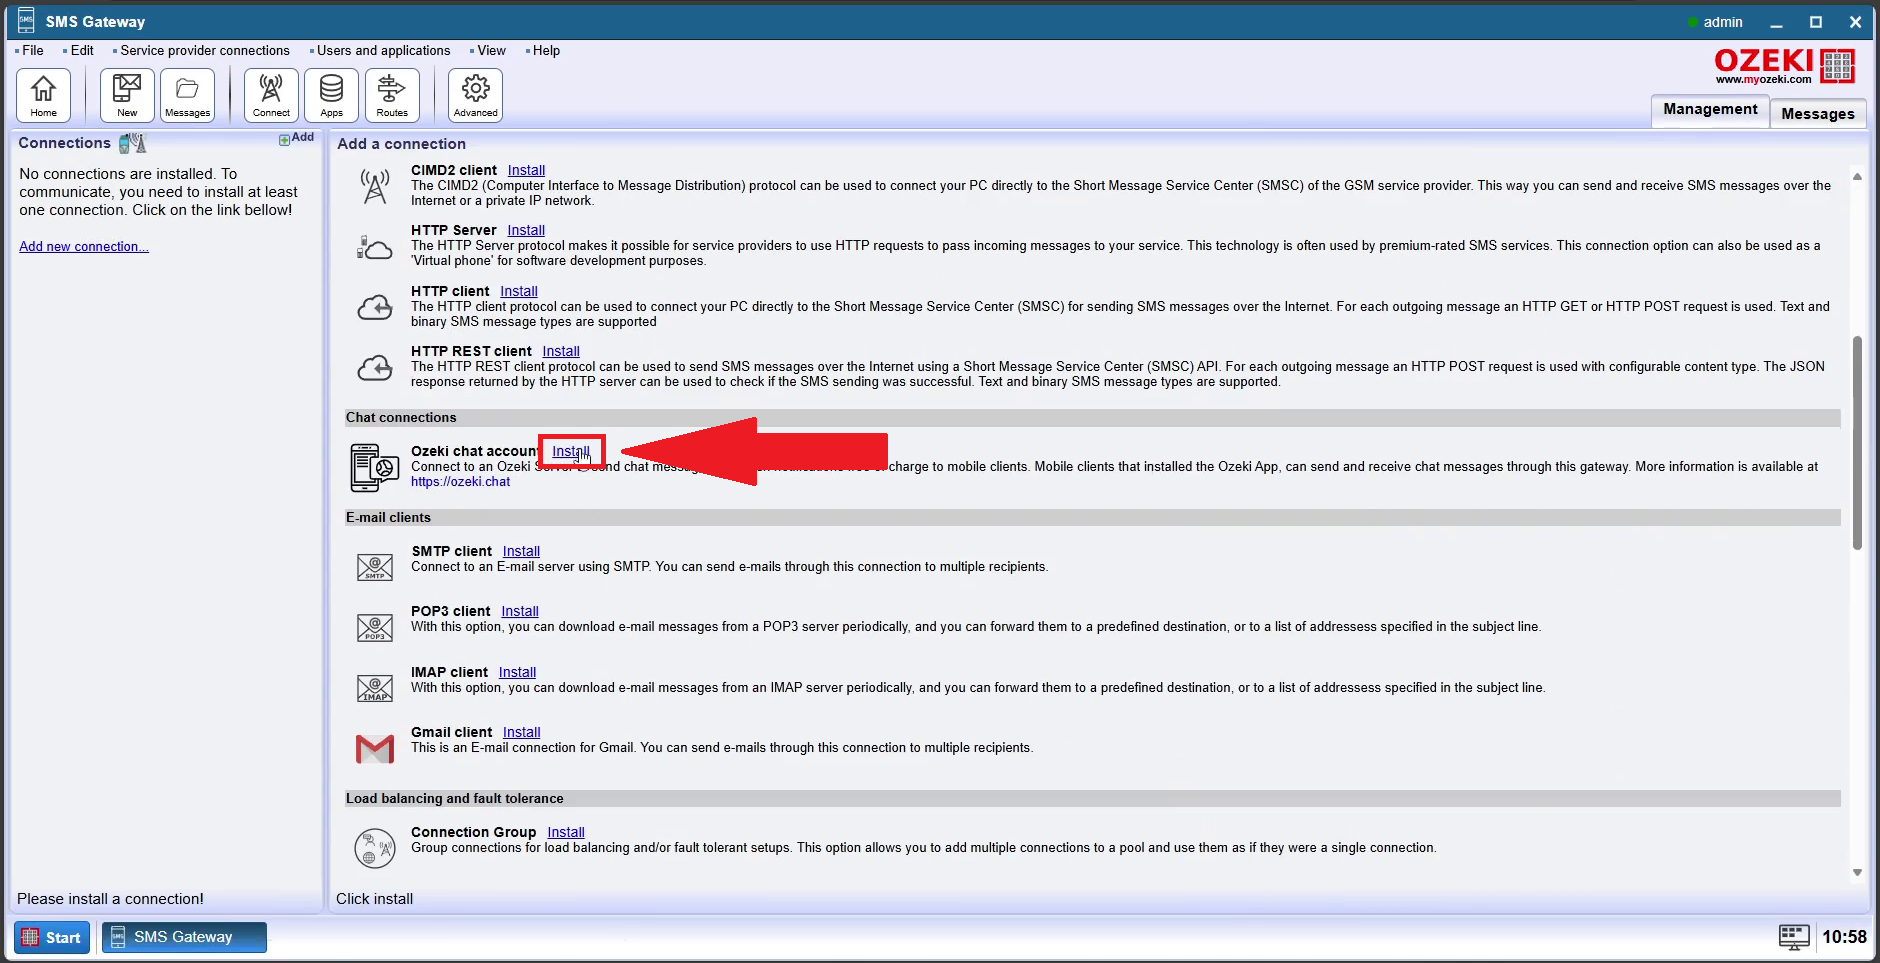
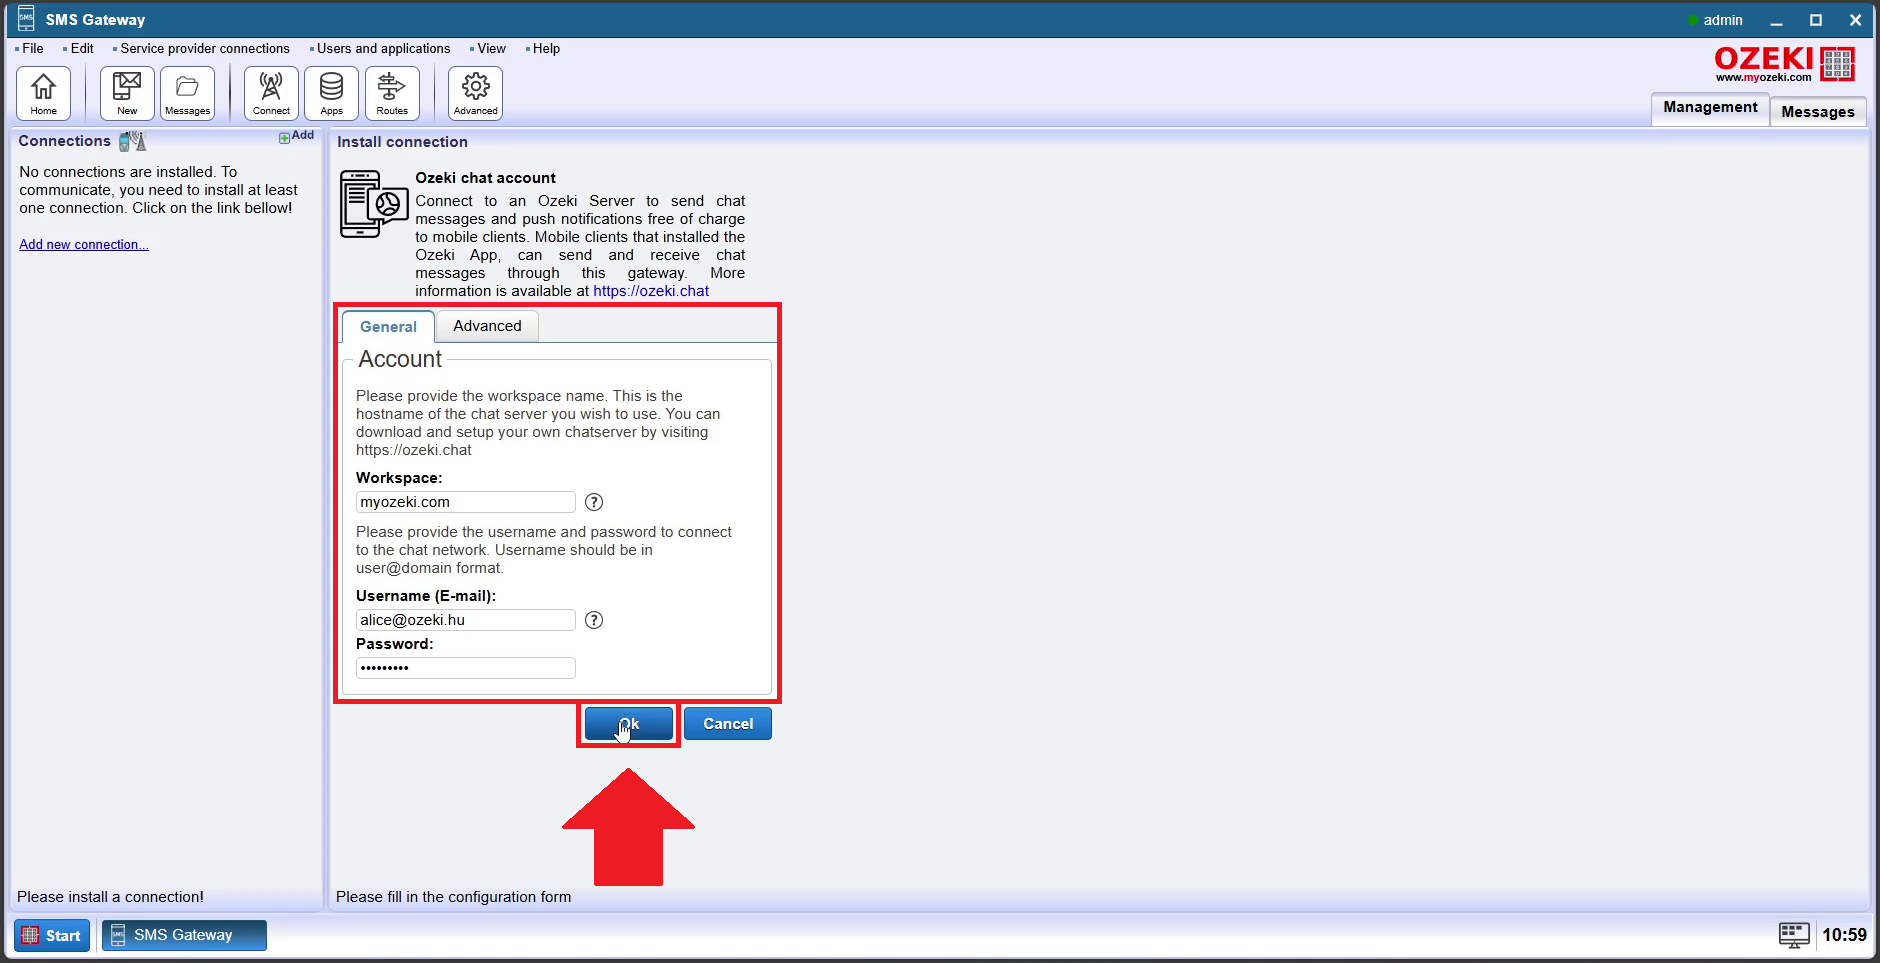
Step 10 - Enter account details
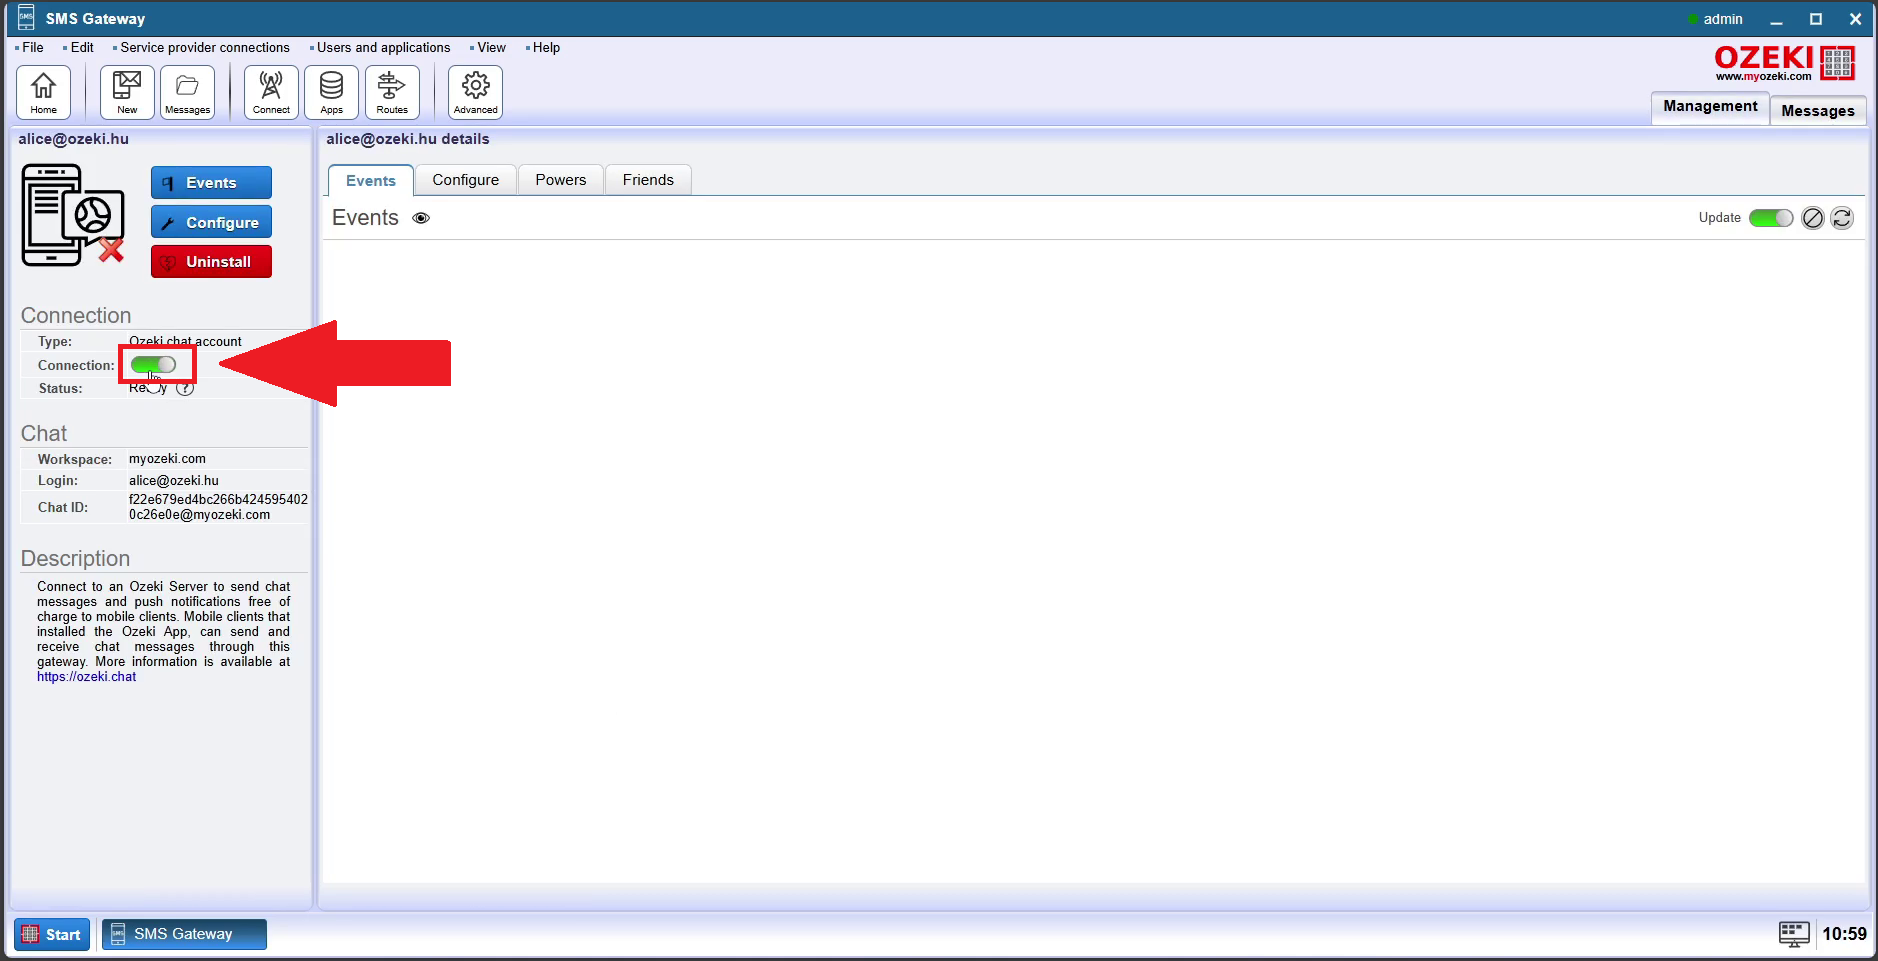
Step 11 - Enable connection
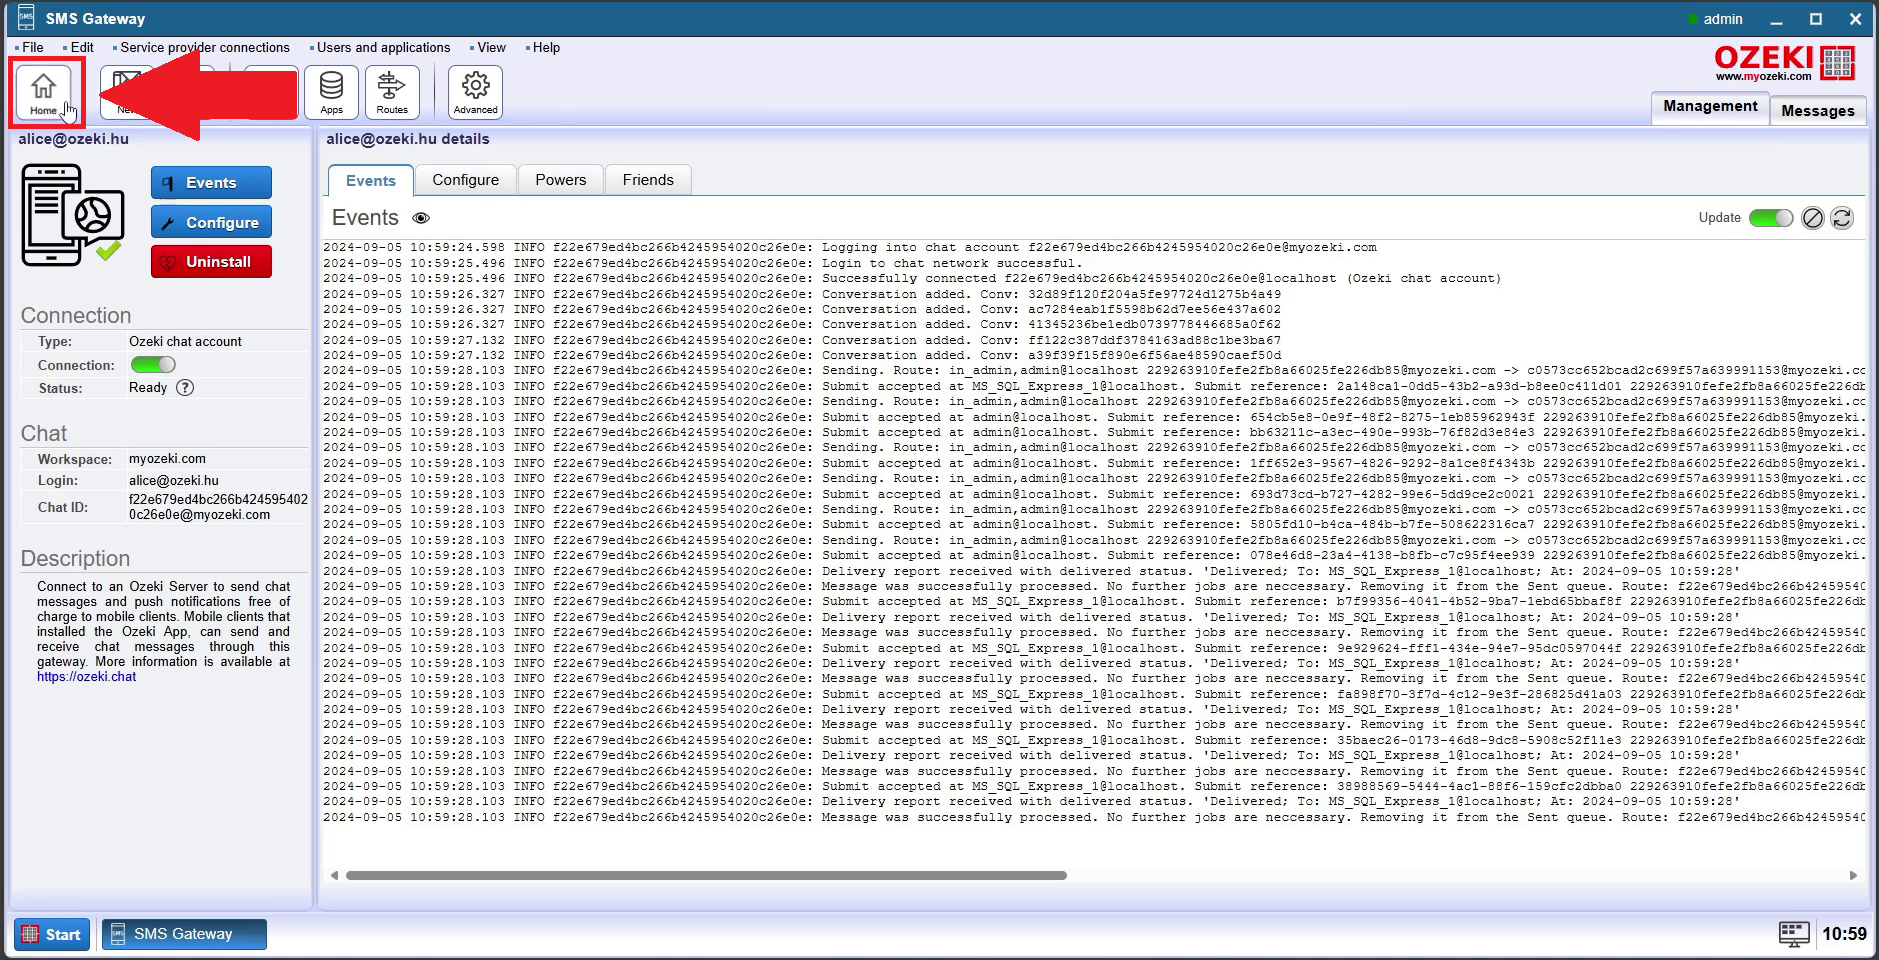
Step 12 - Open home page
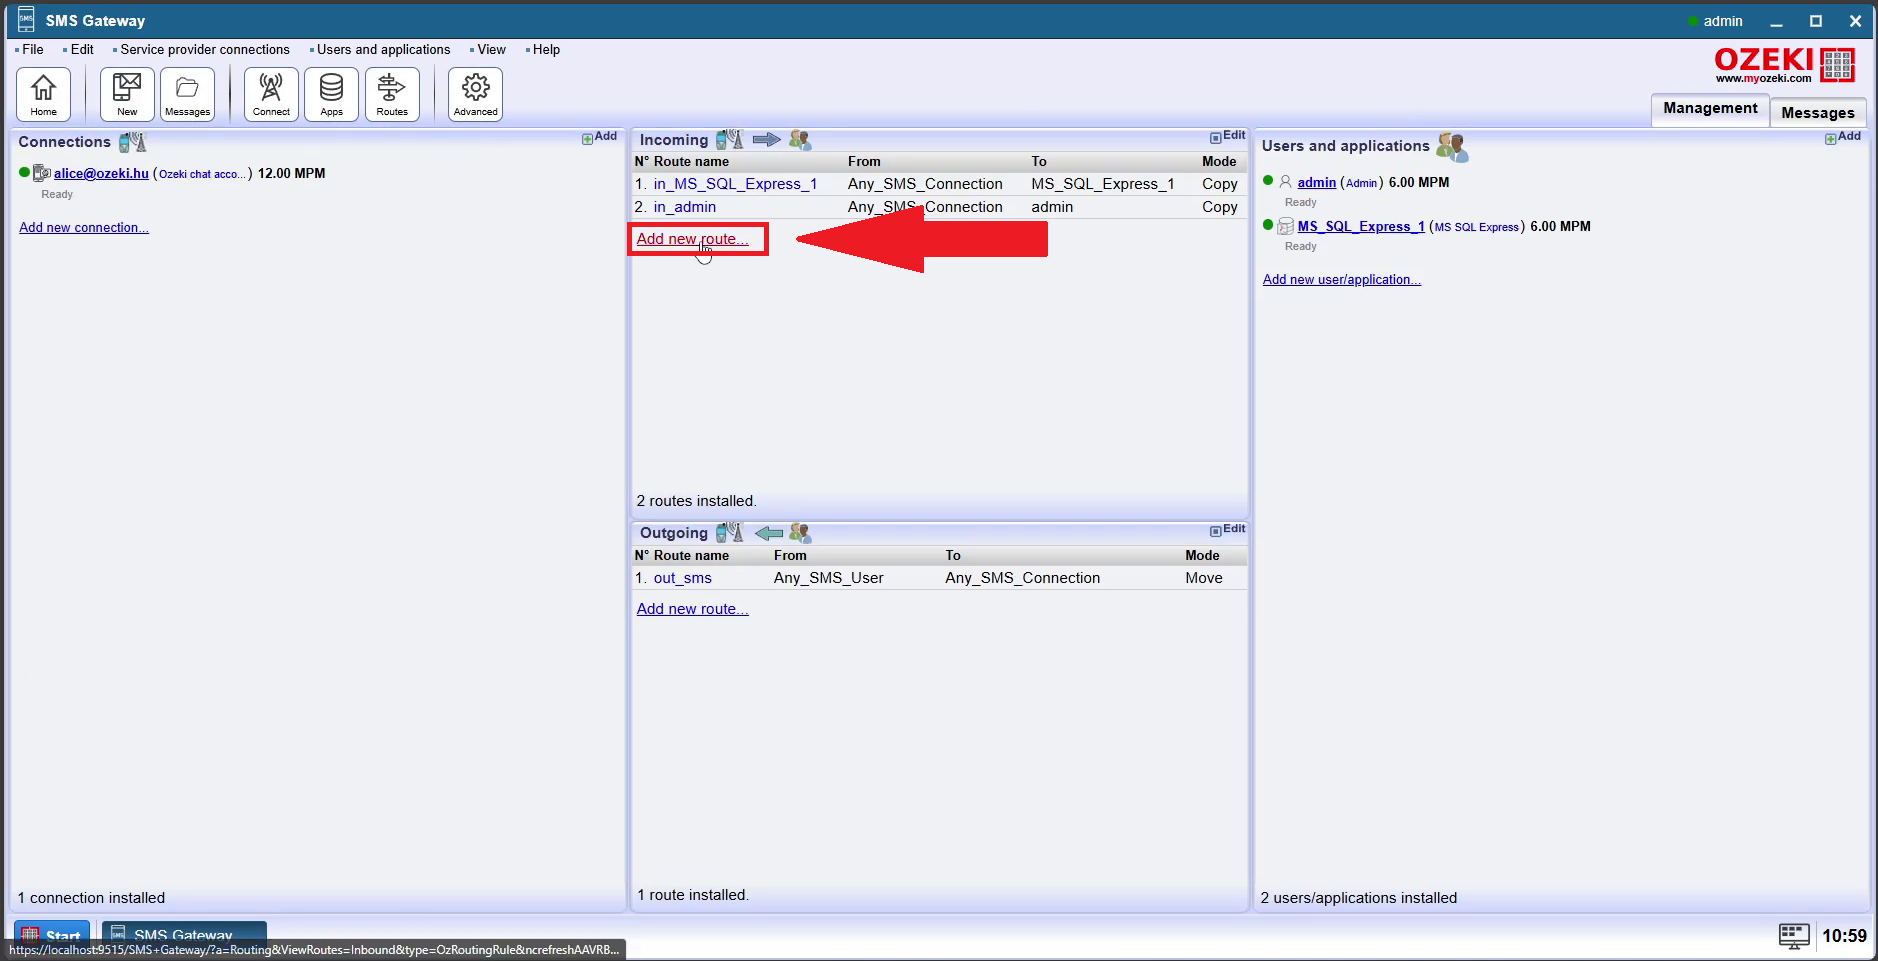
Step 13 - Add new route
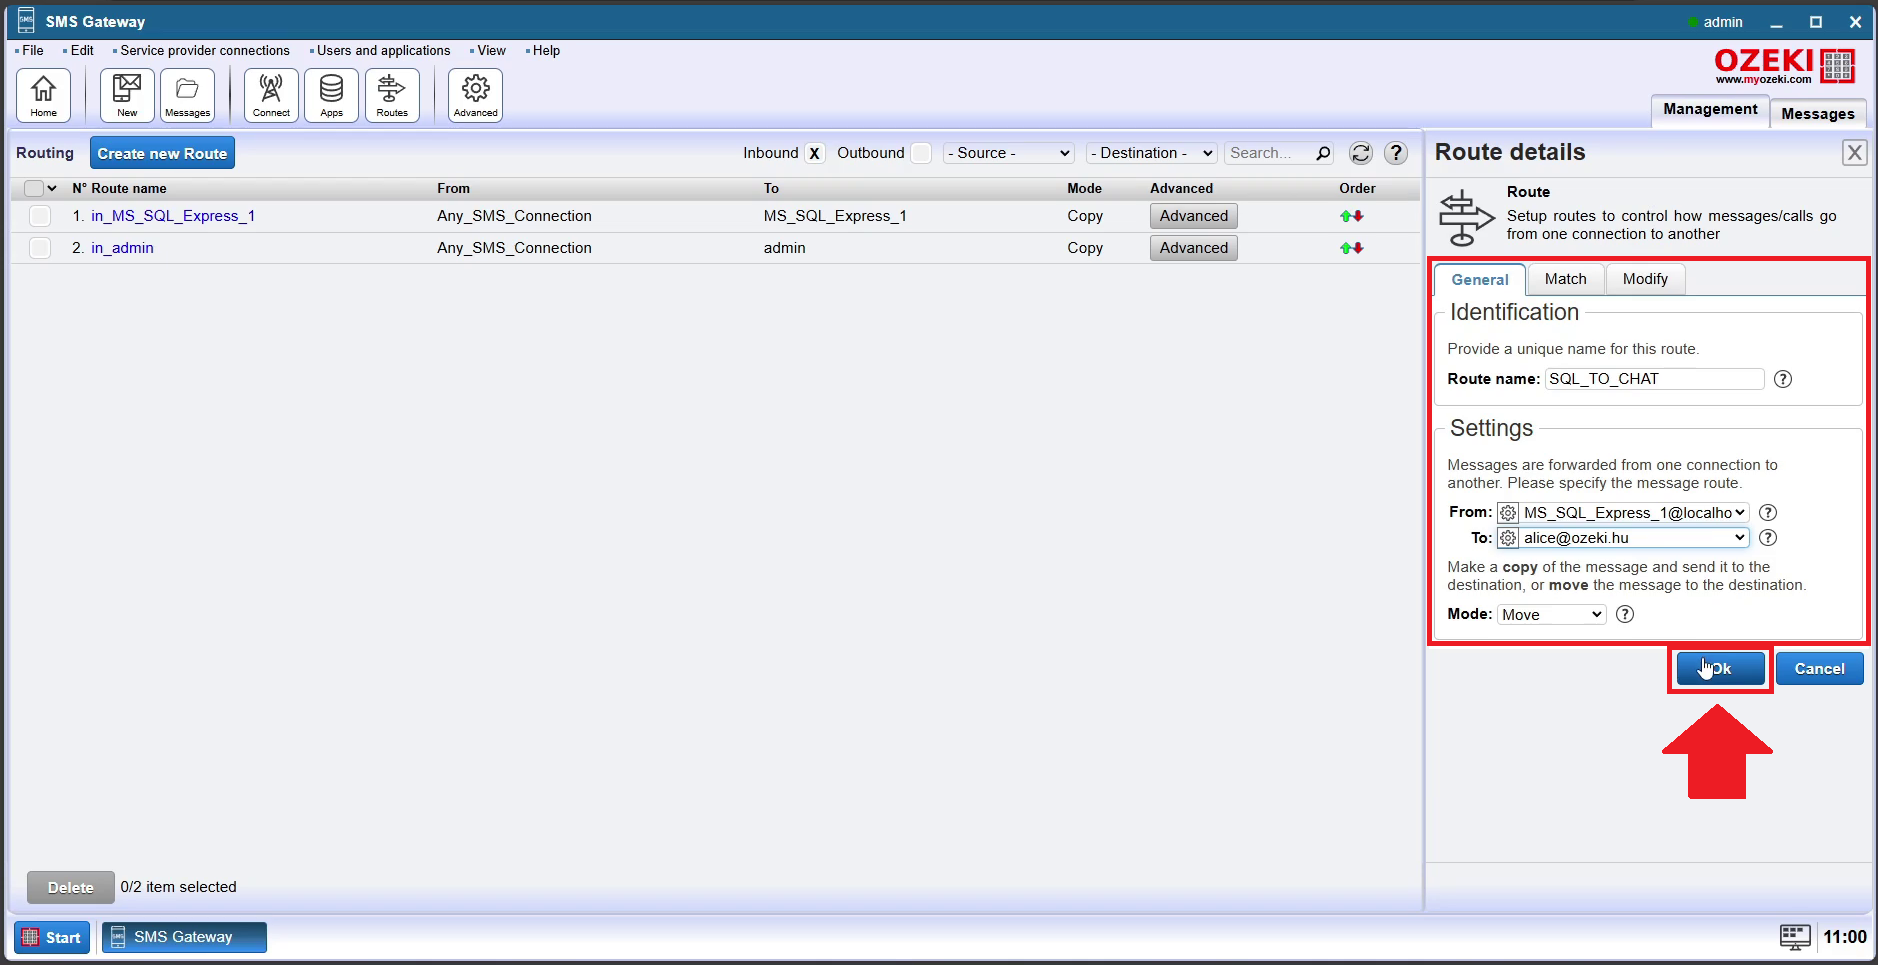
Step 14 - Enter SQL to Chat route details
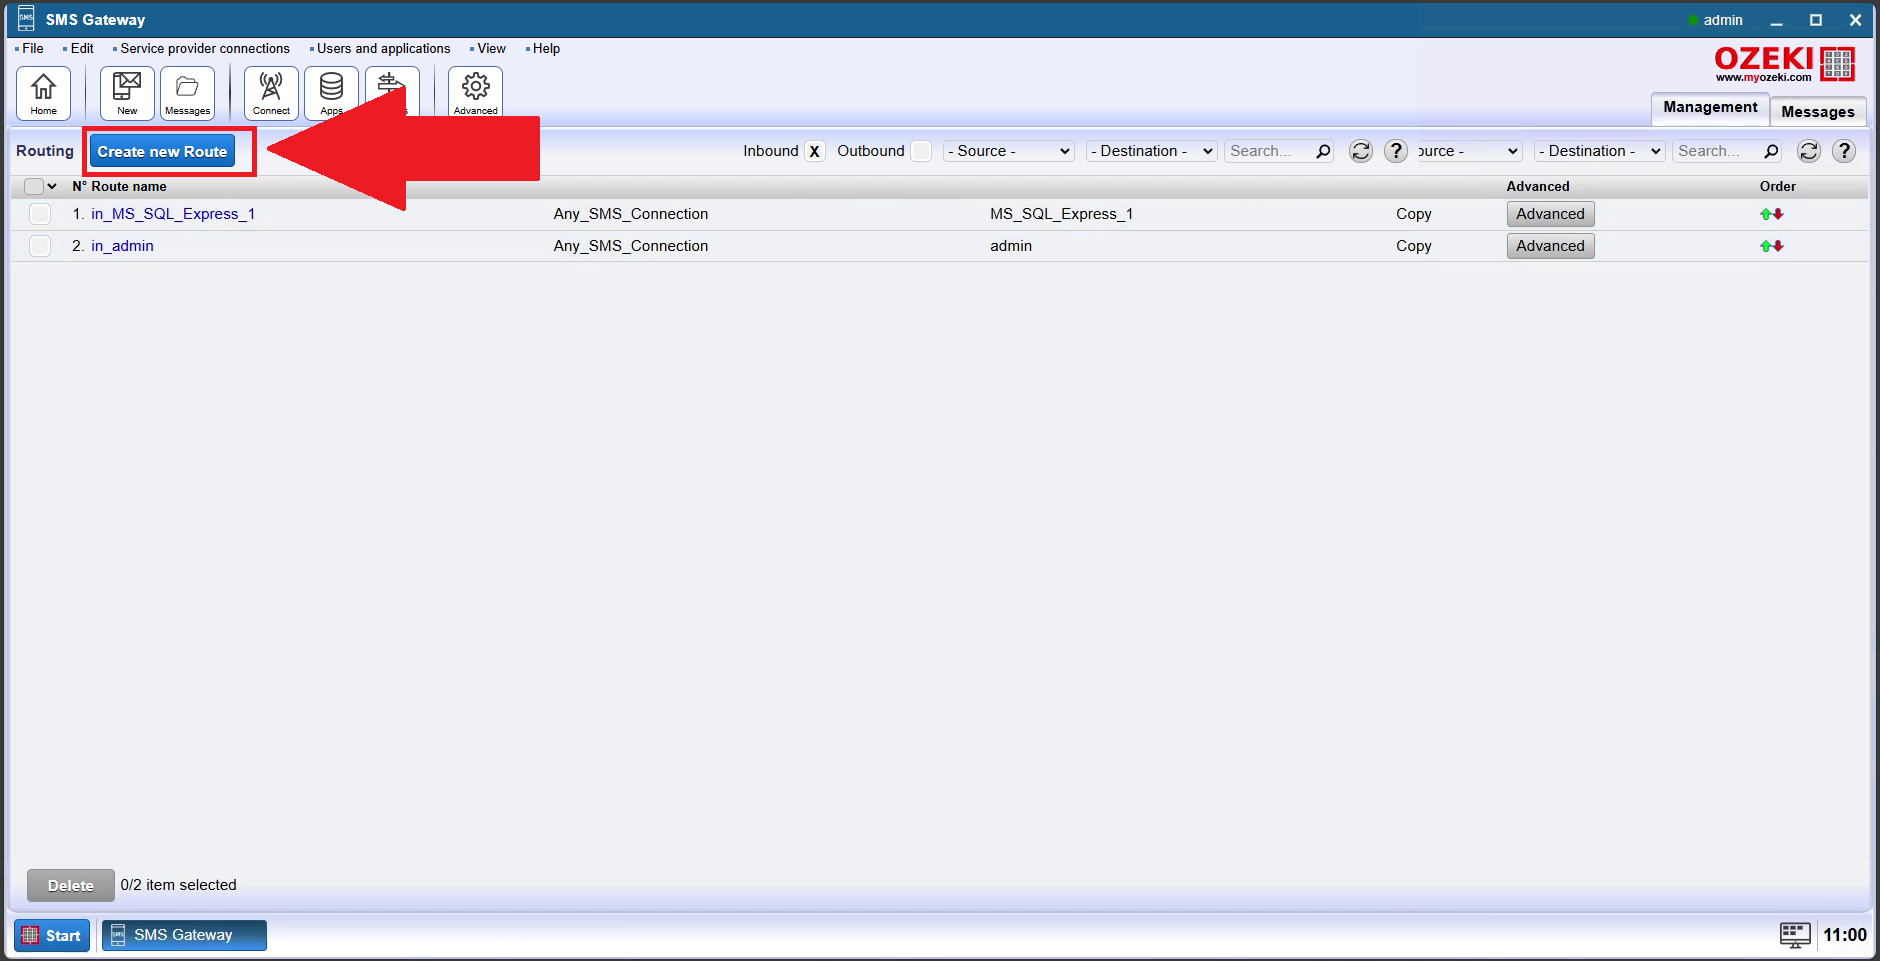
Step 15 - Create new Route
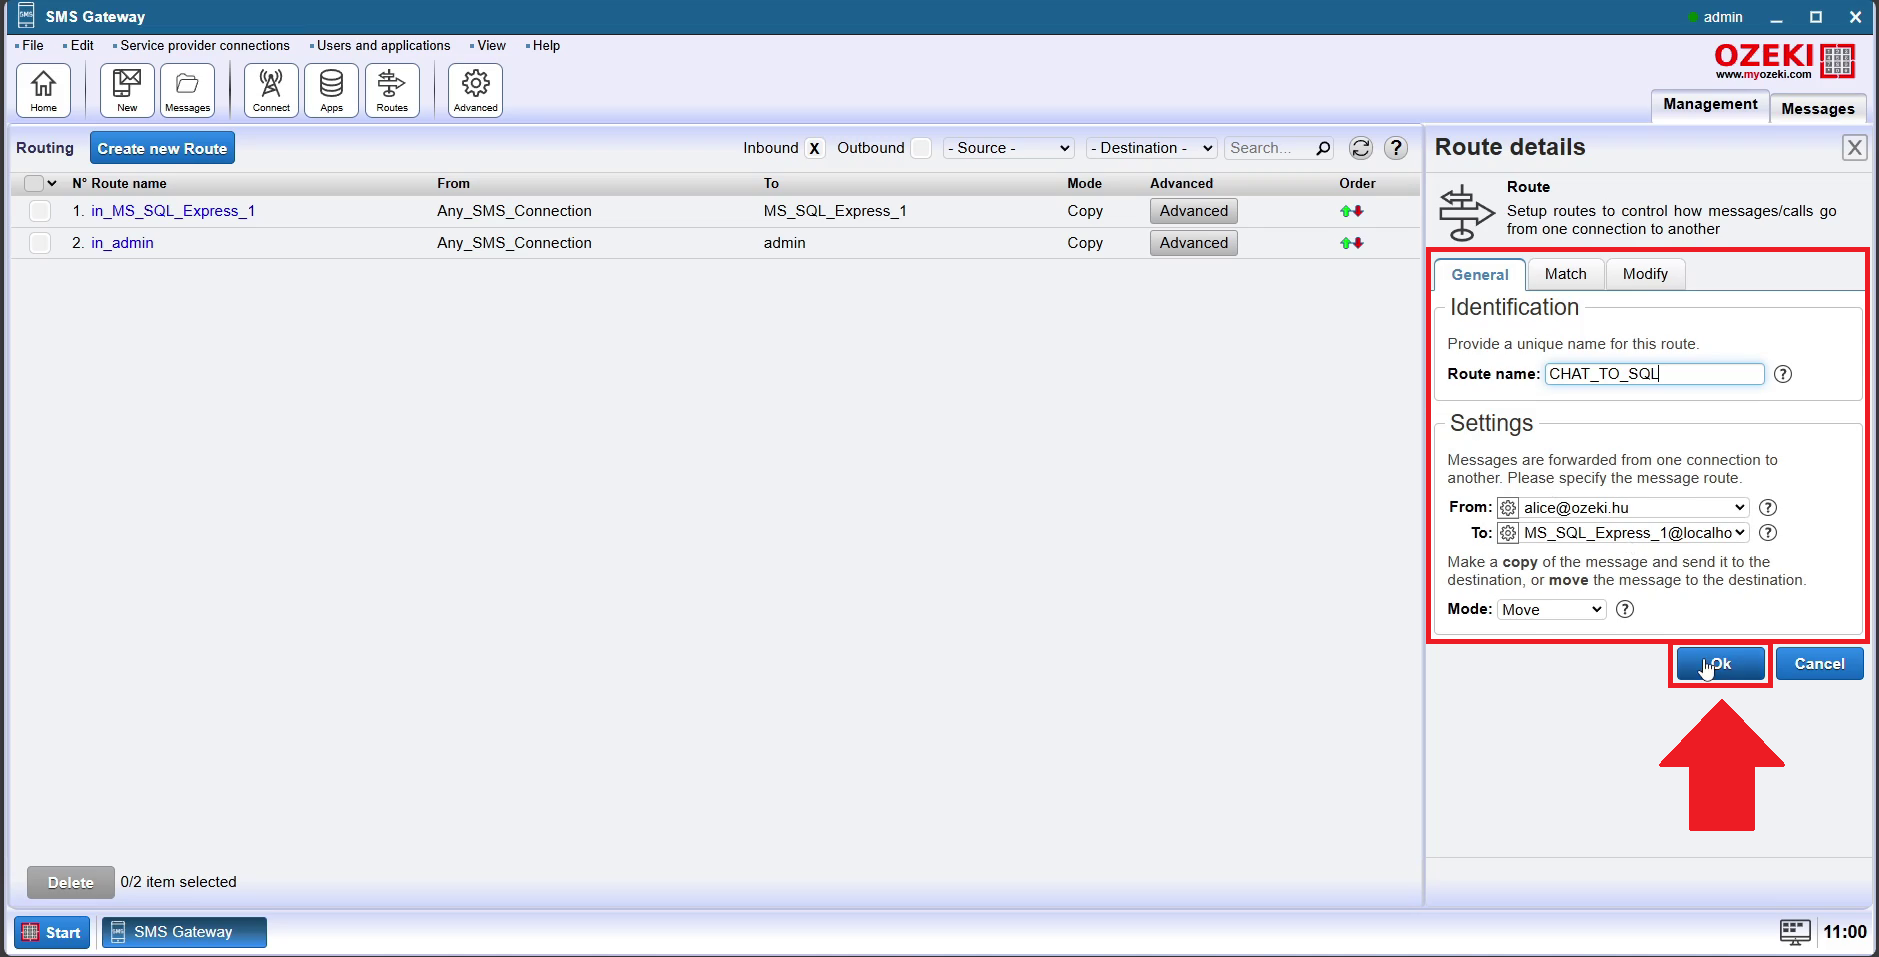
Step 16 - Enter Chat to SQL route
Step 17 - Open home page
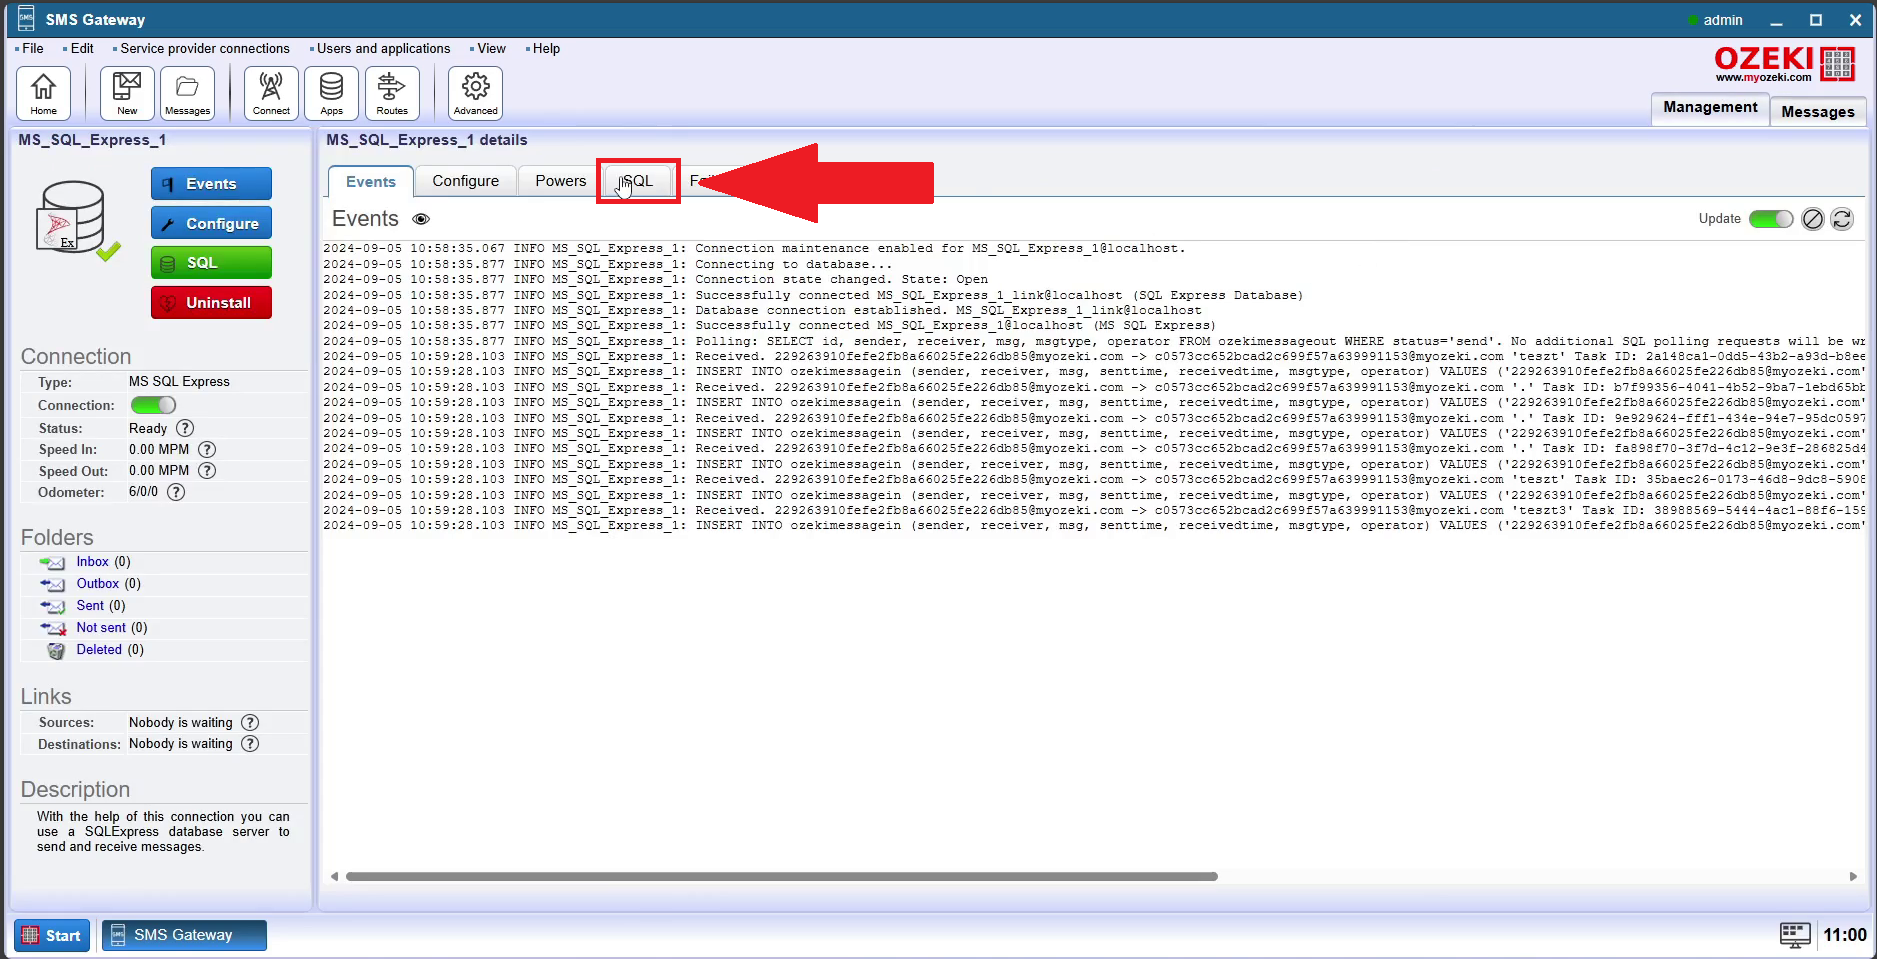
Step 18 - Open SQL application
Step 19 - Open SQL page
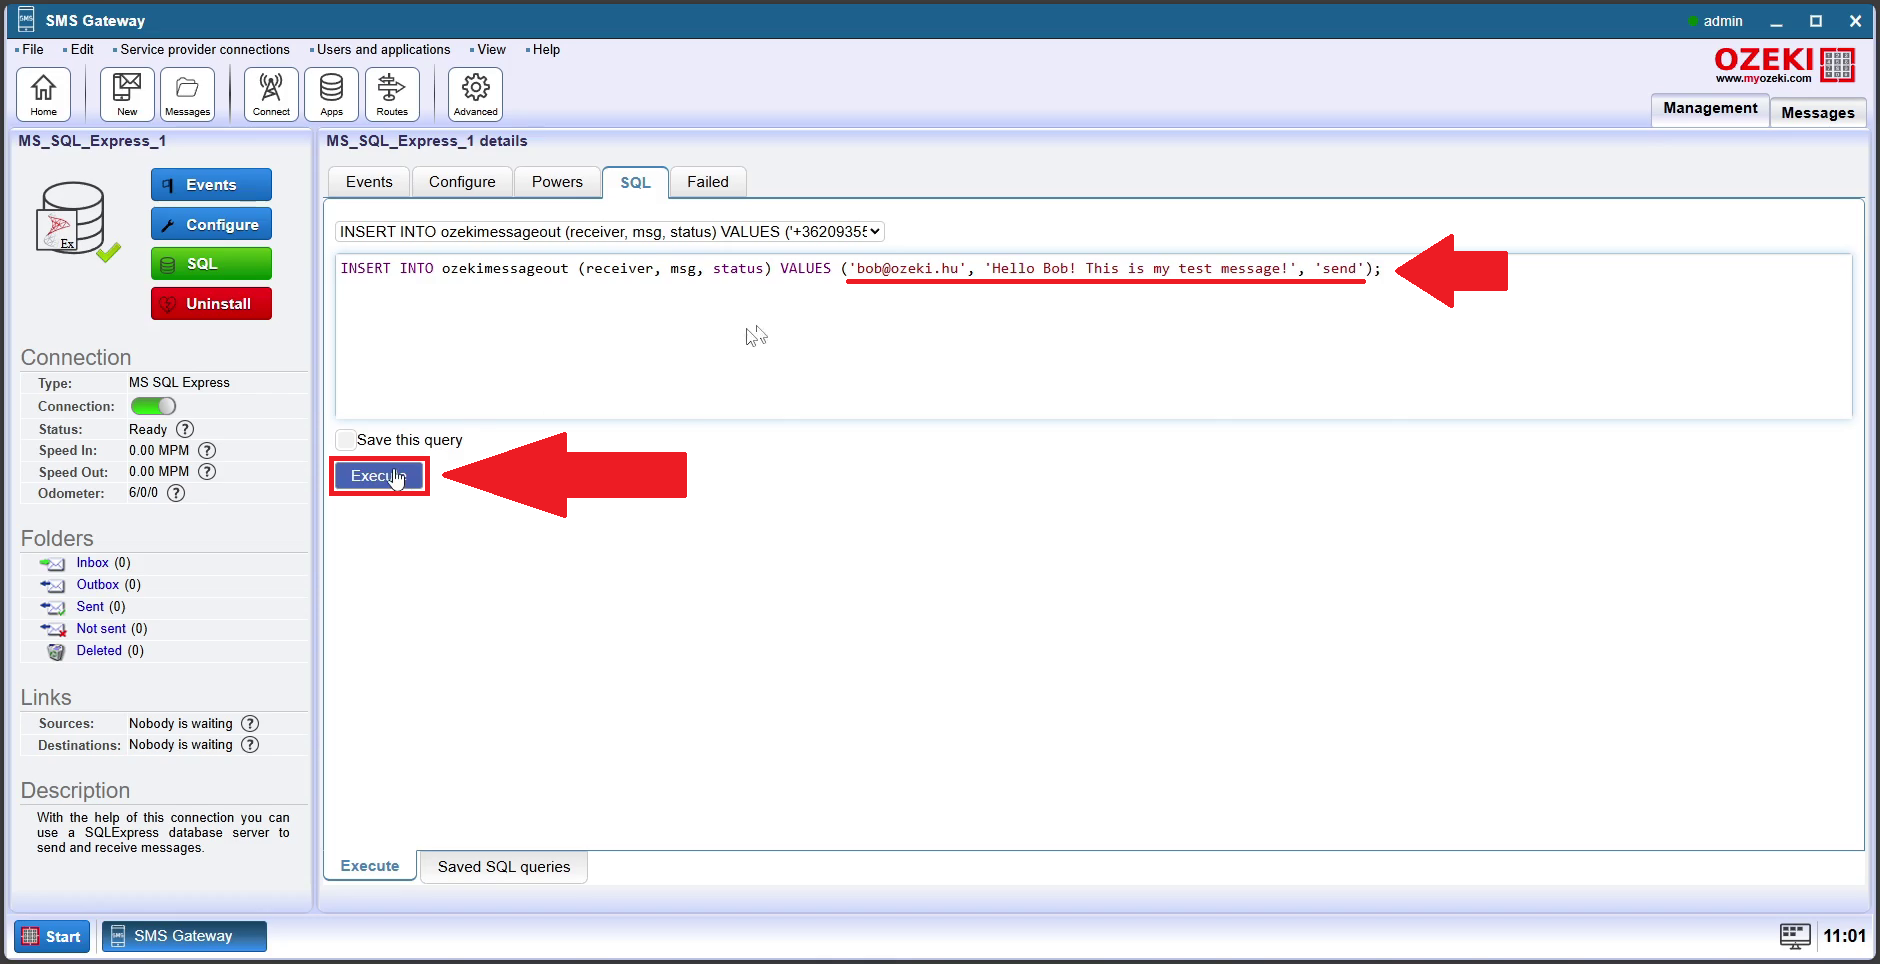
Step 20 - Select the insert new user data shortcut
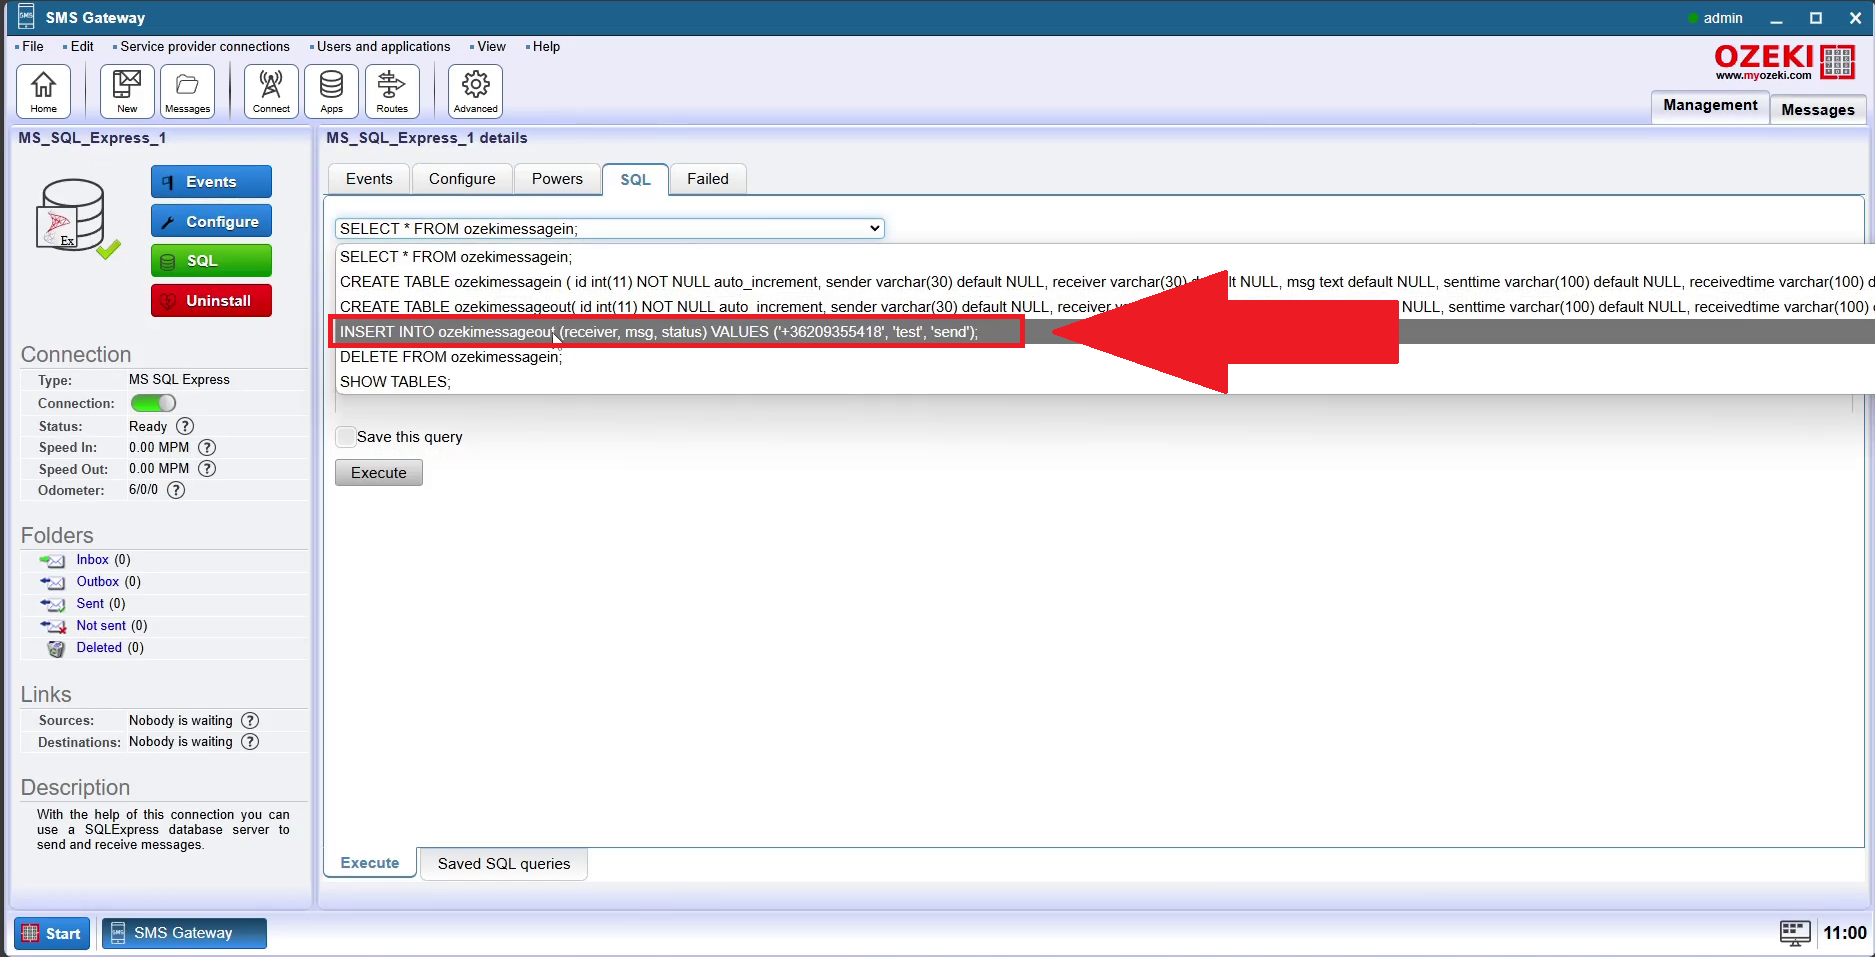
Step 21 - Change the shortcut to your use
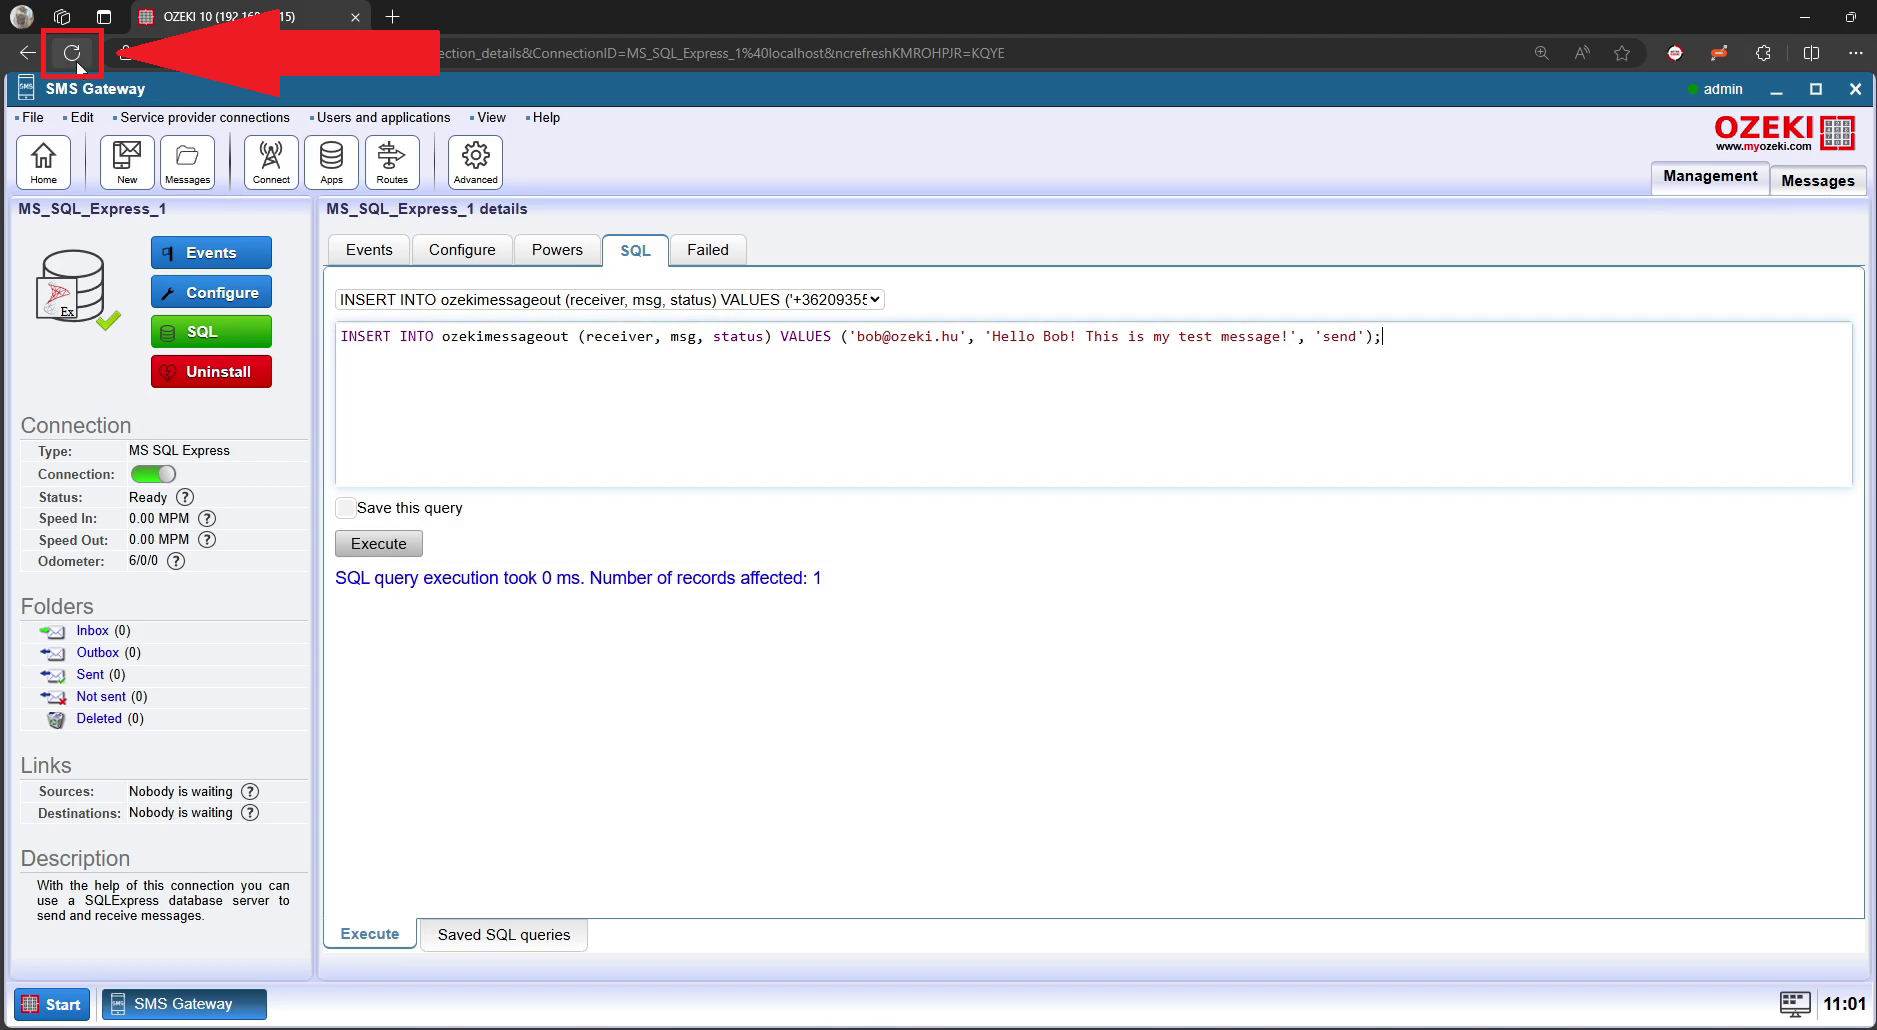
Step 22 - Refresh webpage
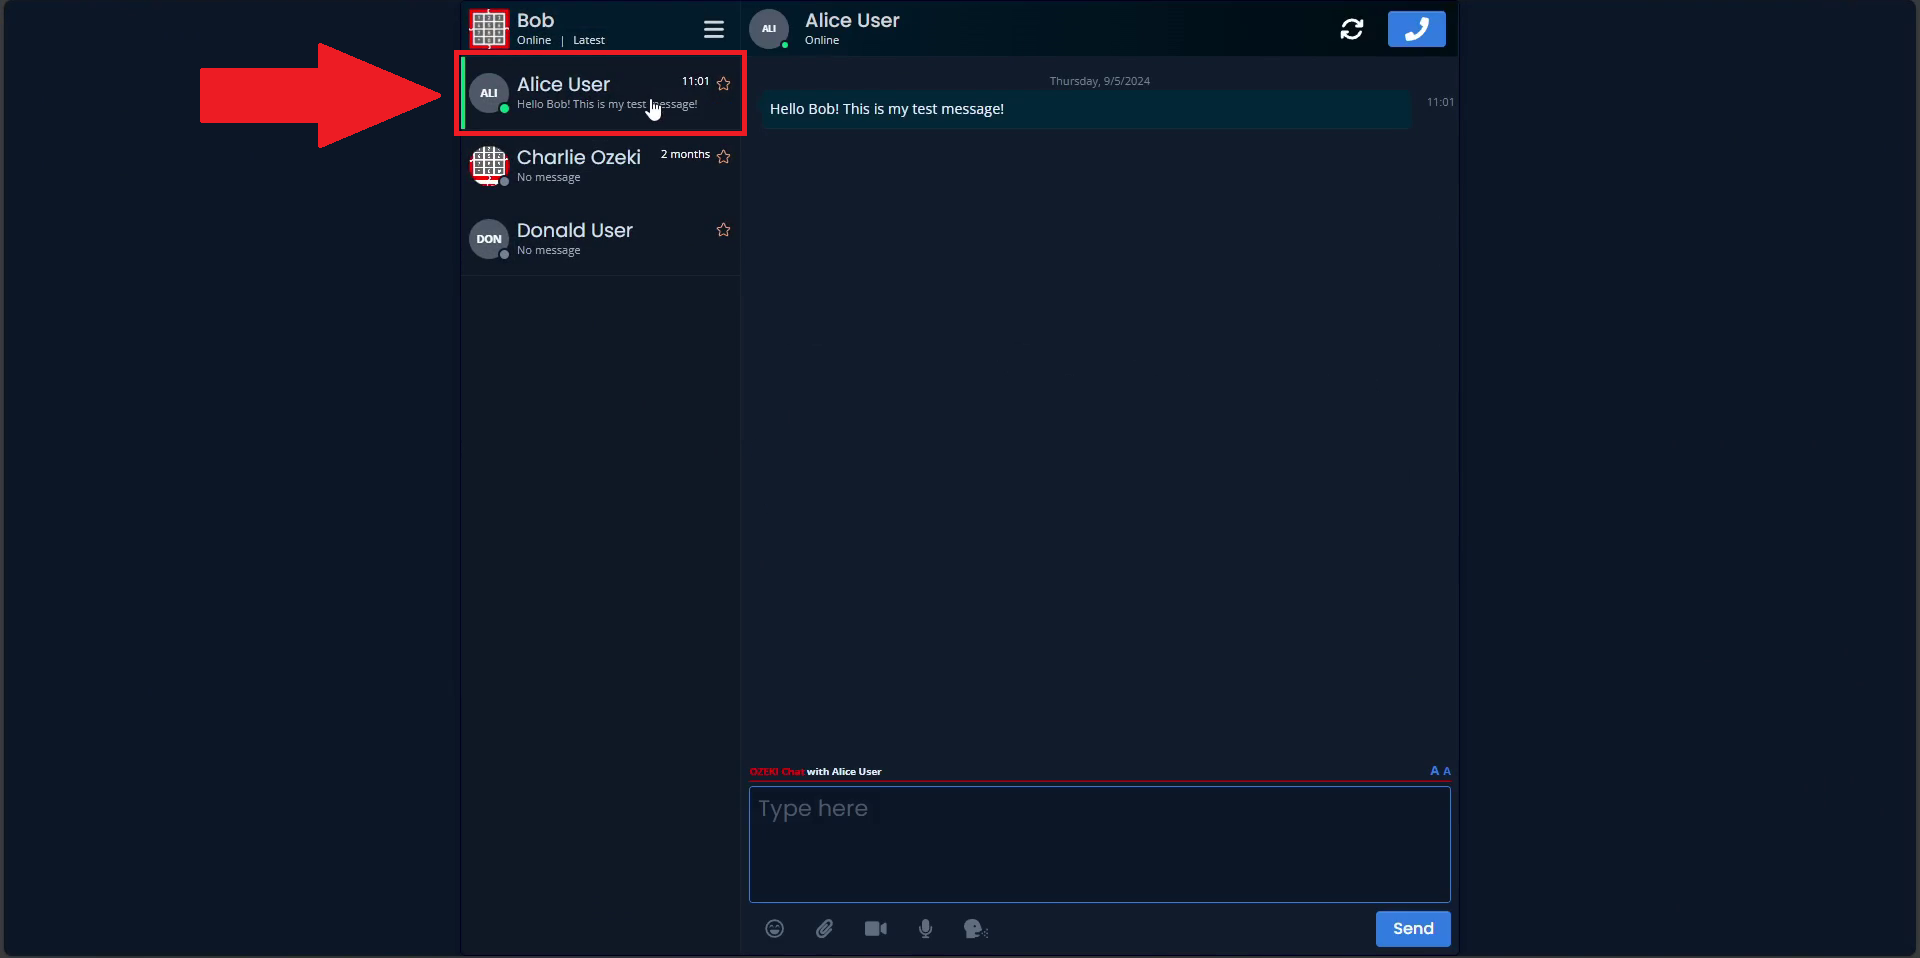
Step 23 - Open receiver user on MyOzeki to see message from sender
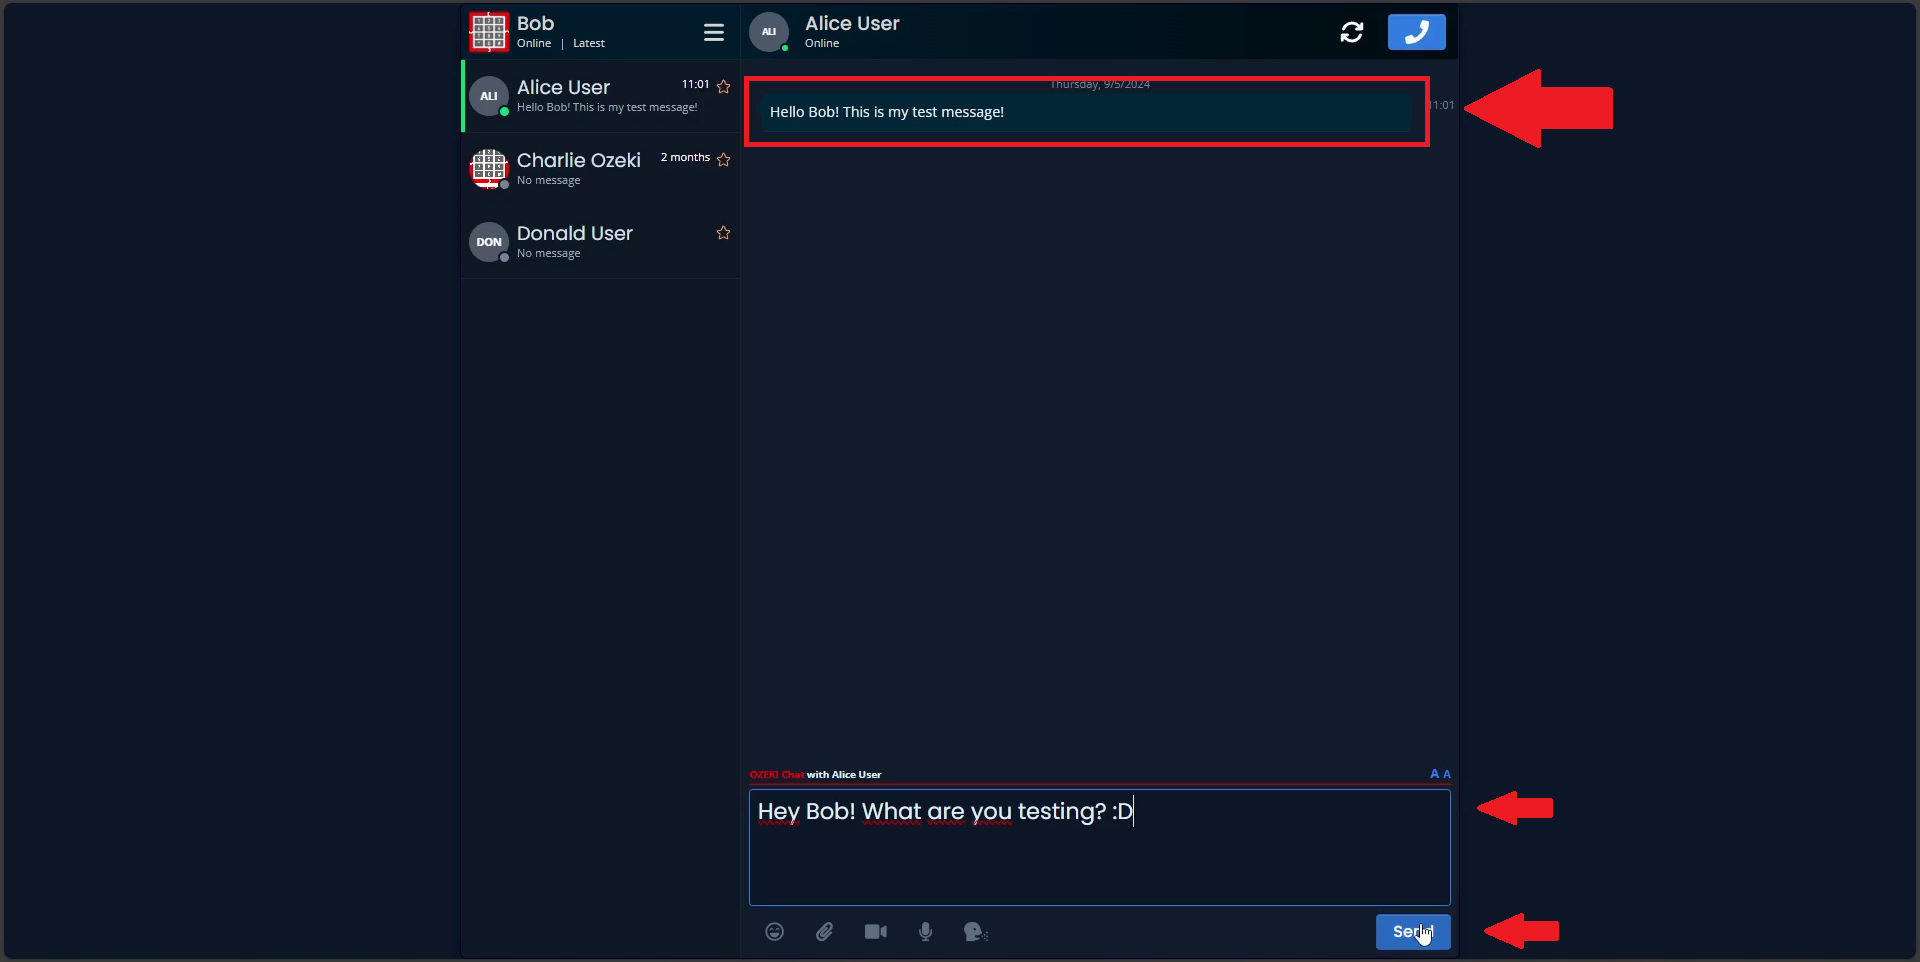
Step 24 - Respond to sender
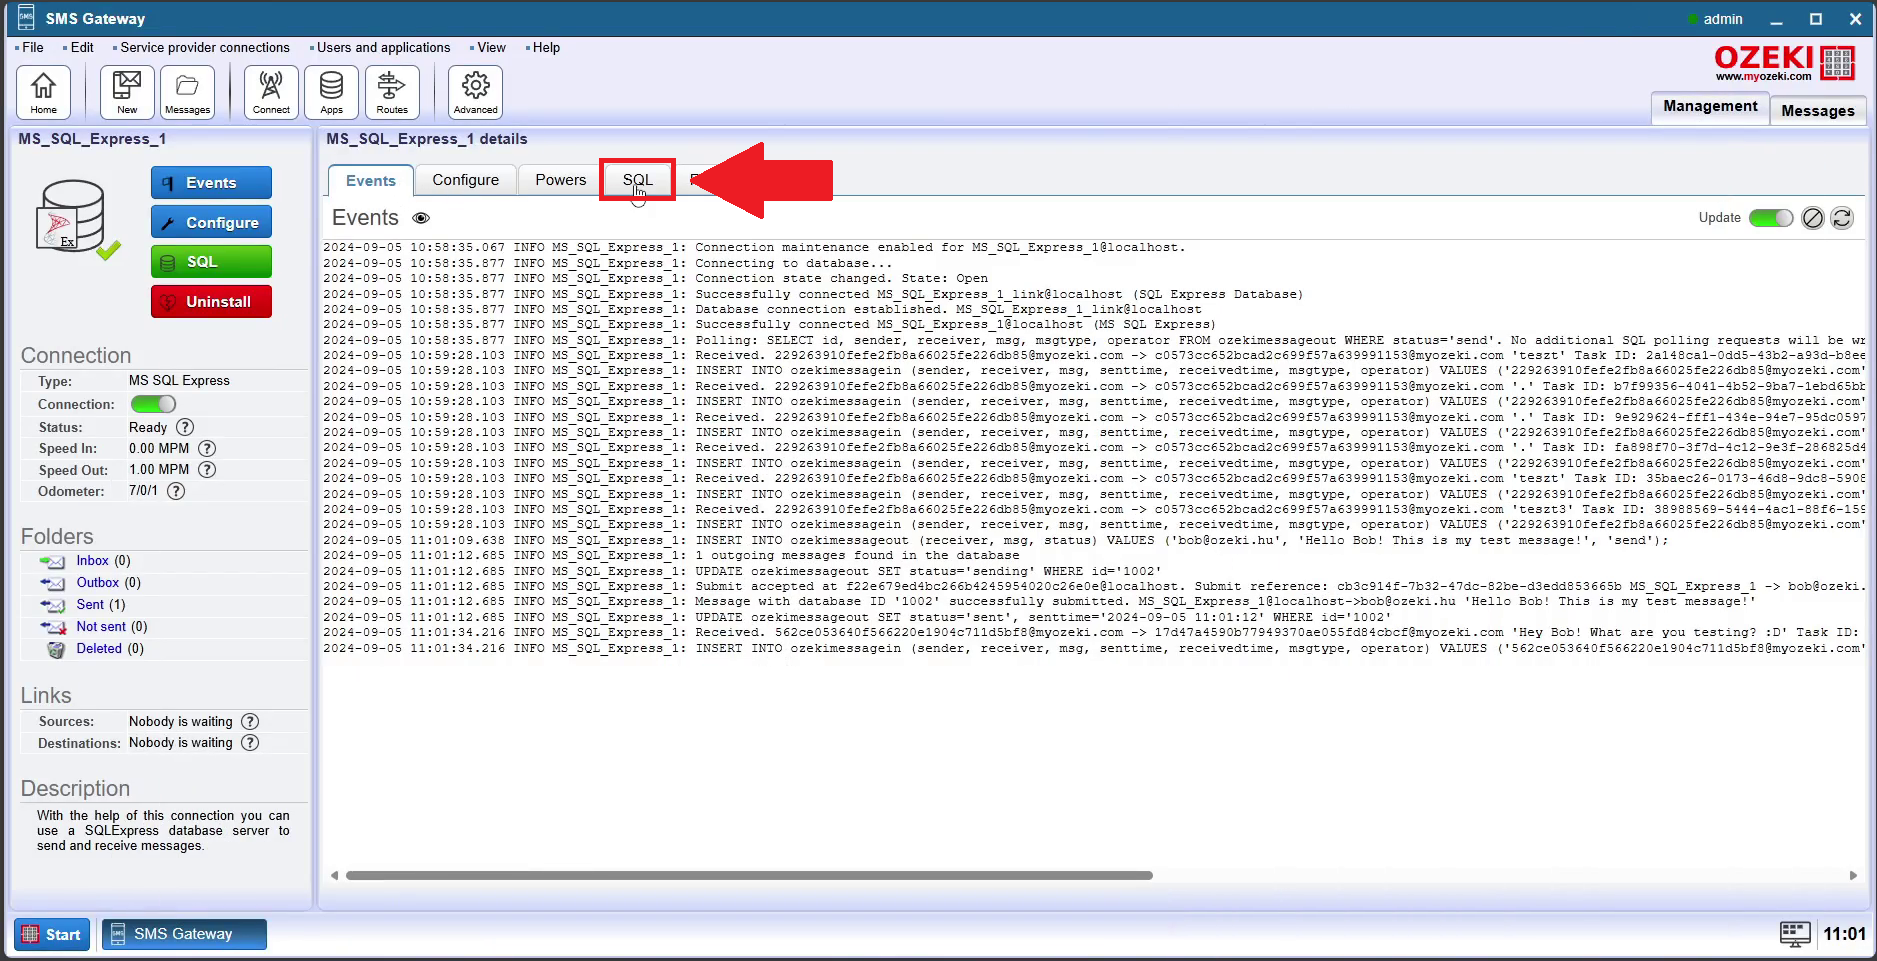
Step 25 - Open SQL page
Step 26 - Select the select shortcut
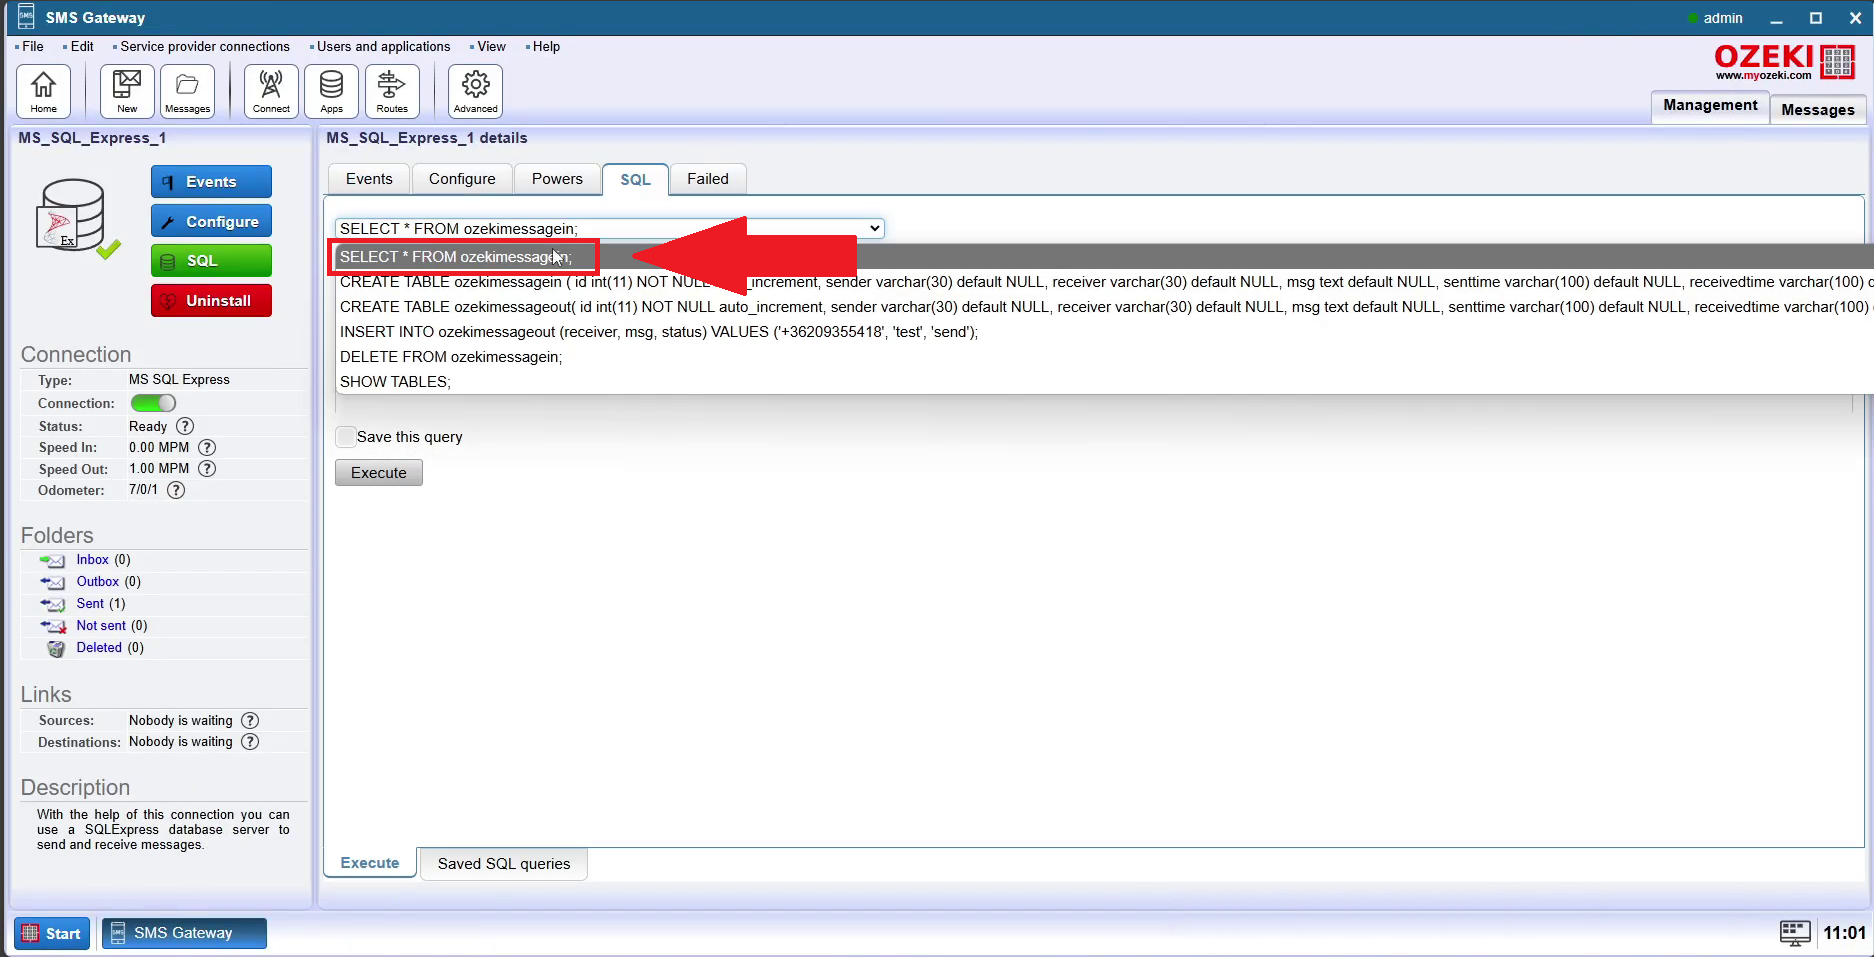
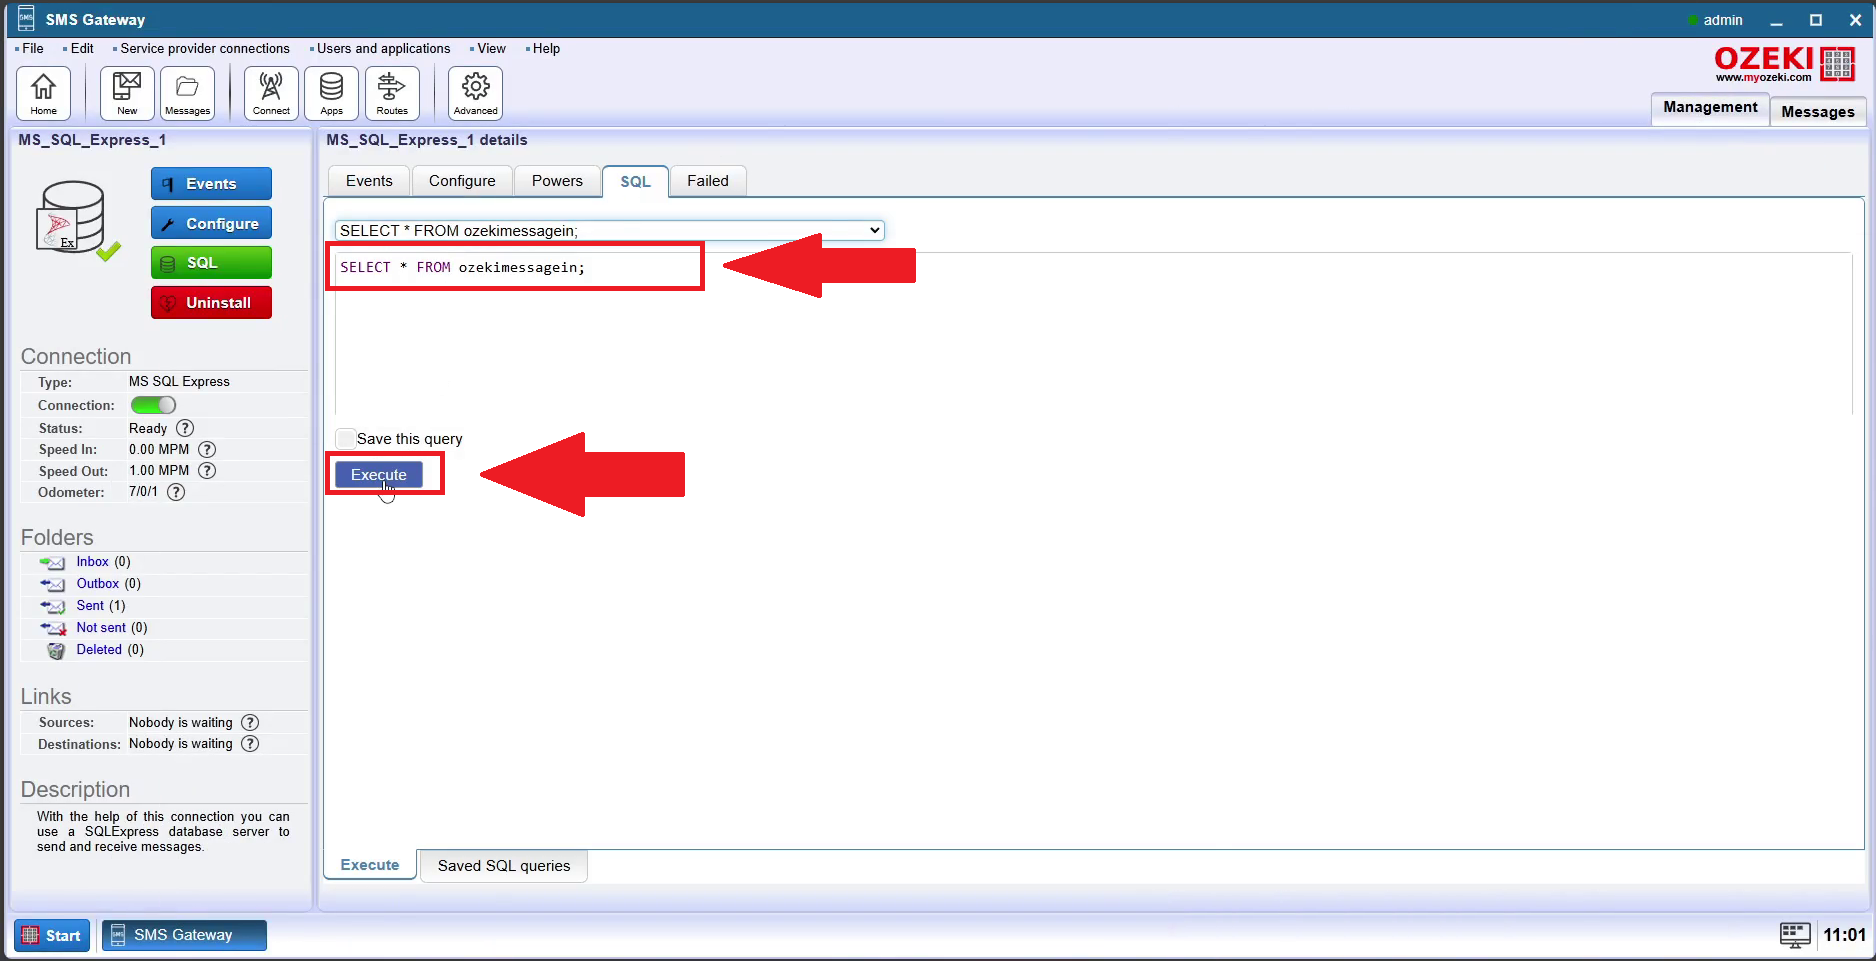
Step 27 - Change the shortcut according to your use
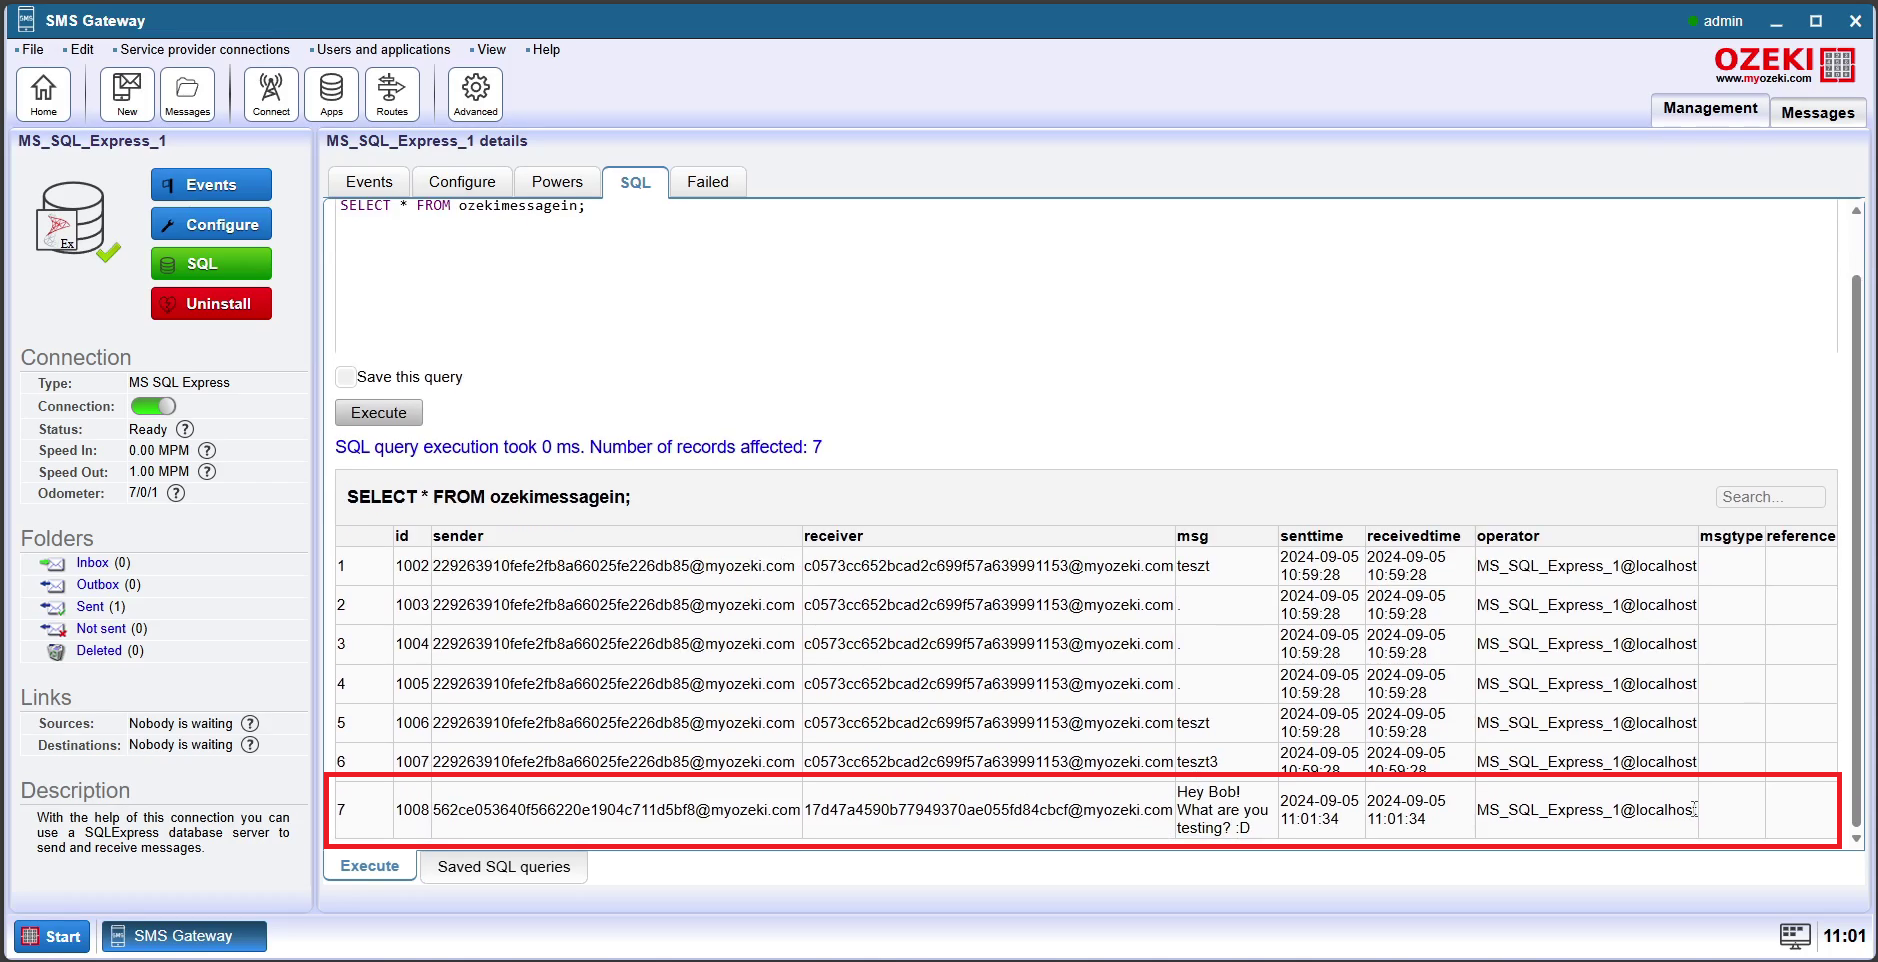
Step 28 - Incoming message shown
More information
- How to send an Ozeki Chat message from the SMS GW GUI
- How to send an Ozeki Chat message from MS SQL
- How to send an Ozeki Chat message from a .txt file
- How to send an Ozeki Chat message using an HTTP request