E-mail to SMS with Postfix and Authentication
This document explains how you can setup an E-mail to SMS service to serve Postfix servers. This setup is useful if you provide SMS service to your customers and each customer has their own Postfix server. The configuration explains how you can create accounts for each customer, and how your customers can use their username and passwords in Postfix to send SMS through your service. The document also shows how you can use SSL/STARTTLS encryption to encrypt traffic between your customer's Postfix server and your Ozeki SMS Gateway. This is necessary to protect your usernames and passwords.
How to send E-mail to SMS from Postfix
To send E-mail to SMS from Postfix:
- Launch Ozeki SMS Gateway
- Configure SMTP service
- Enable SMTP user authentication
- Open terminal
- Create transport rule in Postfix
- Add the SMS Gateway authentication header
- Test sending e-mail to SMS from Postfix
- Check the logs
Introduction
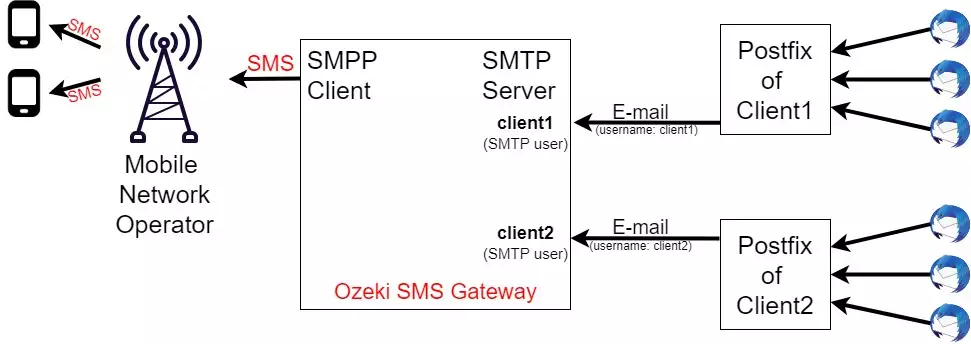
In this setup we assume there are multiple organizations, and each has its own Postfix server. The users send e-mails form Mozilla Thunderbird through these servers. The Postfix servers capture the e-mails going to a specific domain and forward these e-mails to the Ozeki SMS Gateway. The Ozeki SMS Gateway converts the e-mails into SMS and sends them out (Figure 1).
Email to SMS with Postfix (Video tutorial)
In this video, you will learn how to setup an email to sms connection with postfix. This video will start by setting up a new connection and will end with the fully configured email to sms system with postfix capabilities. In this short and easy to understand video, you will learn how to setup and configure a new connection, how to add services and install a new user. In the video we are using the Ozeki SMS Gateway which is a powerful but easy to understand gateway software with an intuitive guide. This means you will have no problem following the steps. Don’t waste any more time. Let’s start!
SMTP authentication
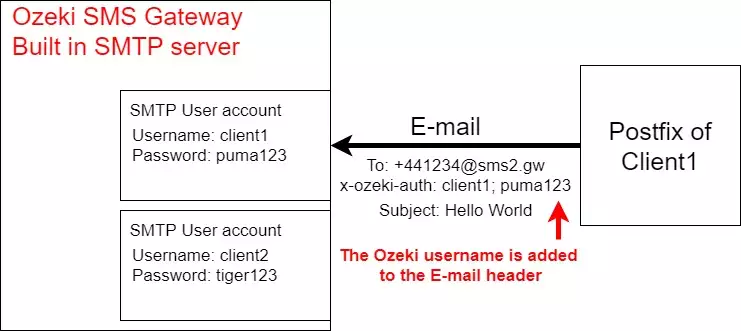
You need to configure a header check rule in Postfix to add the Ozeki Authentication header to the e-mail. You also have to configure the SMTP server in Ozeki to use this authentication header to determine which user the E-mail belongs to. (Figure 2)
SMTP authentication in Ozeki
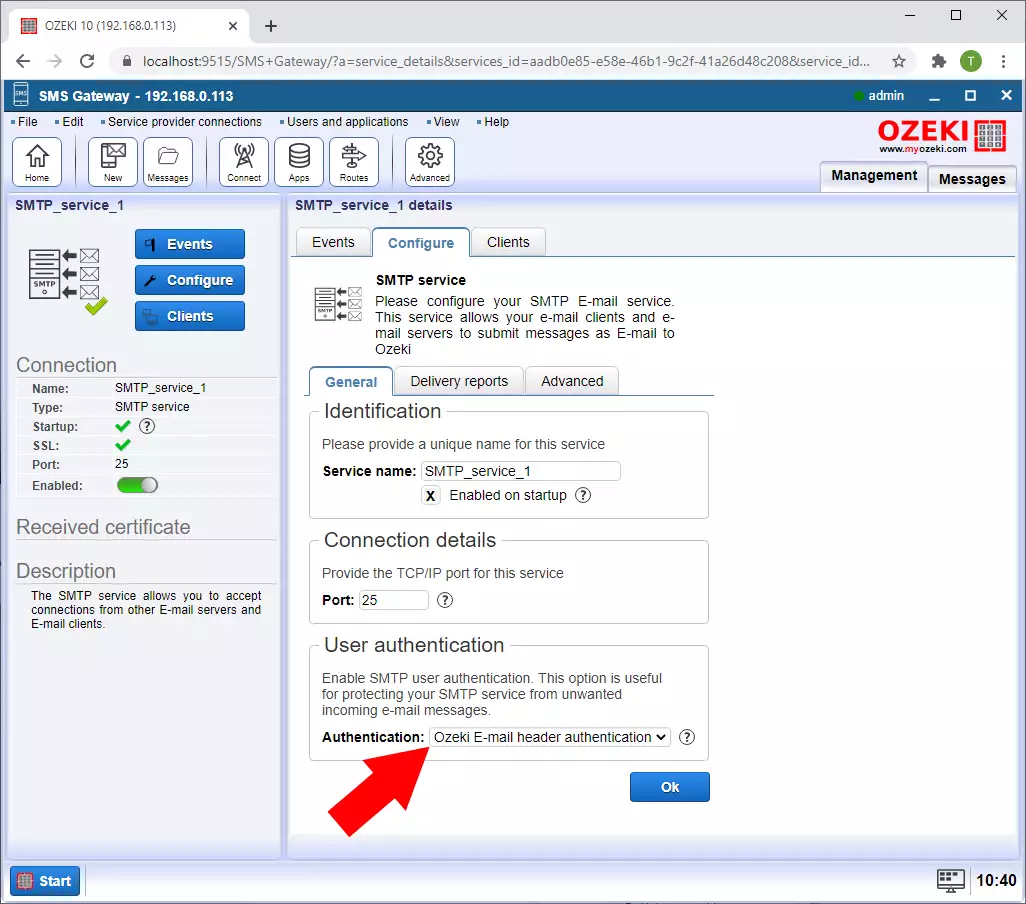
To configure the built in SMTP server of Ozeki to accept the username and password in the e-mail header, you must select the "Ozeki E-mail header authentication" option in the SMTP server configuration (Figure 3). The header field expected will be "x-ozeki-auth: username; password". This header field is appended to each email forwarded to the SMS gateway from Postfix.
SMTP authentication in Postfix (Video tutorial)
In this video, you will learn how to perform an authentication in postfix. The video will start with creating a transport rule and ends with adding the SMS gateway authentication header. This short video is detailed and easy to understand. It only takes a little over 2 minutes to watch. You will learn how to create the transport rule for forwarding all emails where a specific domain is detected. This video will also show you ho to add the authentication header in postfix.
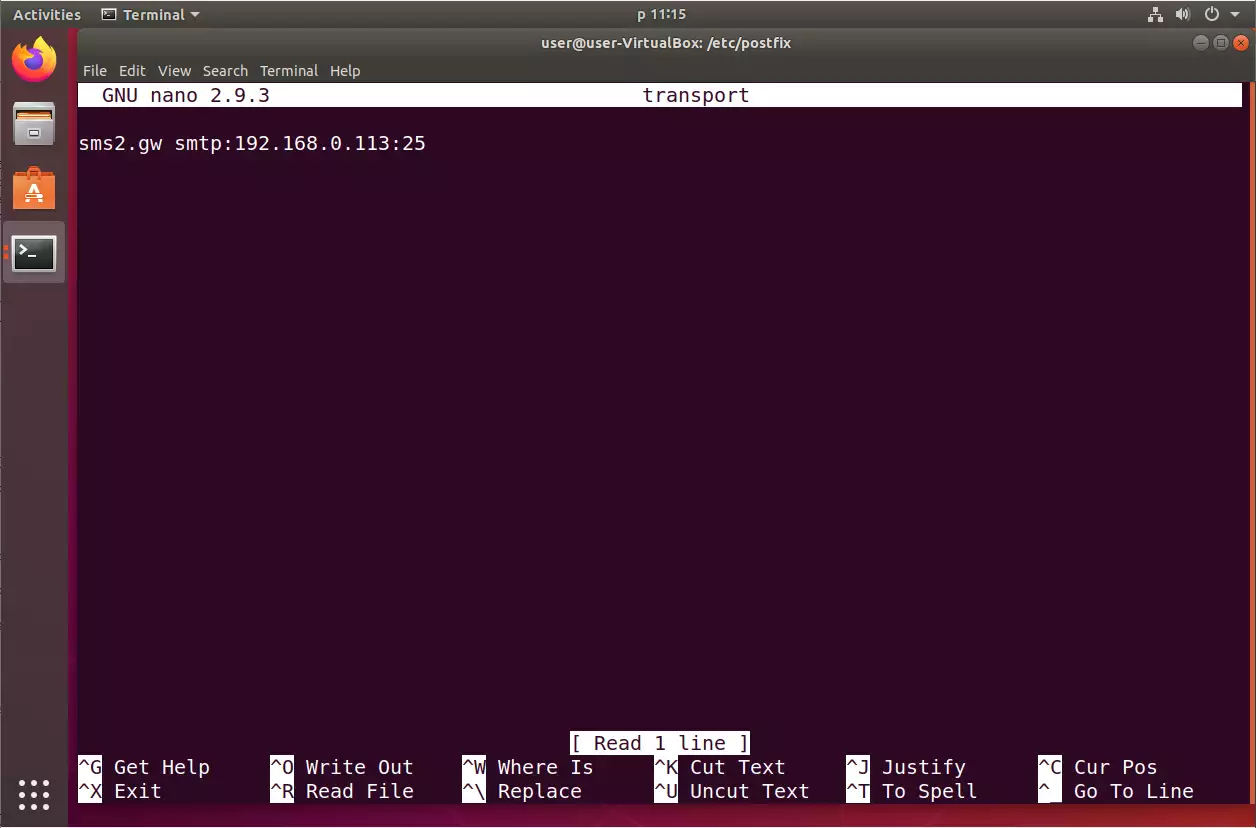
Step 1: Create a transport rule in the postfix to forward all e-mail with sms2.gw domain to the Ozeki sms gateway SMTP service. (Figure 4)
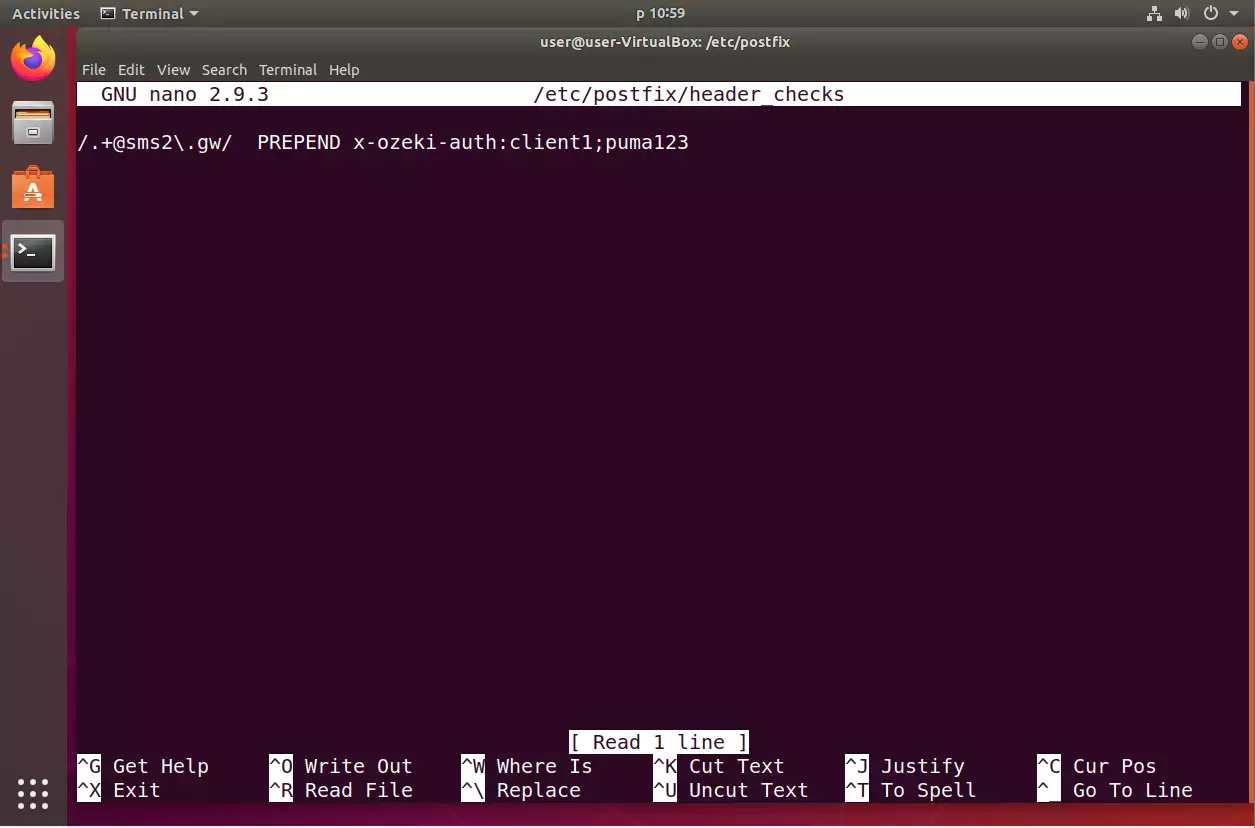
Step 2: To add the SMS gateway authentication header in Postfix, you must add header_checks in the main.cf. In this rule, you should filter for the domain in the recipient address. In our case the regexp is set to "sms2.gw", and you must add a message header field to "x-ozeki-auth: username; password". In our case the username is client1 and the password is puma123 (Figure 5).
Testing the solution
You can test this solution by sending an e-mail message from Mozilla Thunderbird through Postfix. When you send the e-mail you must provide the recipient e-mail address in +44123467@sms2.gw format, where +44123467 should be replaced to the SMS phone number you wish to send your message to and sms2.gw should be the domain you have setup in your Postfix server.
The e-mail you send from Mozilla Thunderbird will go to your Postfix server. Postfix will first append the x-ozeki-auth headers to it, then it will forward it to the SMS gateway using the connector we have setup up.
Next the e-mail will come in to the built in SMTP Server of Ozeki SMS Gateway. The SMTP server will select the appropriate user based on the e-mail header and will forward the messages to it. Next Ozeki SMS gateway will convert this e-mail into SMS and will send it through a mobile network connection. You can follow the message's path in the Ozeki SMS Gateway logs (Video 3).
The path of the E-mail in Ozeki NG SMS Gateway (Video tutorial)
In the last video, you will see the process of testing the created system. It will start with sending a message to a recipient with the sms2.gw domain. At the end, you will see the log for the sending process. This video takes 1 and a half minutes to watch, and it is easy to understand. The Events tab of the Ozeki SMS Gateway will store all the events on a connection so you can use it for troubleshooting later. After this video, you can easily check if your email to sms with postfix system is working or not.
