How to setup the Sunrise Switzerland SMS connection
This guide presents the steps you need to take to setup an IP SMS connection to the Sunrise mobile network operator in Switzerland. Please note, that you must obtain a username and password from Sunrise in order to use this connection. You will also have to open a port on your firewall if you want to receive delivery reports and incoming SMS messages.
How to send SMS through the Sunrise Switzerland (Quick steps)
To send SMS through the Sunrise Switzerland SMS service provider:
- Download and install Ozeki SMS Gateway
- Add new connection
- Install the Sunrise connection
- Configure Sunrise username and password
- Turn on the connection
- Send new message
- Open firewall settings
- In the Advanced settings create New Rule...
- Select the Port type of rule
- Specify local ports
- Allow the connection
- Specify the rule name
How to send sms through the Sunrise Switzerland SMS connection to SMSC (video tutorial)
In this video tutorial we show you how to configure the Sunrise Switzerland SMS connection in Ozeki SMS Gateway and send out a test message. Finally, you can learn about how to open a port on your firewall in case you want to receive delivery reports and incoming SMS messages. We created this sms connection guide with absolute beginners in mind and made sure that it’s full of actionable advice that you can start implementing right away.
You can download the latest version of the SMS gateway from the following URL: https://inside.ozeki.hu/p_727-download-sms-gateway.html
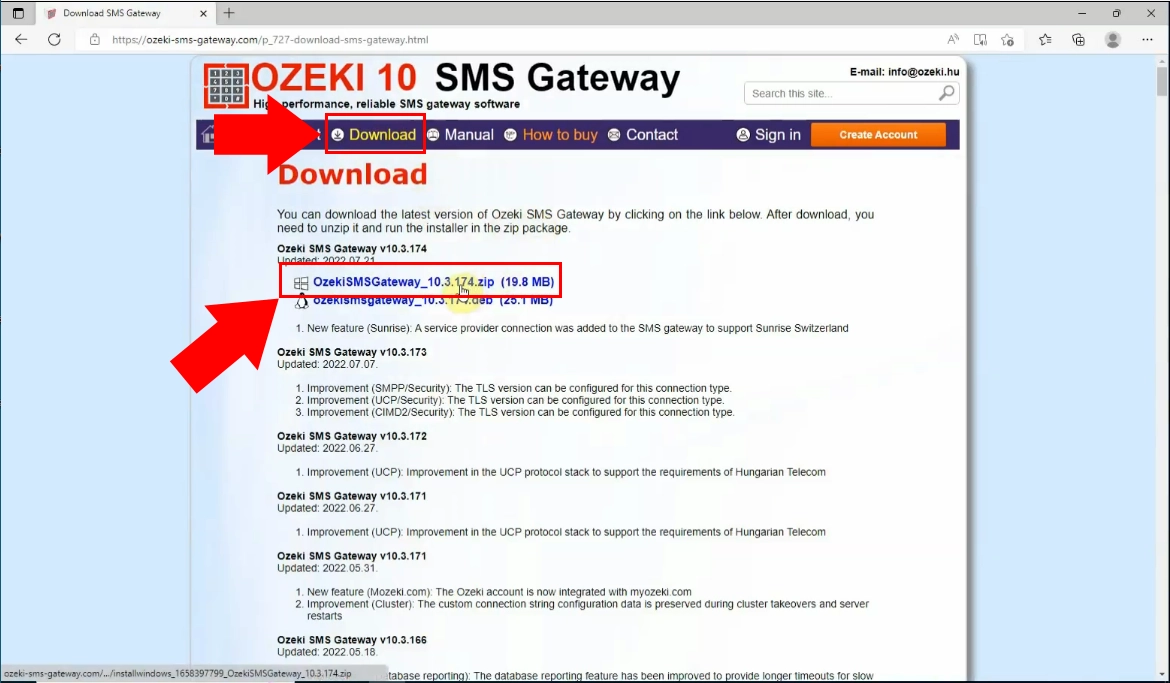
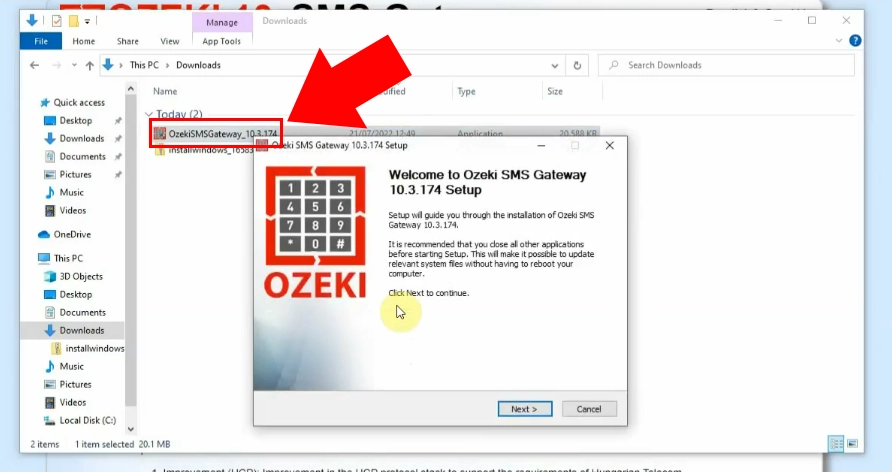
You need to install software and follow general installation steps.
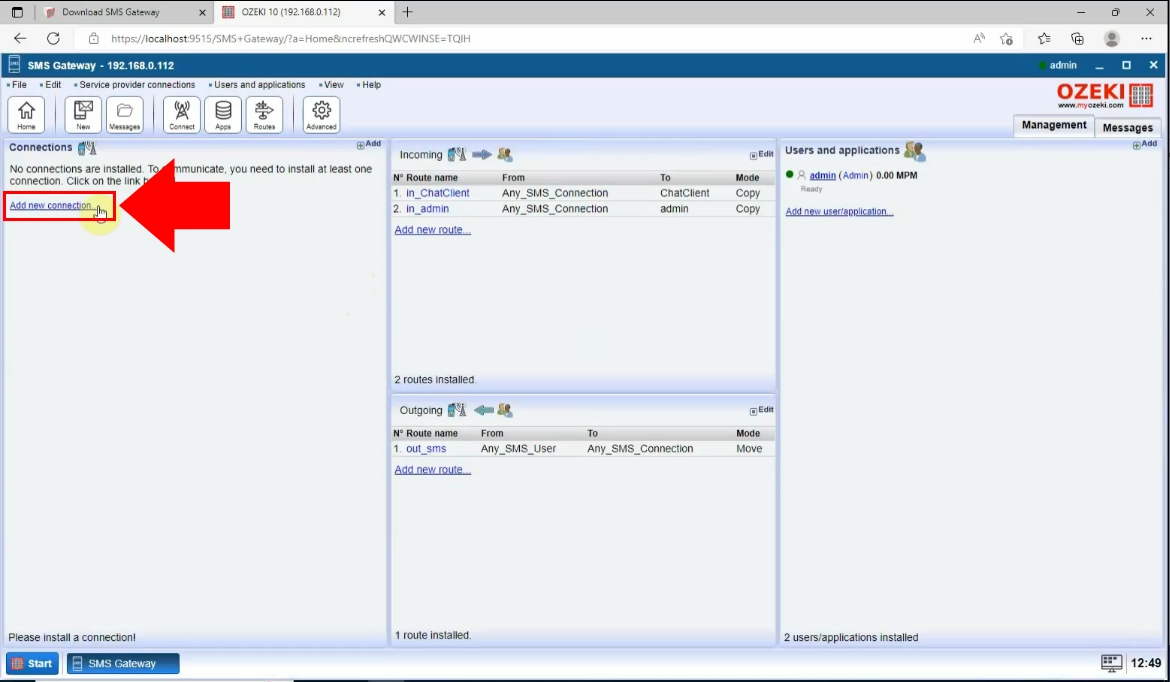
Firstly, add new service provider connection by clicking on the left-hand sided Connections panel's "Add new connection" link.
When you open the "Add new connection" link, the "Add a connection" list will appear on the right side of the GUI. Look for IP SMS connections install list and select the SMPP client install item to use the SMS Sunrise protocol.
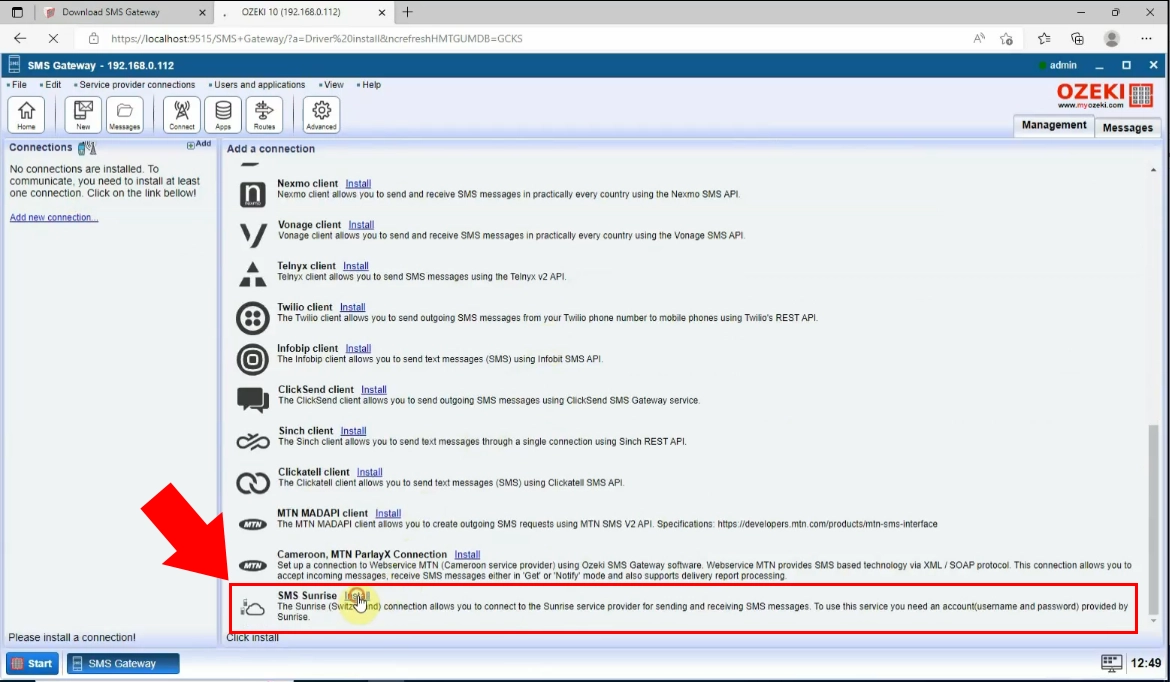
Click on the SMS Sunrise Install link which will bring up to you a configuration page where you need to enter some necessary pieces of information. Add a unique username and a password to set up the connection.
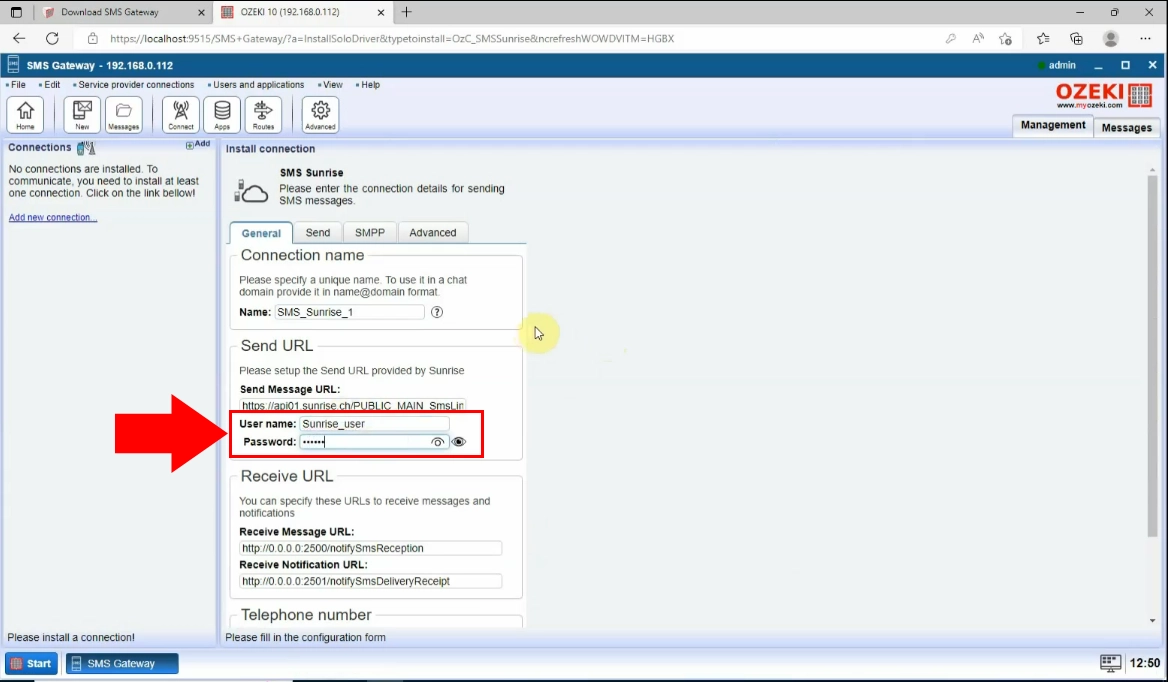
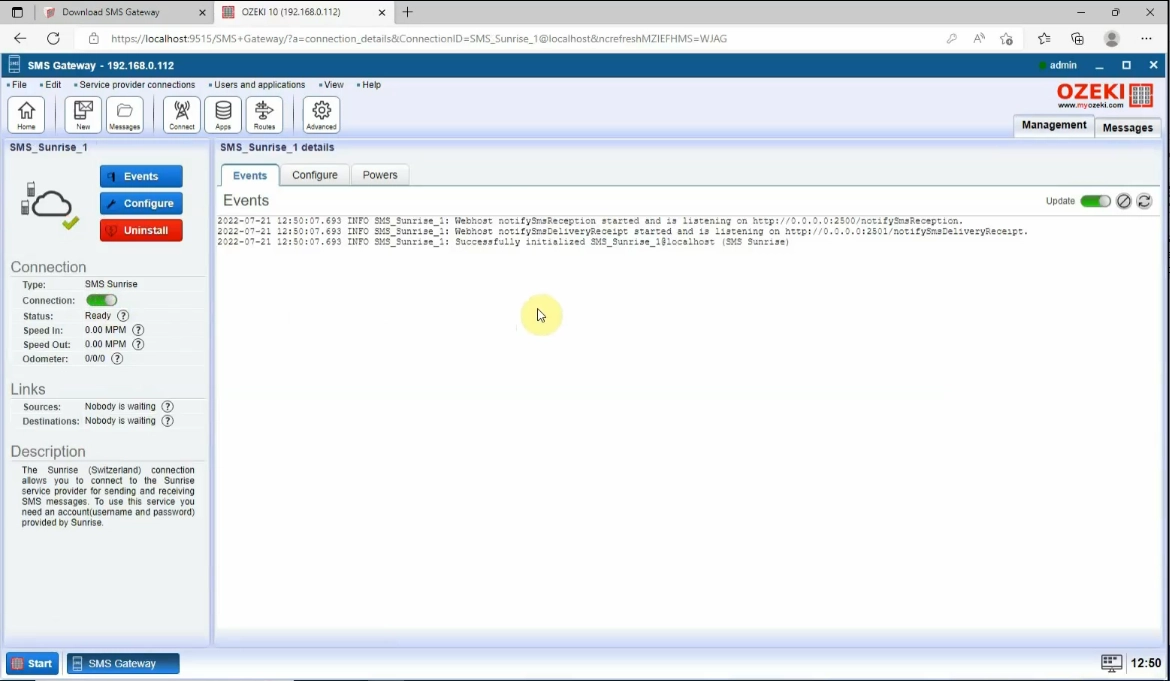
When you are ready with typing information, click on the "Ok" button. Switch the slider button, that can be found at the left side of the panel, to green, in order to set up the connection. If it successful you can see the Events details in order.
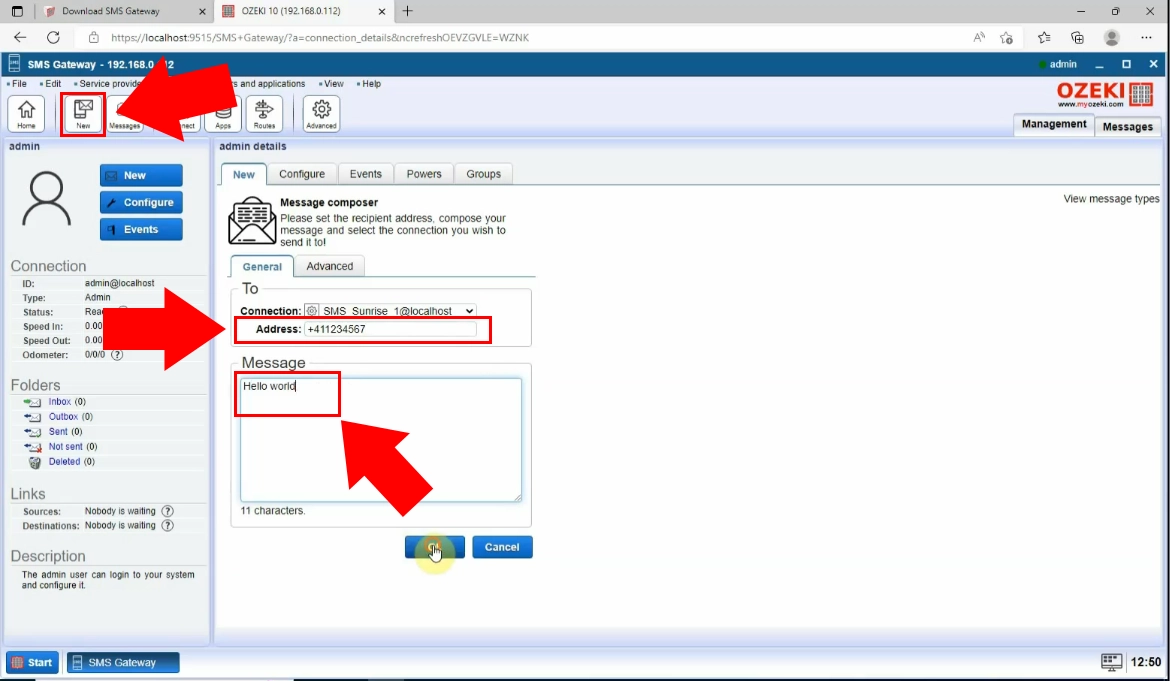
Find the "New" icon from the Ozeki toolbar, click on it.
Type the Address of text message then type your message into the certain boxes.
By clicking on the "Ok" button, you will see the message delivery history of your
messages that has been sent.
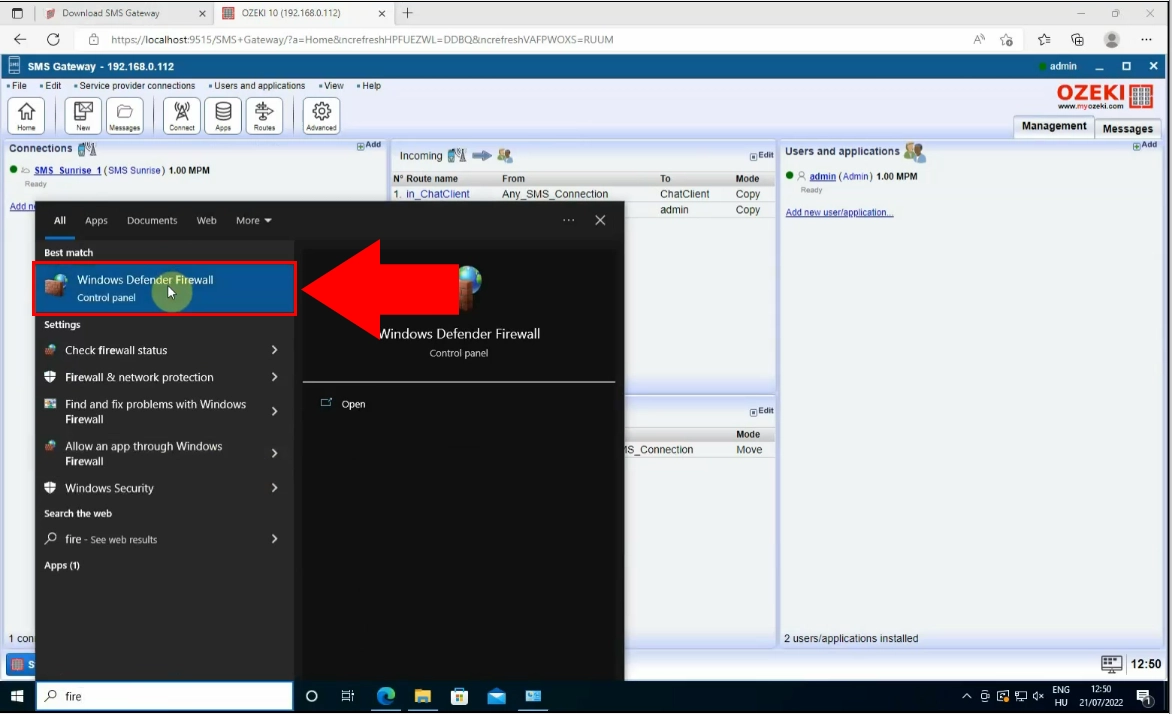
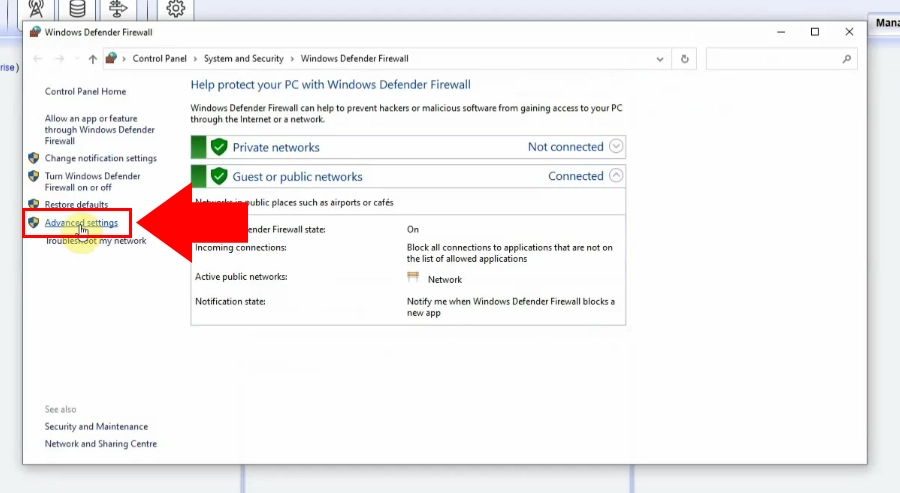
At your PC's start menu, you have to search for the "Windows Defender Firewall".
Choose the "Advanced Settings" at the left side of the control panel.
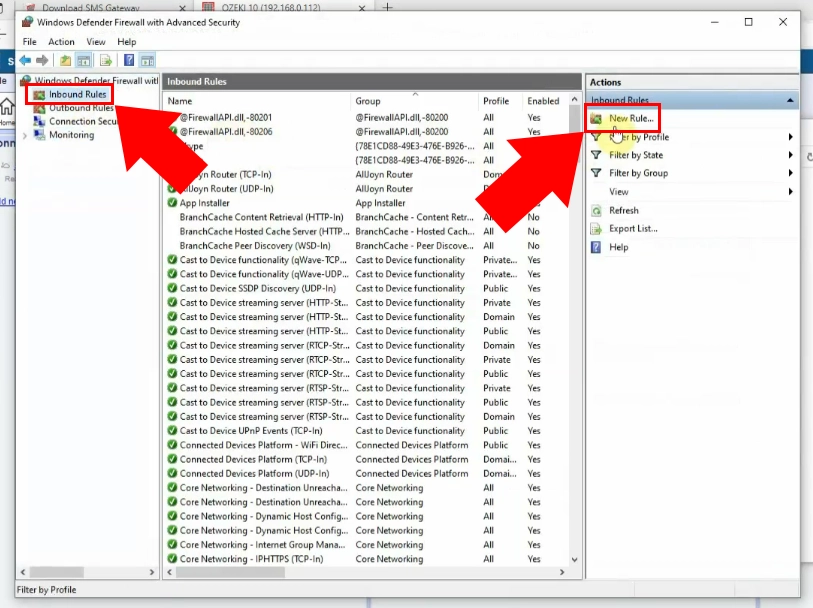
Choose the "Inbound Rules" option from the control panel, then select the "New Rule" option that can be found at the upper right side of the page.
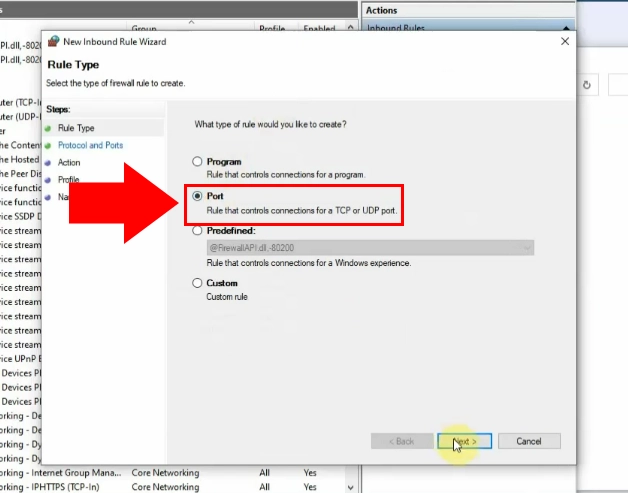
By clicking on the "New Rule" link, a Rule Wizard window will appear, where you have to choose the "Port" option that controls connections for a TCP or UDP port.
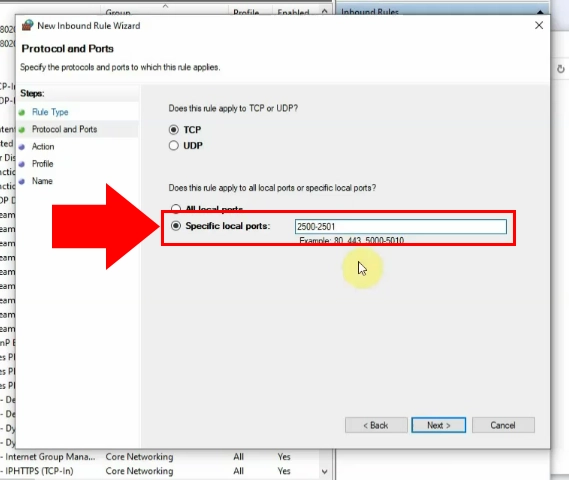
Click on the "Next" button, then at the "Specific local ports" enter the 2500-2501 portal code.
Choose the "Allow the connection" option then click on "Next" button.
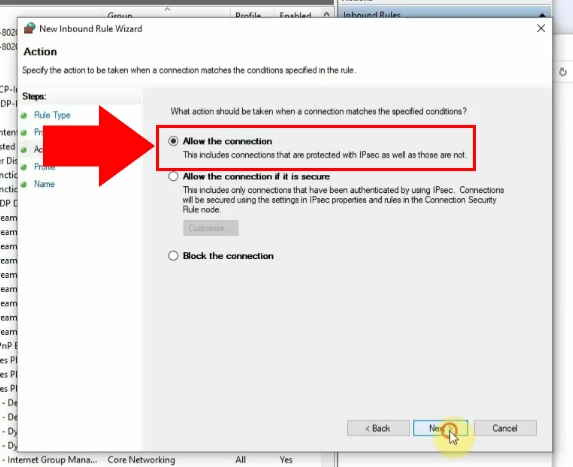
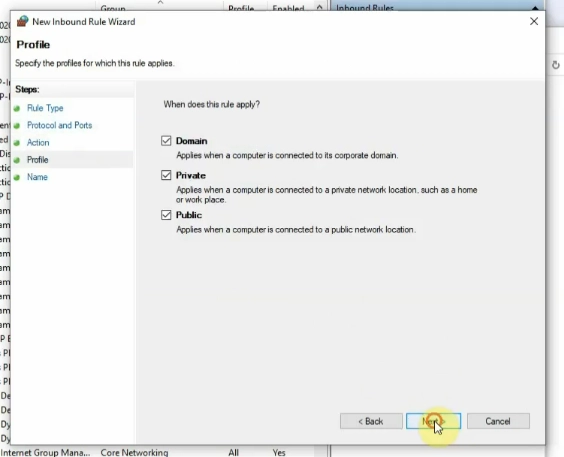
Allow all the given options to apply this rule by clicking on the "Next" button.
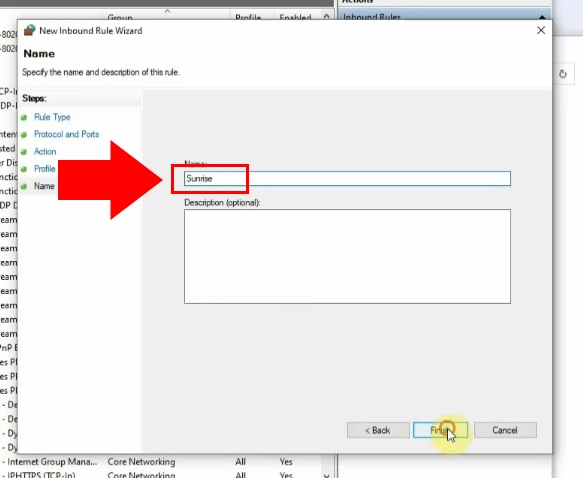
Now, you need to define rule name. Type the "Sunrise" name to the box. Then click on "Finish" button at the bottom.
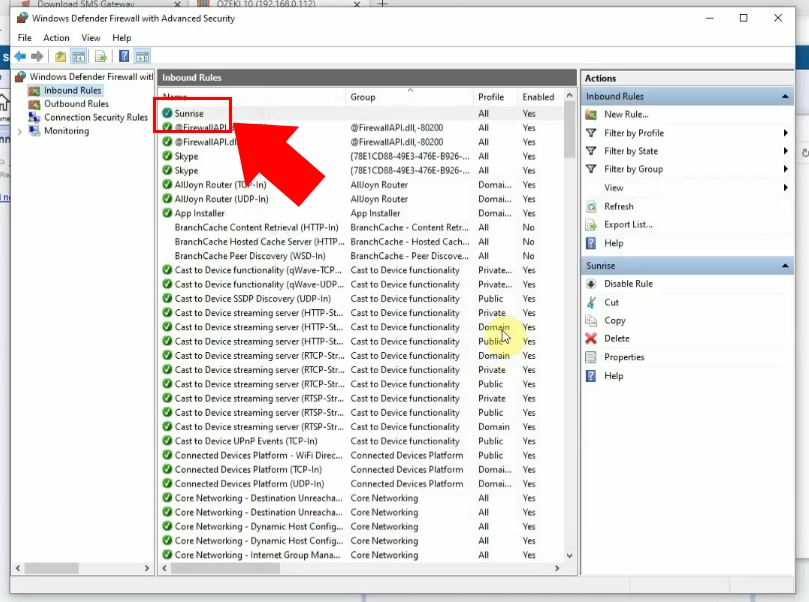
As a result, you can see now the inbound rule that has been created.
More information
- Send SMS to Telecom Slovenije SMSC
- How to send SMS with amazon SNS
- How to send SMS from Clickatell
- How to send SMS using the MTN Developer APIs (MADAPI)
- Sunrise SMS service
- One SMS Service
- How to send SMS from Clicksend
- How to send SMS from Infobip
- How to send SMS using Messagebird
- How to send SMS using Nexmo
- How to send SMS from Telnyx
- How to send SMS from Twilio
- How to send SMS with Yettel SMS Futár connection
- Orion Telekom
