MessageBird SMS service provider
How to create a MessageBird account
In order to use the MessageBird service you need to create an account. In this section we guide you how to do it.
On the main page please select the 'Sign up' button.
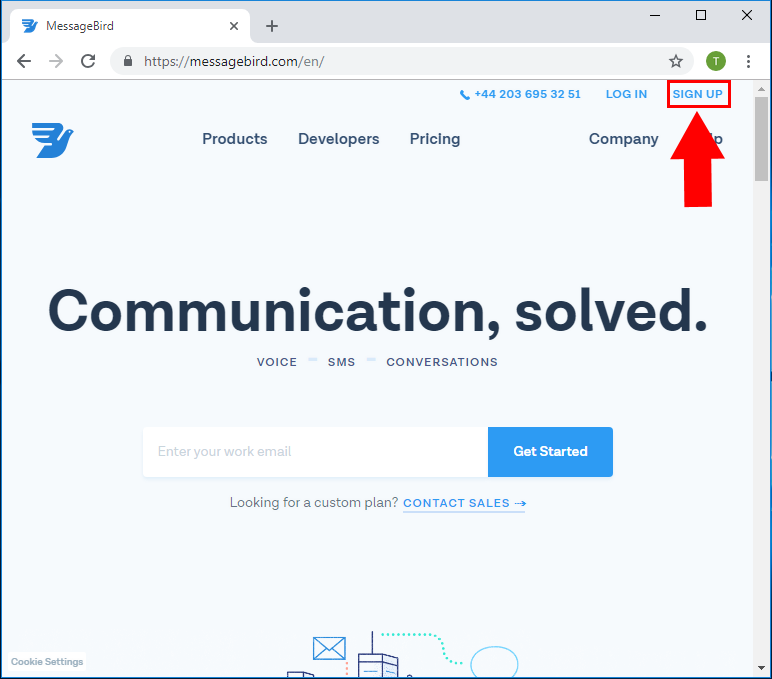
Figure 1 - Clicking 'Sign up'
Then provide the login details and click 'Sign up with email' button.
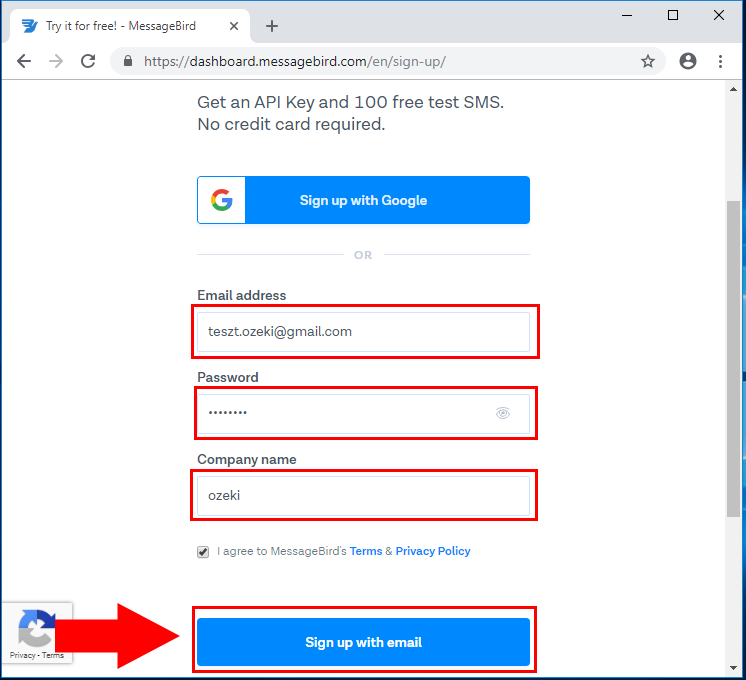
Figure 2 - Provide account details
Check your email and activate your account.
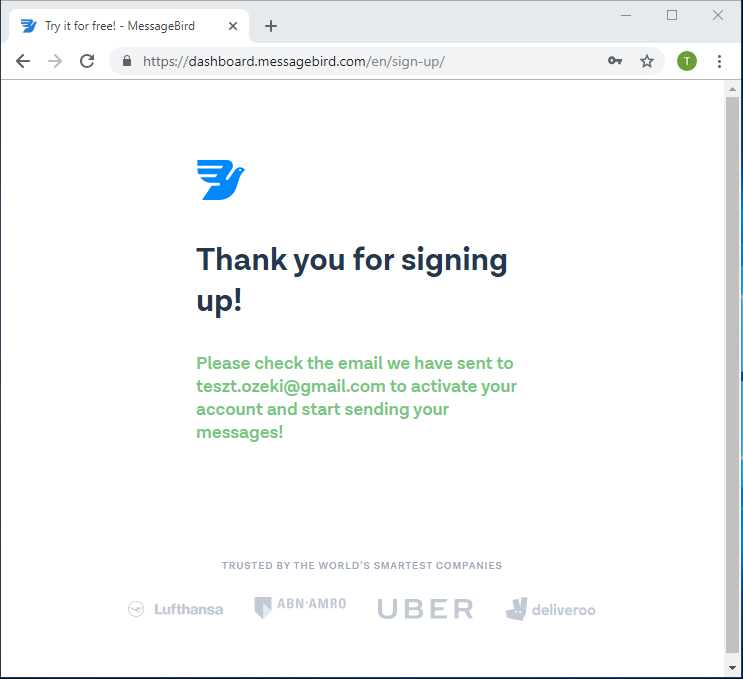
Figure 3 - Successful registration
After the login select the "Dashboard solutions" interface.
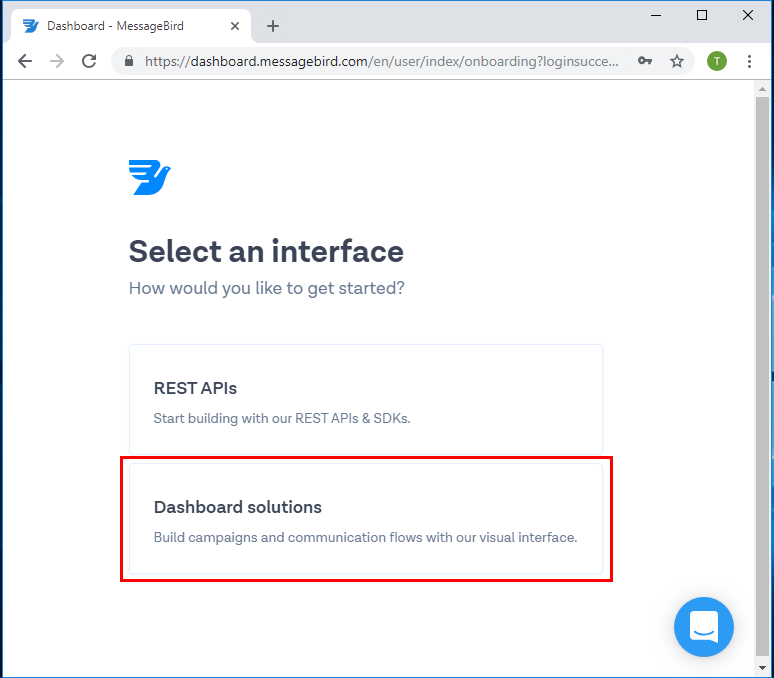
Figure 4 - Select Dashboard solutions
And select SMS product.
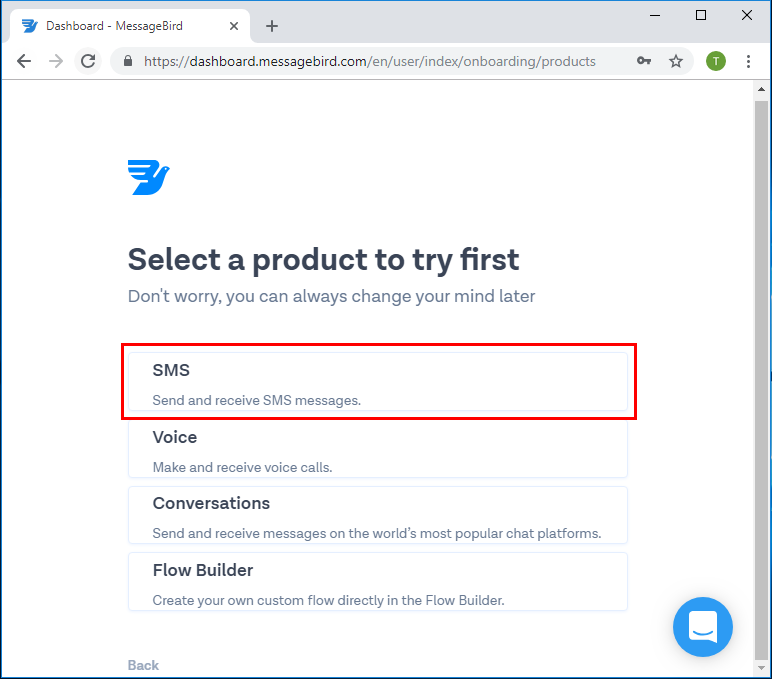
Figure 5 - Choose SMS
Send verification code to your phone number.
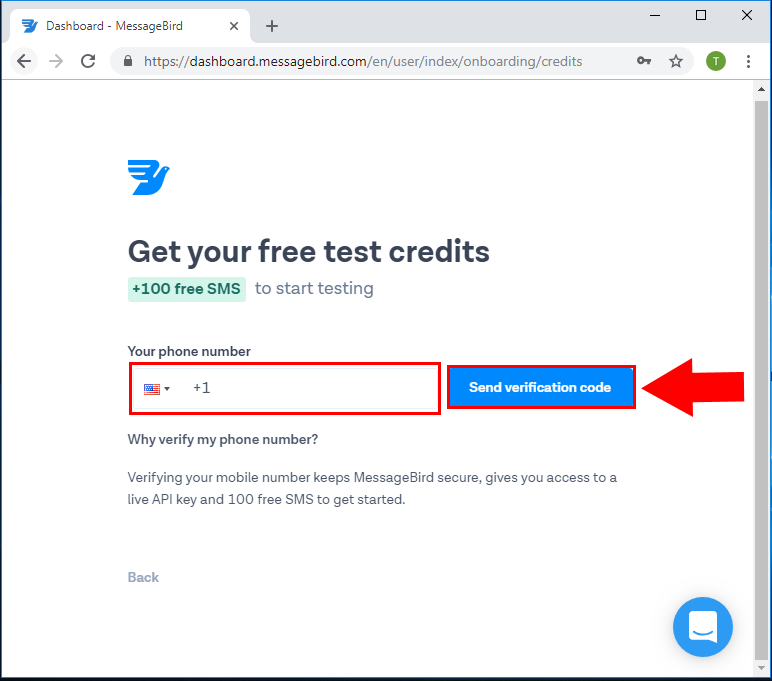
Figure 6 - Send verification code
After the verification, you're all set up.
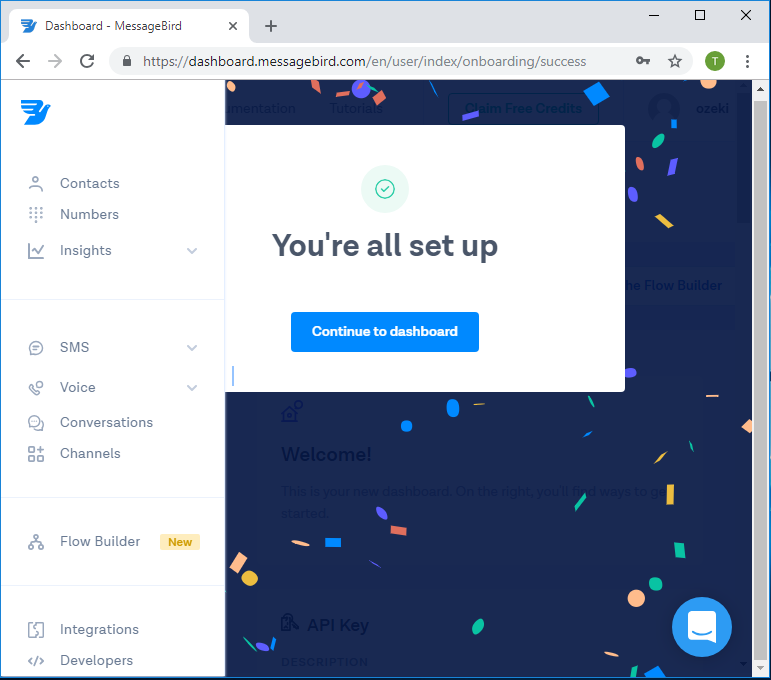
Figure 7 - Successful Log in
How to setup Ozeki 10 and MessageBird for outbound SMS messages
This chapter provides you detailed information on how to configure MessageBird connection for SMS sending in the Ozeki 10 SMS Gateway software.
At first, please Log in to Ozeki 10 with your username and password.

Figure 8 - Login to Ozeki 10
Click on 'Add new connection' on the left.
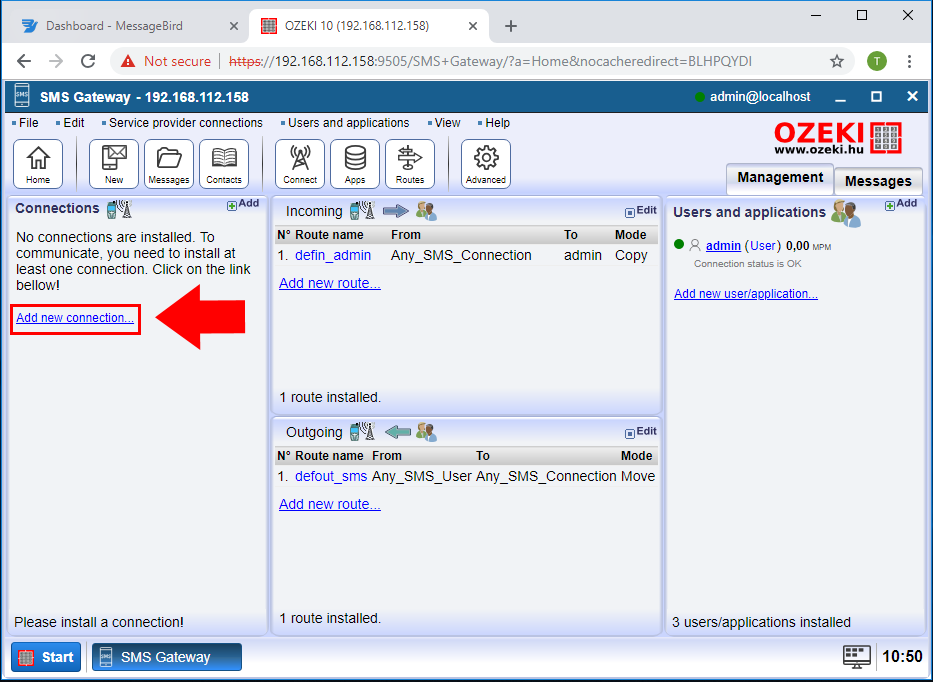
Figure 9 - Add new connection
Select the 'MessageBird' Connection and click on install next to it.
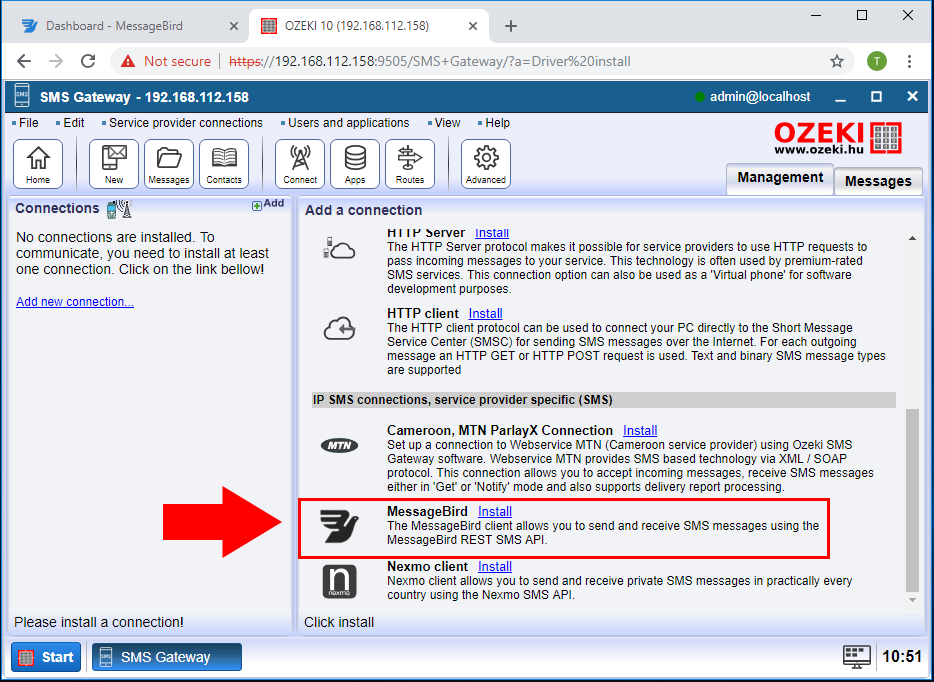
Figure 10 - Install MessageBird
Provide your API key and telephone number on the Install connection page.
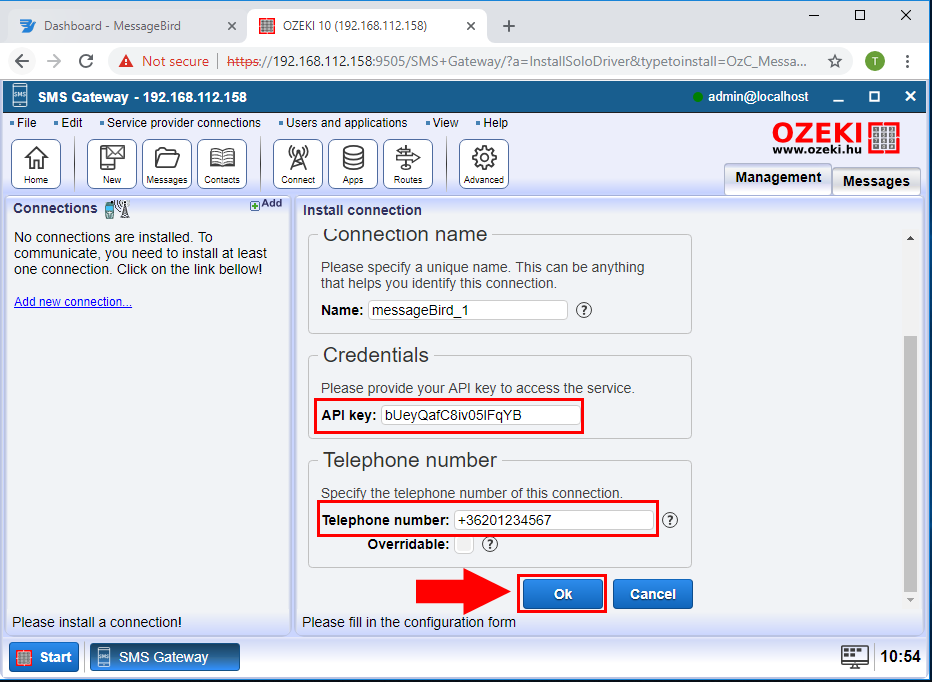
Figure 11 - Provide API key
You can find your API key in the MessageBird Dashboard.
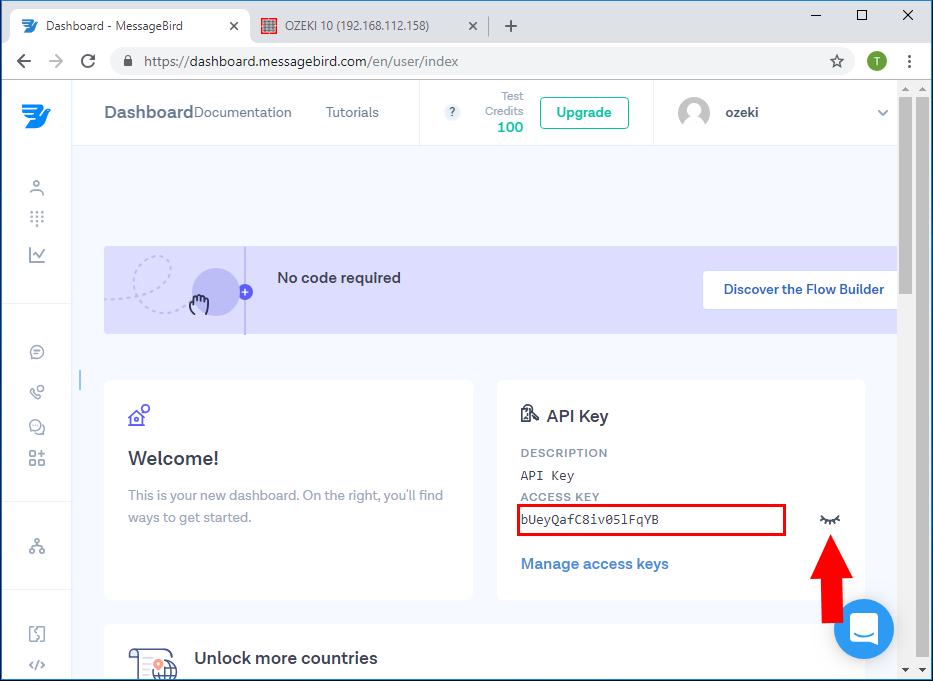
Figure 12 - MessageBird API key
After it you can send a test message.
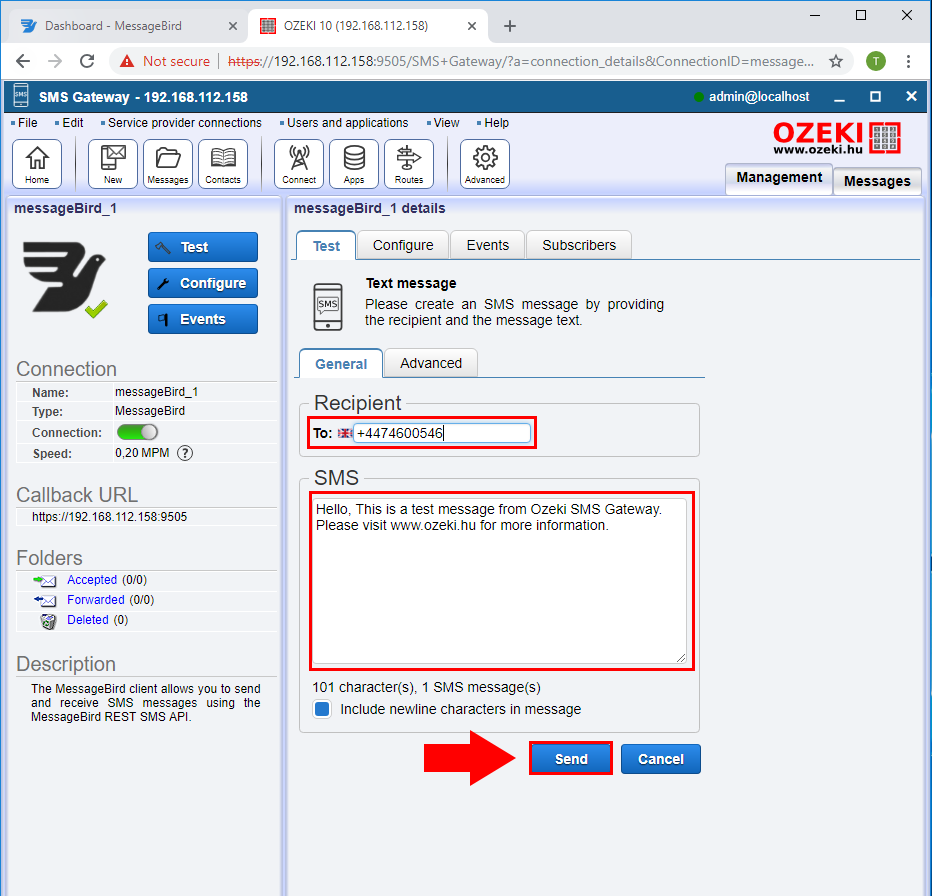
Figure 13 - Send test message
If everything fine the message successfully sent.
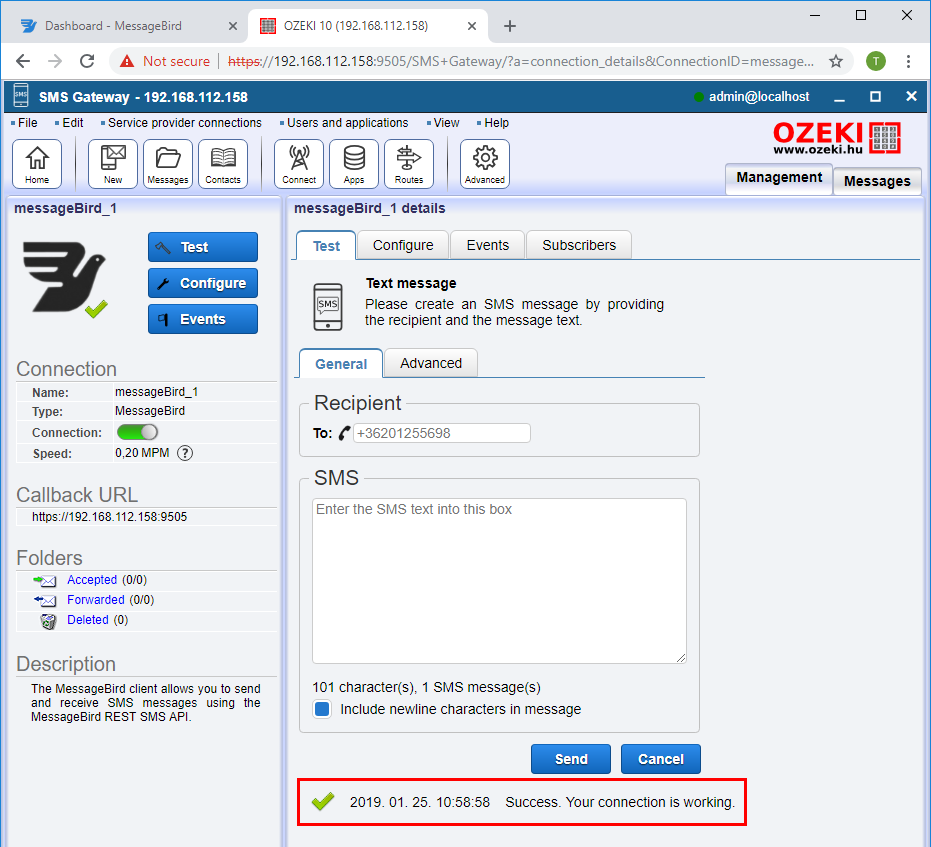
Figure 14 - Message successfully sent
How to setup Ozeki 10 and MessageBird for incoming SMS and delivery reports
Before you can receive incoming delivery reports and inbound SMS, you need to forward ports in order to route the external traffic to your network.
1. Open a Web browser and type your Default Gateway number into the address bar then press Enter.
2. Enter your username and password to access the interface of your router. The default username and password should be listed in the documentation of your router or on a sticker on the side of your router. If the default username and password have been changed and you do not remember them, you will need to reset your router.
3. To forward ports on your router, look for a tab or menu named 'Port Forwarding/Port Triggering' or something similar.
4. No matter what type of router or interface you have, you will need to enter
the same basic information. Enter the port you want to open under External
(Port 1) and Internal (Port 2) or enter a range of ports to open under Start
and End.
In this case Ozeki 10 uses port 9505 by default so you may also provide that
in the 'Internal' section.
5. Select the Protocol (TCP, UDP, or both).
6. Enter the Private IP address of your PC where your Ozeki 10 installed.
7. Be sure you saved the changes.

Figure 15 - Port Forwarding
After having the changes saved, please specify the callback URL on the Advanced tab's Receive section.

Figure 16 - Receive message
In order to receive messages from MessageBird you need to change the webserver protocol to HTTP.
Select Edit and Preferences.

Figure 17 - Preferences
Under the Webserver configuration choose http protocol and click on the OK button.
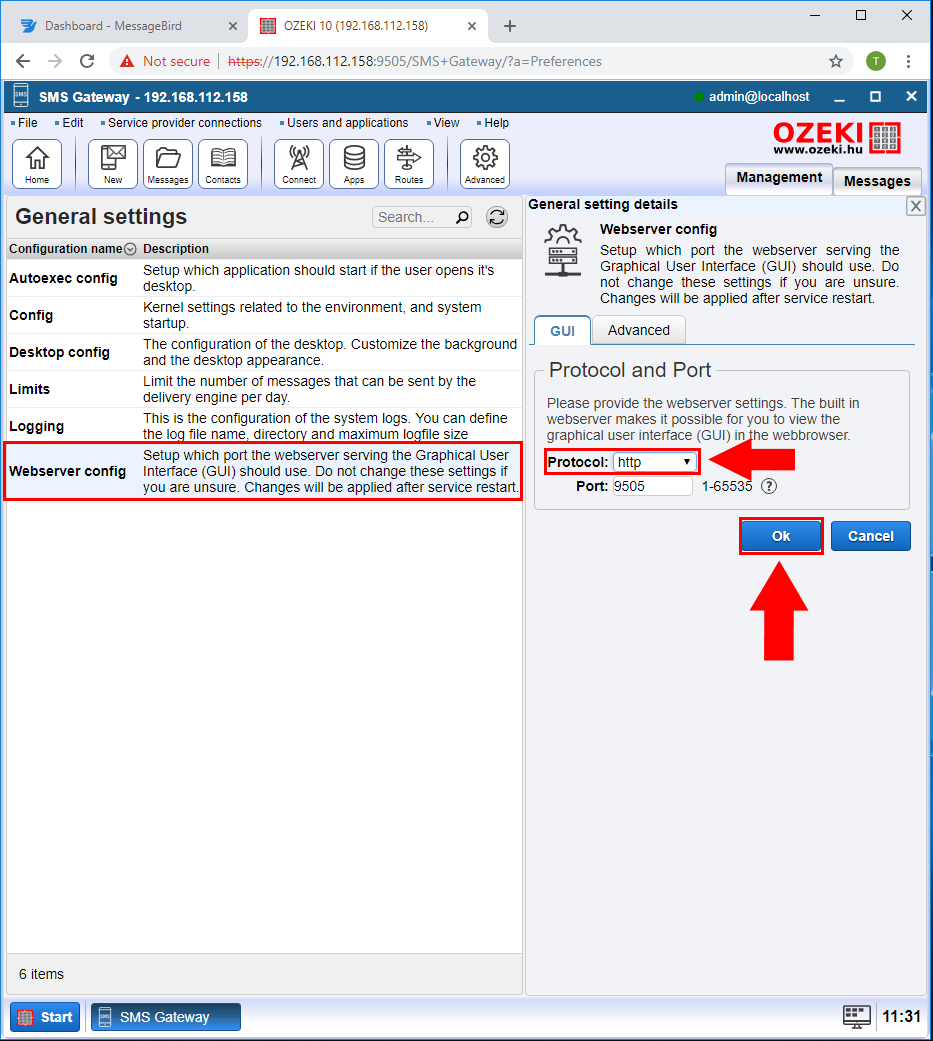
Figure 18 - Webserver config
To apply the changes please restart the Ozeki 10 service
Right-click on your Start button and select Run.
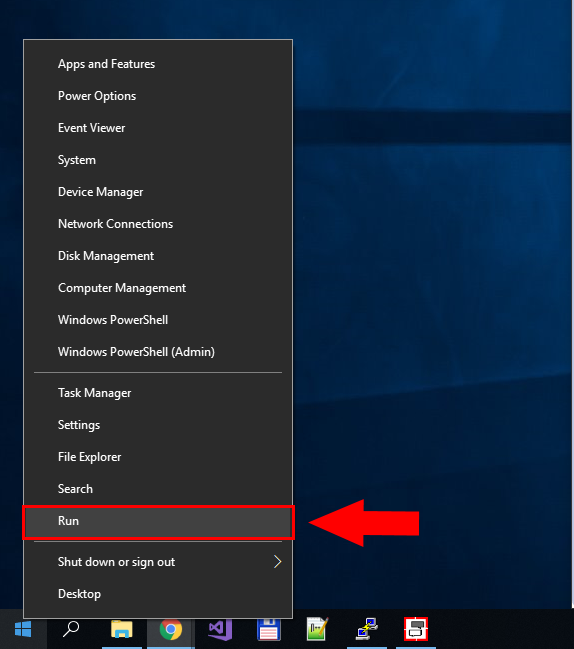
Figure 19 - Run
Type services.msc in the Run box.
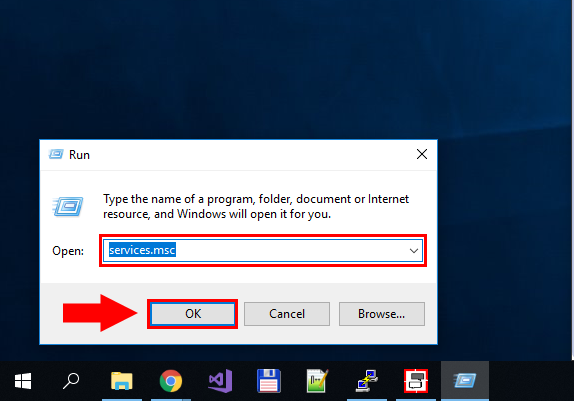
Figure 20 - services.msc
To restart the Ozeki 10 service, select it in the service list and click Restart service.
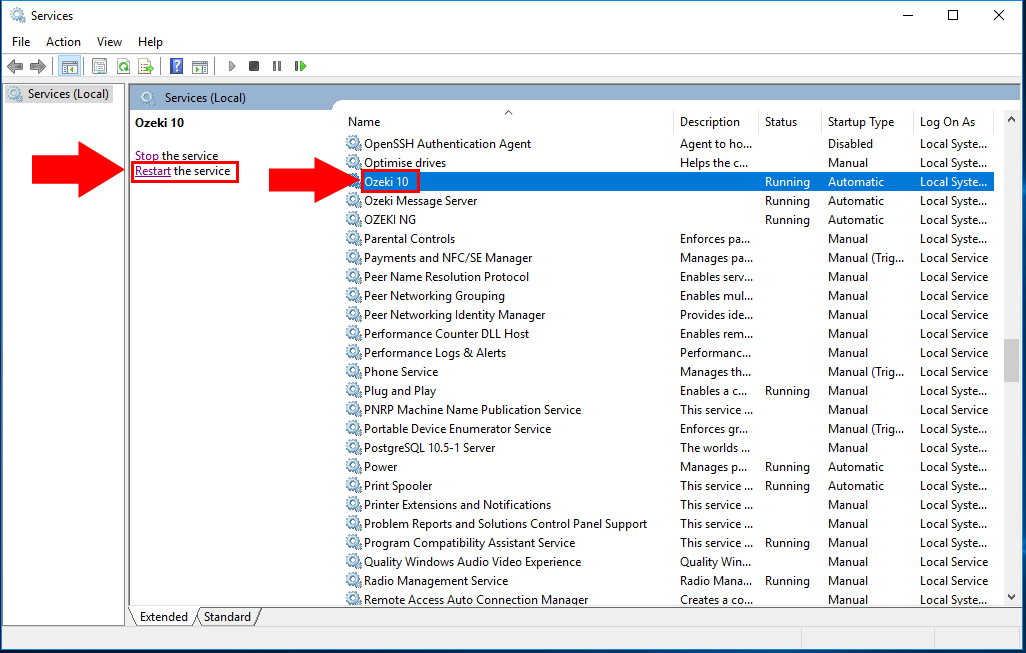
Figure 21 - Restart Ozeki 10
After the service restart you are able to receive messages form the MessageBird. Now we will demonstrate how you can buy MessageBird number and configure MessageBird to receive SMS messages.
Select the Numbers menu and click on the Buy a number button.
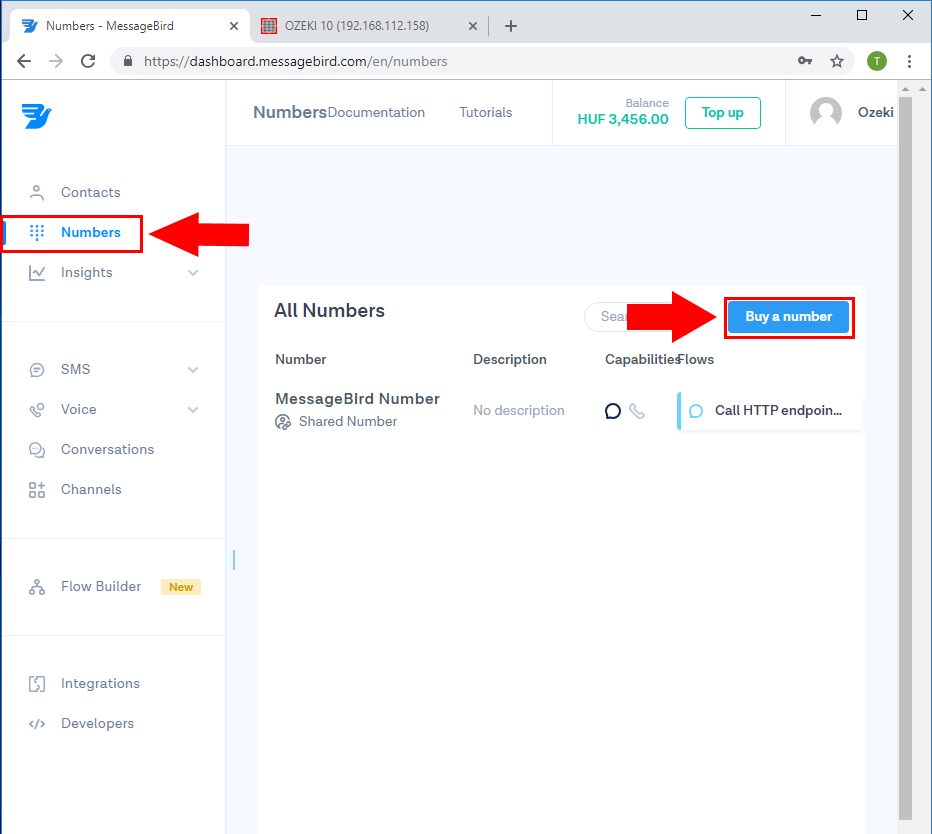
Figure 22 - Buy a number
In the pop-up menu choose your country, select the SMS capability and select a number from the list.
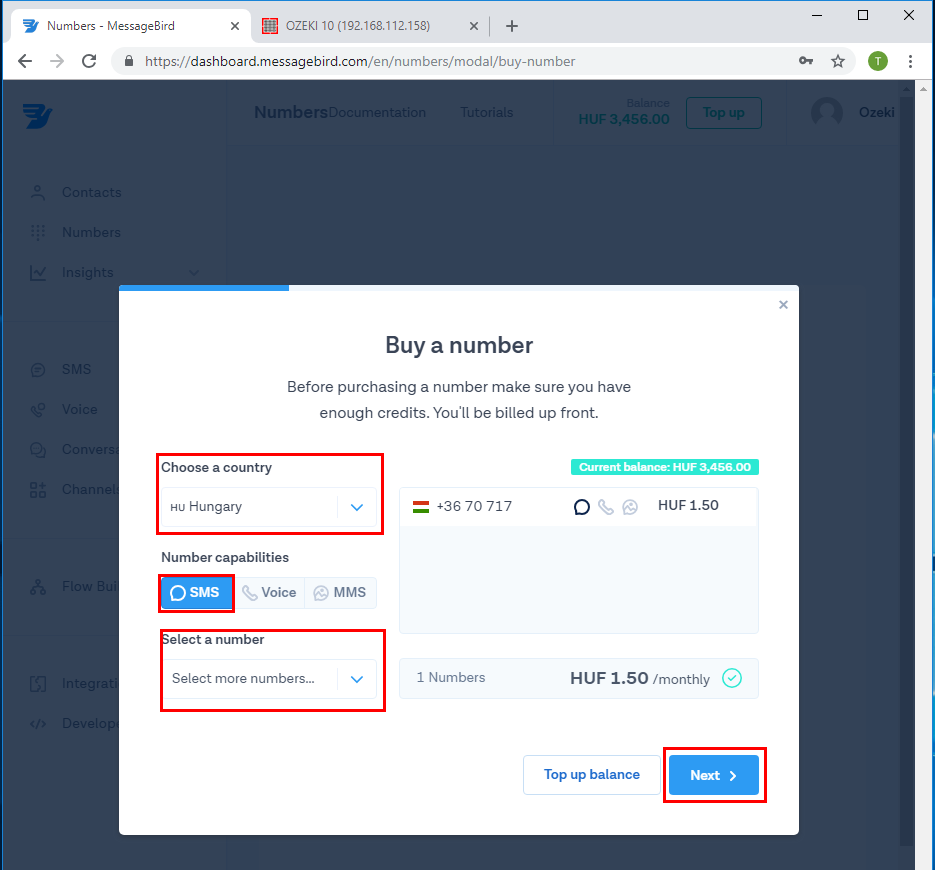
Figure 23 - Select a number
After the purchase you can see your number int he All Numbers list.
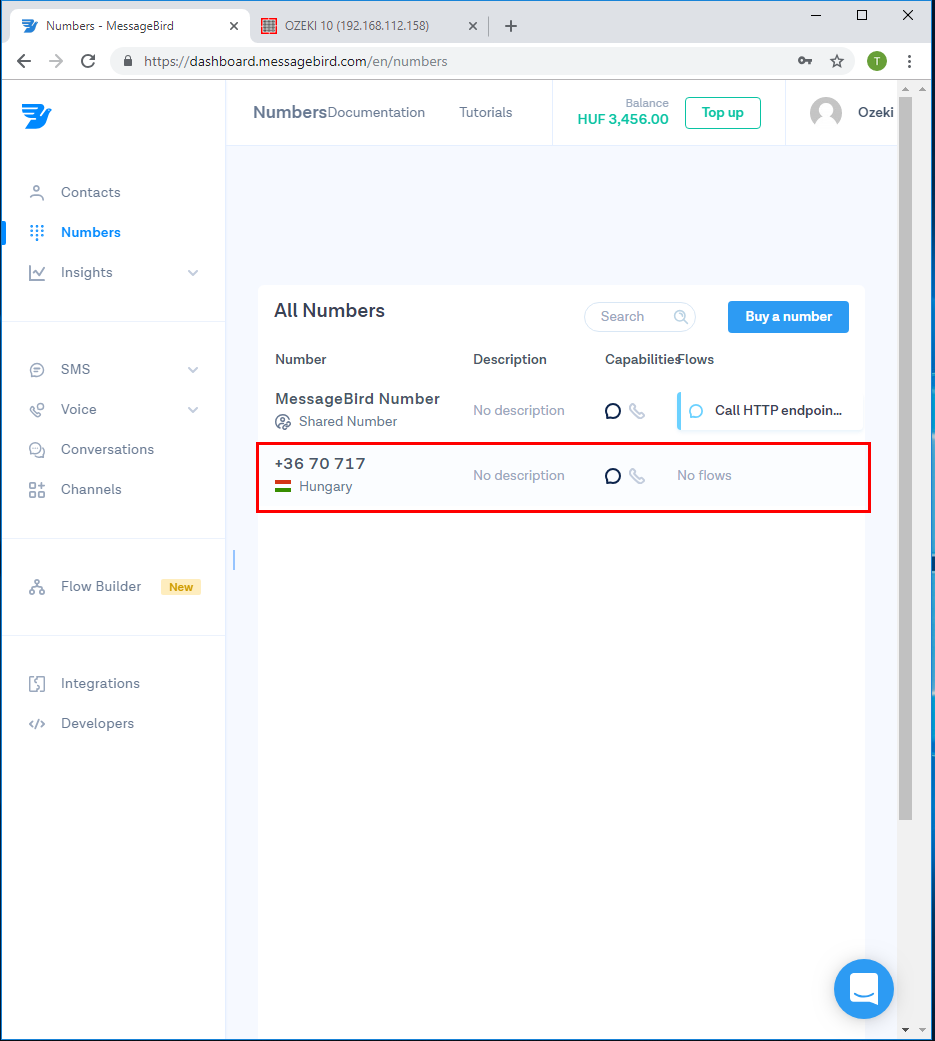
Figure 24 - Number purchased
Now select the Flow Builder and click on the Create new Flow.
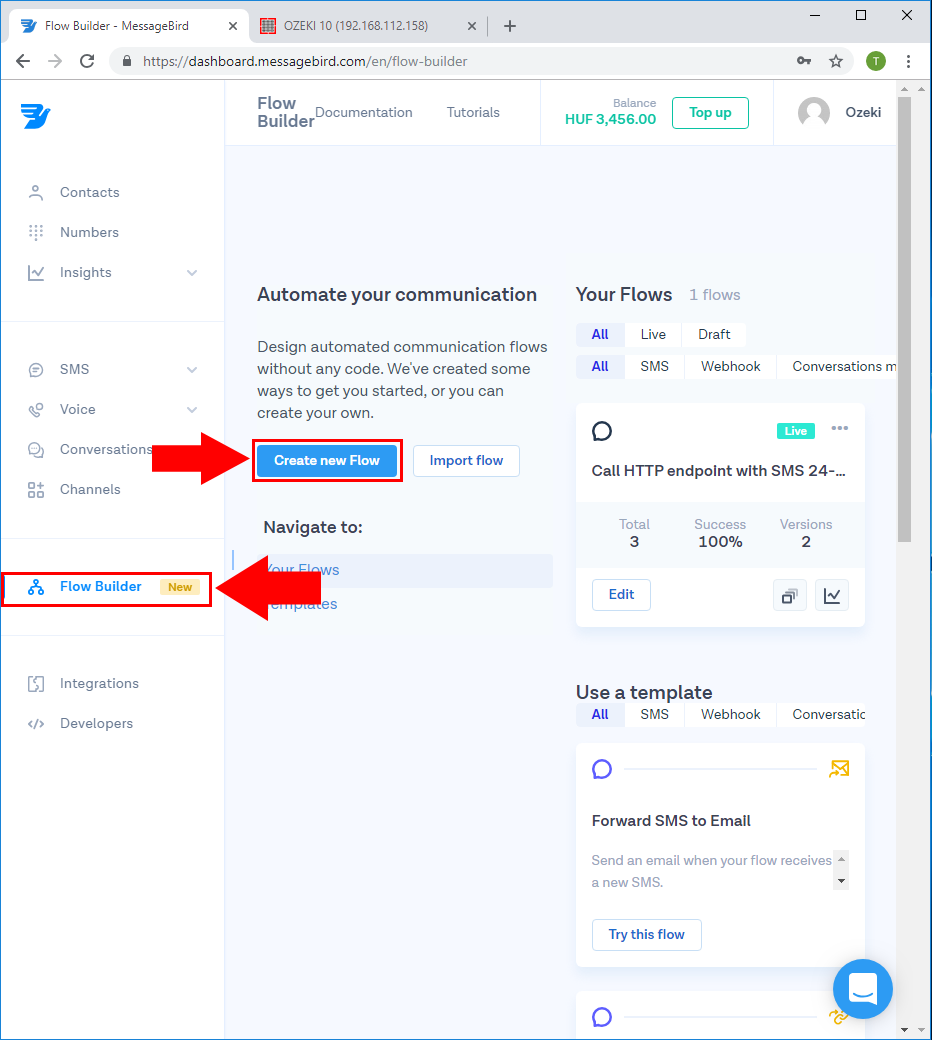
Figure 25 - Create new Flow
Choose Create Custom Flow
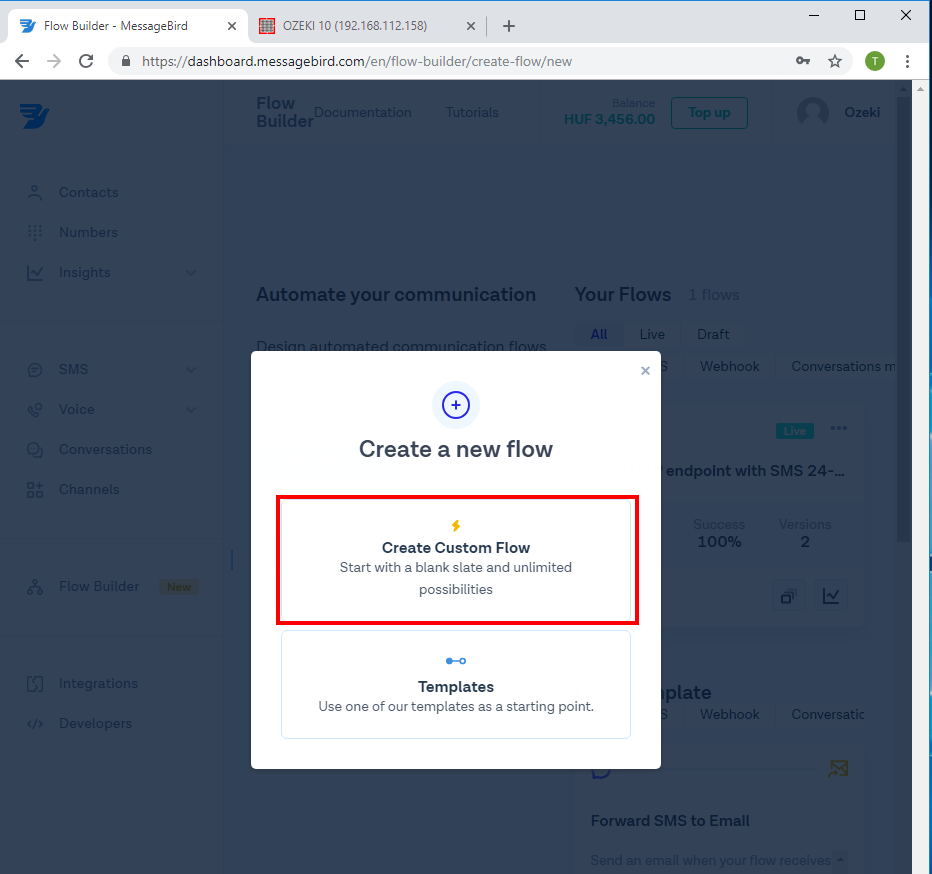
Figure 26 - Custom Flow
In the Set up new Flow menu specify the Flow name and the SMS trigger.
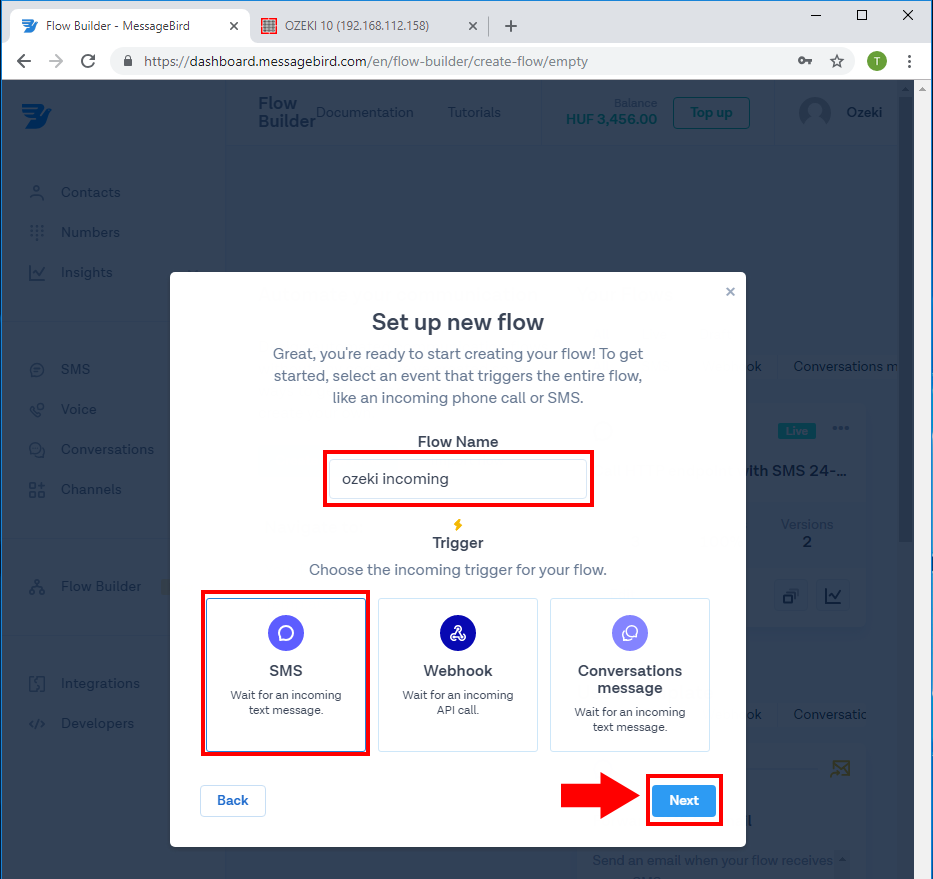
Figure 27 - Setup new flow
Then select your phone number and drag the HTTP Request under the SMS.
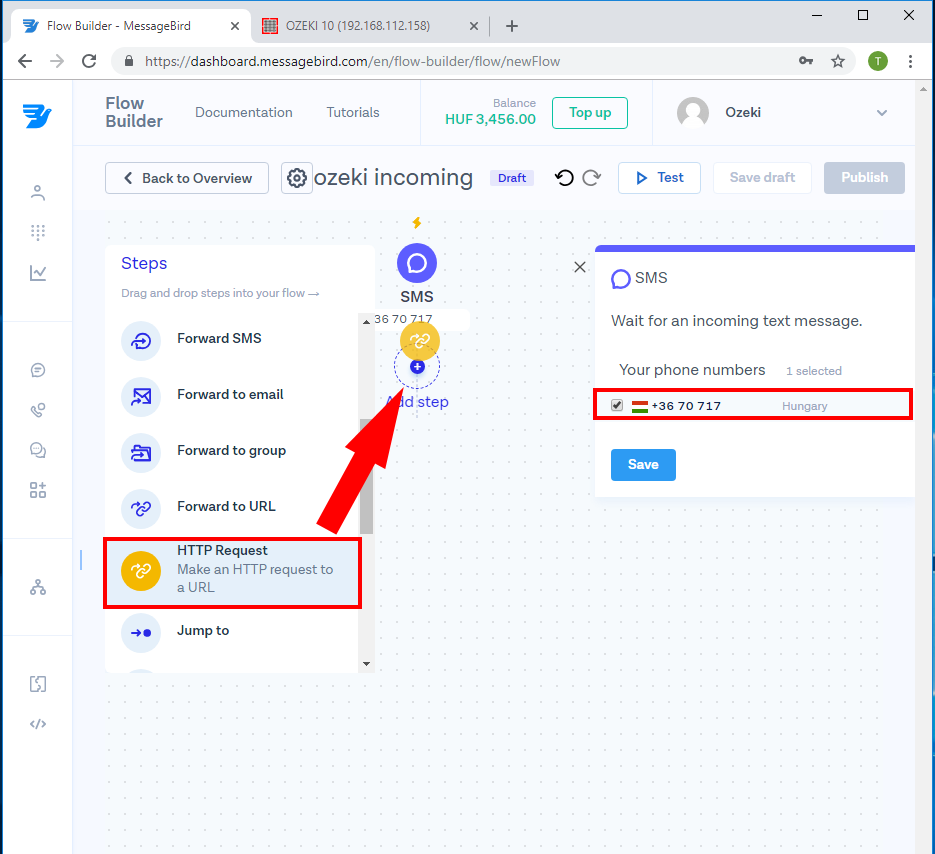
Figure 28 - Add HTTP Request
In the HTTP Request select the POST Method and paste the URL from the Ozeki 10. Finally click on the Save and Publish.
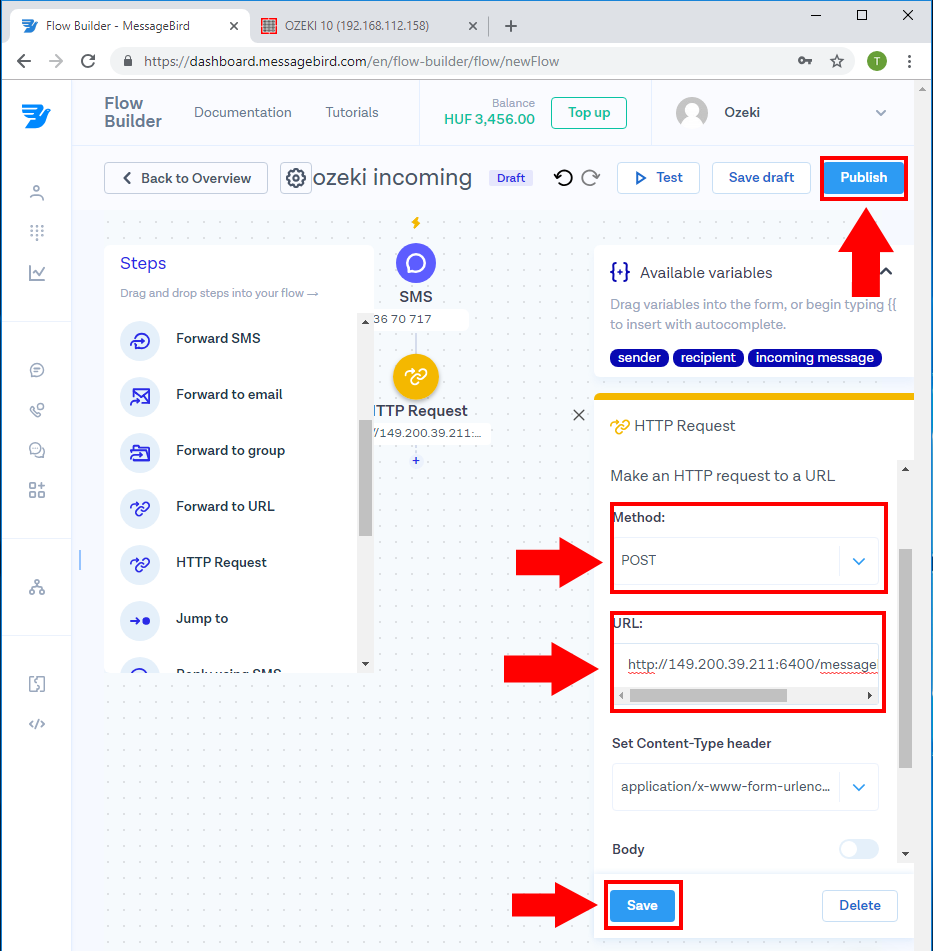
Figure 29 - Set up HTTP Request
You can find the URL on the Advanced tab's Receive section.
Figure 30 - Callback URL
After the Publish you can see the new Flow in the Flow builder.
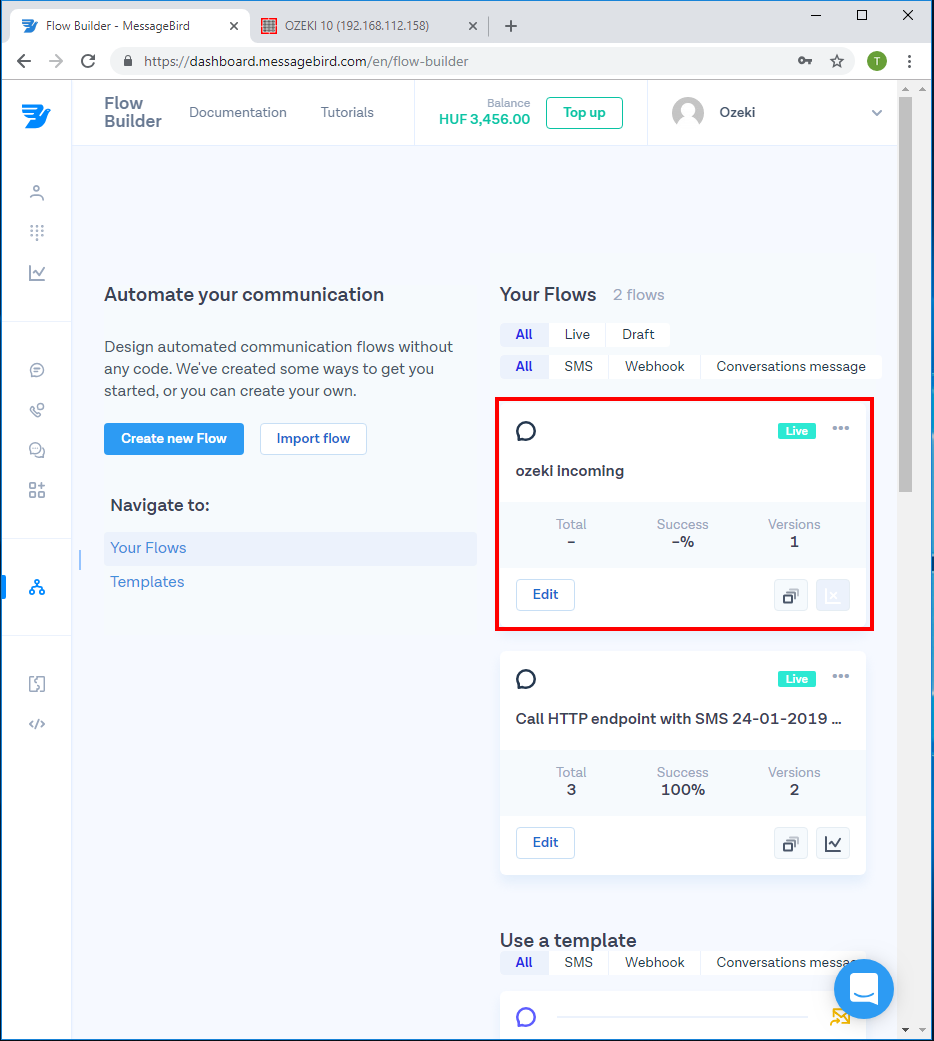
Figure 31 - Flow created
Send a Test Message to this number and you will see the message received in Ozeki 10.
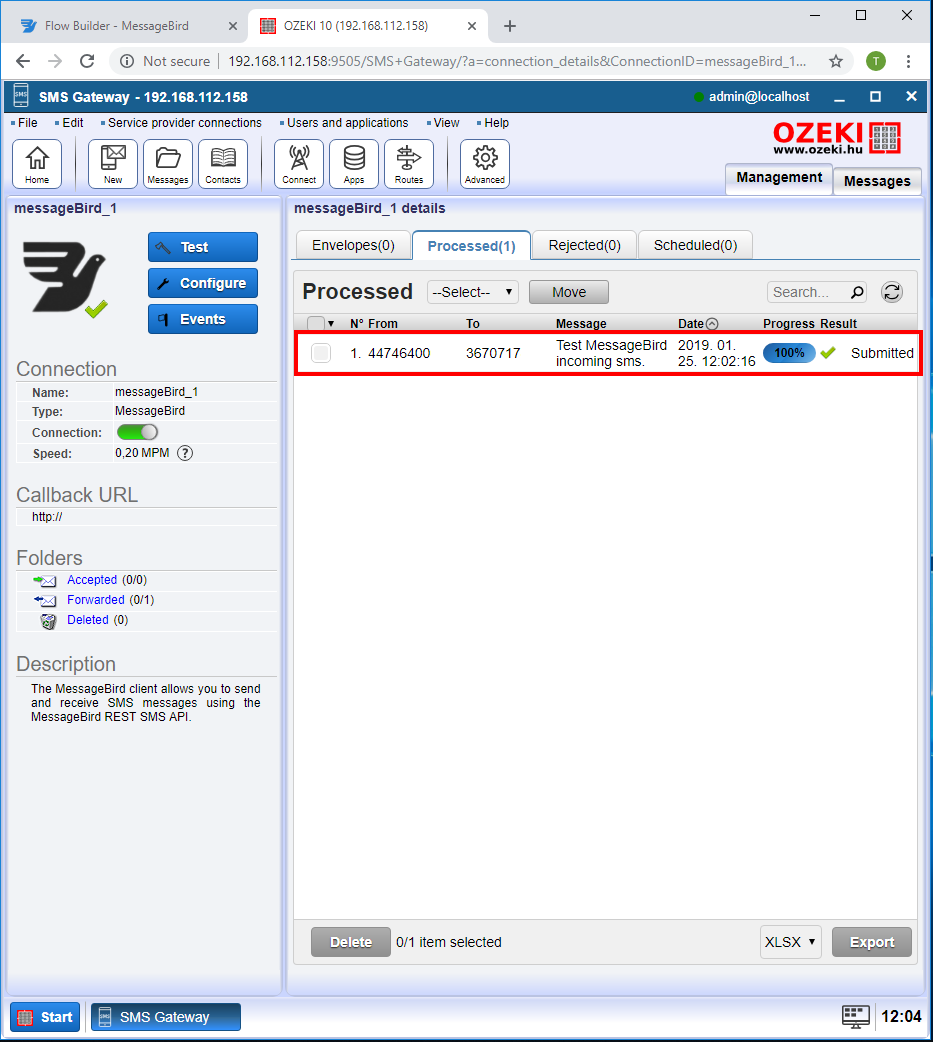
Figure 32 - Test message received
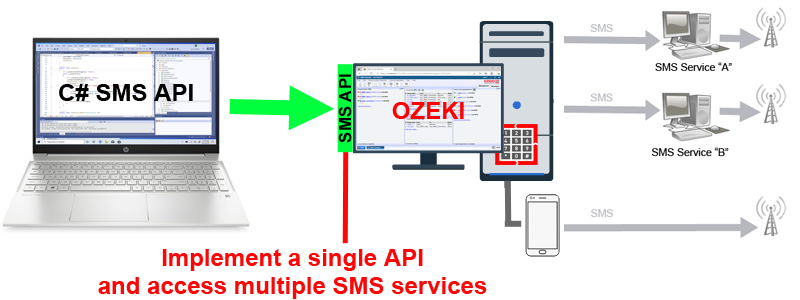
Send texts using the C# SMS API through MessageBird
Automatic sms services run significantly better than human personal. Because of this fact most organizations choose to build automated sms solutions. Ozeki's C# SMS API offers an outstanding tool to achieve this goal. This C# api is great because it can also send texts through high performance sms protocols, such as SMPP,UCP or CIMD2. These protocols are used by mobile network operators to exchange sms between each other. By implementing this single API, you can reach many SMS services or GSM telephone networks with a single code base.
How to send text messages from an SQL database server through MessageBird
If you wish to Send sms from a database server, you can use the database connection offered by your SMS Gateway. To send and receive sms, Microsoft SQL Server, SQL Express, Access, MySQL, PostgreSQL, MongoDB or any other ODBC/SQL compliant SQL database server can be used. The procedure is easy: you need to create two database tables: ozekimessagein and ozekimessageout.
The ozekimessageout table is going to be used for sending sms and the other, the ozekimessagein table shall be used to store incoming sms. To send a text, all you have to do is use an SQL INSERT command to create an SQL entry in the ozekimessageout table. Ozeki 10 will automatically SELECT the sms and it will deliver it to the recipient. During the delivery procedure it will update the status field and timestamp fields in the database to inform you when the SMS was sent from your system, when was it received by the mobile user and if an error occurred, why wasn't it delivered.
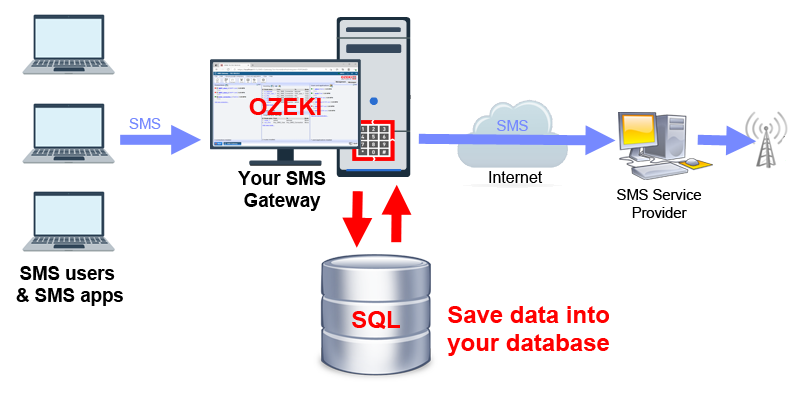
This solution is useful, because it allows you to use custom queries and take advantage of SQL triggers and stored procedures. Another benefit is that most business applications are database driver, so it makes sense to use the database for SMS as well.
Send email to sms from MessageBird
If you setup MessageBird, you can provide an email to sms and sms to email service to office users. Any email client that can send an email to a specially formatted e-mail address will be able to send sms. The email address format is phonenumber@hostname. An e-mail address could look like this: 079763000@email.domain.com. It is also possible to put the mobile number into the email subject. In both cases the email body will be forwarded as the sms to the specified phone number.