How to setup a WhatsApp message connection
Businesses can use WhatsApp to communicate with customers and clients in a personal and convenient way and they can send messages directly to their mobile phone. One way to use WhatsApp for business is to set up a WhatsApp message connection. This allows businesses to send and receive WhatsApp messages through their Ozeki SMS Gateway. In this article, we will show you how to set up a WhatsApp message connection. We will explain the process in detail, from creating a WhatsApp app in the Facebook Developer Portal to configuring the WhatsApp message connection in the Ozeki SMS Gateway. We'll provide screenshots and instructions for each step, so you should be able to follow along easily.
What is WhatsApp message Gateway
WhatsApp message Gateway is a special service that allows businesses to send and receive business WhatsApp messages through the gateway.
What is WhatsApp message connection
WhatsApp message connection is an internet-based connection to WhatsApp Business Server to send and receive messages directly to mobile phones.
Ozeki SMS Gateway has a built-in WhatsApp message gateway that allows businesses to send and receive WhatsApp messages using their existing Ozeki SMS platform without the need to install additional software.
| Comparison: SMS Messages vs. Business WhatsApp Messages | # | SMS Messages | # | WhatsApp Messages |
|---|---|---|---|
| 1 | Limited to 160 characters or 1600 (depending on the mobile service provider) |
1 | Limited to 4096 characters |
| 2 | Sent through cellular network | 2 | Uses Internet for messaging |
| 3 | Works without internet connection | 3 | Requires Internet connection for use |
| 4 | Charges may apply for international messages | 4 | The price is the same for international and local messaging |
| 5 | Stored locally on devices | 5 | Cloud storage for messages |
| 6 | Text communication, MMS multimedia | 6 | Supports rich messages |
| 7 | Compatible with any mobile number | 7 | Works only on smartphones and feature phones |
| 8 | Subscription required | 8 | Installation and registration required |
| 9 | Not synchronized across devices | 9 | End-to-end encryption for privacy |
| 10 | No additional apps required | 10 | Requires WhatsApp application installation |
How the WhatsApp SMS connection works
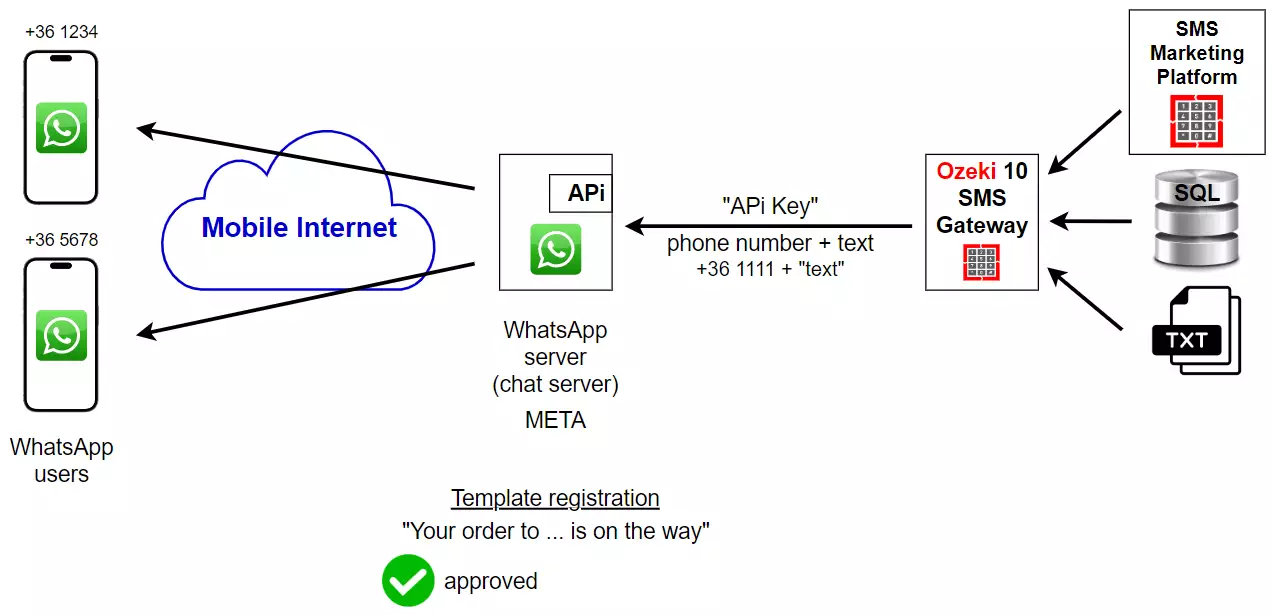
Create WhatsApp app on Facebook developer page
In this video, we will explain the accurate process of creating a WhatsApp app from a Facebook developer page. You can learn the essential steps from the beginning to the end. If you follow these movements, then it will be easy for you to set up a WhatsApp connection.
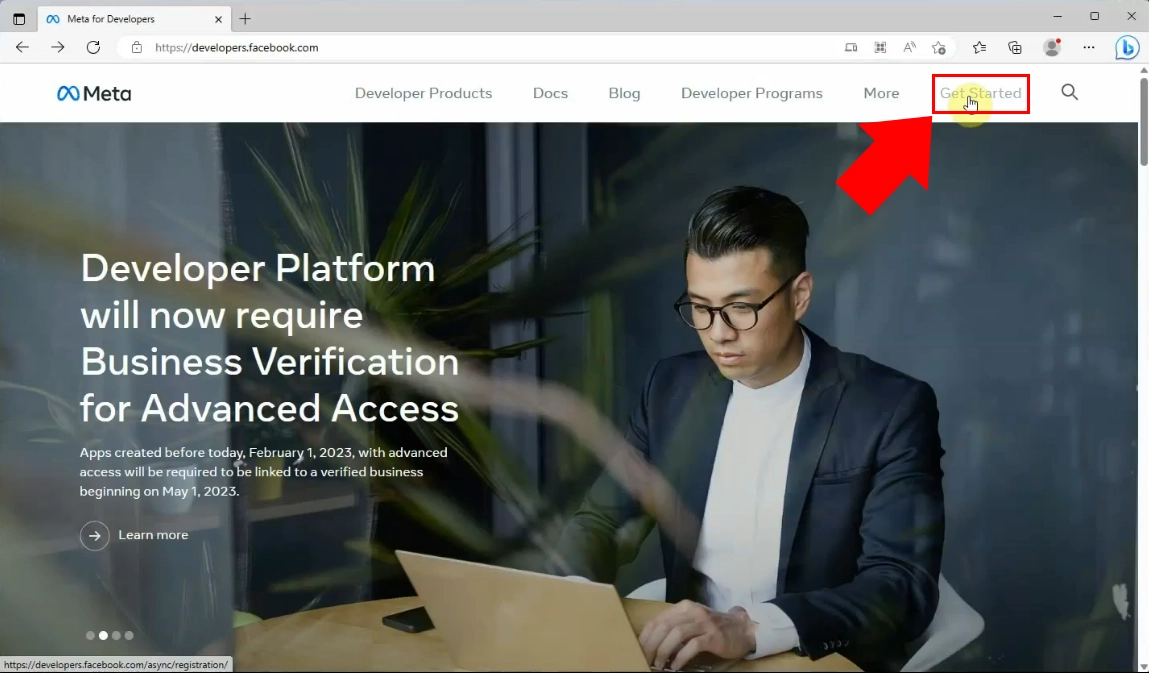
First of all, you need to load in your browser the "developers.facebook.com" website. Then, click on the "Get Started" button in the upper right corner of this page.
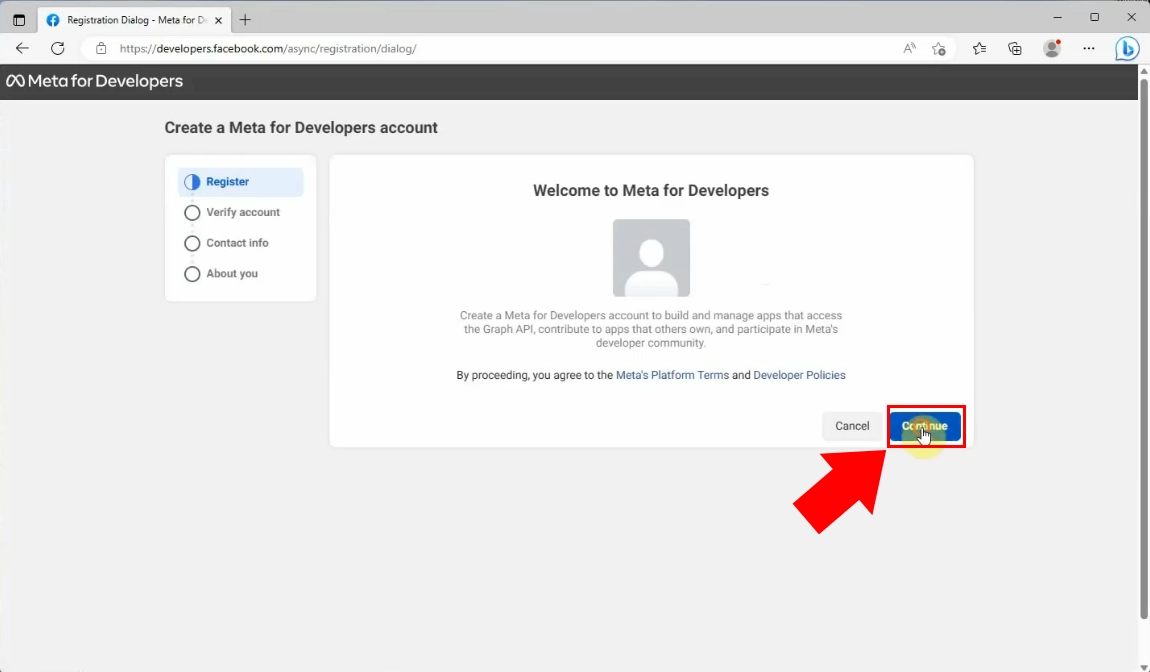
Now, the Welcome page has been brought up. In this page, you can register and create a Meta for Developers account that allows you to manage apps that access the Graph API and contribute to apps that others own. You have to click on the "Continue" button, highlighted in blue, to agree with the terms and policies of the site.
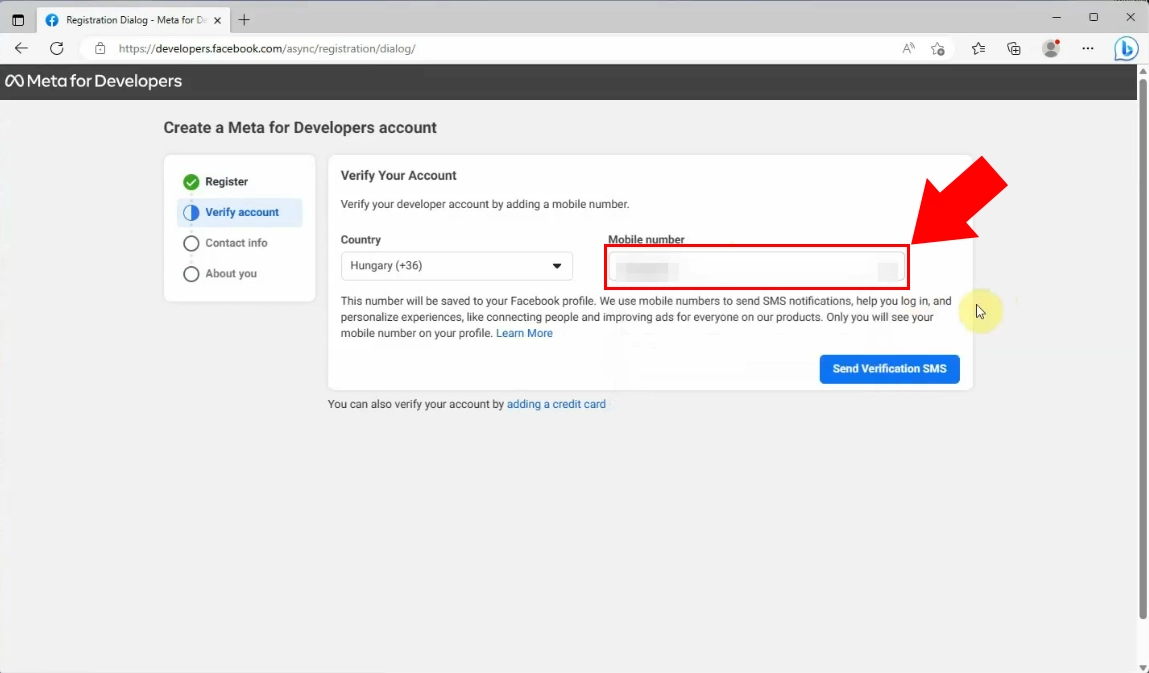
After that you have accepted the policies, you have to verify your account. It is
required to add a mobile phone number, which will be saved to your Facebook profile.
You will receive an SMS notification, in order to be able to do your login and
personalize your profile.
When you are ready with typing your mobile number, you need to click on the "Send
Verification SMS" button. In the other hand, if you prefer other methods, instead
of giving your mobile phone number, then it is possible to verify your account by
your credit card.
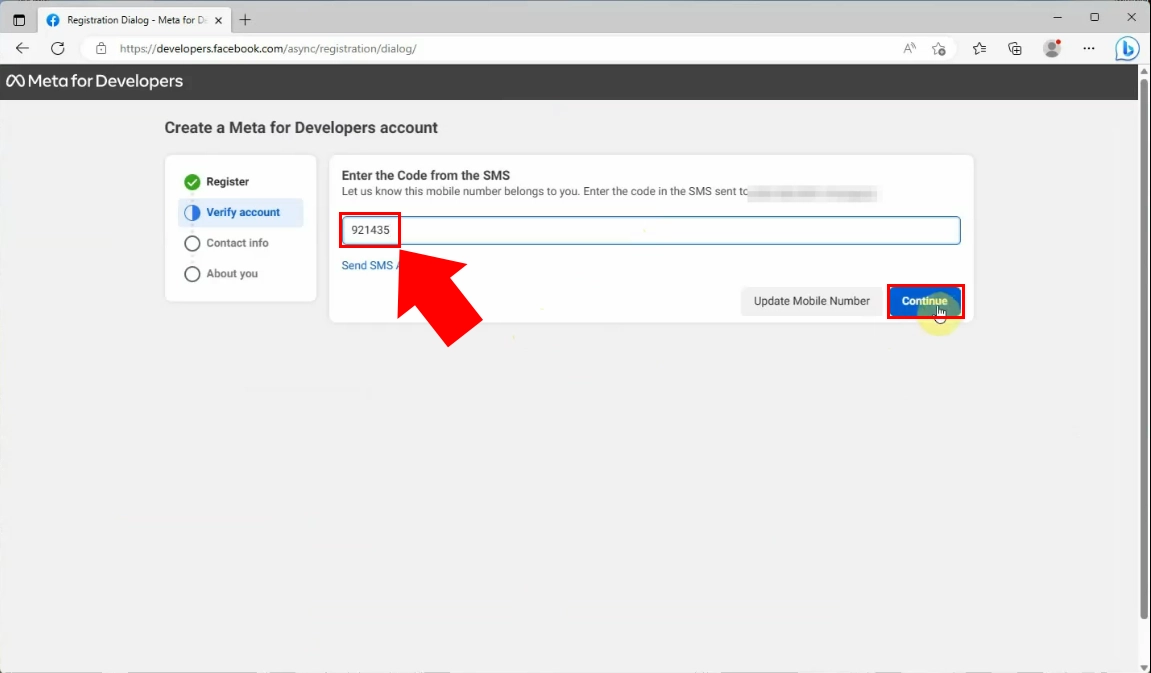
If you have received the verification SMS to the phone number that has been entered during the registration, then you have to type the Code from the SMS to the box. This is required, because it is important to make sure that the phone number belongs to you. If you do not receive any text message, the click on the "Send SMS Again" button. When you are ready with typing the Code, then click on the "Continue" button, highlighted in blue.
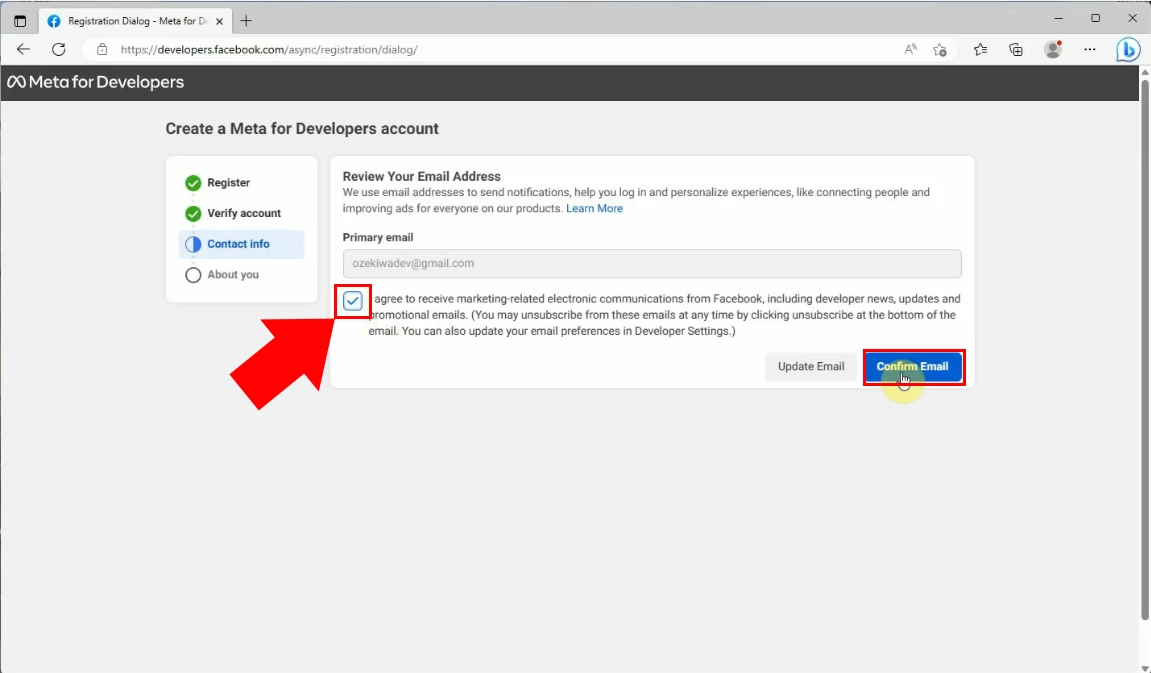
Now, you have to add your primary email address, in order to send you notifications and help you with the login process. You can agree the marketing policies also, if you are interested in. When you have entered the data, click on the "Confirm Email" button.
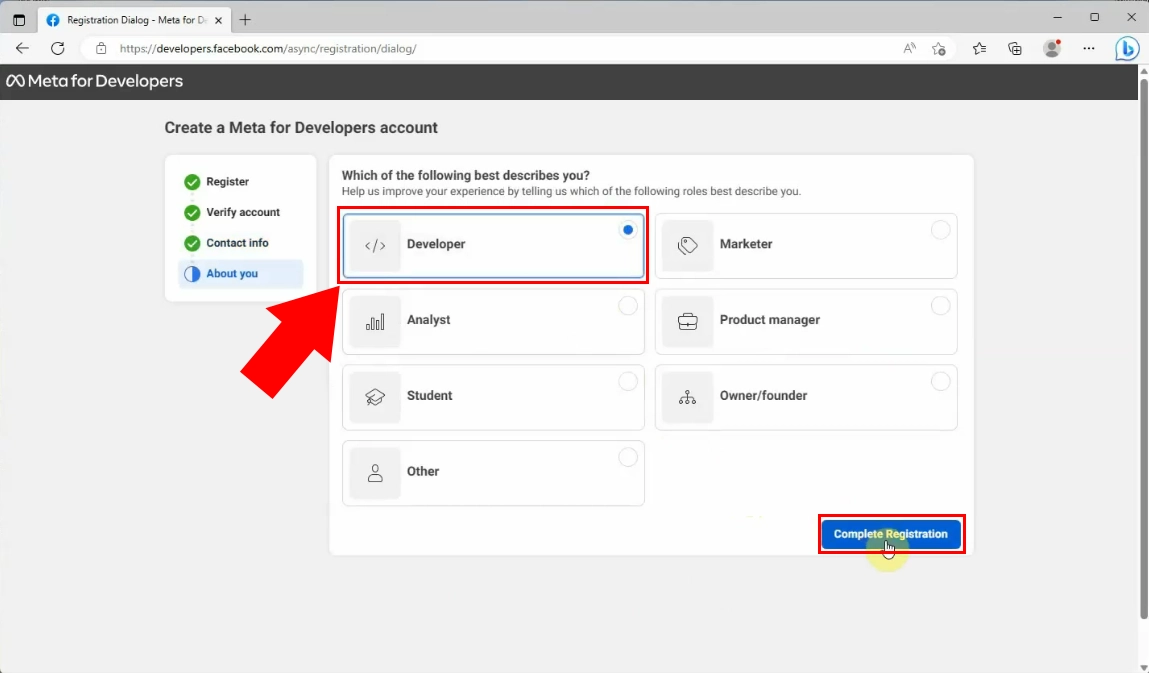
In this section, you have to choose from the given options, that describes you most. Choose the "Developer" option, then click on the "Complete Registration" button.
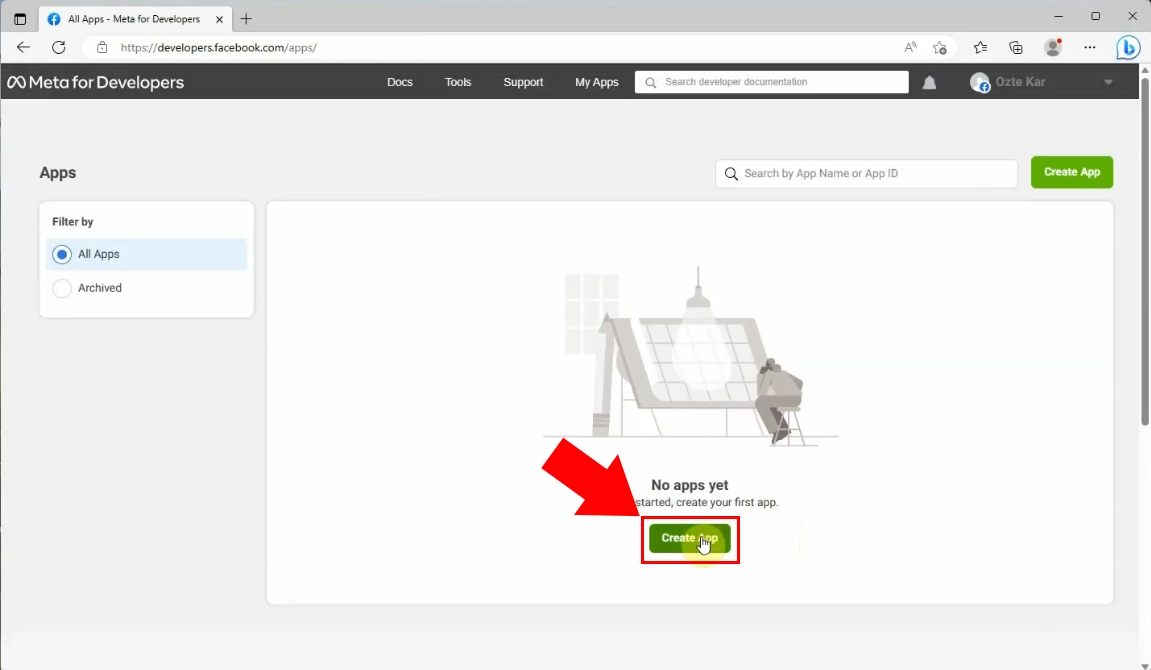
The following step is to create the app to get started. For this, you need to click on the "Create App" button, highlighted in green.
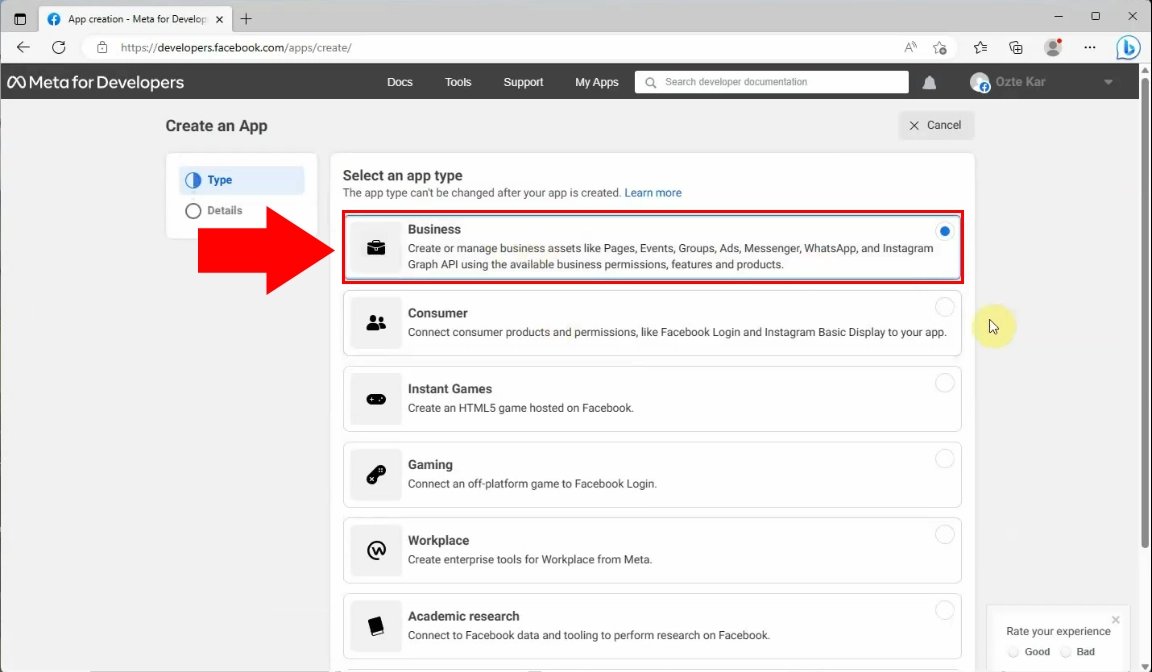
Now, you have to select the apps' type that you want to make. For example, choose the "Business" option from the given choices. Then, click on the "Next" button.
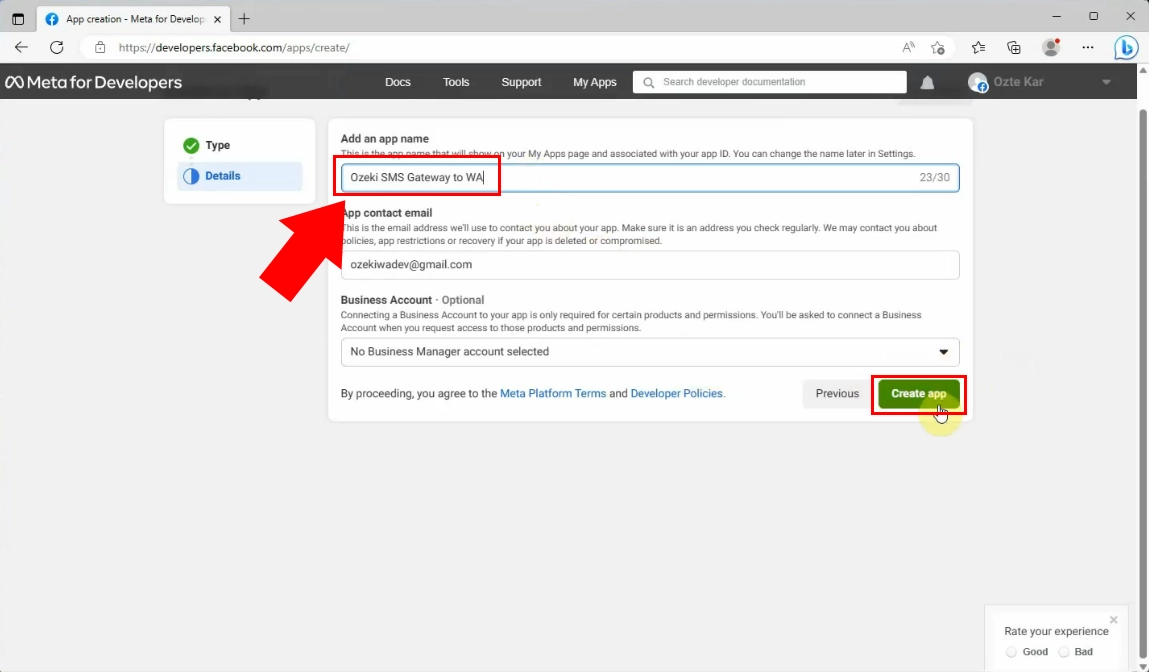
The next step, is to add more details to your app. Enter an app name that will show on your My Apps page and associate with your app ID. The email address, that you have added previously will automatically the email address where you can receive notifications about your app. Make sure it is an address that you check regularly. It is optional to add any business account to your app. When is needed, you can change any details in the Setting menu. If you are ready, click on the "Create App" button. A pop-up page will bring up where you have to enter your password, then submit it.
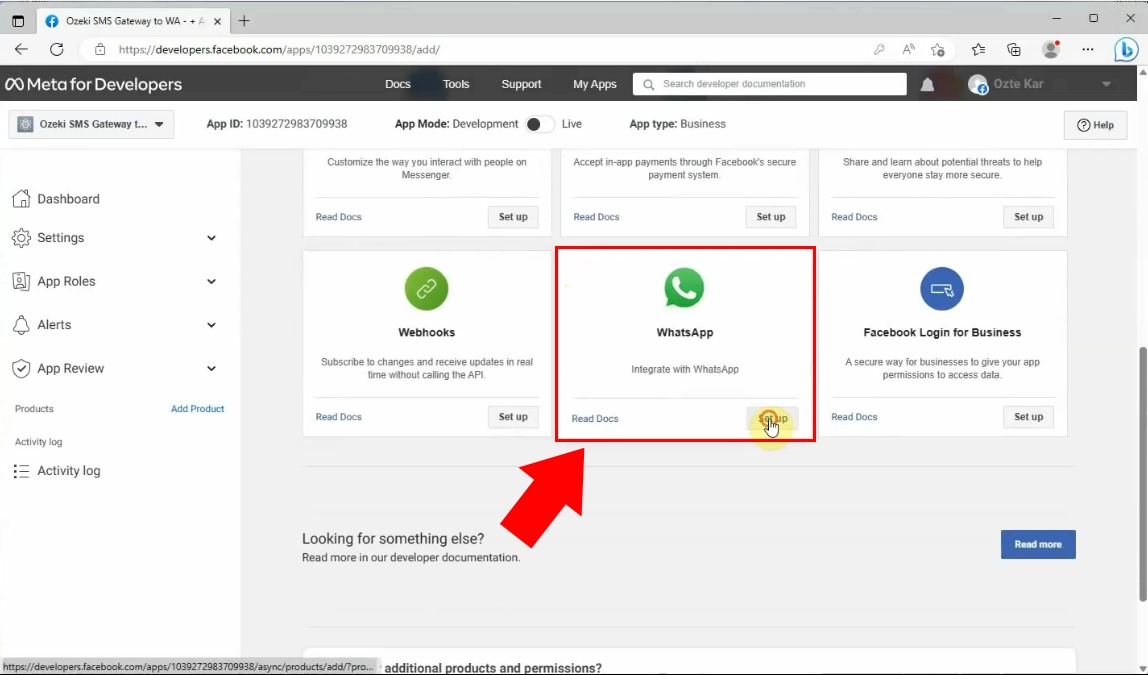
Now, a page has been brought up, where it is possible to set up connections. You have to choose the app type that you need from the given list of options. Now, choose the WhatsApp type, by clicking on the "Set up" button in the right corner of the bottom.
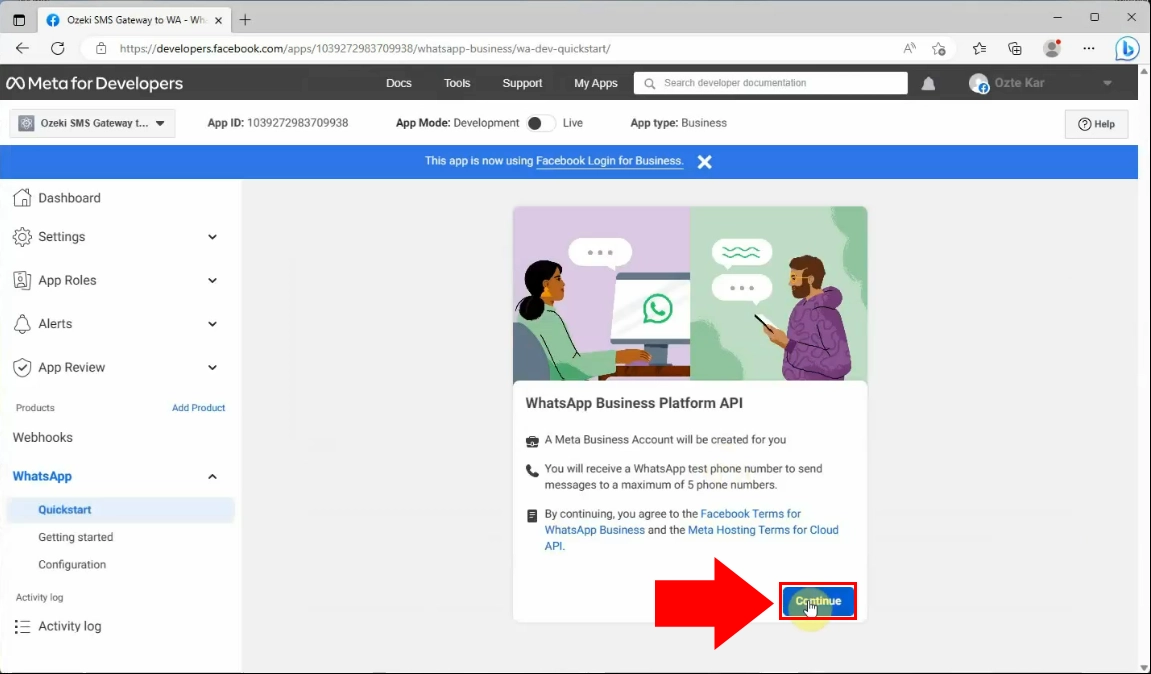
In order to continue the process, click on the "Continue" button, highlighted in blue.
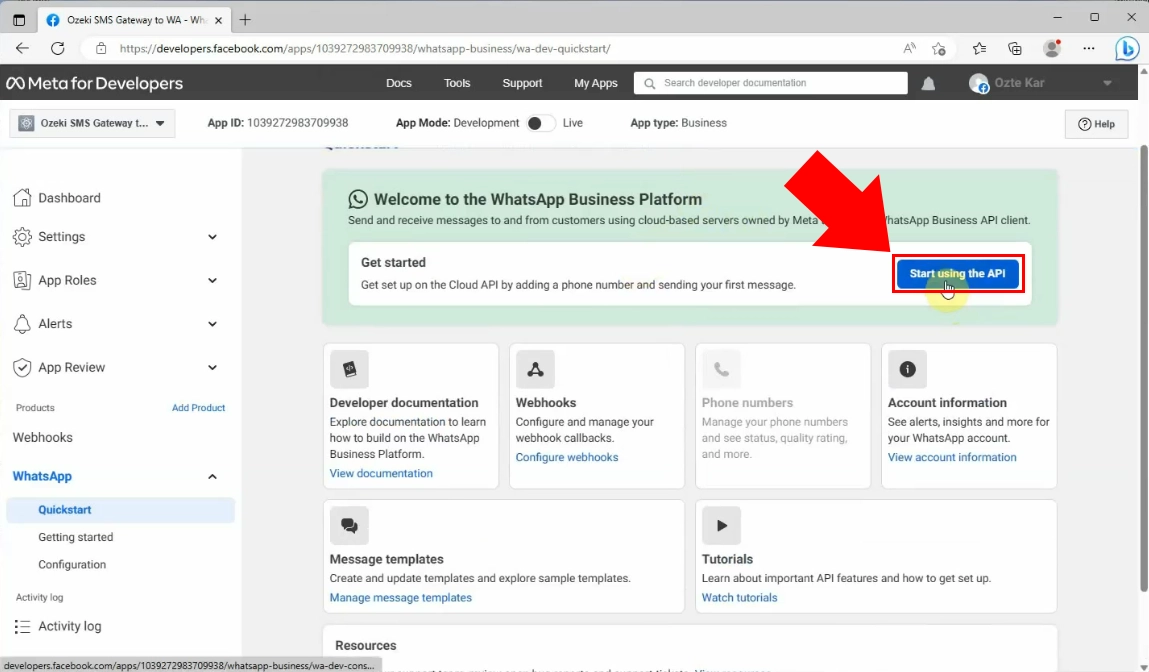
A welcome page will bring up, where you need to click on the "Start using the API" in order to get setup on the API Cloud by adding a phone number for messages.
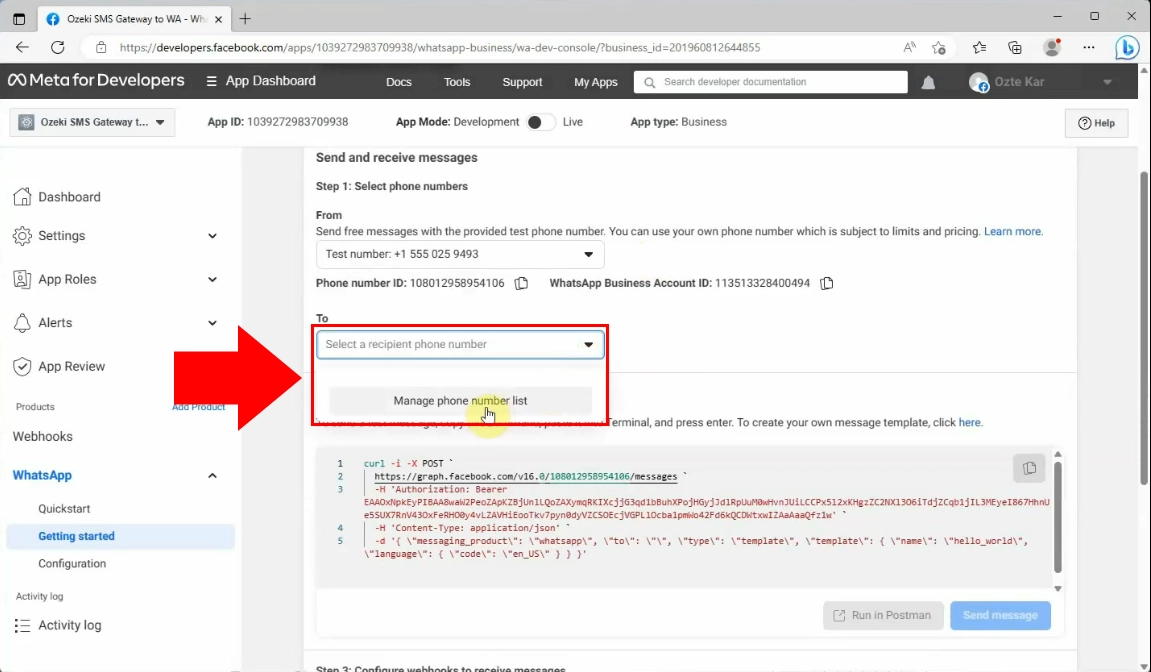
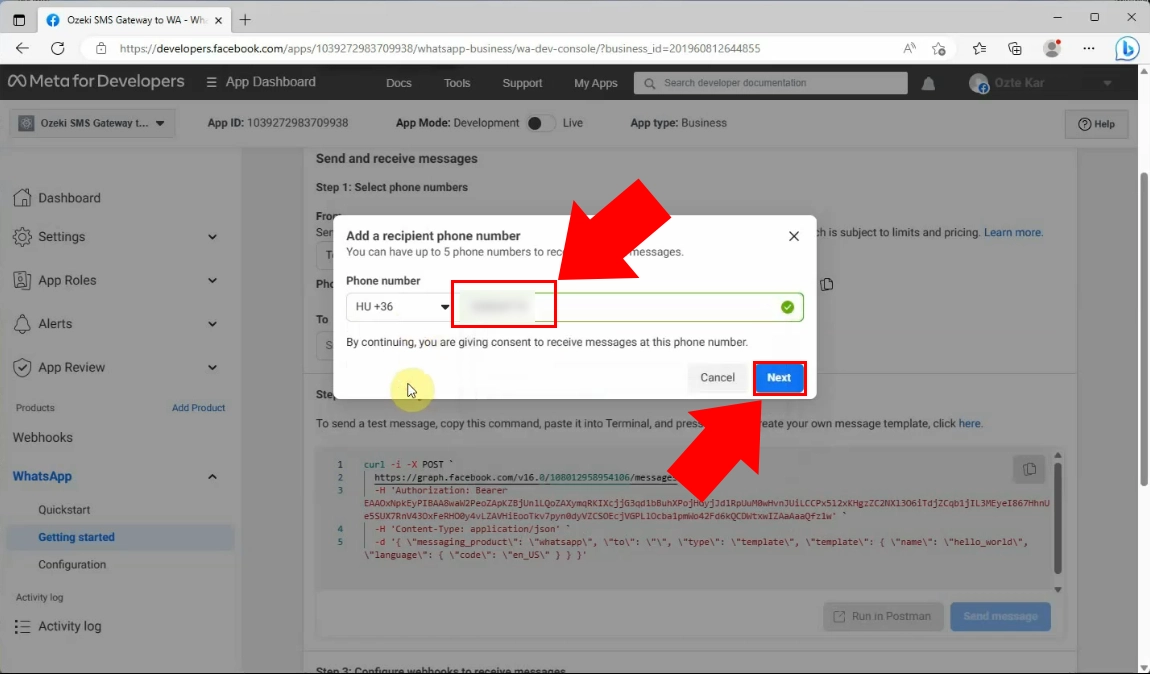
Enter the phone number and if you see a green tick in the box's corner, you can click on the "Next" button.
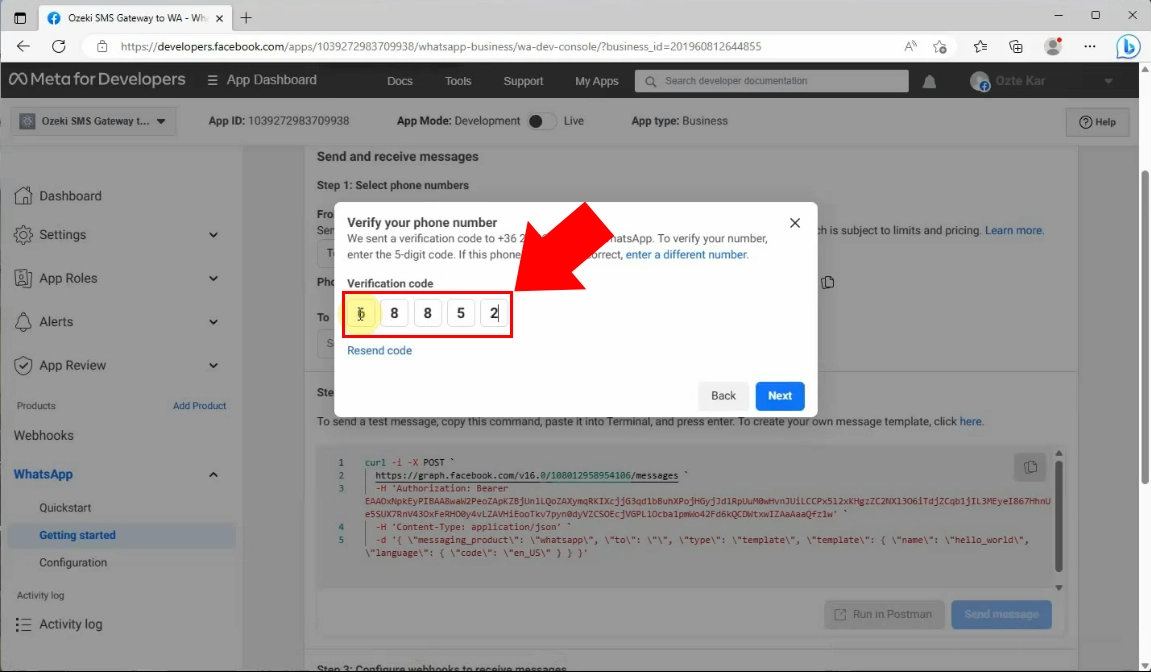
Verify your phone number, by entering the 5-digit code that you have received in SMS. If you do not receive any text message, the click on the "Resend code" button. When you are ready, click on the "Next" button.
Before you continue, in the following page you can learn how to secure GUI access,
how to create and configure SSL certificates, and how to use HTTPS to access the SMS gateway remotely.
How to use HTTPS in the SMS Gateway
Configure WhatsApp connection in Ozeki SMS Gateway
In the following video you will see, how to configure WhatsApp connection in Ozeki SMS Gateway. Follow the steps and be able to do these setups easily.
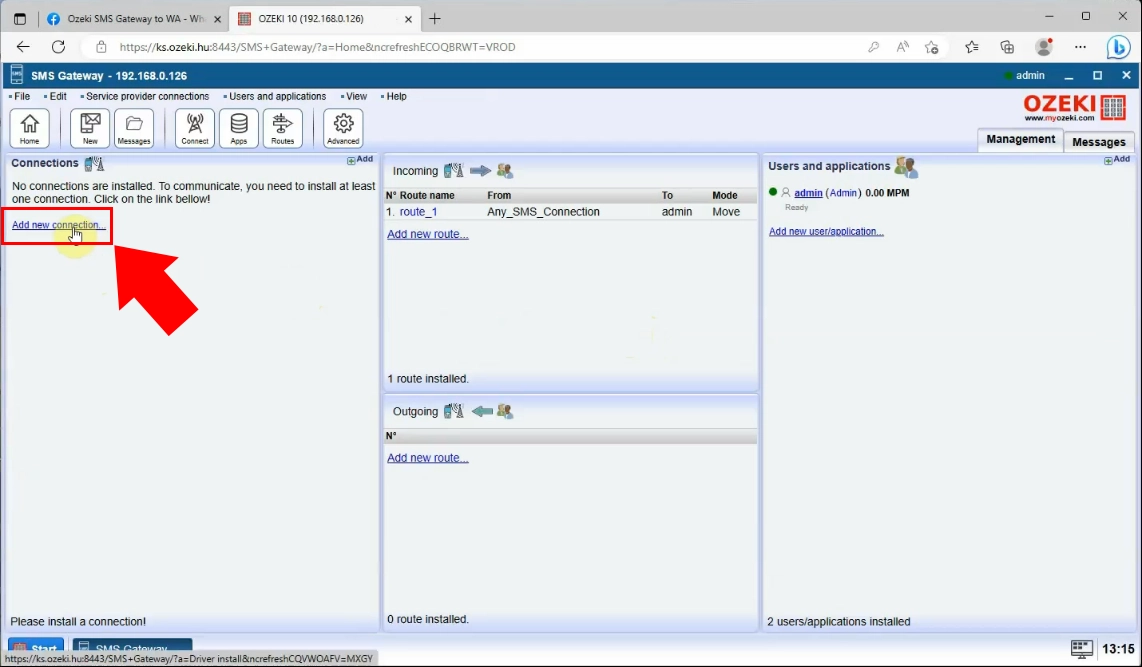
First, log in to your Ozeki SMS Gateway, then choose the SMS Gateway Desktop icon. In the Ozeki Toolbar, choose the "Add new connections" link in the left side of the Connections Panel.
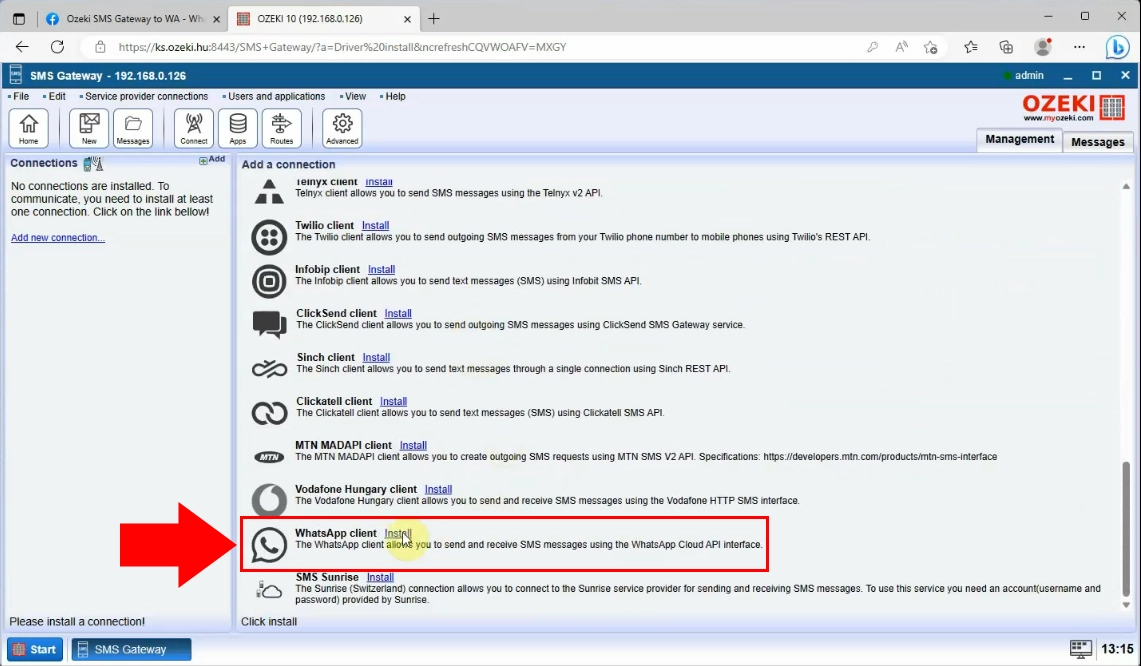
From the "IP SMS connections" install section, choose the WhatsApp client, and click on the "Install" link.
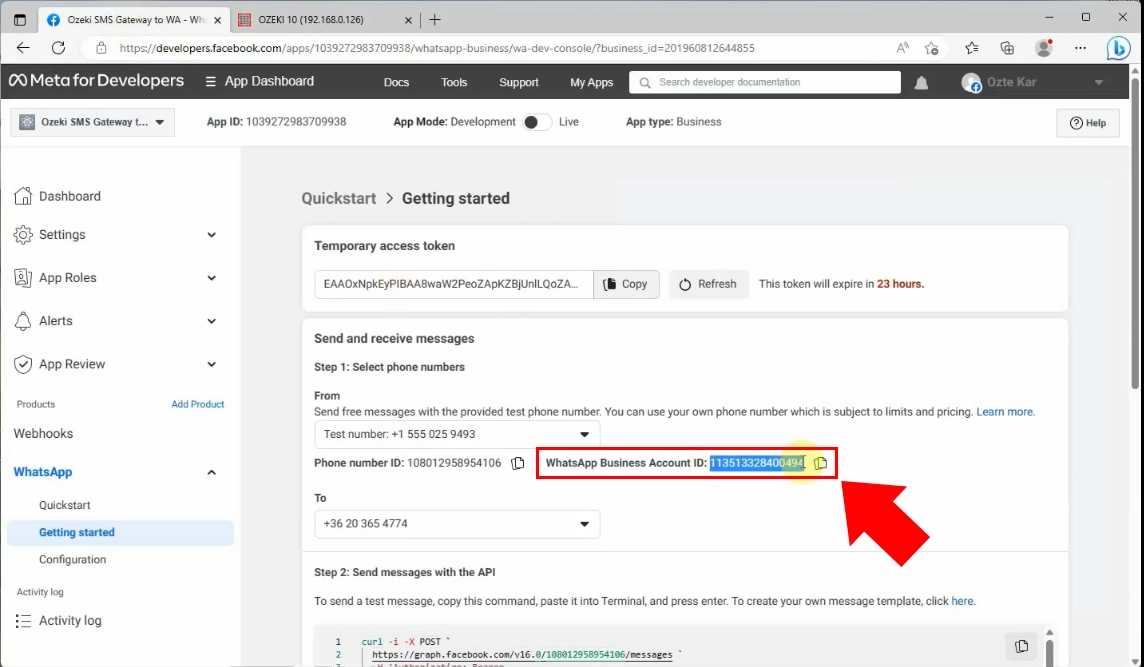
Now you have to install the connection. Copy the WhatsApp Business Account ID from your Meta for Developers page.
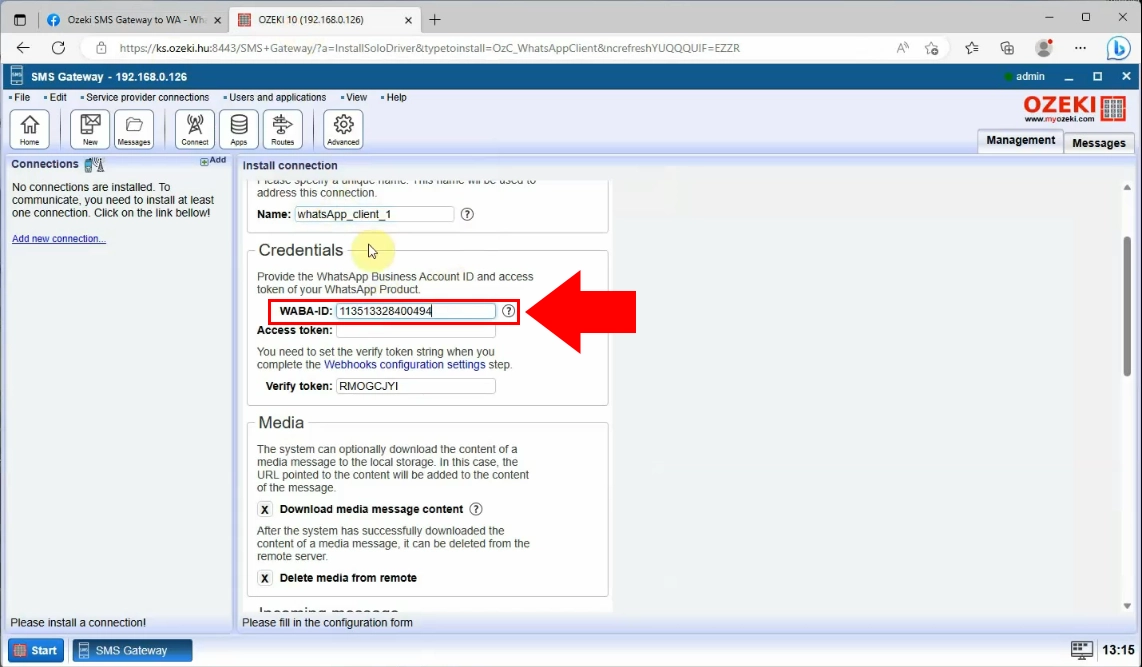
Now, paste your WhatsApp Business Account ID into the WABA-ID box in the Credentials section.
Copy the Temporary access token from your Meta for Developers page.
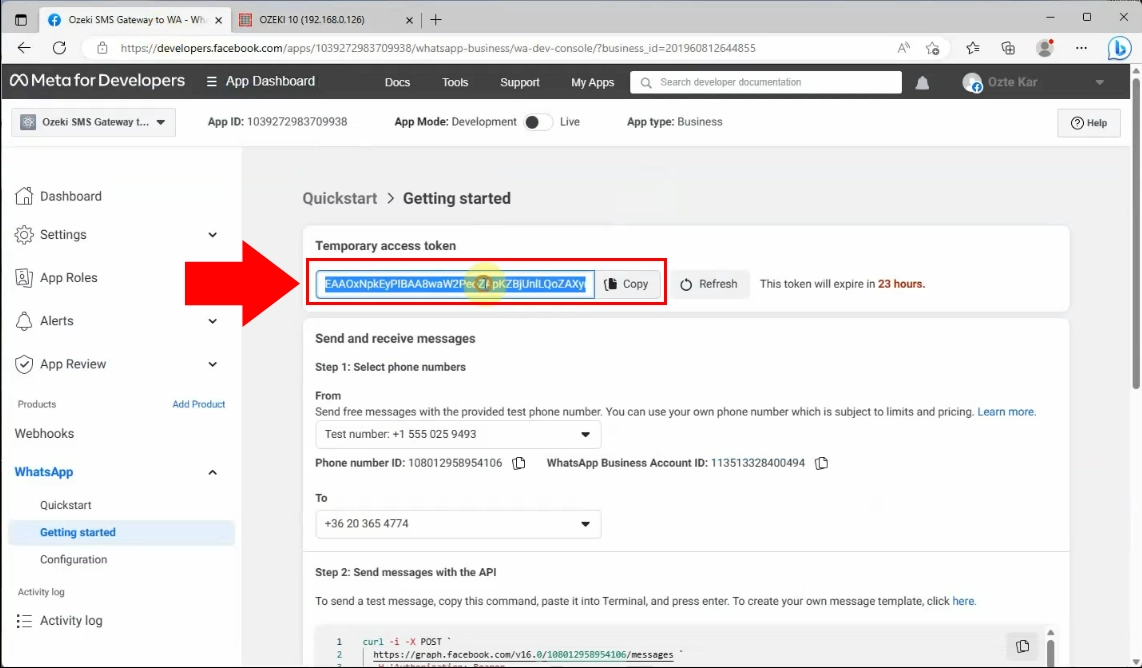
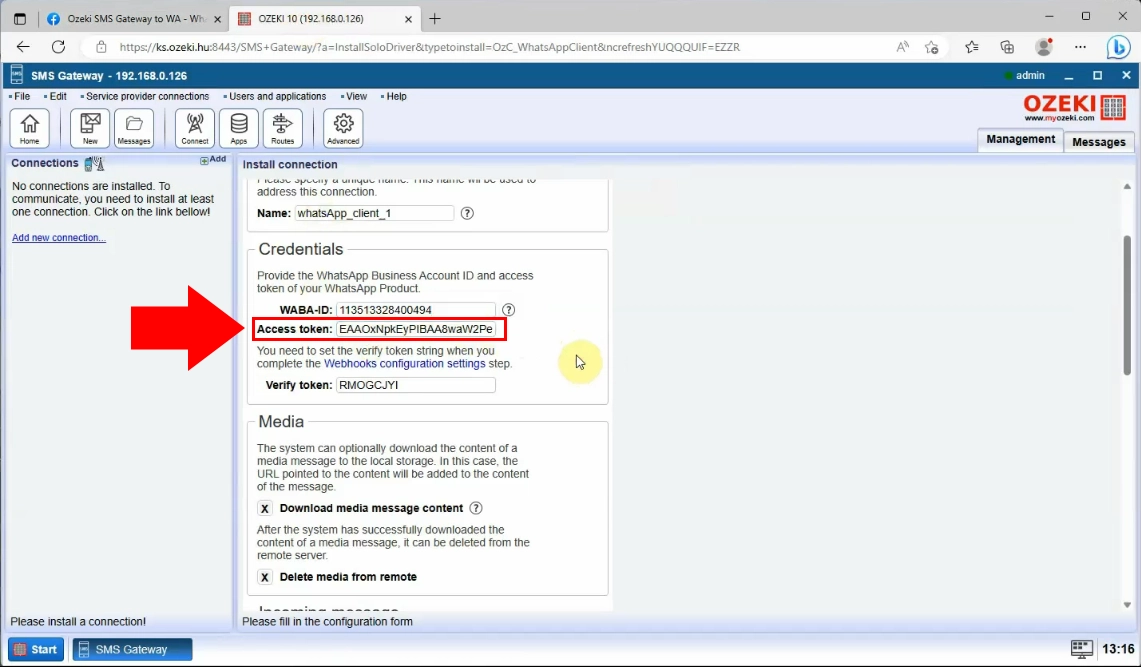
Now, paste your Temporary access token into the Access token box in the Credentials section.
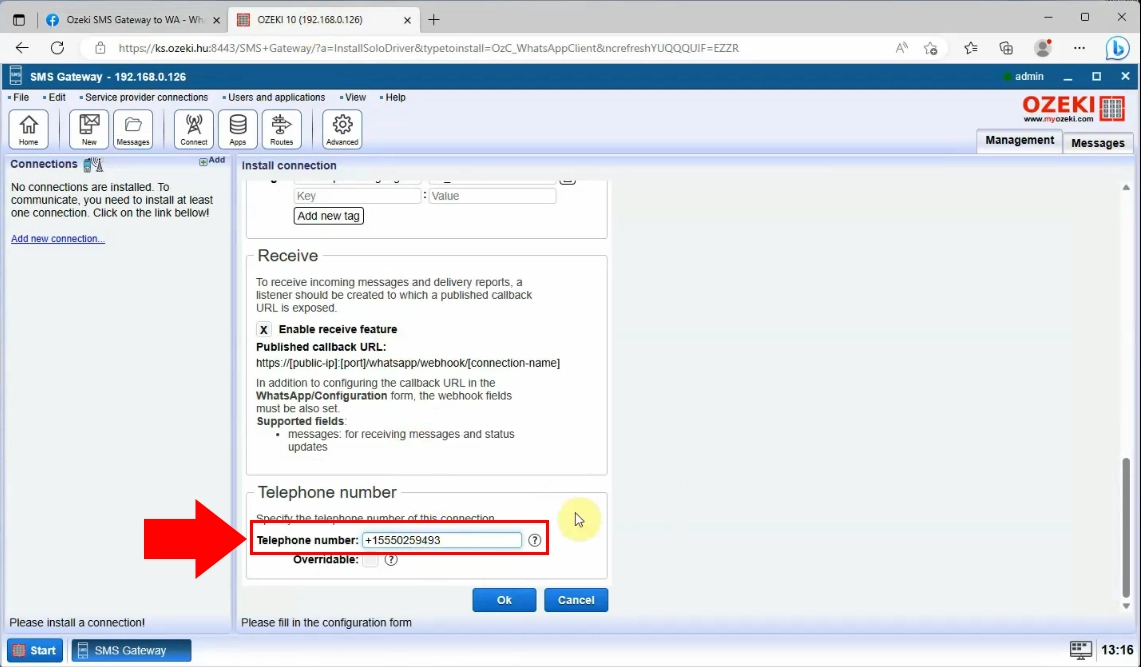
Now, you need to specify a telephone number on the connection. Copy the number from the Meta for Developers page and paste into the Telephone number box. Then click on the "Ok" button, highlighted in blue.
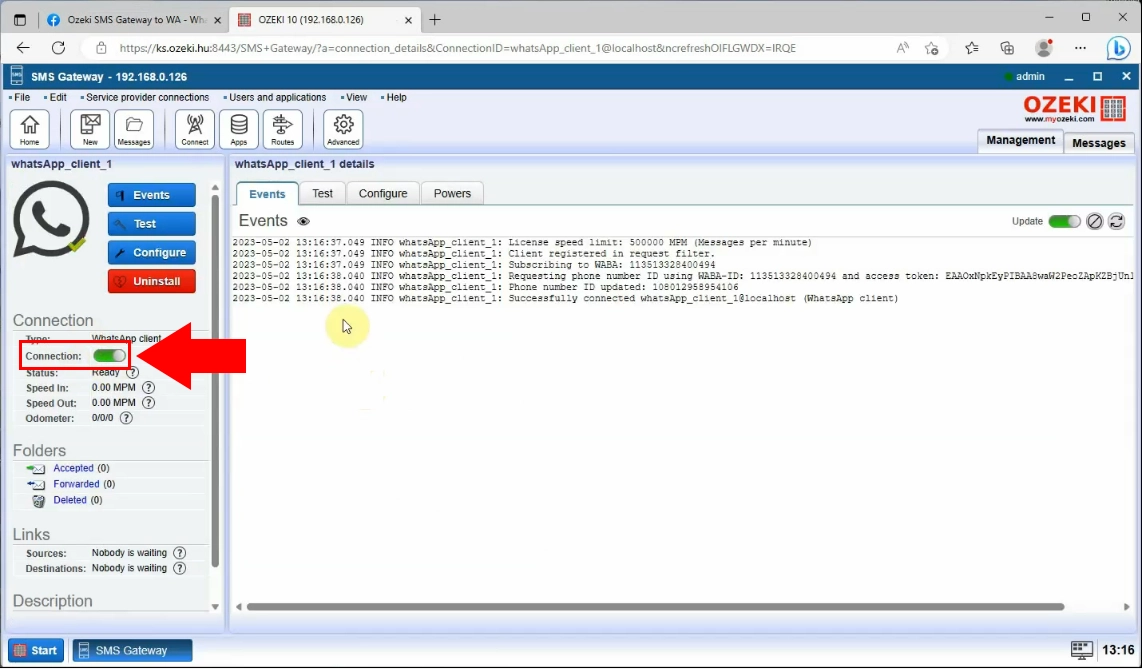
In order to create the connection, you have to switch the slider button into green, at the left panel of Ozeki SMS Gateway.
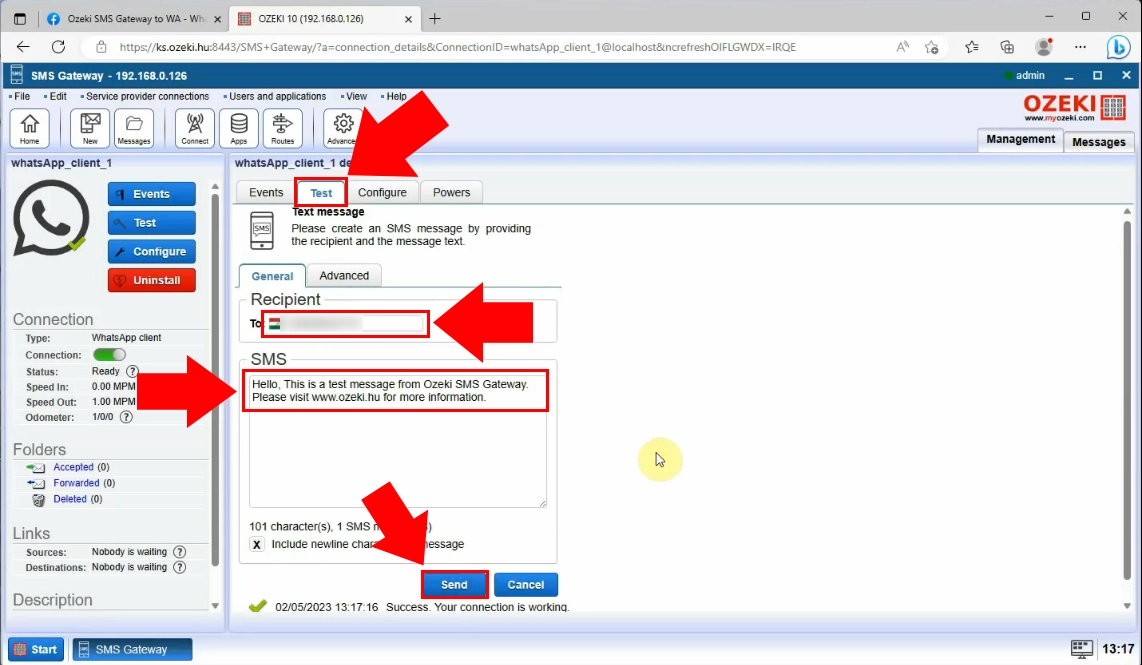
At the right panel of Ozeki SMS Gateway, choose the Test tab and create an SMS message by providing the details. Type the recipients' phone number and send the automatically generated test message, by clicking on the "Send" button. If it worked well, then you will see a green tick under the tab, that means your connection has been set.
Summary
If you follow the steps in this article, you should be able to set up a WhatsApp SMS connection without any problems. This will allow you to send and receive WhatsApp messages through your Ozeki SMS Gateway, which can be a great way to communicate with your customers or clients.
In this article, we have shown you how to set up a WhatsApp SMS connection. We have explained the process in detail, from creating a WhatsApp app in the Facebook Developer Portal to configuring the connection in Ozeki SMS Gateway.
We have provided screenshots and instructions for each step, so you should be able to follow along easily.
Here are some additional useful tips for setting up a WhatsApp SMS connection:
- Make sure that you have a valid WhatsApp Business Account ID and Temporary access token.
- Make sure that the phone number that you add to your WhatsApp Business App is the same phone number that you use in Ozeki SMS Gateway.
- Test the connection by sending a test message to a recipient's phone number.
If you have any further question, please send us an e-mail to the info @ozeki.hu address or register to our website https://myozeki.com for assistance.
