Configure you SMPP mobile network connection in Ozeki
There are various ways to connect your SMS gateway to the mobile network. You can use a GSM modem over a data cable, an Android Mobile phone through Wifi or you can connect directly to an SMS service provider over the Internet. Connecting to an SMS service provider over the Internet is your best choice, because it provides the most reliable and highest capacity link. In this guide you can take a look at the steps you need to connect to an SMS service provider over the Internet using an SMPP client connection.
How to configure SMPP mobile network connection in Ozeki
To configure SMPP mobile network connection in Ozeki:
- Launch Ozeki SMS Gateway
- Add new client connection
- Install SMPP client connection
- Enter hostname or IP address
- Type port number 9551
- Select Advanced tab
- Tick Log level check boxes
- Check the logs
Step 1 - Open Ozeki SMS Gateway
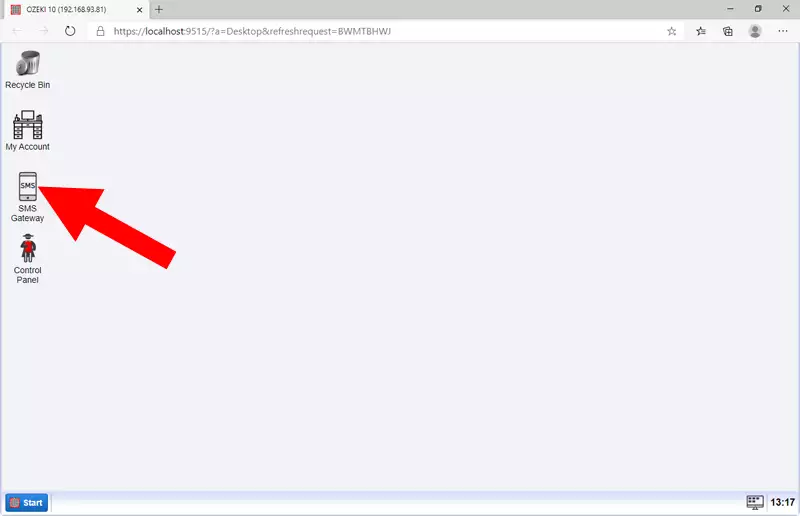
Start the SMS Gateway software in the Ozeki 10 Operating System. Click on the icon of the SMS Gateway on the desktop (Figure 1).
Step 2 - Add new Client connection
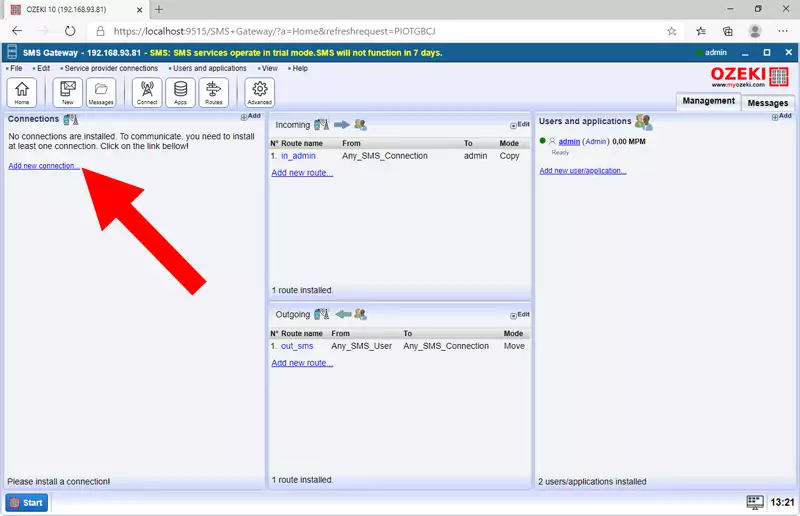
To create new SMPP Client connection click on the "Add new connection.." (Figure 2) in the Connections section.
Step 3 - Install SMPP Client connection
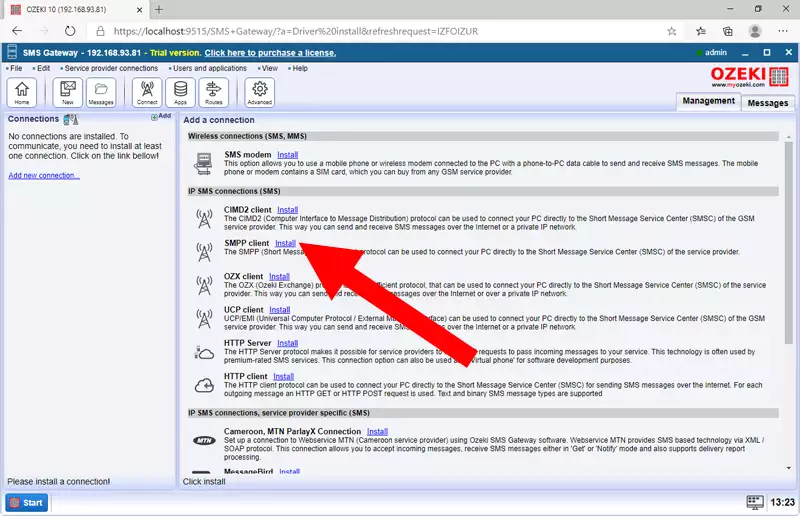
To connect to the SMS provider an SMPP client connection is required. Select the SMPP client from the list of the SMS Connections and click on the blue Install URL (Figure 3).
Step 4 - Setup SMPP Client connection
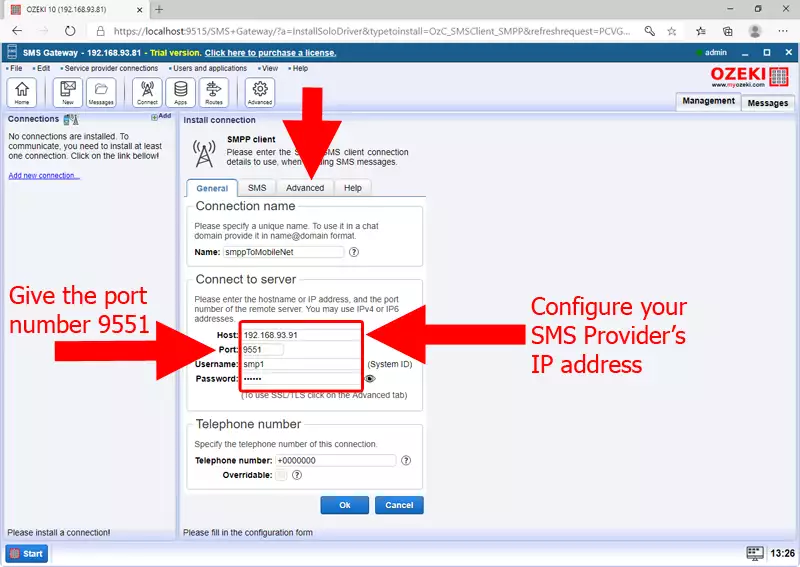
The configuration process of the SMPP connection you need to give the name of your connections in the "Name:" field. The most important part is during the configuration by entering the service connection details. In the Host field enter the IP address or host name of your SMS provider. Change the port number for 9551. Enter the SMPP credentials (Name and Password). This information is usually provided by your service provider. Finally, click on the Advanced tab to configure the log level. (Figure 4)
Step 5 - Open Advanced tab
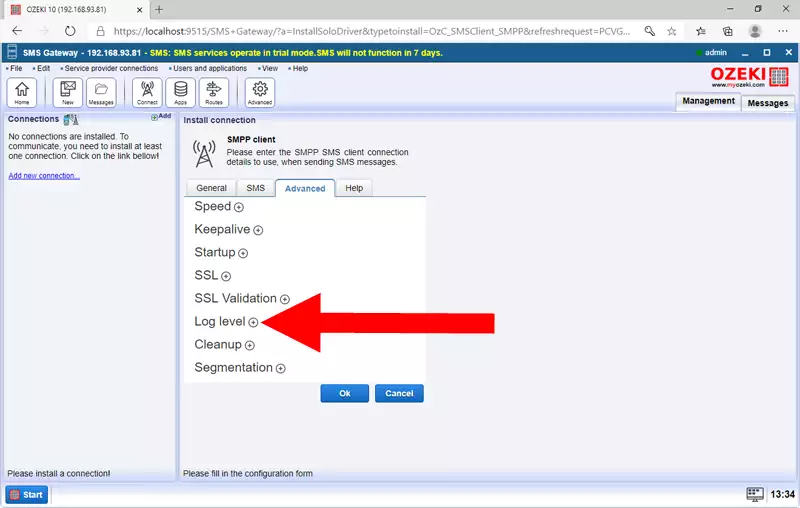
If you want to track the communication of the SMPP client connection you need to setup log level on the Advanced tab, as you can see on Figure 5.
Step 6 - Setup Log level
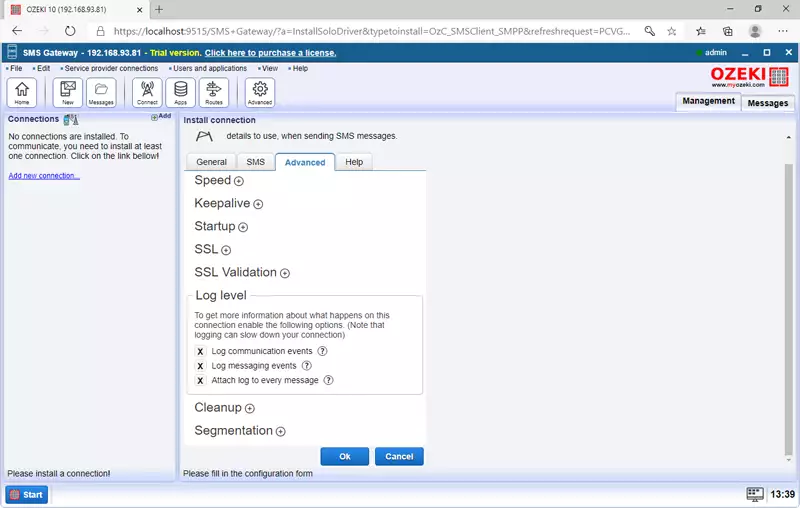
Check the boxes for the detailed communication log. The Log communication events provide information about messaging between the SMPP Client and SMPP Service provider. The Log messaging events shows the status of the SMS messages. (Figure 6)
Step 7 - Checking of the events in the log and the connection
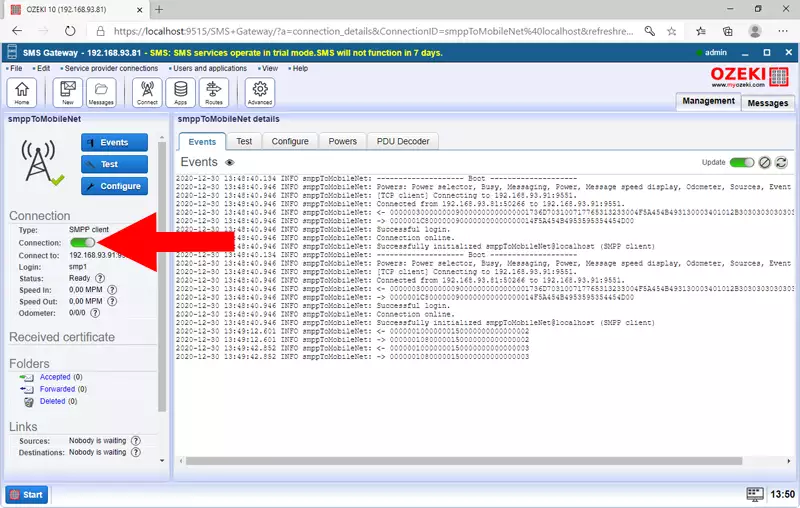
When the SMPP client connection can connect to the SMS Service provider the connection status is enable. Like on Figure 7, once your connection is online, you can check the SMPP client connection log to see if the SMS system connected properly to your SMS service provider.
