How to open IMAP port in Windows Firewall
Allowing IMAP port through firewall - configuration steps
Internet Message Access Protocol (IMAP) is a protocol for accessing email messages from a local or a shared mail server or service. IMAP allows a client e-mail program to access remote message stores as if they were local. Windows Firewall is an application which monitors connections to make them more secure. To grant access reliably, you need to open an IMAP port on the Windows Firewall, which will let the server send and receive packages without disturbance. We provide you this step-by-step tutorial, which guides you through the setup of such port.
Create an access rule for outgoing IMAP connections. Follow the steps:
- Open Windows Defender Firewall
- Select Advanced settings
- Go to Inbound rules
- Add a New rule...
- Select Port rule
- Choose TCP
- Specify the local ports: Enter "143" into the textbox
- Select "Allow the connection"
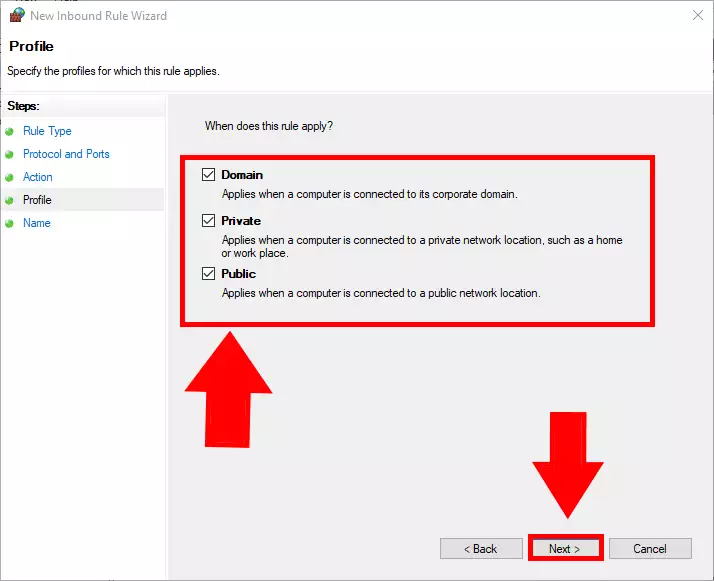
- Tick all of the following checkboxes: Domain, Private, Public
- Give a name to this rule
- Click on Finish button
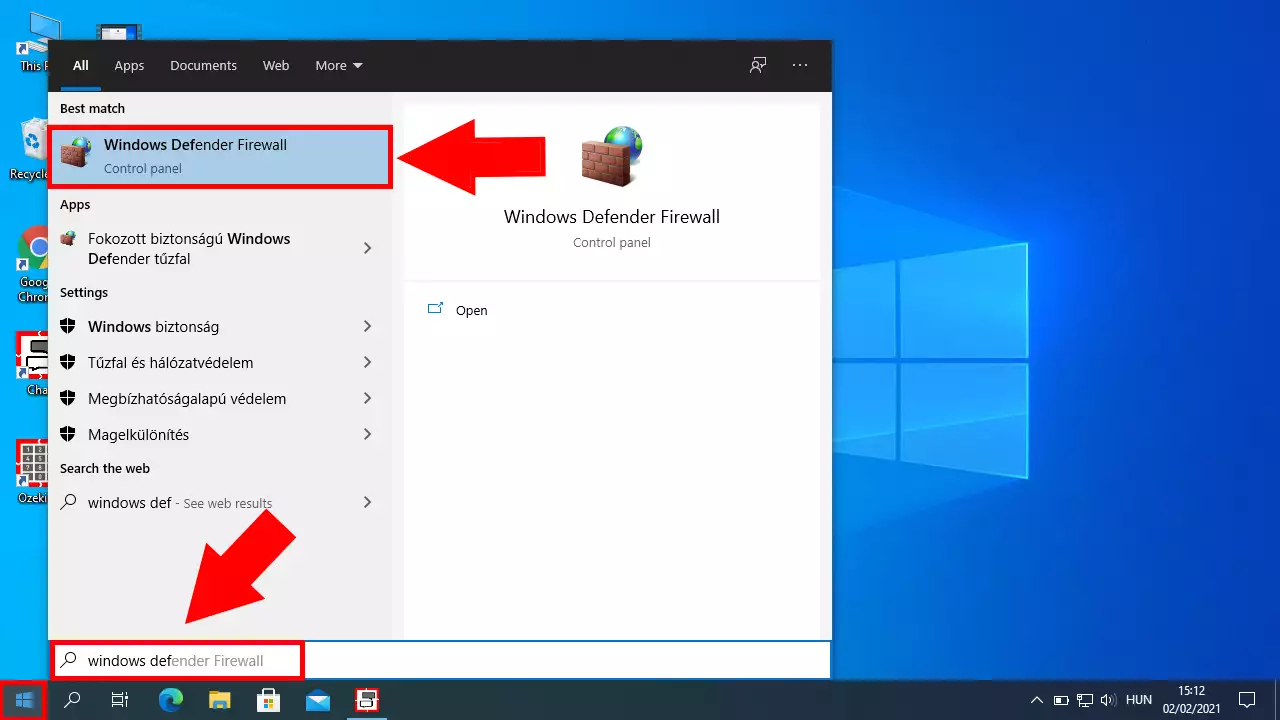
Open the Windows Defender control panel
First you need to open the “Windows Defender Firewall” application. To do so, please press the windows button on your keyboard and start typing ”windows firewall”. This way your computer will start searching for the application. You can see on Figure 1, what should you screen look like when it finds the application. Click it and it will open.
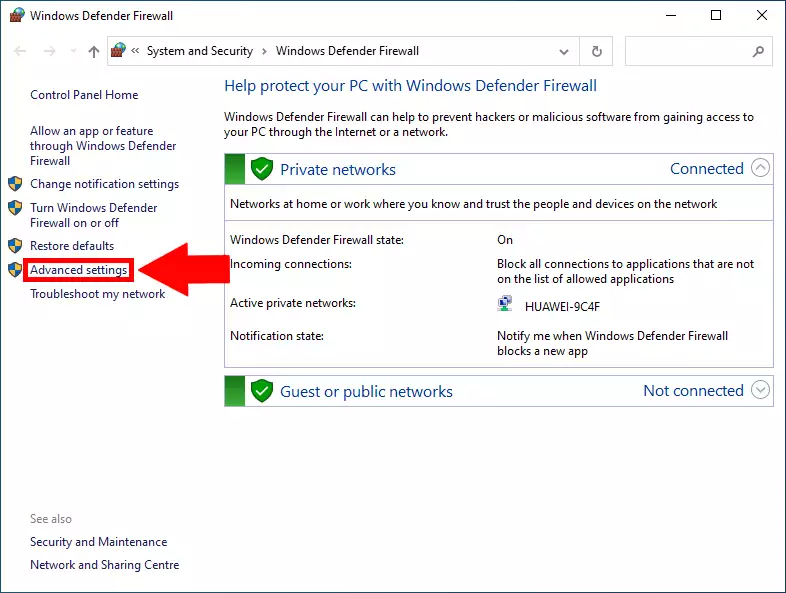
Open the advanced settings
Now you are in the Windows Defender Firewall control panel. Here you can monitor if your firewall is working as intended and providing safety for your computer. Next, you need to search for “Advanced Settings” in the control panel on the left side of the screen. Here you will be able to configure your port deeply. You can find the button with the help of Figure 2.
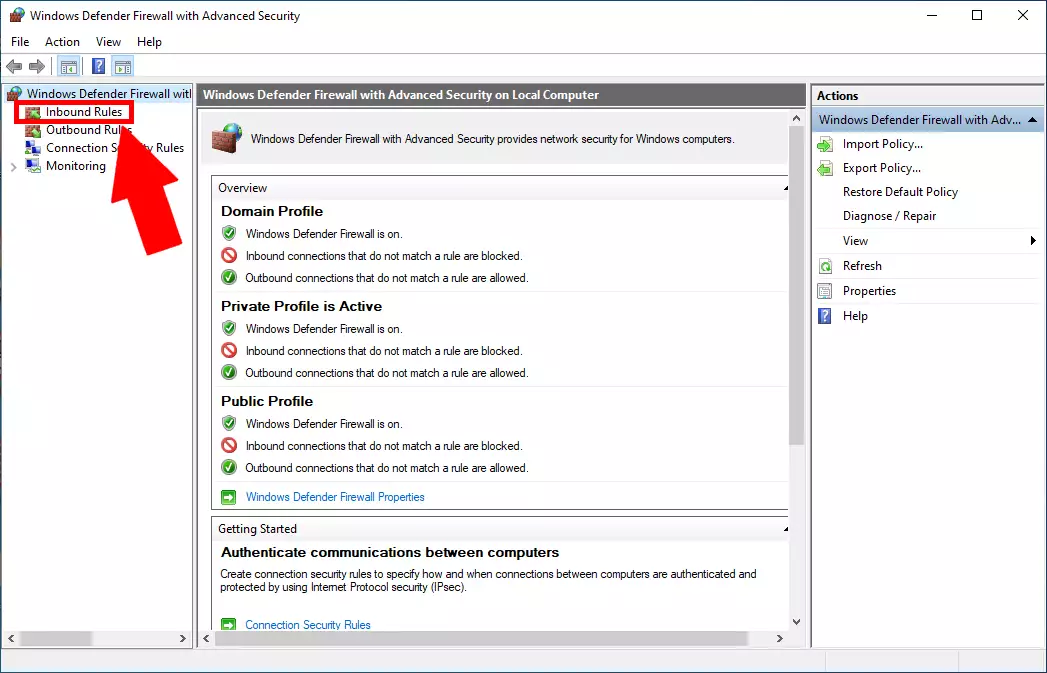
Open the list of Inbound Rules
Next, you need to configure your new rule. To do that, simply head over to the Inbound Rules management console. It is located on the left side of the screen. You can find it with the help of Figure 3. Click it and it will open up.
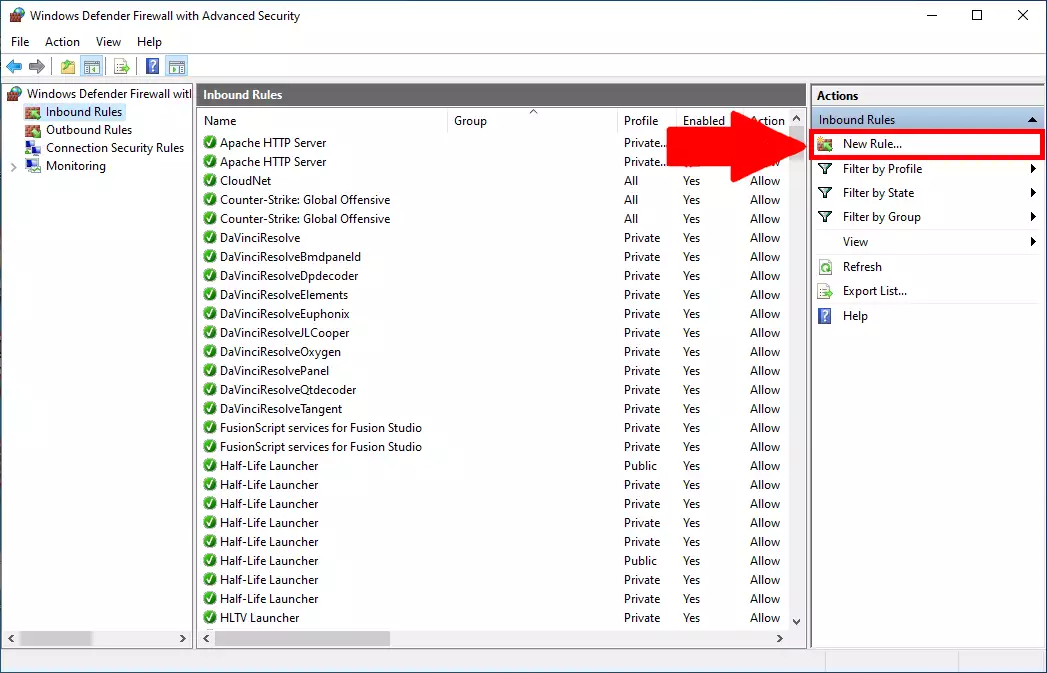
Create a new rule
Here you can see the list of all the existing rules. To create your new rule, click the “New Rule..” button on the right side of the screen located in the “Action” panel. Click it and it will start a process, where you can configure and create a new rule. You can see the button on Figure 4.
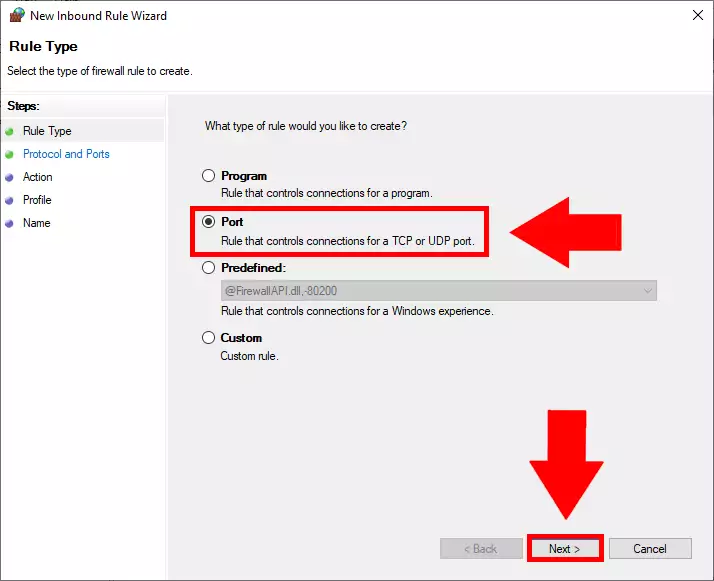
Choose the Port rule type
Here you will have the options the set what type of port you would like to create. It could be Programs, Ports or a Predefined which could be handy if you would like to use File or Printer sharing, or Remote Assistance on the exception you are creating. In this case, you will need to choose the port option. To see which one to choose please look at Figure 5.
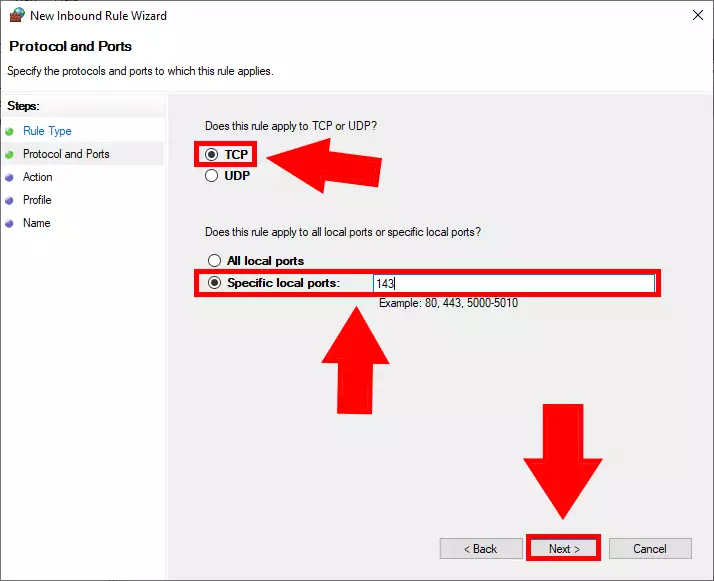
Choose the TCP option and configure it
Now you are choosing which type of protocol you are using on the connection. TCP is the Transmission Control Protocol, which is designed as a model to offer highly reliable, end-to-end byte stream over an unreliable network. UDP is almost the same as TCP, only it is not using error-checking system. TCP is slower but more secure and UDP is faster. In this case, you need to choose TCP, and specify the local port which will be “143”. To see how the window should look like, study Figure 6.
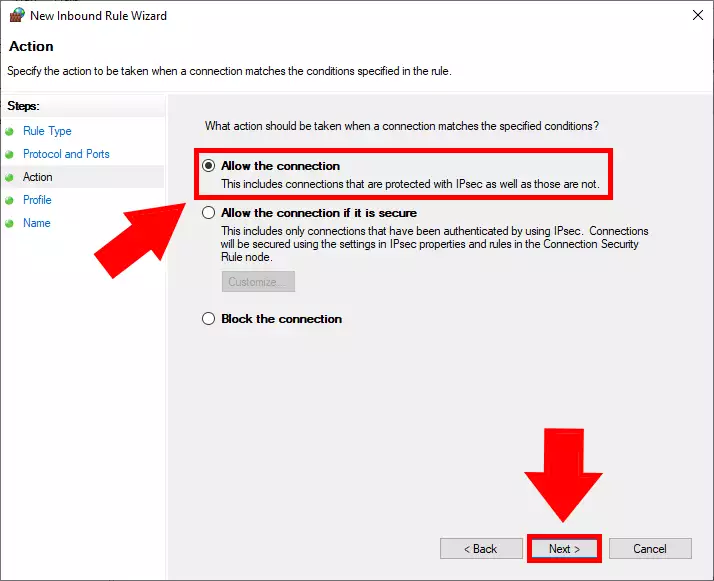
Choose the condition of the rule
In this step, you will need to choose what the rule should be doing. You could choose between “Allow the connection”, “Allow the connection if it is secure” and “Block the connection”. Our goal is to have an open, undisturbed connection, so please choose “Allow the connection”. To see which one to choose, please see Figure 7.
Set which type of connection the rule should apply to
Now you need to choose which type off connection, the rule should be applied to. You have 3 options. Domain Private and Public. Domain is strictly for corporate network, private is for your home network and the public is for when you wish to use it on an airport network or in a caffe. To have a connection which you can use anywhere you wish, please tick in all the boxes. To see what this window should look like, please study Figure 8.
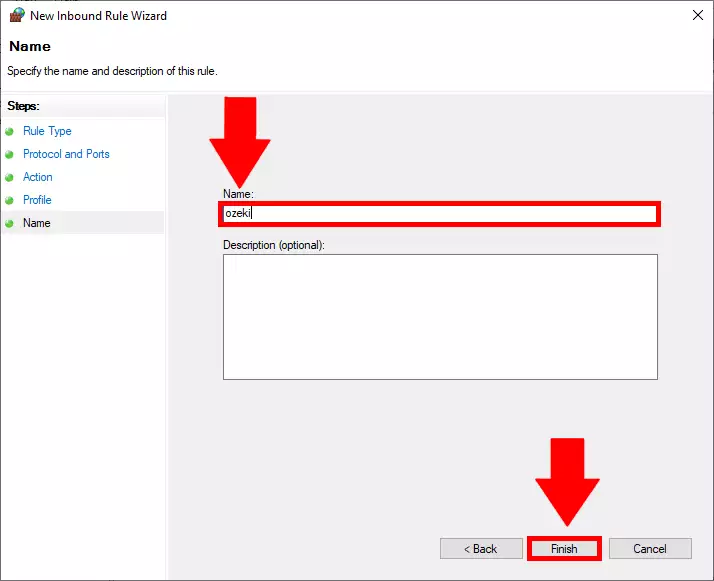
Name your Inbound Rule
The final step is to name your connection. It could be anything you wish, but make sure that you can distinguish the rule by the name given. In our example, we named it “ozeki”. If you have the name typed in, click the finish button to finalize your decision. You can see our example name on Figure 9.
