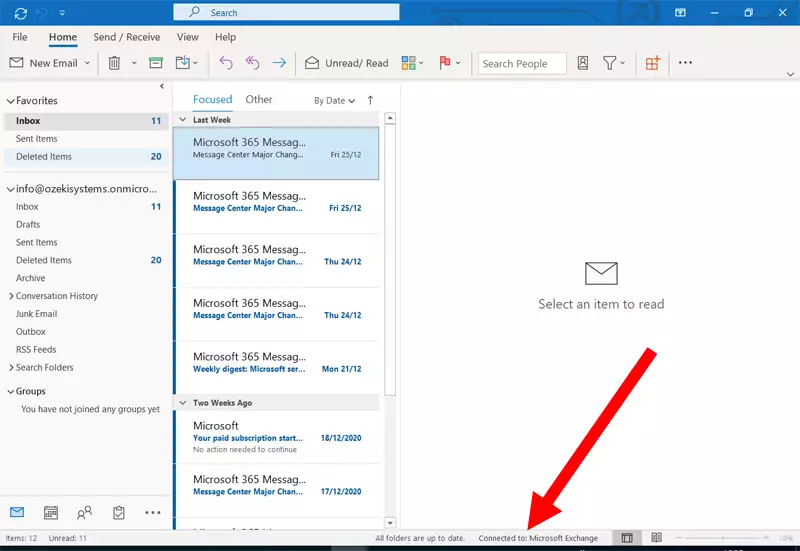
Exchange messages in the SMS gateway
After you have done setting up the Ozeki SMS Gateway and the Exchange Server setup, you need to check if everything works together. The best way of it is to check if you have received the validation e-mail from Microsoft.
You can check it by visiting the SMS Gateway and looking into the SMTP Log. This tutorial will guide you through every step you need to take to get to the log file and find the validation e-mail, then to start sending SMS messages form Outlook.
Step 1 - Open SMTP
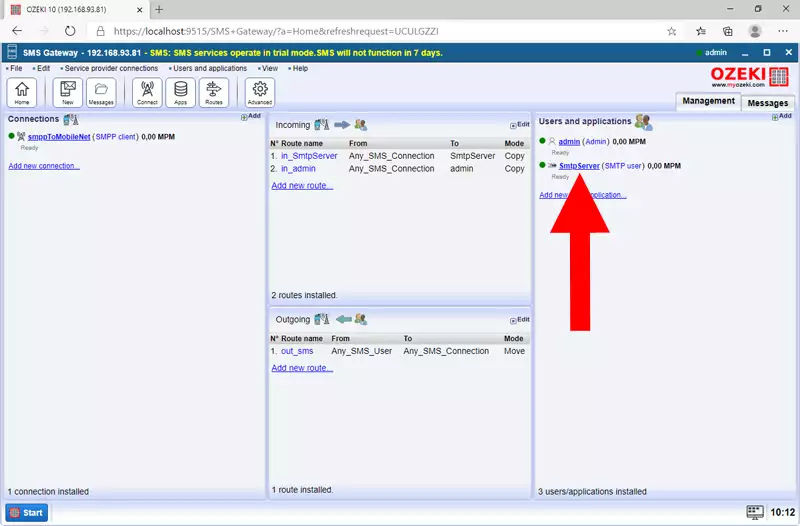
First step you need to take is open the SMS Gateway and search for your SMTP Server in the Users and Application panel. Click it and it will open the details of the server. You can see where to click on Figure 1.
Step 2 - Check SMTP Log
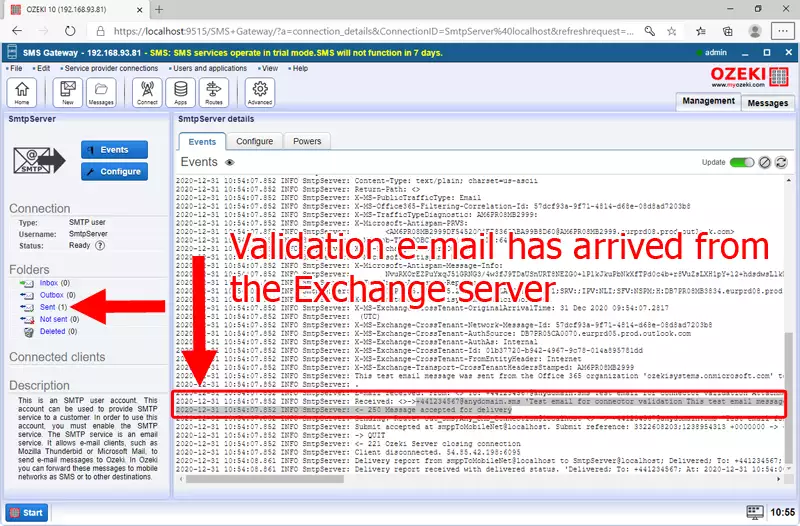
Now on the Events tab, you could see the log of the server. This will note every event that happened on the server to make maintenance easier. On Figure 2, you could see the log of the validation highlighted with red. This means that the validation e-mail has arrived from the Exchange server. Click the Sent folder located on the left side of the screen to proceed.
Step 3 - Open SMTP Sent box
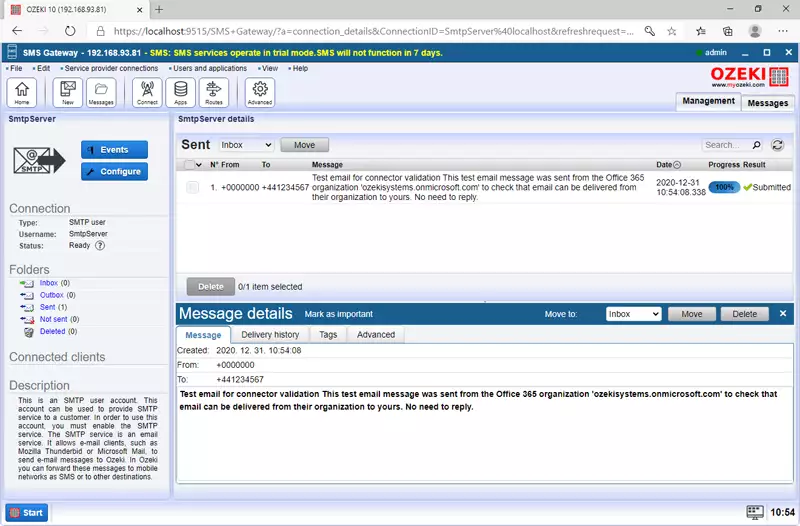
Here in the Sent folder, you could see that you have sent a validation e-mail from your SMTP server. This was an automatic message; no further action is required. You can see the message on Figure 3.
Step 4 - Open SMPP client
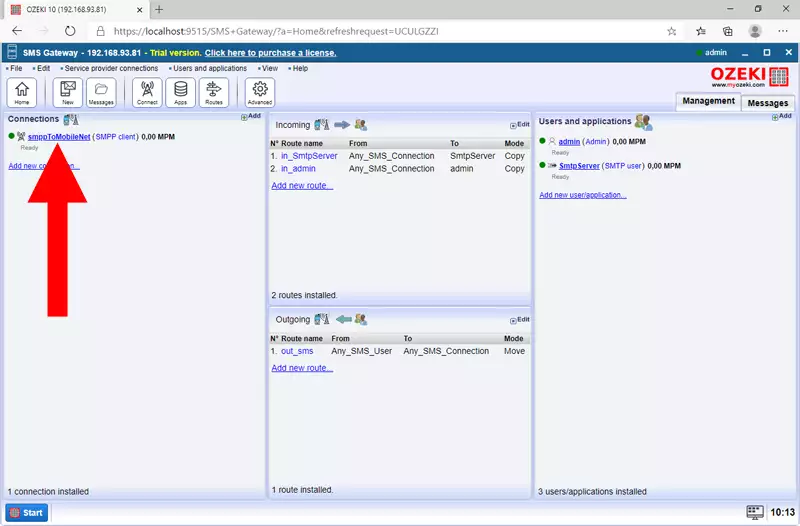
Now your need to open the details of the SMPP client. To do that, head back to the home page of the SMS Gateway. Here on the left side of the screen you will find the connections panel. As you can see on Figure 4, you need to search for your SMPP client. Click it and it will open the details of it.
Step 5 - Check SMPP log
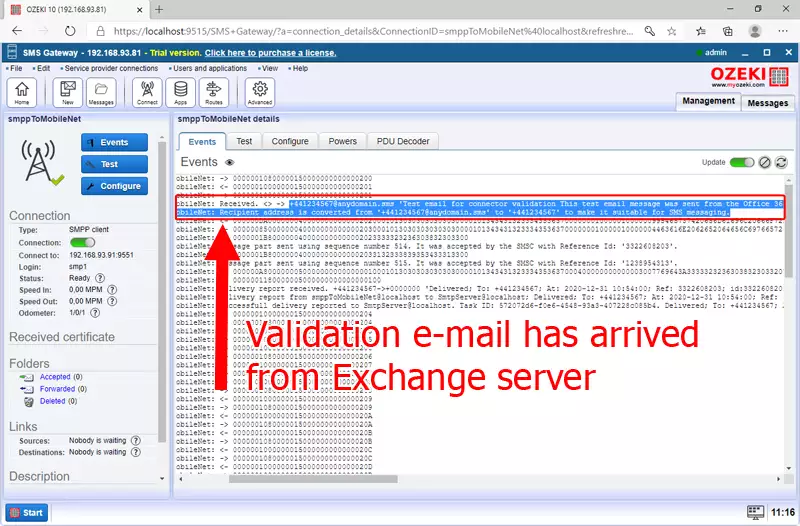
As you can see on Figure 5, the log shows that the validation message was received successfully. It means that you have a working connection, so you could start sending SMS from Outlook.
Step 6 - Open Microsoft Outlook
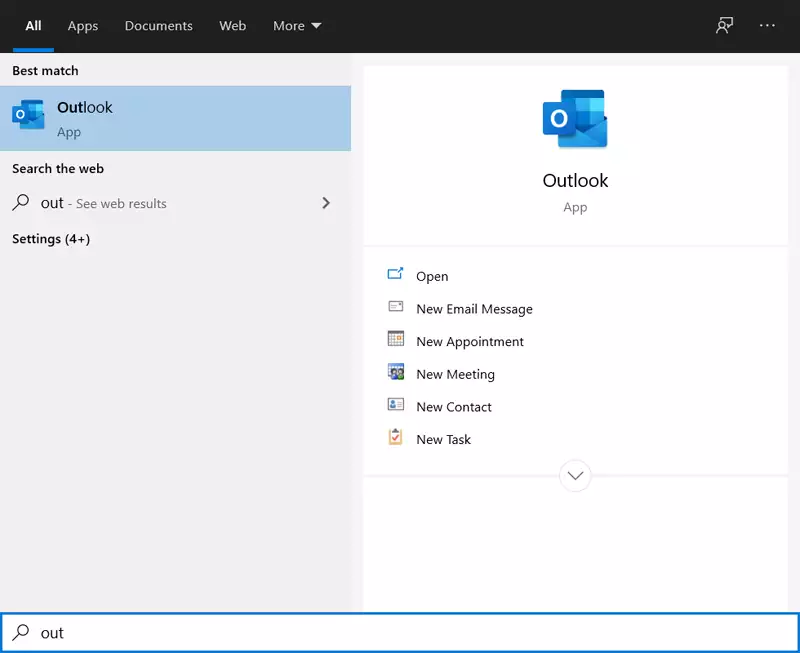
To start sending SMS form Outlook, you first need to open Outlook. As you can see on Figure 6, you can do that by opening the start menu and start typing Outlook. Your computer will find the application. Click it to launch the program.
Step 7 - Compose new e-mail
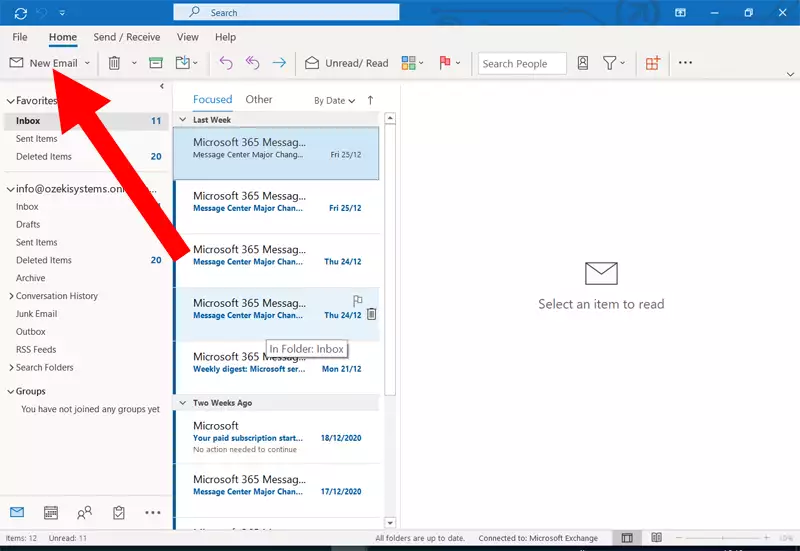
Now you need to start the mail composing process. Click the New Email button on the upper left side of the screen, as you can see on Figure 7. Click it and it will open the message composing window.
Step 8 - Enter the e-mail address and message
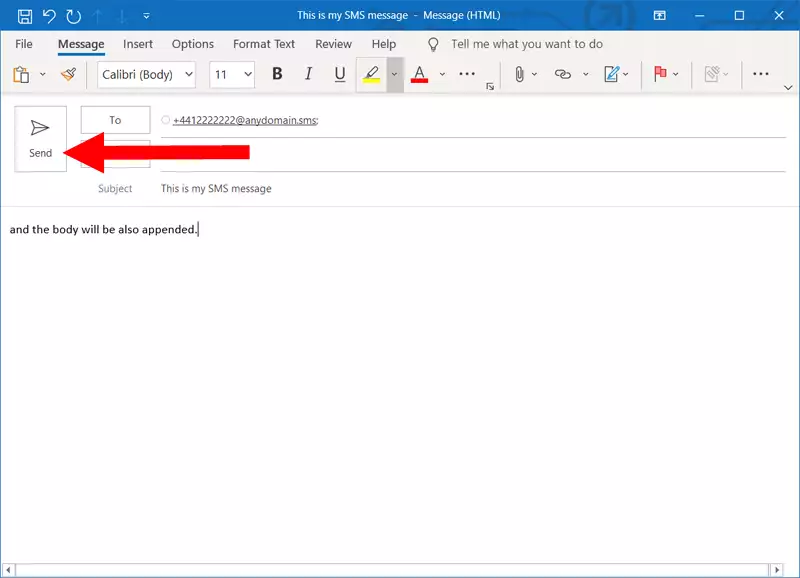
Compose a message with the To box filled in with the recipients address which will be the phone number’s domain, a subject and the body of the e-mail. Provide that information and click the Send button. It will start the message sending process. You could see the required information on Figure 8.
Step 9 - The message was sent out
On the bottom of Microsoft Outlook, you can see a status indicator. If the text is the same as on Figure 9, it means that you have a working connection with the Microsoft Exchange, so the message was sent to the phone successfully.
